Google Ads User Guide on GTG CRM
1. Connect Google Ads Account
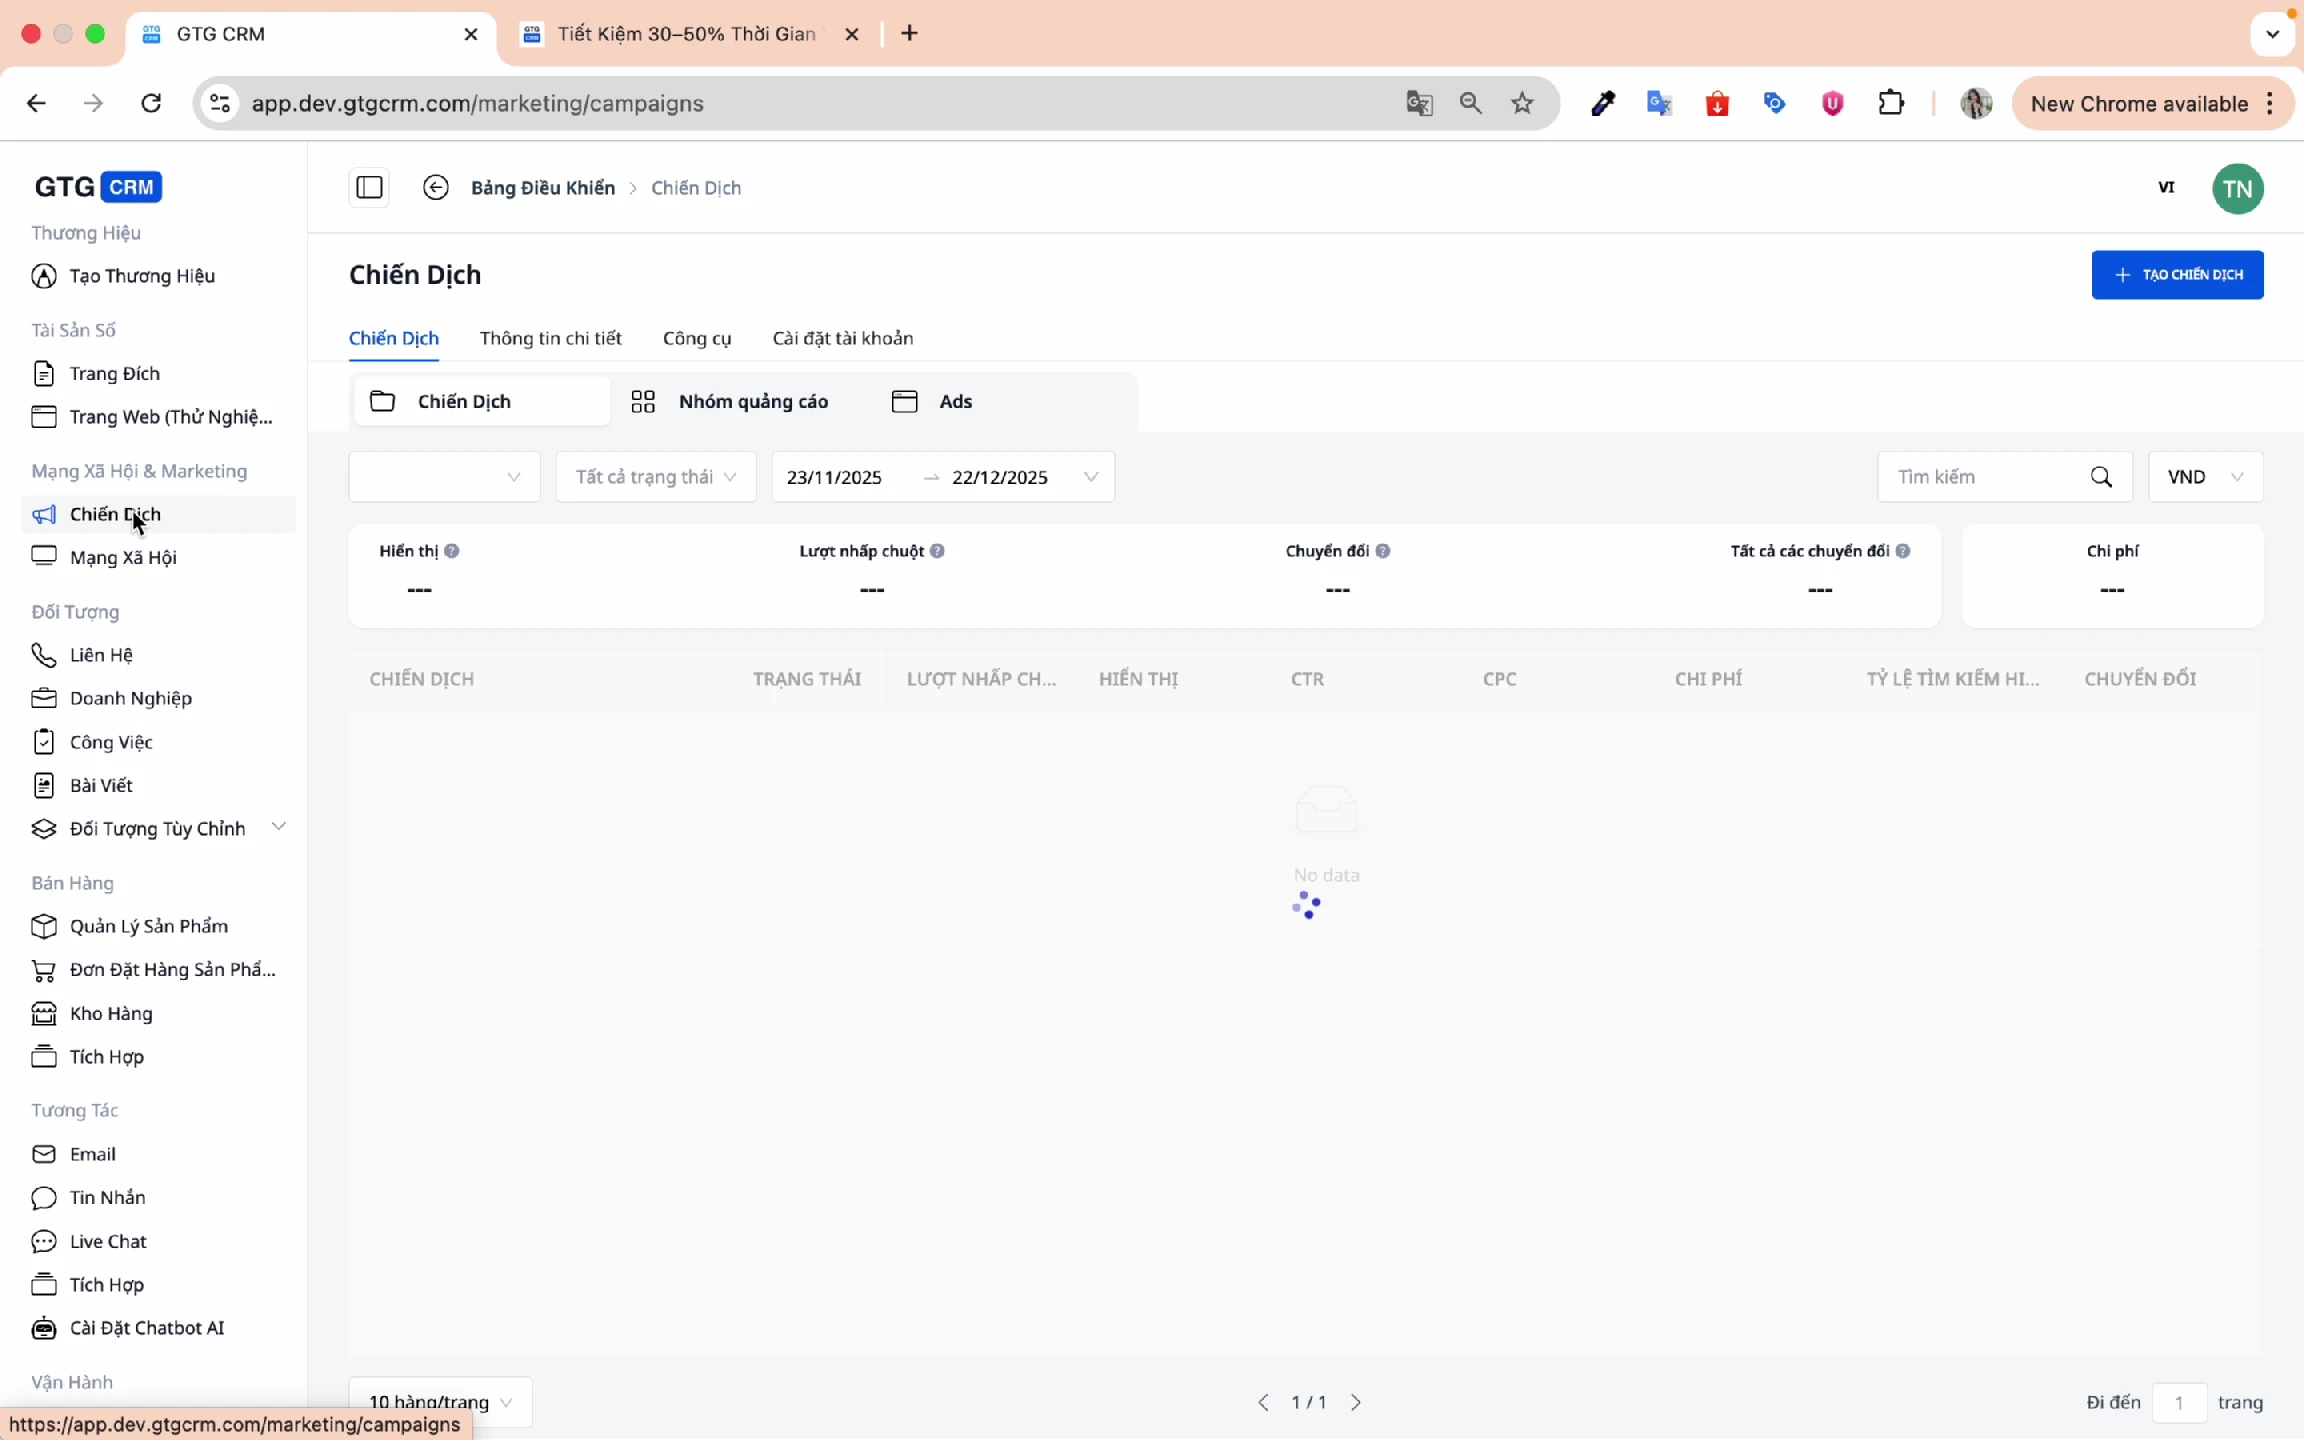
Step 1: Access Campaigns Menu
From the GTG CRM main screen, click on Campaigns in the menu bar.
Step 2: Go to Account Settings
Click on Account Settings to connect your ad account.
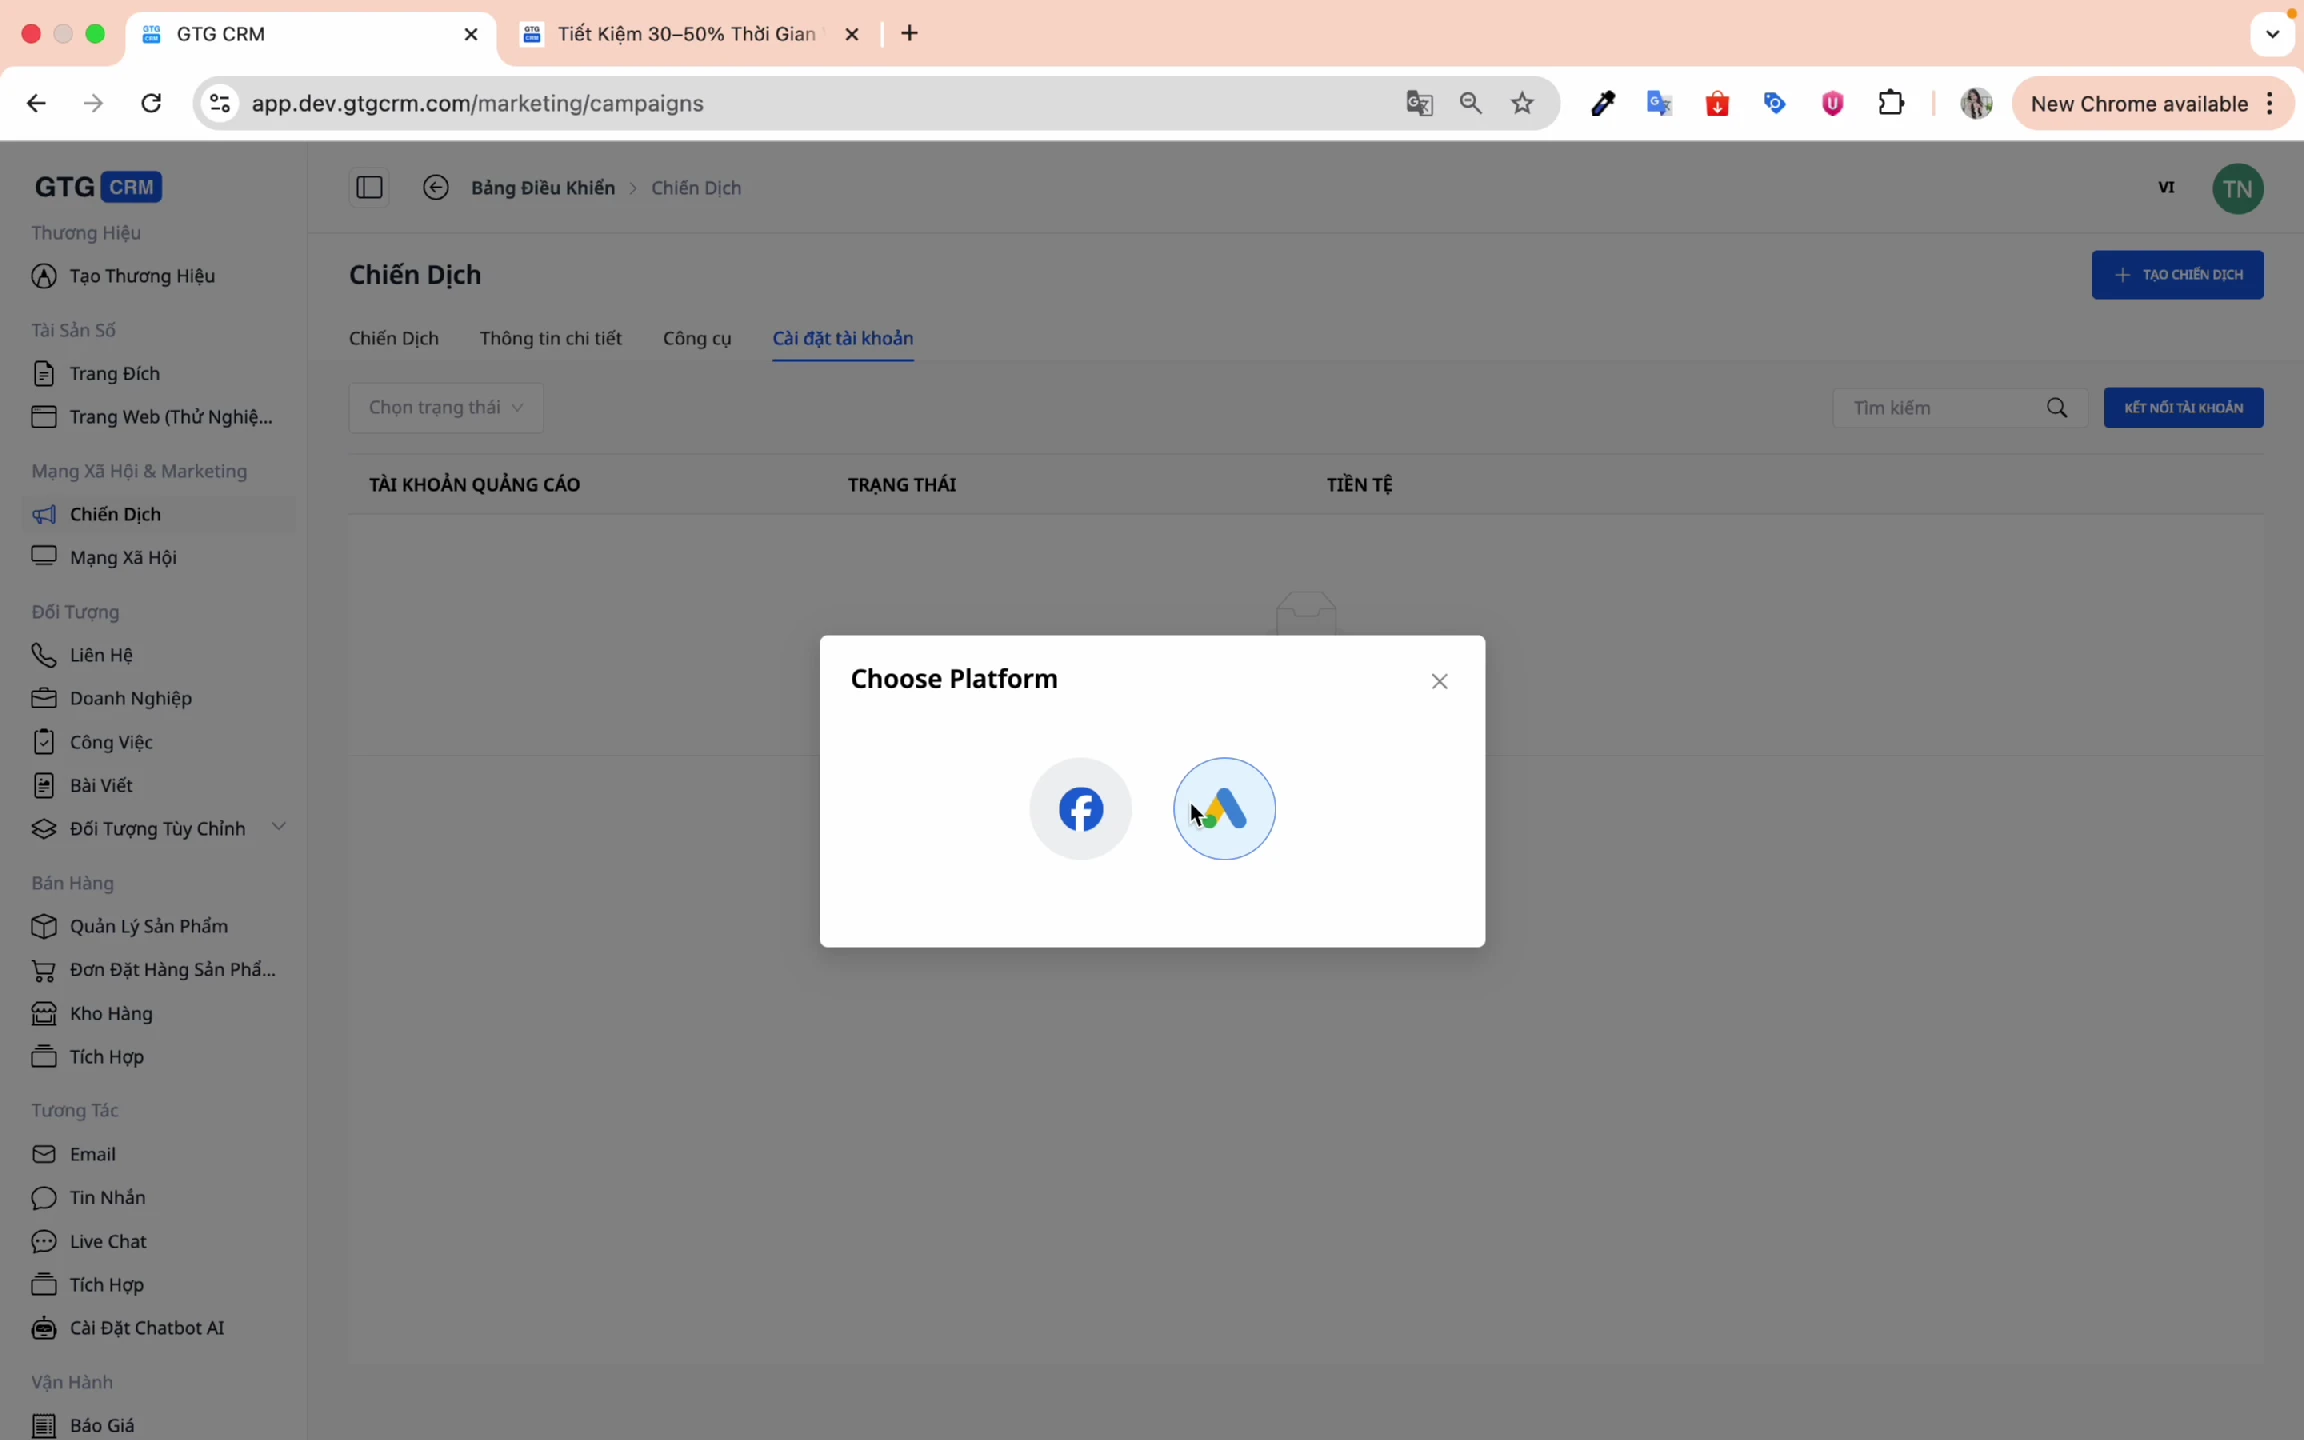
Step 3: Select Google Platform
GTG CRM supports 2 main platforms:
- Facebook Ads
- Google Ads ← Select this option
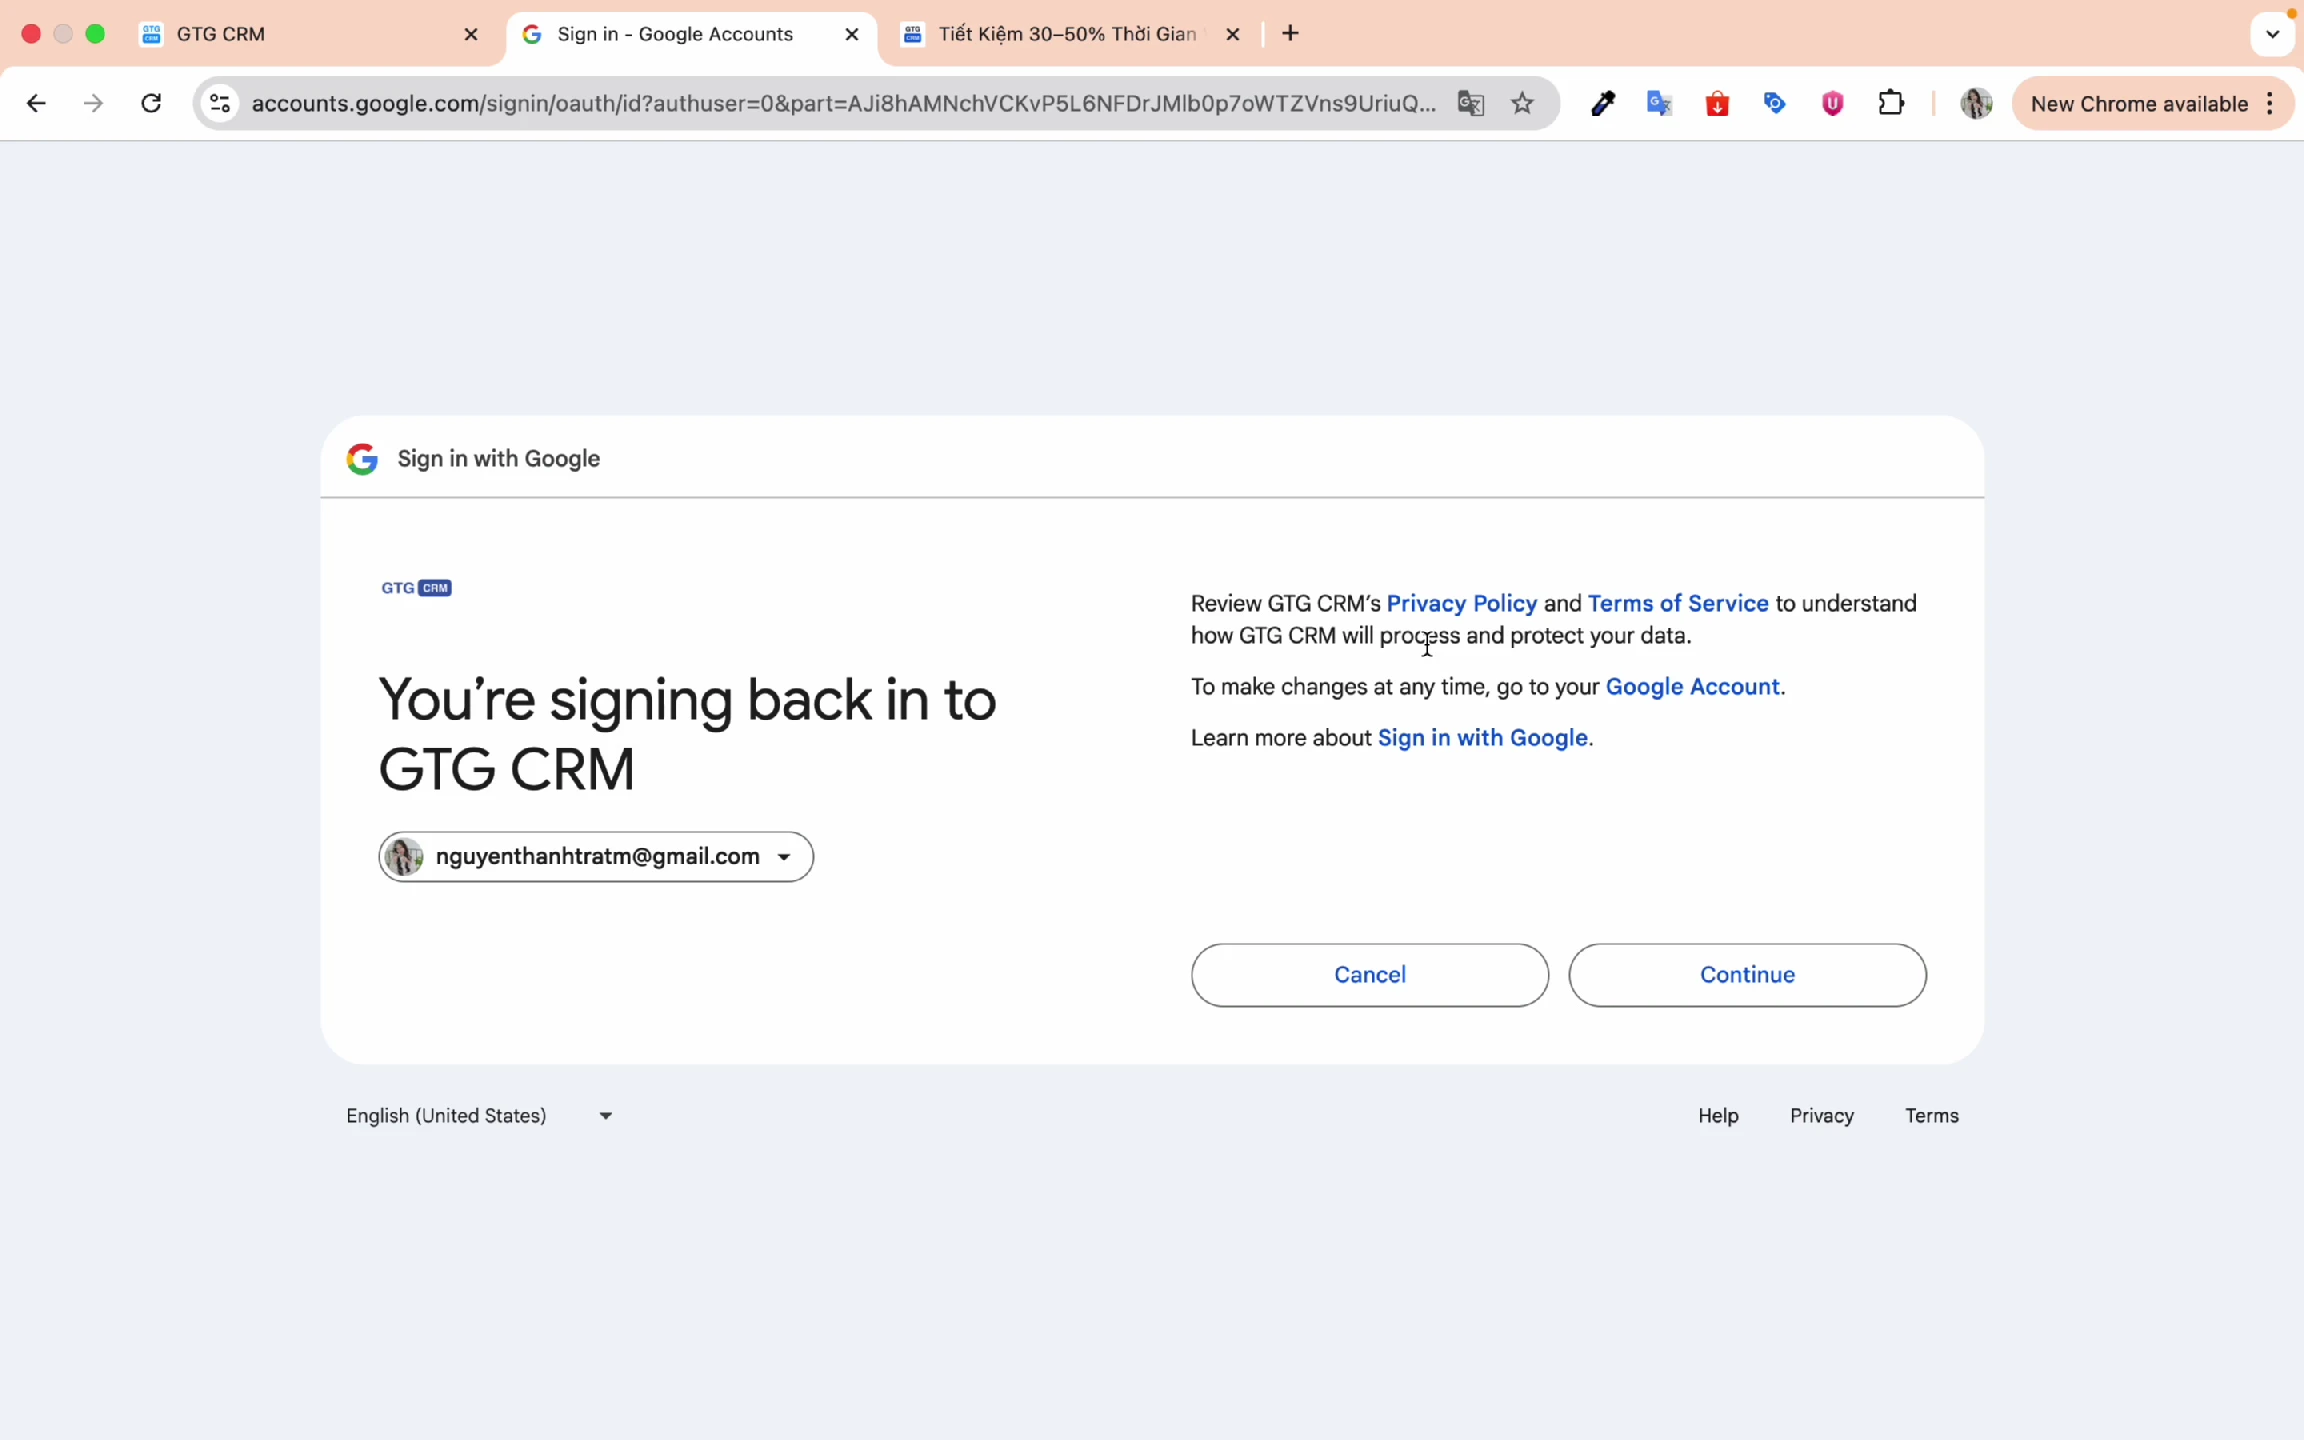
Step 4: Log in to Google Account
- Select your Google Ads advertising account
- Click Log in
- Choose the specific account you want to connect
- Click Connect Account
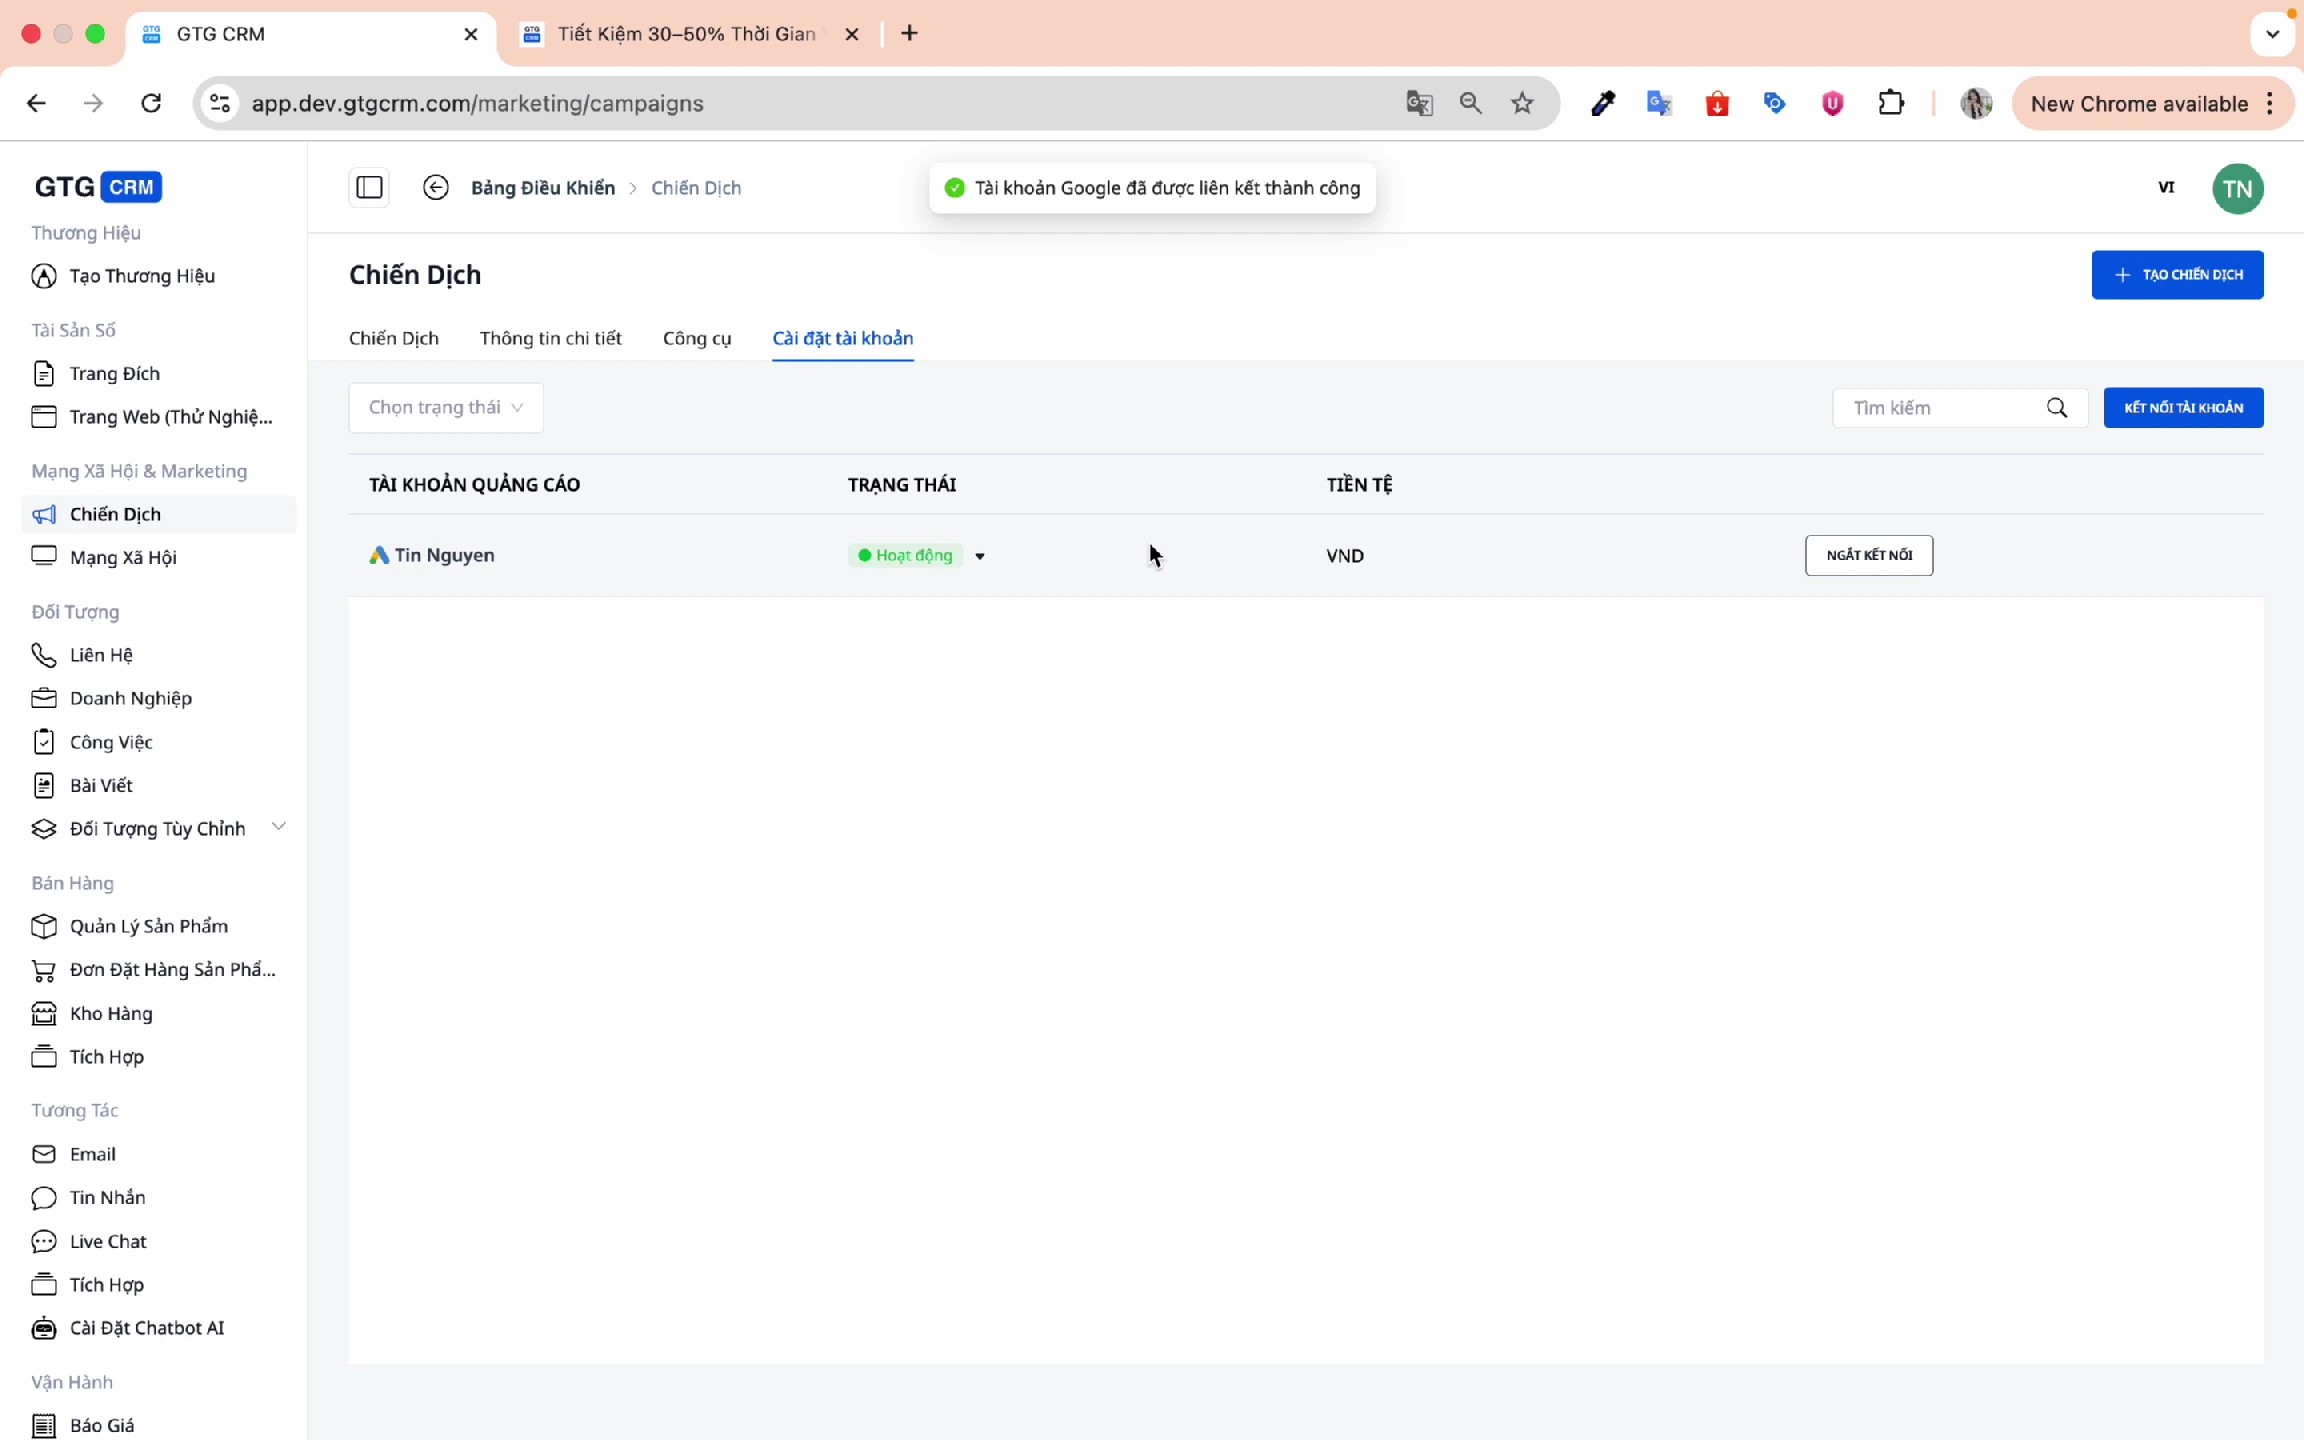
Step 5: Confirm Successful Connection
When you see the successful connection message, you're ready to create a campaign.
2. Create New Campaign
Step 1: Click "Create Campaign"
From the Campaigns screen, click the Create Campaign button.
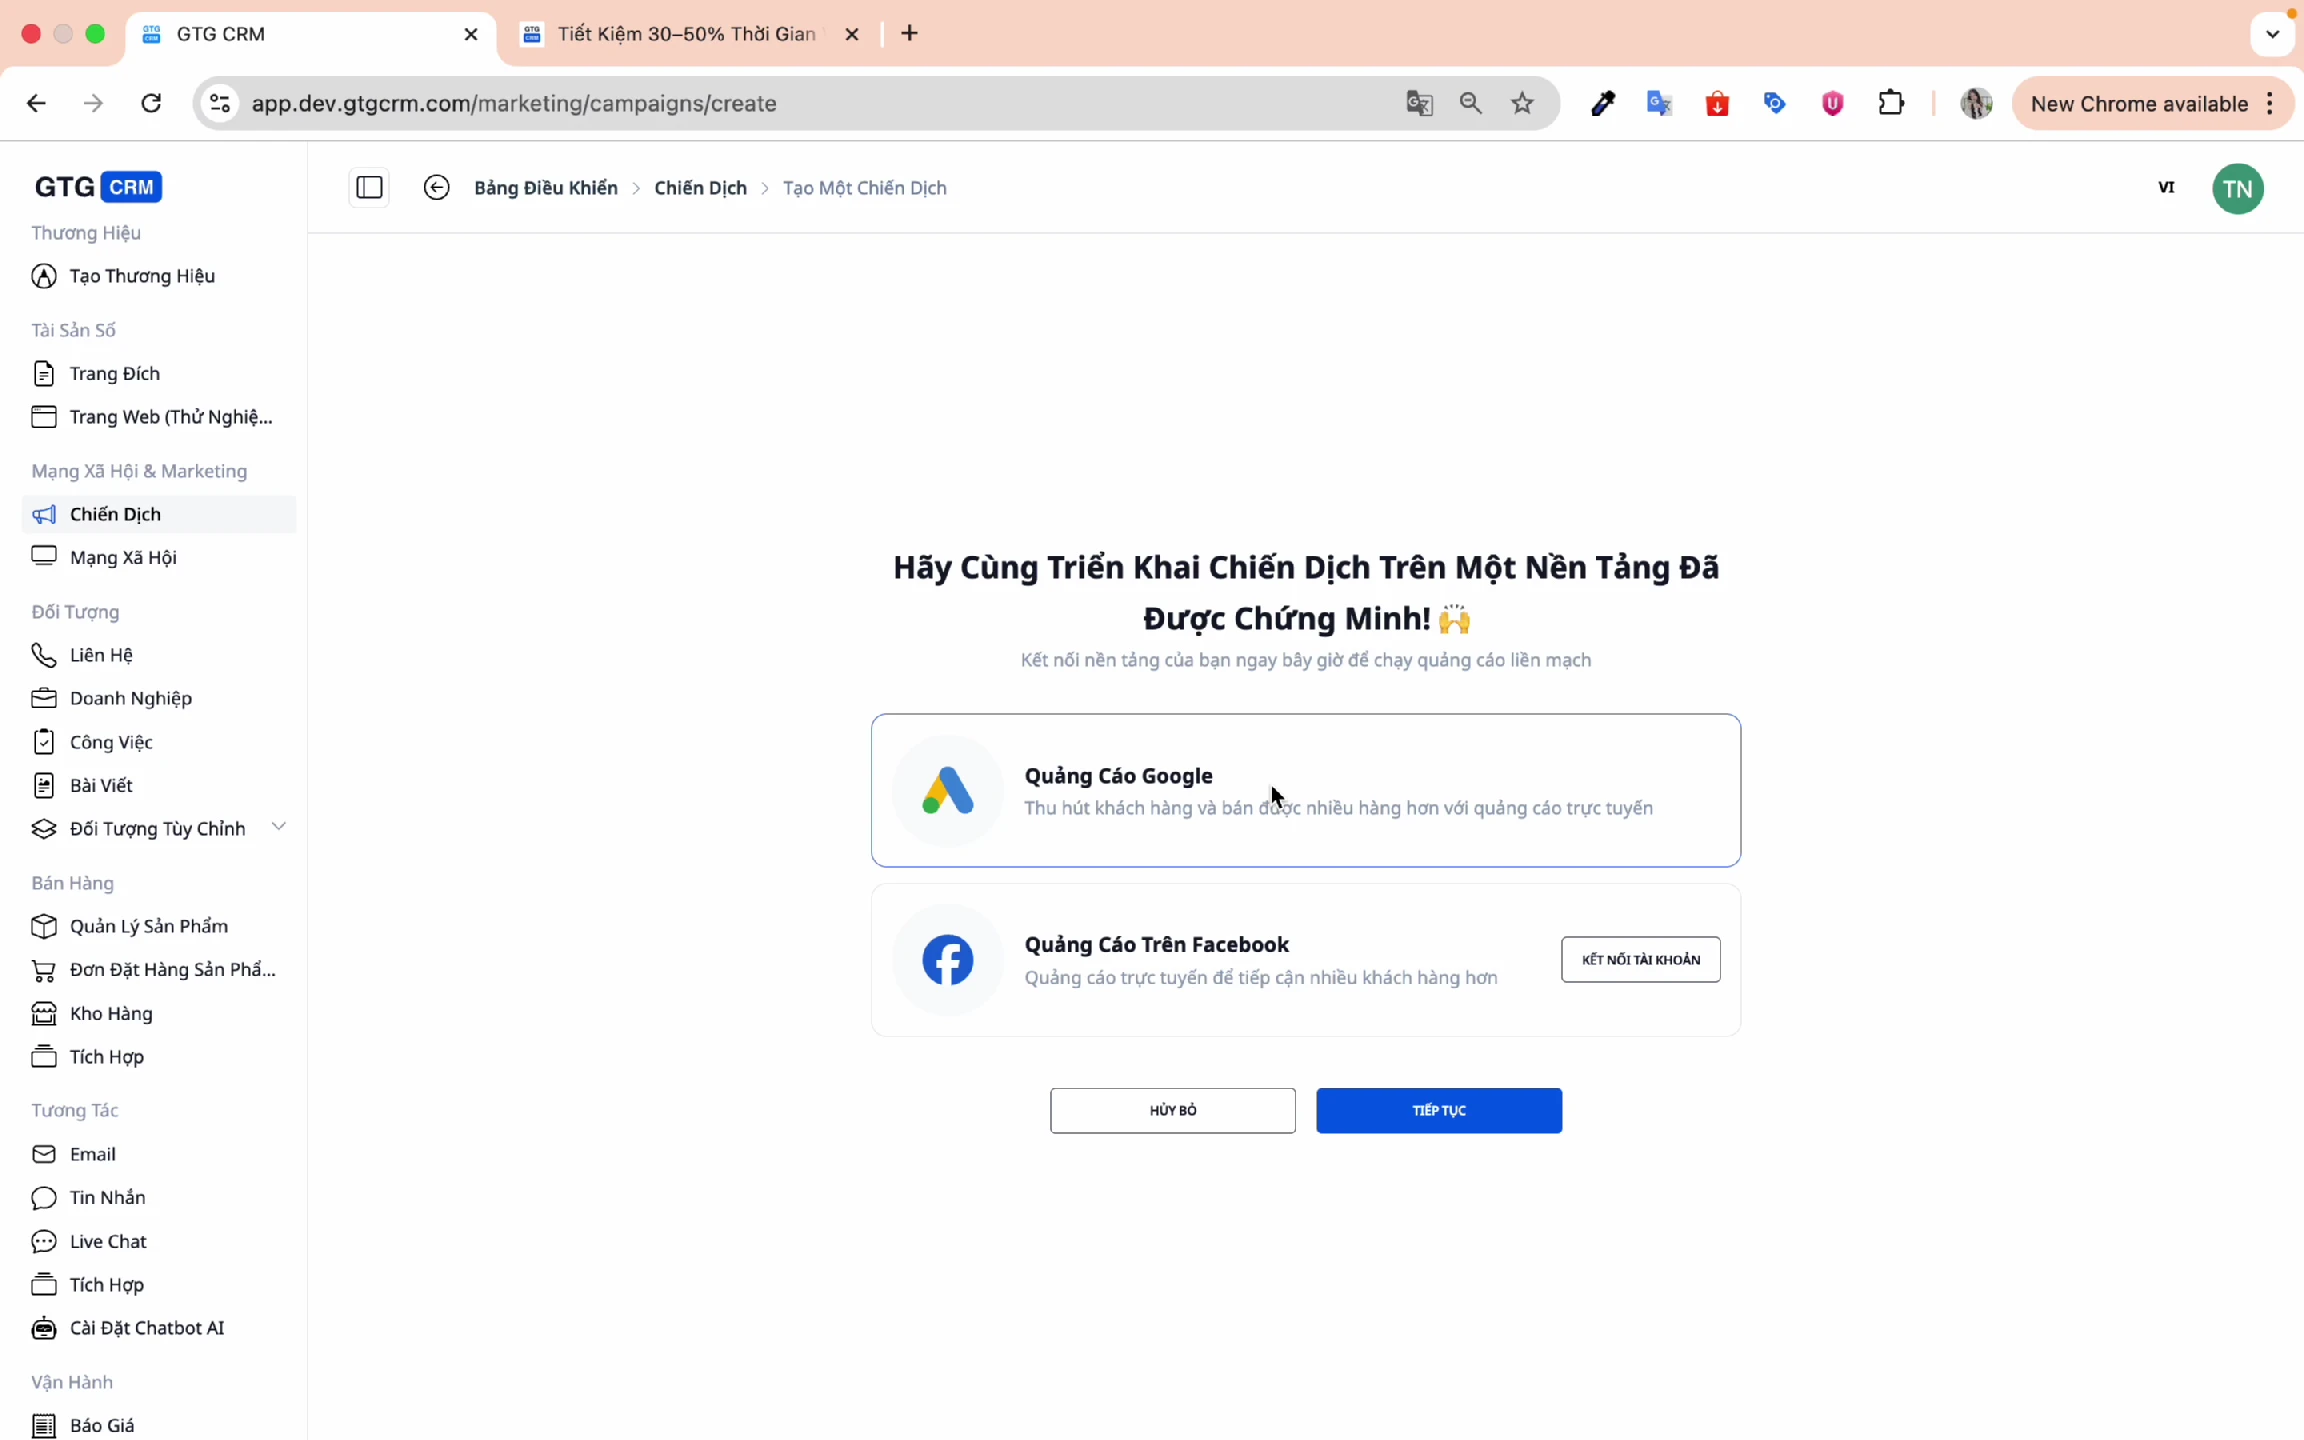
Step 2: Select Ad Platform
Select Google Ads and click Continue.
3. Set Campaign Objectives
Step 1: Choose Campaign Objective
GTG CRM offers 3 main objectives:
| Objective | When to Use |
|---|---|
| Sales | To increase direct sales |
| Leads | To collect potential customer information |
| Web Traffic | To increase website visits |
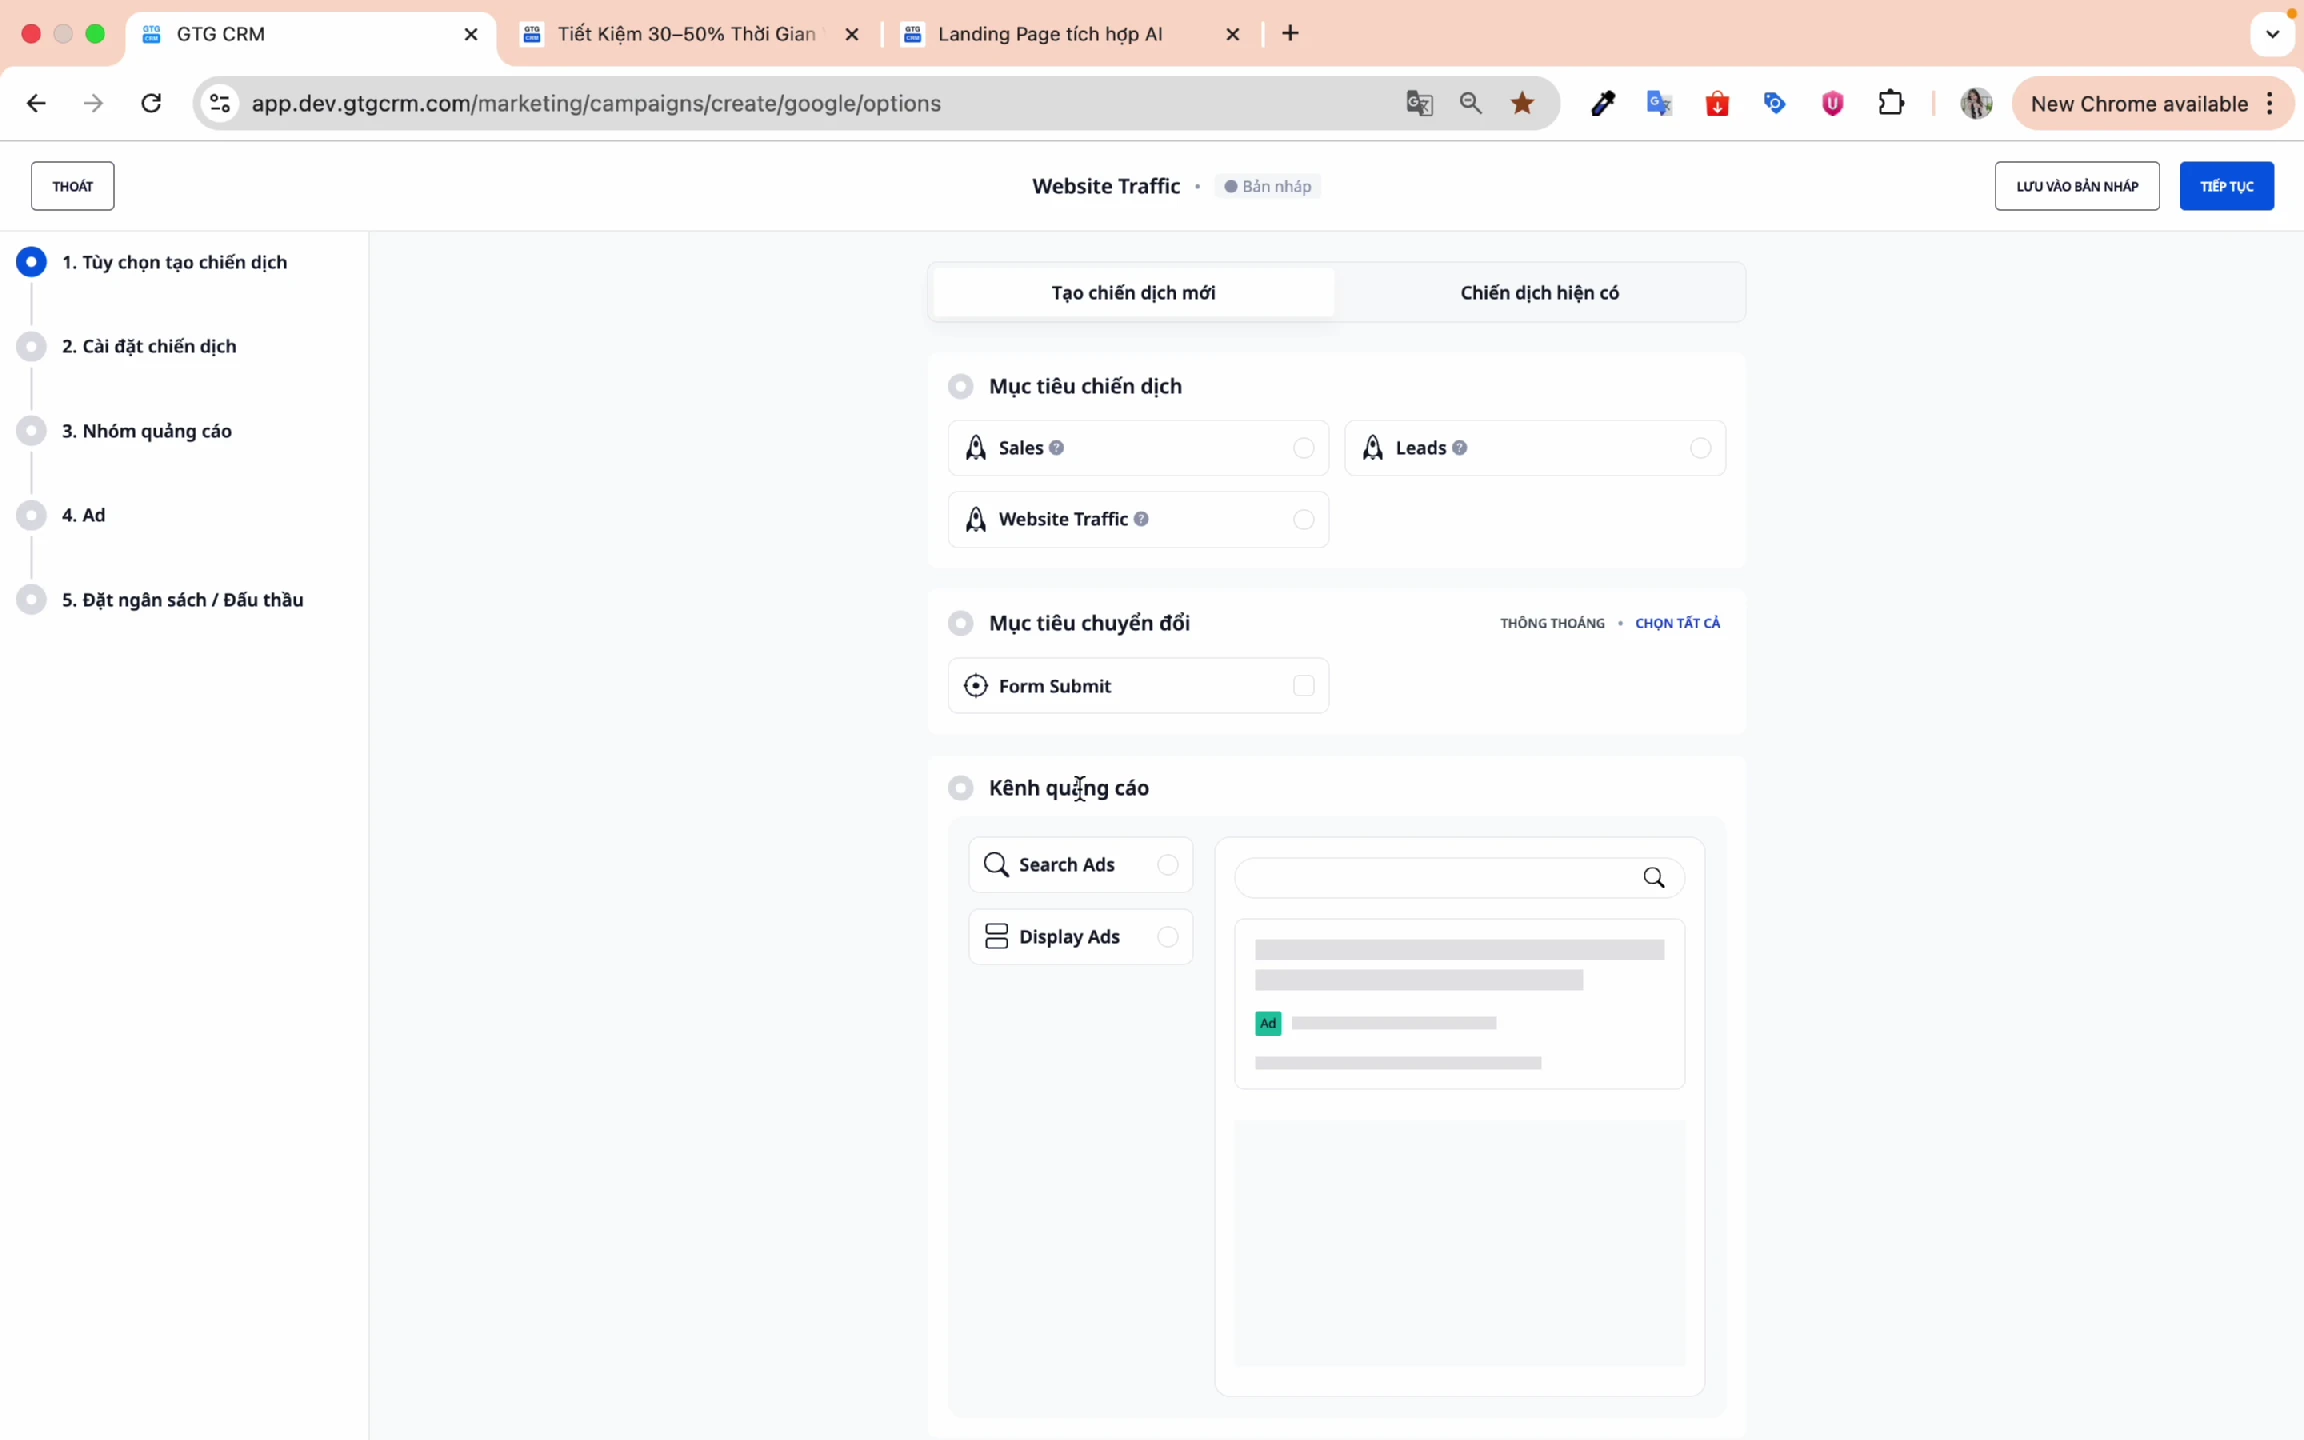
Step 2: Choose Conversion Goal
Example: Form Submit - when a customer fills out and submits a form, it's recorded as a conversion.
Step 3: Select Ad Channel
- Search Ad: Ads displayed on Google search results
- Display Ad: Ads displayed on Google's partner network
Step 4: Select Target Devices
Check the devices you want to target:
- ☑️ Mobile
- ☑️ Desktop
- ☑️ Tablet
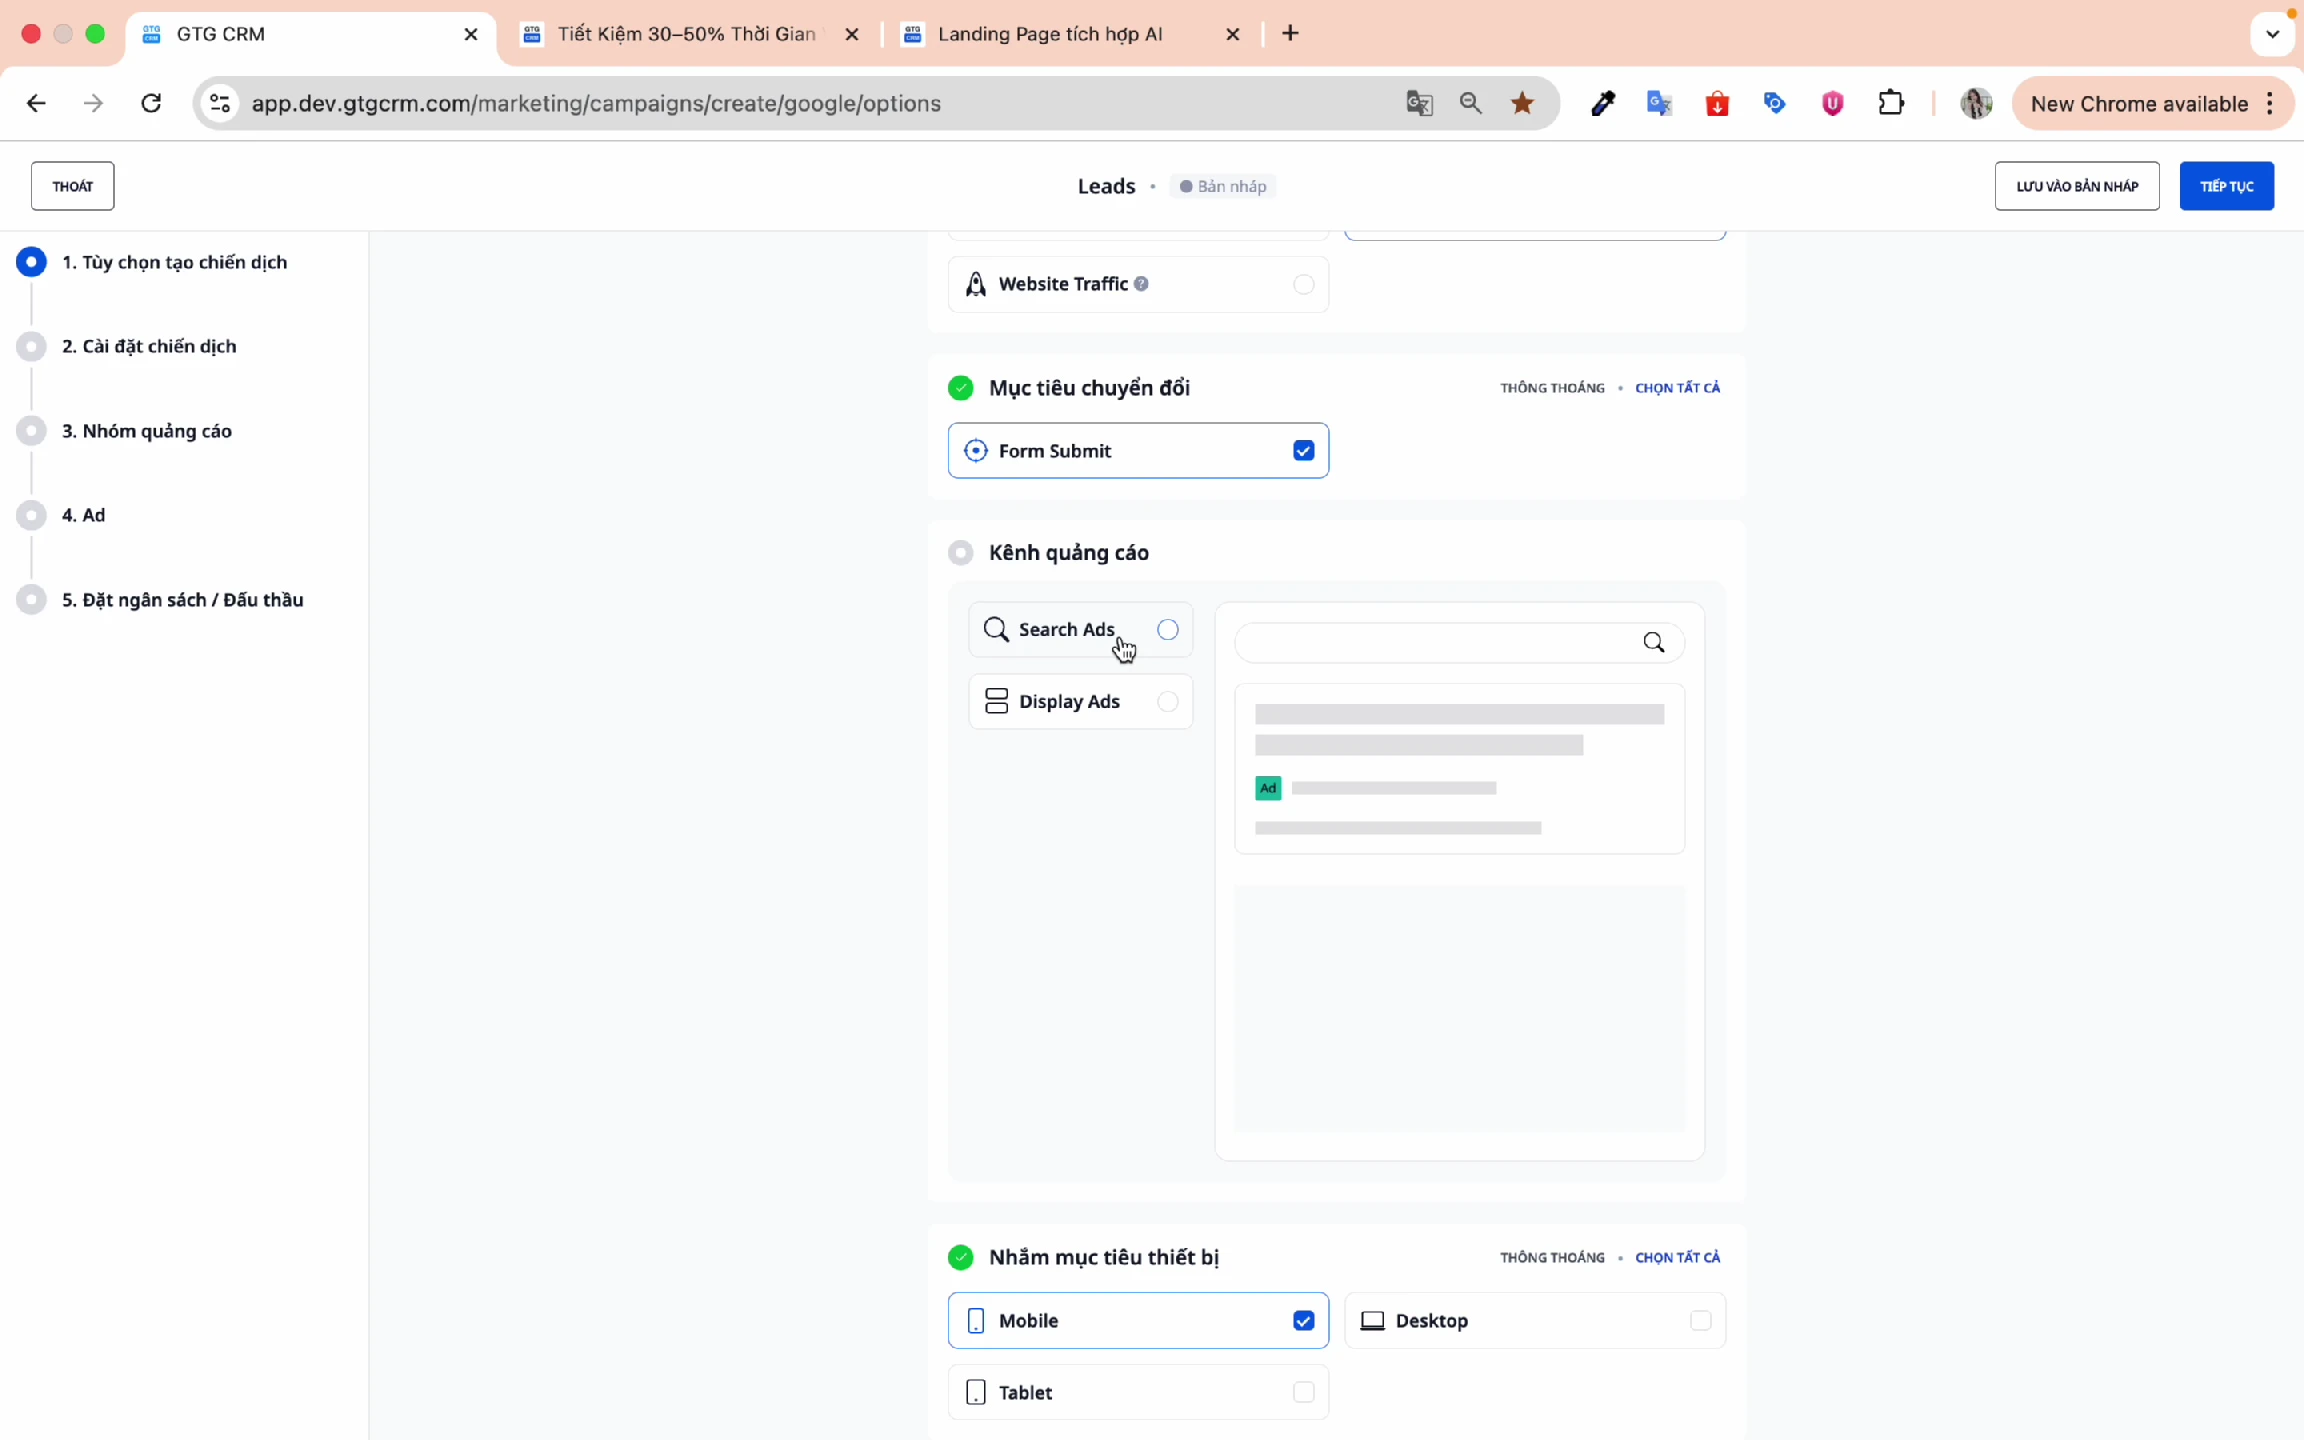
Click Continue to proceed to the next step.
4. Targeting Setup
Step 1: Name Your Campaign
Give it a memorable name that's easy to search for later.
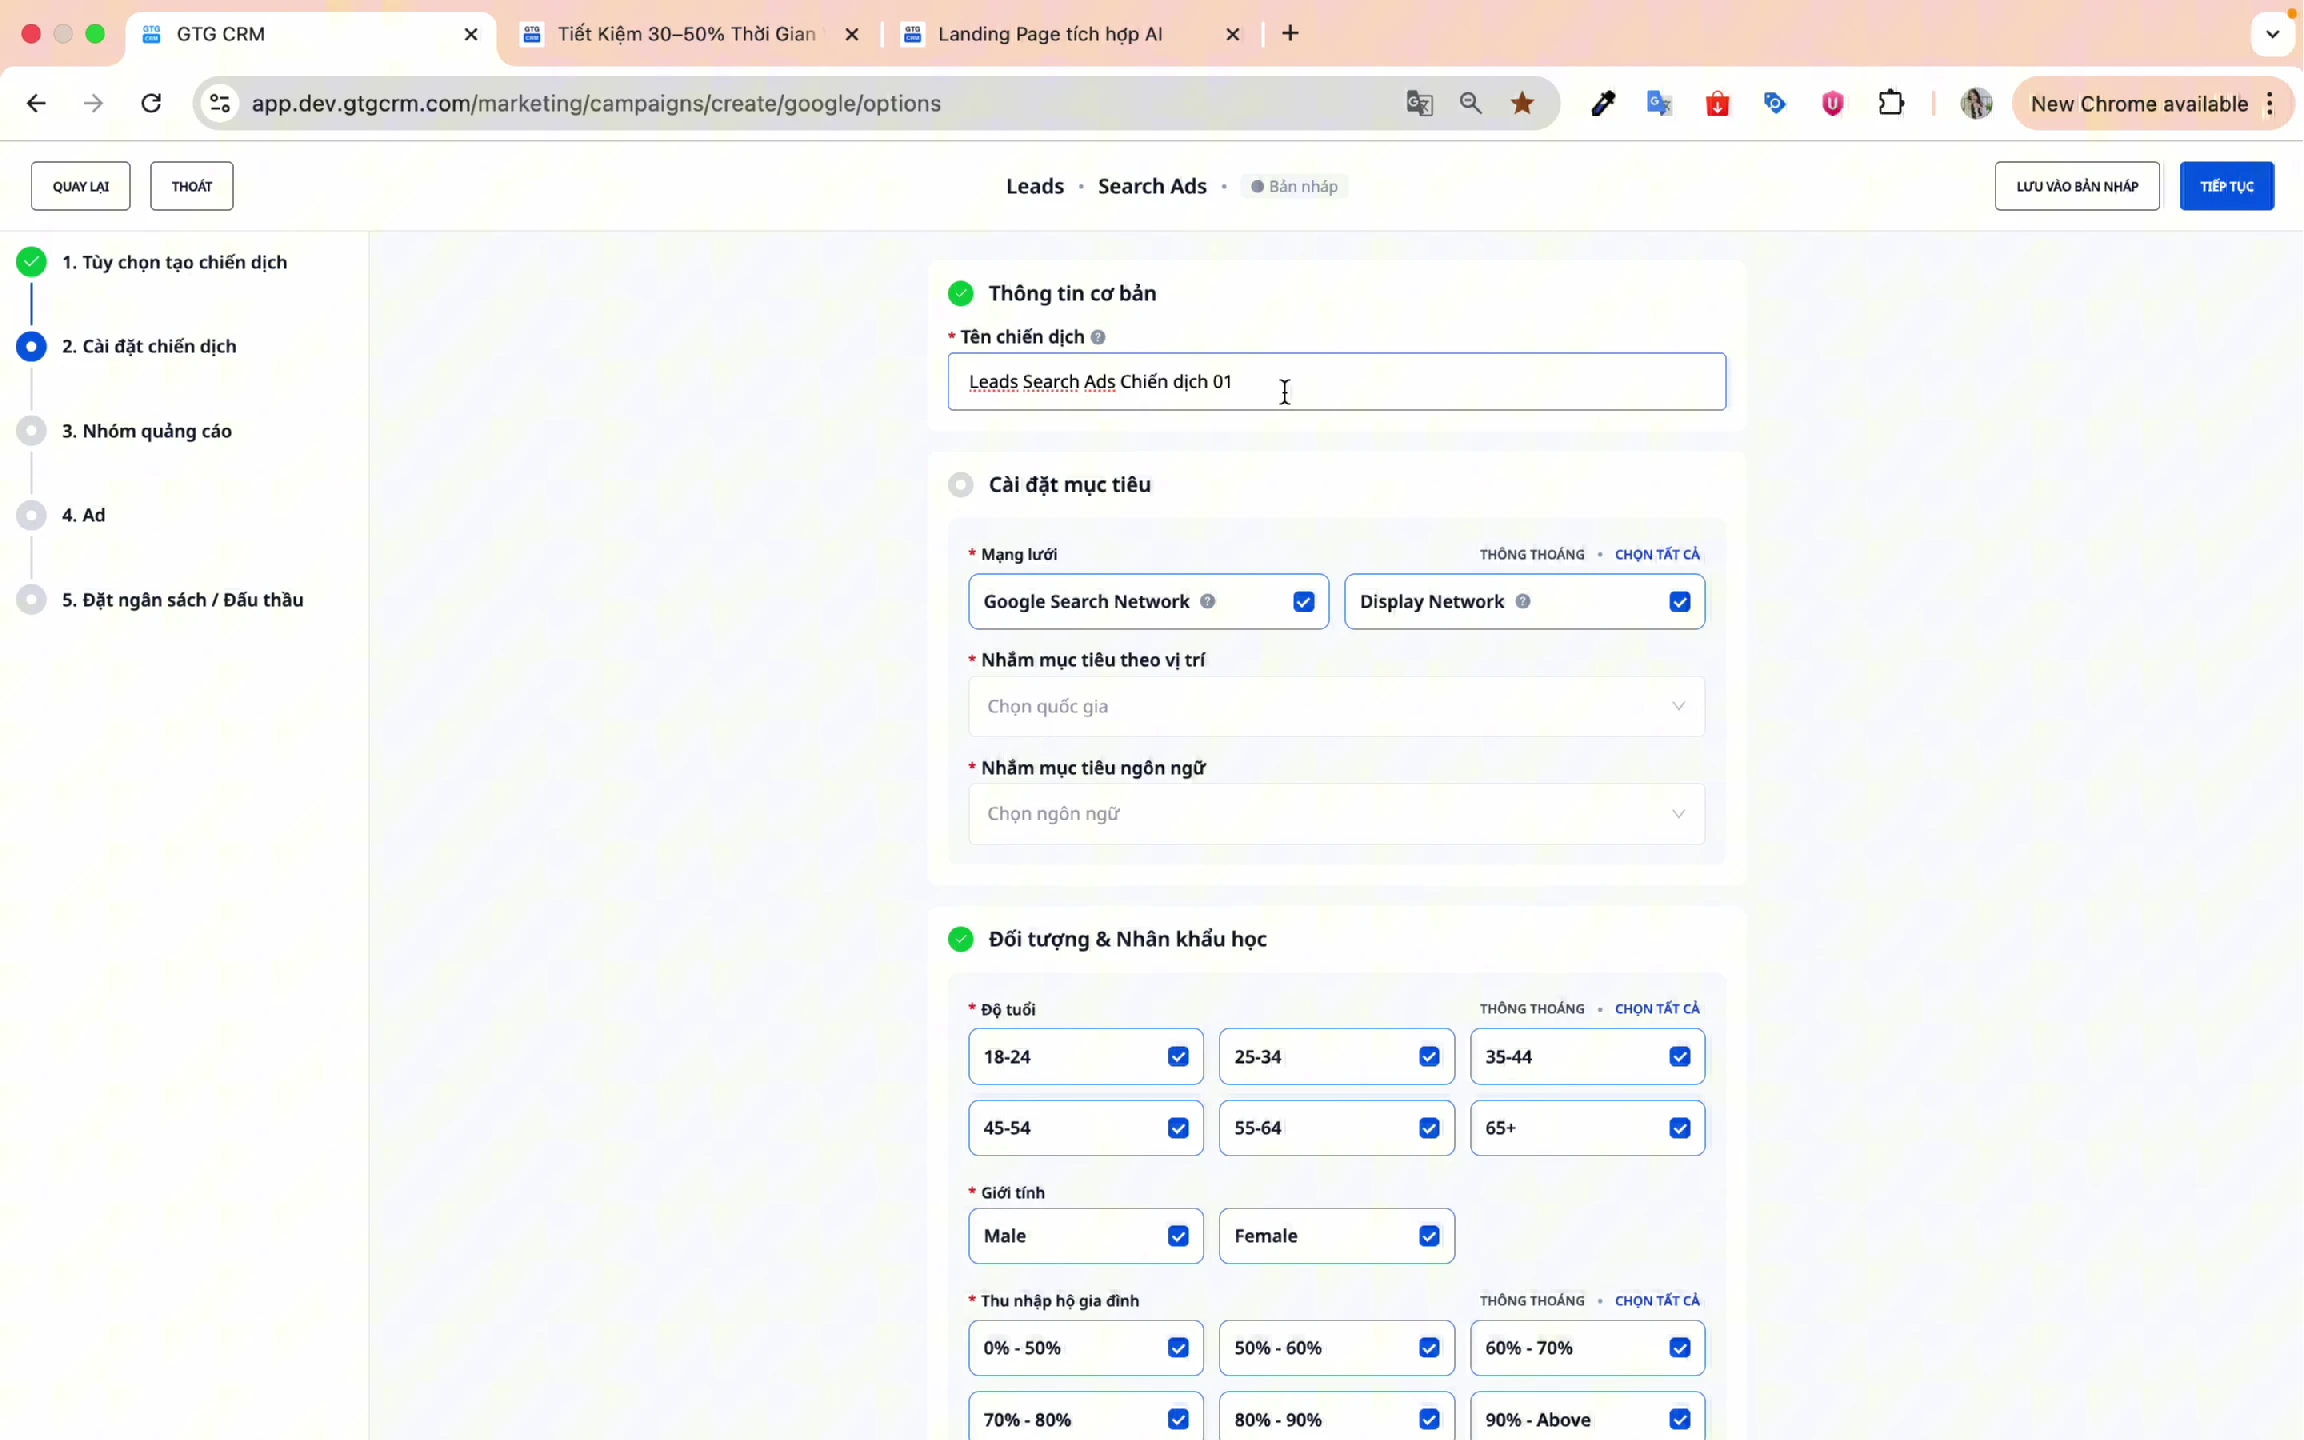
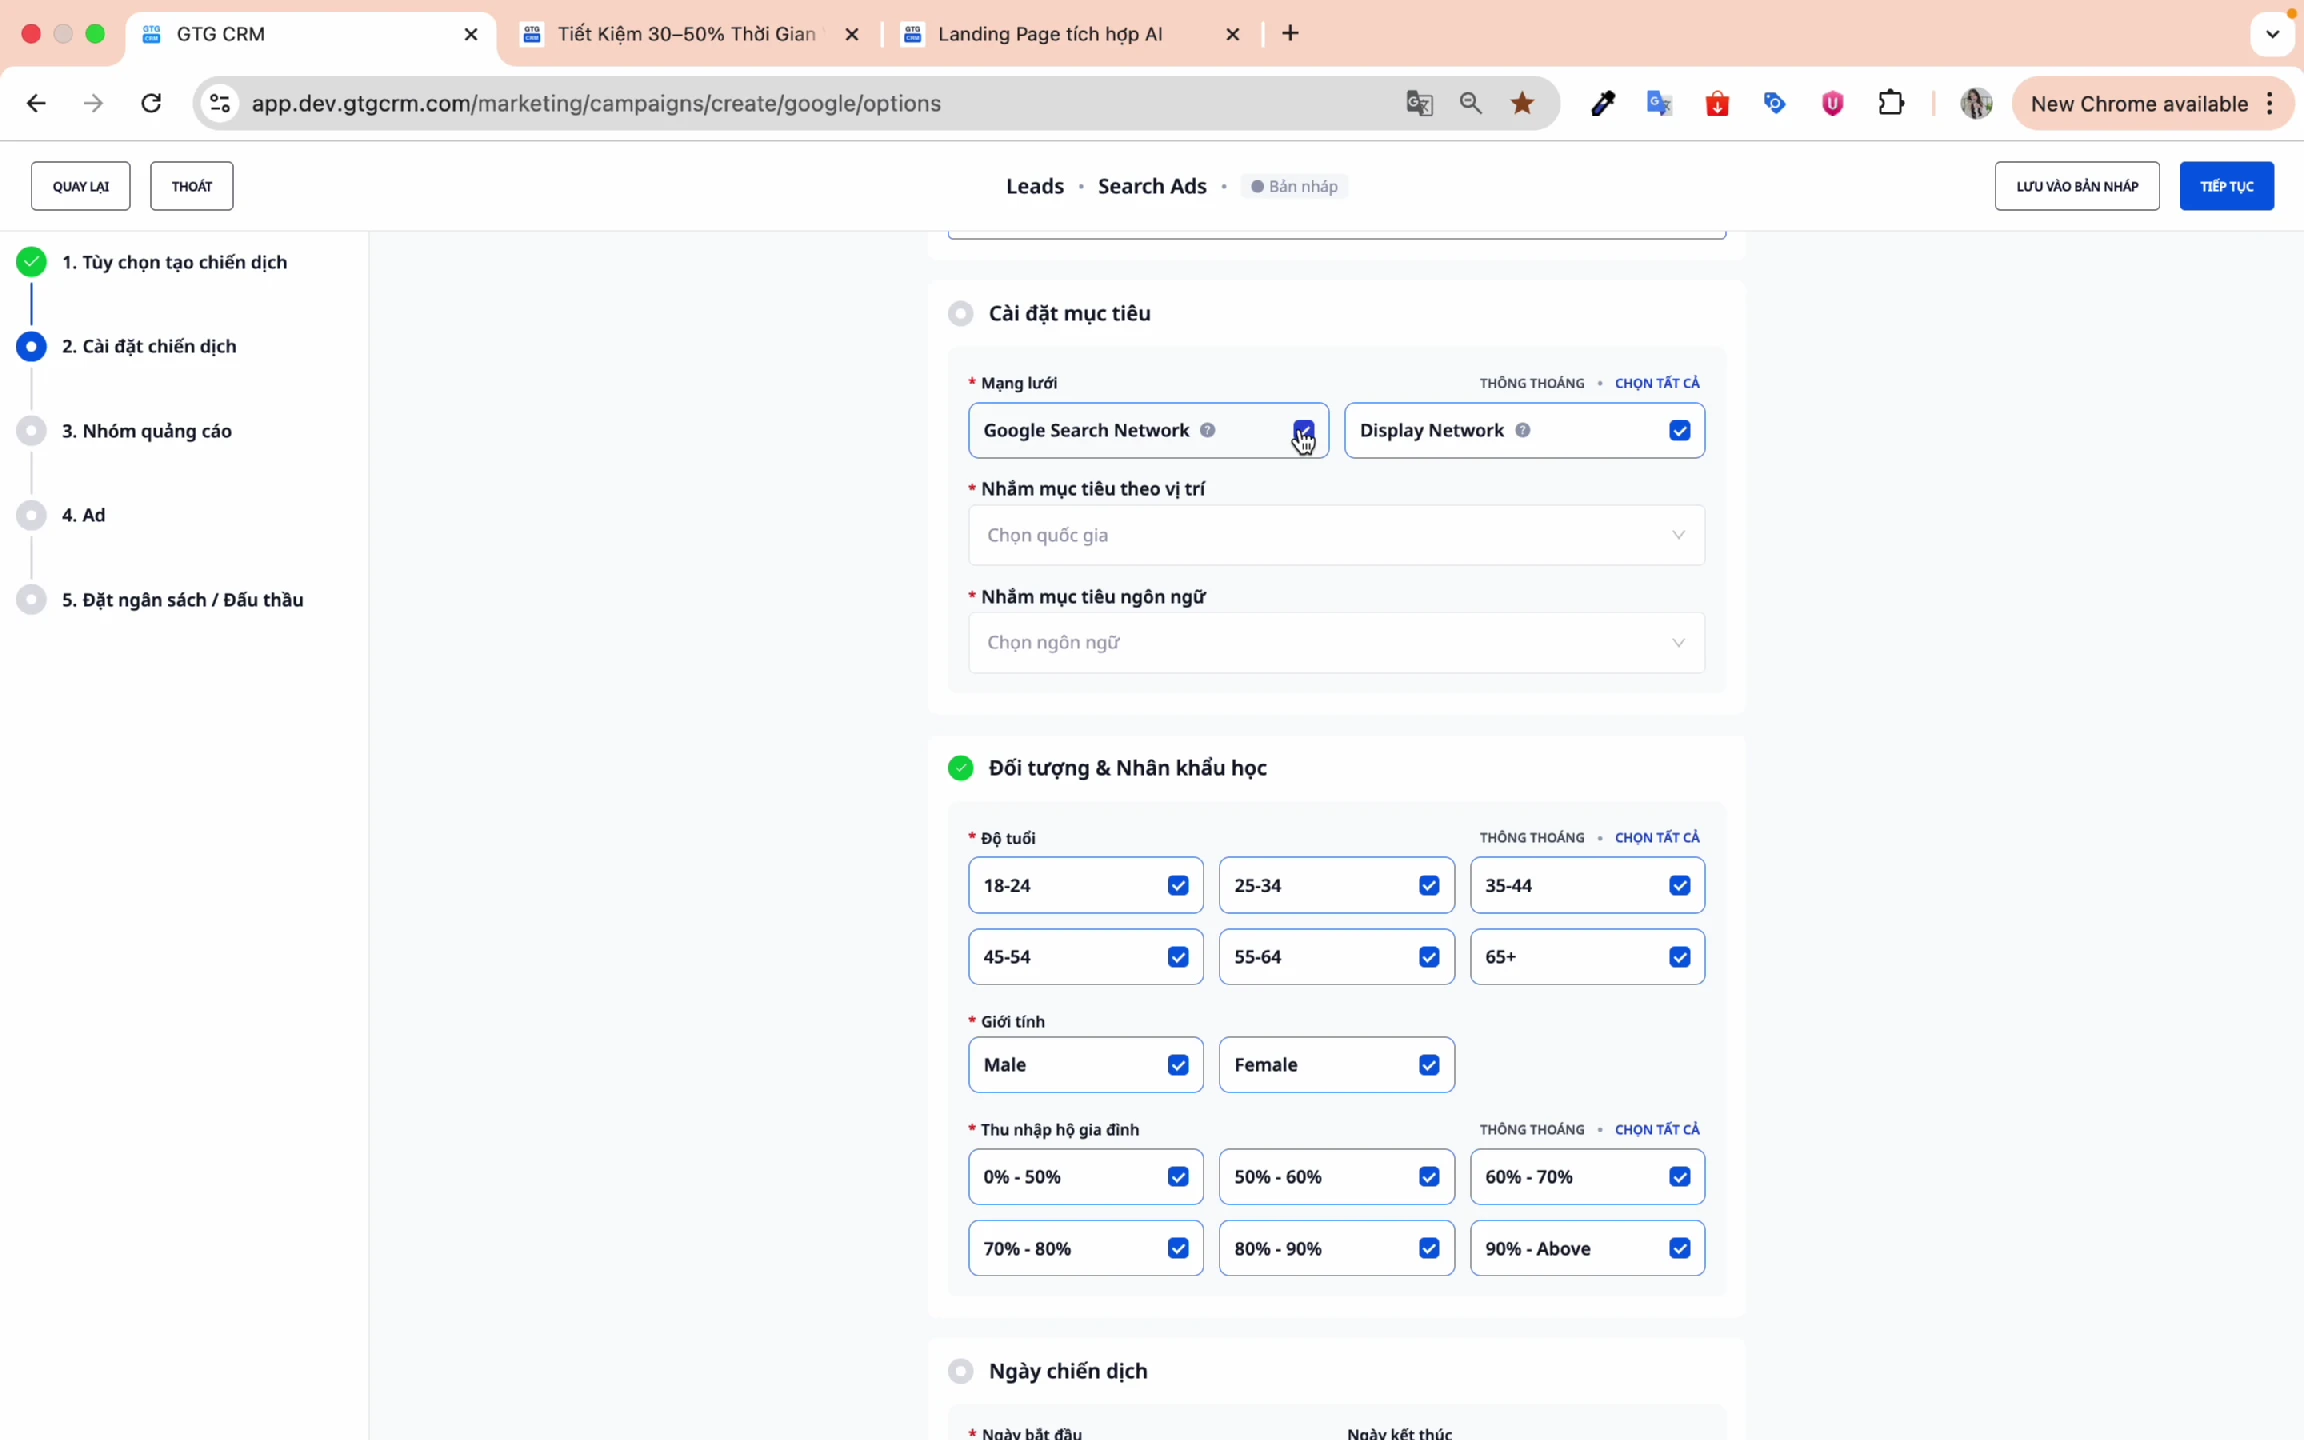
Step 2: Network Settings
Select ad networks:
- Google Search Network: Ads displayed on Google Search
- Google Display Network: Ads displayed on partner sites
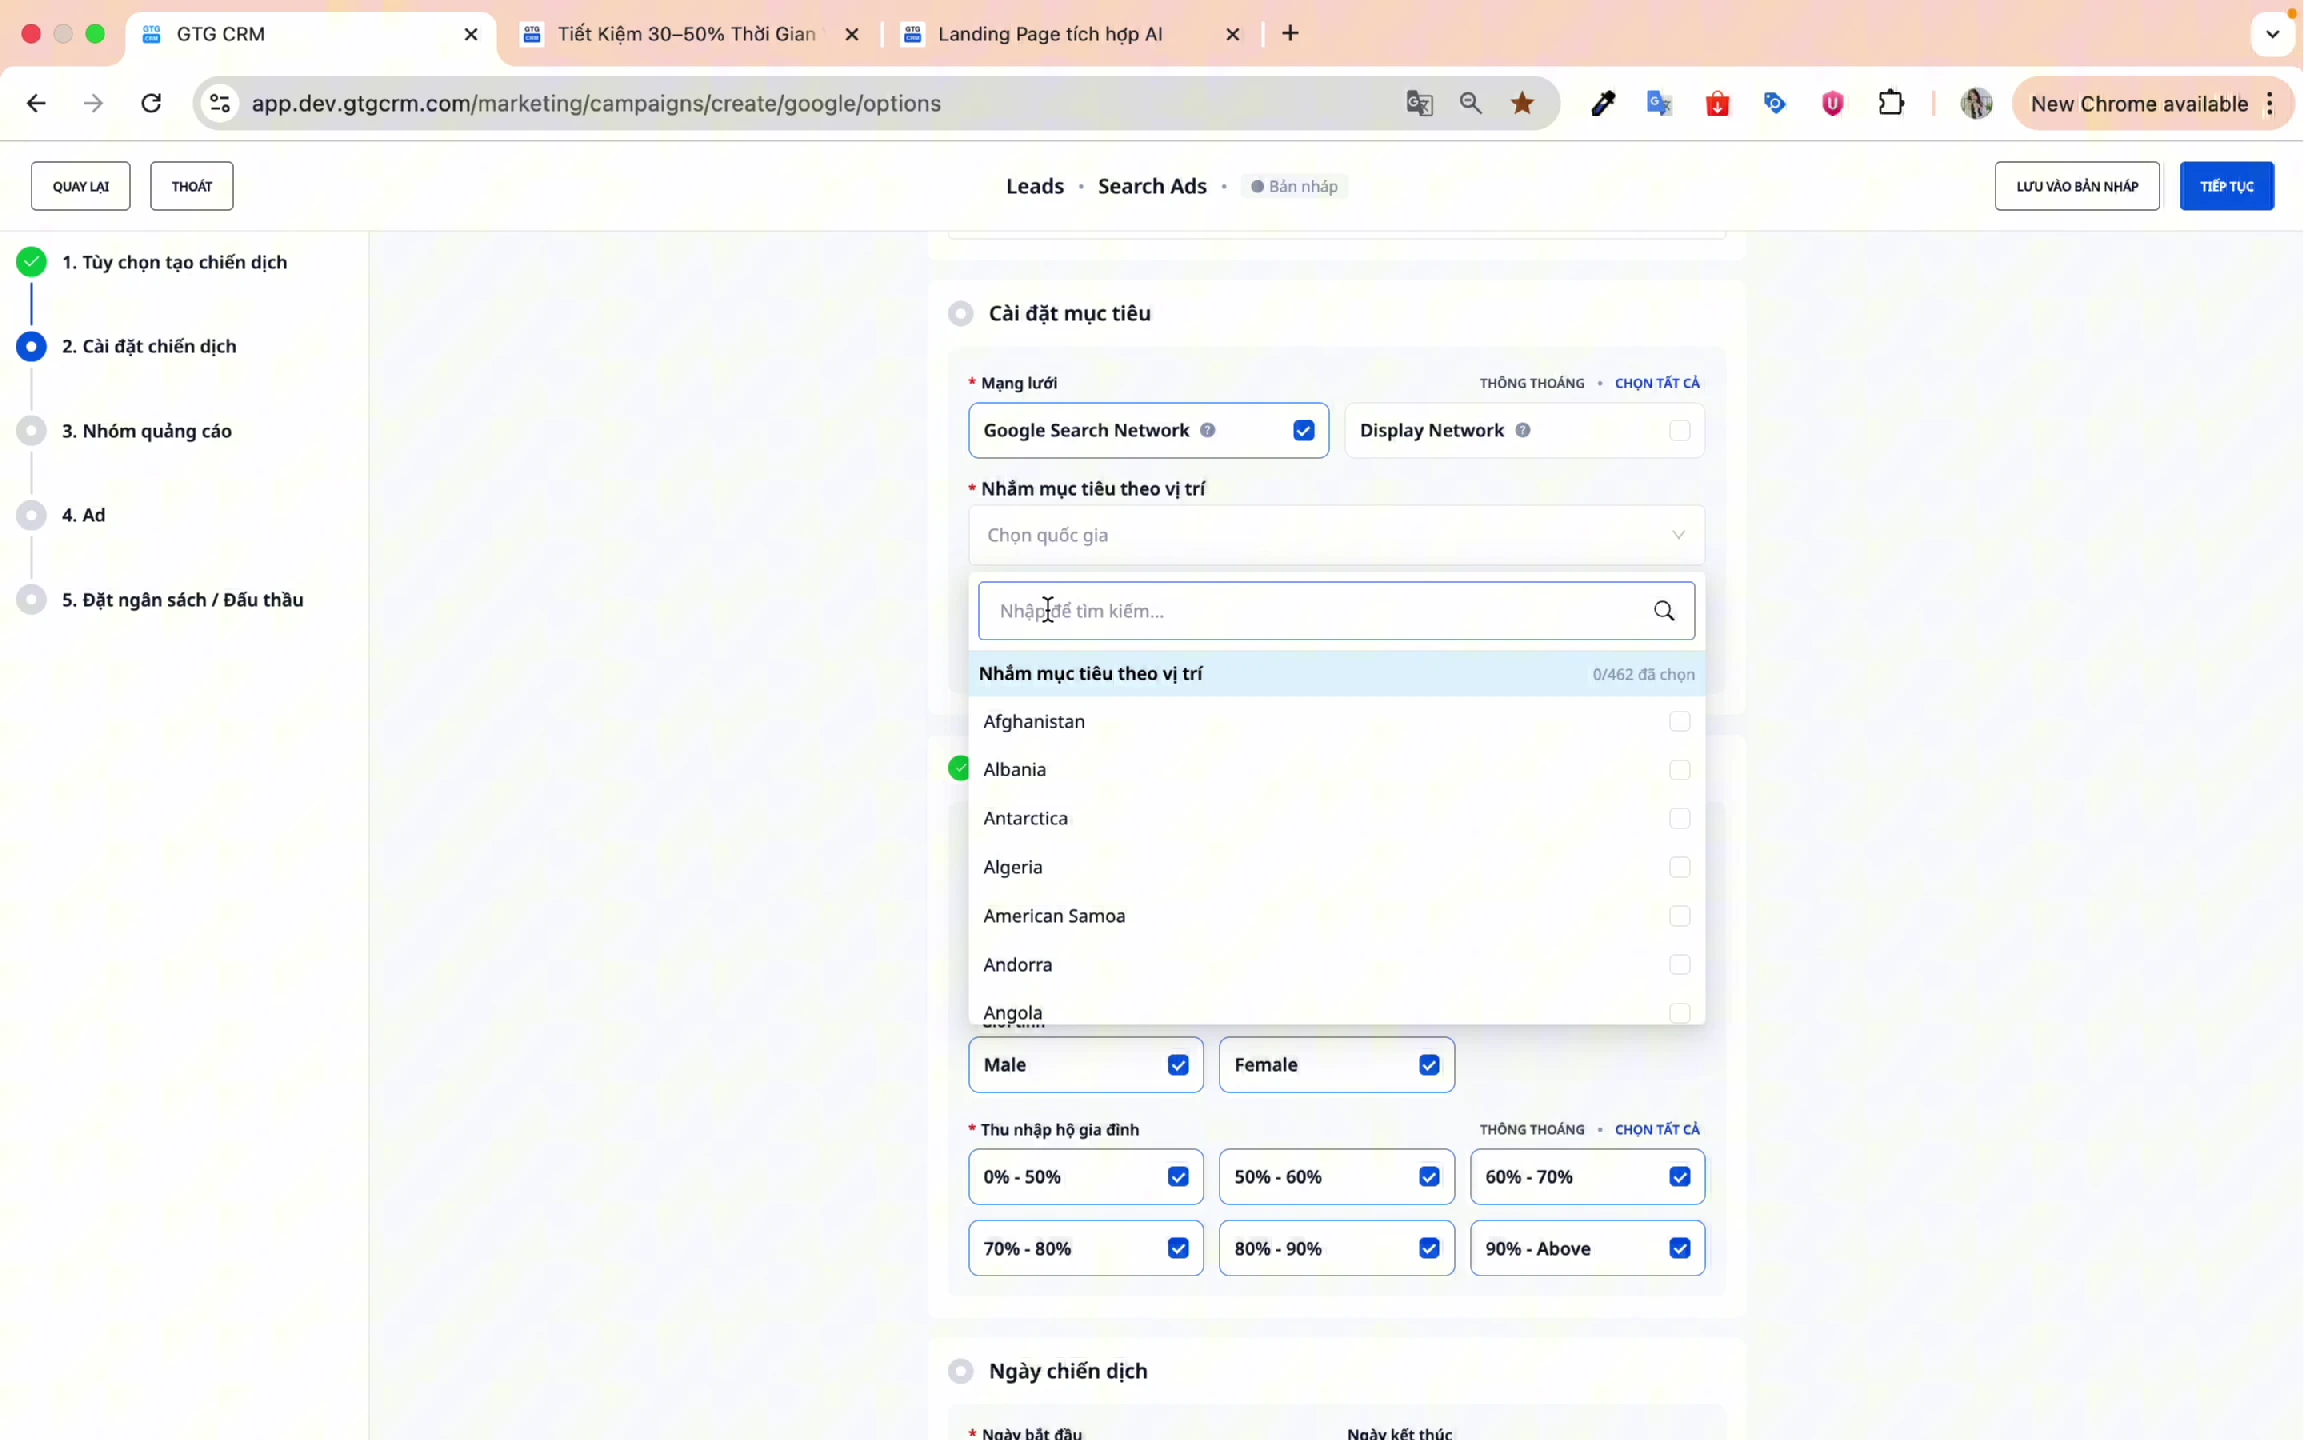
Step 3: Target by Location
Select the geographic areas you want to target:
- By country
- By province/city
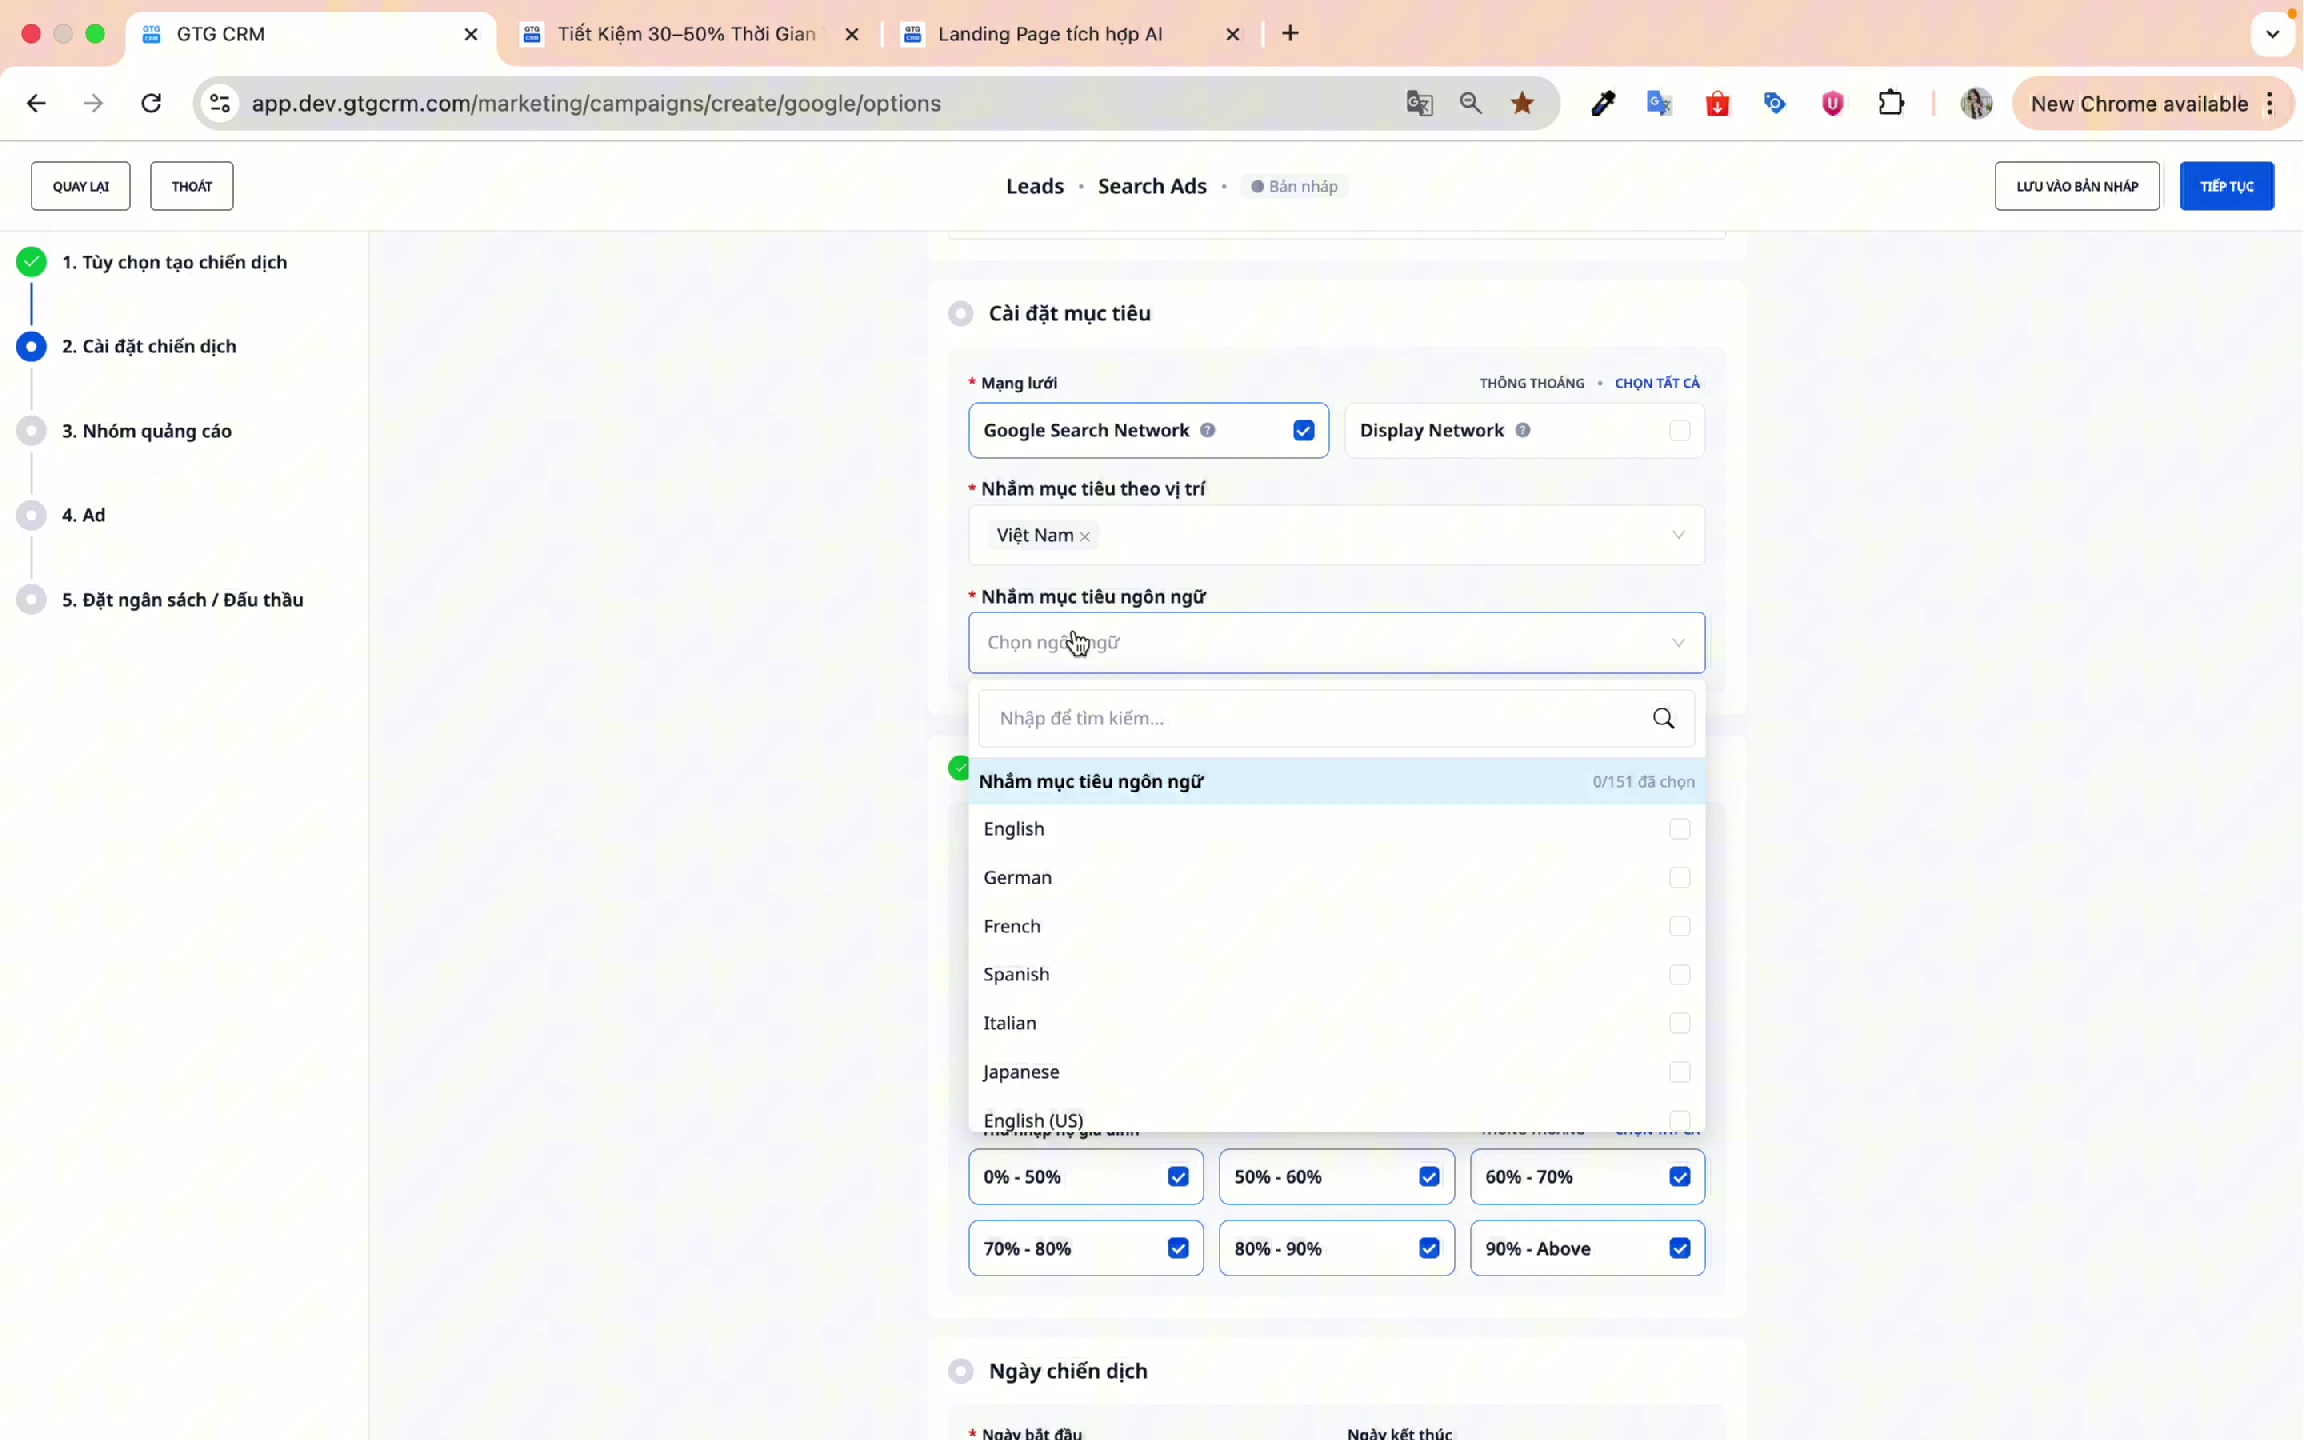
Step 4: Target by Language
Select the language spoken by your target customers.
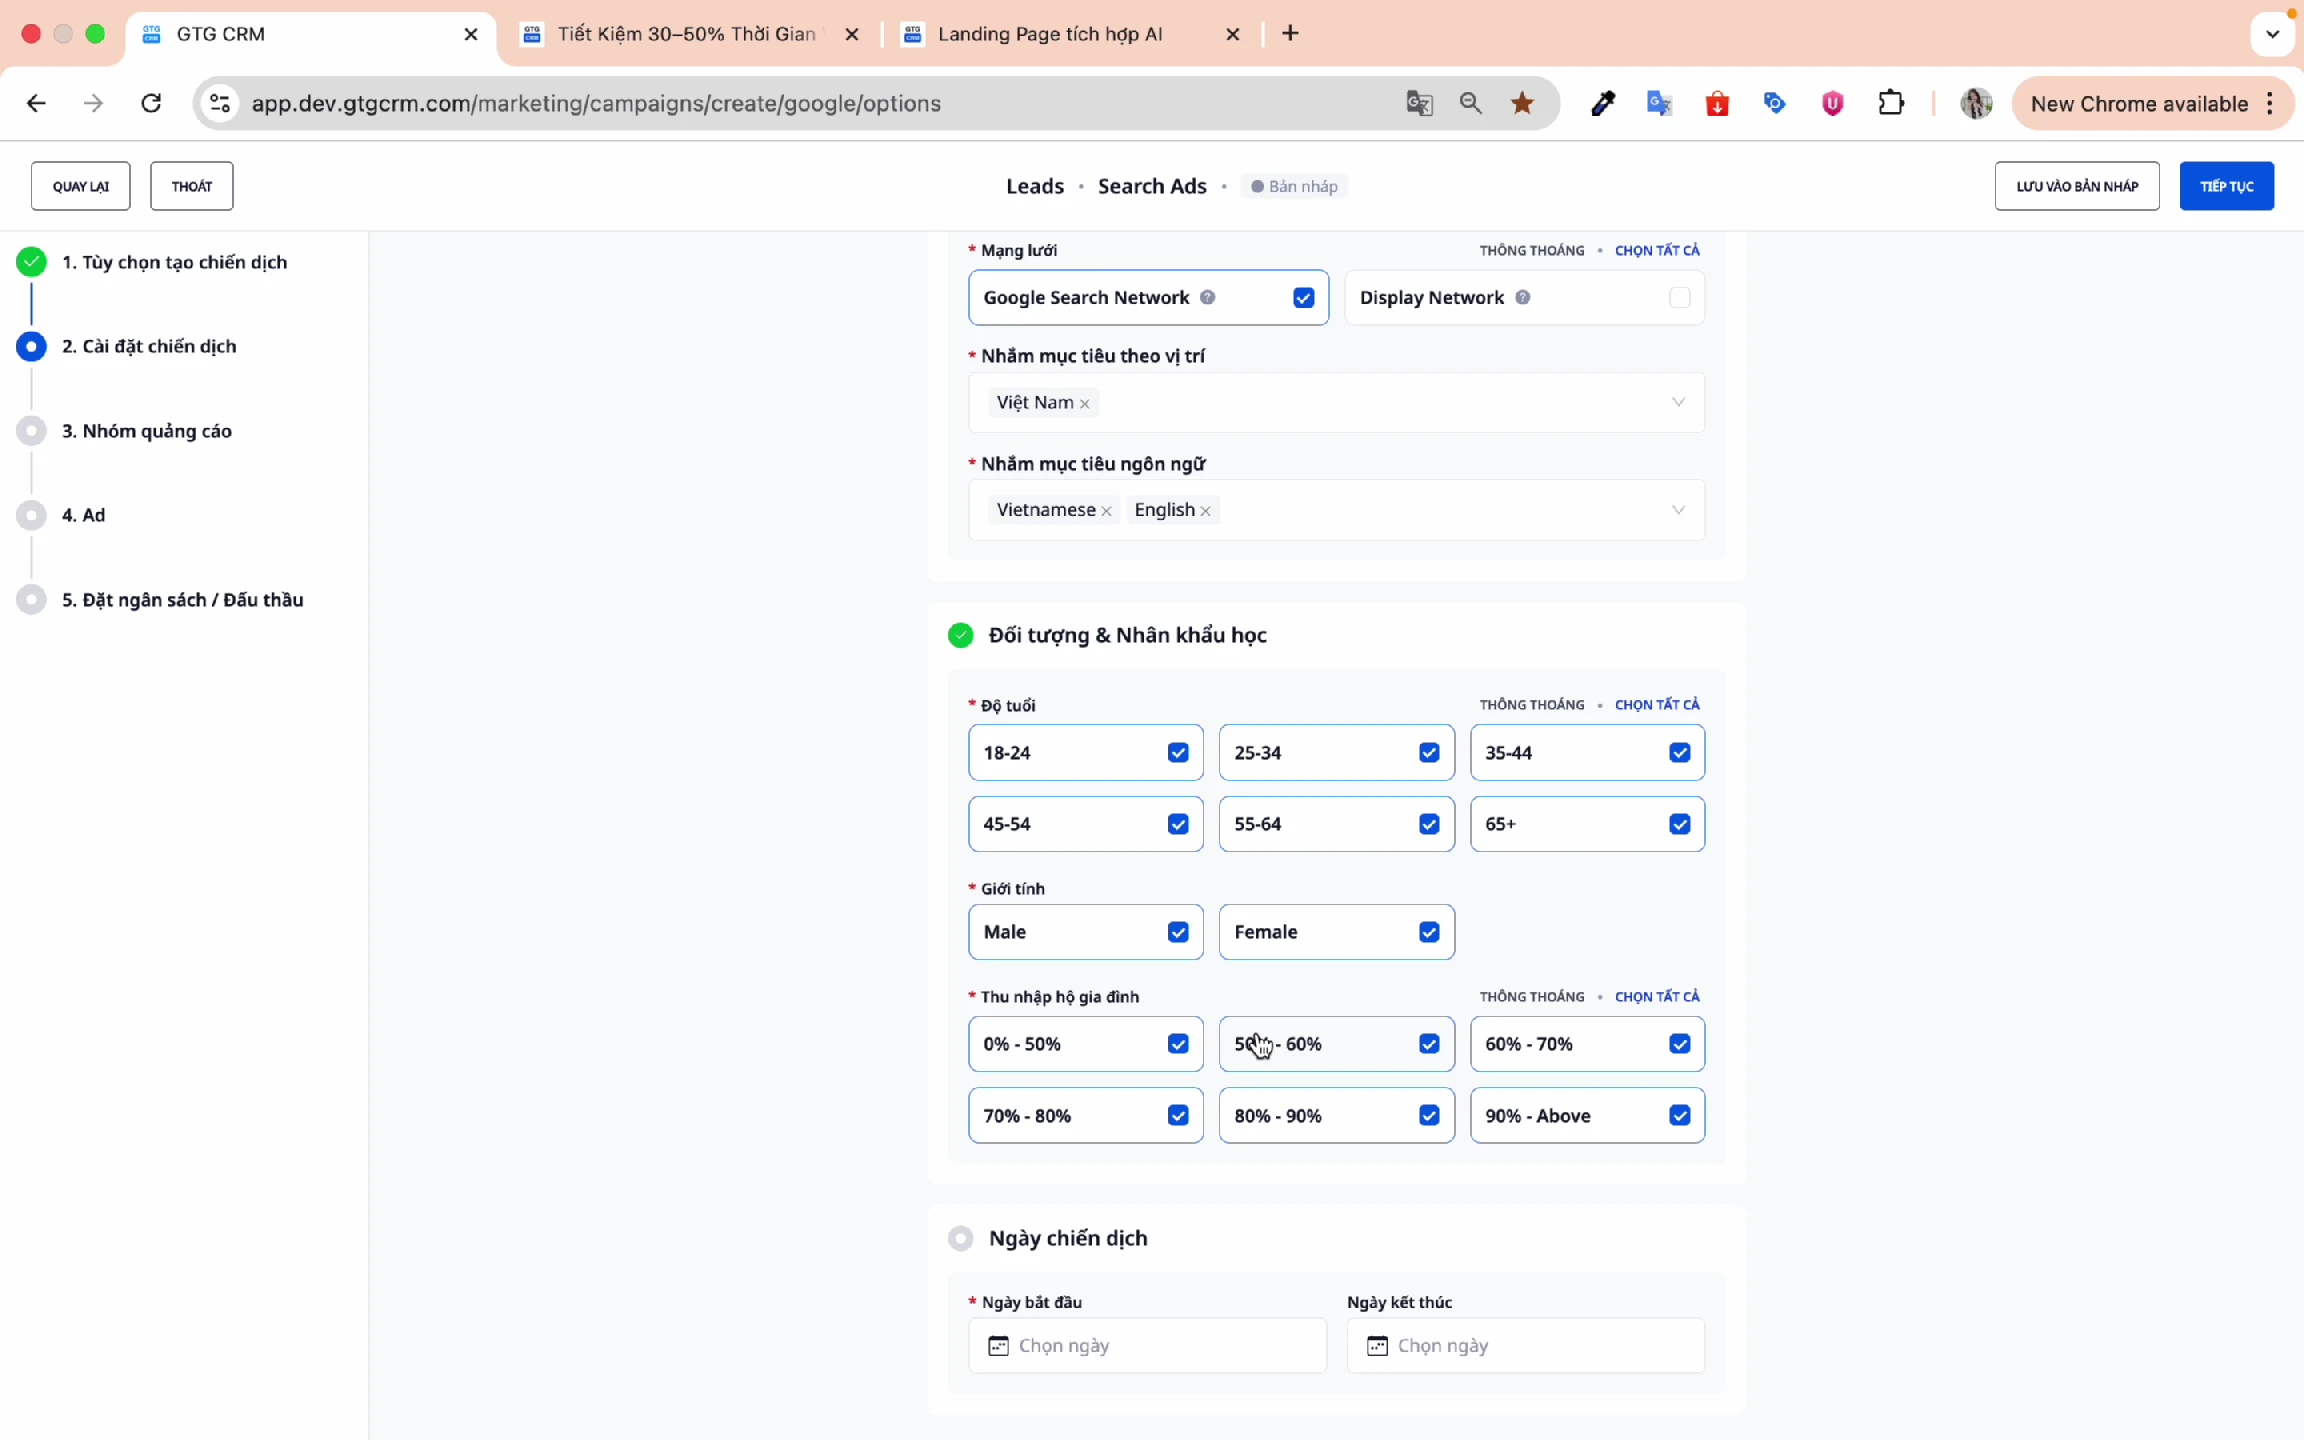
Step 5: Demographic Settings
Customize your audience by:
Age:
- ☑️ 18-24
- ☑️ 25-34
- ☑️ 35-44
- ☑️ 45-54
- ☑️ 55-64
- ☑️ 65+ You can uncheck if not relevant
Gender:
- ☑️ Male
- ☑️ Female
Household Income:
- Select income brackets that match your products/services
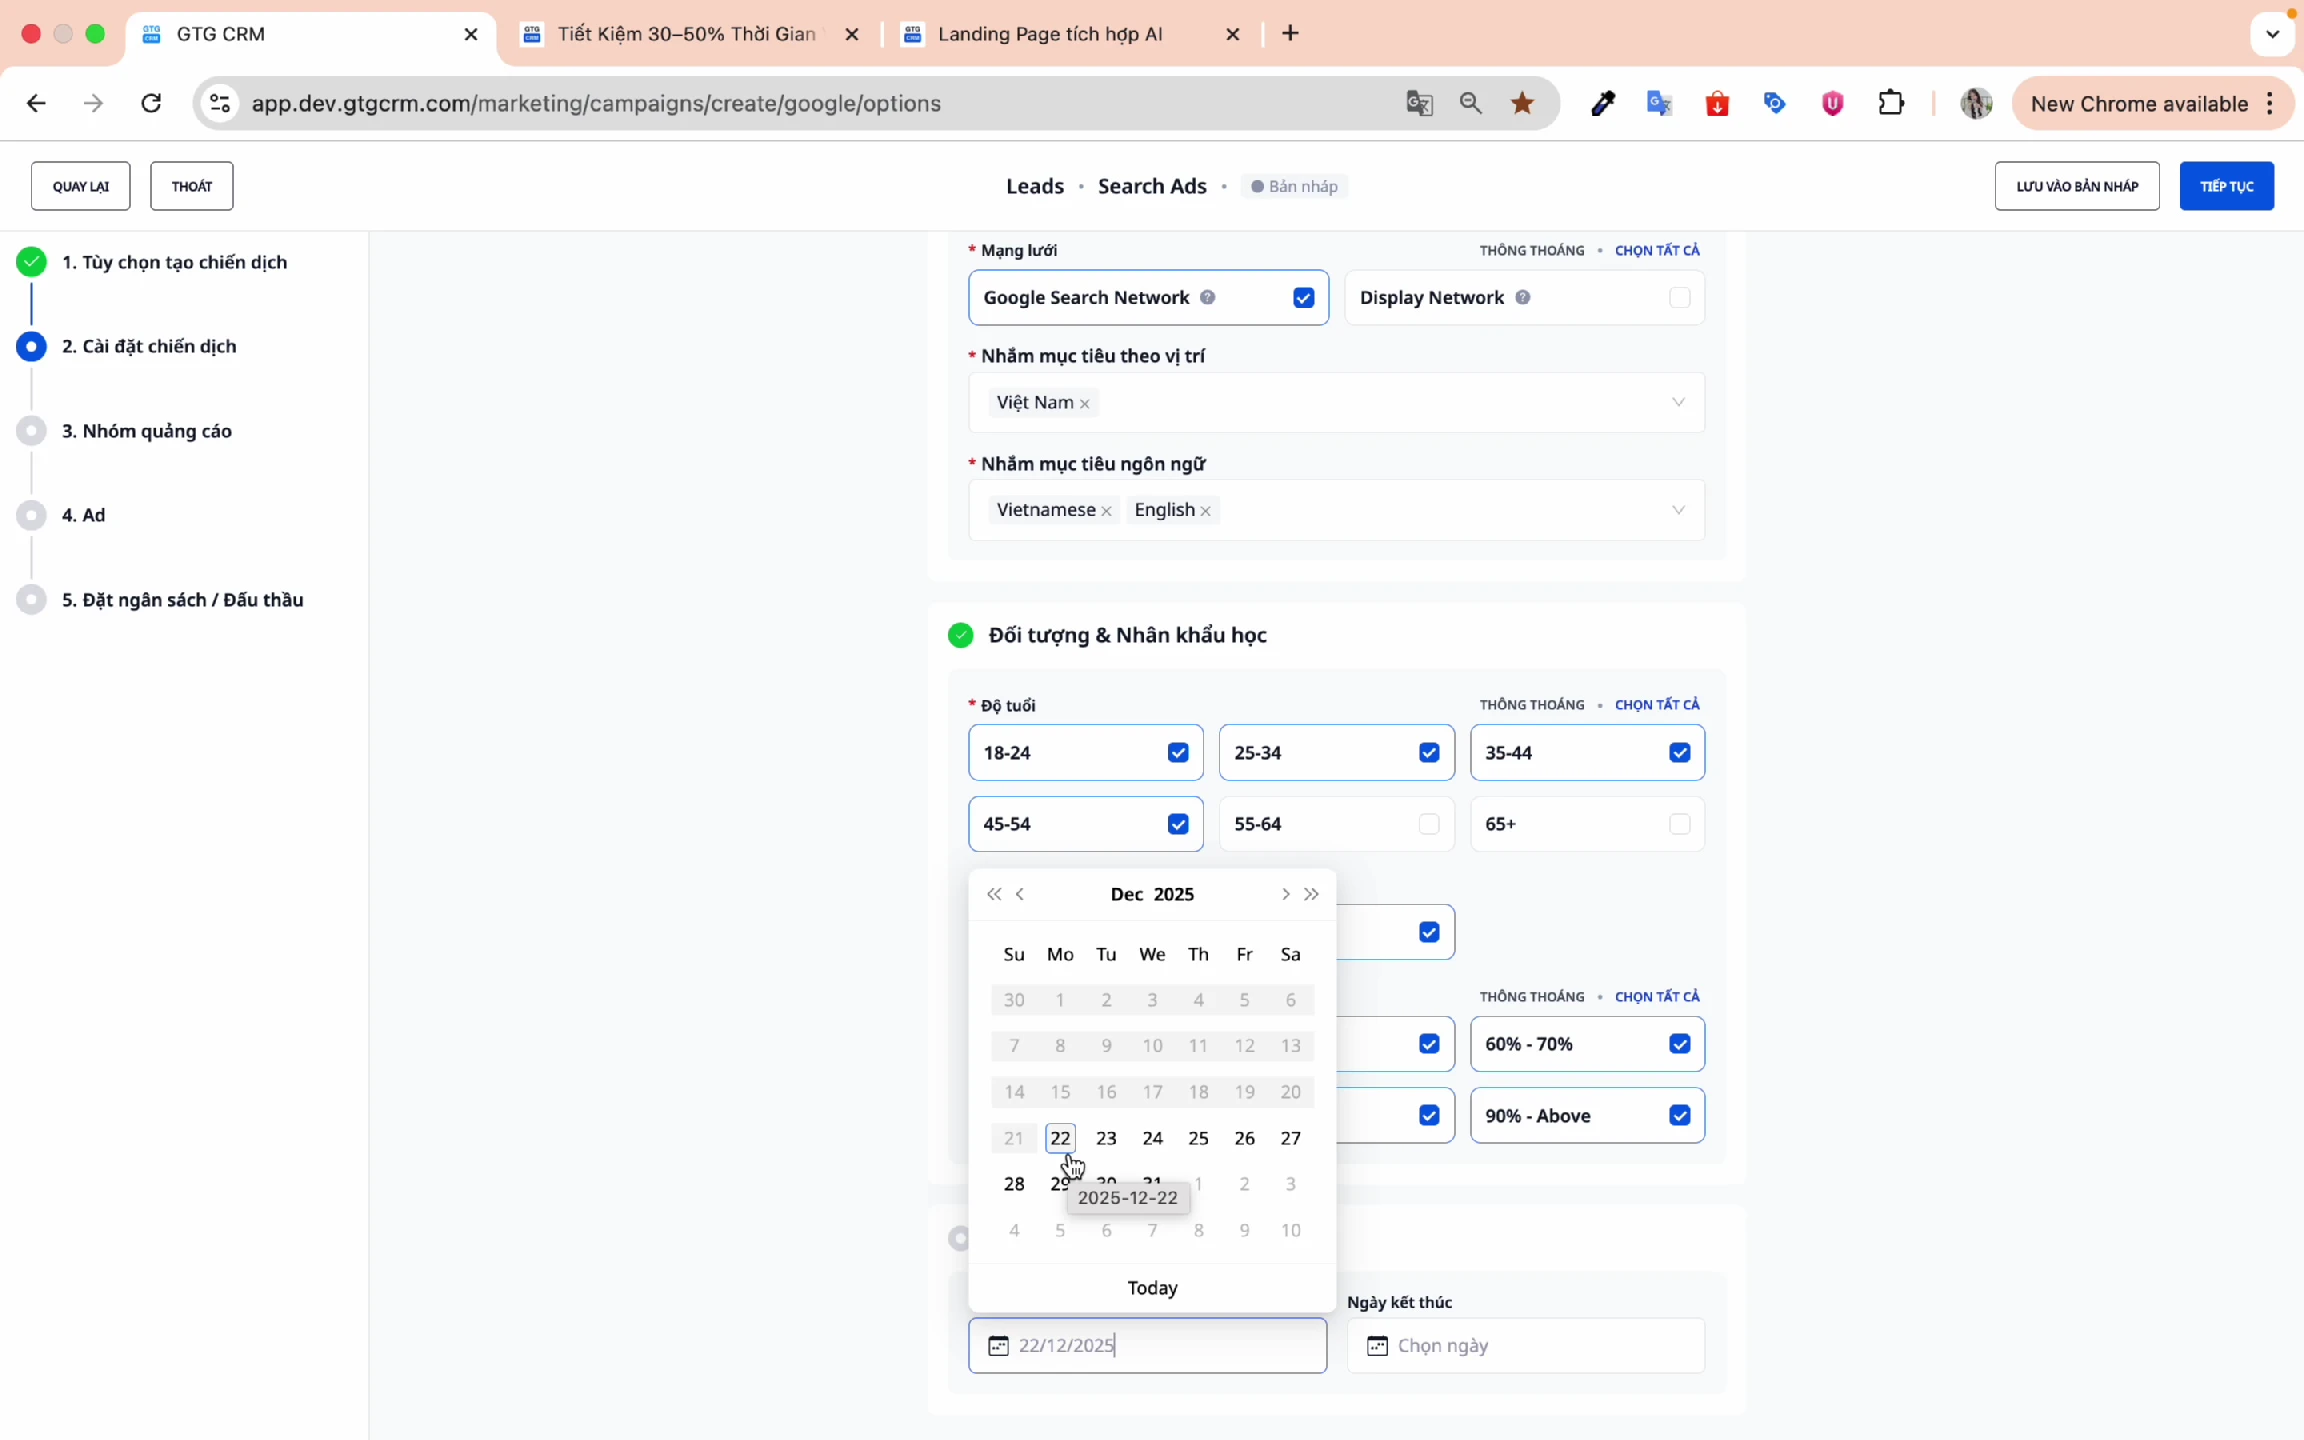
Step 6: Set Campaign Dates
- Start Date: Choose the date to start running ads
- End Date: Choose the campaign end date
Click Next to continue.
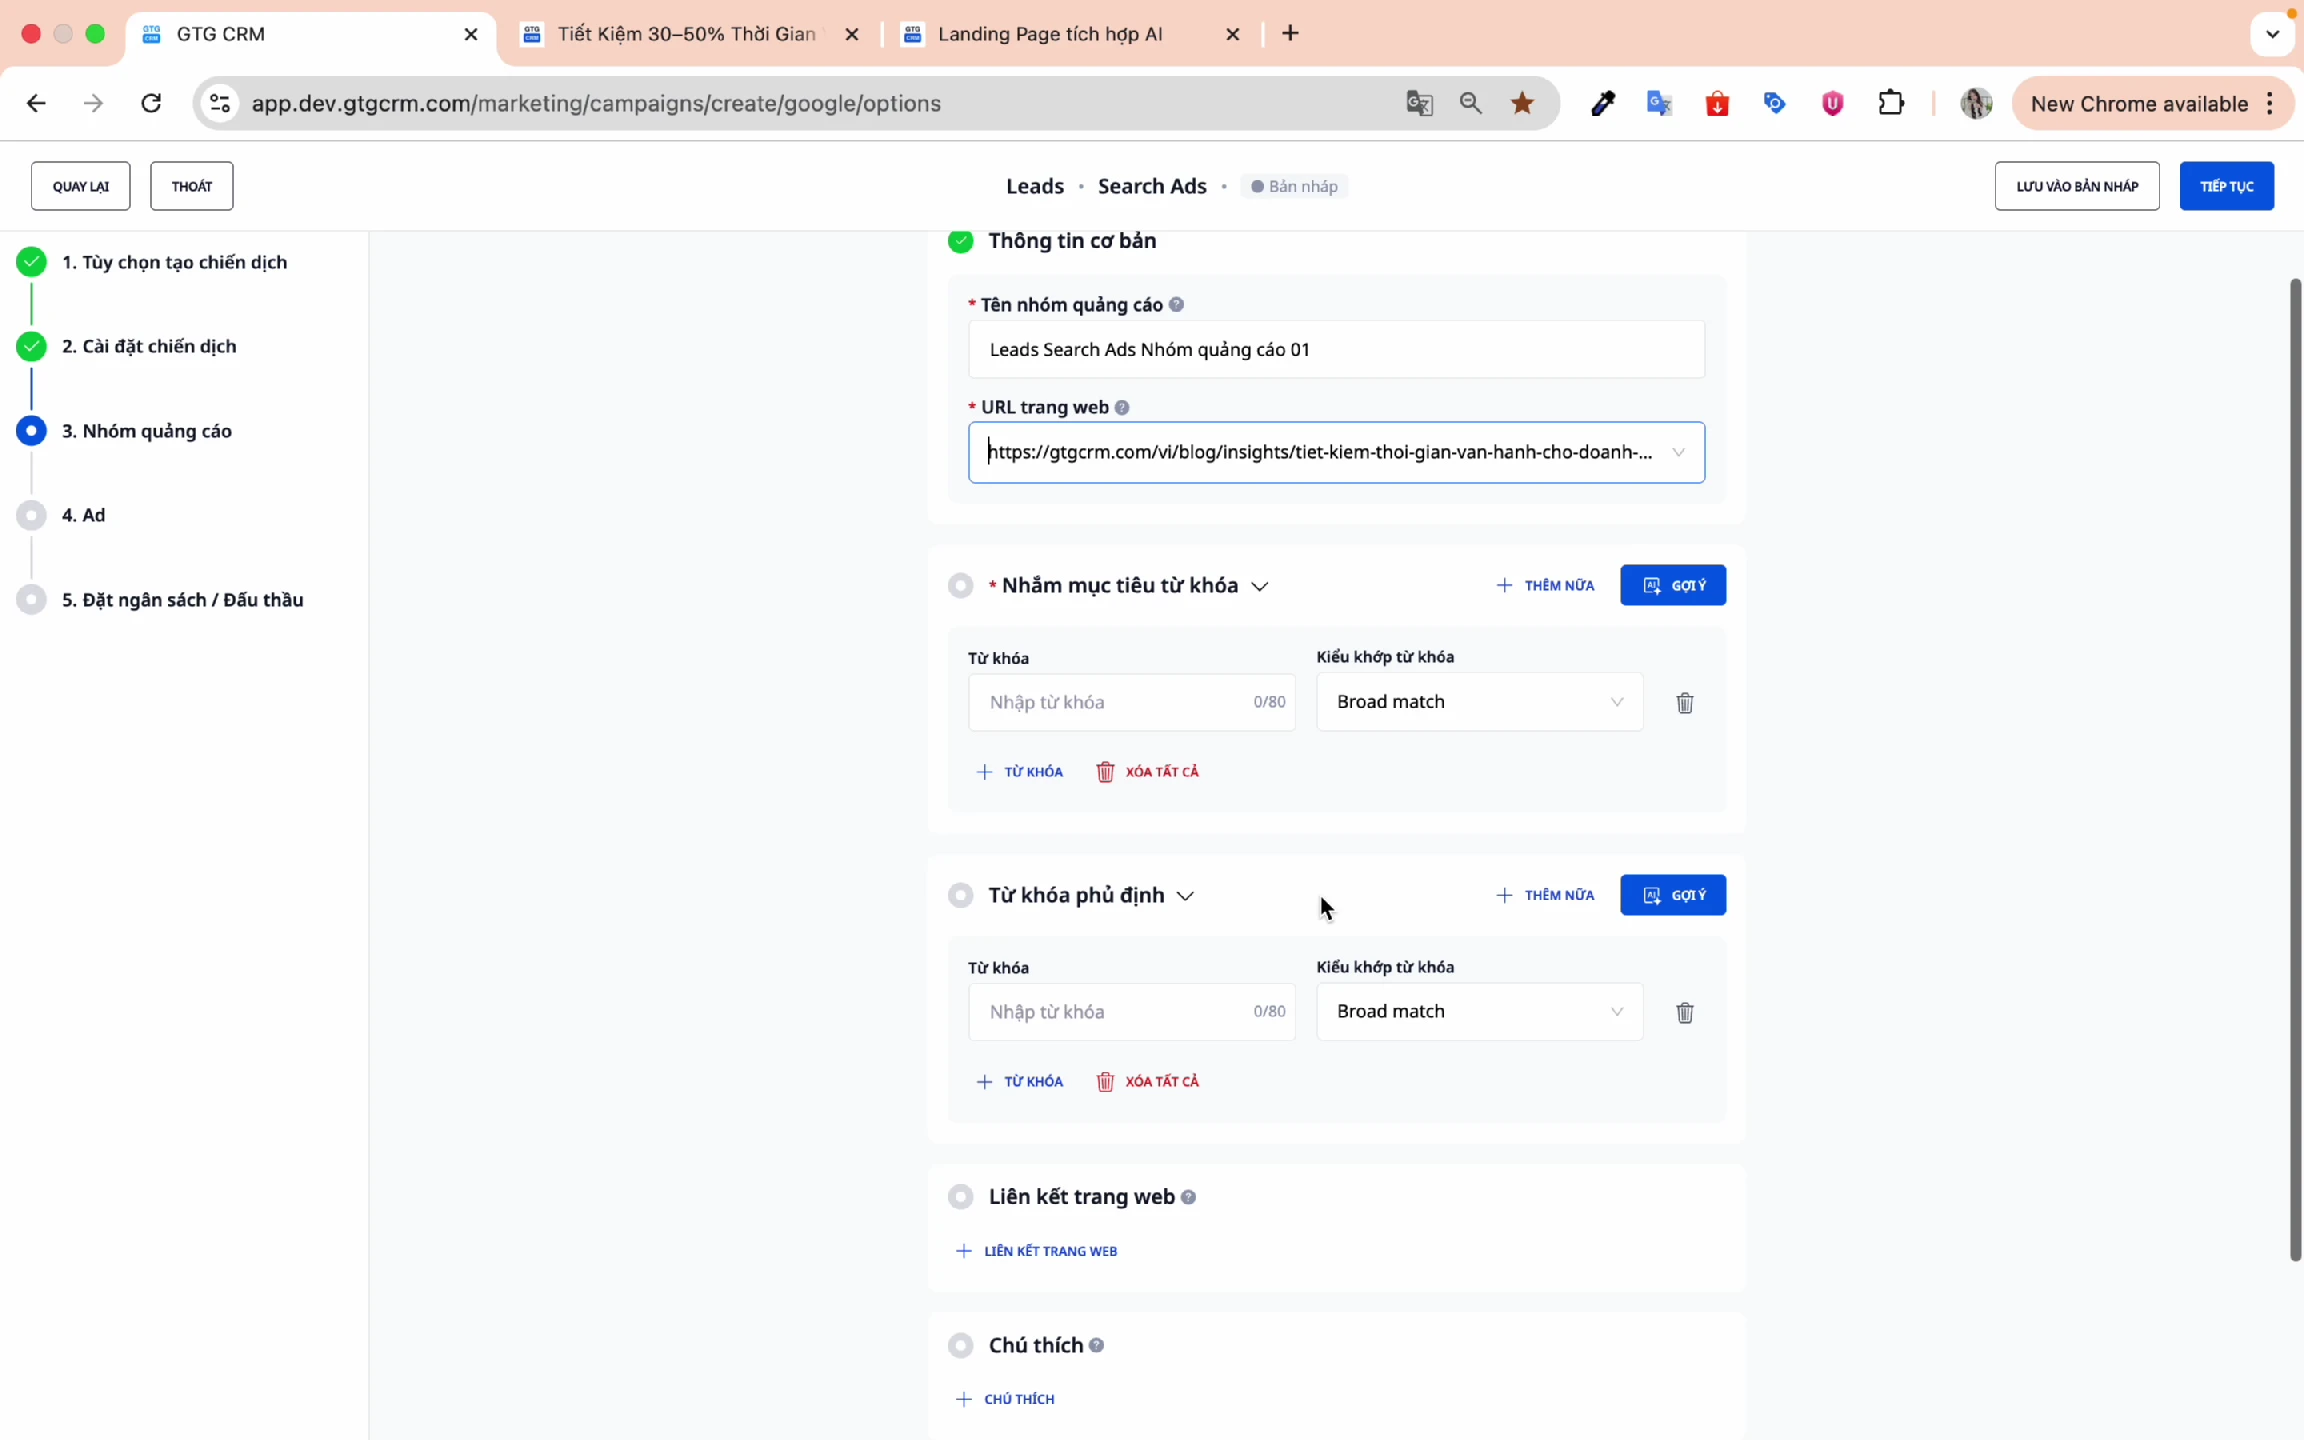
5. Create Ad Group
Step 1: Name Your Ad Group
Give it a name different from the campaign name for easy distinction and searching.
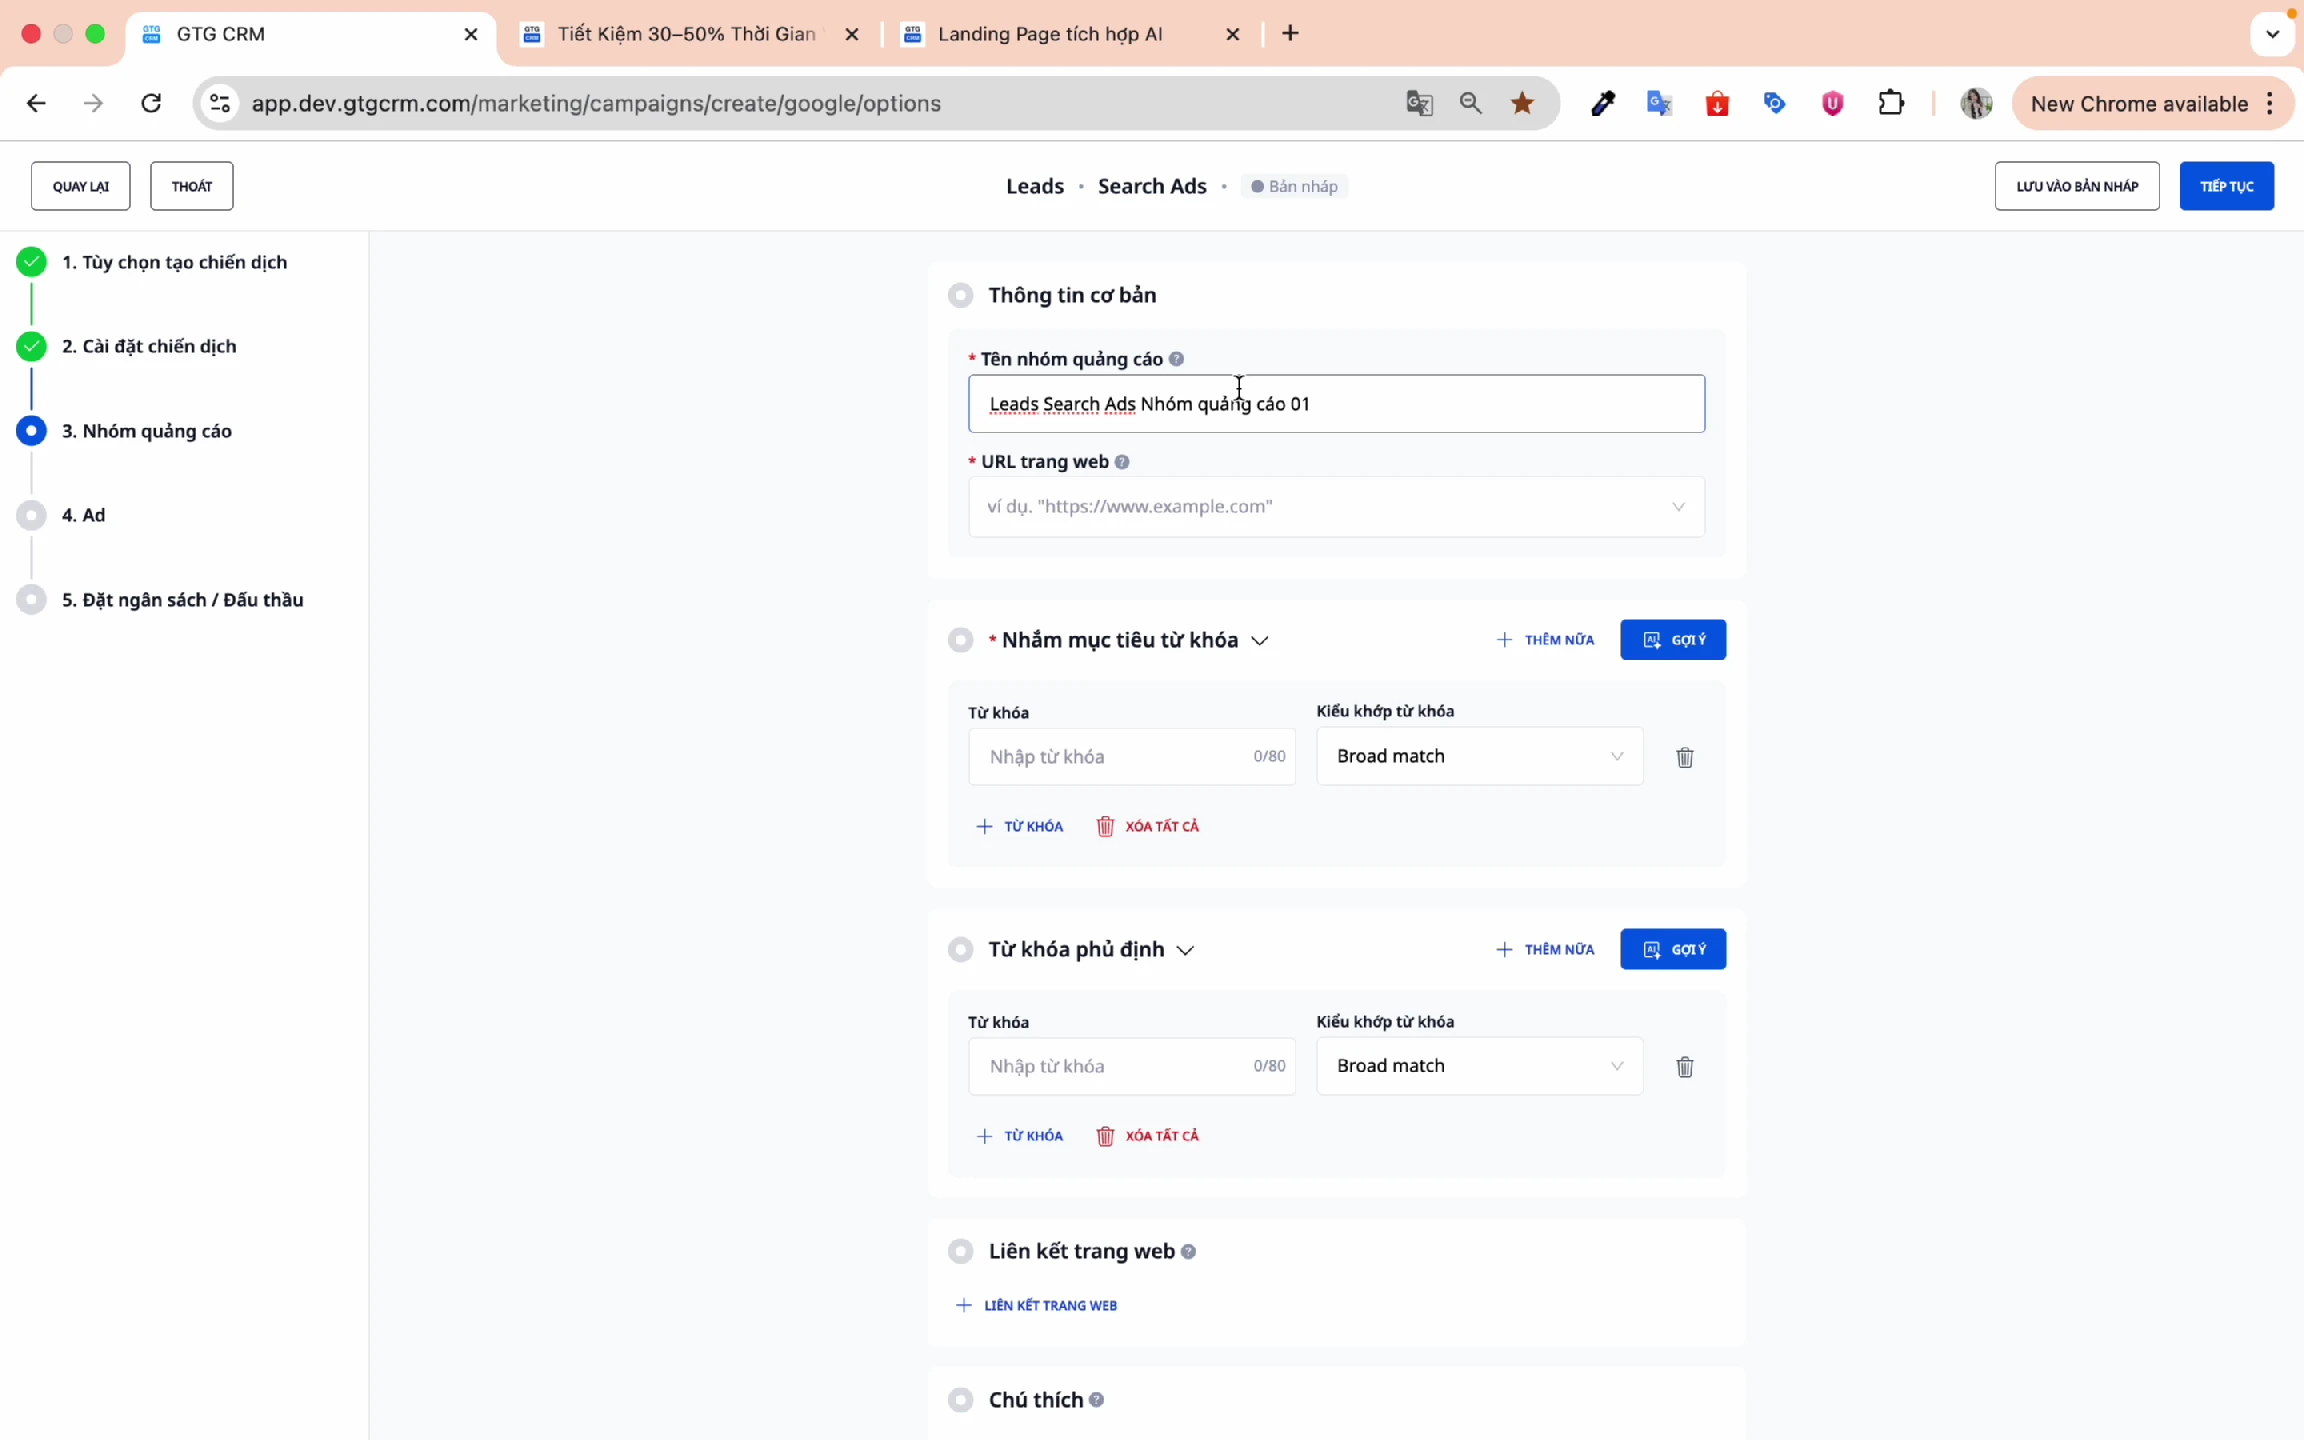
Step 2: Enter Landing Page URL
Enter the landing page URL - this page is important because:
- AI will analyze the content to suggest keywords
- AI will create ad content based on this page
6. Keyword Setup
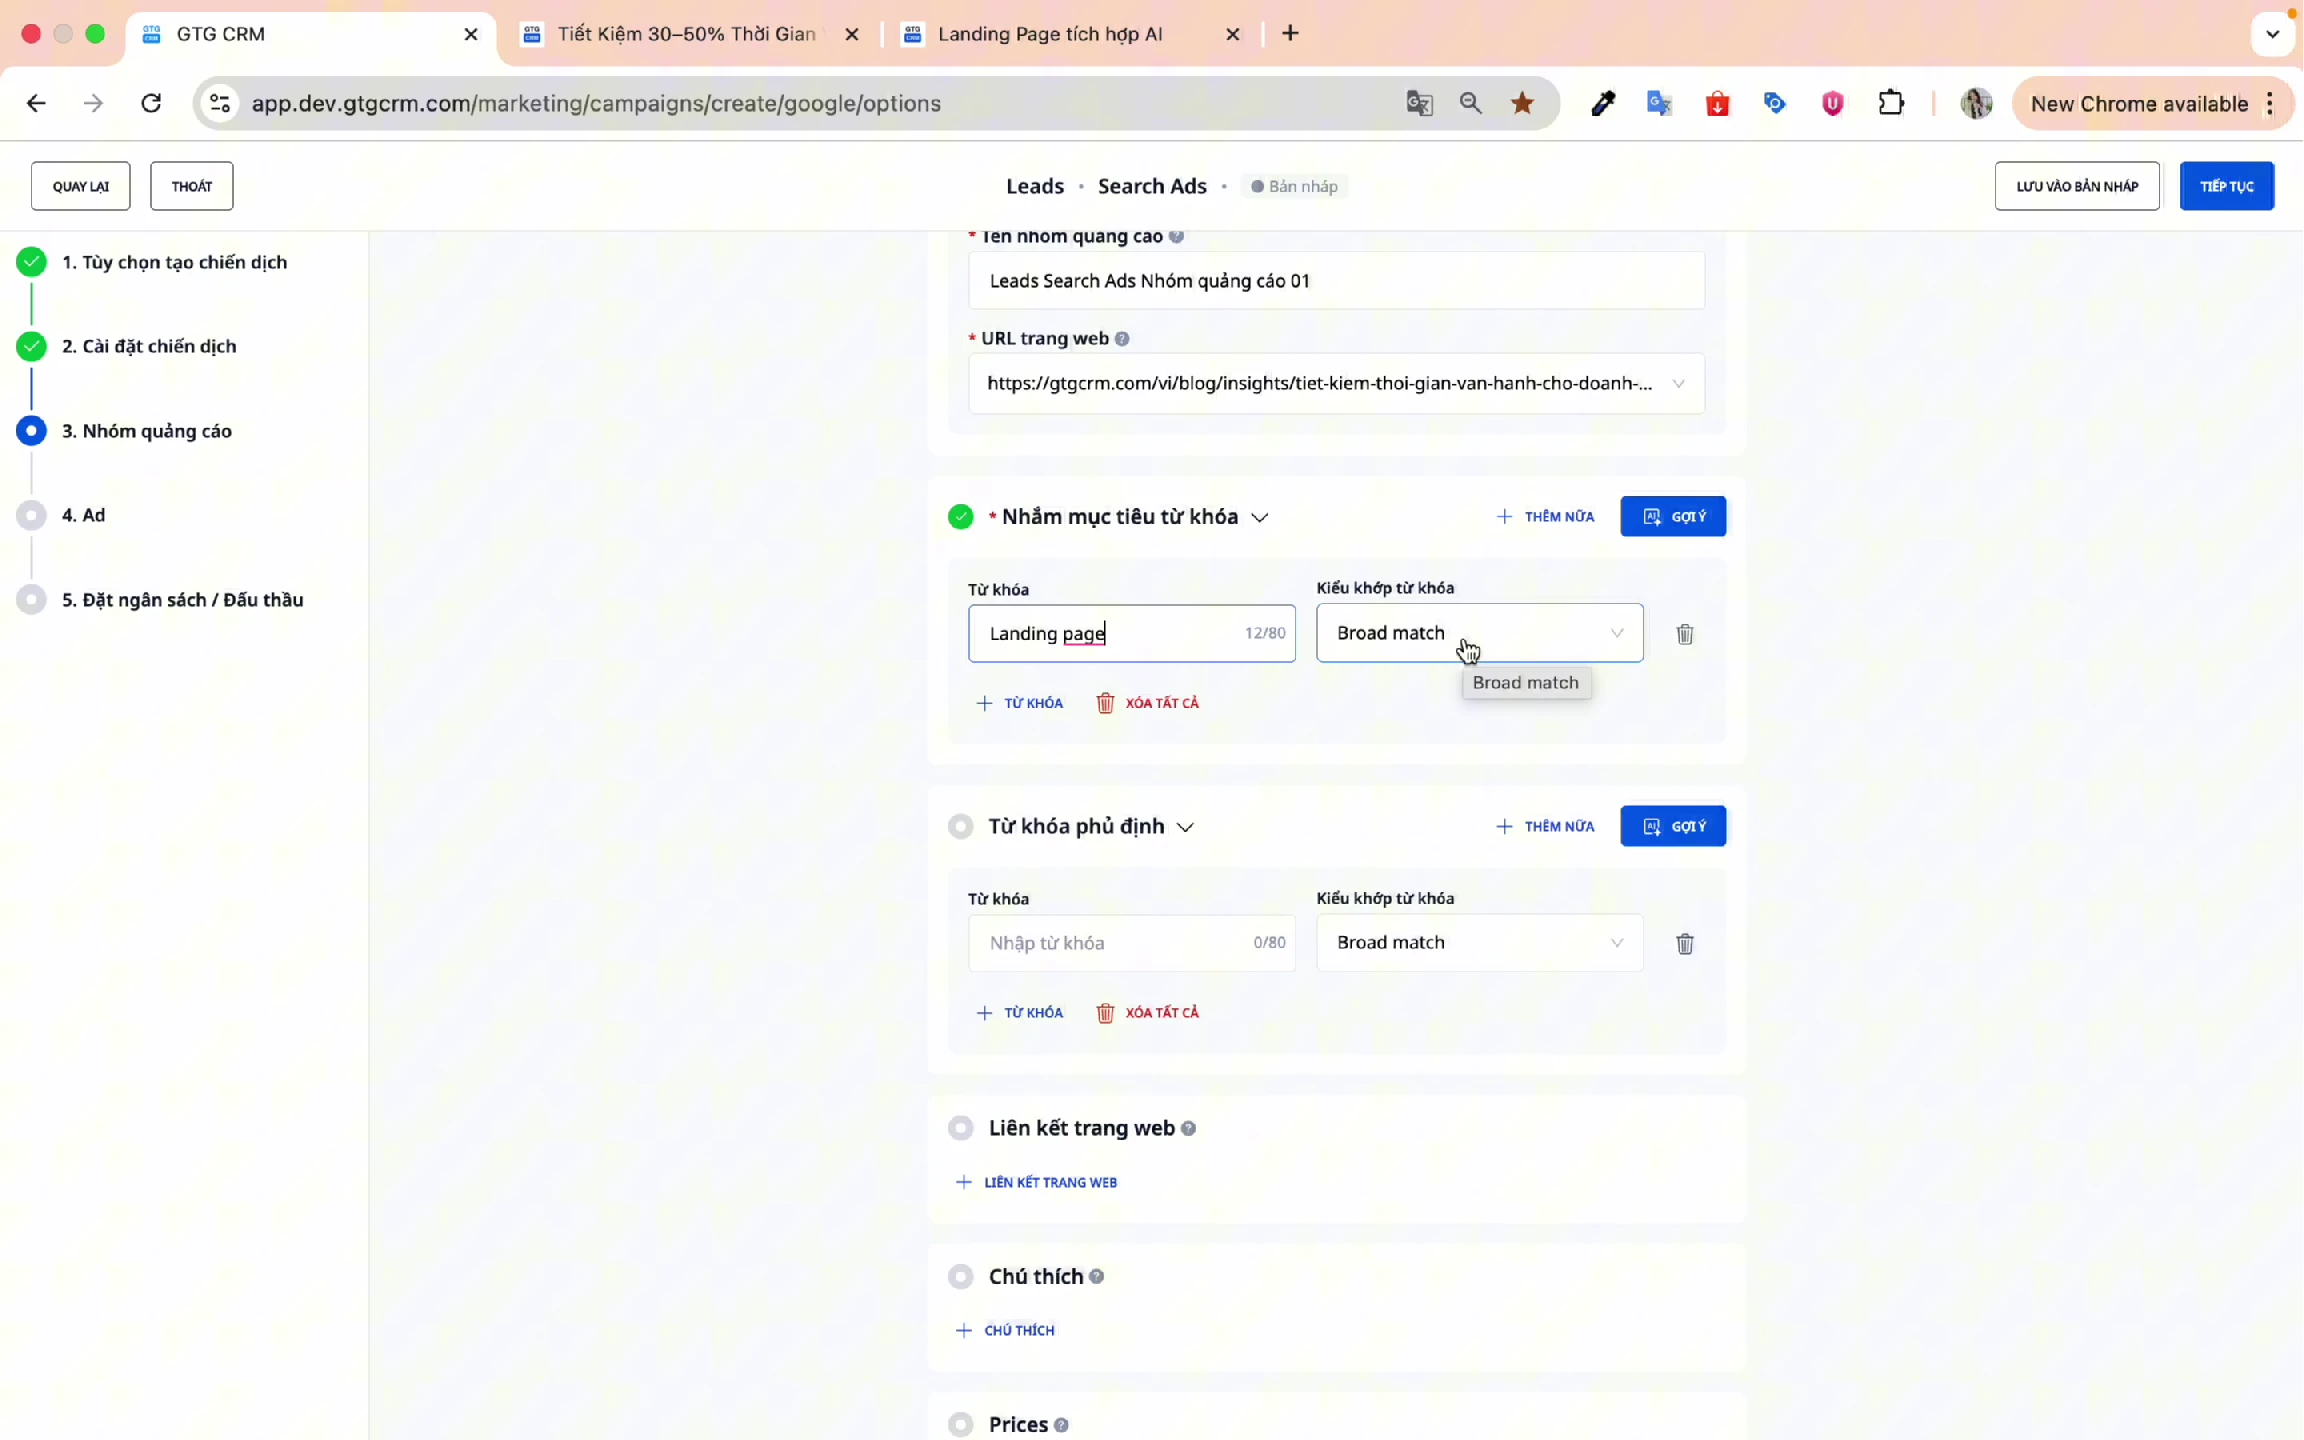
Method 1: Enter Keywords Manually
- Enter keywords one by one in the Keywords field
- Choose the keyword match type:
- Broad Match
- Phrase Match
- Exact Match
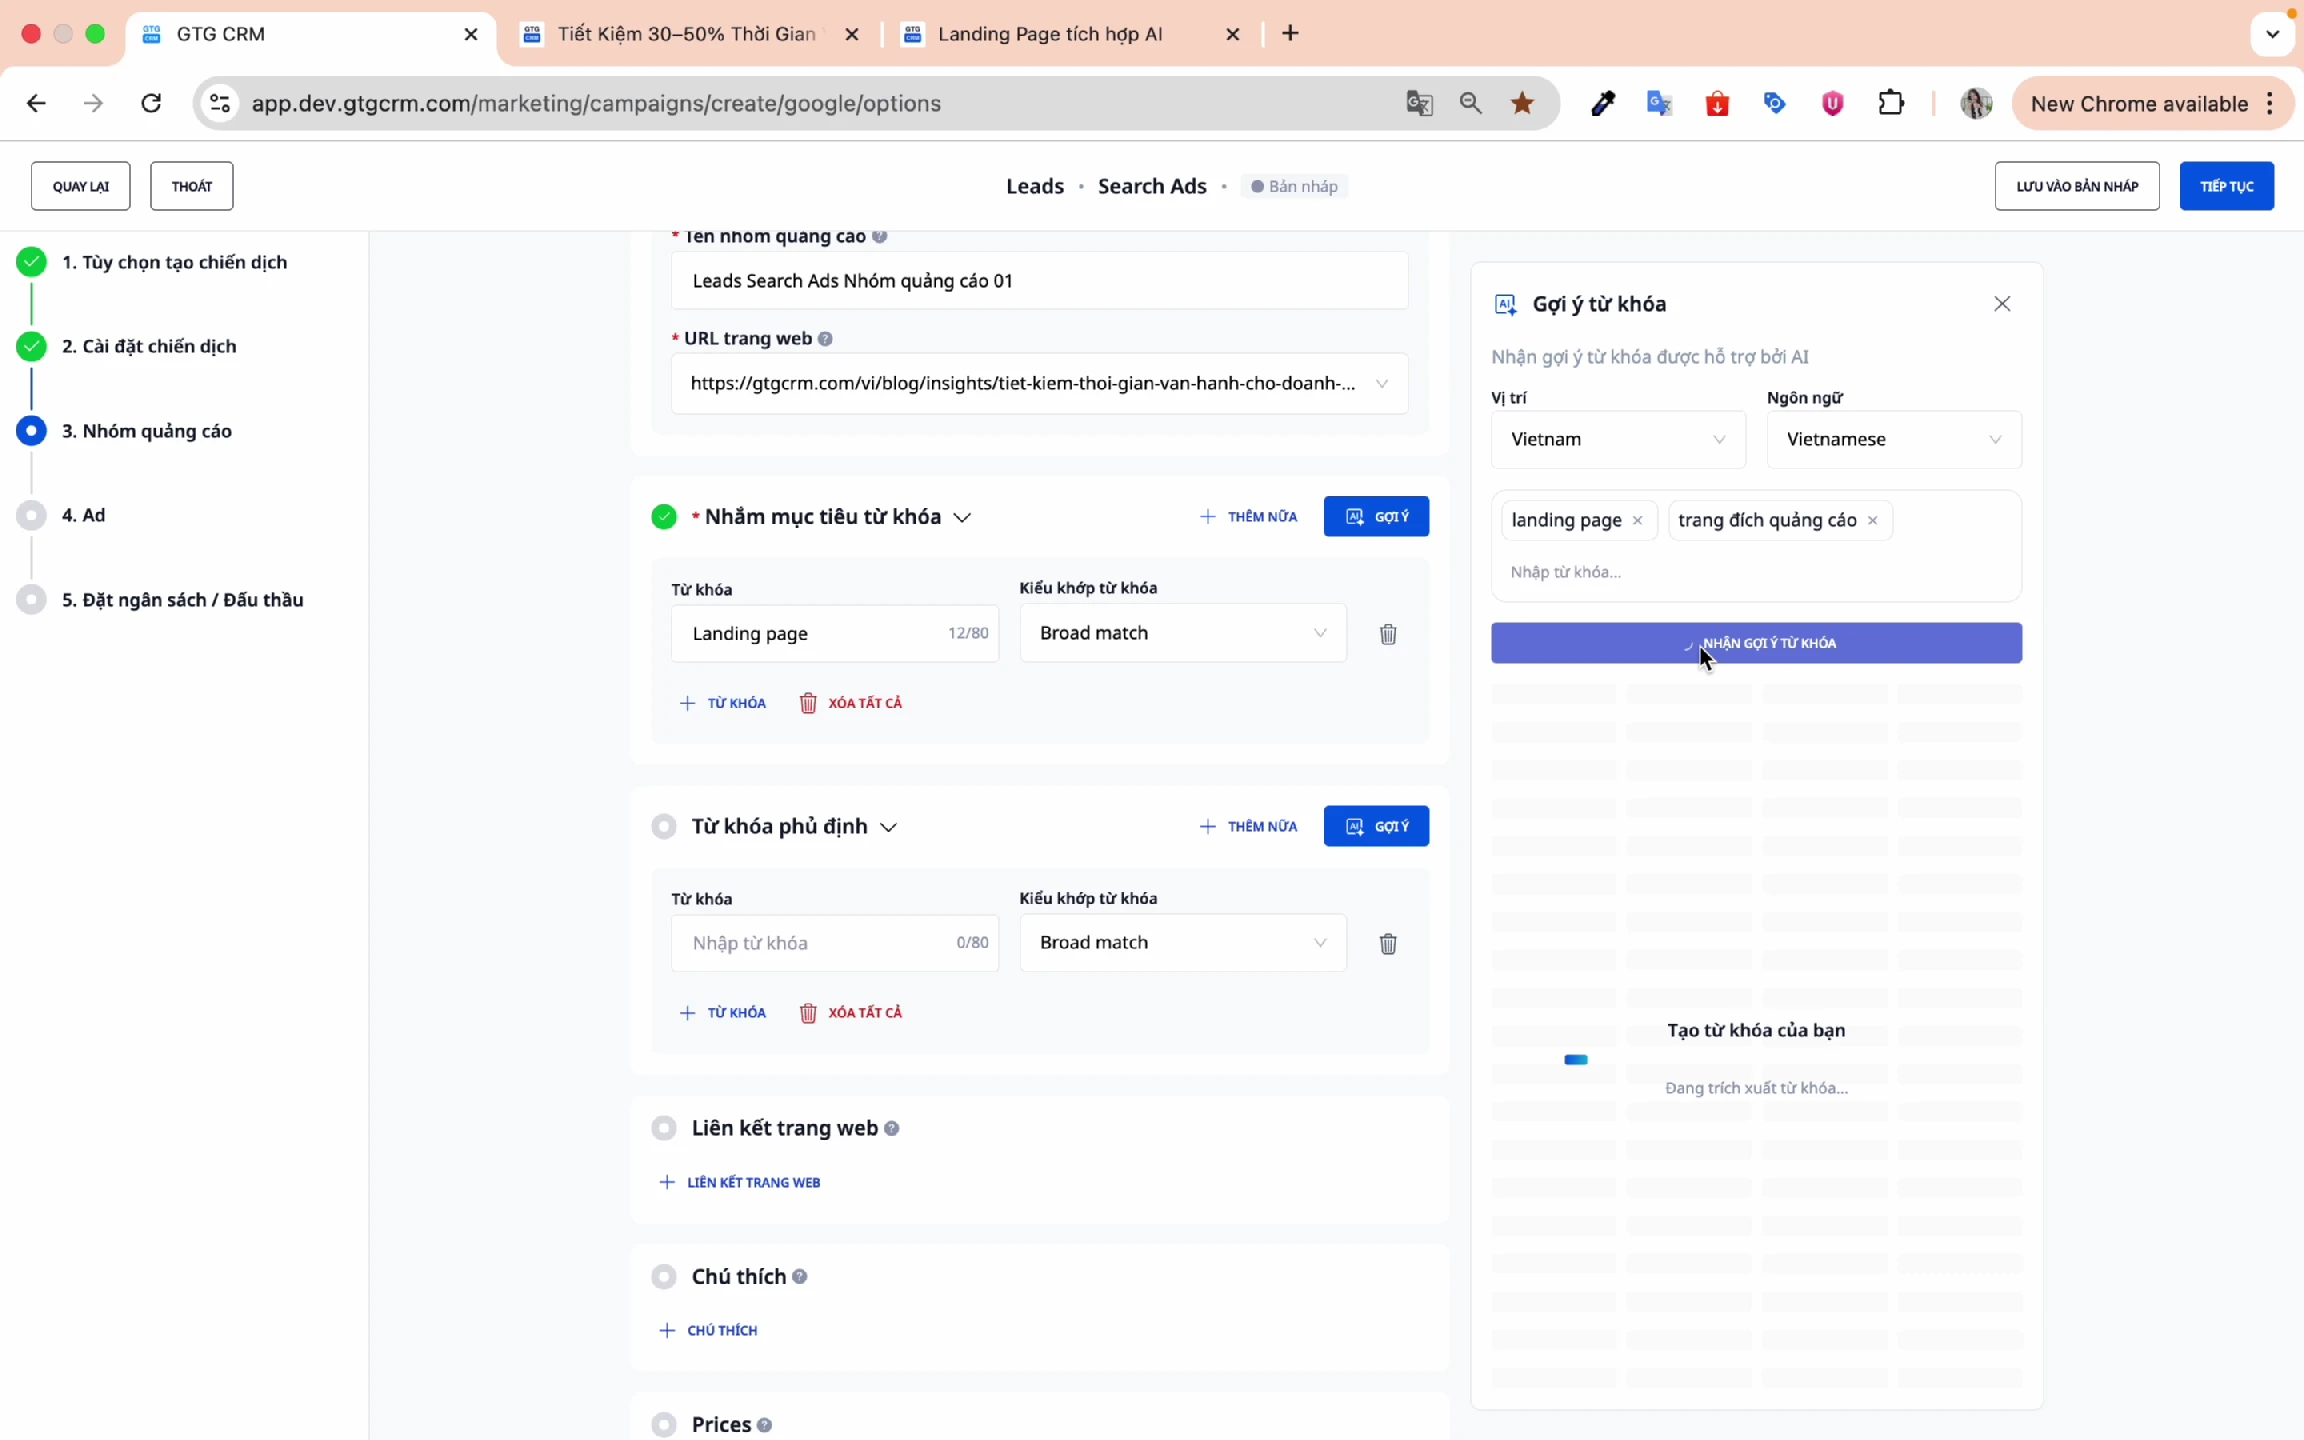
Method 2: Use AI Keyword Suggestions (Recommended)
- Enter the landing page URL
- Add initial suggested keywords (e.g., "Landing page", "Ad page", "Advertising")
- Click Get Keyword Suggestions
- Wait about 10-15 seconds
- Select relevant keywords and click Insert
Add Negative Keywords
Negative keywords help exclude irrelevant searches:
- Enter keywords you want to exclude
- E.g., If it's not accounting software, add "accounting" to negative keywords
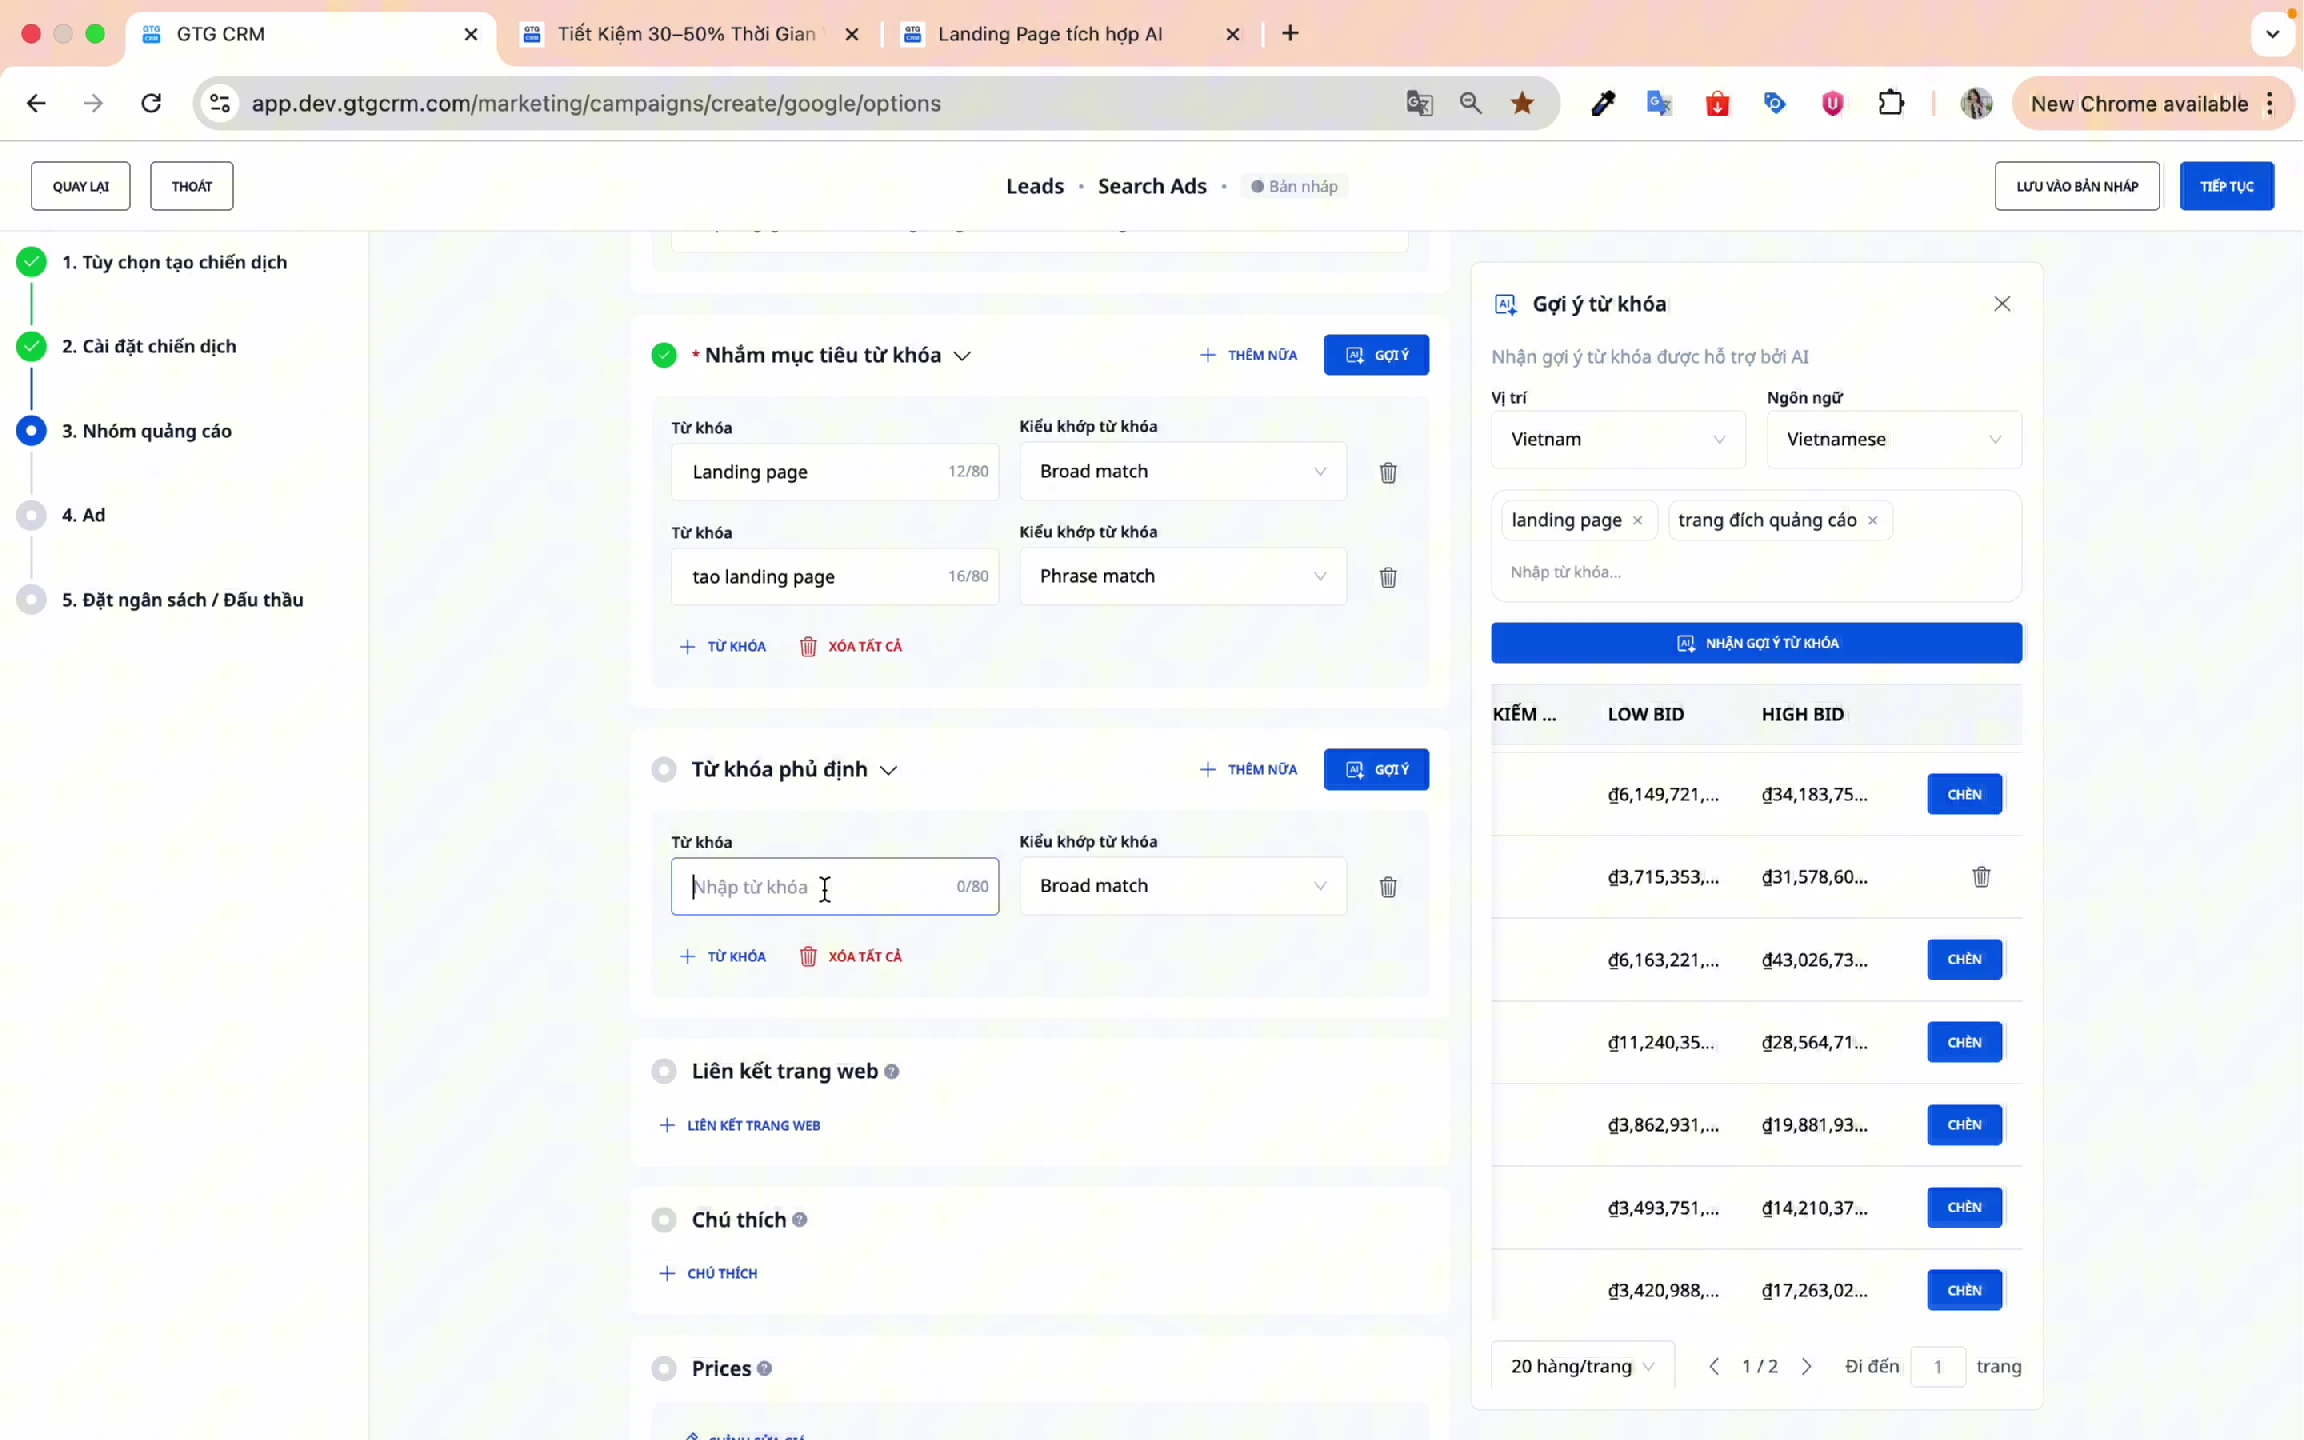
⚠️ Note: The keyword field cannot be empty, otherwise the ad will not be created.
Add Sitelinks
Sitelinks are additional links displayed below your ad:
- Click Add Sitelinks
- Fill in the details:
- Text: The text displayed to customers
- Path: The URL when clicked
- Description: A brief description for the link
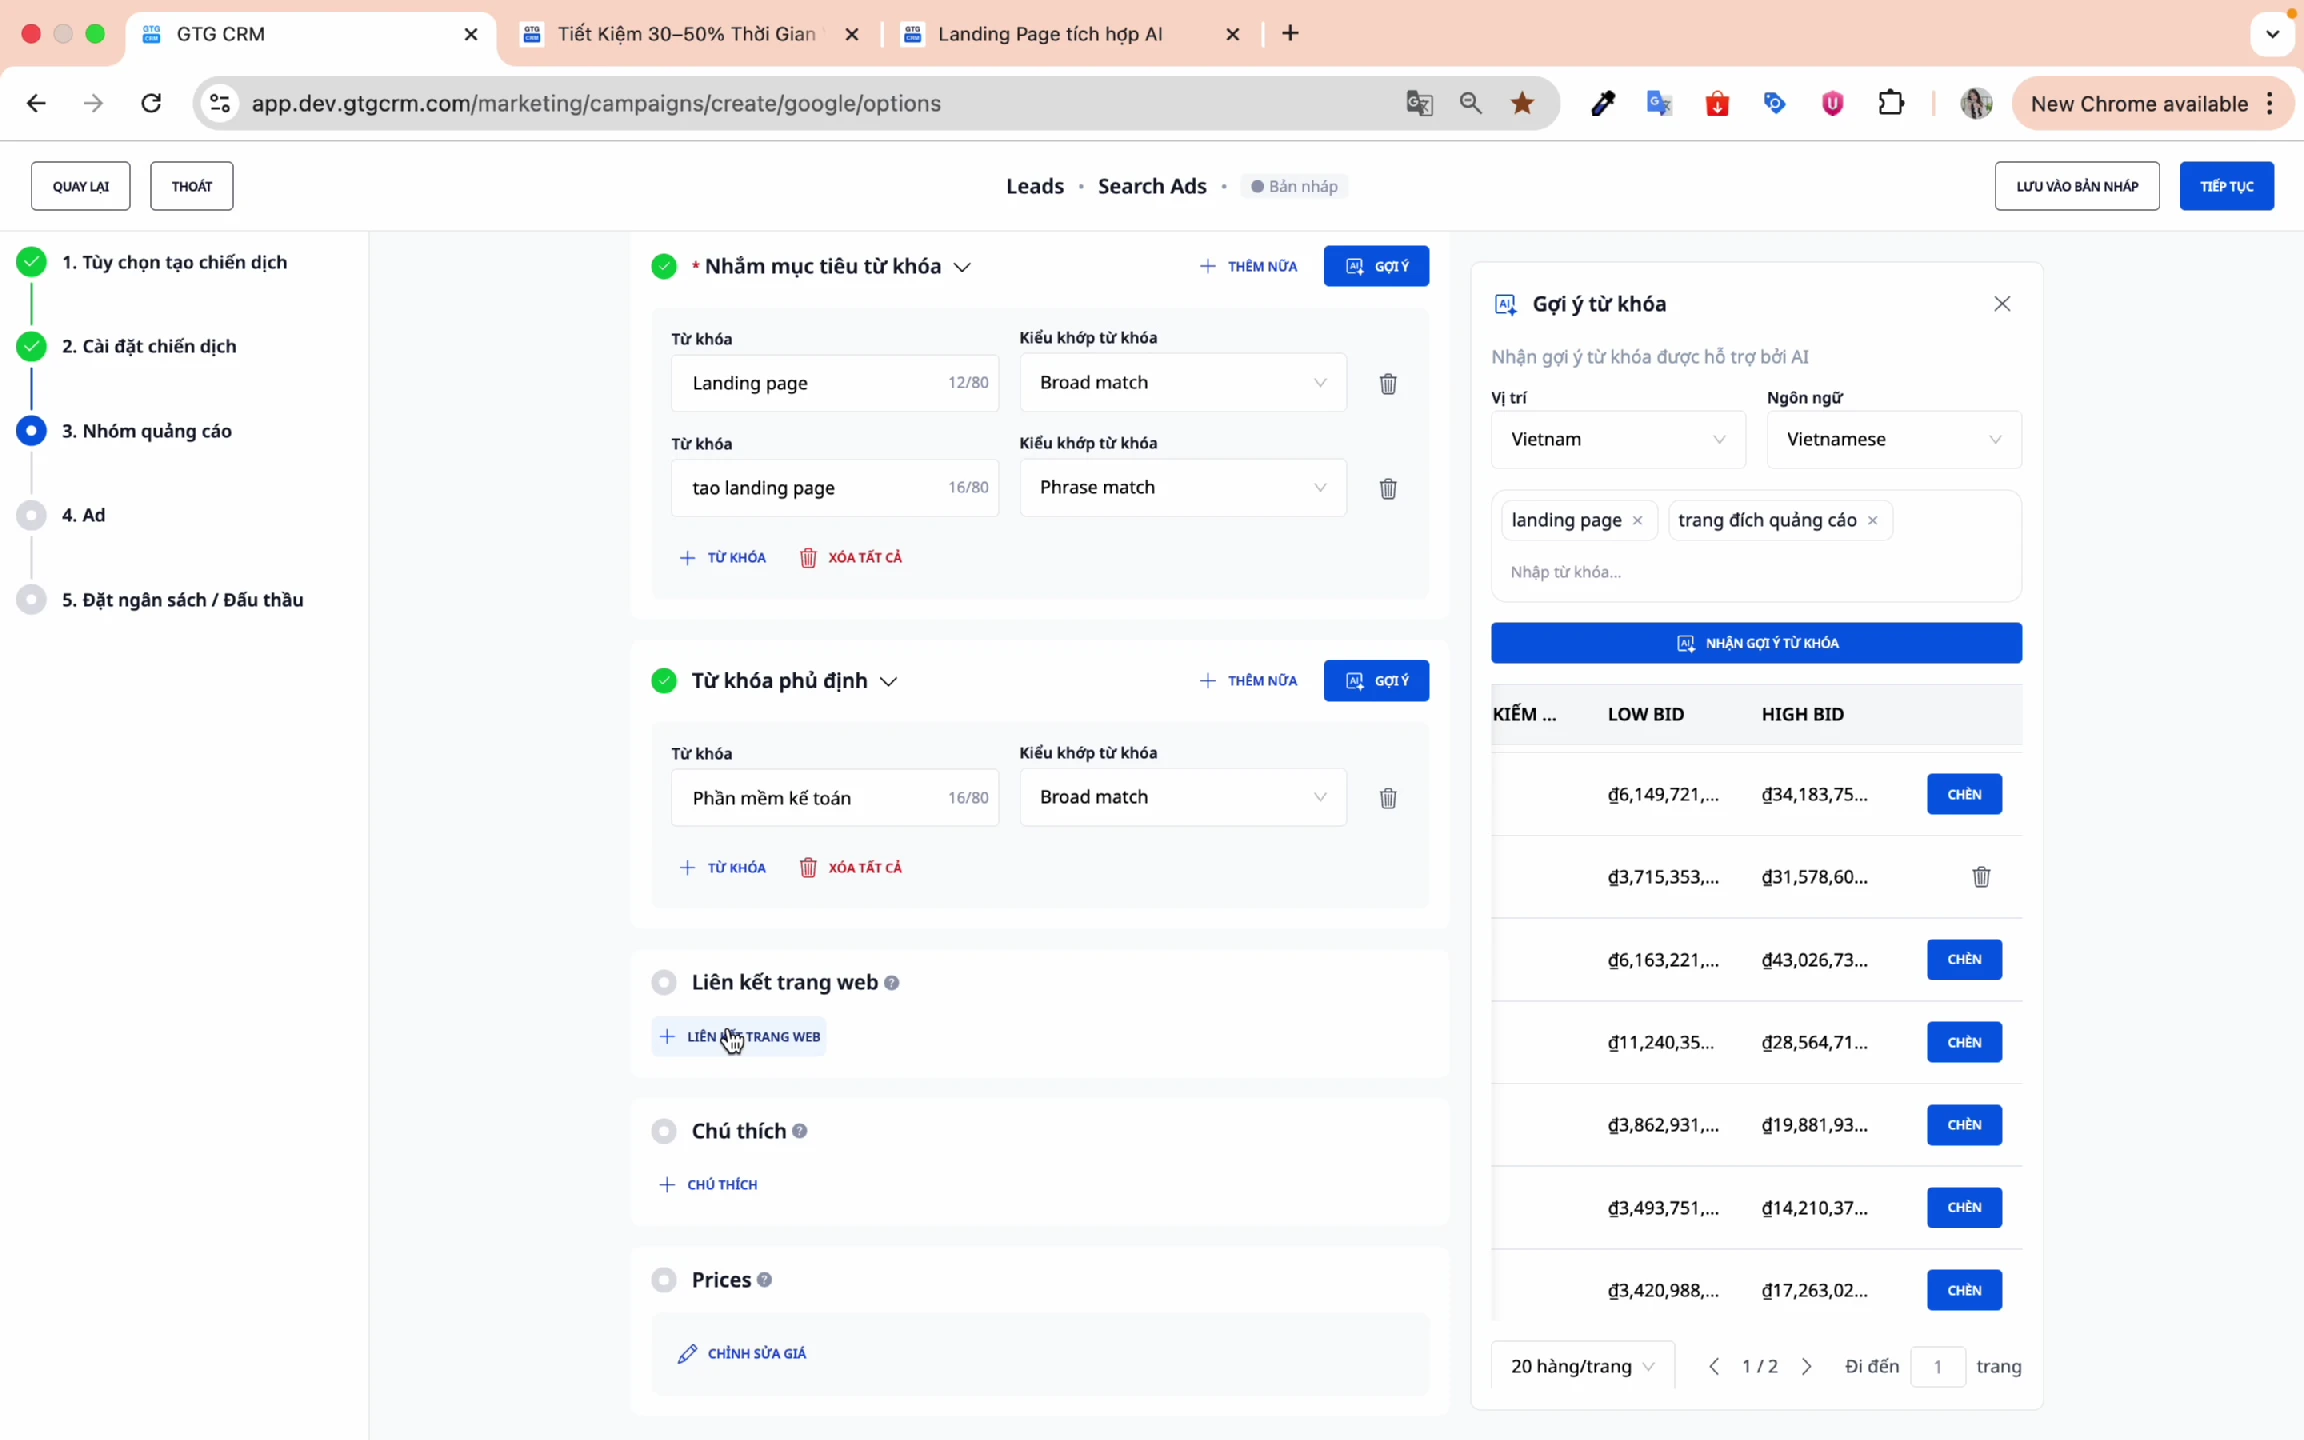
⚠️ Note: All fields must be filled in.
Click Continue to proceed to ad creation.
7. Create Ad Content
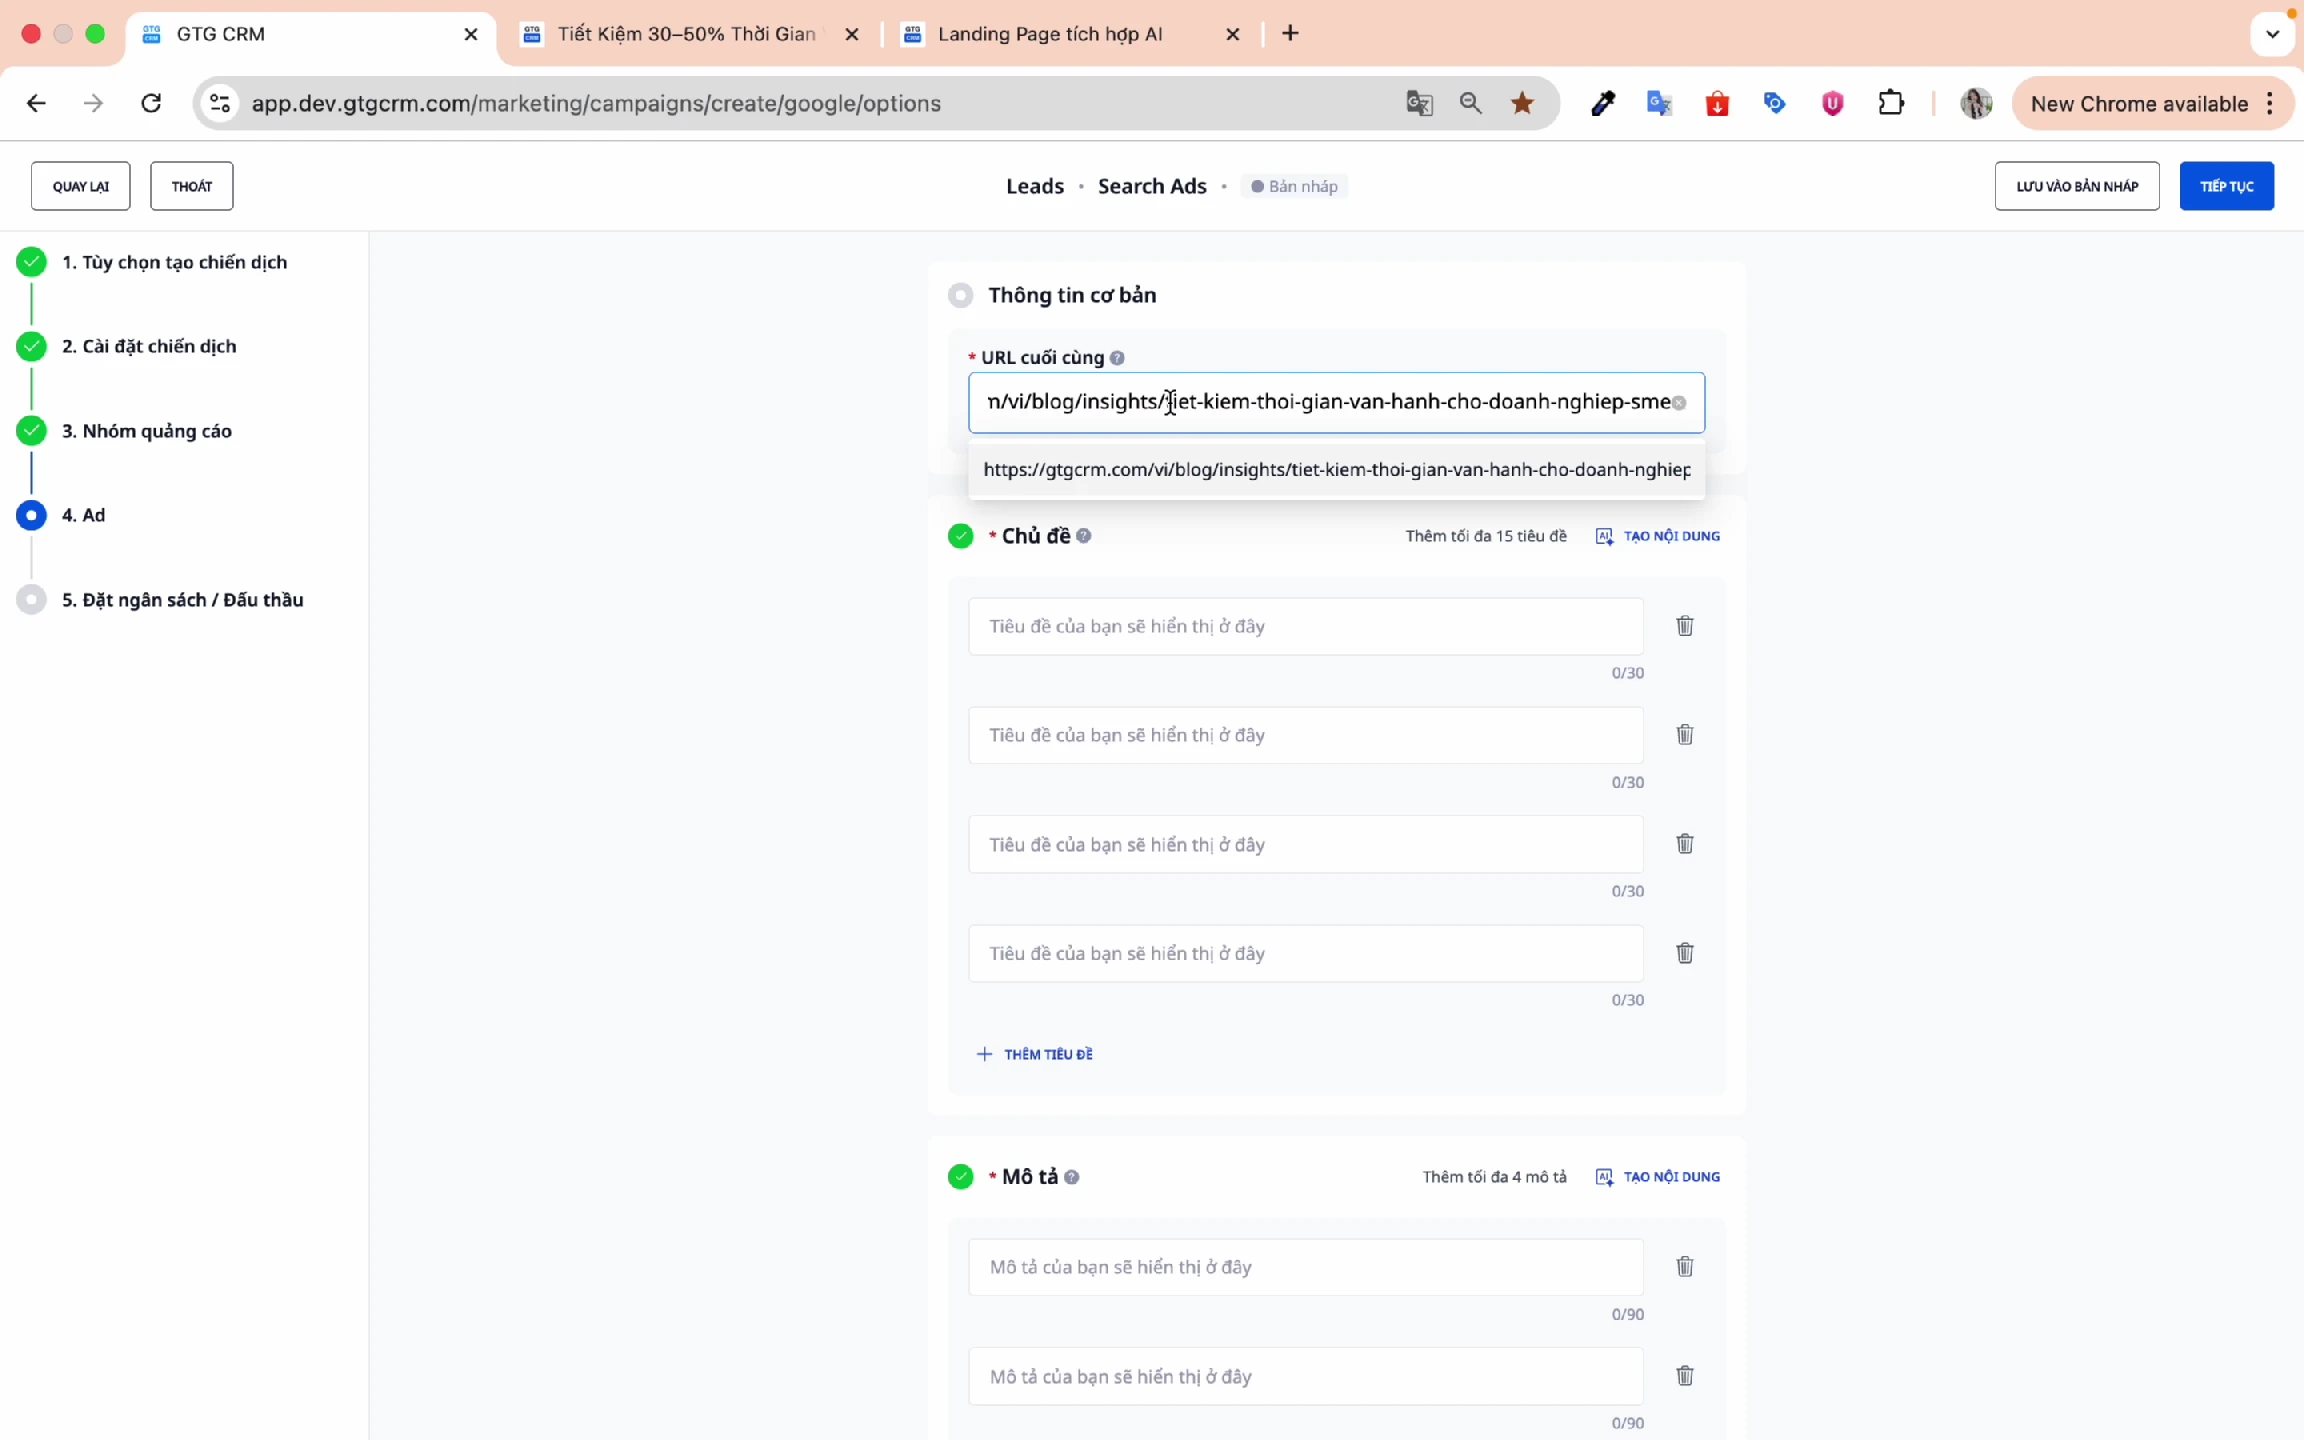
Step 1: Enter Final URL
Enter the landing page URL that you want customers to visit when they click on your ad.
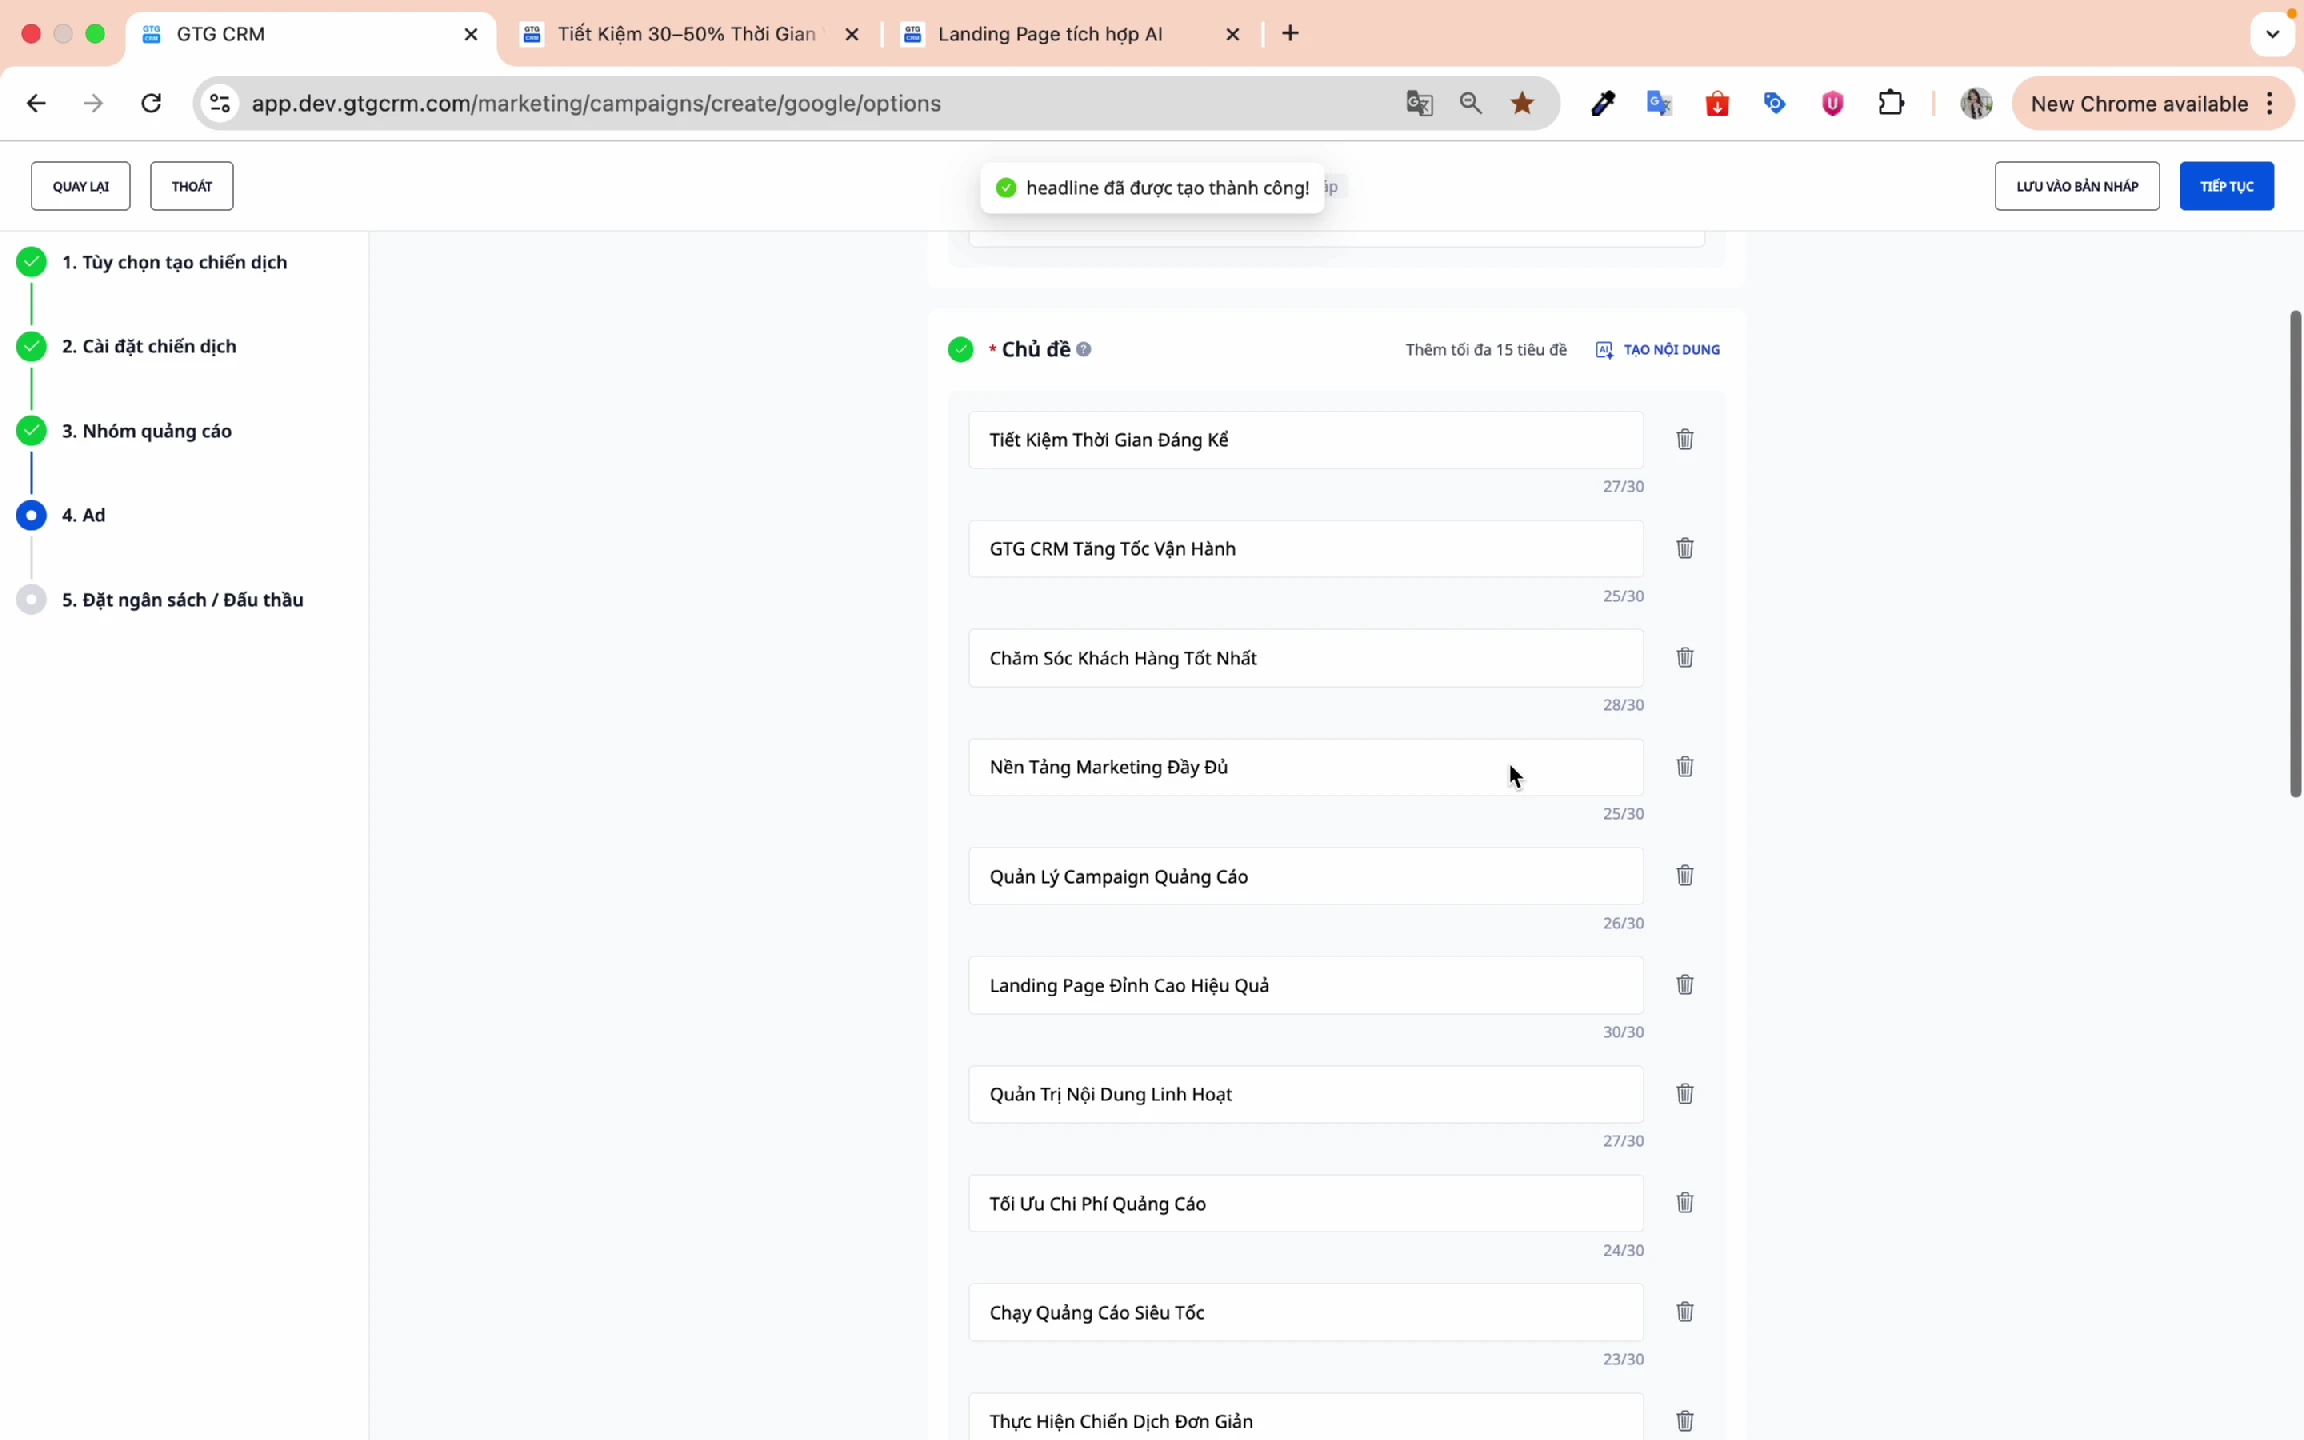
Step 2: Create Headlines
Method 1: Manual Entry
- Enter each headline into the fields
- Each headline has a maximum of 30 characters
Method 2: AI Content Creation (Recommended)
- Click AI Generate Content
- The AI will analyze the landing page and create suitable headlines
- Review and edit if necessary
Step 3: Create Descriptions
Method 1: Manual Entry
- Enter the description content
- Each description has a maximum of 90 characters
Method 2: AI Content Creation (Recommended)
- Click AI Generate Content
- The AI will generate descriptions that fit the character limit
- Review and edit if necessary
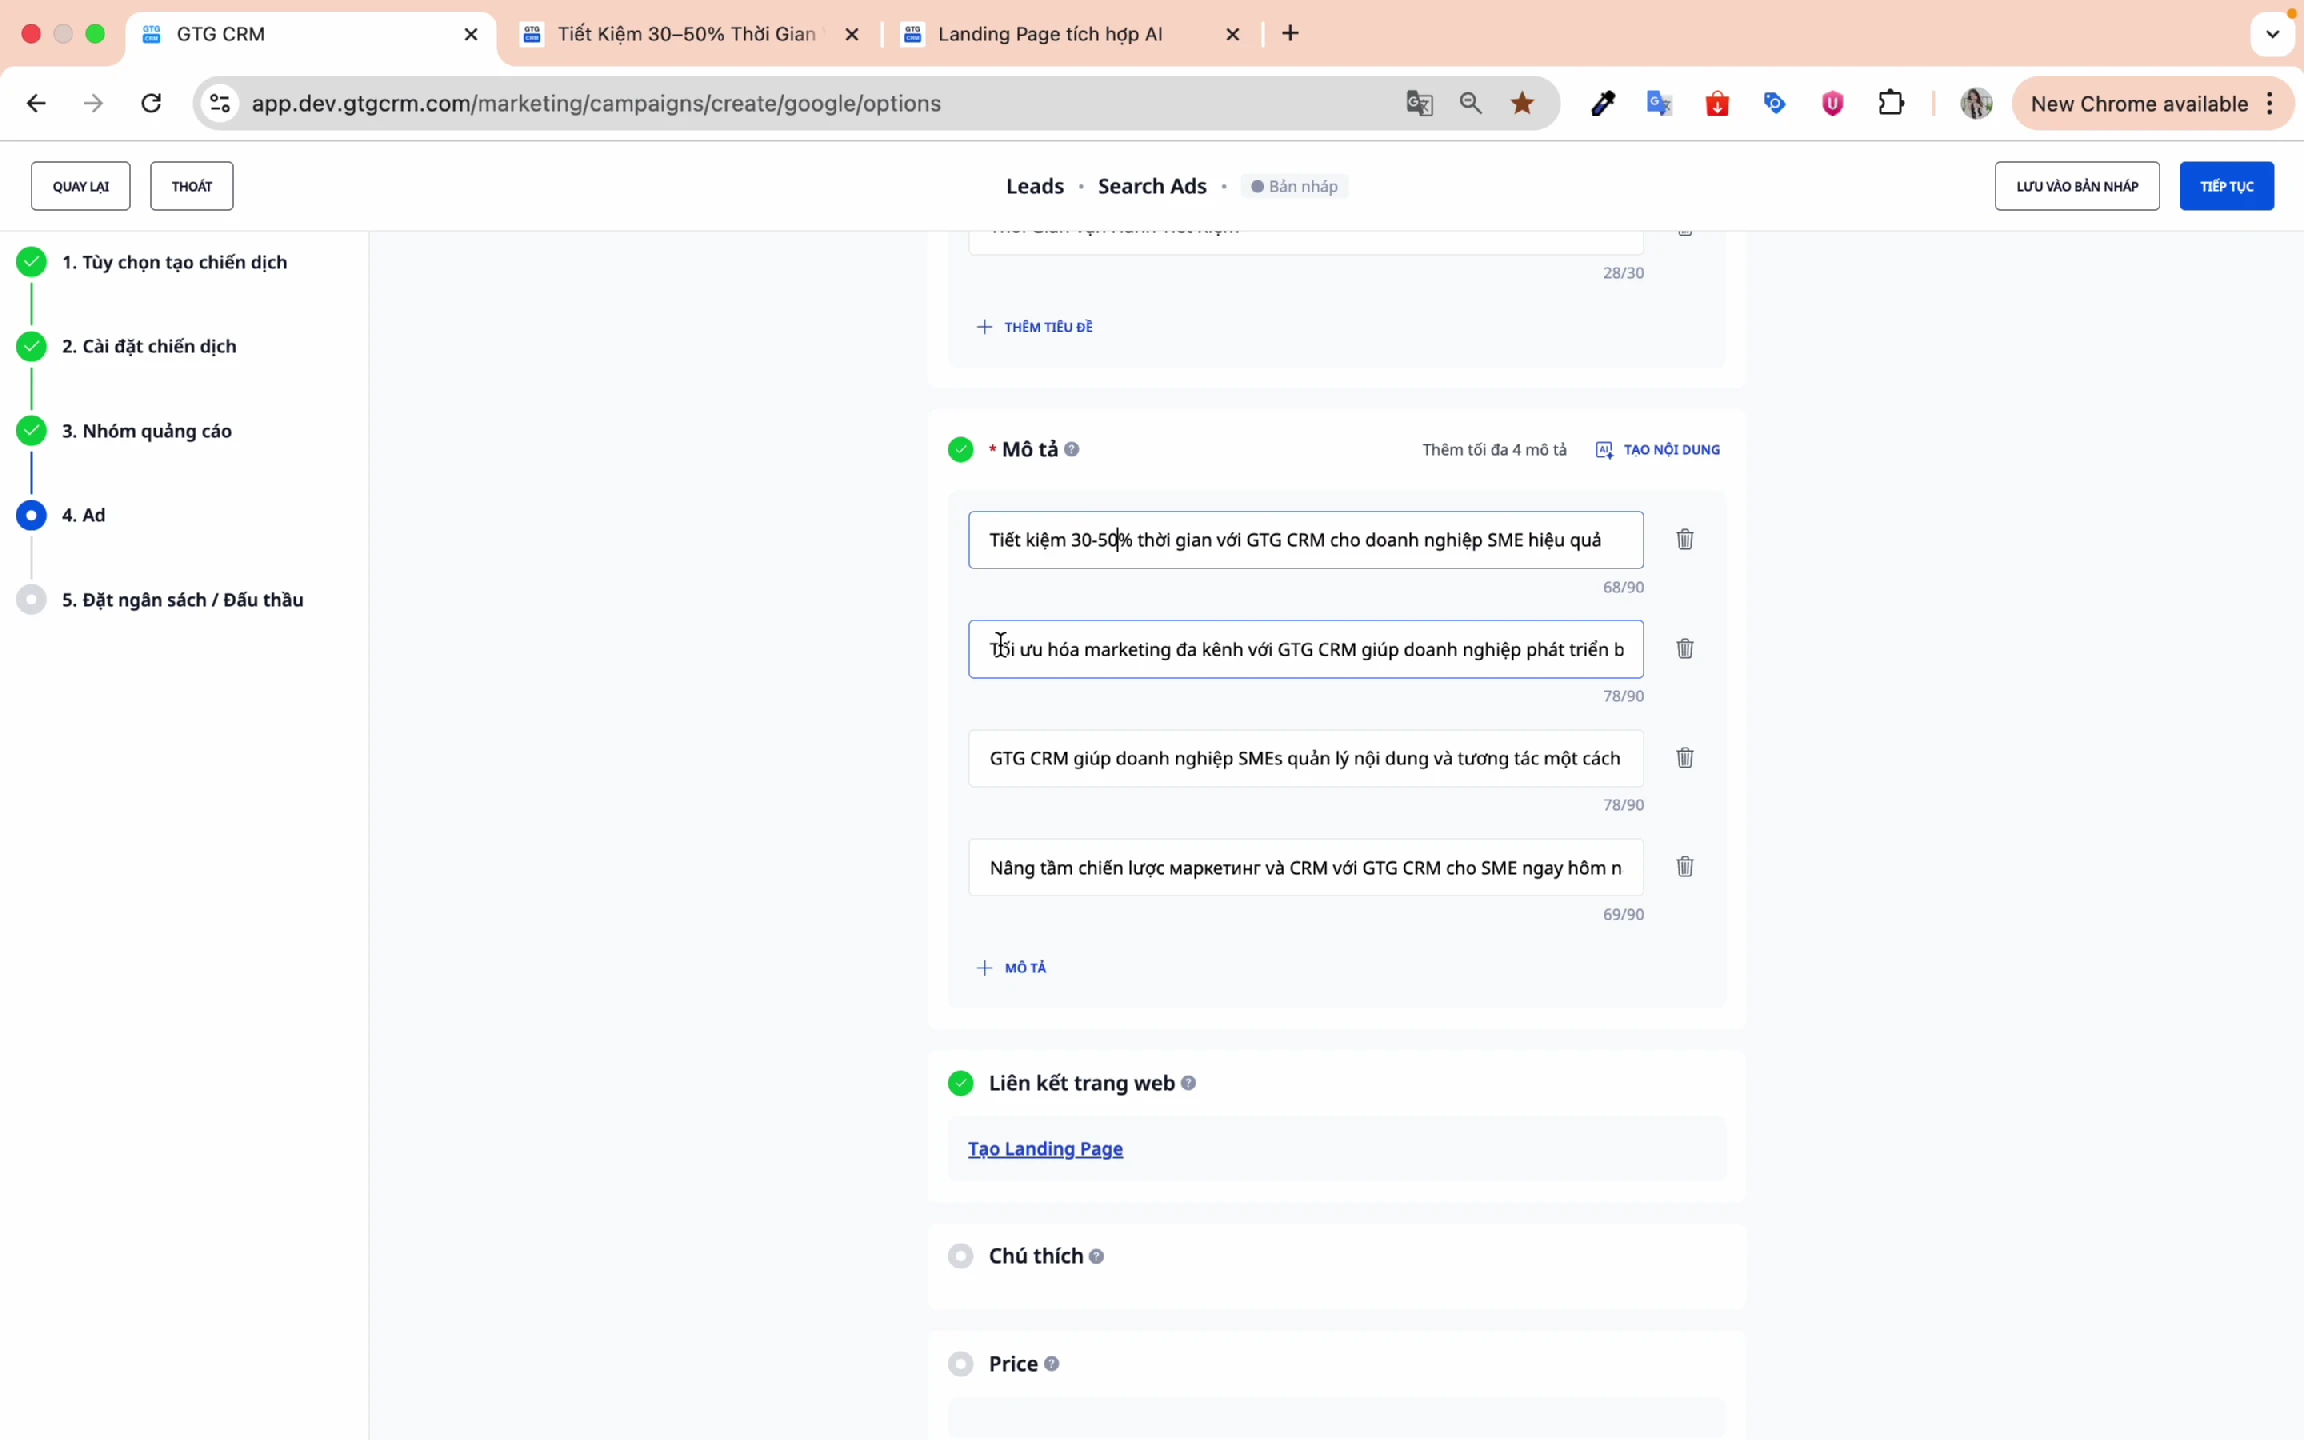
💡 Tip: GTG CRM's AI is highly accurate, generating content based on the landing page and the information you provide. Edits are usually minimal.
Click Continue to set your budget.
8. Budget Settings
Step 1: Choose Budget Type
- Daily Budget: Easy to control daily spending (Recommended)
- Total Campaign Budget: Flexible allocation over time
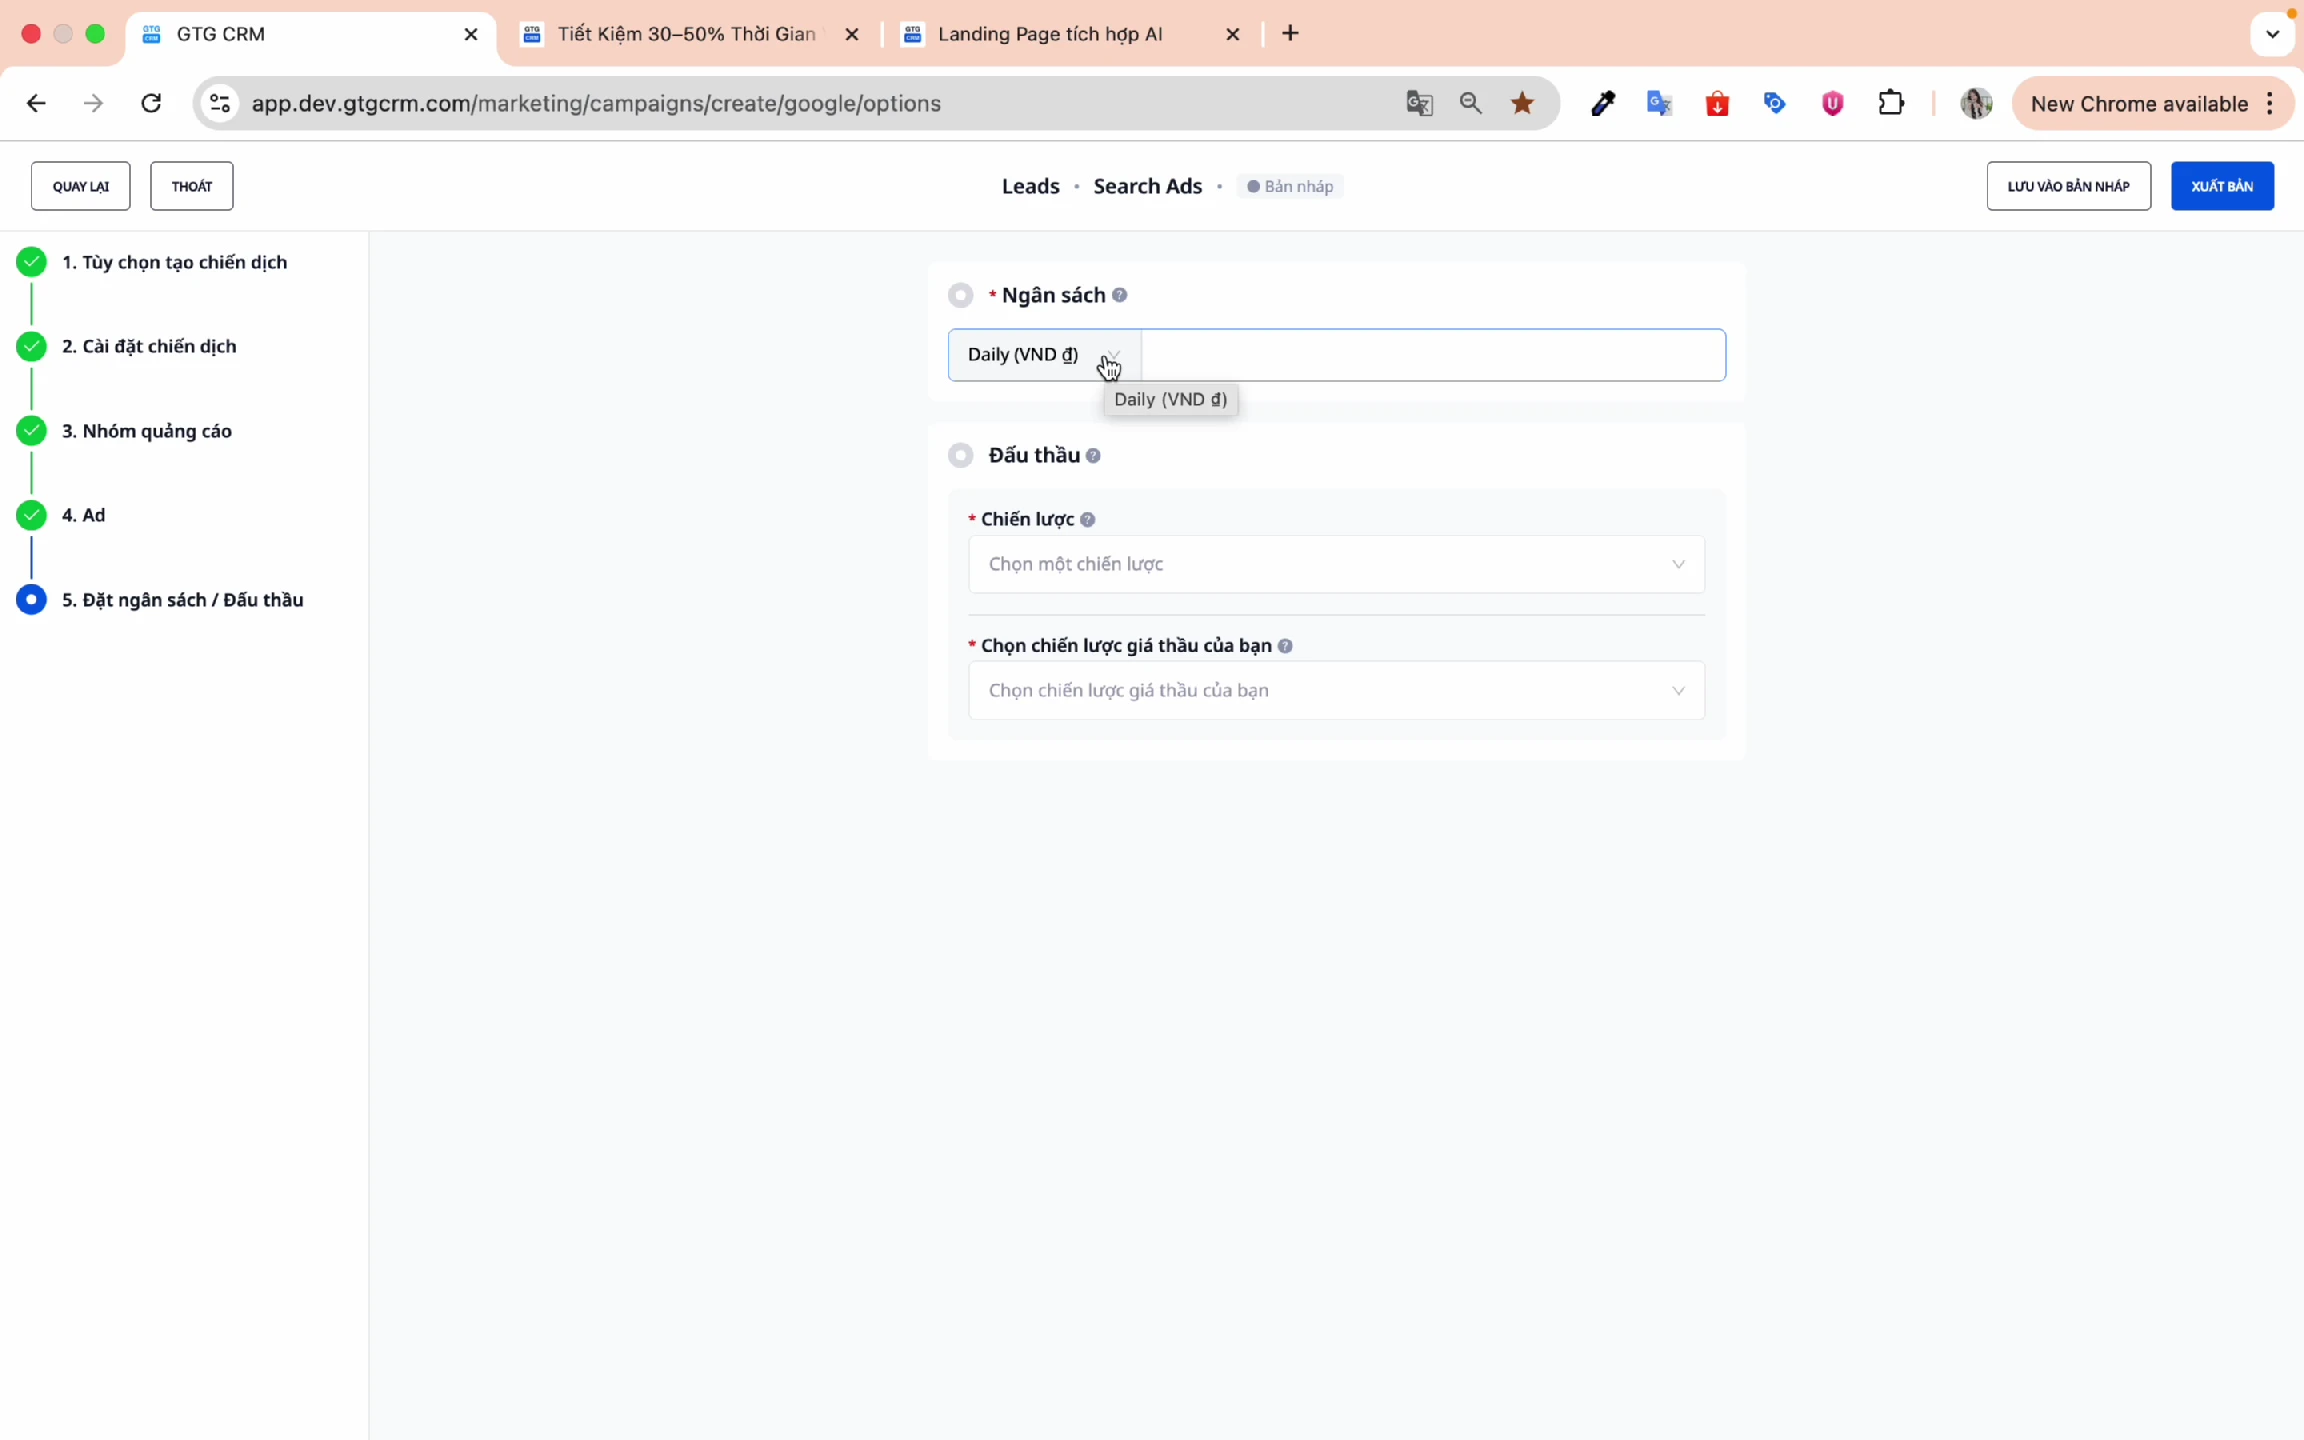
Step 2: Enter Budget Amount
E.g., 200,000 VND/day
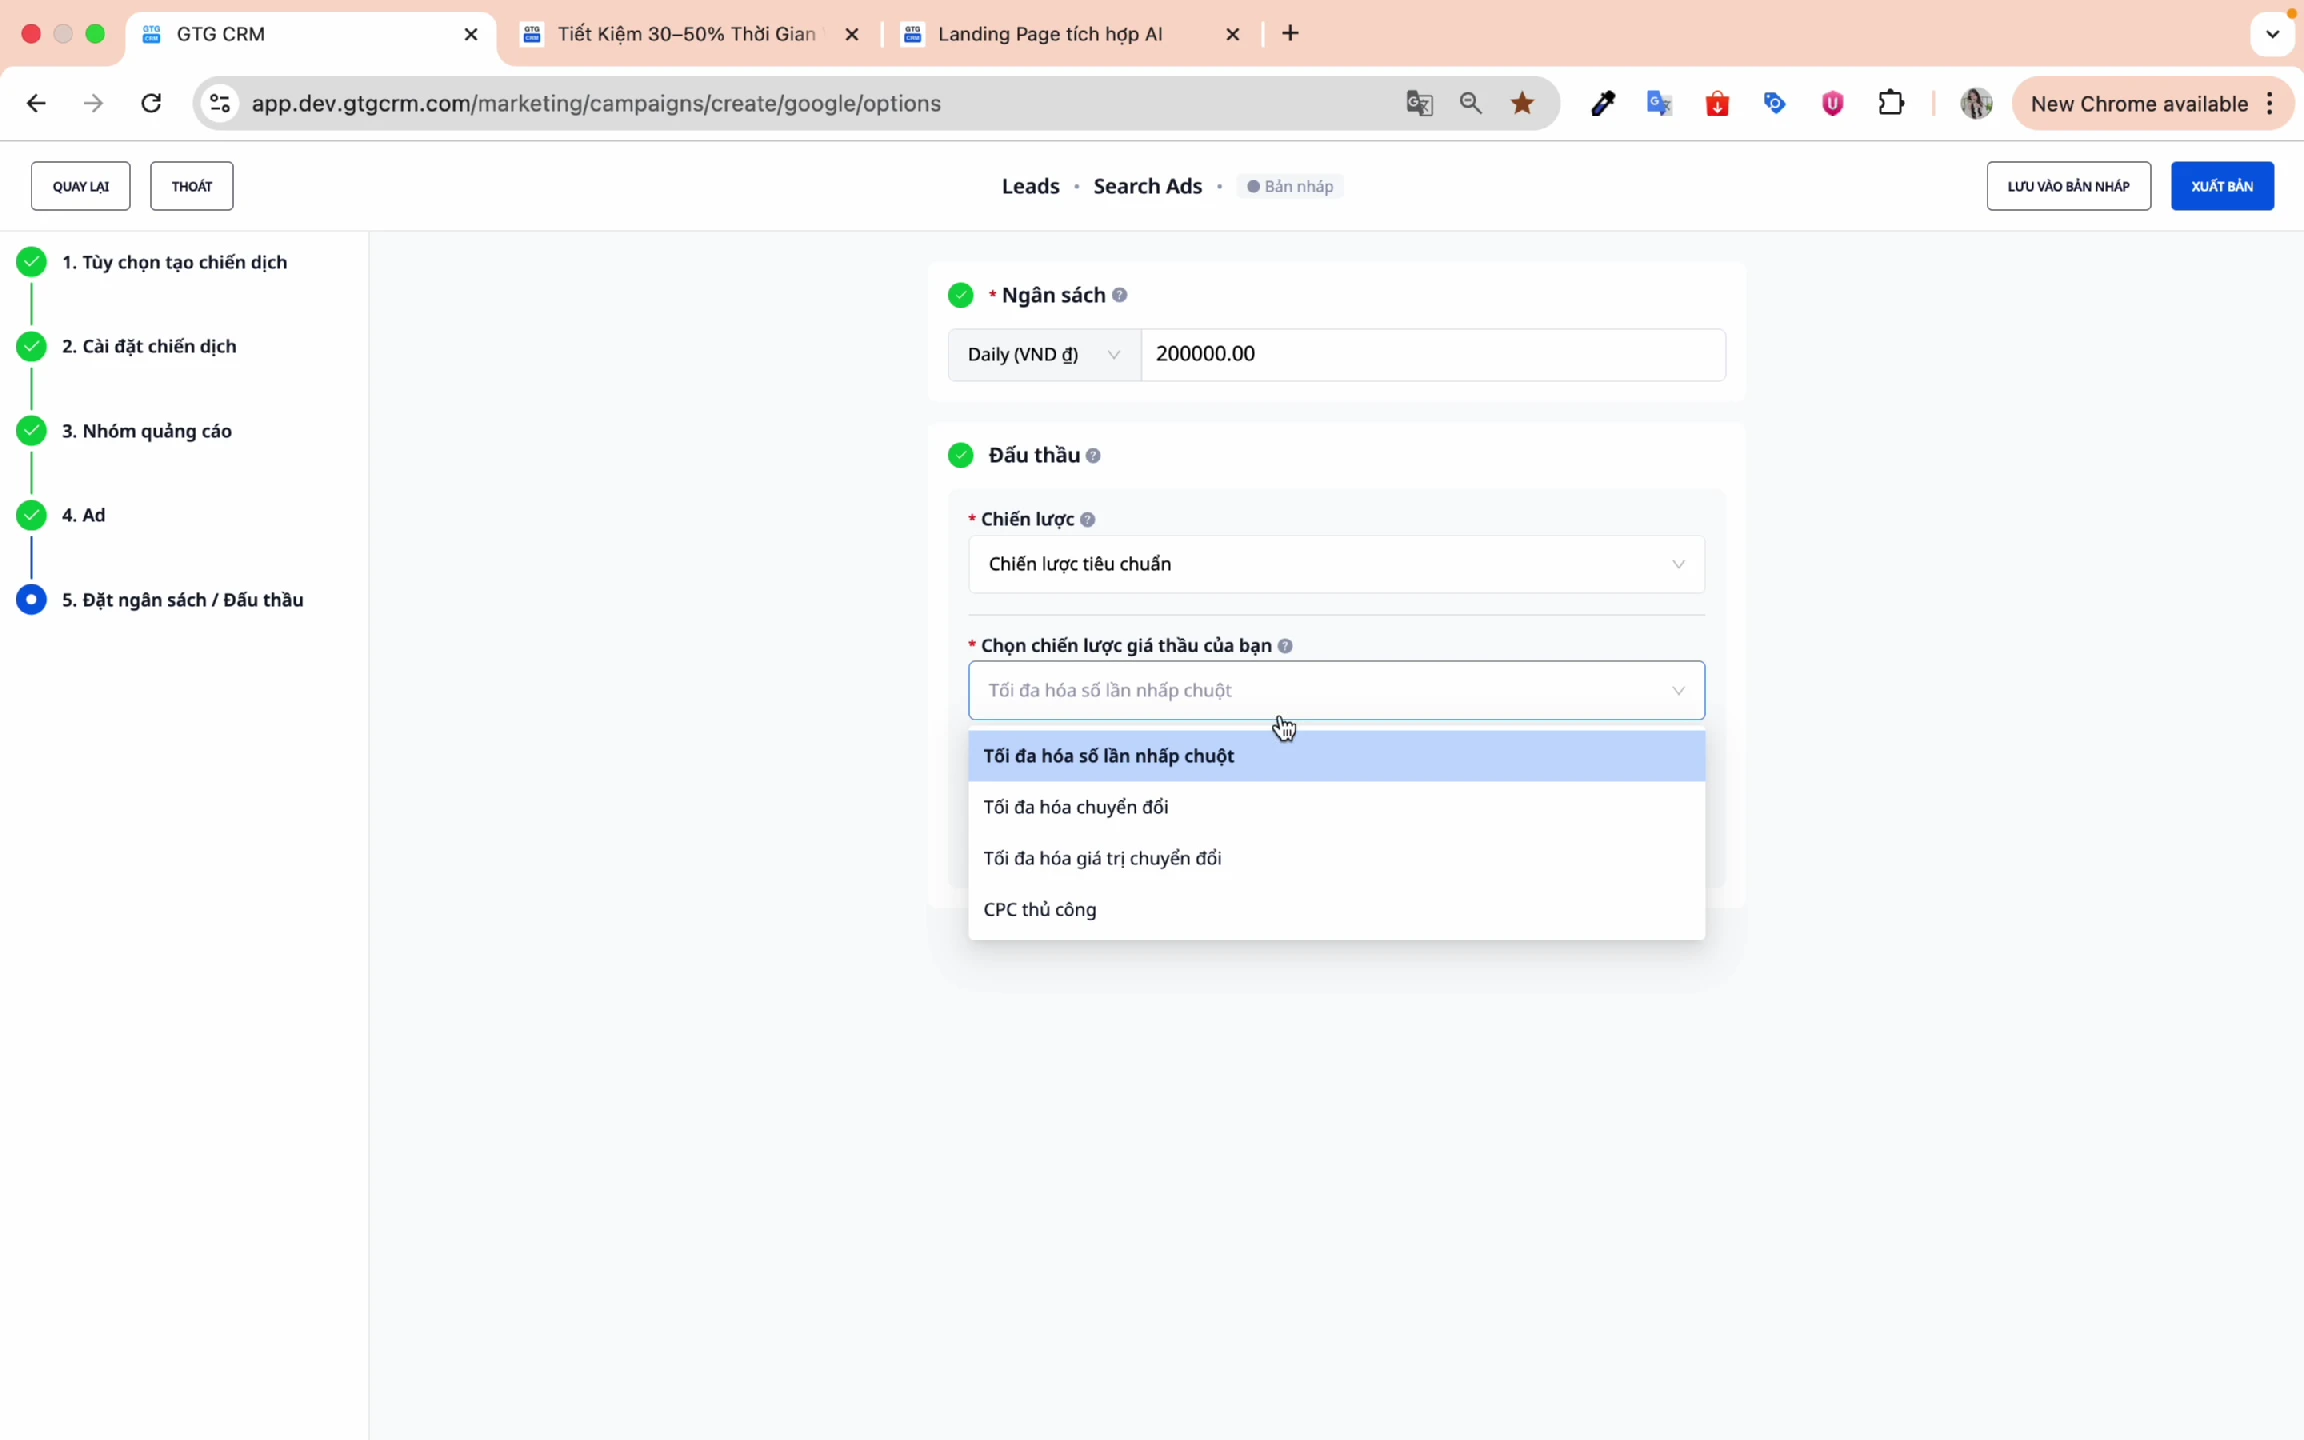
Step 3: Choose Bidding Strategy
Standard Strategies:
| Strategy | Description | Best For |
|---|---|---|
| Maximize Clicks | Get the most clicks within your budget | Increasing traffic |
| Maximize Conversions | Get the most conversions | Collecting leads |
| Maximize Conversion Value | Get the most conversion value | Optimizing ROI |
| Manual CPC | Control the cost per click | Cost control |
Step 4: Set Cost Target (Optional)
- For new campaigns: You can skip this step
- After running for a while: Come back to set a specific cost target
9. Publish Campaign
Step 1: Review Information
Double-check all settings before publishing.
Step 2: Click "Publish"
Click the Publish button to create your campaign.
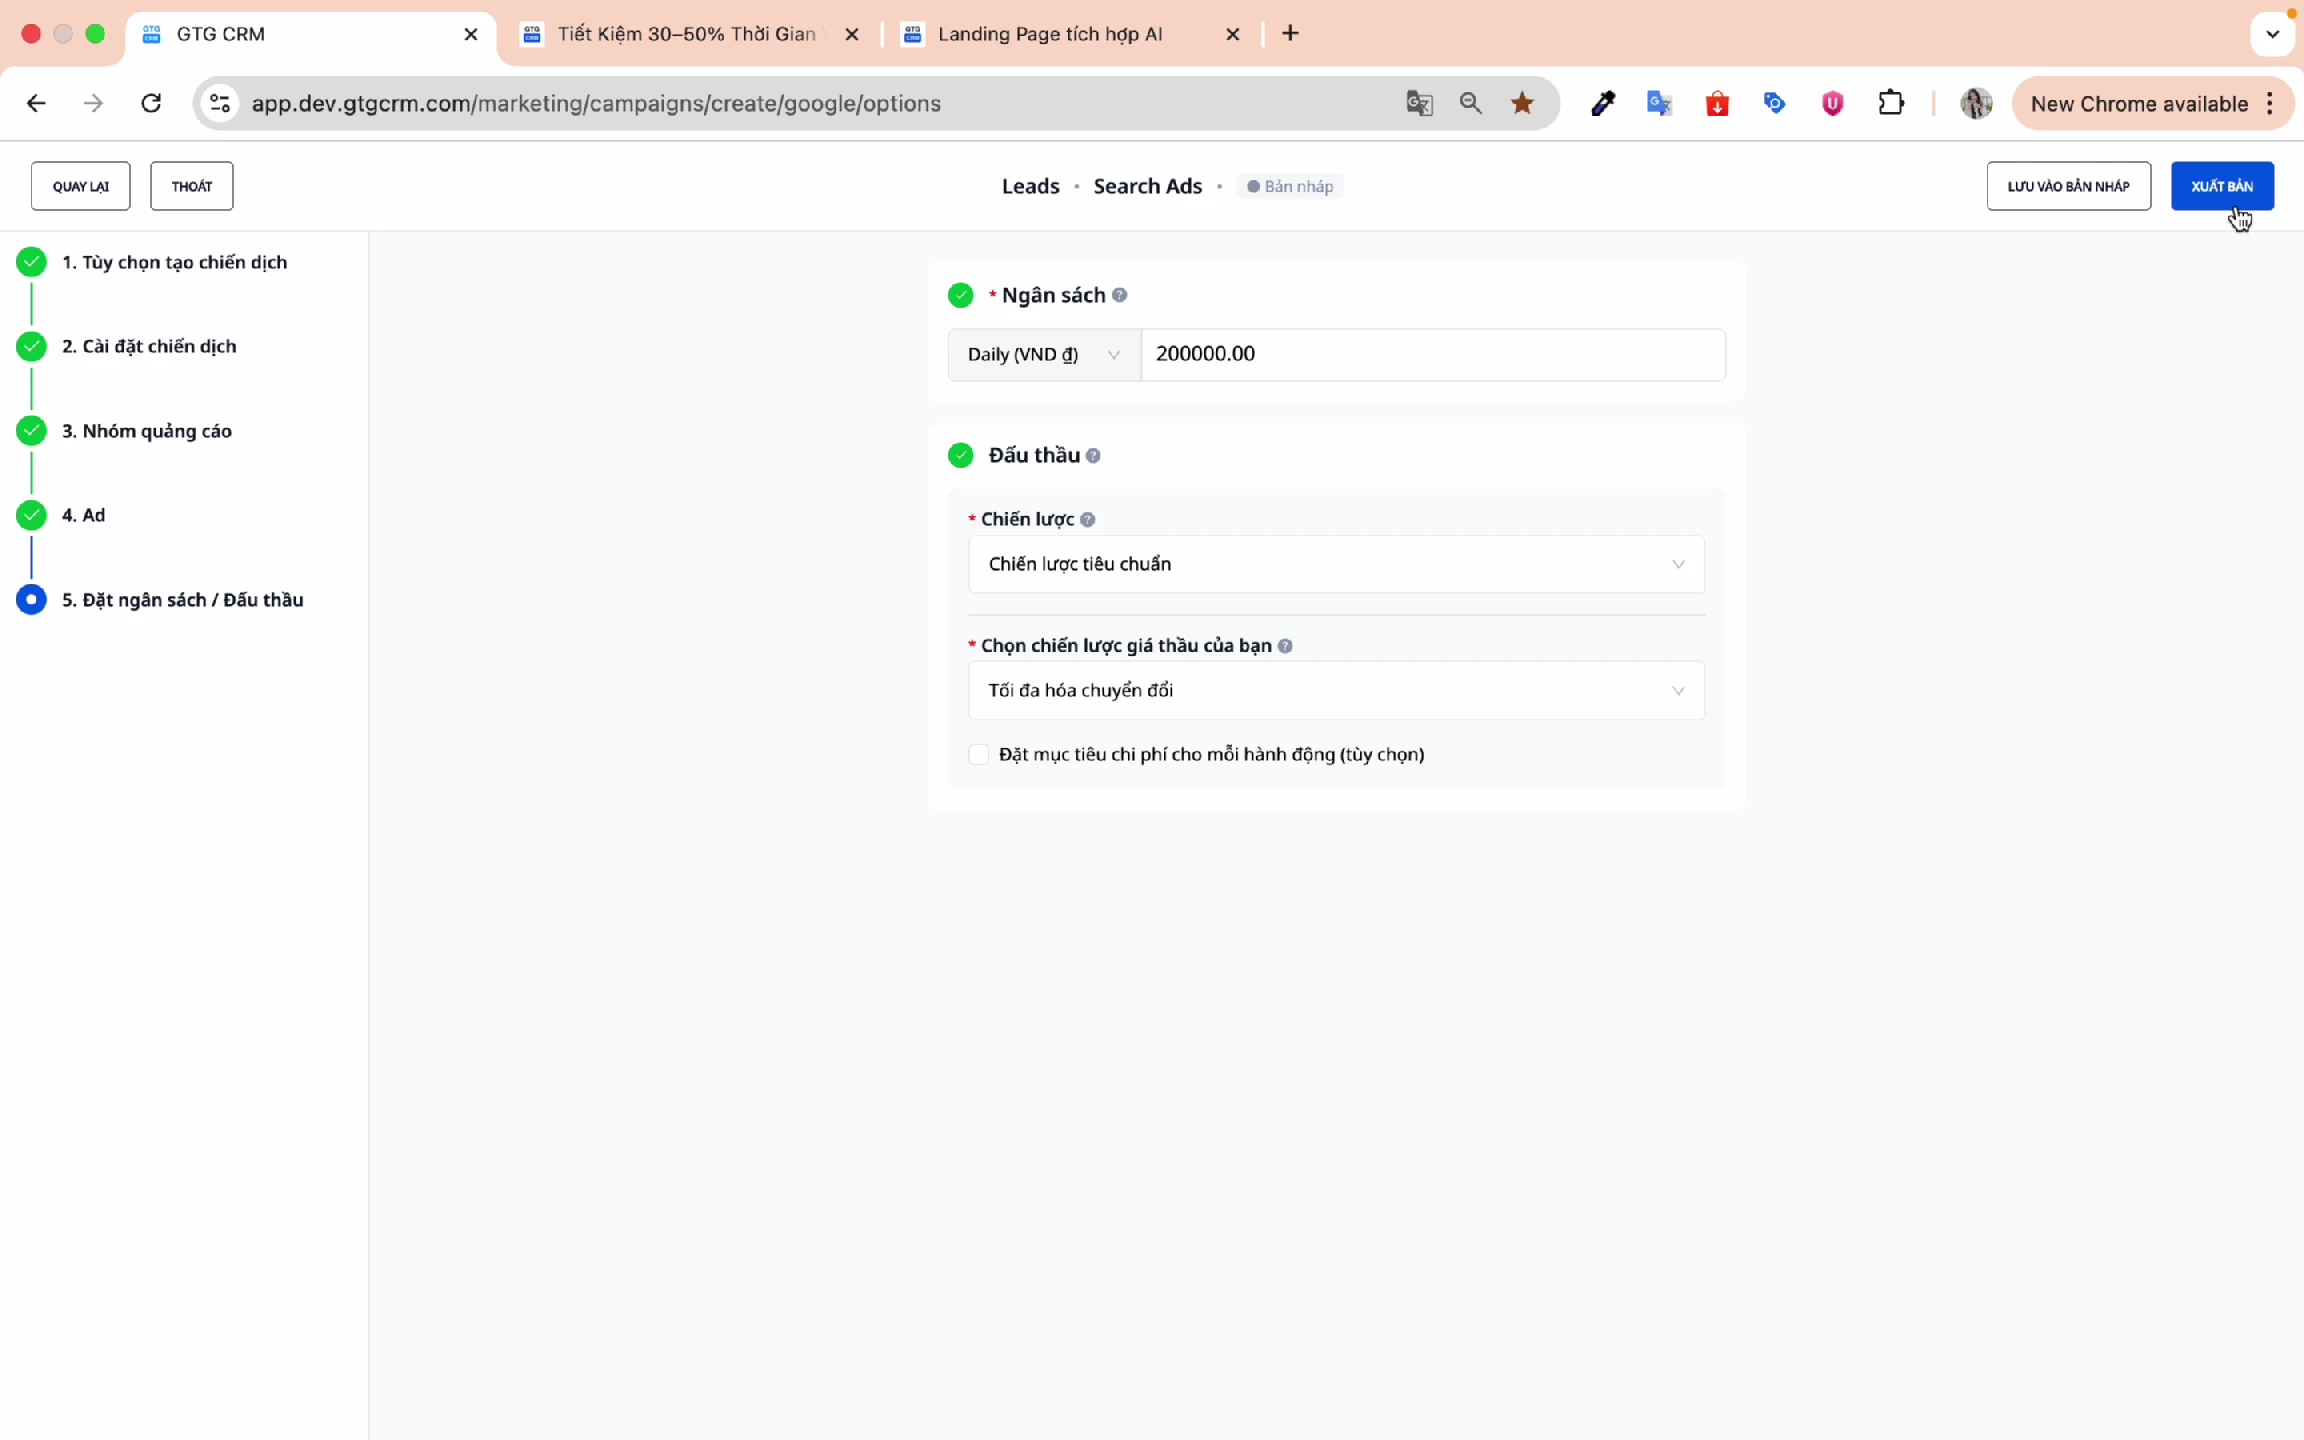
Step 3: Confirmation of Success
When you see the success message, your campaign has been created.
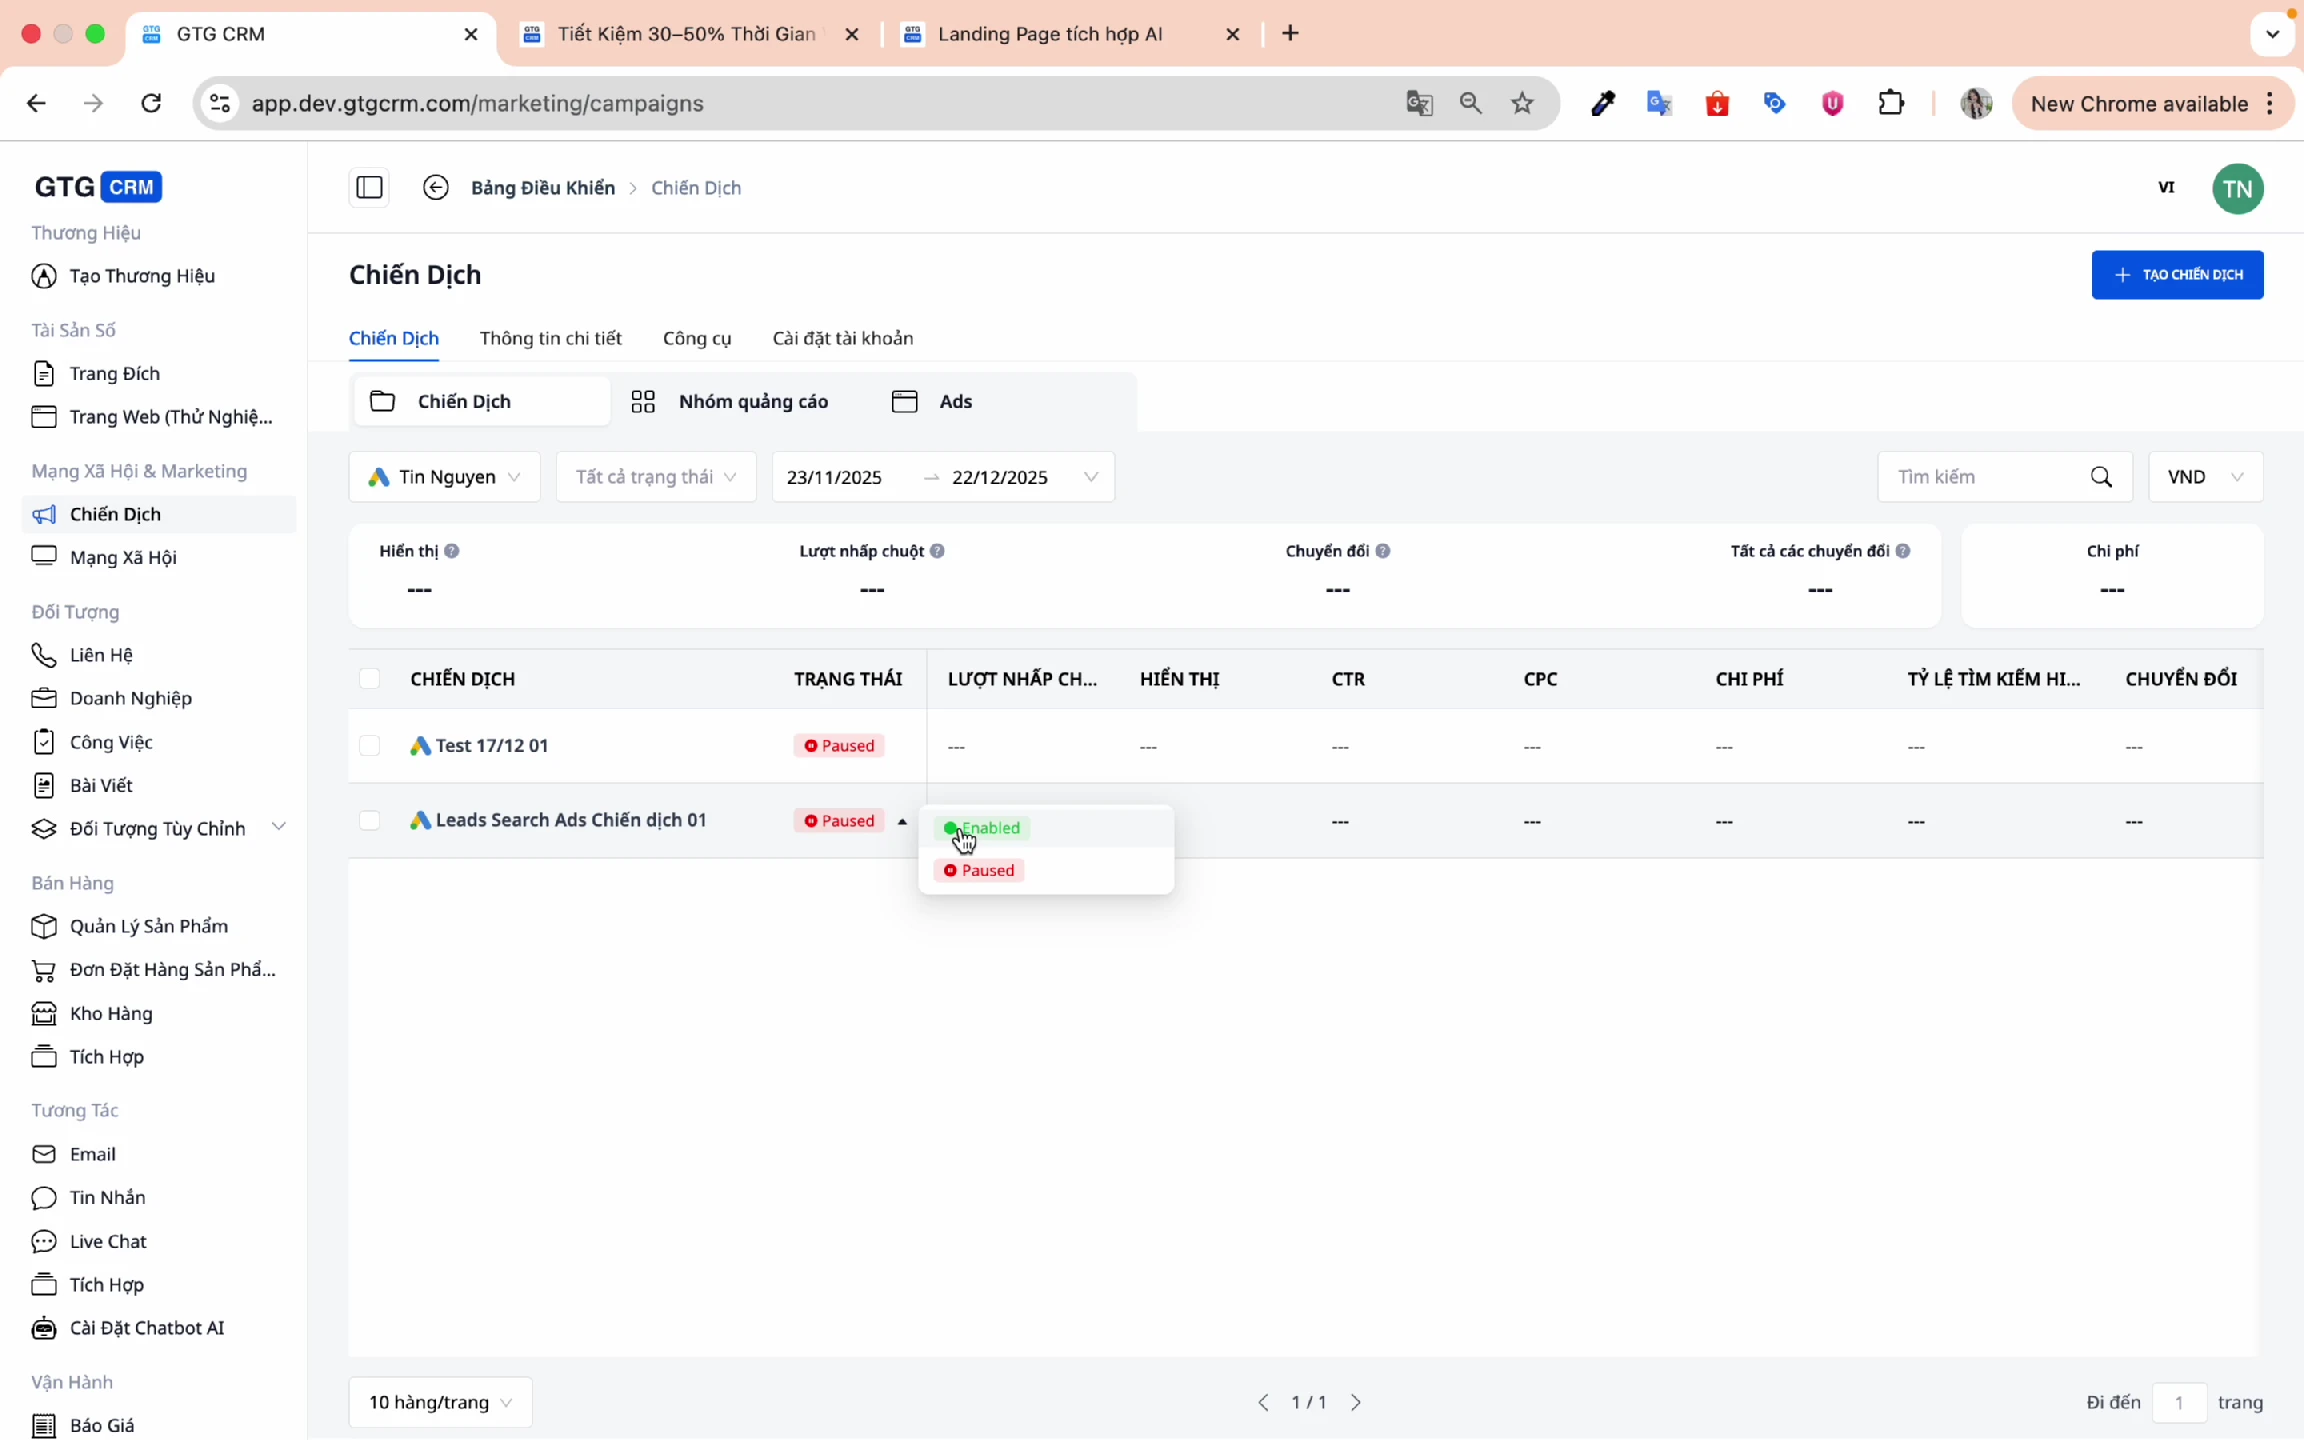
Step 4: Enable Campaign
Click Enable to activate your campaign and start running ads.
10. Add Ads to Existing Campaign
In addition to creating new campaigns, you can add ads to existing ones.
Step 1: Select "Existing Campaign"
On the campaign creation screen, select the Existing Campaign tab.
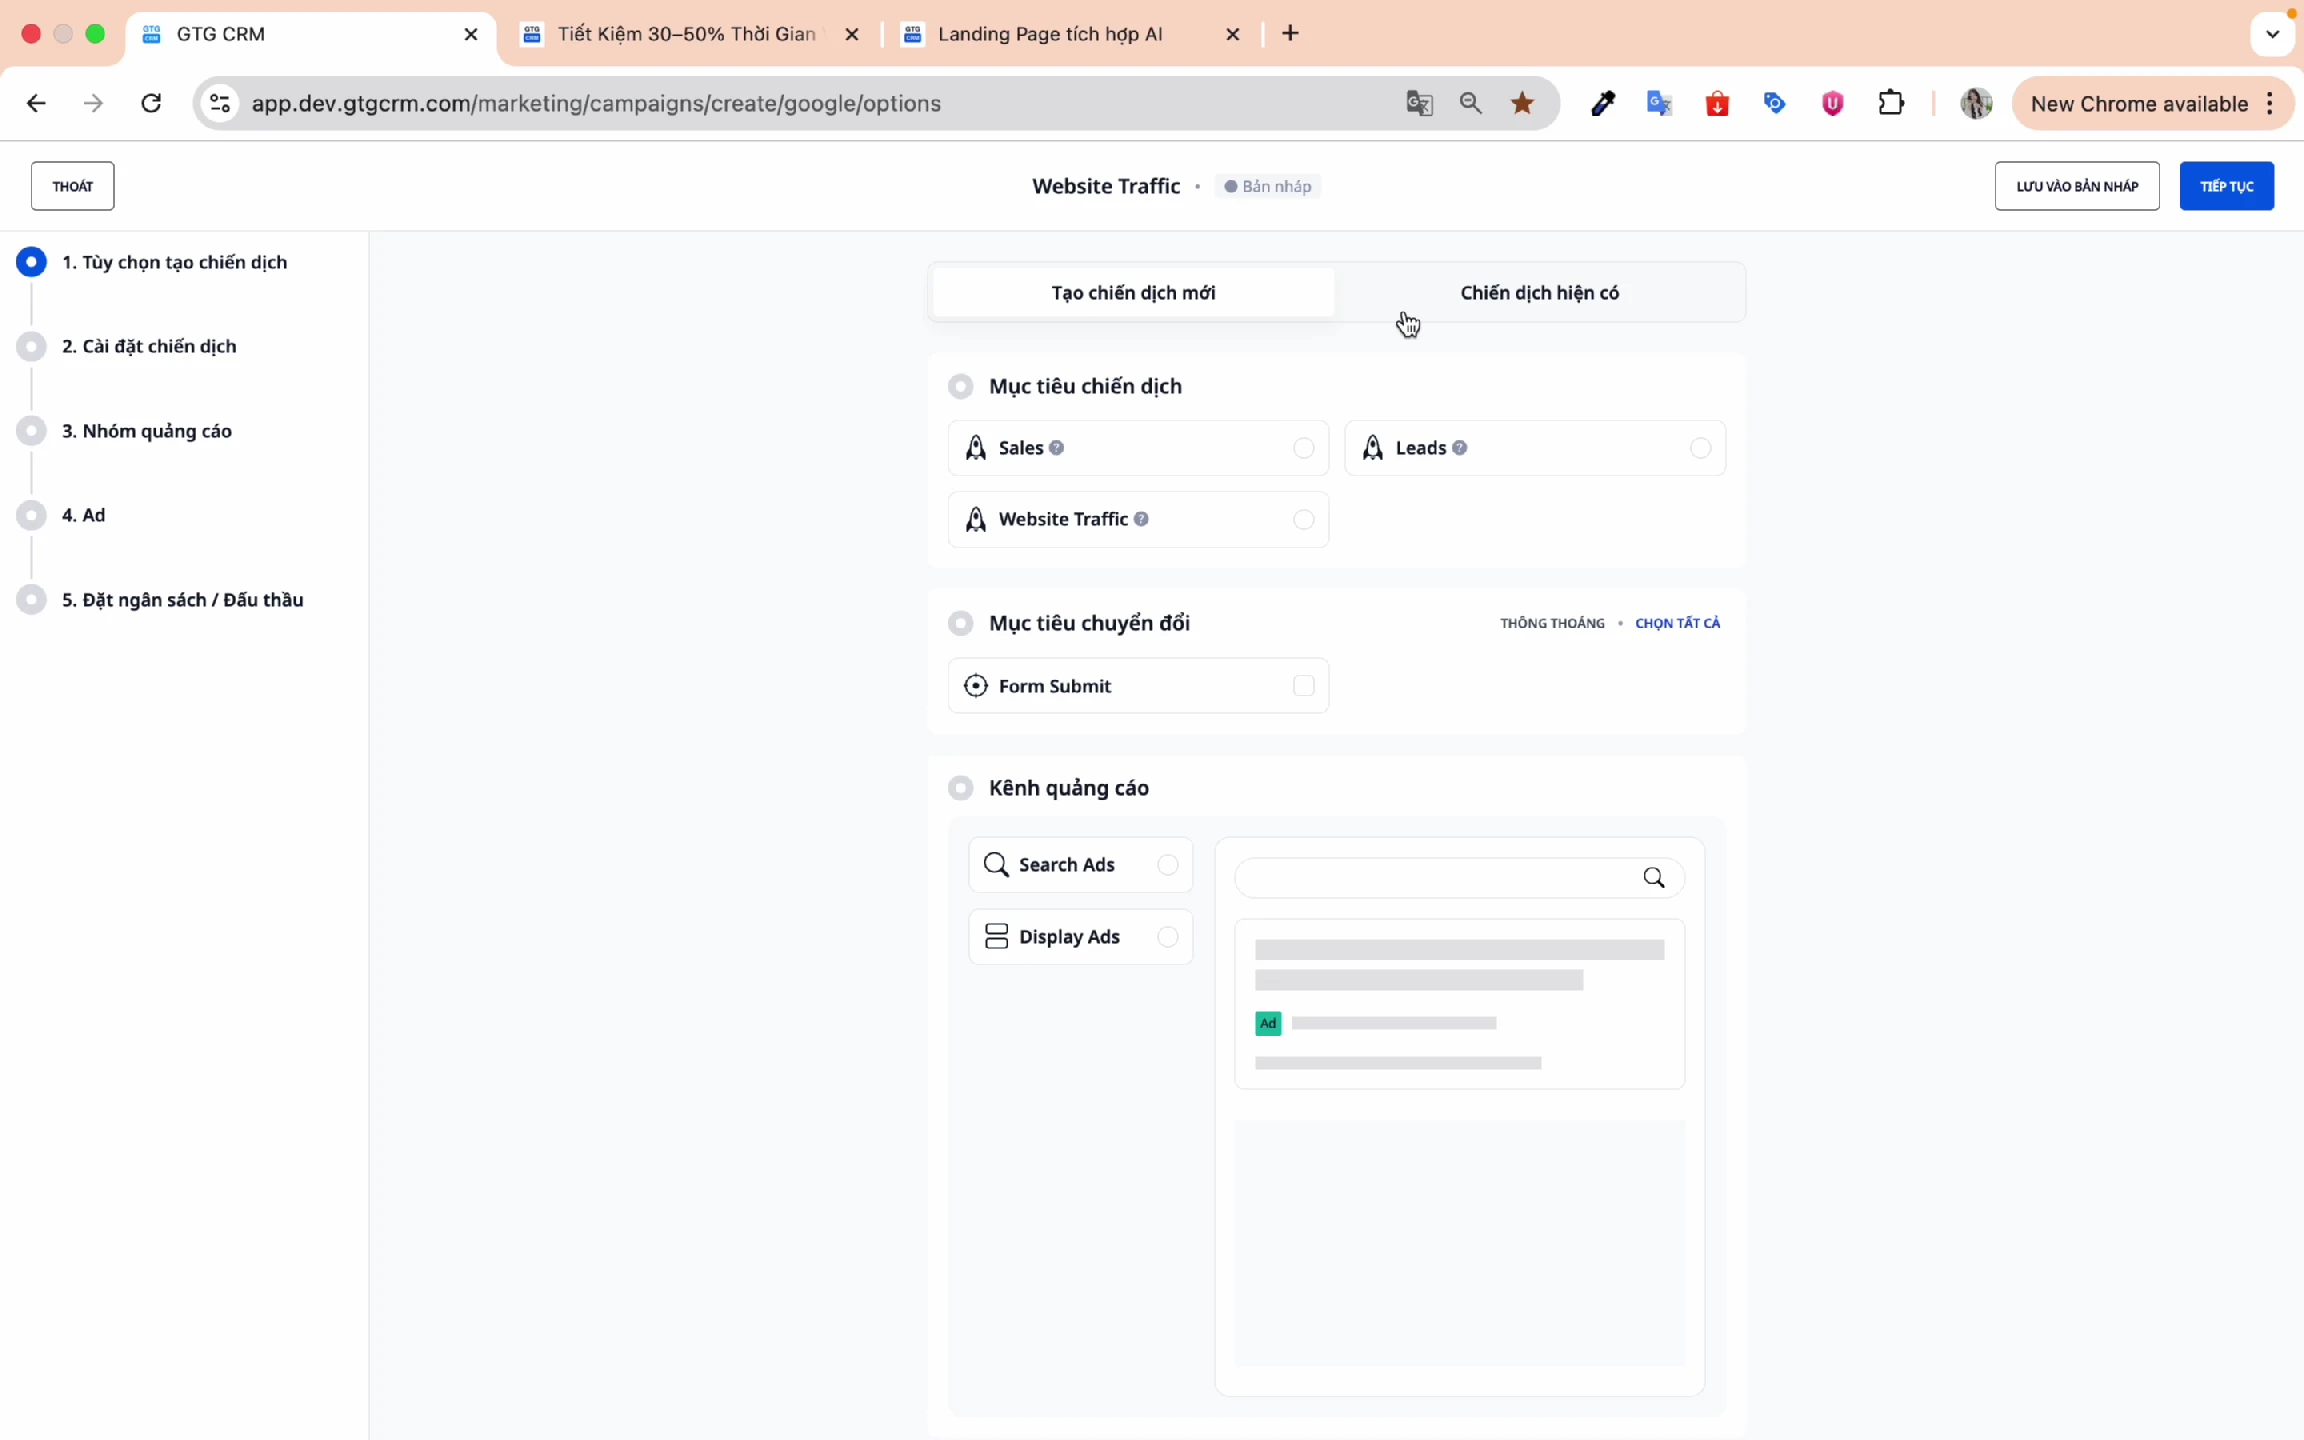
Step 2: Choose Campaign
Select the campaign you want to add ads to.
Step 3: Review Settings
GTG CRM will display the existing settings:
- Campaign objective
- Targeting
- Budget
- You can change them if needed, otherwise click Continue
Step 4: Select Ad Group
- Existing Ad Group: Select an existing group
- Create New Ad Group: Create a new group
⚠️ Note: You cannot use the same name for a new ad group as an existing one.
Step 5: Set Keywords and Content
Similar to creating a new campaign:
- Add keywords (manually or AI suggested)
- Create ad content (headlines, descriptions)
Step 6: Publish
Click Publish to add the ad to the campaign.
Tips for Effective Use
About Keywords
- Use AI suggestions to save time
- Add negative keywords to avoid wasting budget
- Start with Broad Match, then narrow down based on data
About Content
- Let AI generate content first, then make minor edits if needed
- Ensure your landing page has good content for accurate AI analysis
- Create multiple ad variations for A/B testing
About Budget
- Start with a small budget and increase gradually as you see results
- For new campaigns, choose "Maximize Conversions" without a target CPA
- After 2-4 weeks, review data and set an appropriate target CPA
About Tracking
- Regularly check performance in GTG CRM
- Compare between ad groups
- Turn off underperforming ads
Frequently Asked Questions
Q: How many keywords do I need for an ad group? A: It's recommended to have 10-20 closely related keywords per ad group.
Q: How long does AI keyword suggestion take? A: It usually takes about 10-15 seconds.
Q: Can I edit a campaign after creating it? A: Yes, you can edit all settings after the campaign is created.
Q: What is the minimum budget? A: There is no mandatory minimum budget, but at least 100,000-200,000 VND/day is recommended to gather enough data.
Support
For further assistance, please contact:
- 📧 Email: support@gtgcrm.com
- 📞 Hotline: 0908235566
GTG CRM - Simple and effective Google Ads management! 🚀