Introduction
Running Google Ads is now easier than ever as you can create and manage ad campaigns directly on the GTG CRM platform. No need to switch between multiple tabs, no need to worry about complex setup - everything is integrated seamlessly and intuitively.
With the built-in Google Ads feature in GTG CRM, you can create Search Ads and Display Ads campaigns in just a few minutes, with a friendly Vietnamese interface and detailed step-by-step guidance. The system also supports automatic synchronization of existing campaigns, helping you manage all marketing activities in one place.
Key Features
- Easy Google Ads Account Connection - Link your ad account with just a few clicks
- Create Brand New Campaigns - Build campaigns from scratch with a step-by-step wizard
- Sync Existing Campaigns - Automatically sync running campaigns to GTG CRM for centralized management
- Support for Various Goals - Sales, Leads, Web Traffic with multiple conversion options
- Precise Targeting - Set detailed location, language, demographics, and time targeting
- Flexible Budget Management - Control daily and campaign budgets
- Vietnamese Interface - All operations are in Vietnamese, easy to understand and user-friendly
Detailed User Guide
Step 1: Connect Google Ads Account
Before creating ads, you need to connect your Google Ads account to GTG CRM:
- On the main screen, click the Campaigns menu
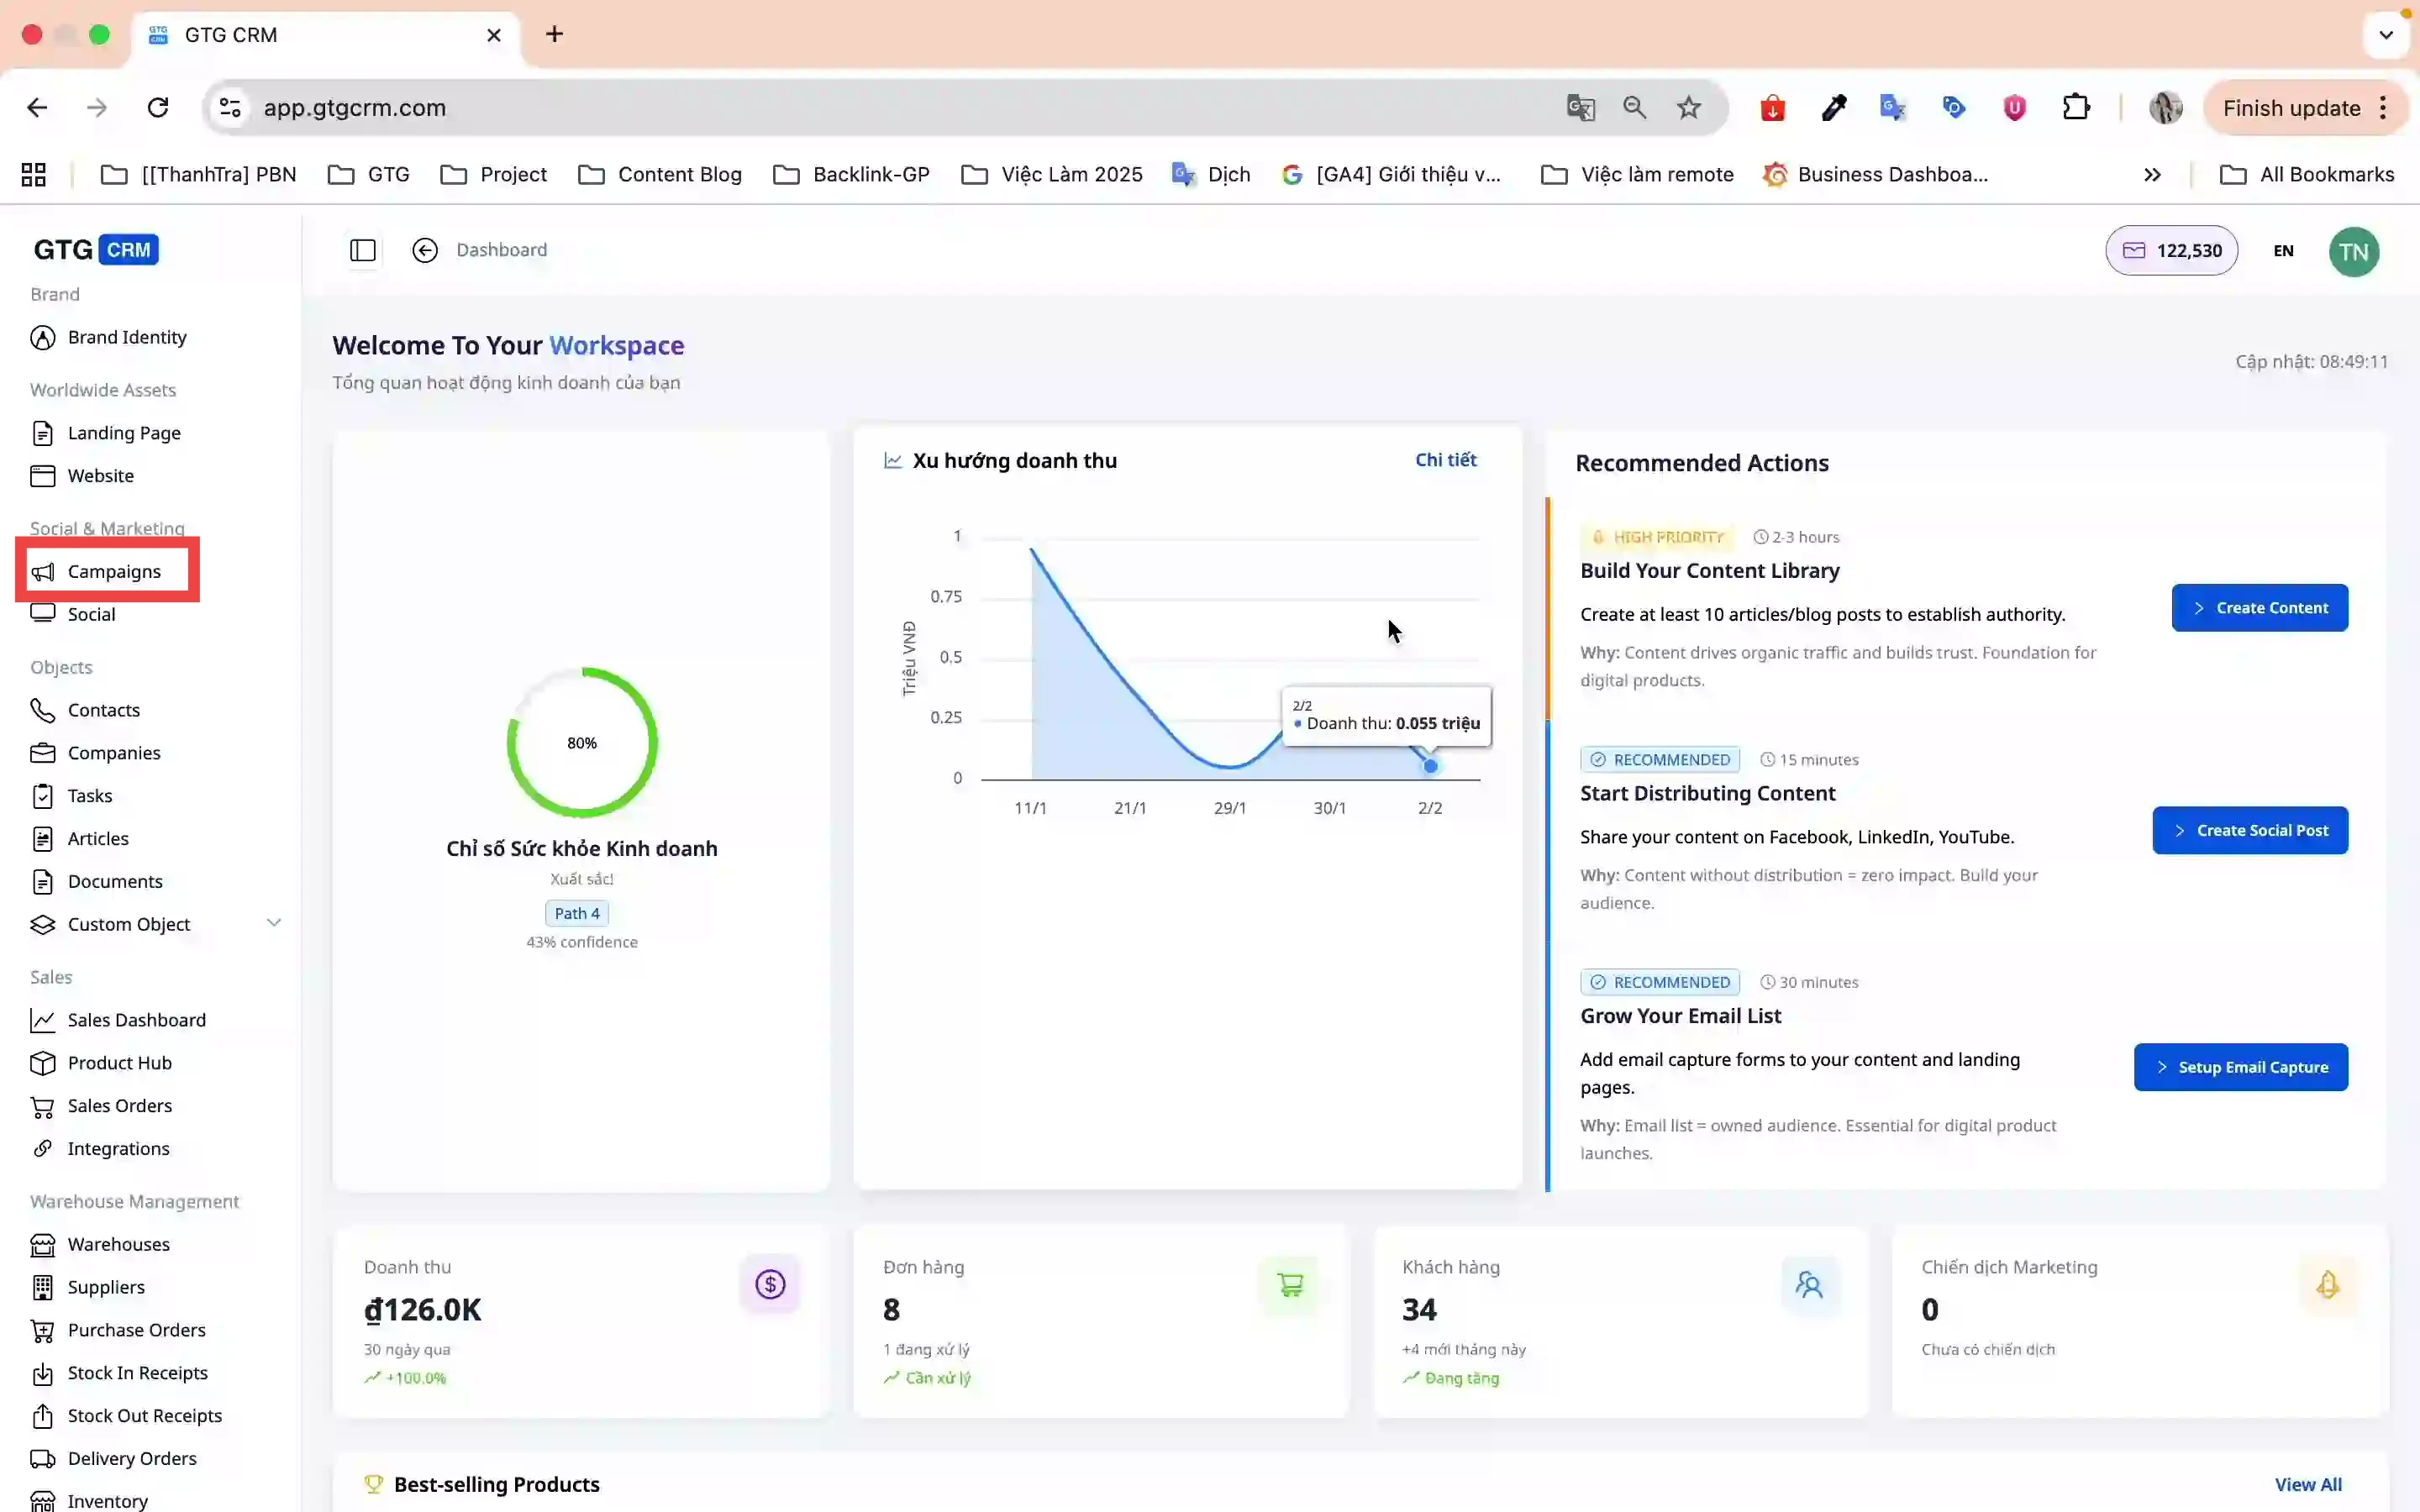
- Go to Account Settings → Connect Account
- Select the Google platform (GTG CRM supports both Facebook and Google)
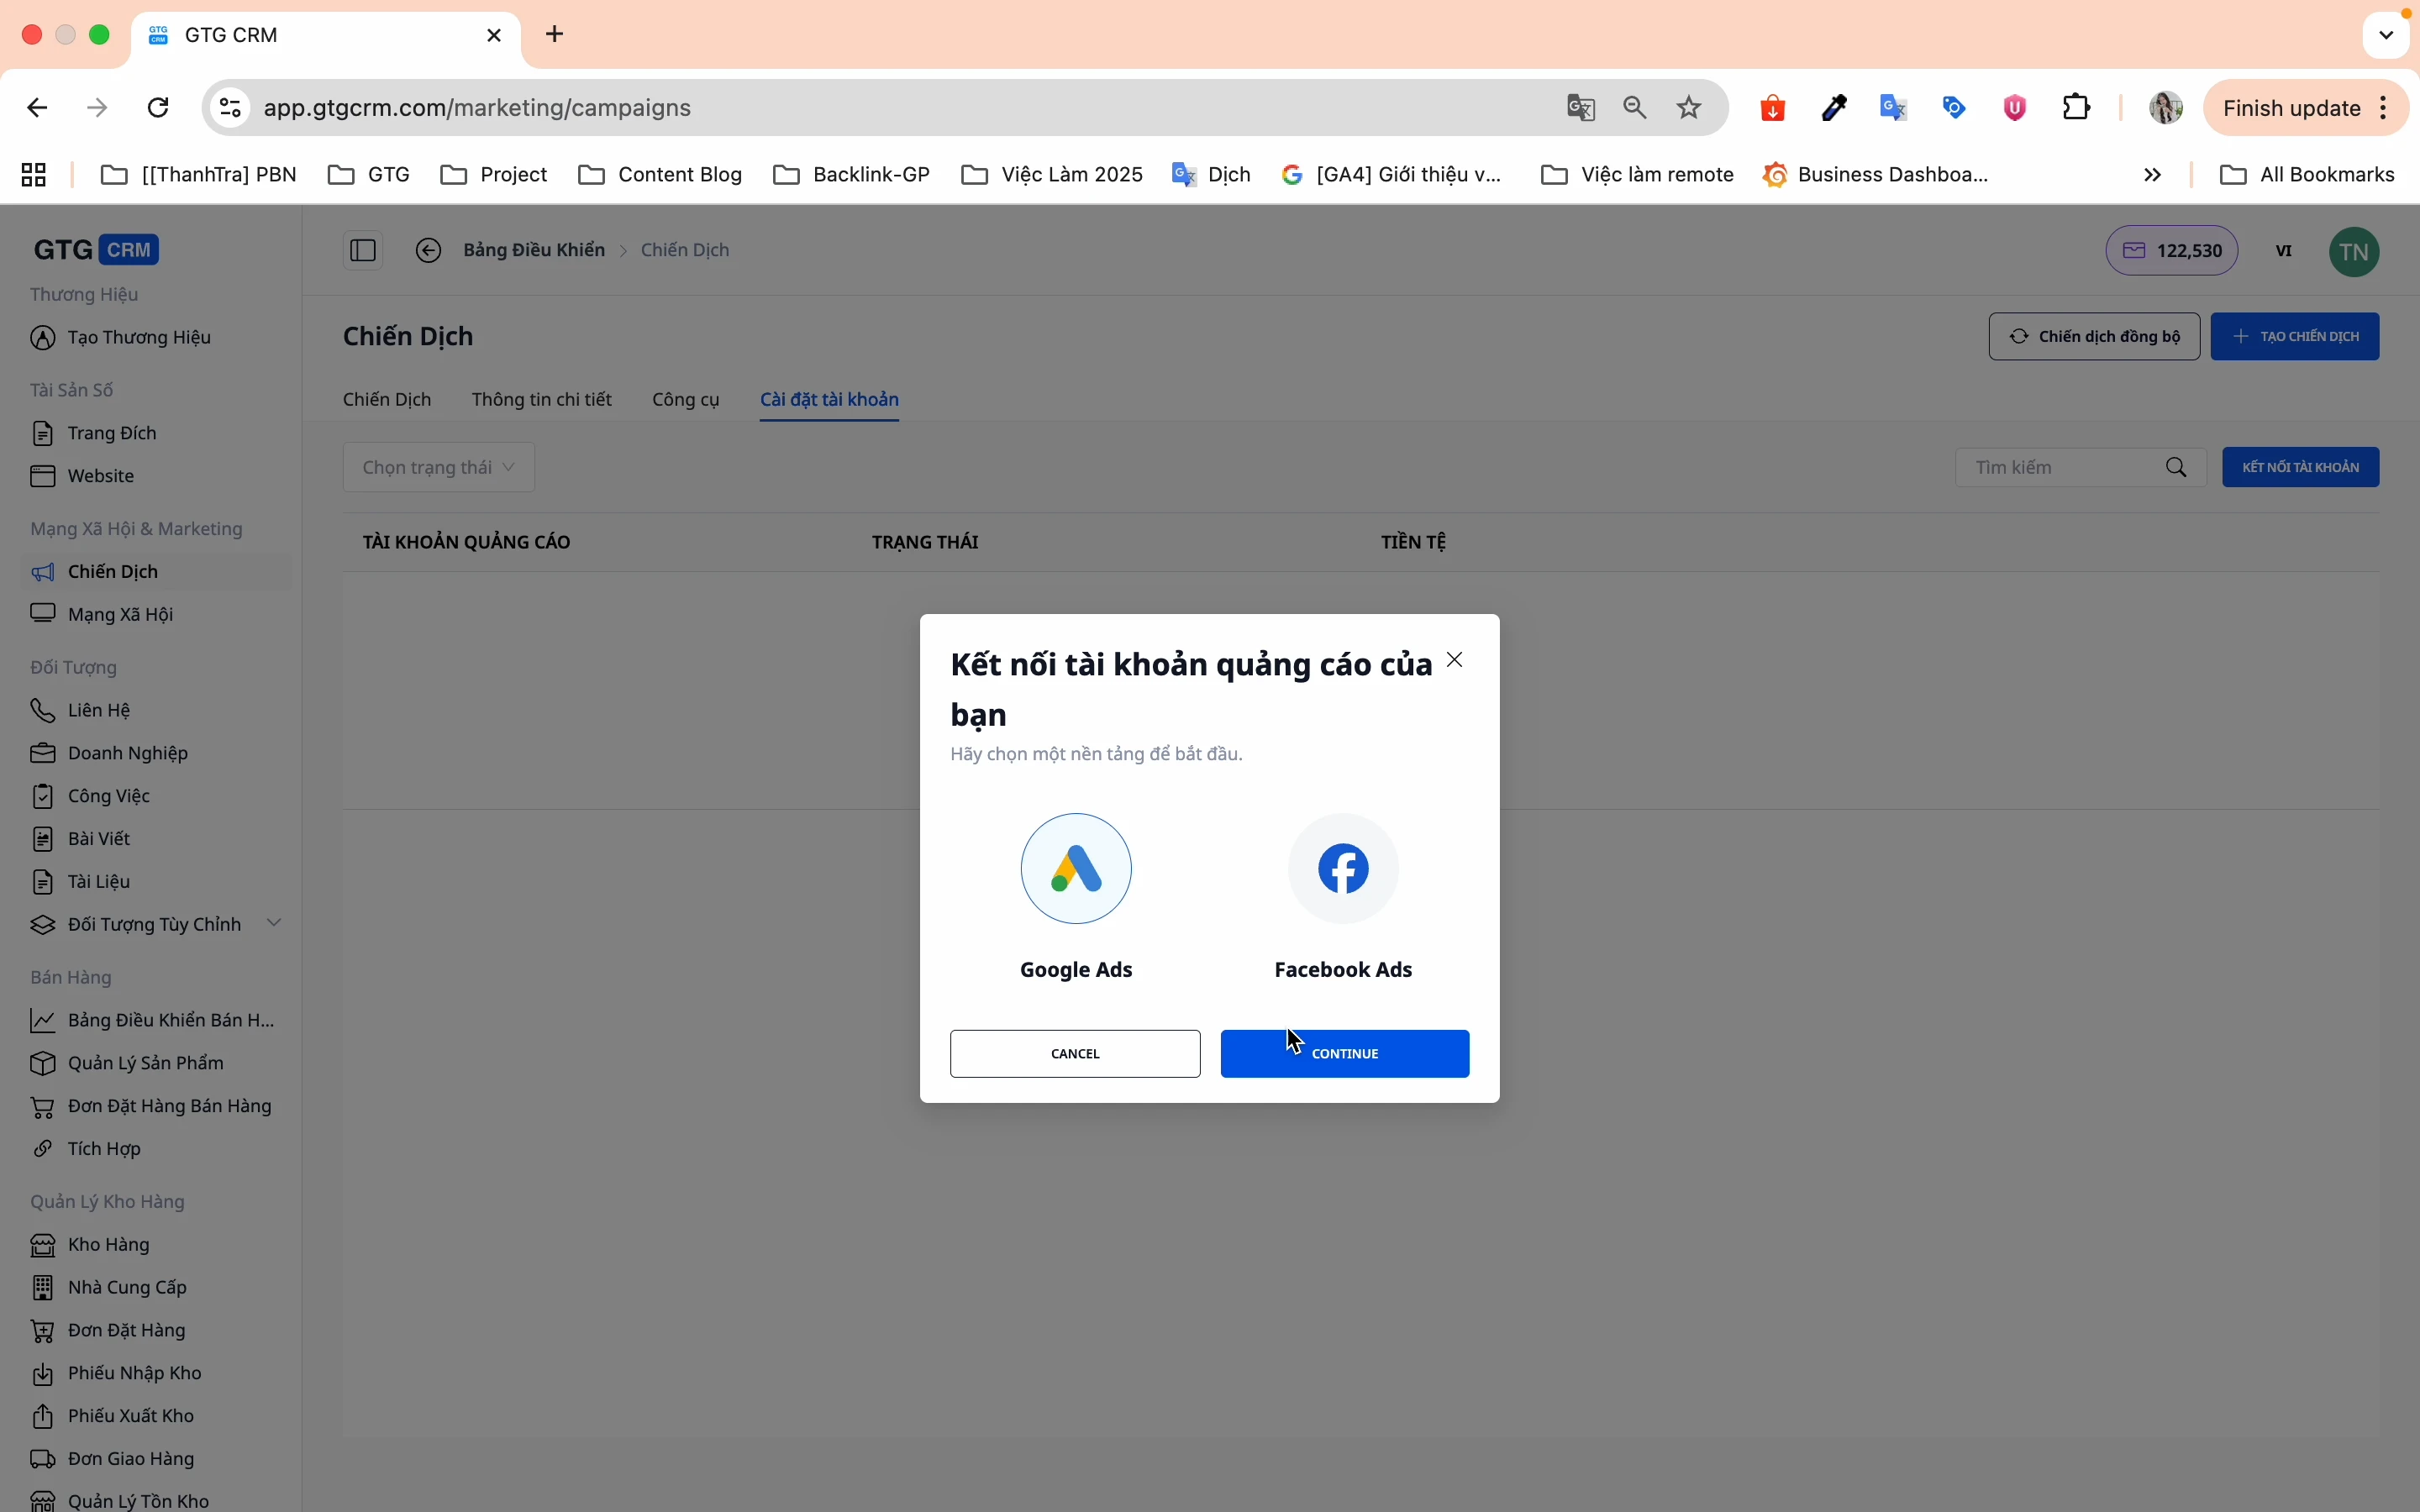
- Click Login and select your Google Ads account
- Click Connect Account to complete
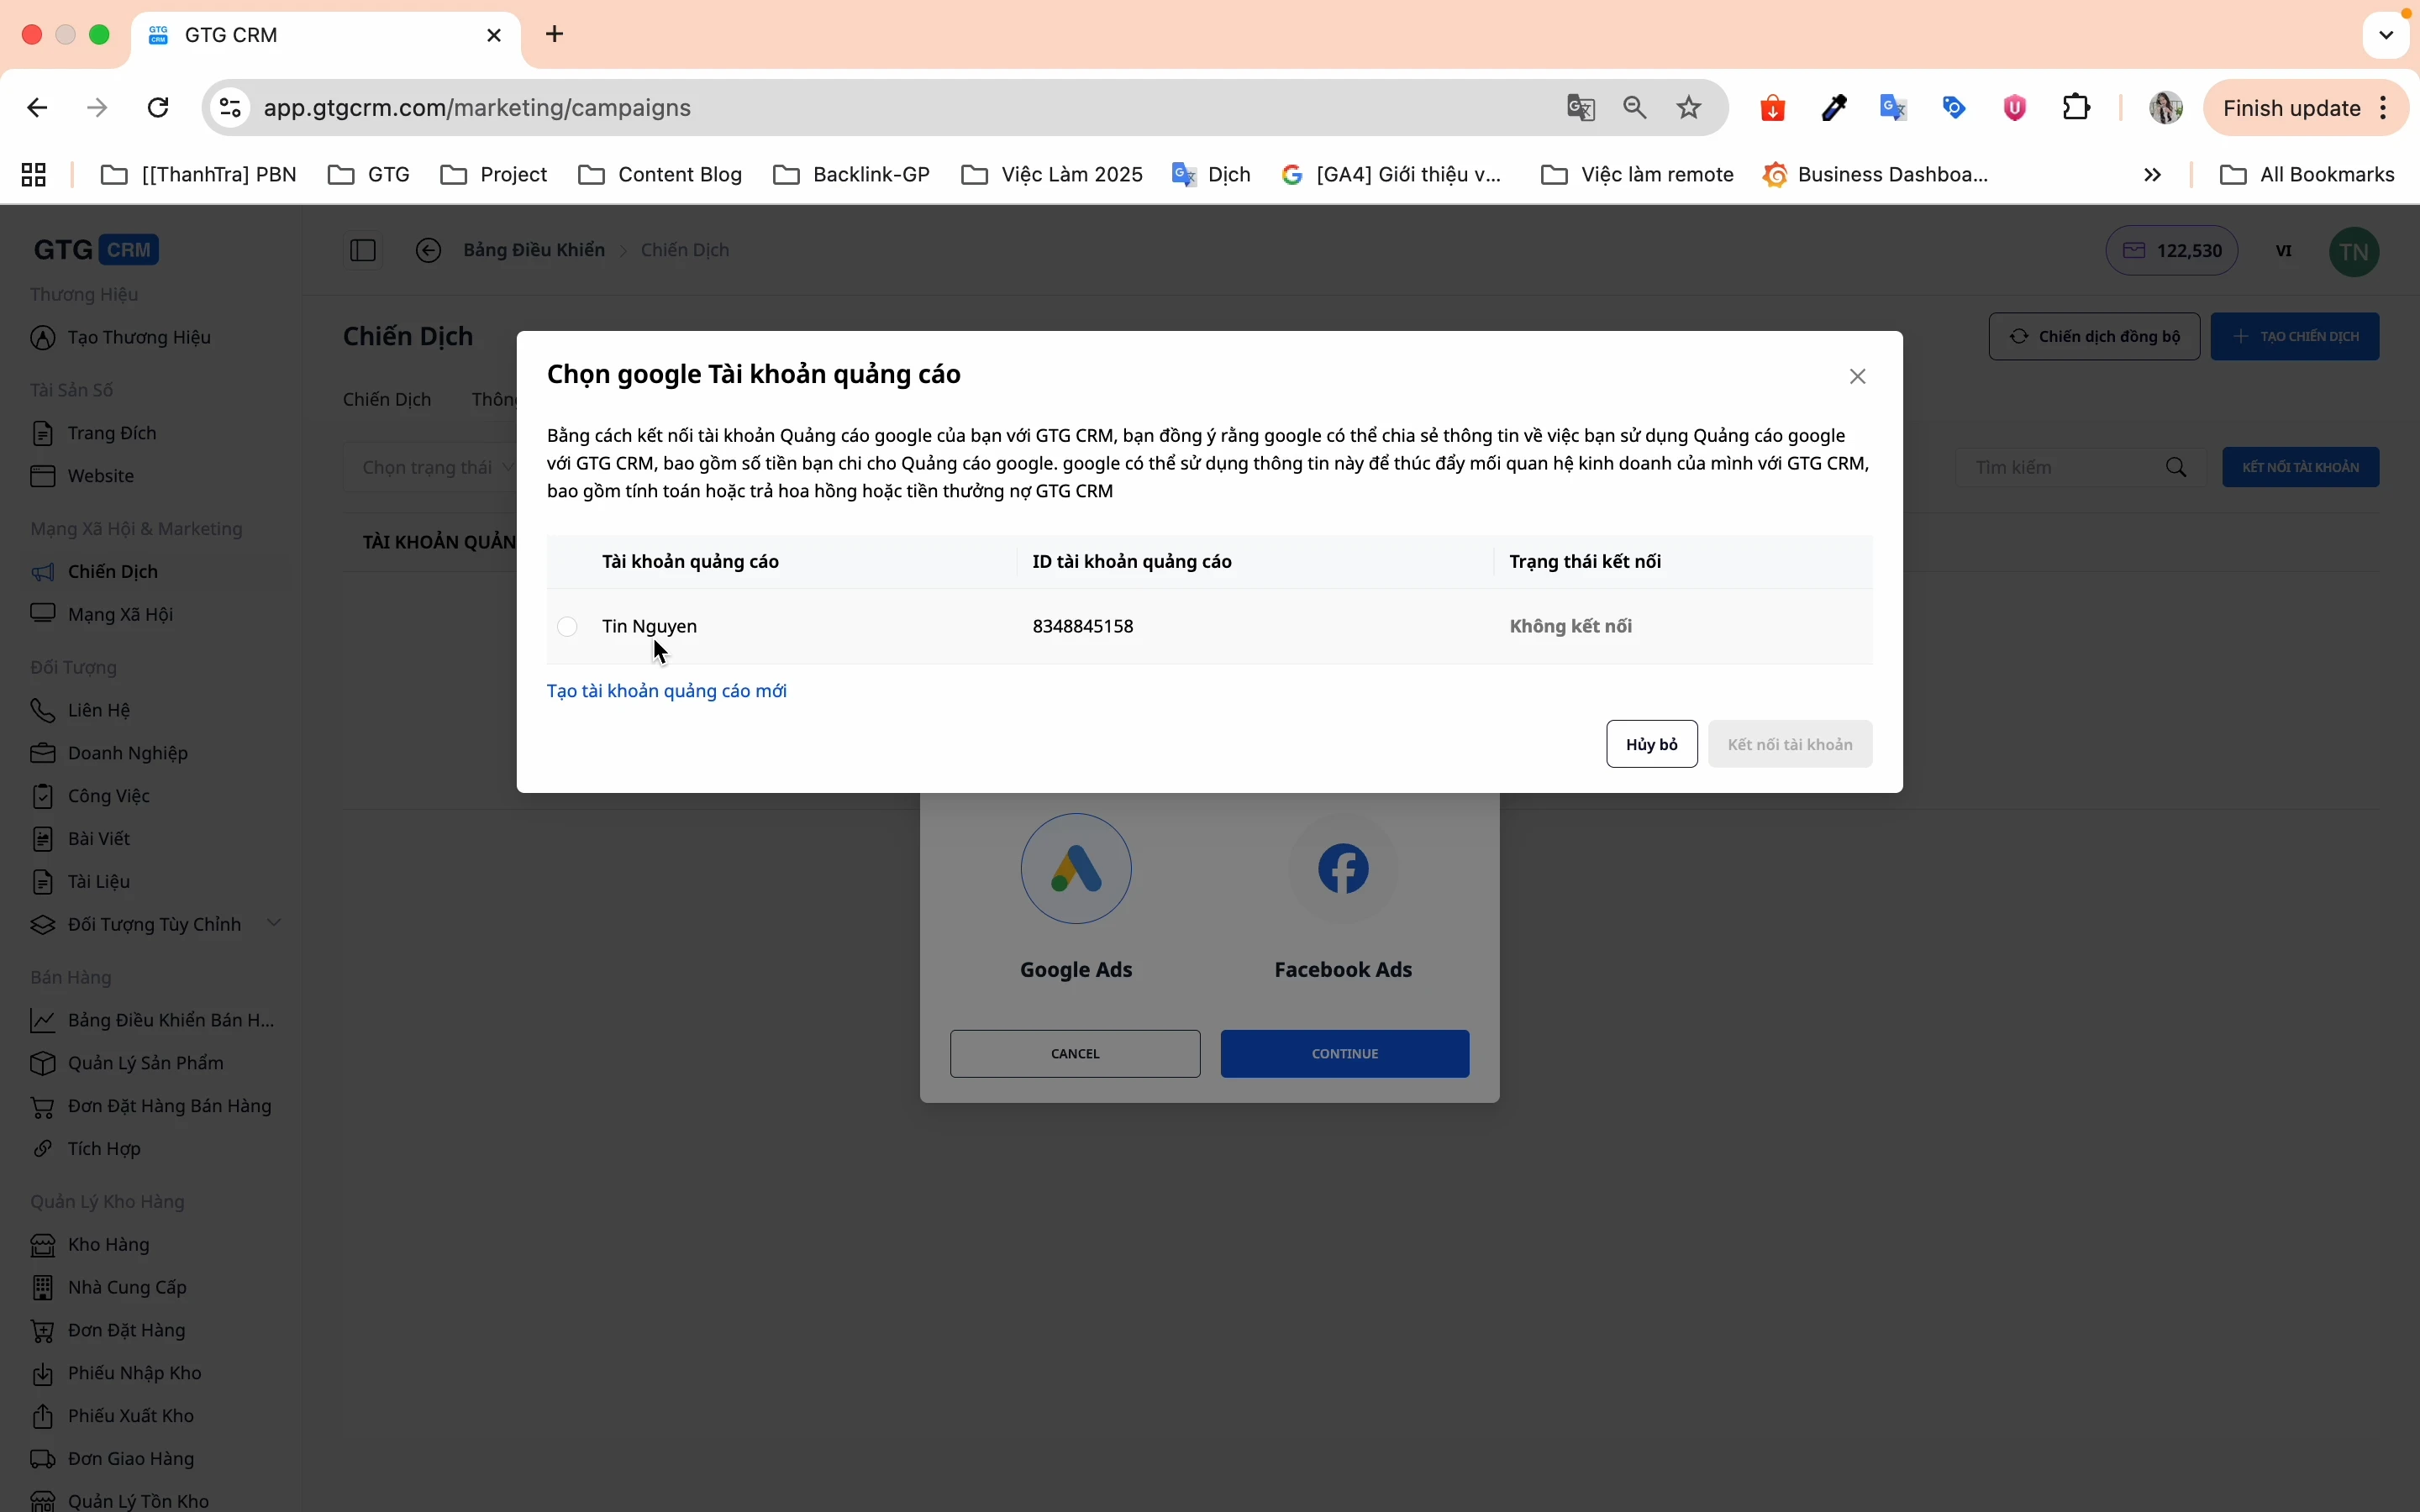
✅ Account connected successfully! You can start creating campaigns now.
Step 2: Sync Existing Campaigns
If you are already running ads on Google Ads, sync them to GTG CRM for easier management:
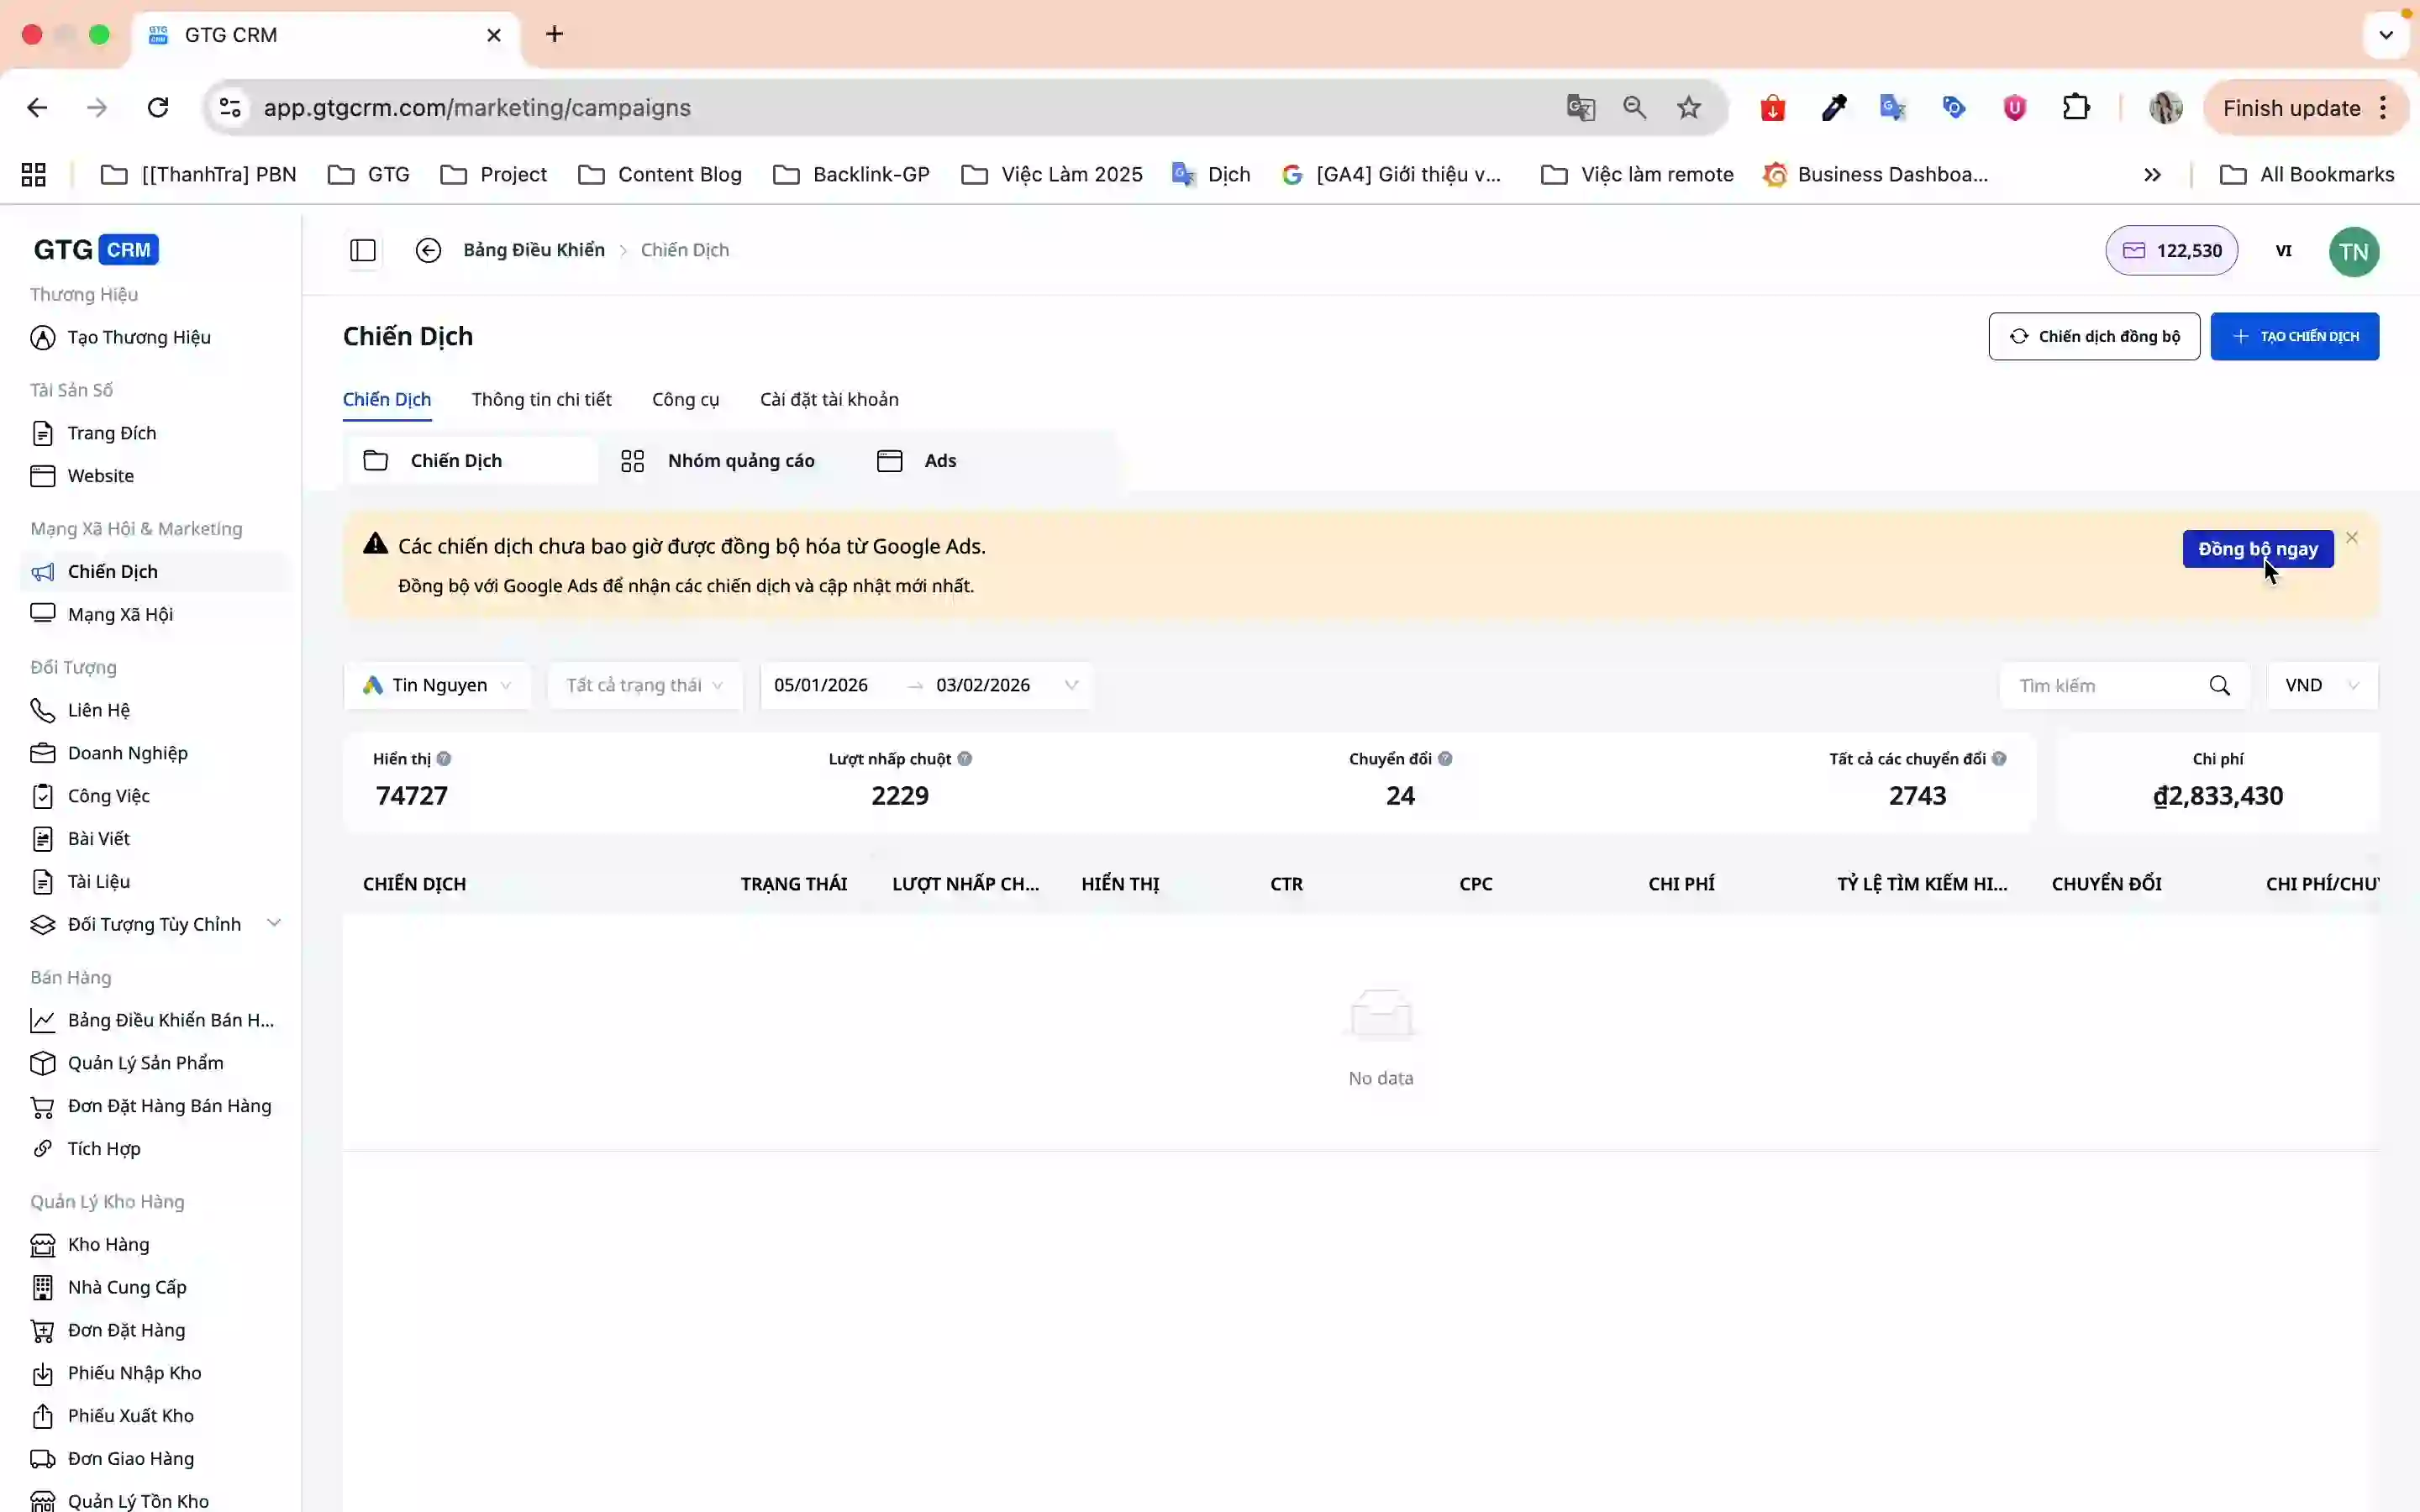
- On the Campaigns screen, click Sync Now
- The system will automatically sync all campaigns from Google Ads to GTG CRM
Step 3: Create a New Campaign
3.1. Campaign Initialization
- Click Create Campaign
- Select Google Ads → Continue
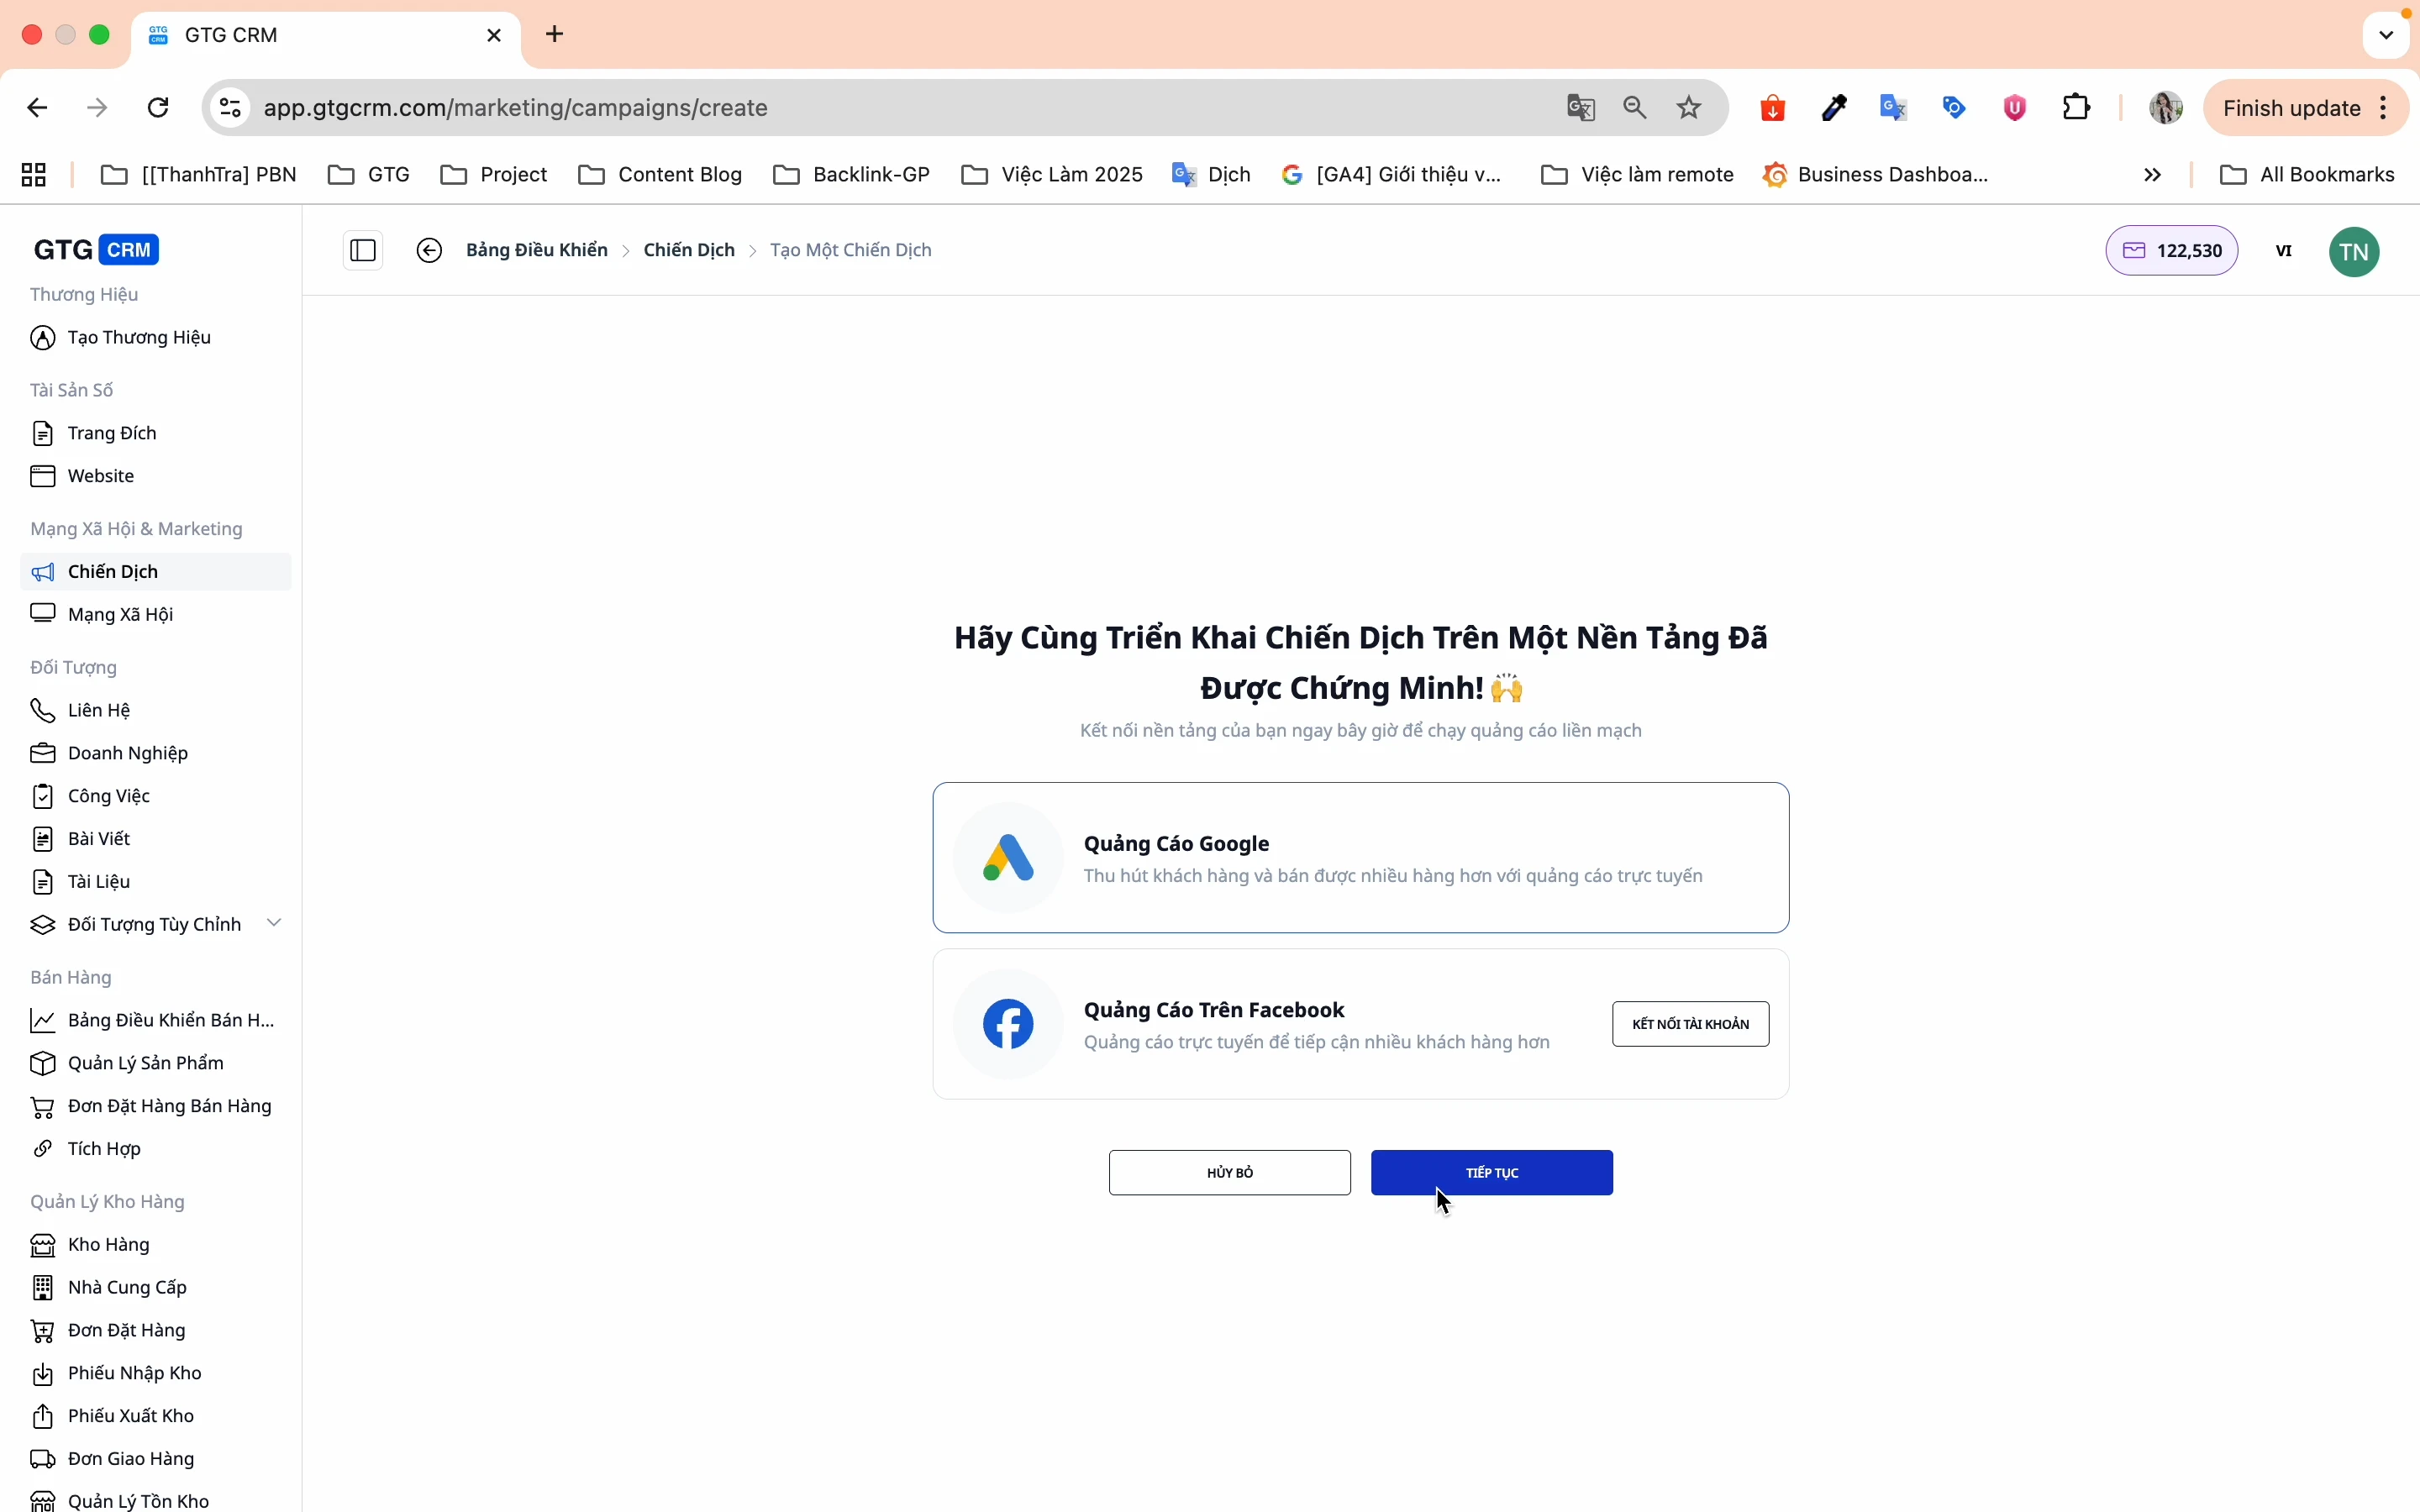
3.2. Campaign Options (Step 1/5)
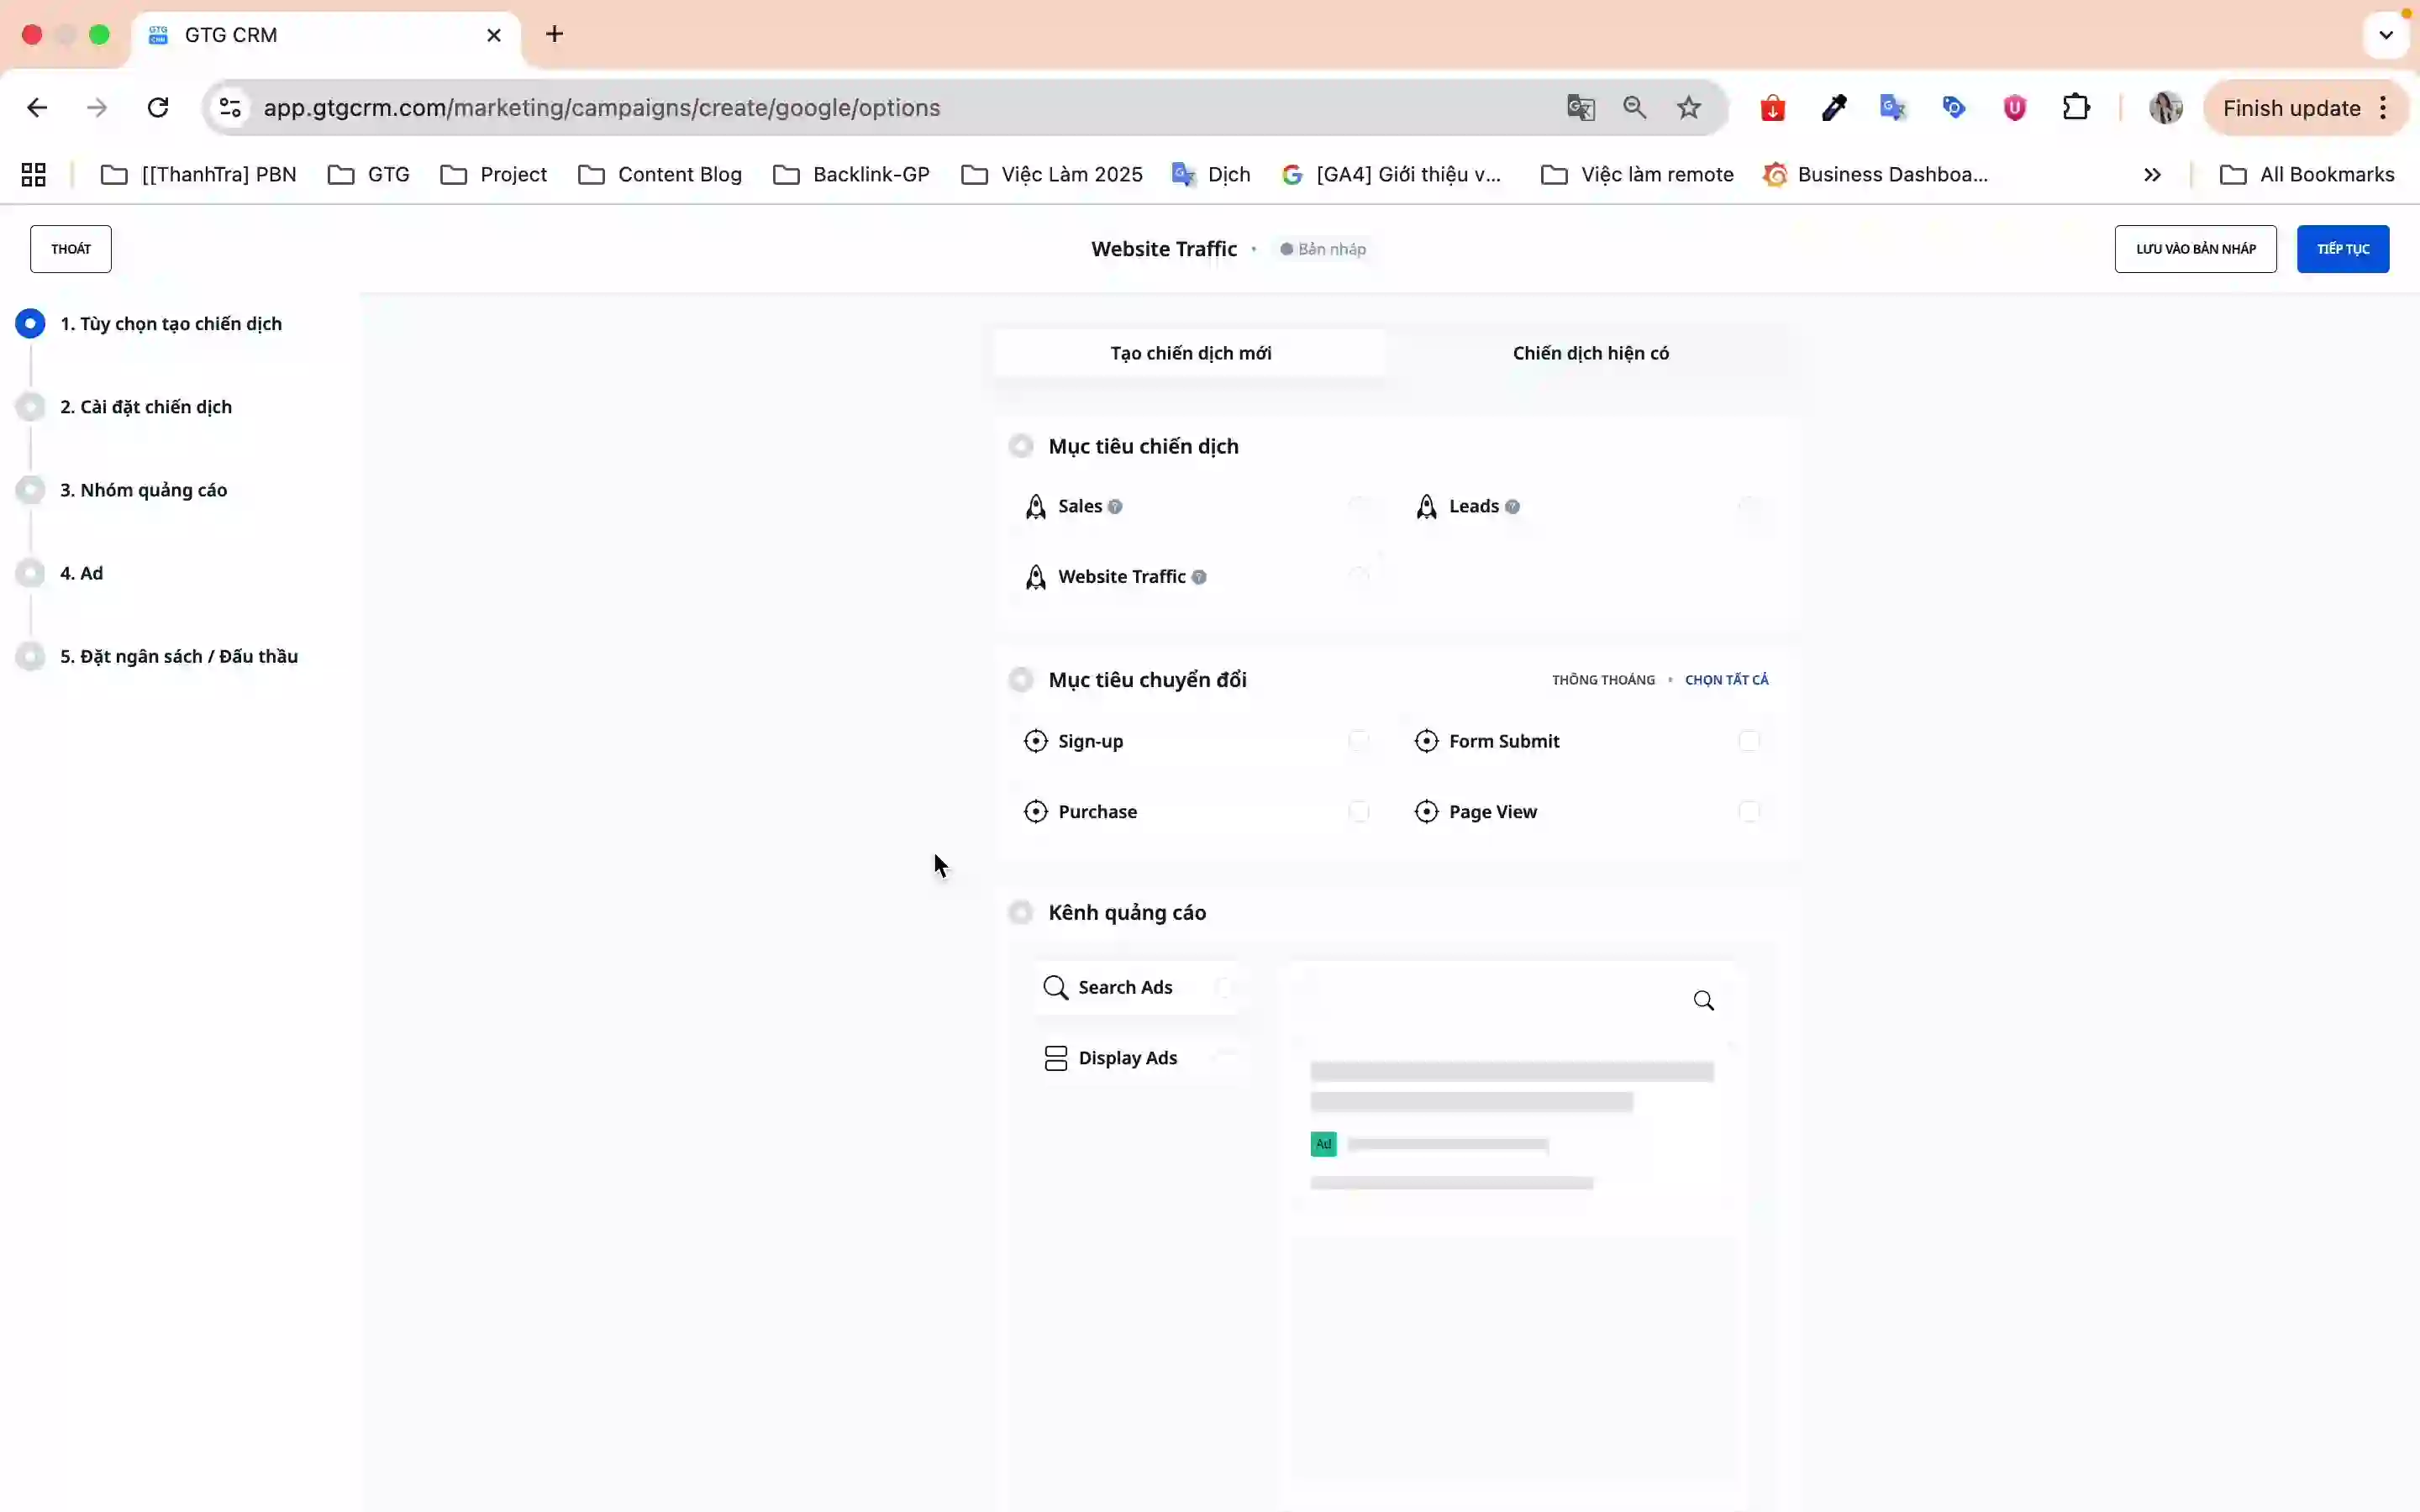
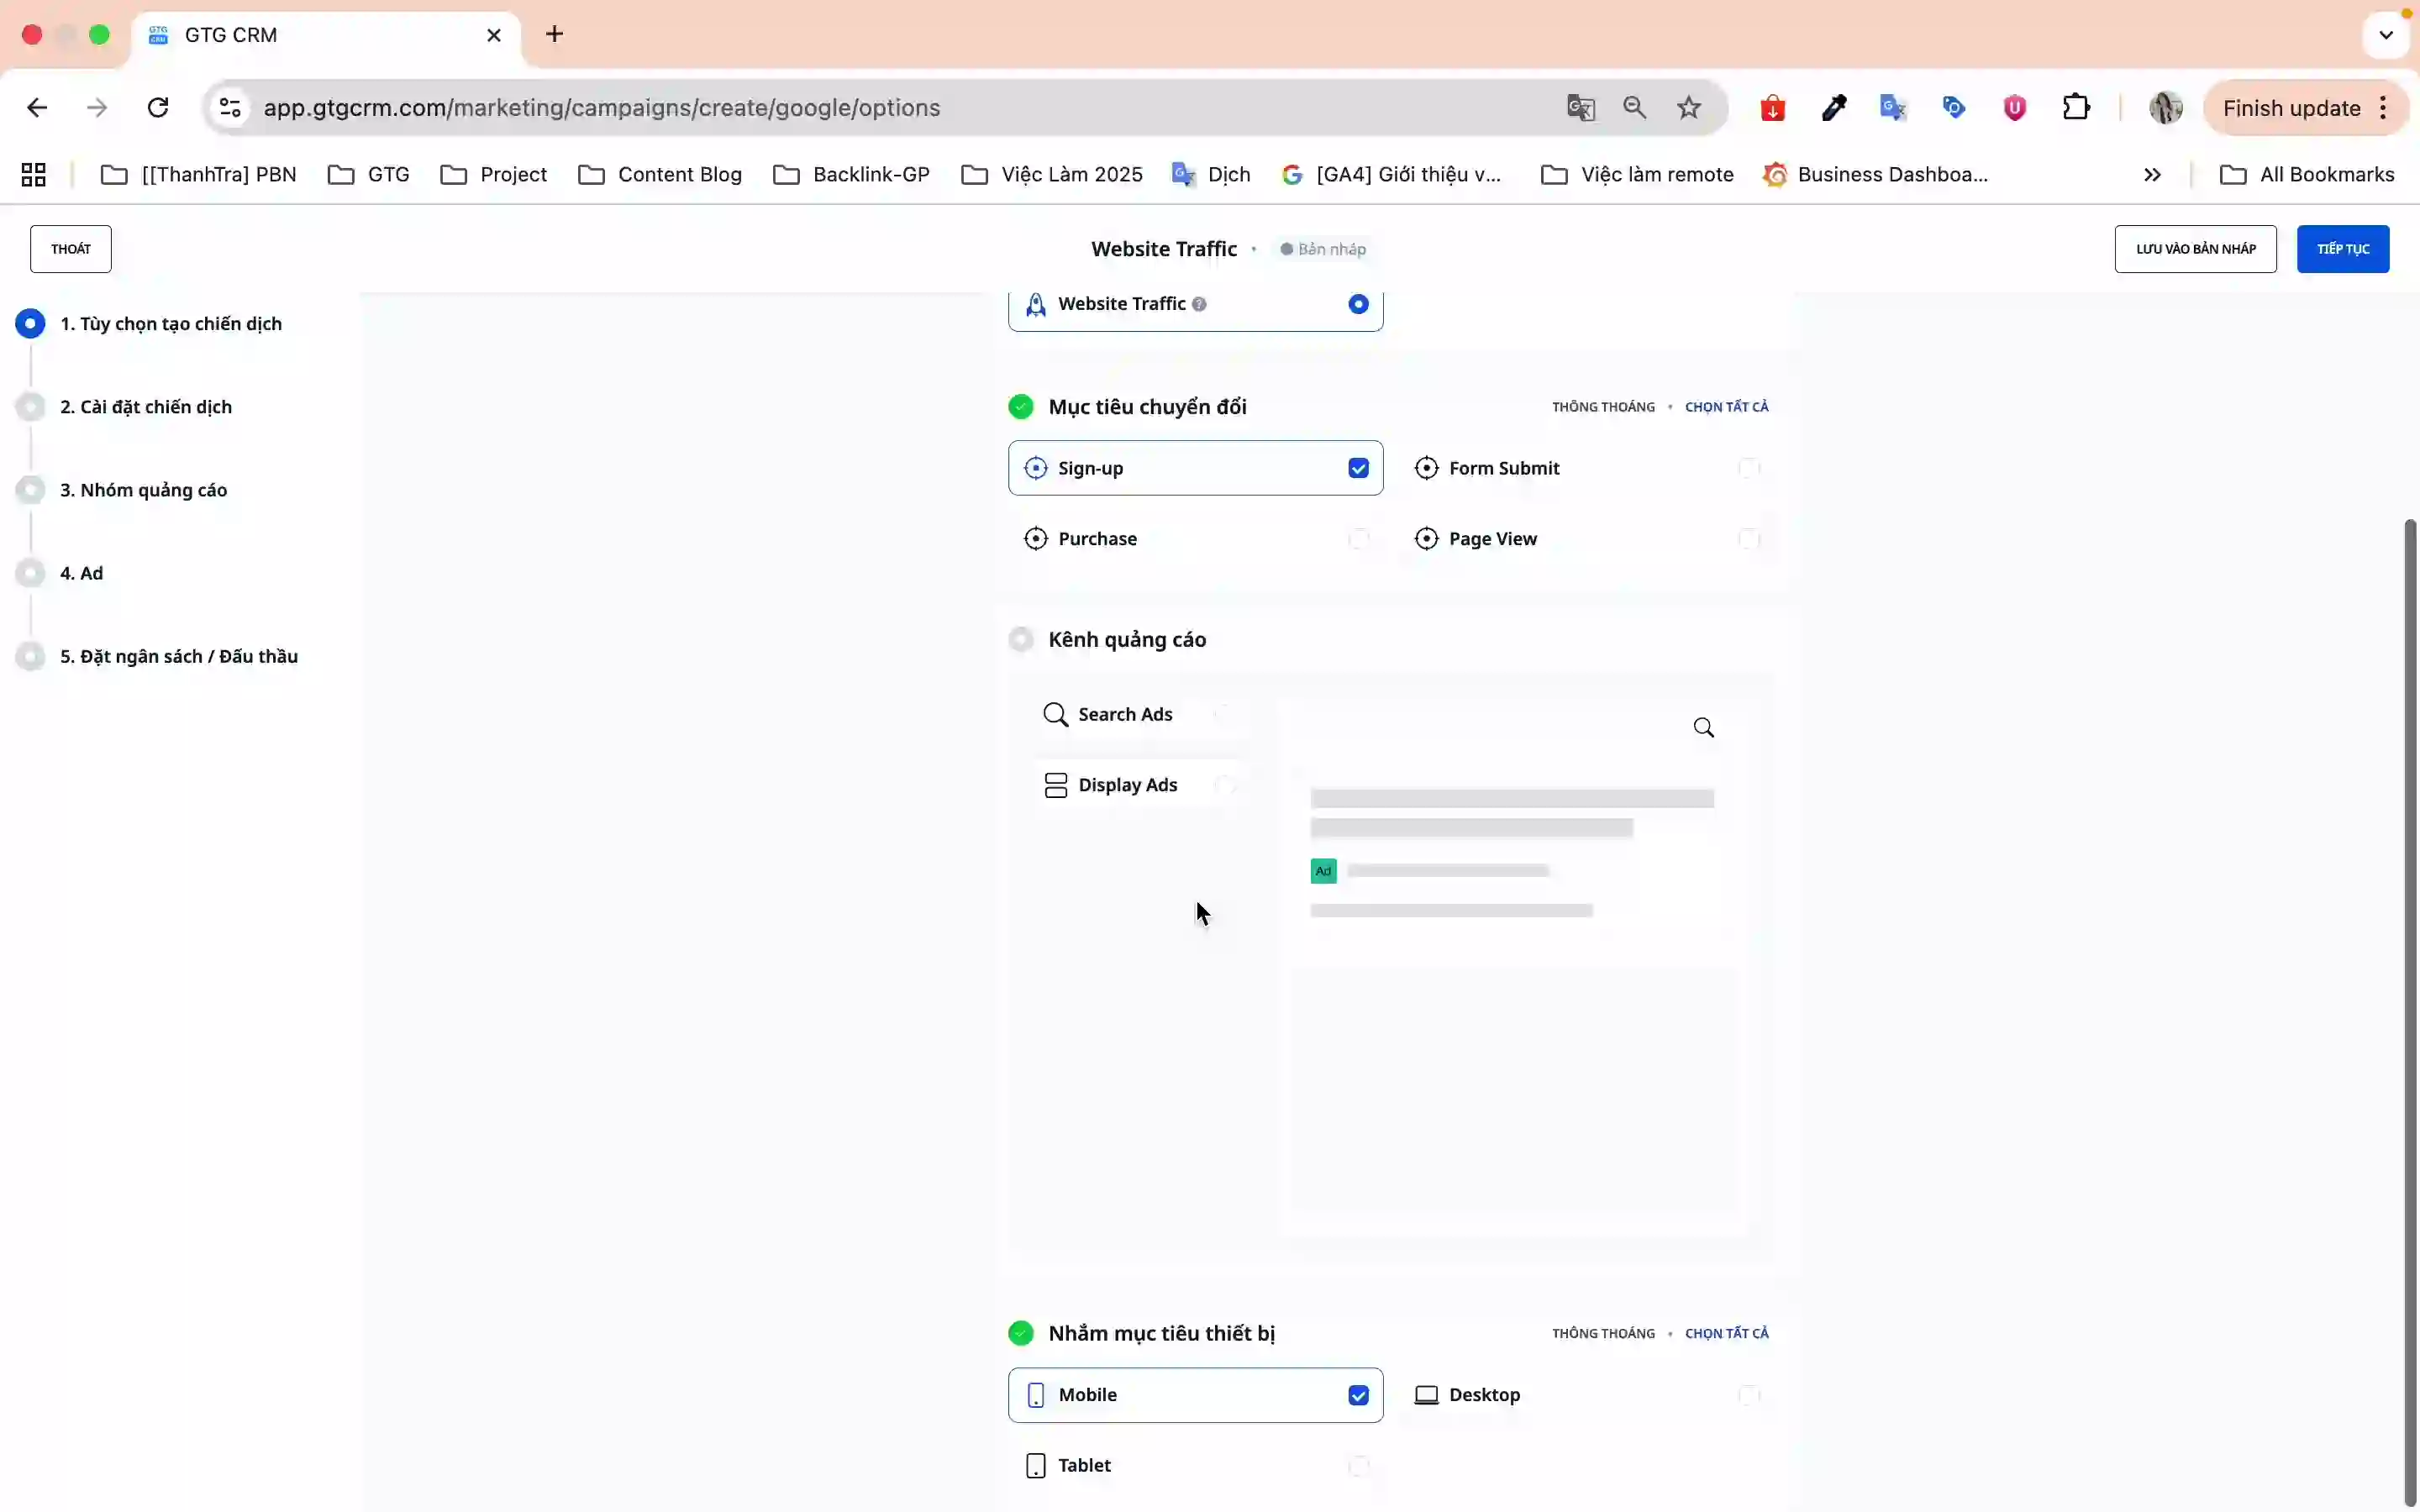
You will see an overview screen with 5 steps to create a campaign:
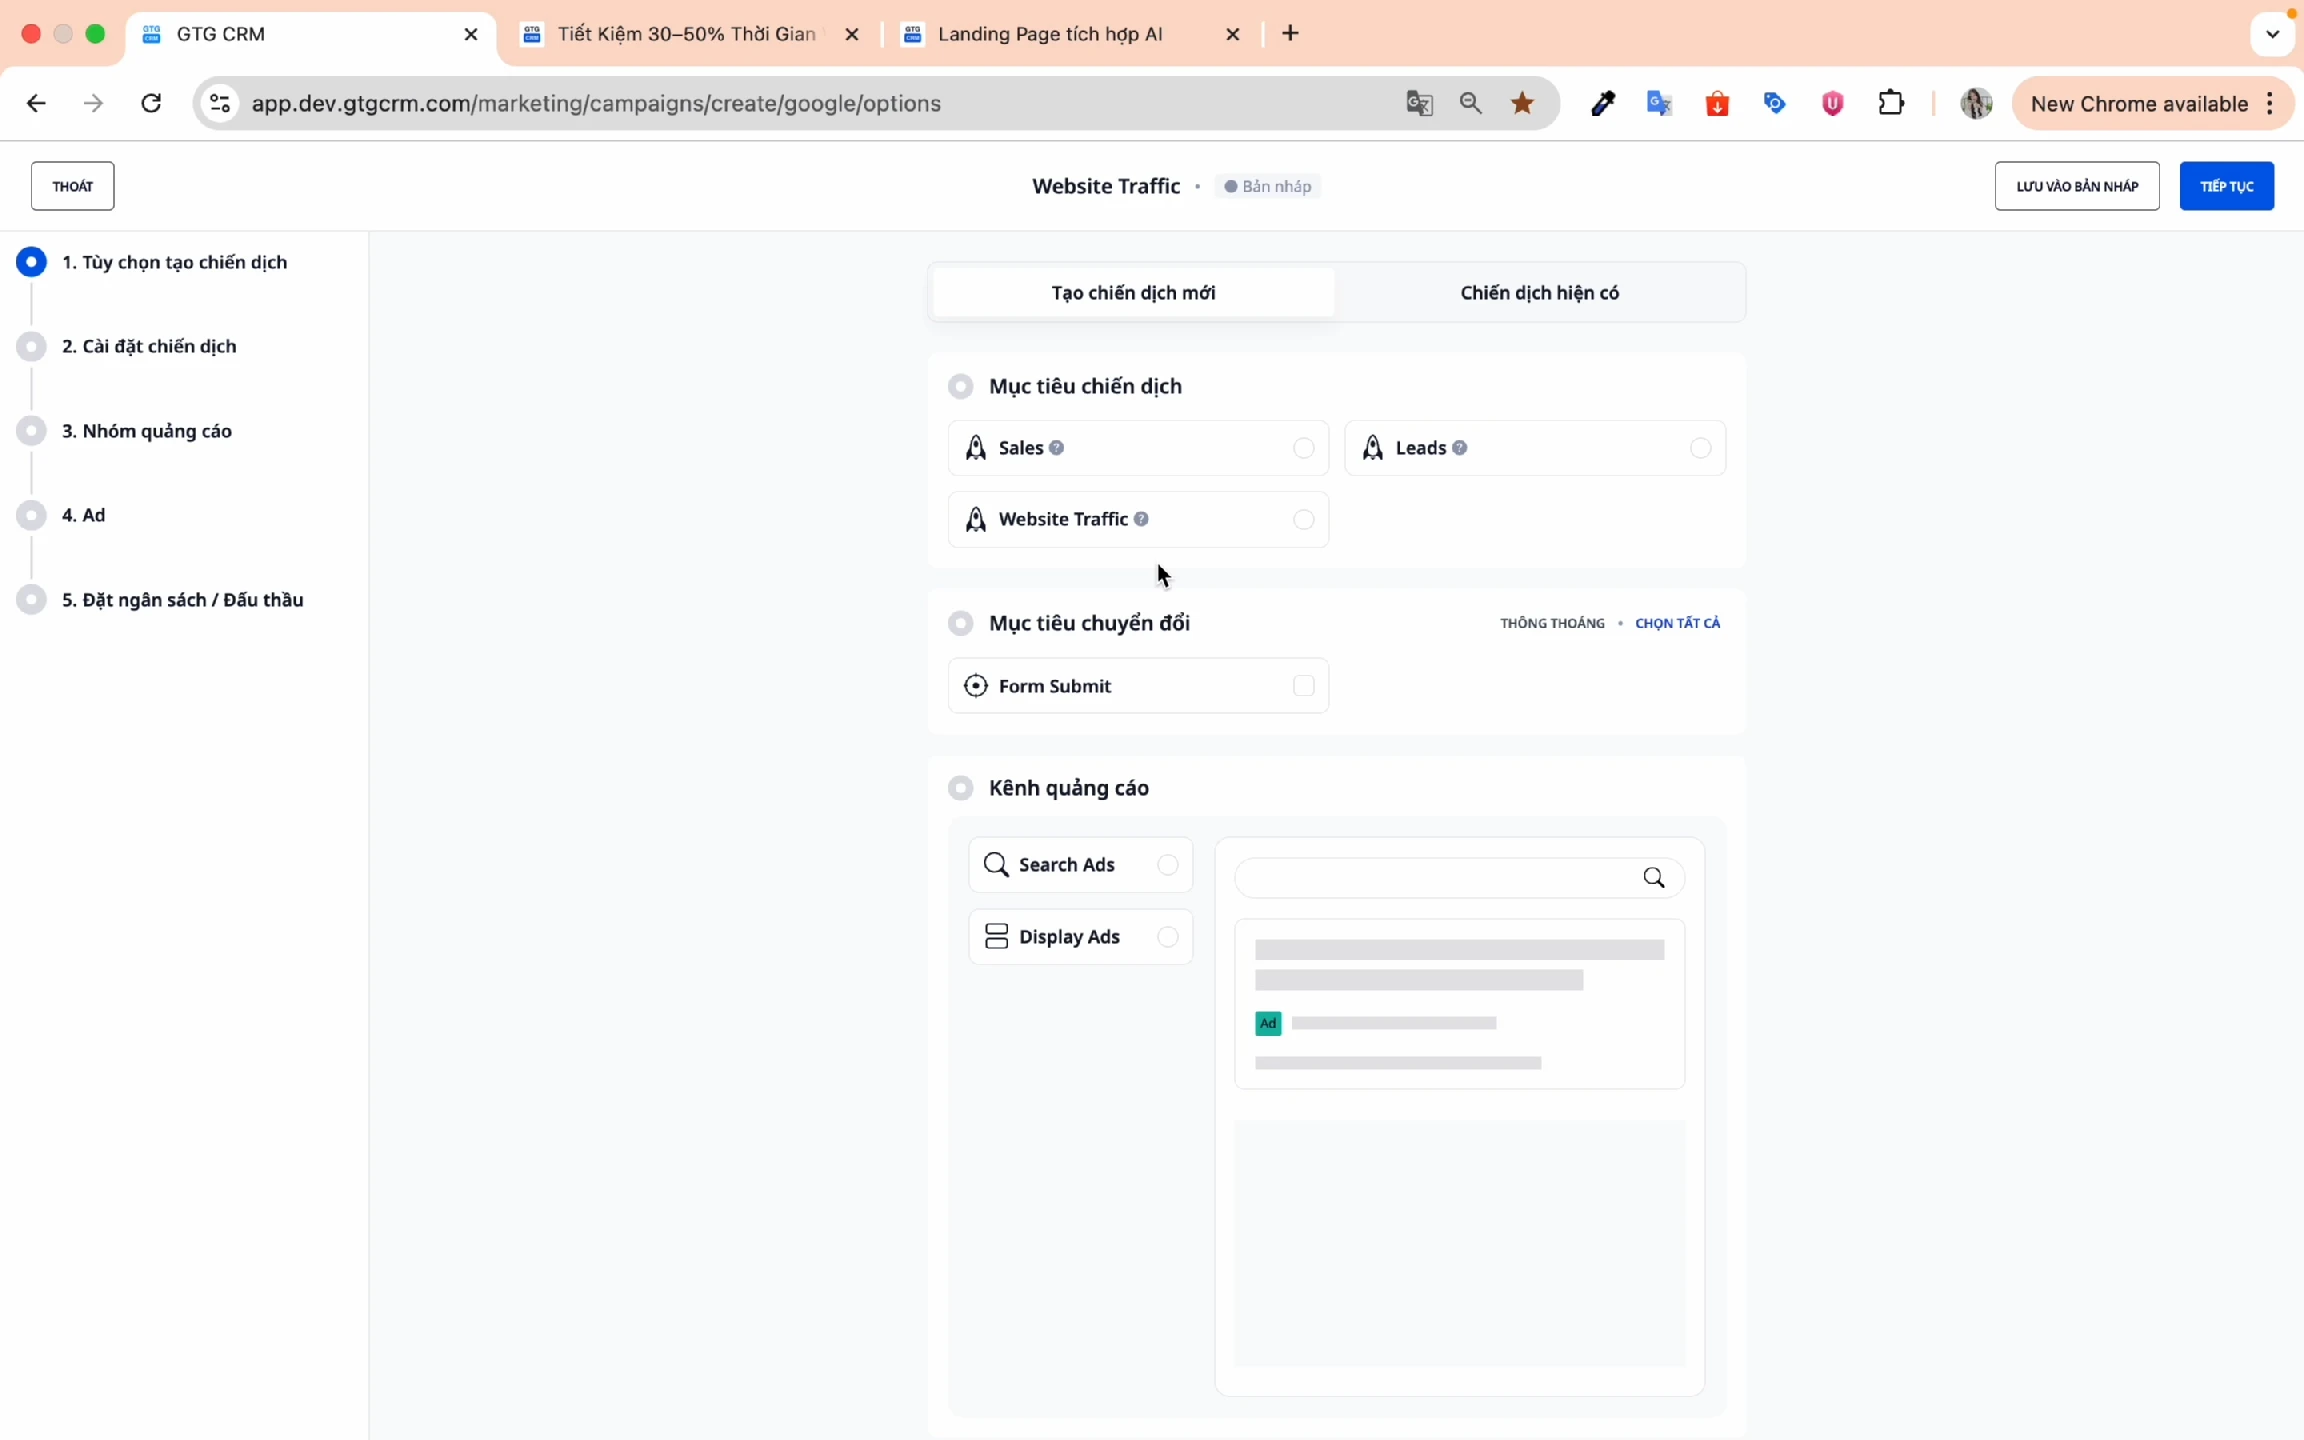
Choose campaign objective:
- Sales - Optimize for direct sales
- Leads - Collect potential customer information
- Web Traffic - Increase website traffic
Conversion goal:
- Select the type of conversion you want to track (e.g., Form Submit, Purchase, Sign Up)
- Example: When a customer fills out a form and clicks Submit → 1 conversion is recorded
Ad channel:
- Search Ad - Displays on Google search results
- Display Ad - Displays on partner website network
Device targeting:
- Mobile, Desktop, Tablet (it's recommended to choose all 3 for maximum coverage)
Click Continue to proceed to the next step.
3.3. Campaign Settings (Step 2/5)
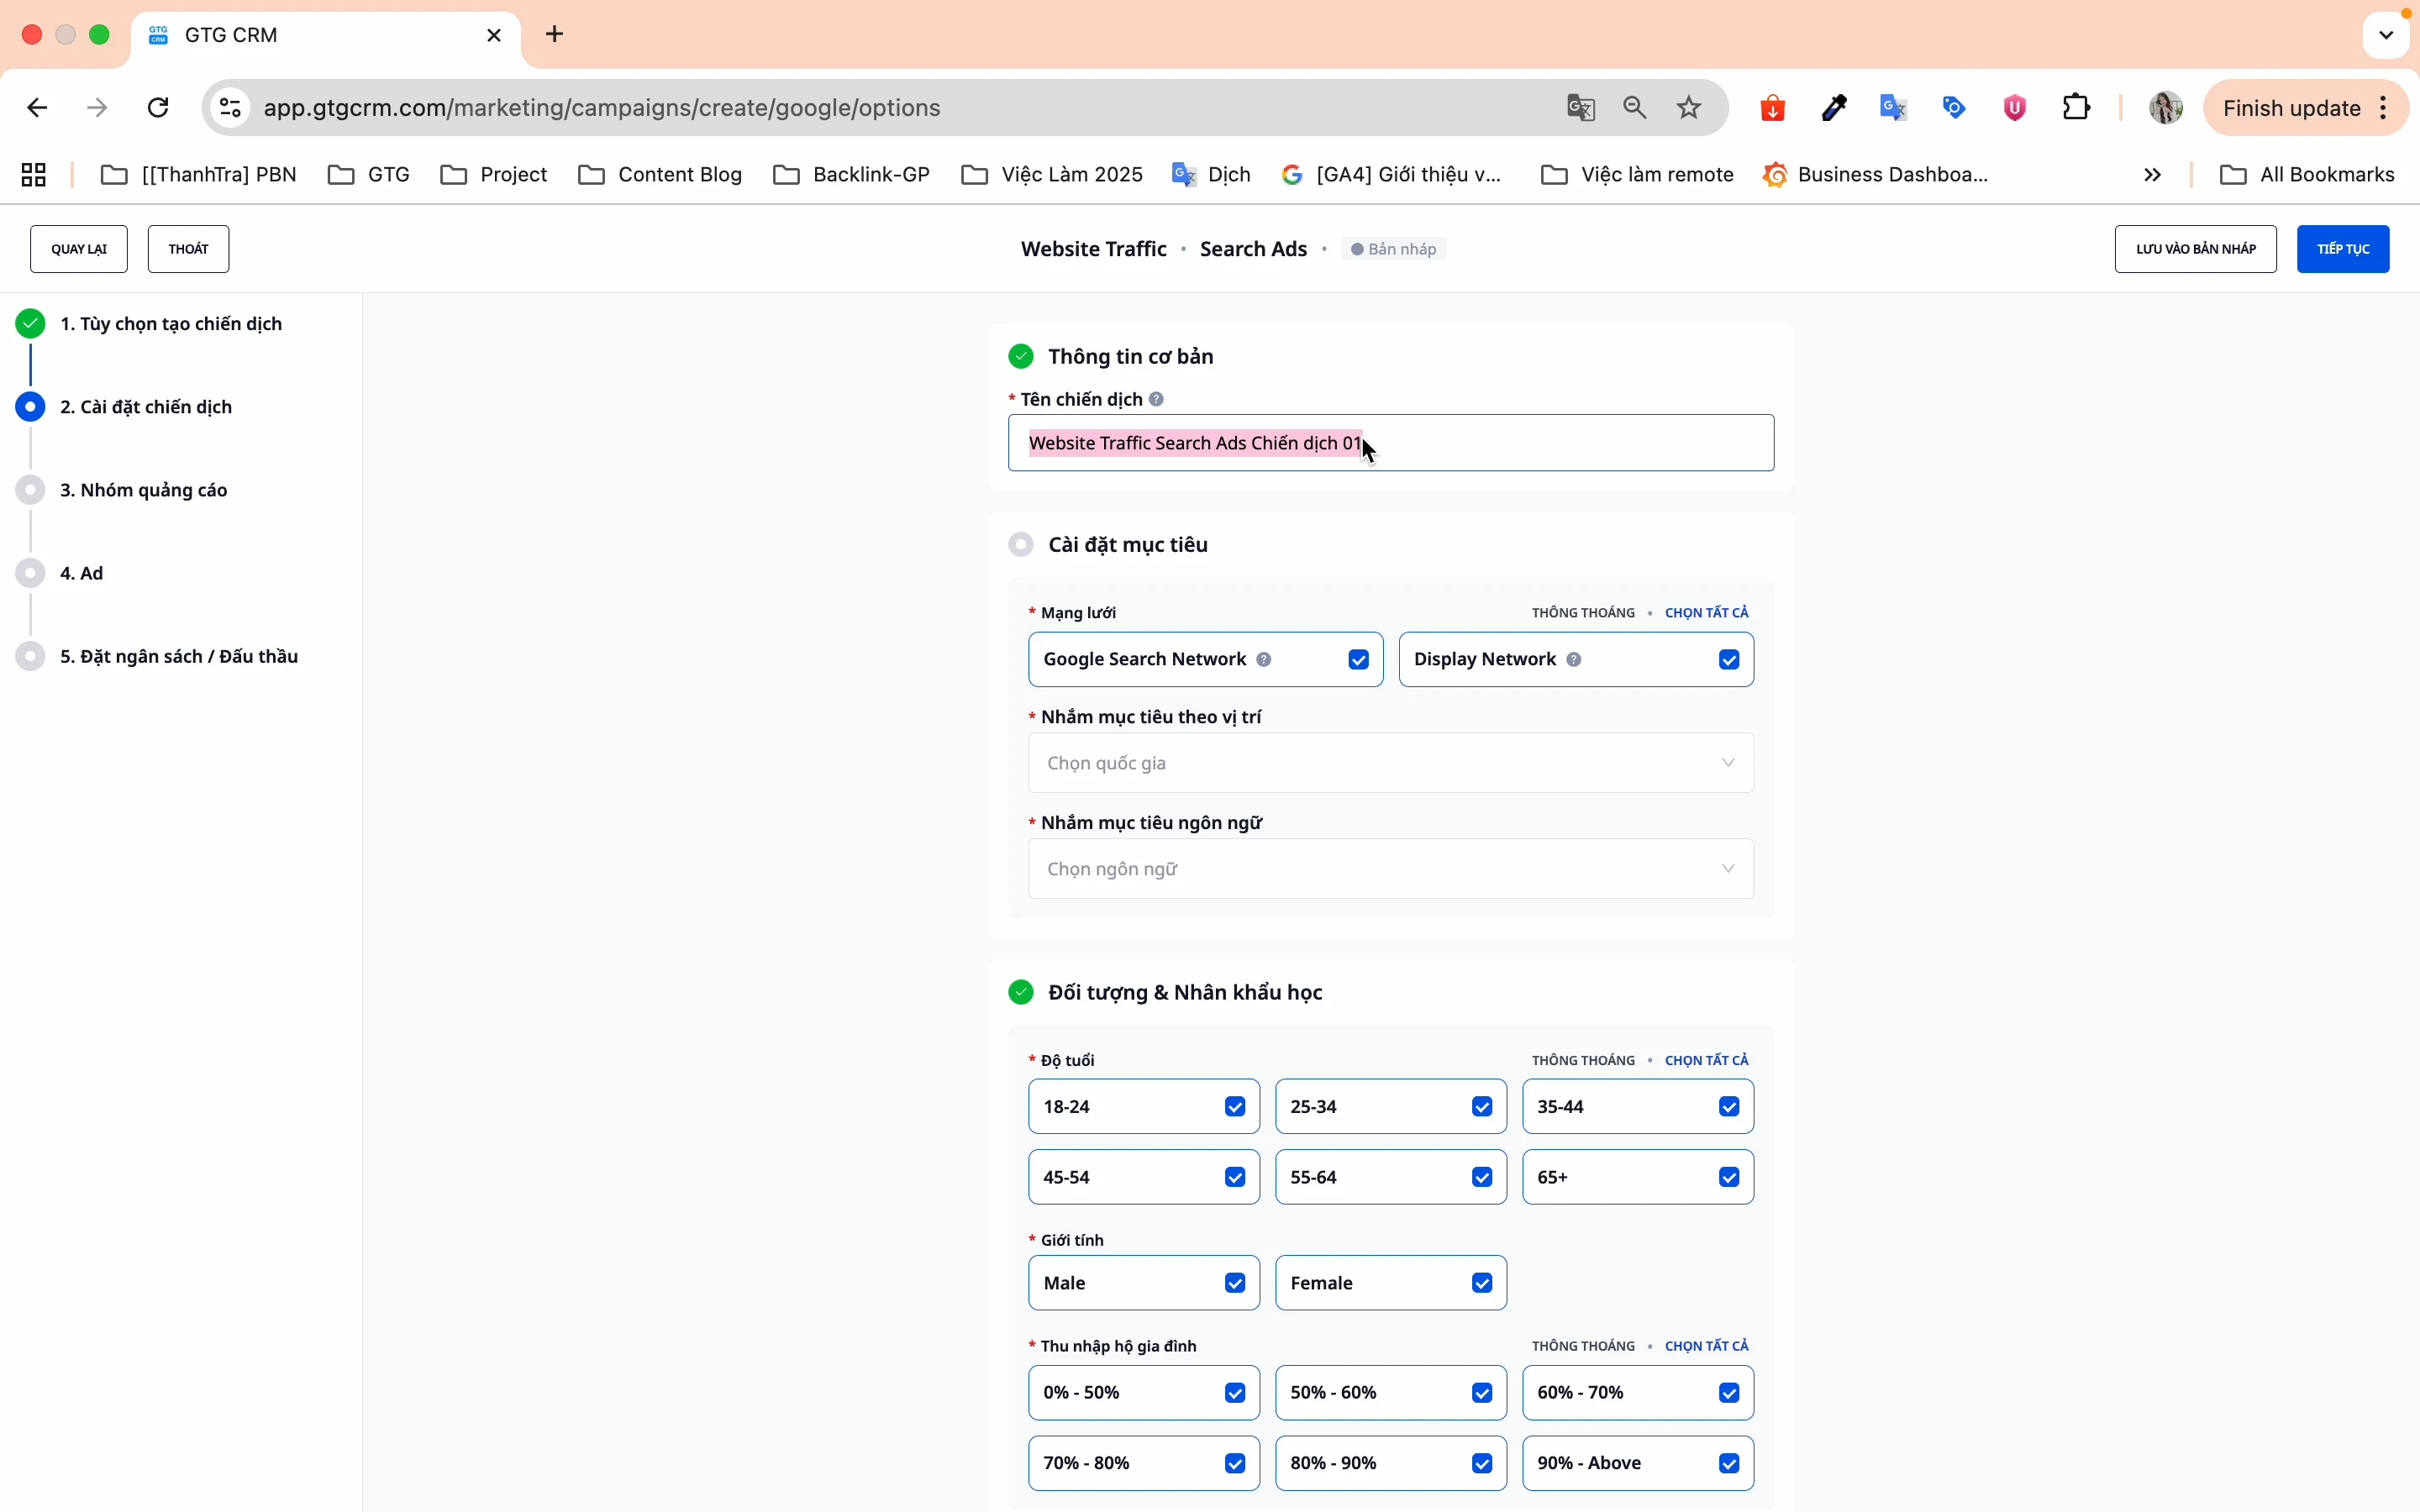
Campaign Name:
- Choose a memorable name, not a duplicate of old campaigns
- Example: "GTG CRM Features 2026"
Objective Settings:
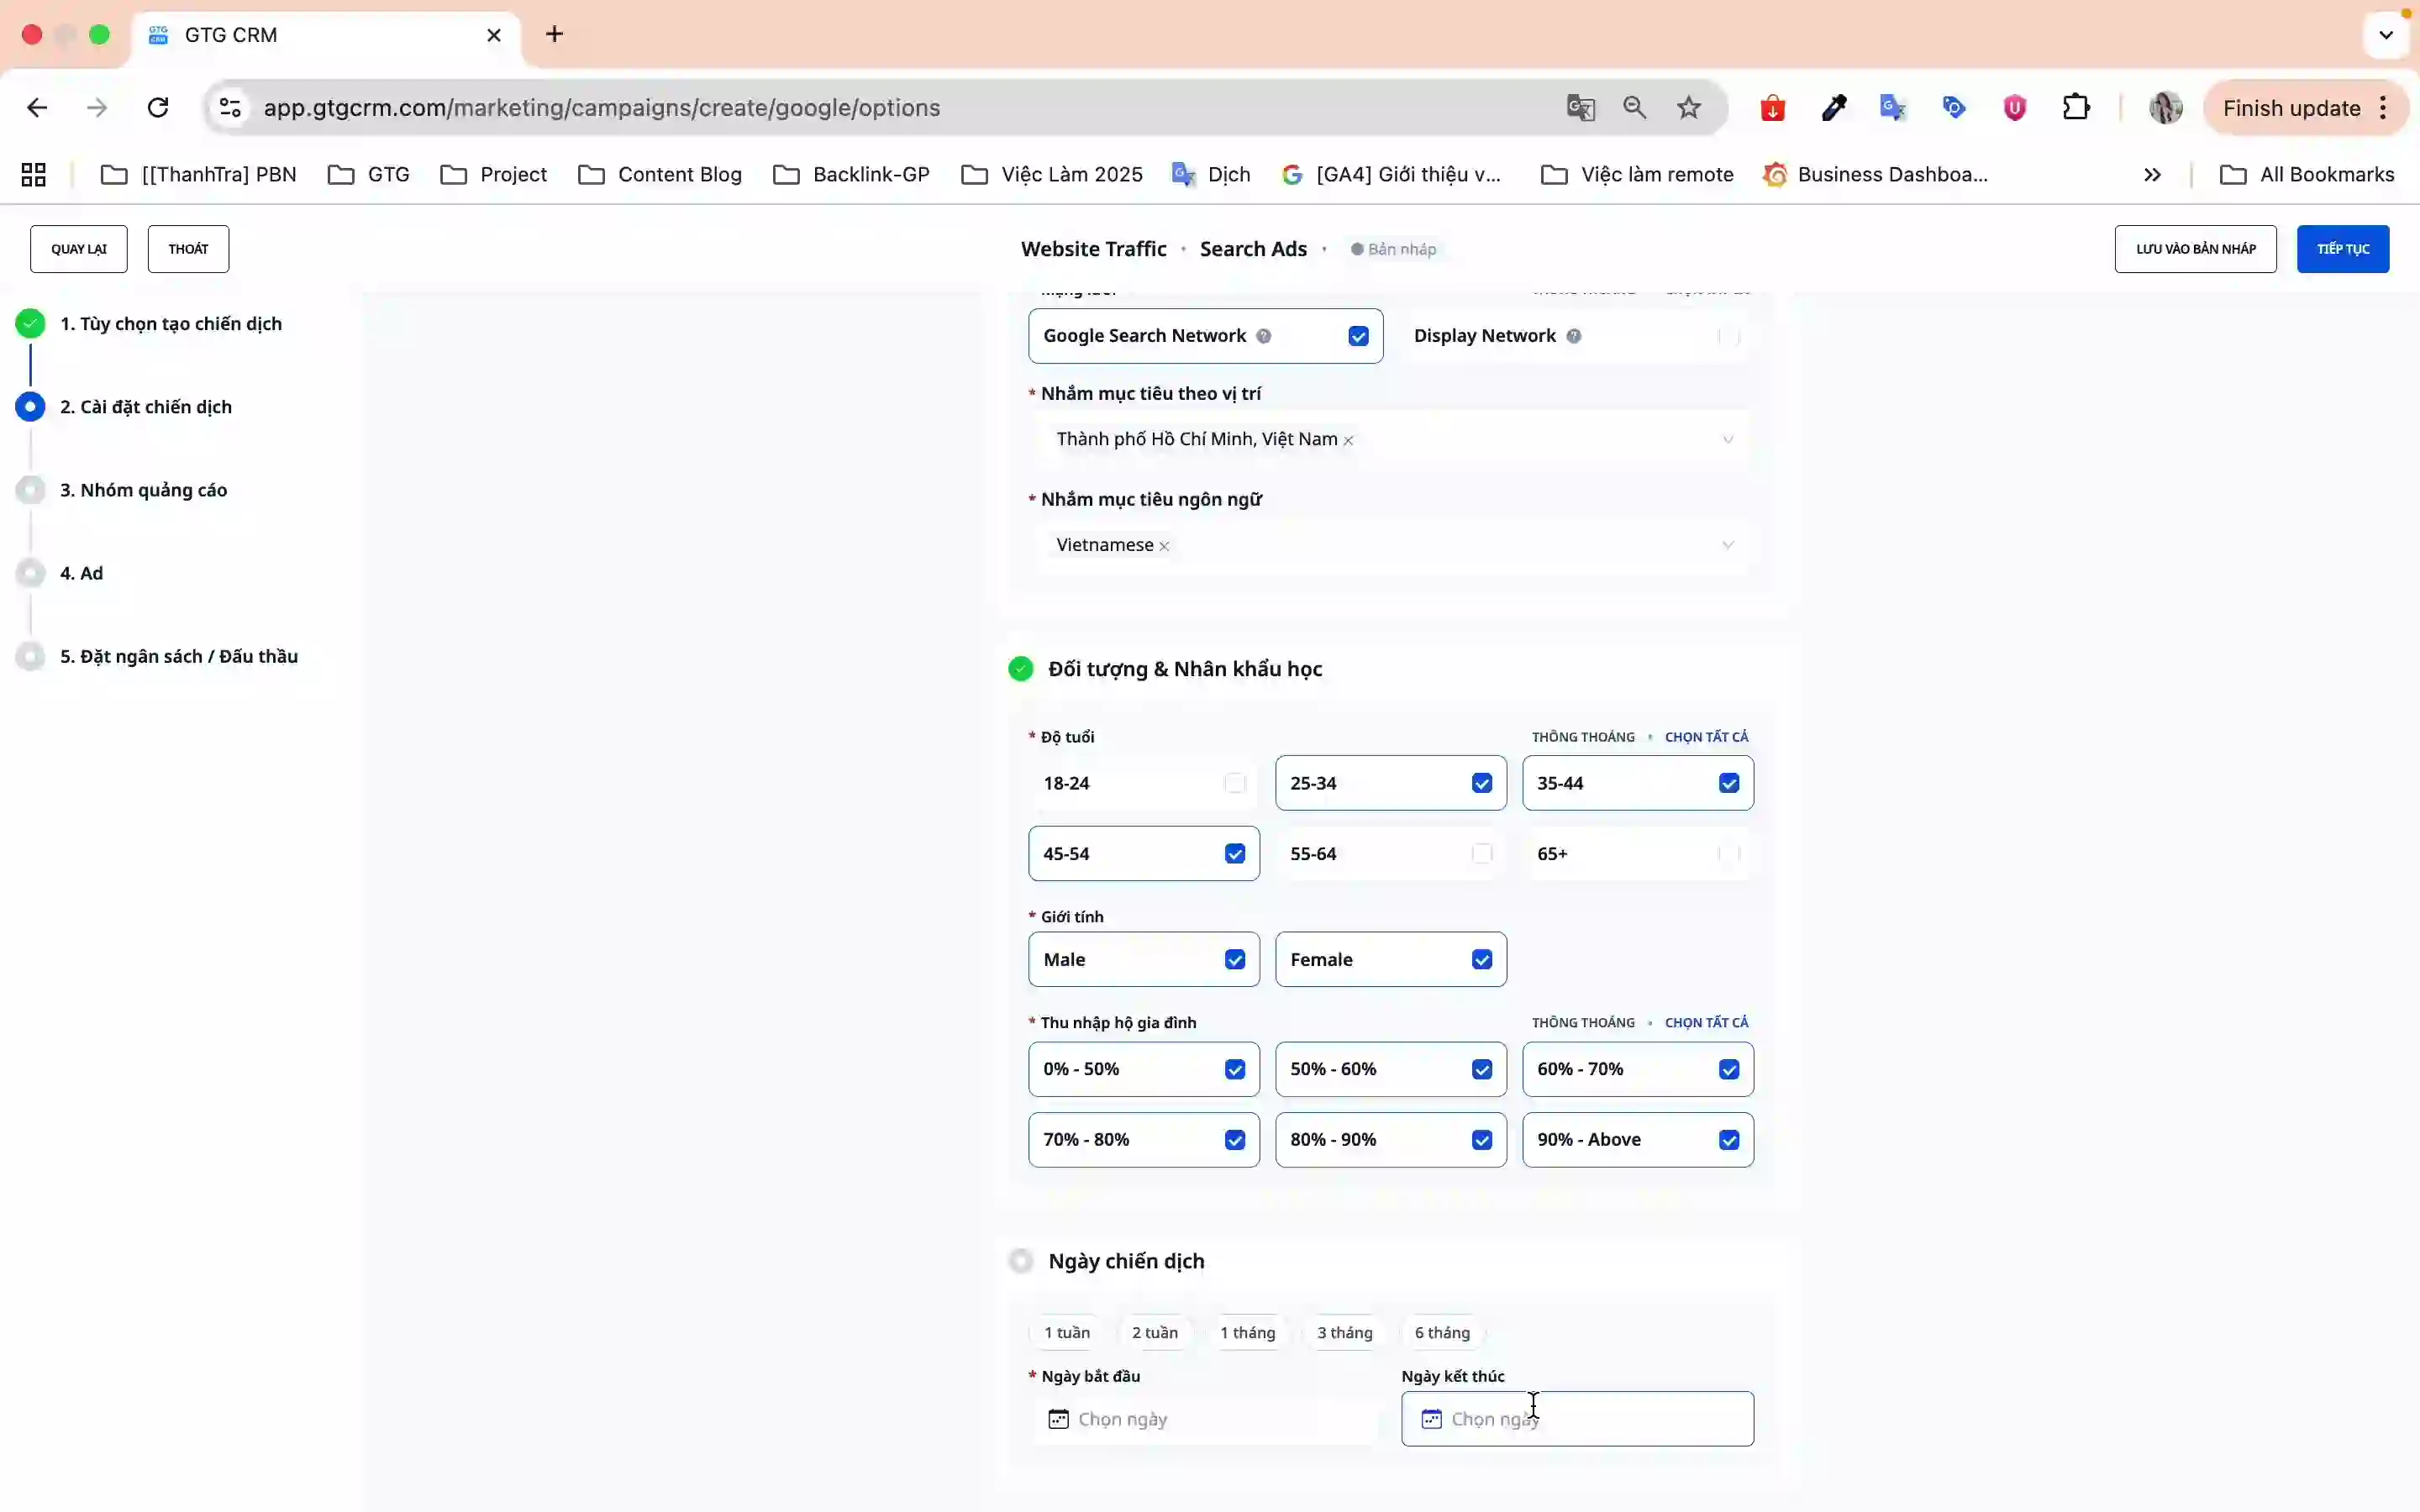
- Networks:
- Google Search Network - Displays when users search
- Google Display Network - Displays on partner websites
- Location Targeting:
- Select the countries or provinces you want to target
- You can select multiple locations at once
- Language Targeting:
- Choose the language your target audience uses
- Example: Vietnamese for the Vietnamese market
Audience and Demographics:
- Age - GTG CRM defaults to selecting all, you can deselect groups that are not suitable
- Gender - Male, Female, or All
- Household Income - Segment by income level
Campaign Schedule:
- Select the start and end dates
- Or use the available preset time frames
Click Continue to proceed to the next step.
3.4. Ad Group (Step 3/5)
In this step, you will set up:
- Ad group name
- Target keywords
- Bidding strategy
- Daily budget
3.5. Ad Content (Step 4/5)
Create compelling ad content:
- Ad headlines (up to 3 headlines)
- Ad descriptions (up to 2 descriptions)
- Display URL and Final URL
3.6. Review and Publish (Step 5/5)
- Review all campaign information
- Click Publish for the campaign to go live
- The campaign will be submitted to Google Ads and start running
Benefits of Using This Feature
- Time-saving - No need to switch between platforms, everything is centralized in GTG CRM
- Easy Management - Track both Facebook Ads and Google Ads in a single place
- User-friendly Interface - Step-by-step wizard in Vietnamese, suitable for beginners
- Automatic Sync - Campaigns are updated in real-time with Google Ads
- Flexible and Powerful - Full targeting features like the native Google Ads
Important Notes
- Account Connection - Ensure you have a Google Ads account before using this feature
- Budget - Carefully check your budget and payment methods on your Google Ads account
- Keywords - Choose keywords relevant to your products/services to optimize ad performance
- Conversions - Set conversion goals before creating campaigns for accurate tracking
- Periodic Sync - It's recommended to sync campaigns regularly to update the latest data
With the integrated Google Ads feature, GTG CRM helps you run ads more effectively, save time, and manage more easily. Start today to reach millions of potential customers on Google!
Ready to try this feature for your business for free?
Try for Free