What You Can Do After This Guide
Connect communication channels → write custom instructions for the bot → select the scope for bot articles (Off / All / Only those I select) → set the handover threshold → save and test chat → see the bot respond naturally with quick-tap suggestions.
Preparation
1. Logged into GTG CRM with customer care configuration permissions — To set up the AI Chatbot
2. Have products/articles in the system — For the bot to have accurate data to respond with
3. Account for the channel to connect (Facebook Fanpage, Zalo OA, WhatsApp…) — For the bot to respond on those channels
Step 1 — Connect Communication Channels
- From the main menu, select Communication Channels.
- Click Connect on the desired channel (Facebook Messenger, Zalo OA, WhatsApp, Live Chat), select the page/account, and grant permissions.
✅ Expected Result: The channel displays a "Connected" status in the list.
Step 2 — Open AI Chatbot Settings & Understand Data Sources
- Go to Settings → AI Chatbot.
- Review the "How the bot works" section: the bot responds based on your Brand Identity, Products, and Articles.
✅ Expected Result: The AI Chatbot settings page opens, and you can see the data sources.
Step 3 — Write Custom Instructions
- Open the Custom Instructions section.
- Describe the role, response style, and how to handle situations. For example: "You are a friendly fashion sales assistant. Greet politely, ask what the customer is looking for, suggest suitable products; if the customer wants to buy, ask for the size and confirm the order."
✅ Expected Result: The instructions are saved; the bot will respond according to the role and style you set.
Step 4 — NEW: Select Article Scope for Bot
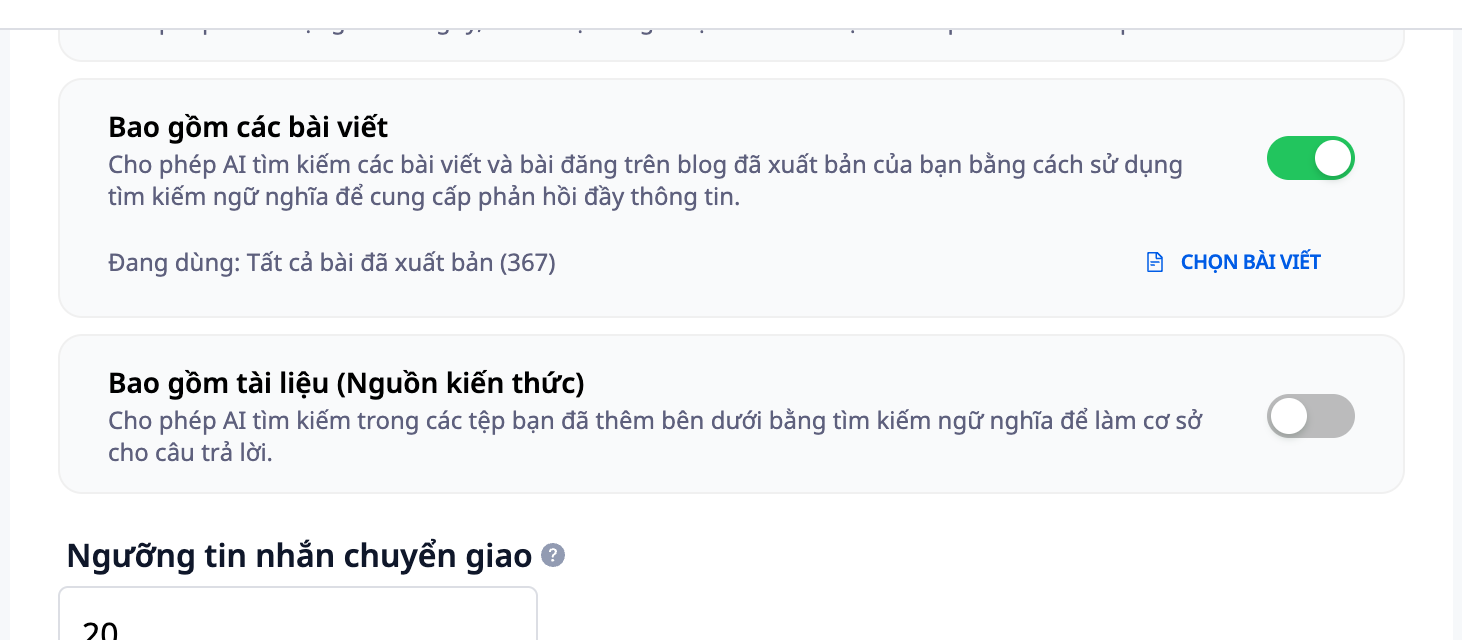
- In Context Options, find the Articles section. Instead of the old toggle switch, there is now a scope selection button.
- Choose one of three levels:
- Off — the bot will not use any articles.
- All Articles — the bot can use all articles that are ready in the system.
- Only those I select — you will manually choose a list of articles.
✅ Expected Result: The button displays the scope you just selected.
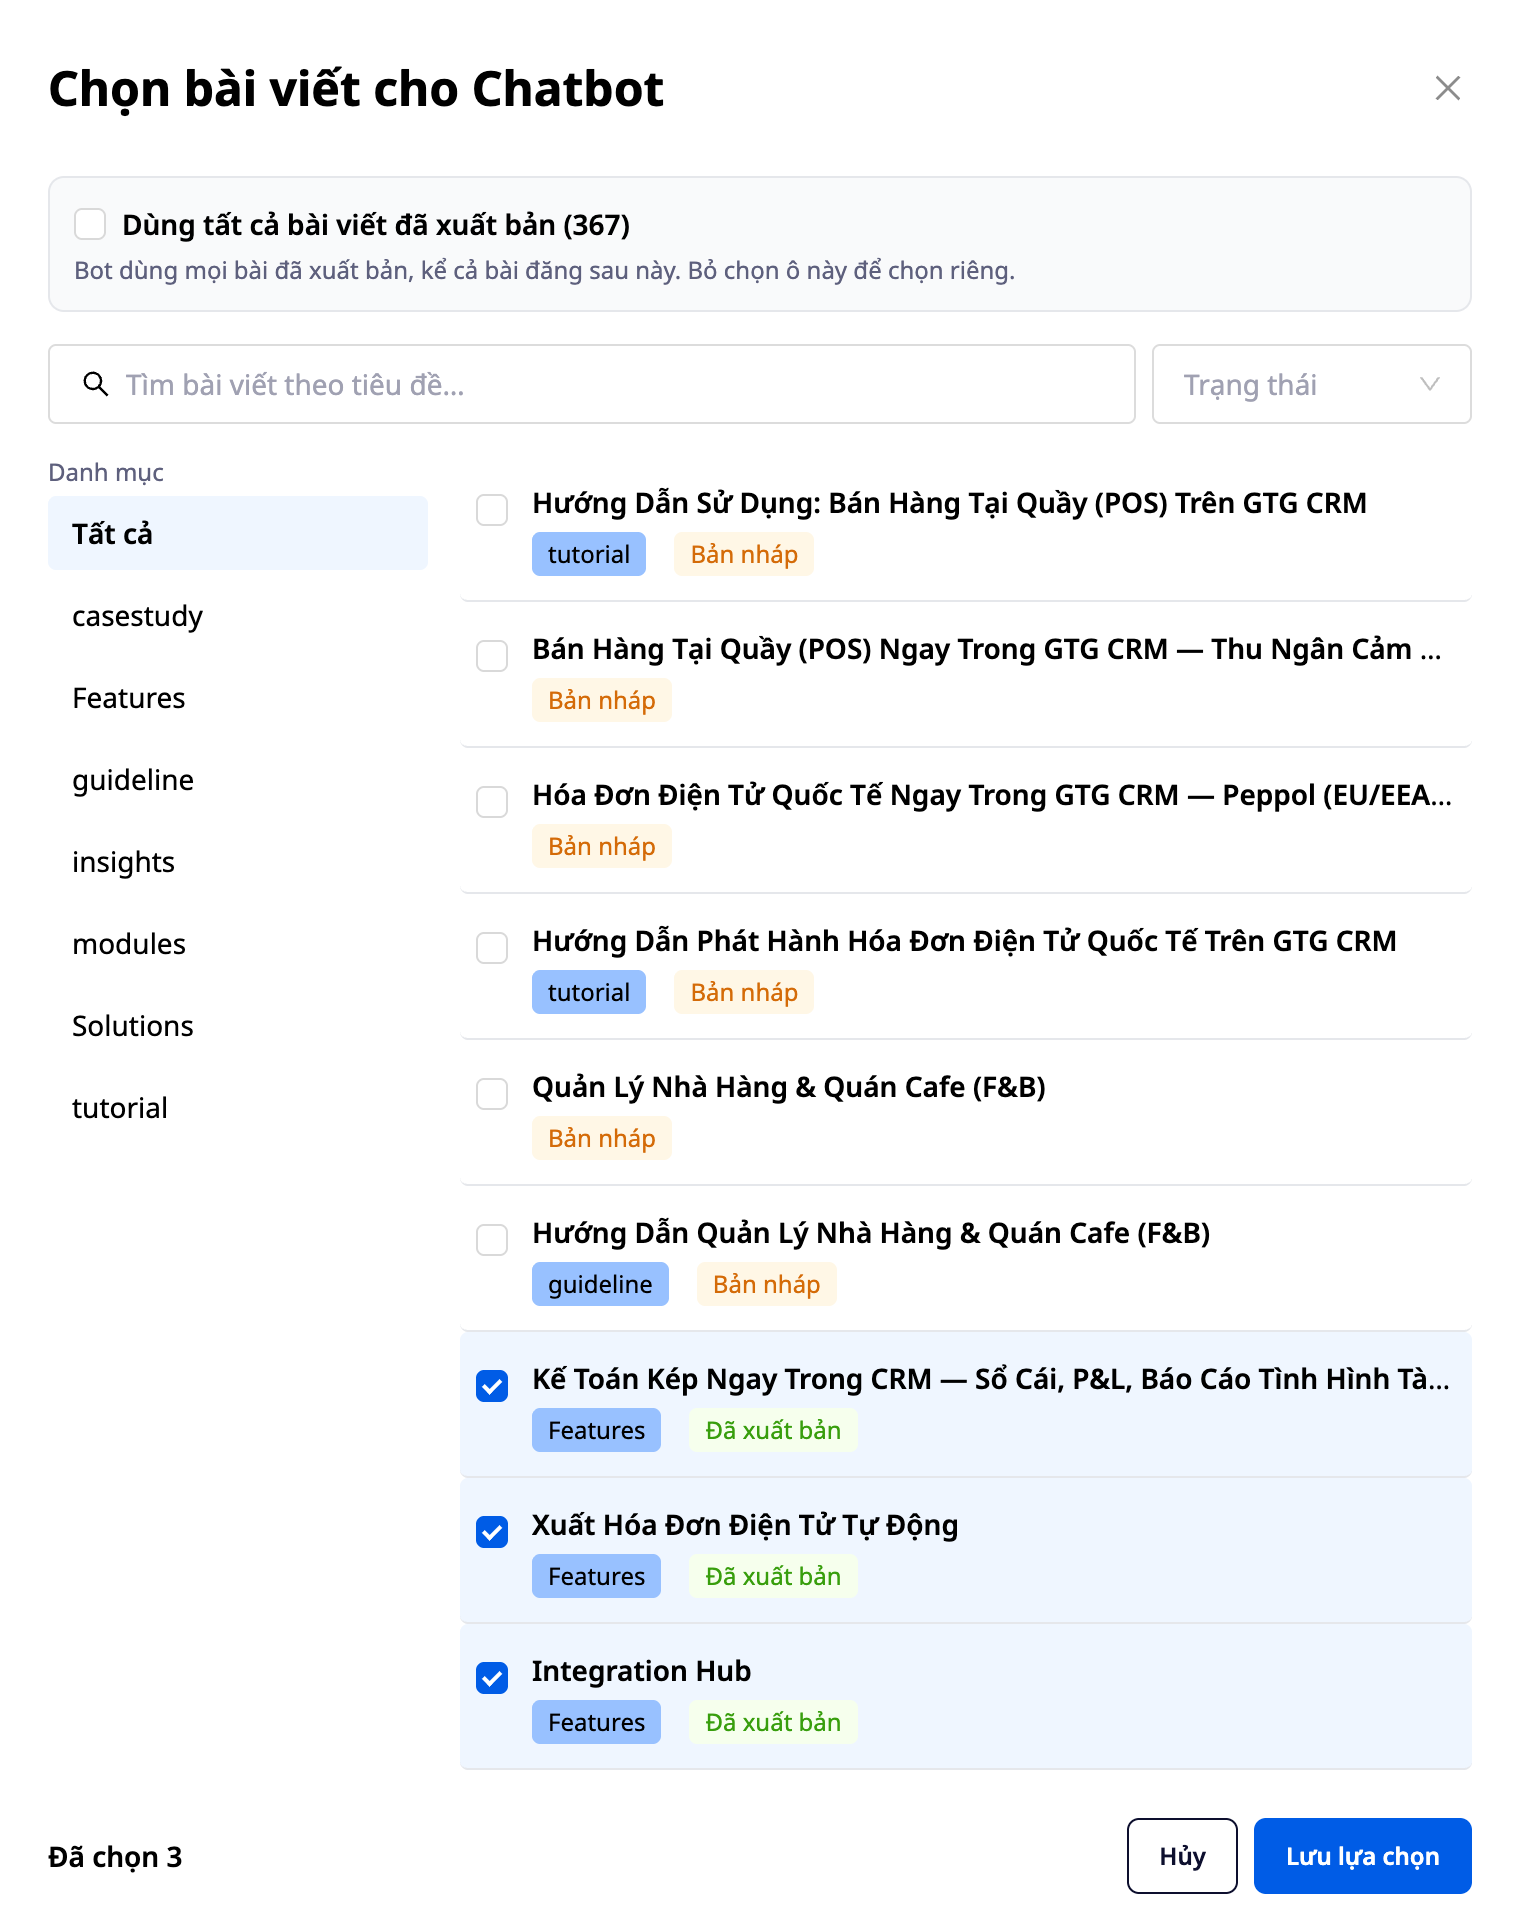
Step 5 — NEW: Select Individual Articles in the Article Picker (when using "Only those I select")
- Click to open the article picker.
- Filter by category & status, or search by title.
- Check the boxes for each article (or select an entire category). Observe the readiness status of each article: Ready / Processing / Not yet processed.
- Confirm your selection.
✅ Expected Result: Only the articles you select (and are ready) will be used by the bot for responses; articles that are not yet processed will be usable once the system finishes processing them.
💡 Want the bot to respond from your documents (policies, price lists, FAQs)? See the article Guide to Setting Up Knowledge Sources for AI Chatbot — upload your documents and enable the "respond from documents" capability.
Step 6 — Set Handover Threshold & Enable/Disable by Channel
- Set the transfer threshold (number of messages the bot handles before escalating to a staff member). Suggestion: 5–7 for simple products, 10–15 if consultation is needed, 20+ for complex services.
- Enable/disable the bot for each channel as needed; select the response language.
✅ Expected result: The bot responds with the correct number of messages set, then transfers to a staff member; it only operates on channels you enable; it responds in the chosen language.
Step 7 — Save & Test Chat (see natural tone + quick reply suggestions)
- Click Save.
- Open the test chat screen (or send a test message on a connected channel). Ask questions like a real customer: "Does the shop sell any shirts?", "How much is product X?", "Do you offer shipping?".
✅ Expected result: The bot responds naturally, with correct information, and within the scope of posts you selected; at the end of the interaction, display 2–3 suggested next steps as quick reply buttons (on website/app Live Chat), which customers can tap to continue the conversation immediately.
Quick Reference for Expected Results
Channel Connection — Channel displays "Connected"
Post Scope Selection — Button displays the correct level (Off / All / Only those I choose)
Open Post Selection Frame — Filter by category/status, see the readiness status of each post
Save & Test Chat — Bot responds naturally + displays quick reply suggestions at the end of the interaction
Notes
- Natural tone and quick reply suggestions work automatically — no need to enable them separately.
- On text-only supported channels (Facebook/Zalo/WhatsApp), suggestions appear as text; on website/app Live Chat, they are tappable quick reply buttons.
- Posts in "Not processed/Processing" status will be used by the bot after the system finishes processing.
- If the bot's response is insufficient: add/select more posts on the correct topic, or update product information, then try again.
Support
For further assistance: email support@gtgcrm.com.