Accounting & E-Invoice Suite User Guide
Step-by-step guide to setting up and using the double-entry accounting system, chart of accounts, journal entries, financial reports, and VAT declaration in GTG CRM.

GTG CRM Team · Product Team
June 14 2026
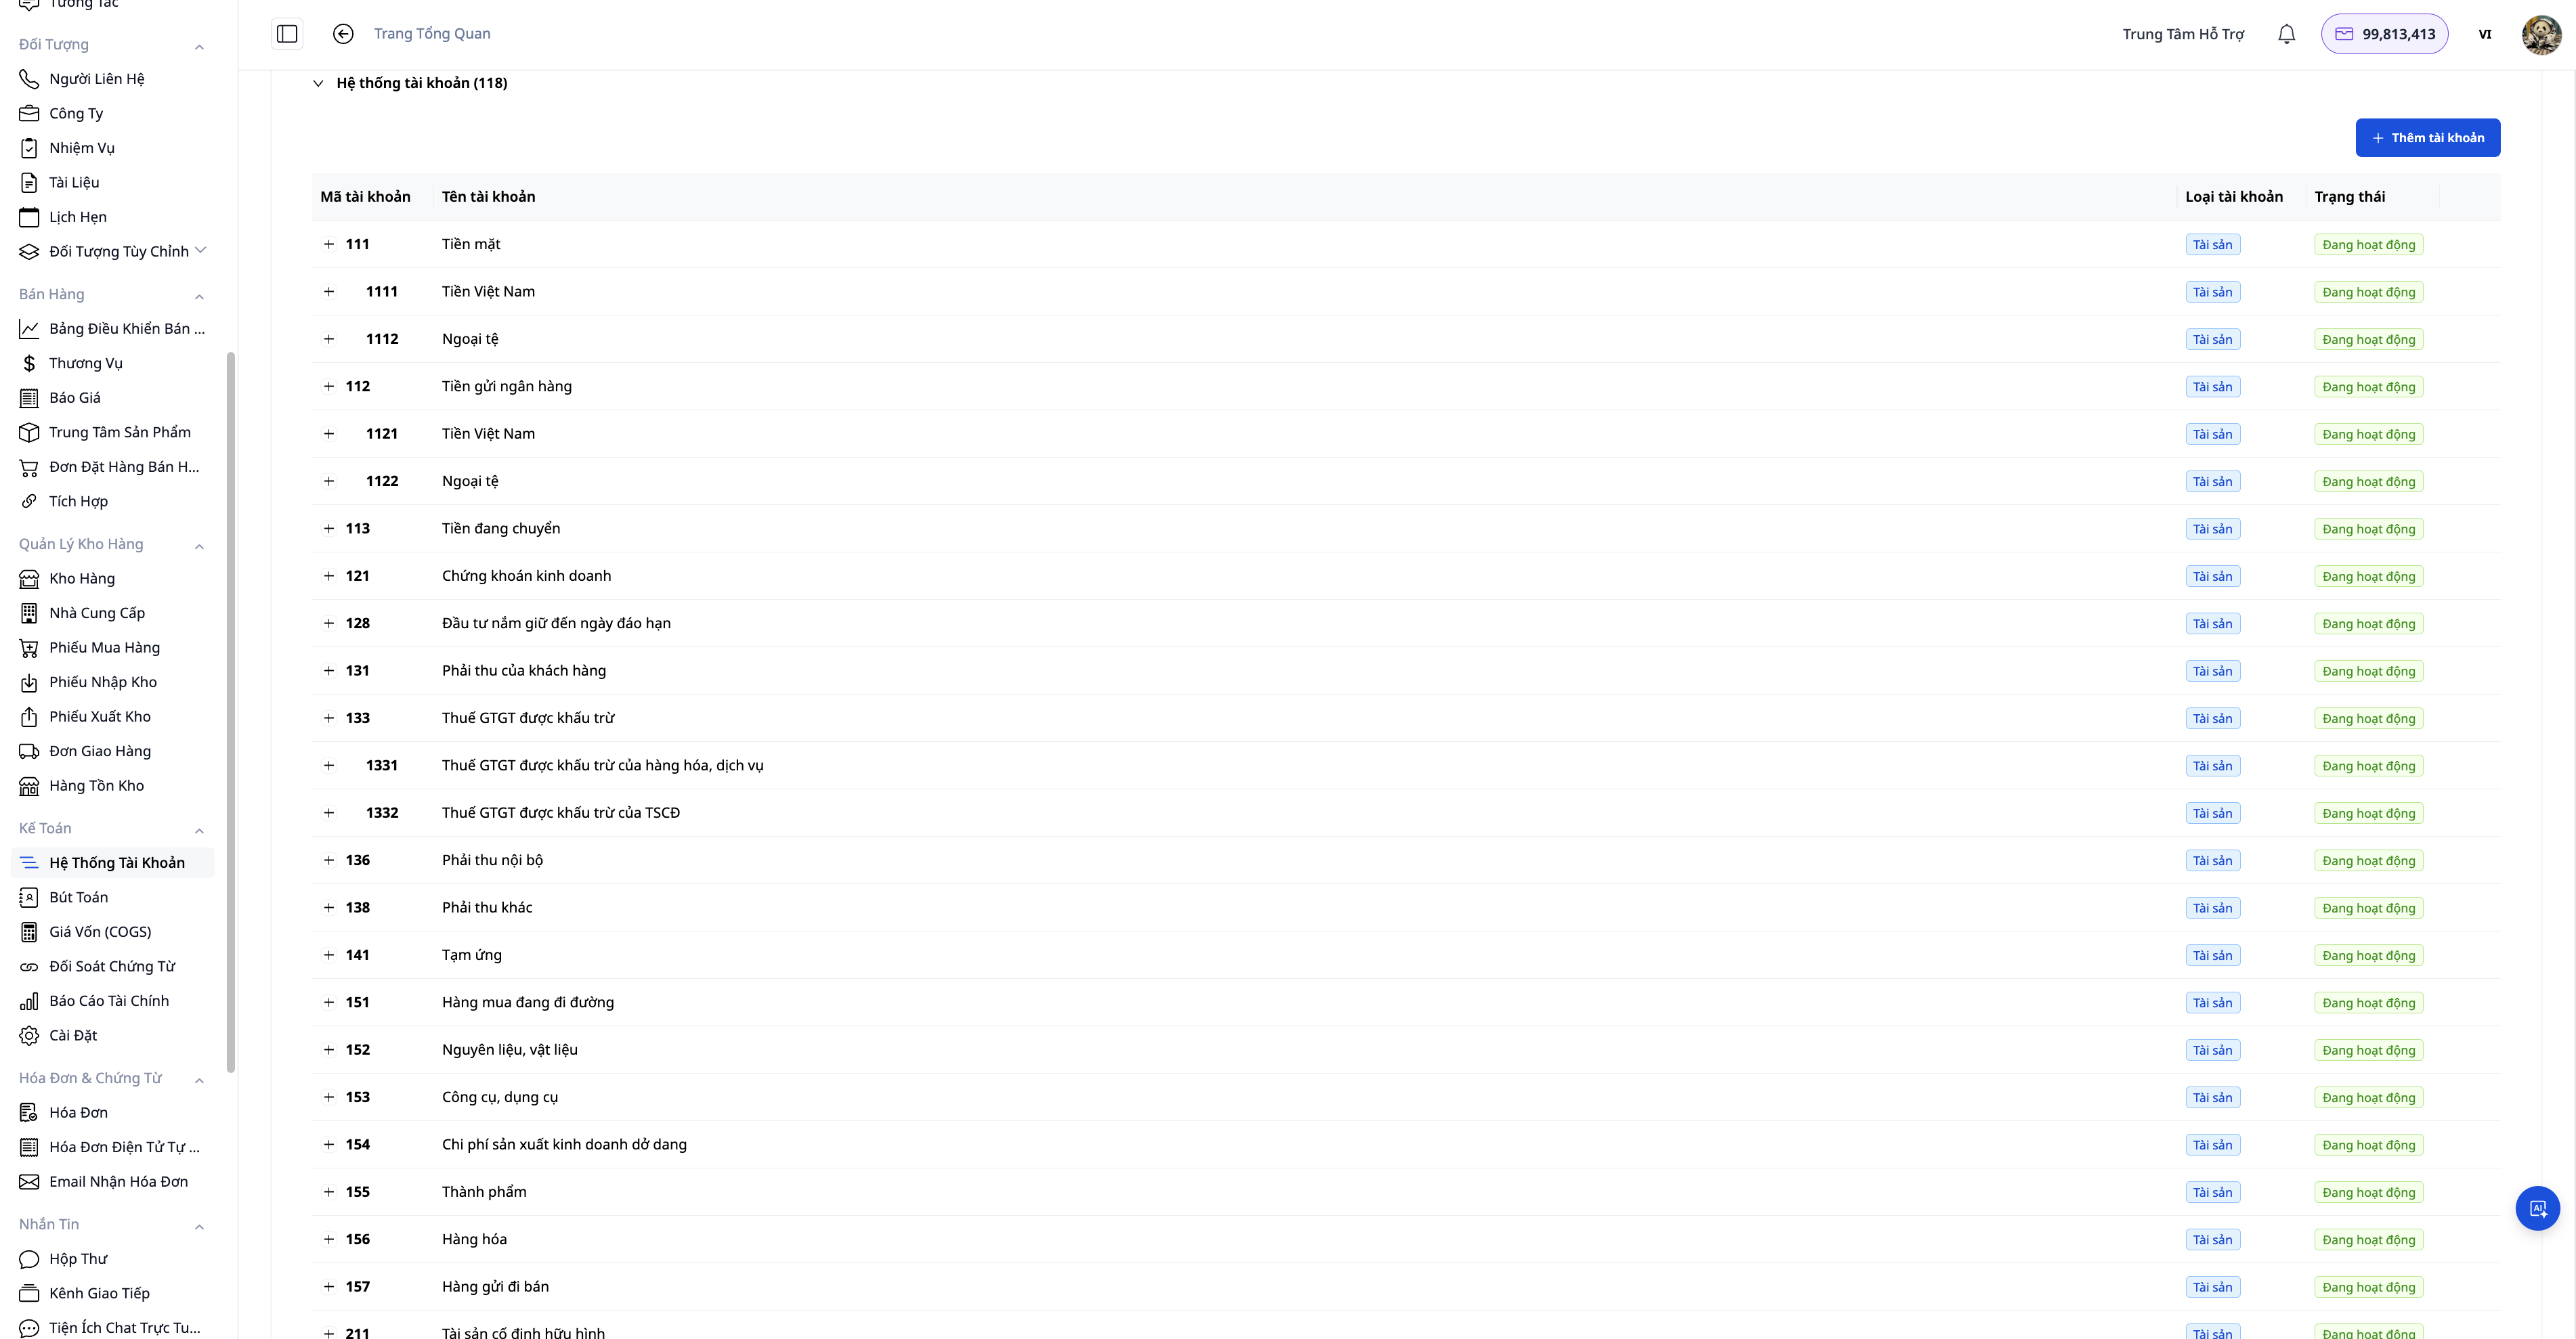
Table of Contents
Introduction
This guide will help you set up and operate the Double-Entry Accounting Module in GTG CRM: from enabling the feature, building the Chart of Accounts, configuring revenue recognition, to viewing financial reports and enabling automation.
Requirements: Logged-in GTG CRM account; user with access to the Accounting module (see Permissions section at the end of the article).
Key Features
- Enable/disable Accounting for workspace
- Multi-national Chart of Accounts
- Journal Entries & Posting Rules
- Revenue Recognition Configuration (INVOICE / DELIVERY)
- P&L, Balance Sheet, VAT Declaration reports
- Code-free accounting automation
User Guide
Step 1: Enable Accounting & Select Standard
Go to Settings → Accounting Settings.
- Enable the Accounting (accounting_enabled) toggle.
- Select the Accounting Standard (accounting_standard) — e.g., VAS TT200 or TT133.
- Save.
Step 2: Build Chart of Accounts
There are 3 methods:
| Method | When to use |
|---|---|
| Apply CoA Template | Fastest — select VN or 1 of 11 countries, the system will set up the accounts. |
| AI-assisted Setup (Generate Accounting Setup) | AI suggests accounts based on your business type & country. |
| Import Chart of Accounts | You have your own chart of accounts, import it. |
You can add/edit individual accounts or Reset to start over.
Step 3: Check Posting Rules
Posting rules define which transactions are recorded in which accounts (e.g., sales revenue → Account 511, cost of goods sold → Account 632).
- Enable/disable each rule using the Active toggle — disabling does not delete the configured entries.
- Each rule automatically generates balanced Debit — Credit journal entries.
Step 4: Configure Revenue Recognition
In Accounting Settings, select the Revenue Recognition Point (revenue_recognition_point):
- INVOICE (default): recognized when the invoice is issued.
- DELIVERY: recognized when goods are delivered / shipped from inventory.
Step 5: Daily Operations — Auto-Generated Entries
After setup, you don't need to manually record entries:
- Completed order → system generates entries for revenue + cost of goods sold.
- Electronic invoice issued → corresponding entry.
- Electronic invoice canceled (S-Invoice/MISA) → automatically reverses the entry.
- Refunds / Returns → entries for refund + reversal of cost of goods sold per item.
You can go to Journal Entries to view, filter, and reconcile all entries.
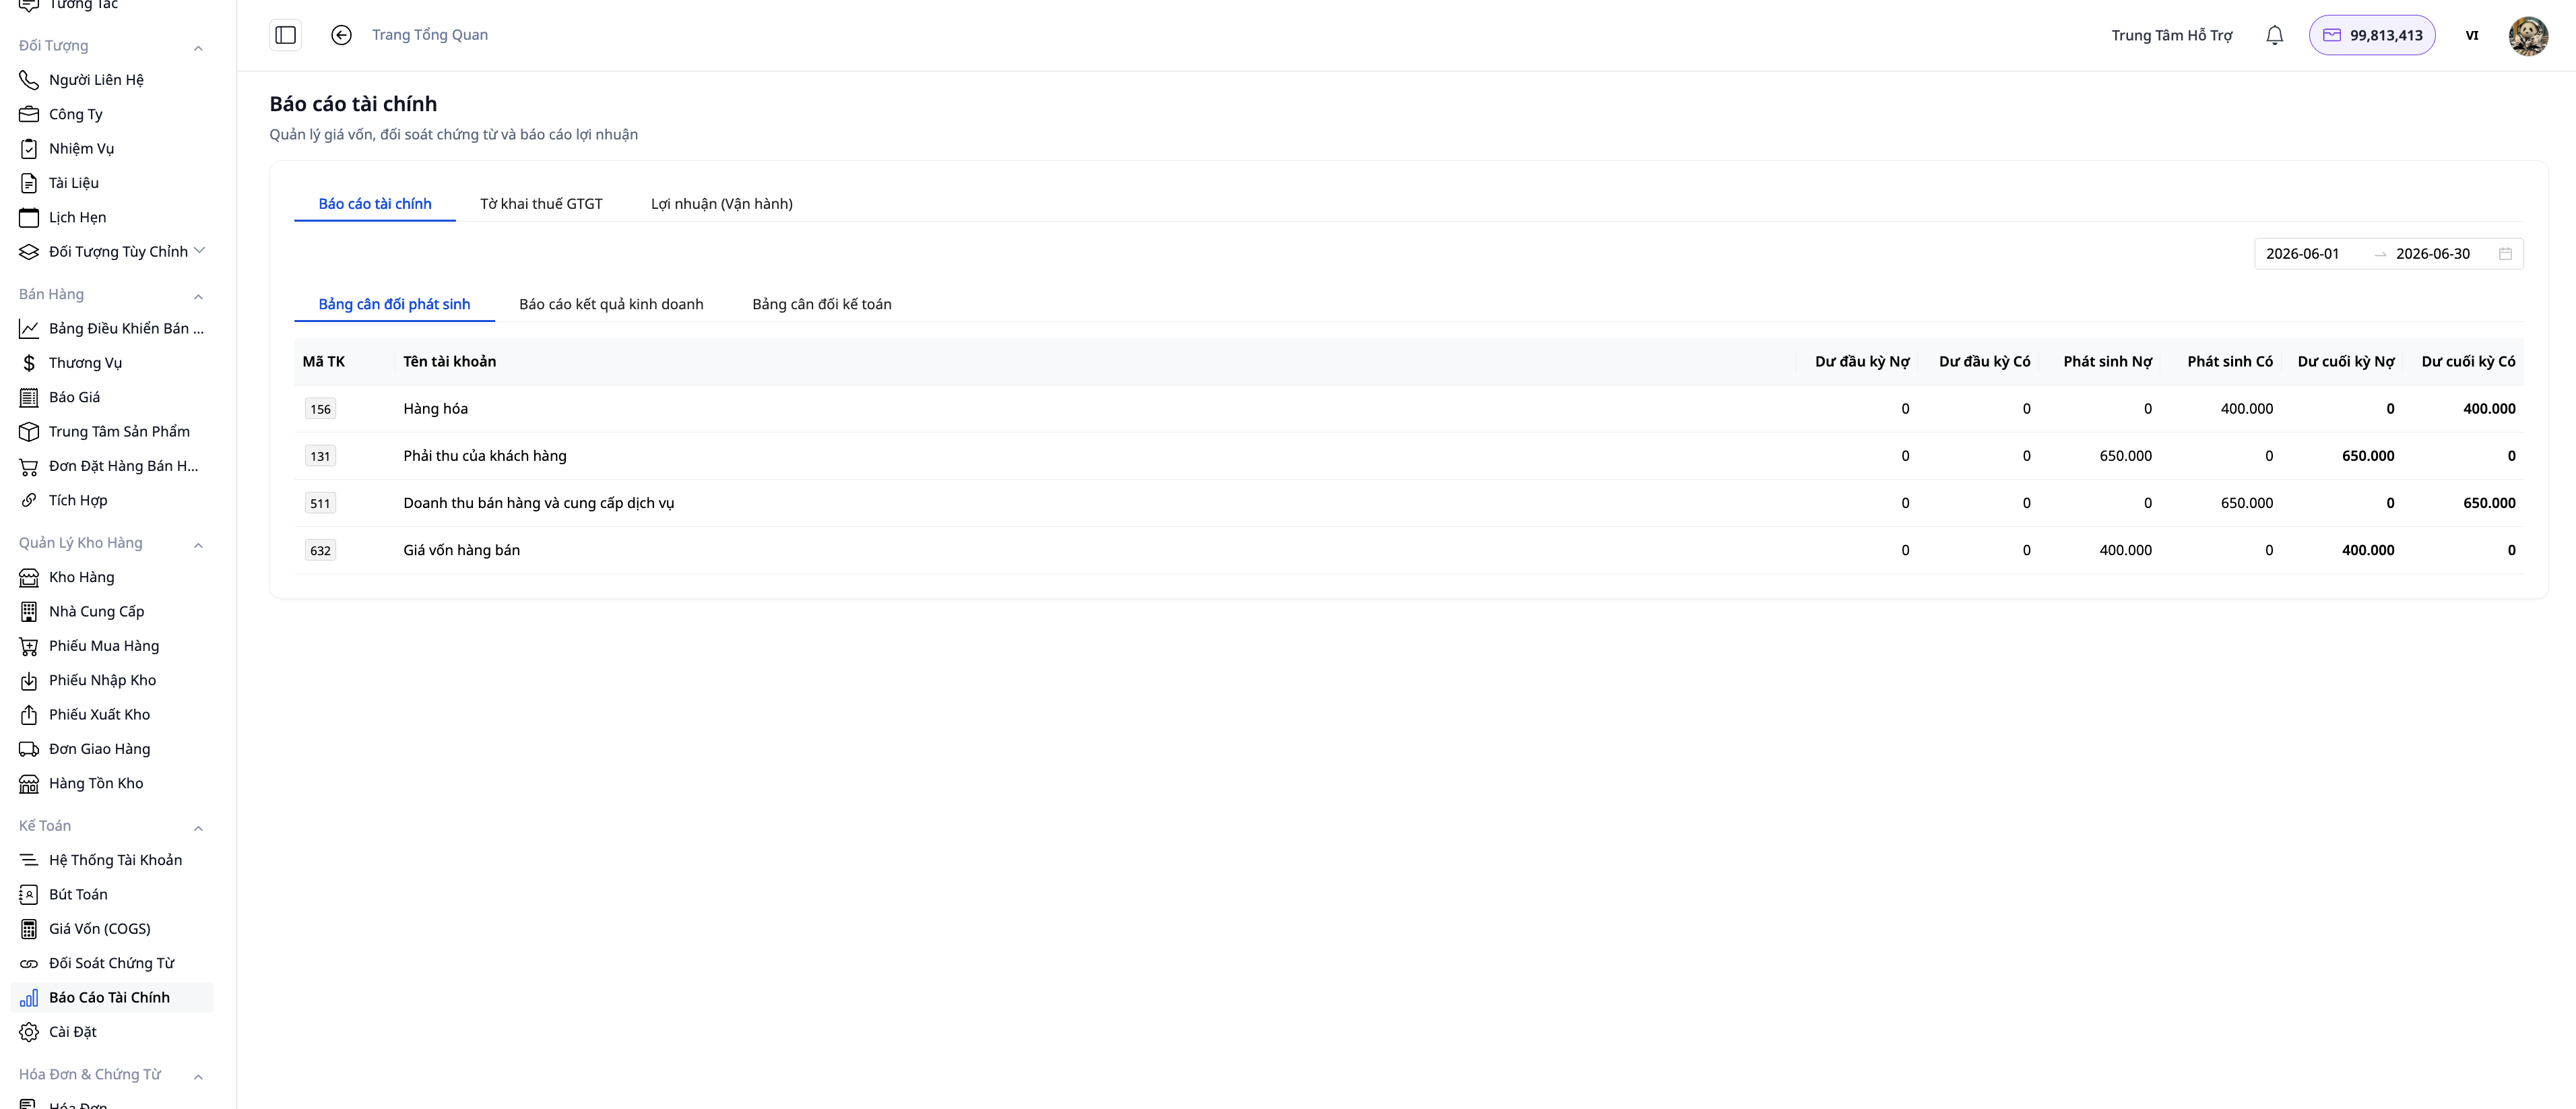
Step 6: View Financial Reports
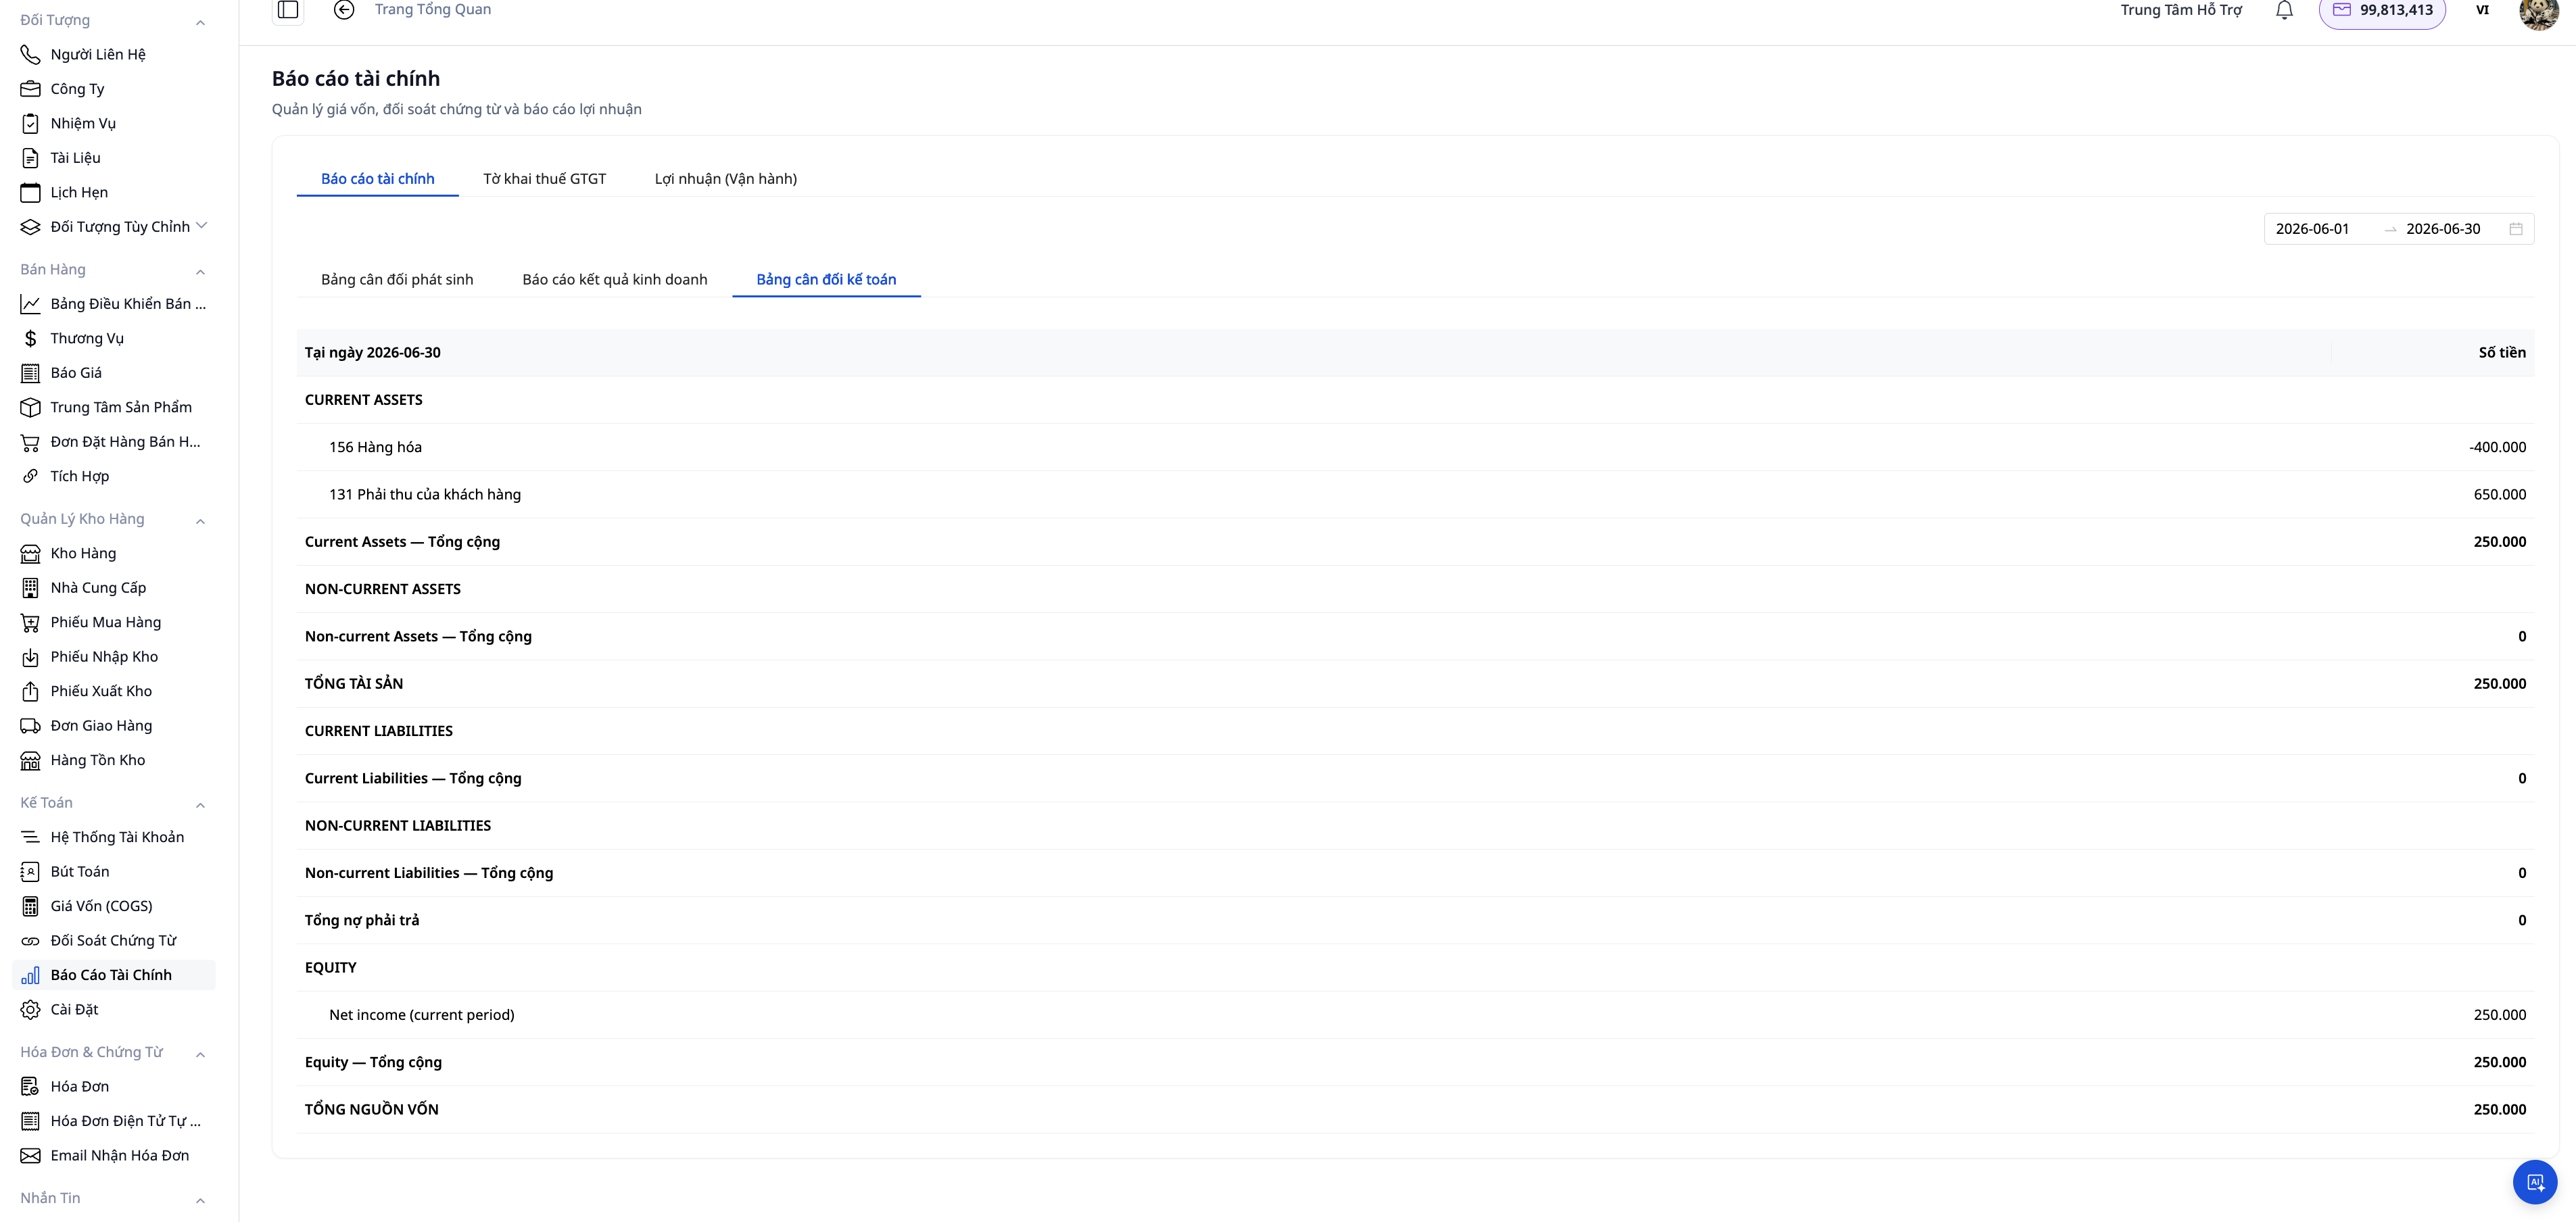
Go to the Accounting Reports section:
- Profit & Loss (P&L) — select period → view revenue, cost of goods sold, profit.
- Balance Sheet — assets = liabilities + equity.
- VAT Declaration — pre-aggregated for the tax filing period.
Step 7: Enable Accounting Automation (Optional)

Go to the Accounting Automation section, enable the processes you need (auto-invoice, generate journal entries, revenue recognition, refunds/returns).
- Debit/Credit entries can be edited directly on the "Create Journal Entry" node.
- Enable based on your needs — not required to enable all.
Permissions
Access to the Accounting module is controlled by workspace permissions. Contact your workspace owner/administrator to be granted permission to view reports, create journal entries, or configure accounting settings.
Benefits
- Set up once, operate automatically
- Books always match invoices and orders
- Real-time financial reports, ready for closing & tax filing
- Scalable to multiple countries as needed
Documentation belongs to GTG CRM
Maybe You Should Read These

Accounting & E-Invoice Suite

E-Invoice

Automated Electronic Invoice Generation

Comprehensive sales solution for retailers
Automated E-invoice Issuance

CRM

Automation

Business Documents & Certificates

Consolidate 5 Software

Facebook Ads
Form Builder