LinkedIn Ads User Guide - GTG CRM
A step-by-step guide to connecting your LinkedIn Ads account, creating Lead Gen campaigns to automatically sync leads to your CRM, tracking conversions, and managing performance within GTG CRM.

GTG CRM Team · Product Team
June 14, 2026
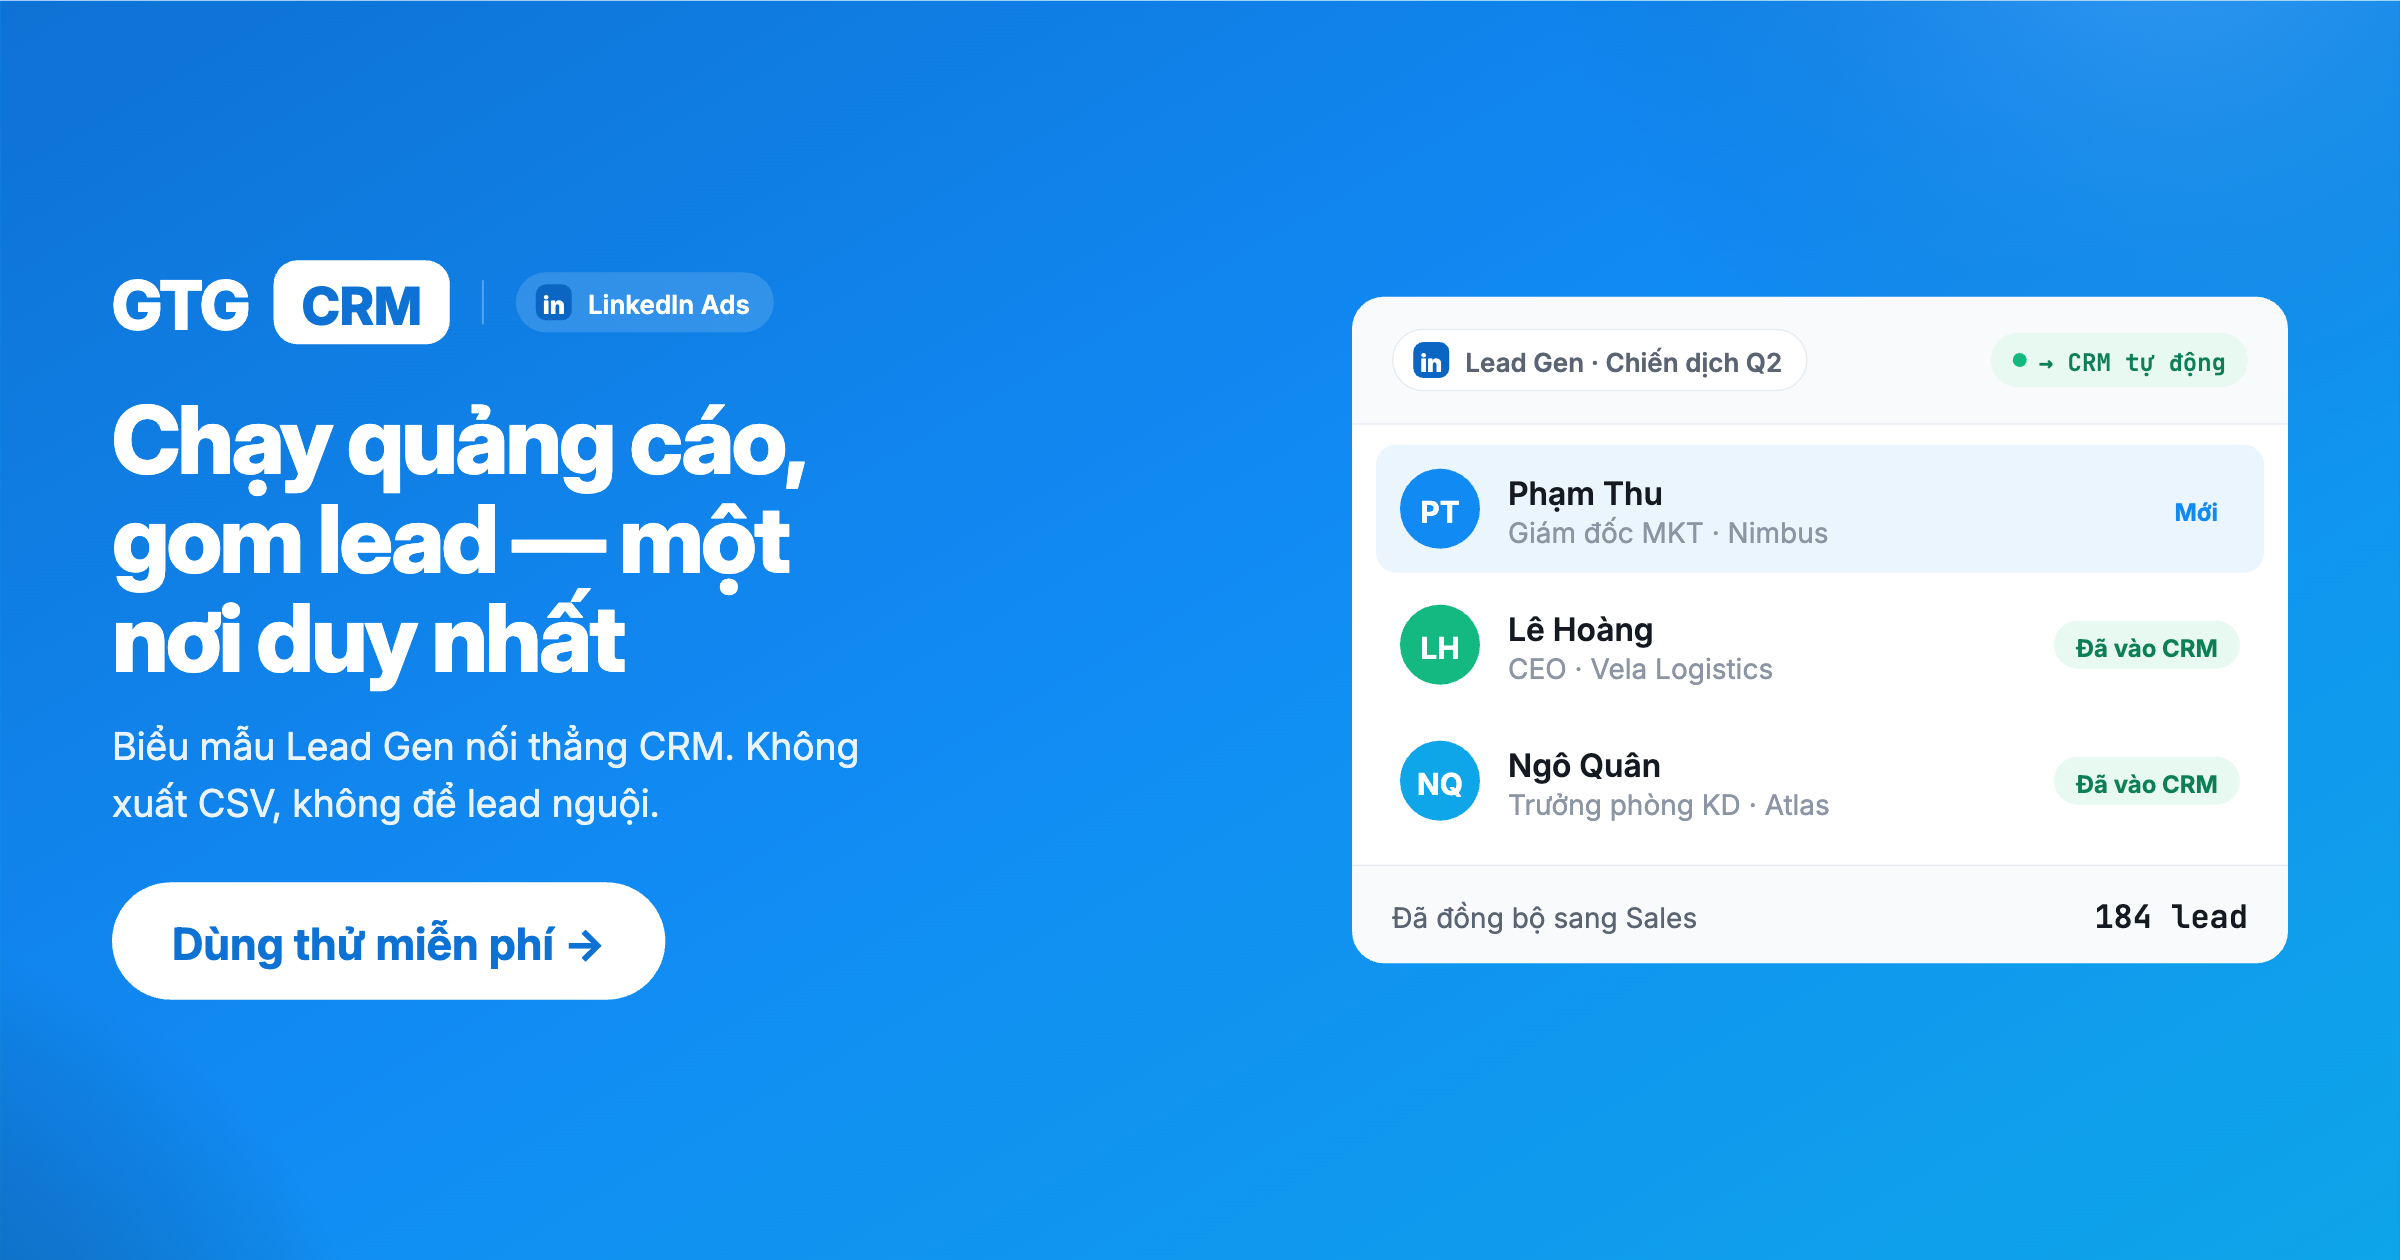
Table of Contents
This guide helps you run LinkedIn ads directly within GTG CRM from A to Z: connect your LinkedIn Ads account, create campaigns (including Lead Gen forms that auto-sync leads to CRM), select existing posts to sponsor, track conversions, clone campaigns, and handle billing hold alerts.
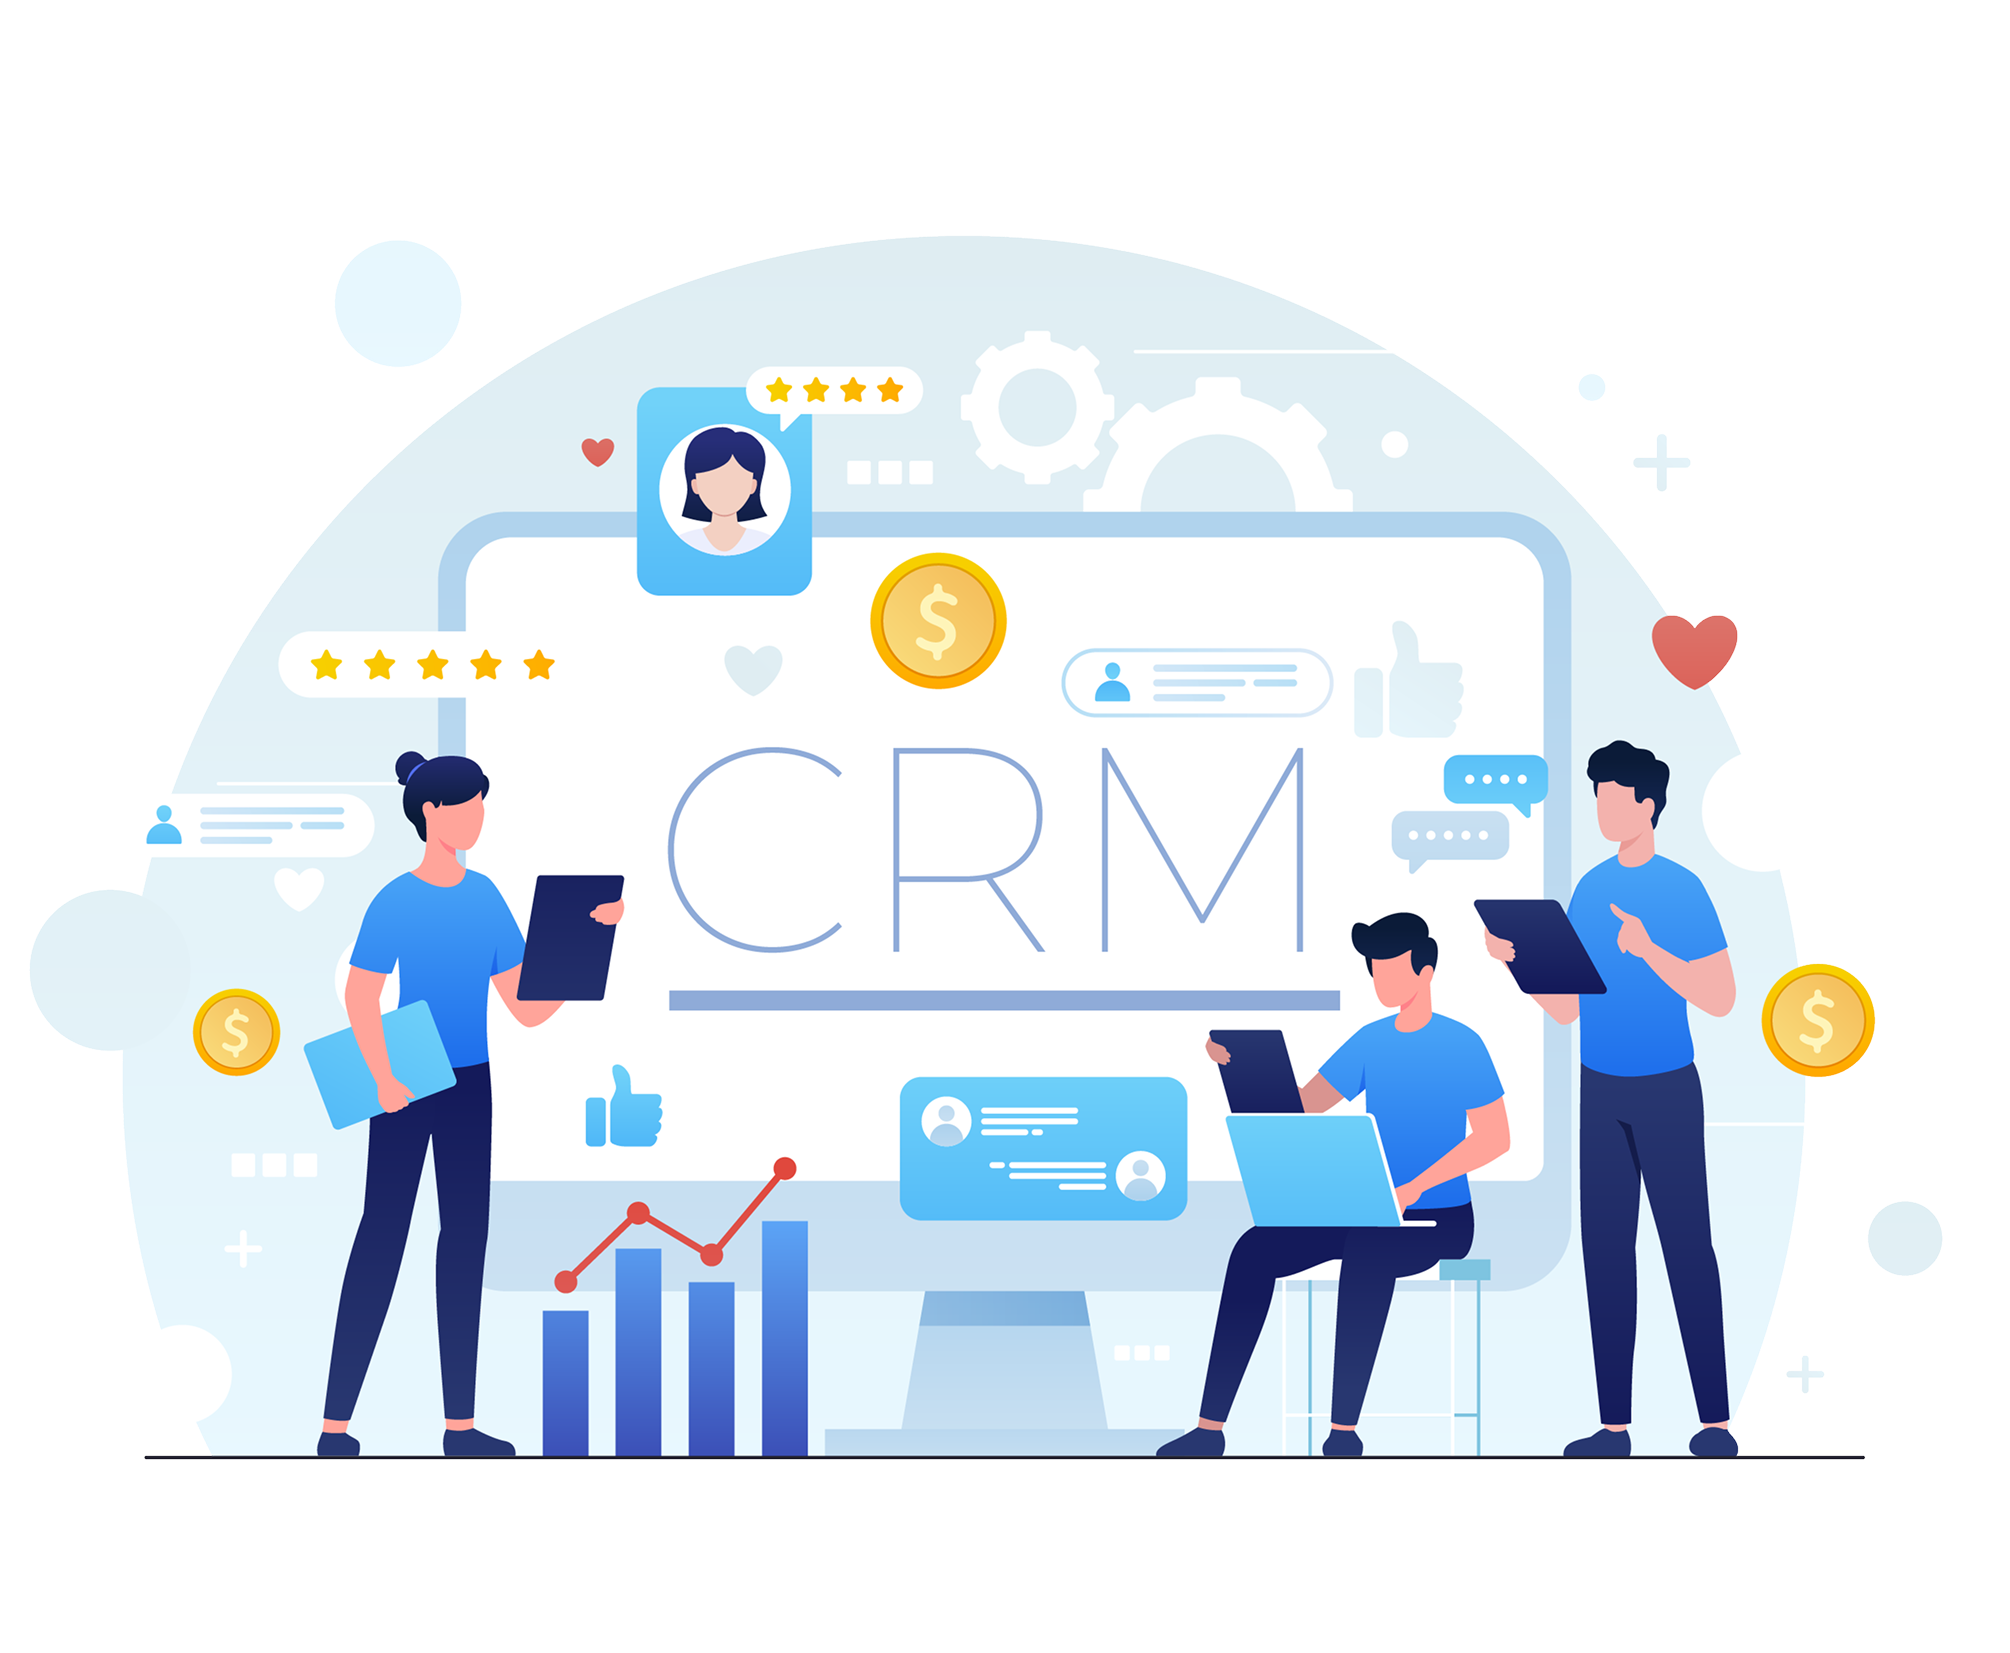
For B2B businesses, marketing agencies, and lead-generation teams, this is the way to consolidate the entire process of running ads → collecting leads → leads to CRM → sales follow-up → conversion measurement into a single interface, alongside Facebook Ads and Google Ads.
Prerequisites: - Logged into GTG CRM with access to the Marketing → Ads module. - A LinkedIn Ad Account and admin rights to the Company Page linked to that account.
Key Features
- Connect LinkedIn Ads Account via OAuth, managed alongside Facebook Ads and Google Ads.
- Lead Gen Forms — capture leads directly on LinkedIn, with leads automatically synced to CRM (Lead Sync).
- Carousel Ads + CTA picker for each ad, with previews that match real Sponsored Posts.
- Select existing organic posts on your LinkedIn Company Page to sponsor.
- Website Conversions Tracking — know which ads are driving valuable actions.
- Clone campaigns and manage draft campaigns.
- Billing Hold Alerts — get notified immediately when your account is on a billing hold.
Detailed User Guide
Step 1: Connect LinkedIn Ads Account
Before creating a campaign, you need to connect your LinkedIn Ads account to GTG CRM.
- Go to Marketing → Ads.
- Click Create Campaign.
- In the platform selection window, choose LinkedIn.
- Complete the authorization step (OAuth) in the popup window — log in to LinkedIn and grant ad access.
- Select the LinkedIn Ad Account you wish to use.
Result: Your LinkedIn Ads account is linked and ready for campaign creation. This account will appear alongside Facebook and Google channels in the Ads interface.
💡 Access Permissions: The LinkedIn account used for connection must be an admin of the Company Page, and that Page must have an active ad account. If authorization fails, disconnect and reconnect.
Step 2: Select Campaign Objective
The LinkedIn campaign wizard begins with selecting an objective — this determines ad formats and subsequent optimization strategies.
- In the wizard, choose a suitable objective, for example: - Lead Generation — capture leads directly on LinkedIn using Lead Gen Forms. - Website Visits — drive traffic to your website/landing page. - Brand Awareness — maximize impressions. - Website Conversions — optimize for valuable actions (sign-ups, purchases). - Other objectives like Engagement, Video Views, Job Applicants.
- Click to proceed to the format selection step.
Result: After selecting an objective, the system will pre-filter valid ad formats for the next step.
💡 If your primary goal is B2B lead generation and direct lead entry into CRM, select Lead Generation and refer to Step 4 to set up the Lead Gen form.
Step 3: Select Ad Format
Choose an ad format that aligns with your objective. Depending on the objective, available formats may include:
| Format | When to Use |
|---|---|
| Single Image | Basic sponsored ads with an image, headline, description, and CTA button |
| Carousel | Multiple image cards within a single ad — tell a product/service story |
| Video | Sponsored video content |
| Document | Post PDFs/slides for viewers to browse directly in their feed (whitepapers, case studies) |
After selecting the format, proceed to the ad content configuration step (Details).
Result: The chosen format will dictate the content fields you need to fill in the next step.
Create Carousel Ads + Select CTA
For the Carousel format, you create multiple image cards, each telling a part of the product story.
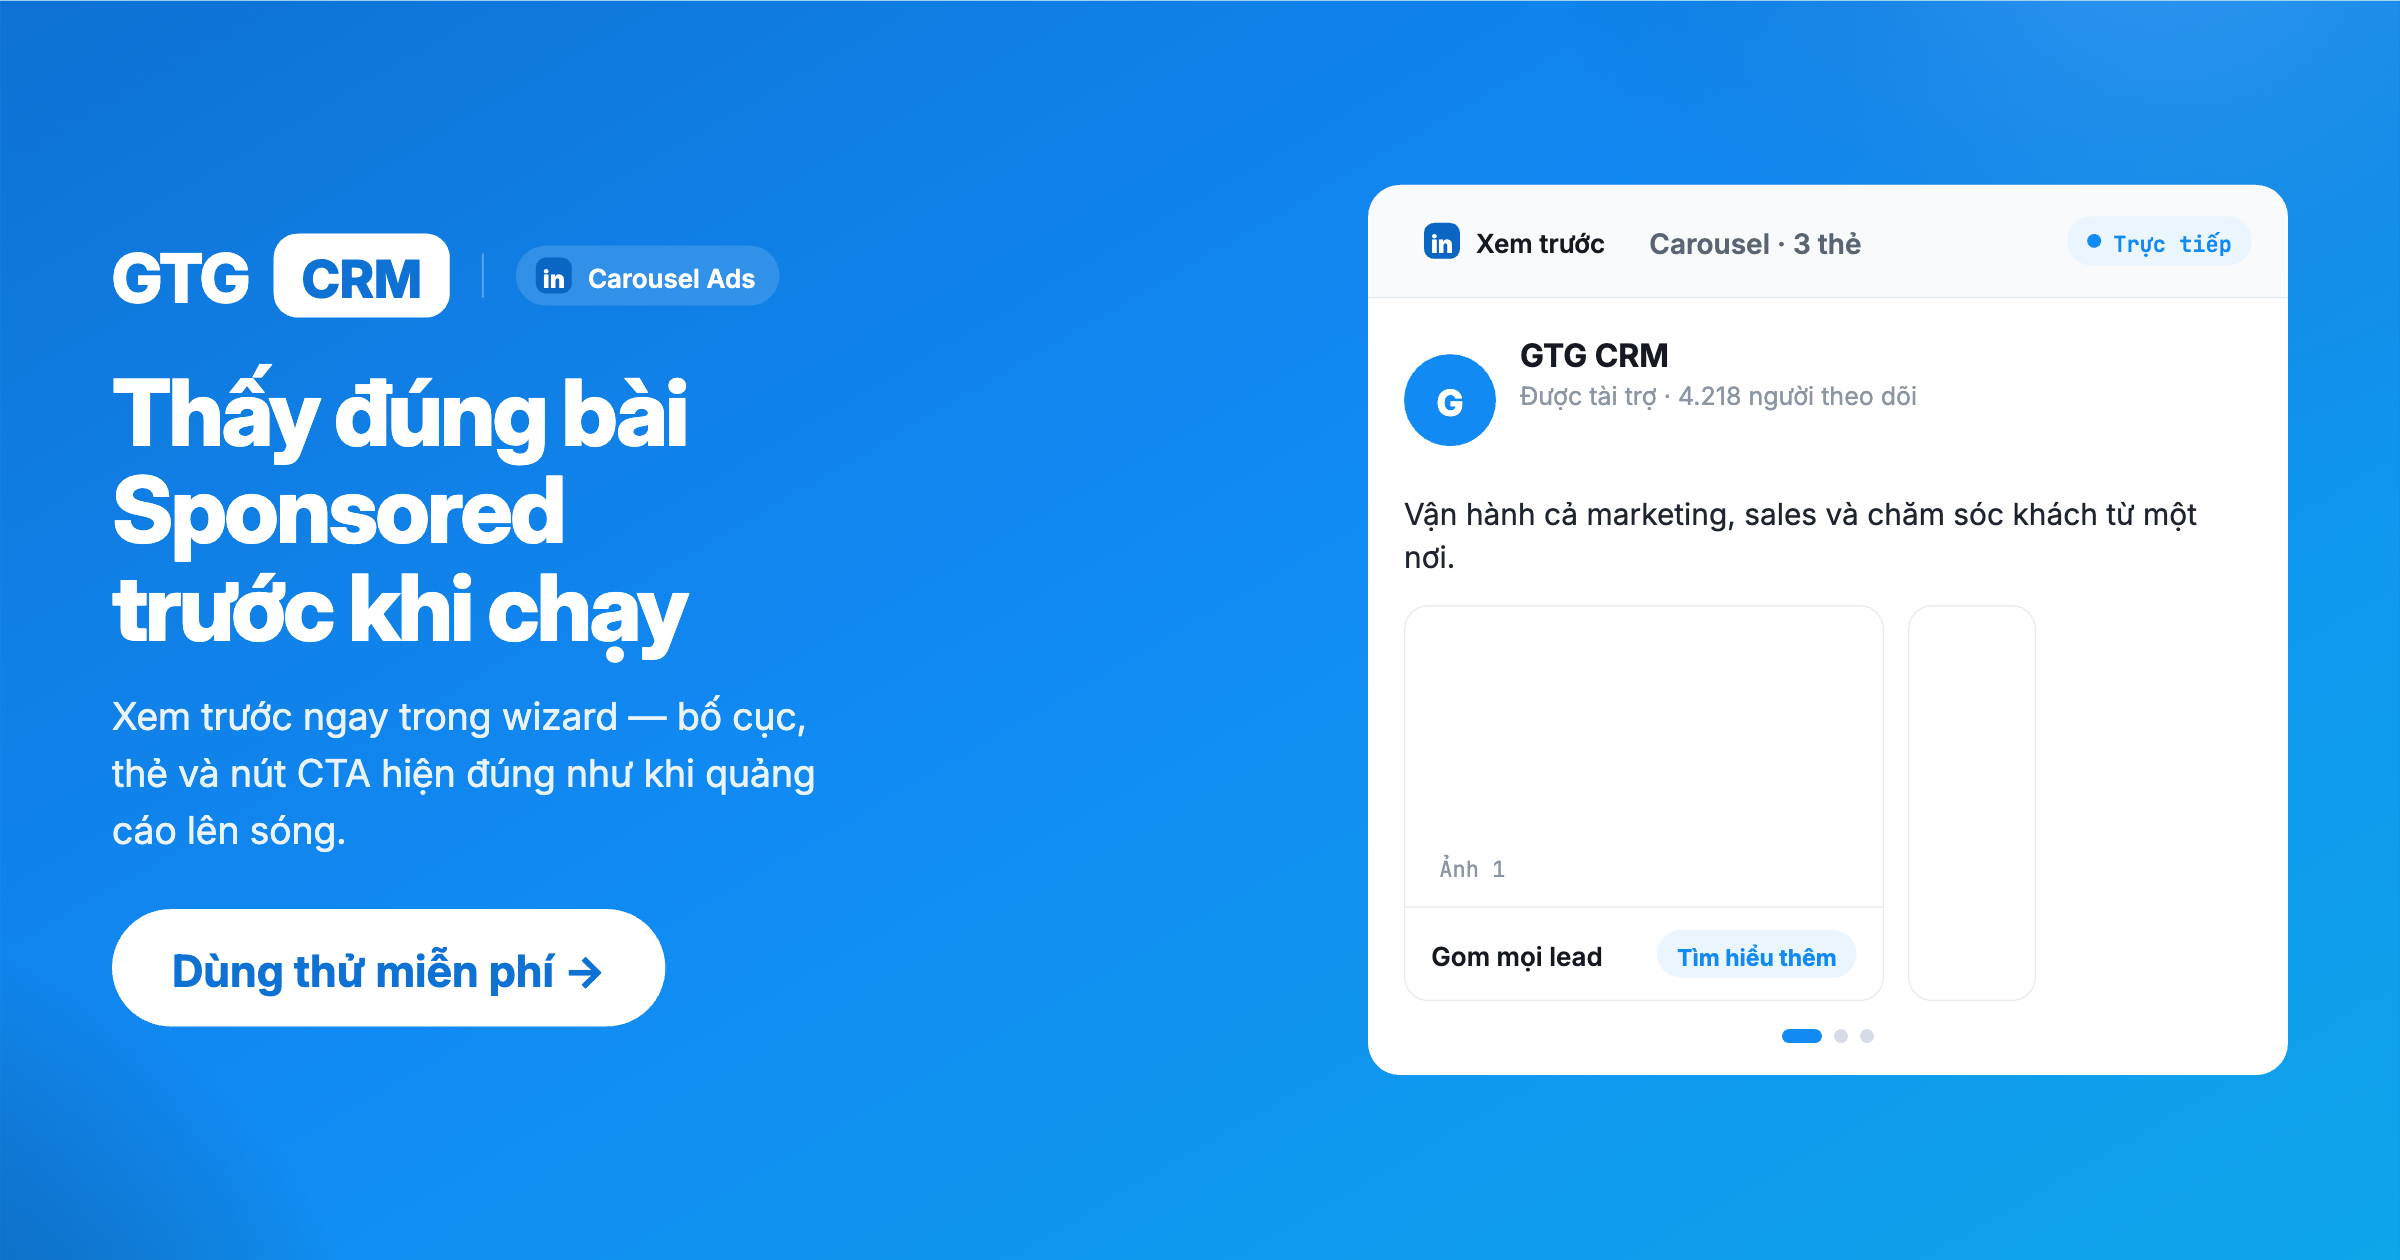
- Add image cards for the Carousel ad.
- In the CTA picker, select the call-to-action button for the ad (e.g., Sign Up, Learn More, Contact Us).
- View the preview that mimics a real Sponsored Post directly within the wizard to check the ad's appearance before launch.
- Set a clear ad name for easy management and future reference.
Result: The Carousel ad with its CTA and preview accurately matches its published appearance — minimizing surprises upon launch.
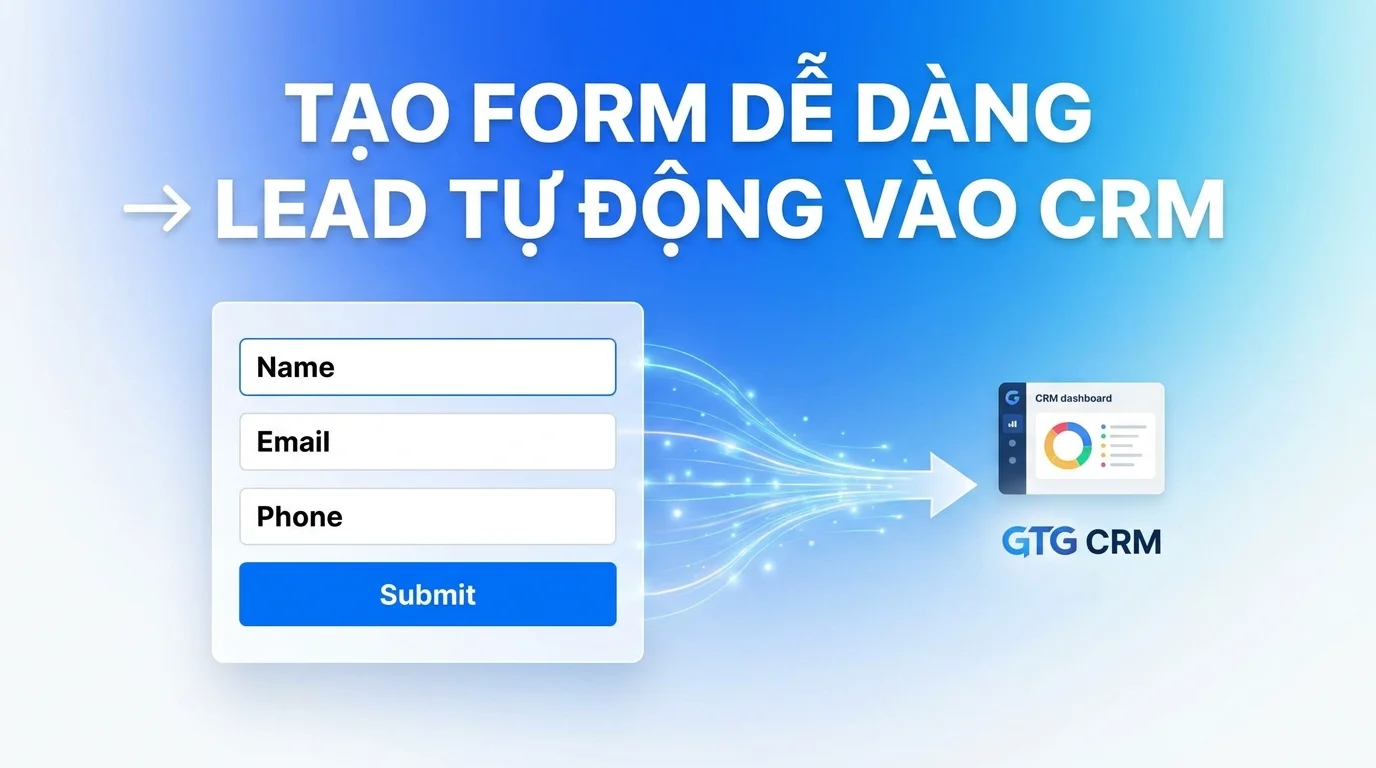
Step 4: (Optional) Create Lead Gen Form — Leads Auto-Sync to CRM
This is the standout feature of running LinkedIn Ads in GTG CRM. Applicable when you select the Lead Generation objective in Step 2.
Lead Gen Forms allow prospects to fill in information directly on LinkedIn (pre-filled from their LinkedIn profile), and leads will auto-sync to the CRM — no need for Excel export or manual import.
Steps:
- In the wizard (Lead Generation objective), select an existing Lead Gen Form from the list, or click Create Lead Gen Form.
- Configure the fields you need to collect (name, email, company, job title, phone number, etc.).
- Map the form fields to the contact fields in CRM.
- Set up a thank-you message with a CTA link (if needed).
- Save — the form will be automatically linked to the campaign.
Result: When prospects fill out the form on LinkedIn, leads will flow directly into your CRM within seconds and be ready for automated nurturing (email sends, sales reminders, pipeline assignment).
💡 Lead Sync: Leads are synced in real-time via webhooks and are deduplicated by email before creating/updating a contact. If you suspect missed leads, use the Sync Leads button for manual catch-up synchronization. You will also receive notifications for new leads.
📄 Privacy Policy: LinkedIn requires Lead Gen Forms to have a privacy policy URL. GTG CRM provides a standard clause for collecting and processing lead data from LinkedIn for your reference when configuring the form.
Step 5: (Optional) Select Existing Post to Sponsor
No need to recreate ads from scratch — with suitable formats, you can sponsor an active organic post on your LinkedIn Company Page.
- In the content configuration step (Details), select the Use Existing Post option instead of creating a new one.
- Choose an already published organic post from your LinkedIn Company Page.
- Continue configuring the remaining steps as usual.
Result: The ad utilizes an existing post; the post's existing engagement (likes, comments, shares) is retained with the sponsored ad.
Step 6: Set Up Targeting
LinkedIn offers powerful professional targeting capabilities ideal for B2B.
Configure your audience based on criteria such as:
- Job Titles, Job Functions, Seniority Levels
- Company Names, Company Size, Industries
- Skills, Groups, Education
- Geographies, Languages
Result: Ads will reach your precise B2B target audience (e.g., the right decision-makers, in the right industries).
Step 7: Set Budget & Schedule
The final step of the wizard is configuring your budget and run dates.
- Set a Daily Budget and/or a Total Budget if needed.
- Choose a Bid Strategy that aligns with your objective (e.g., CPC for Website Visits, CPM for Brand Awareness, CPV for Video Views).
- Set the campaign's Start/End Dates.
Note: The displayed currency will match the currency of your LinkedIn Ad Account.
Result: Upon completion, you can publish your campaign to start running.
⚠️ Billing Hold Alert
If your LinkedIn Ad Account is on a billing hold — for example, due to a payment method issue — the wizard will display an alert during the campaign creation process.
- When you see this alert, address the payment issue in LinkedIn Campaign Manager before publishing.
- If not resolved, the campaign will not run (no ad delivery).
💡 Thanks to this alert, you'll know immediately why your ads aren't running, saving you troubleshooting time.
Step 8: Track Website Conversions
To know which ads are truly driving valuable actions (sign-ups, purchases, downloads), you need to set up Conversion Rules.
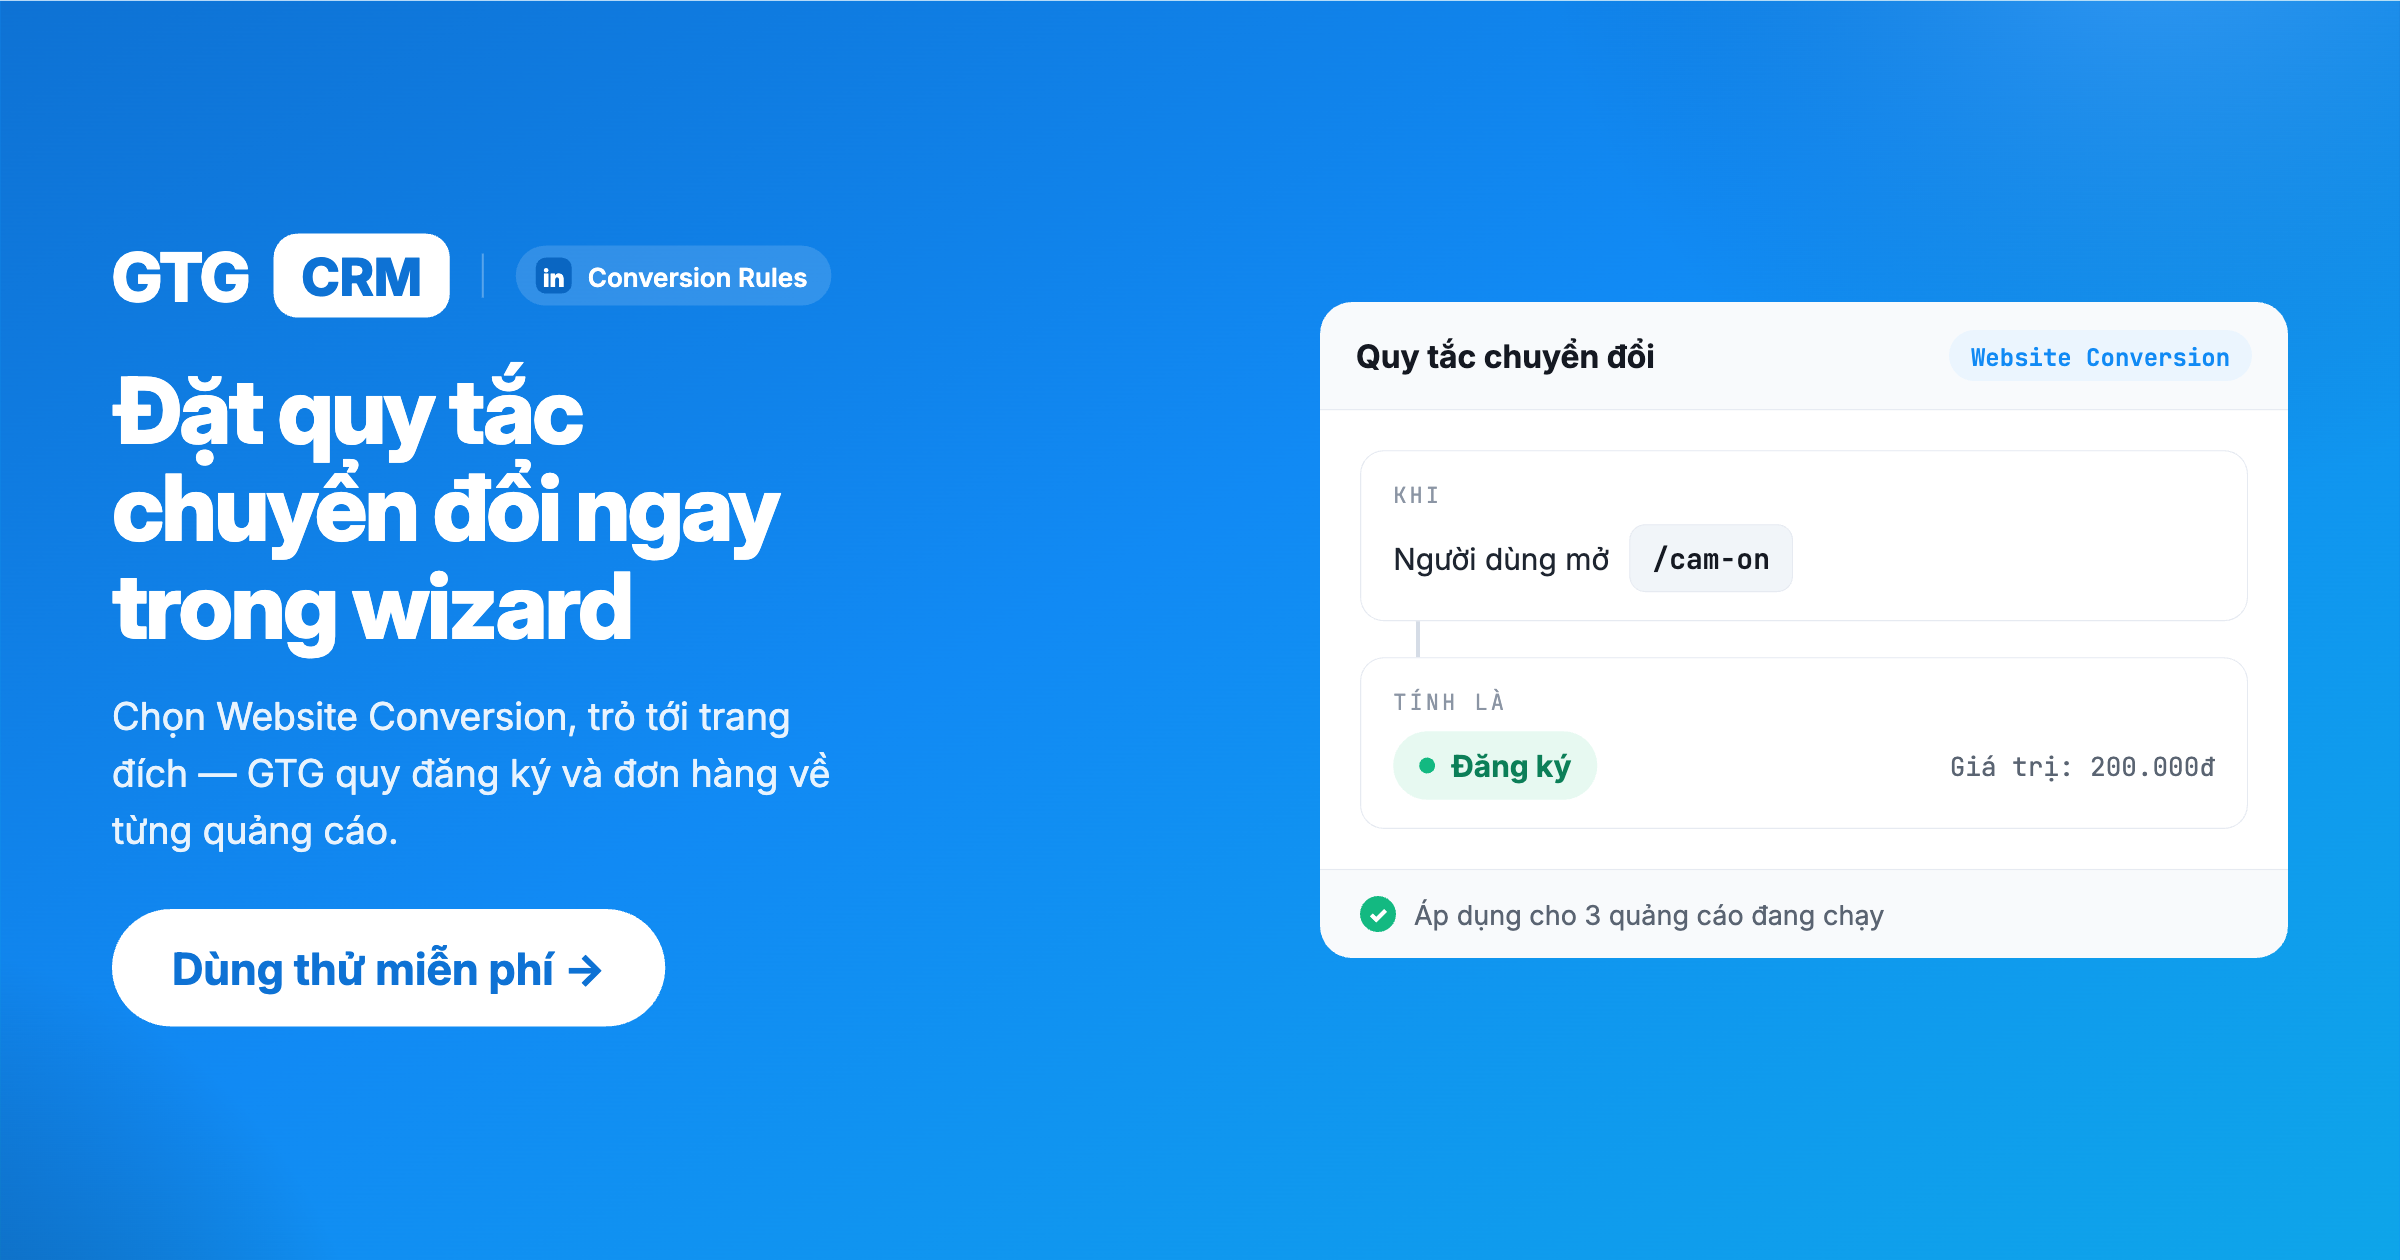
- Go to Marketing → Ads → Conversions.
- Click Create Conversion Rule.
- Select the conversion type (e.g., purchase, sign-up, download).
- Link the rule to one or more campaigns.
Result: When a contact in CRM completes the tracked action, the conversion event will be sent back to LinkedIn (via matching based on email). Conversion data typically appears in LinkedIn Campaign Manager after 24–48 hours.
💡 This allows you to know which ads are generating deals and optimize your budget accurately, rather than guessing.
Step 9: Clone Campaign & Manage Drafts
When a campaign performs well, you can quickly duplicate its structure instead of rebuilding it from scratch.
- Go to Marketing → Campaigns and open the LinkedIn tab.
- On the campaign you want to duplicate, open the ⋮ (three dots) menu next to the campaign name and select Clone.
- A dialog box will appear with a suggested name ("Copy of …") — modify it if desired, then confirm.
- A DRAFT copy of the entire campaign is created (structure, ads, targeting, budget). The draft does not incur costs and is not yet live on the ad platform.
- Open the draft to review/edit, then publish when ready — the original campaign remains unchanged.
Manage Draft Campaigns: For LinkedIn, you can select and delete draft campaigns in bulk directly from the campaign list to keep it tidy.
Note: Cloned campaigns start with zero performance history — they are entirely new campaigns.
Result: You can quickly reuse effective structures, reducing setup time for new campaigns.
Step 10: Monitor Performance & Manage Ads
After your campaigns are live, monitor and refine them for optimal results.
- View performance by ad to identify winning ads and those to pause.
- Track metrics like impressions, clicks, CTR, cost, CPC/CPM, conversions, and cost per conversion.
- Analyze by LinkedIn demographic data (job titles, companies, industries, seniority) to see which segments are most engaged.
- Adjust ad-set and ad content status directly when needed.
Result: You make data-driven optimization decisions — pausing underperforming ads and increasing investment in effective ones.
Benefits of Using
- Instant Leads to CRM — no manual export/import, enabling immediate sales follow-up.
- Centralized Multi-Channel Management — Facebook Ads + Google Ads + LinkedIn Ads in one interface.
- Conversion Measurement — know which ads generate deals and optimize budget correctly.
- Quick Campaign Creation — cloning, using existing posts, CTA picker, real previews.
- Reduced Operational Errors — billing hold alerts, clear ad naming, transparent status.
Who is it for?
- Marketing Agencies — manage LinkedIn Ads for multiple clients in one place.
- B2B Businesses — where LinkedIn is a high-quality lead source.
- SMBs doing B2B Lead Gen — capture leads and automate follow-up without missing opportunities.
Important Notes
- The LinkedIn account used for connection must have admin rights to the Company Page, and that Page must have an active ad account.
- If leads are not syncing, check the Lead Sync configuration and use Sync Leads to catch up; leads are deduplicated by email.
- Conversion data takes approximately 24–48 hours to appear; ensure contacts have valid emails and that conversion rules are linked to running campaigns.
- Always address billing hold alerts before publishing — otherwise, ads will not be delivered.
Documentation belongs to GTG CRM — A comprehensive CRM & Marketing Platform