1. Aðgangur að Heimildum
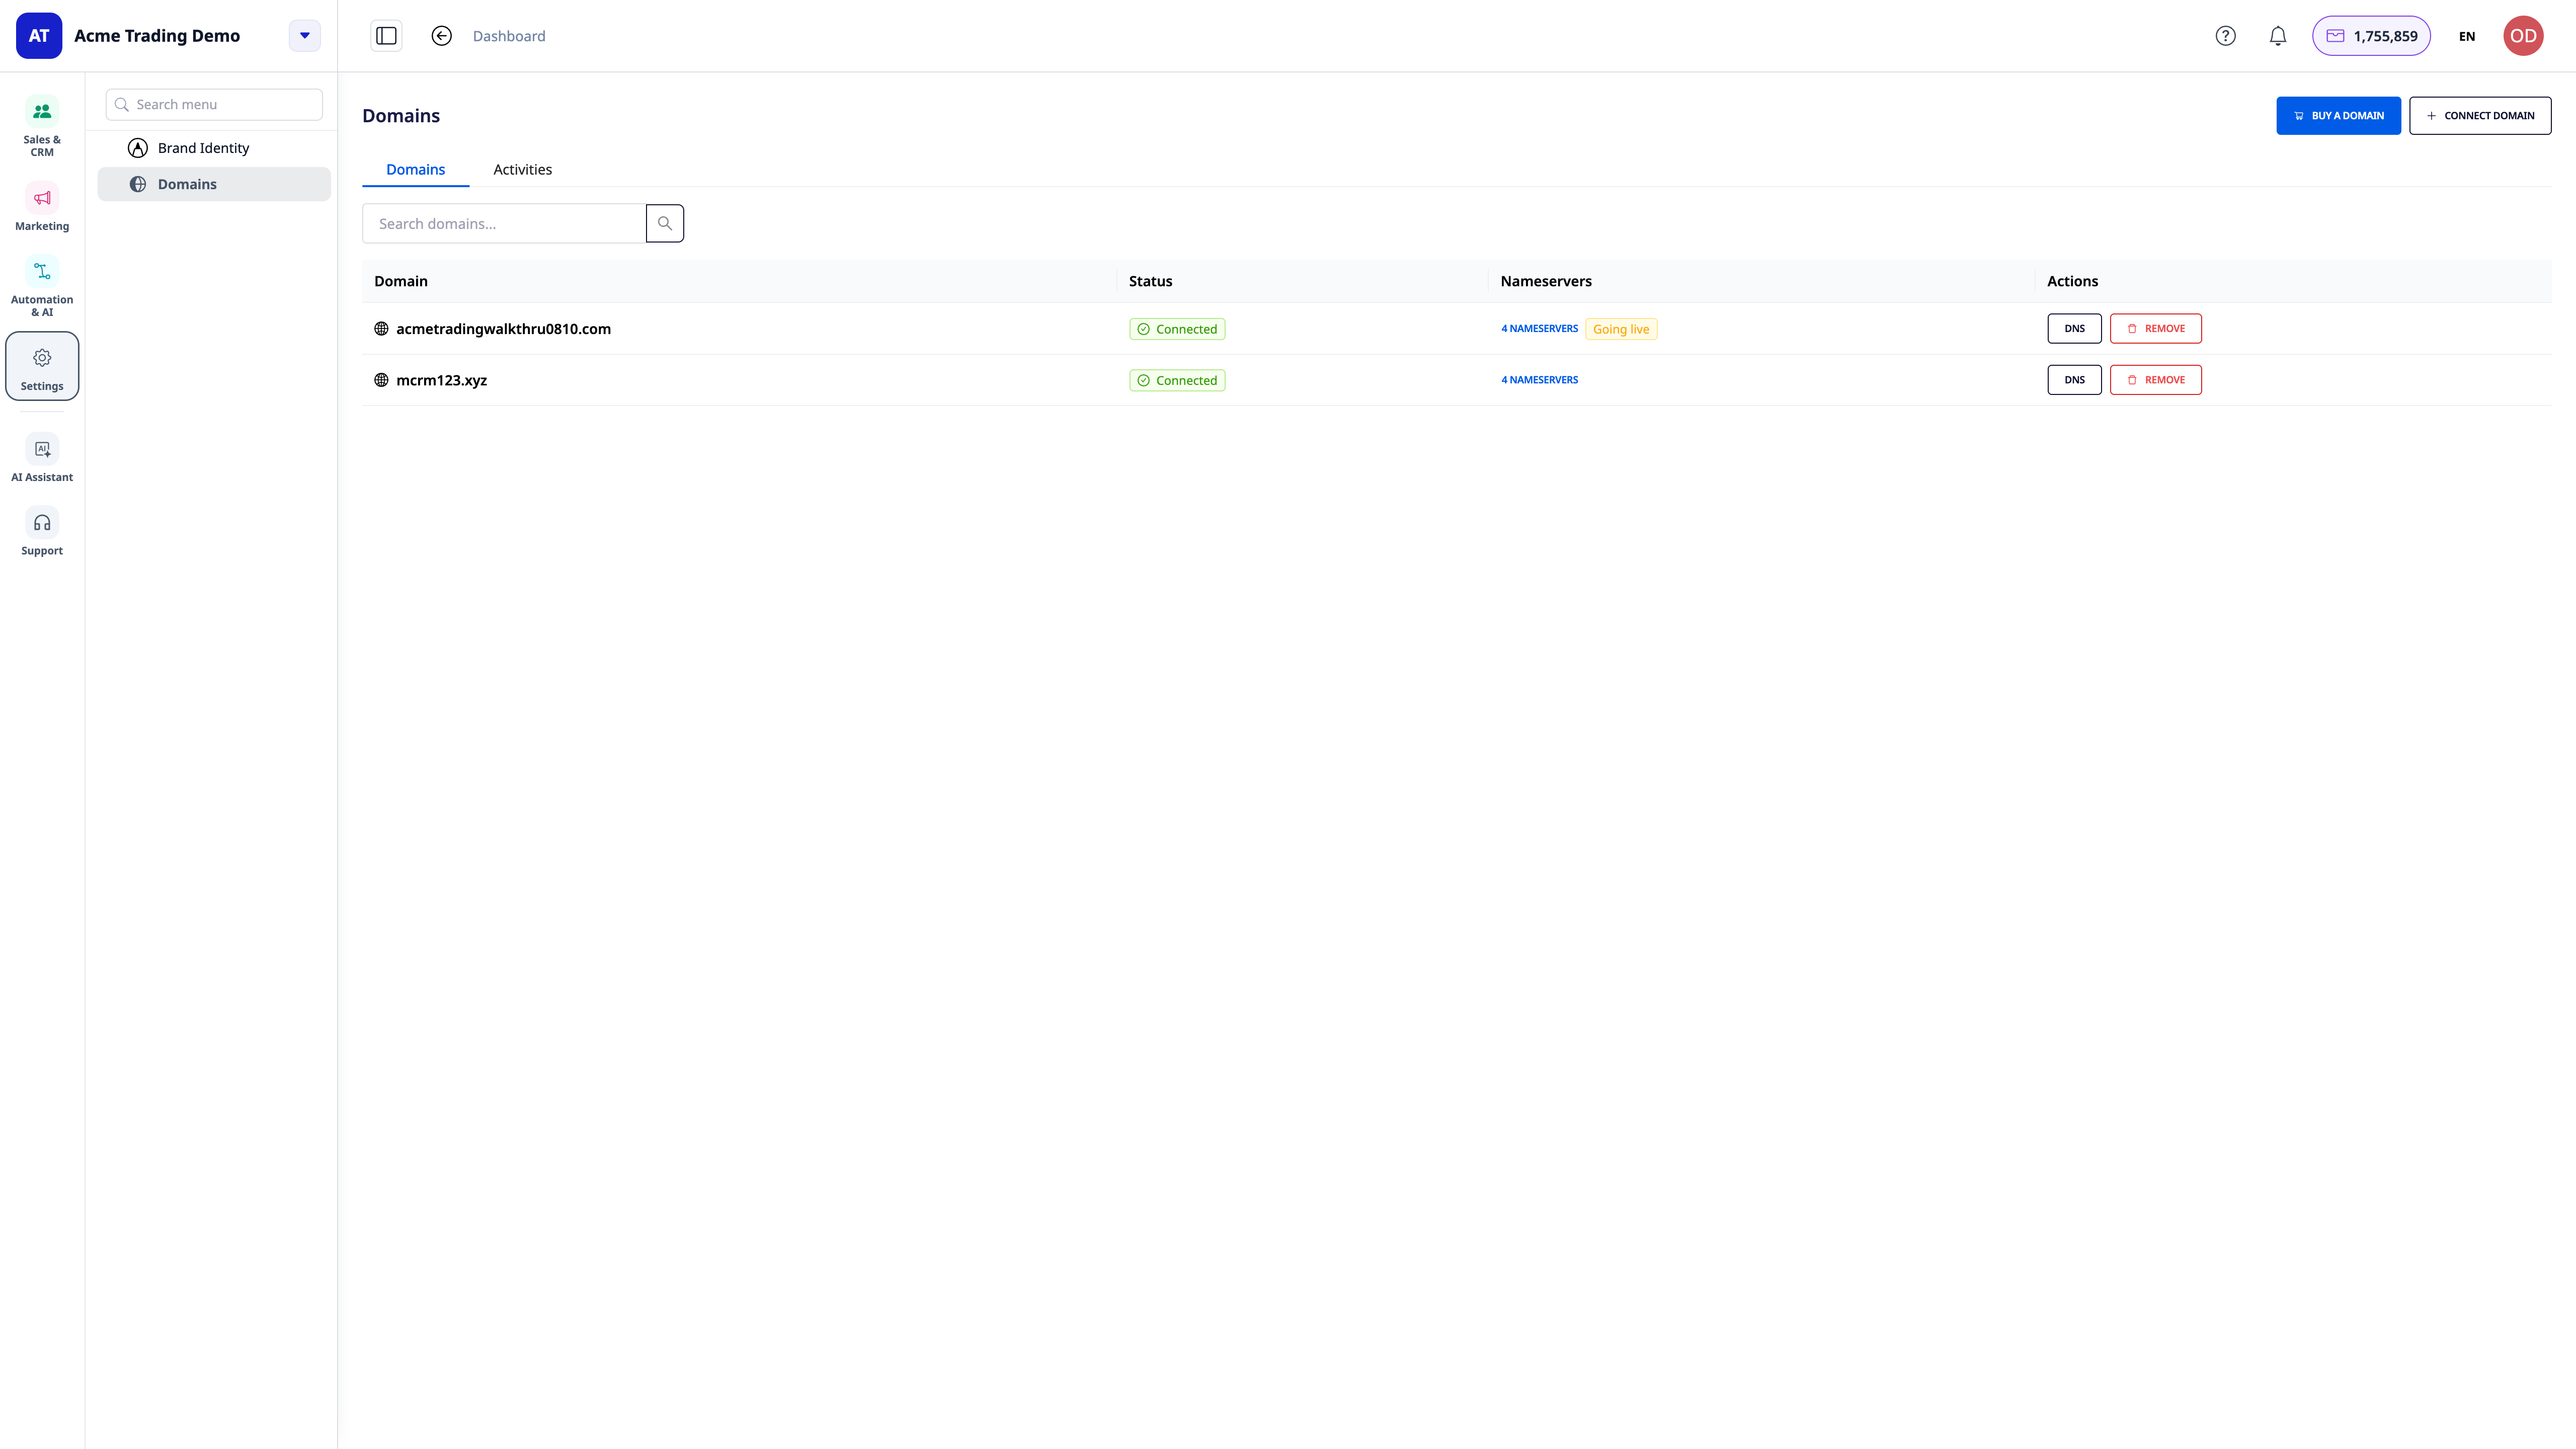
Skref 1: Skráðu þig inn á GTG CRM
Skráðu þig inn á GTG CRM reikninginn þinn.
Skref 2: Opnaðu Stillingarvalmyndina
Horfðu á vinstri hliðarvalmyndina, skrunaðu alveg niður og smelltu á Stillingar.
Skref 3: Veldu Heimildir
Í Stillingarvalmyndinni, smelltu á Heimildir.
2. Skoða Sjálfgefna Hlutverk
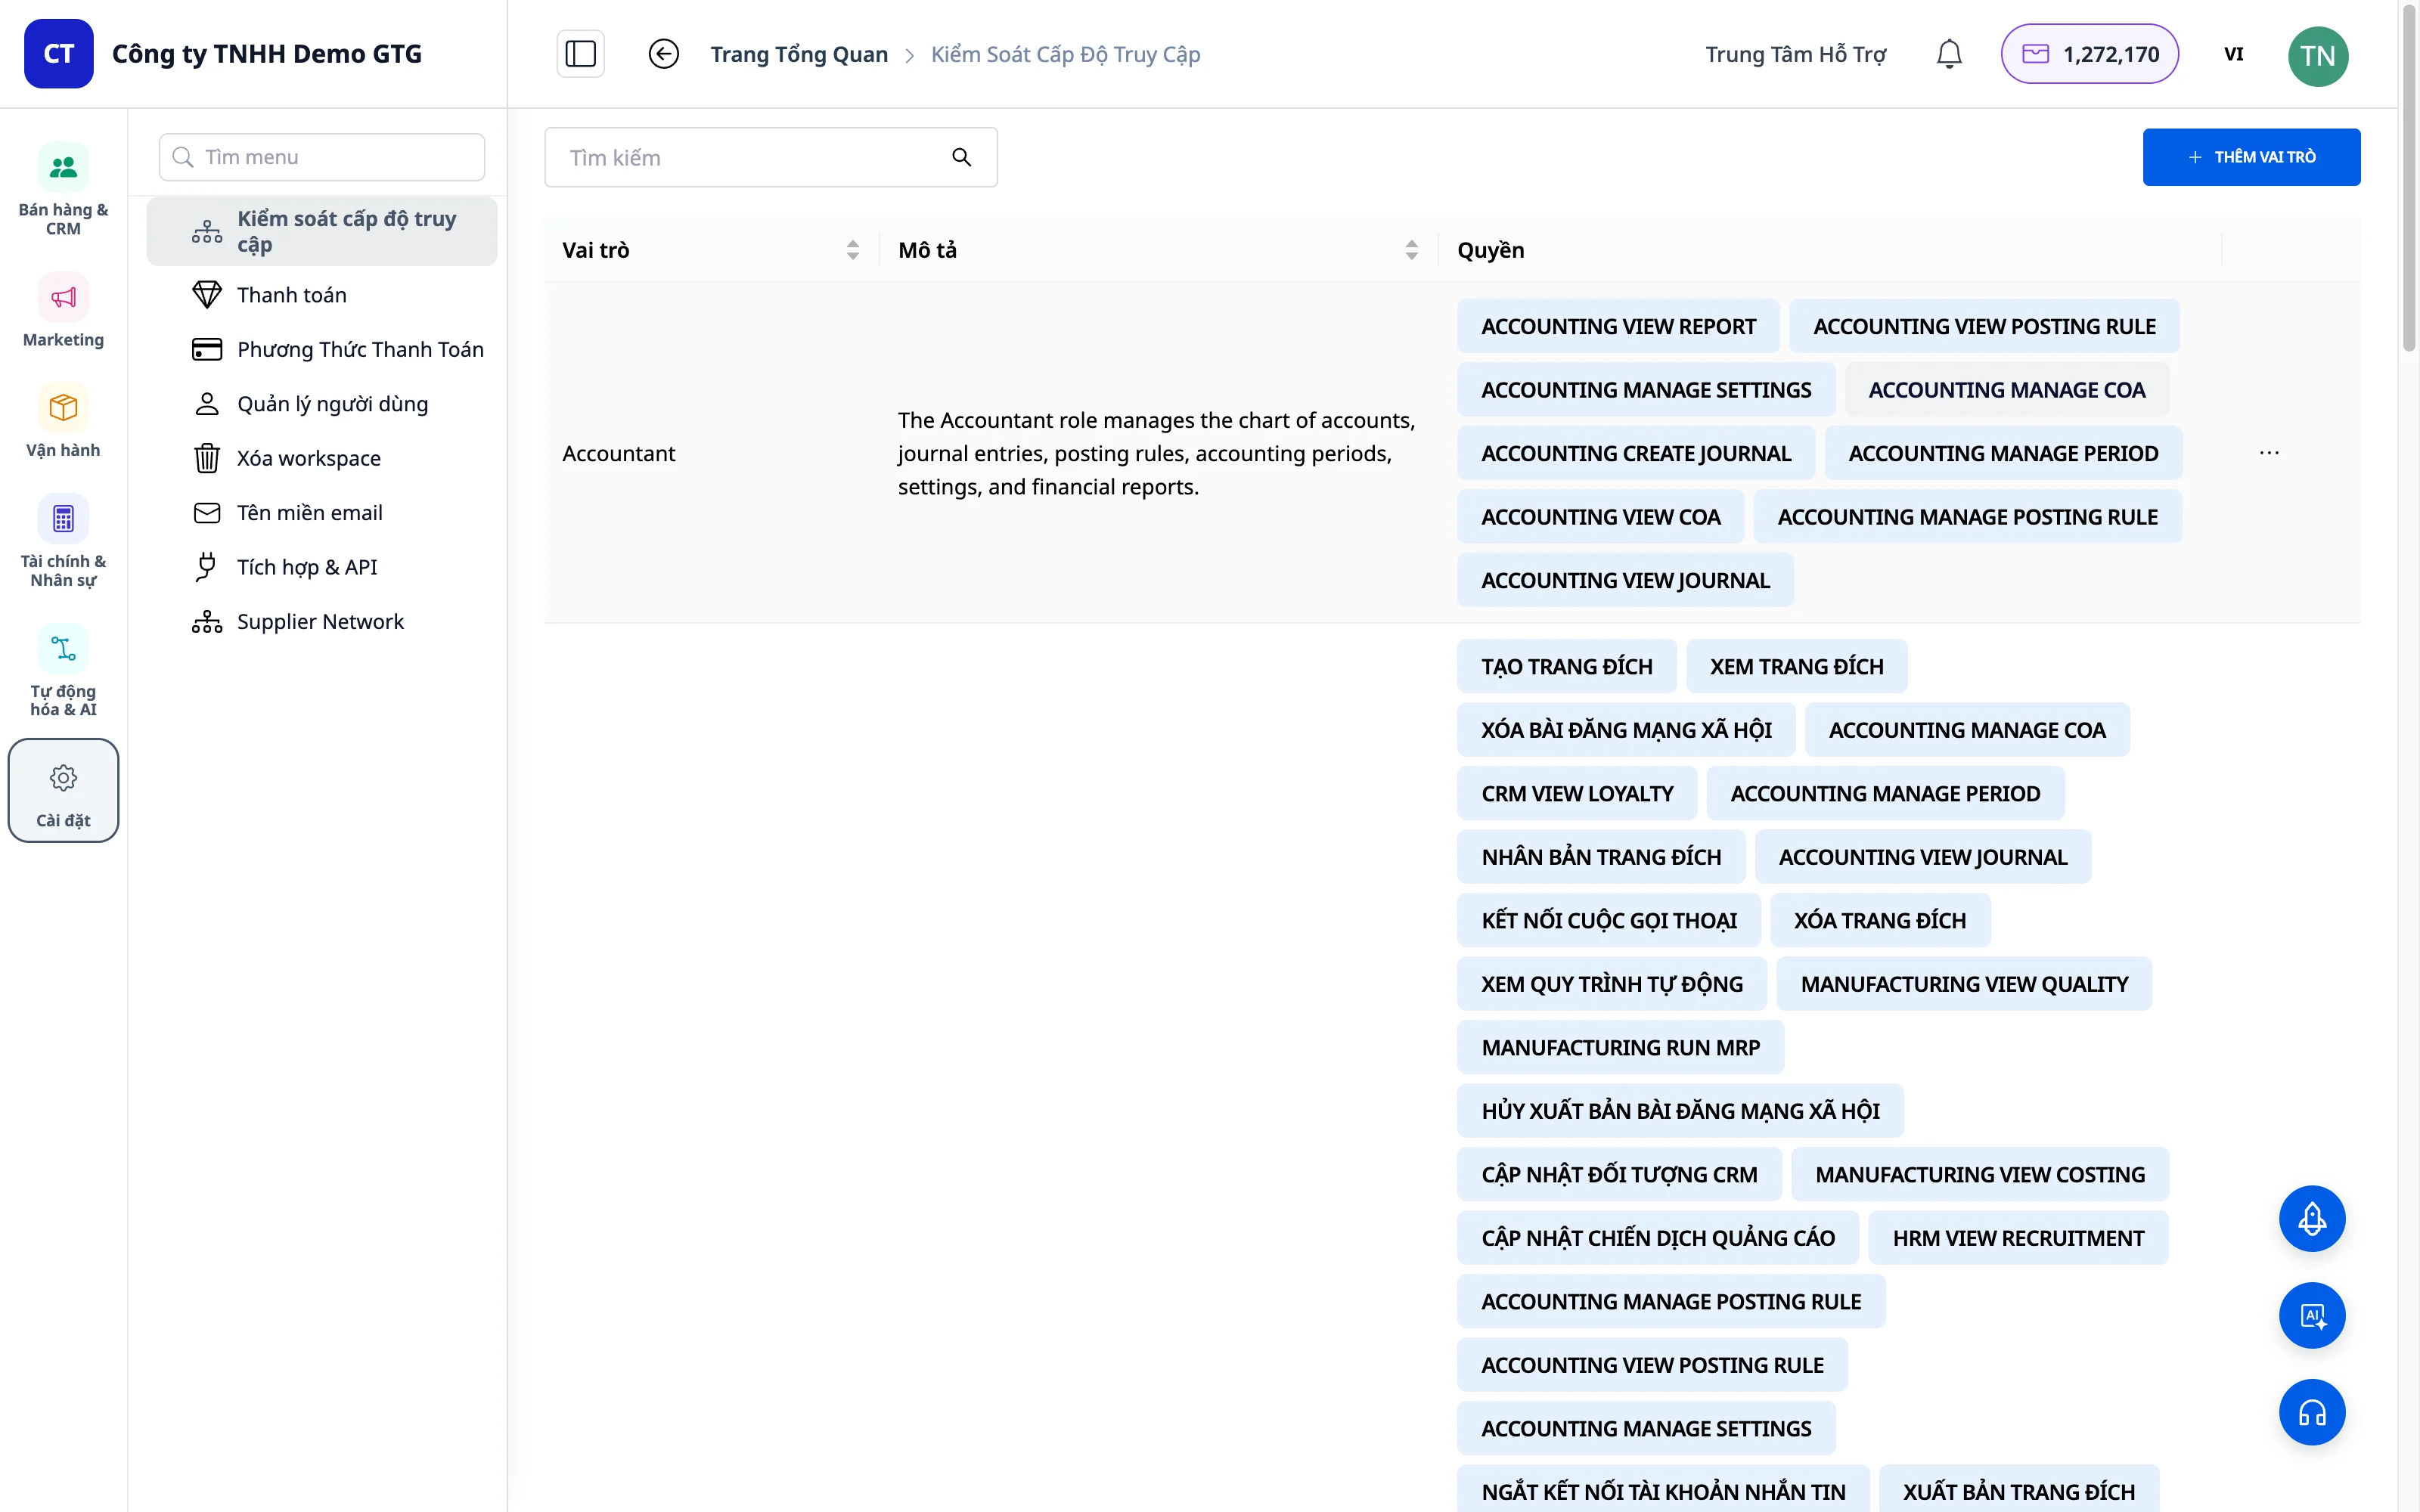
GTG CRM býður upp á 3 sjálfgefin hlutverk:
Administrator
| Eiginleiki | Gildi |
|---|---|
| Nafn | Administrator |
| Heimildir | Fullar heimildir á kerfinu |
| Lýsing | Hæsta heimild, stjórnar öllu kerfinu |
| Stillingar | Sjálfkrafa með allar Stillingarheimildir (frá 5/2026) |
Marketing Manager
| Eiginleiki | Gildi |
|---|---|
| Nafn | Marketing Manager |
| Heimildir | Stjórna markaðssetningu, skoða skýrslur |
| Lýsing | Fyrir markaðsstjóra |
Marketing Staff
| Eiginleiki | Gildi |
|---|---|
| Nafn | Marketing Staff |
| Heimildir | Framkvæma markaðssetningarstörf |
| Lýsing | Fyrir markaðsstarfsmenn |
3. Búa til Nýtt Hlutverk
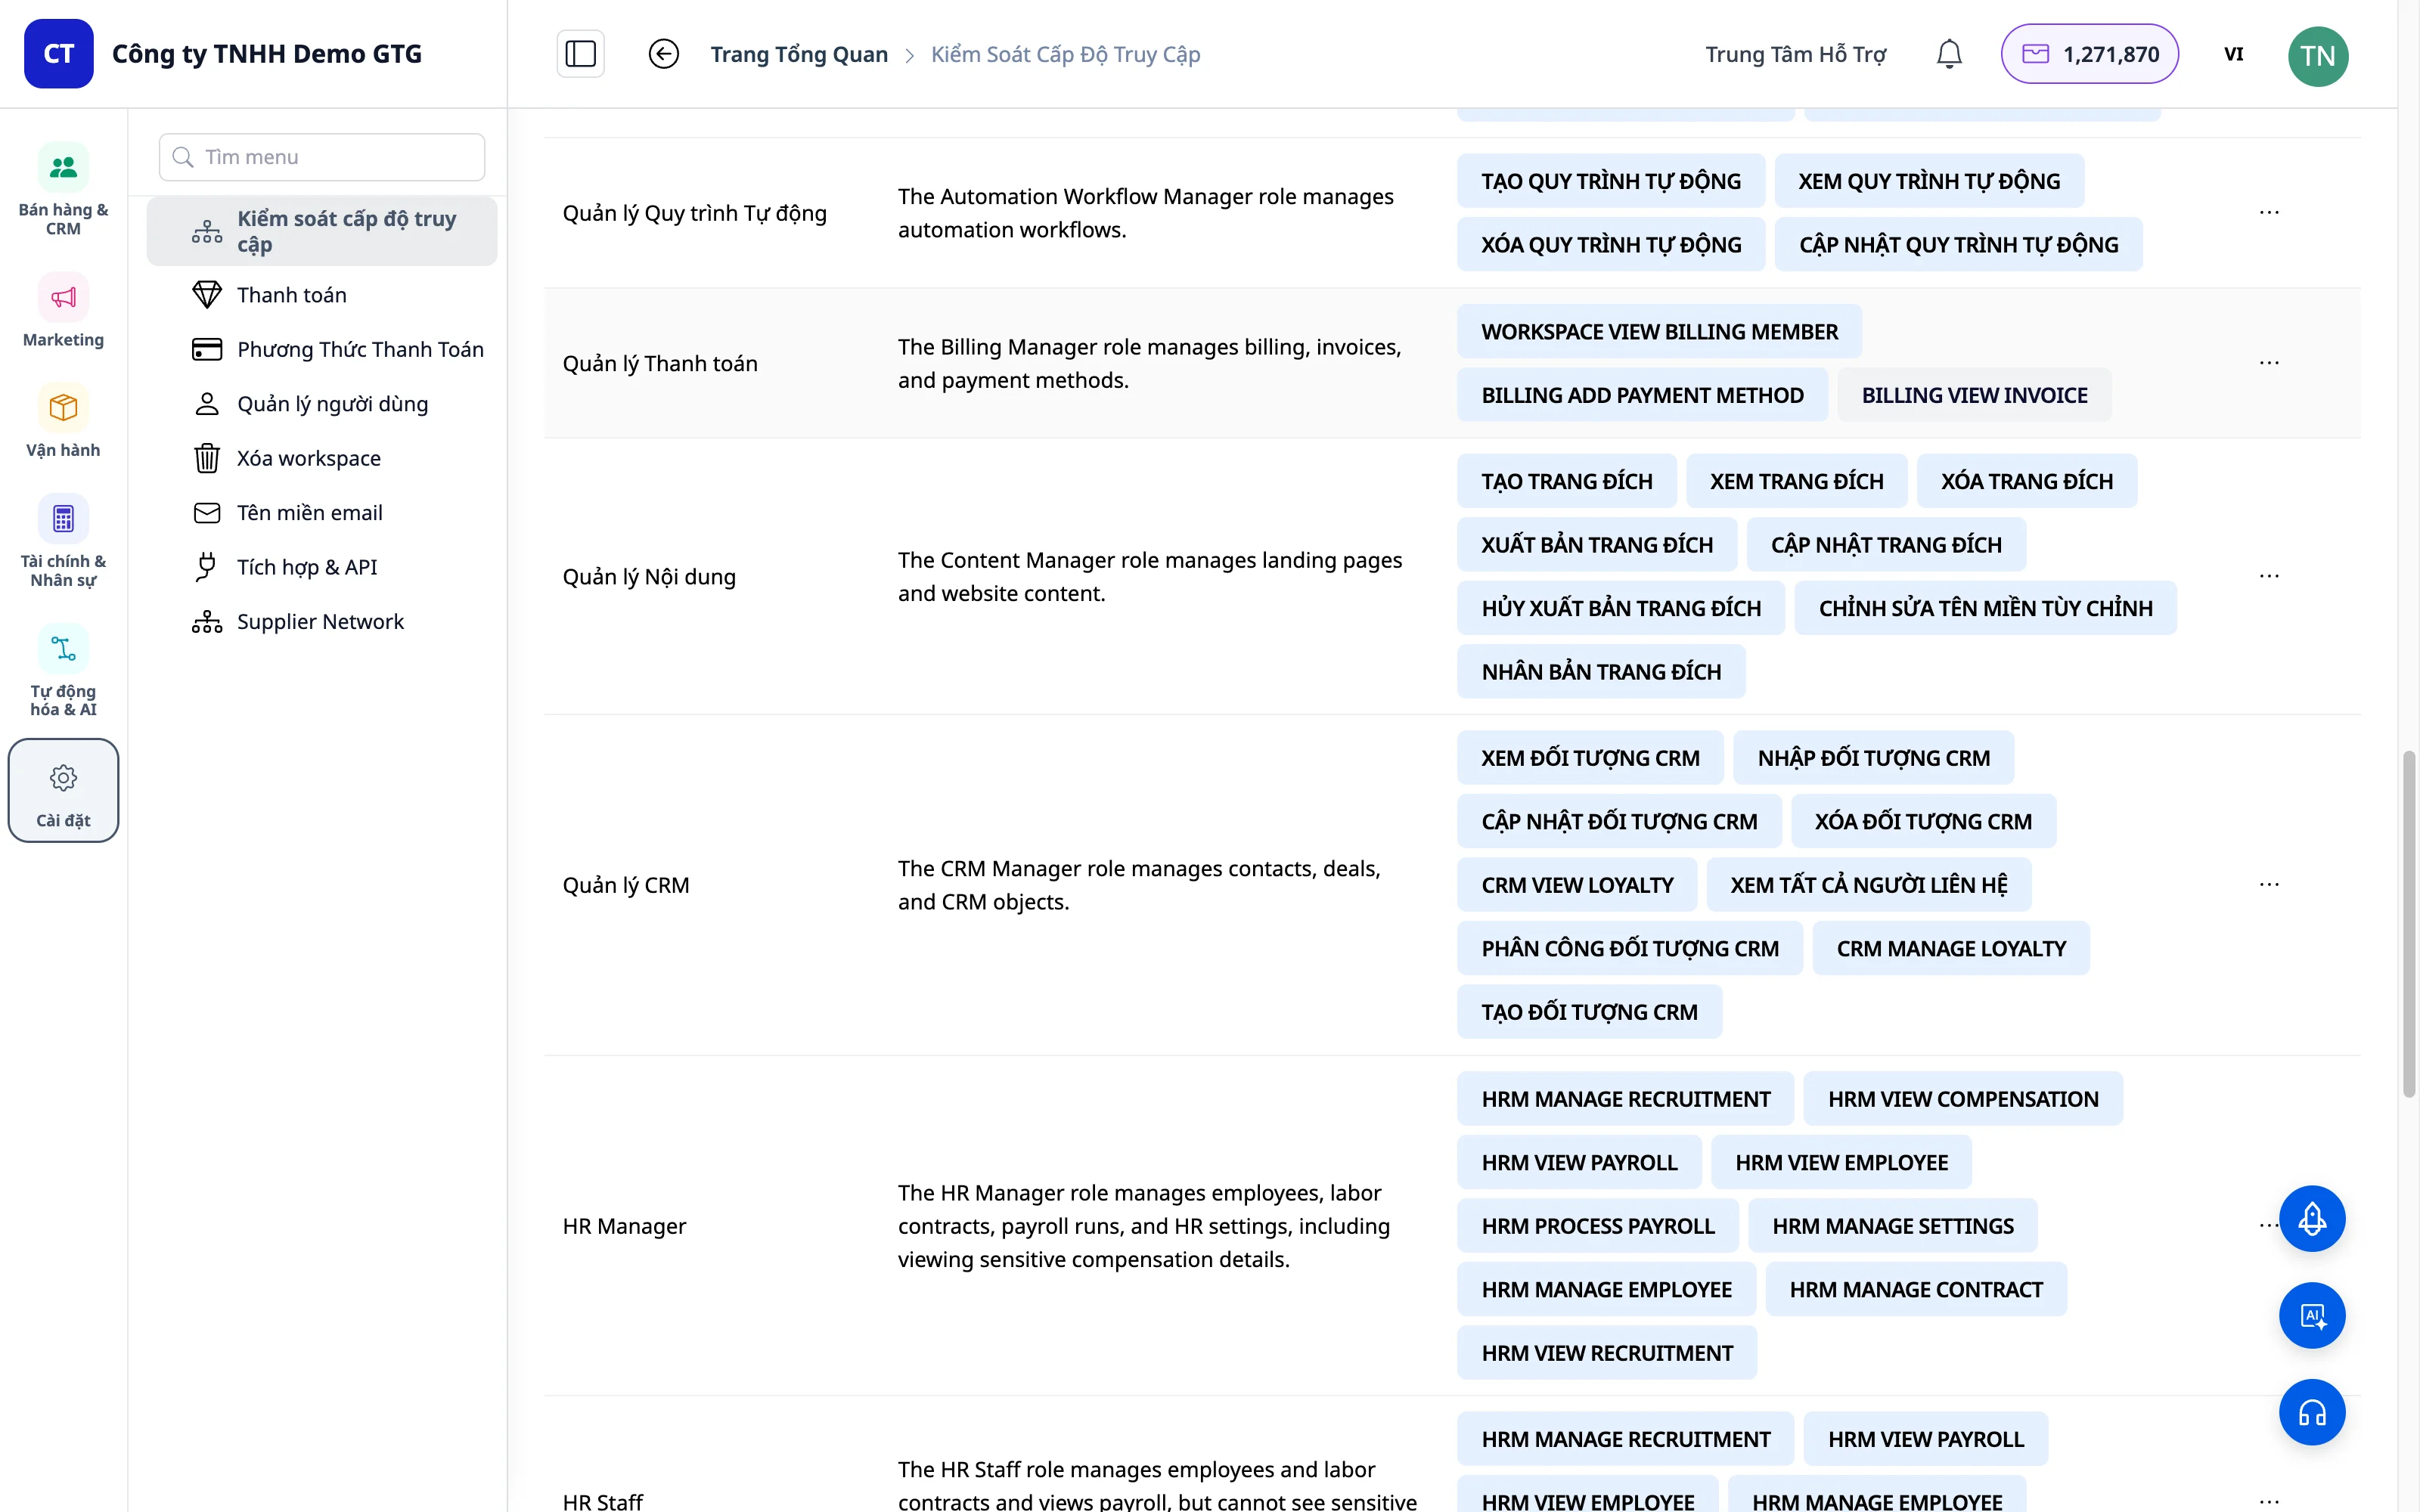
Skref 1: Smelltu á „Bæta við hlutverki“
Í hægra horni skjásins, smelltu á hnappinn „Bæta við hlutverki“.
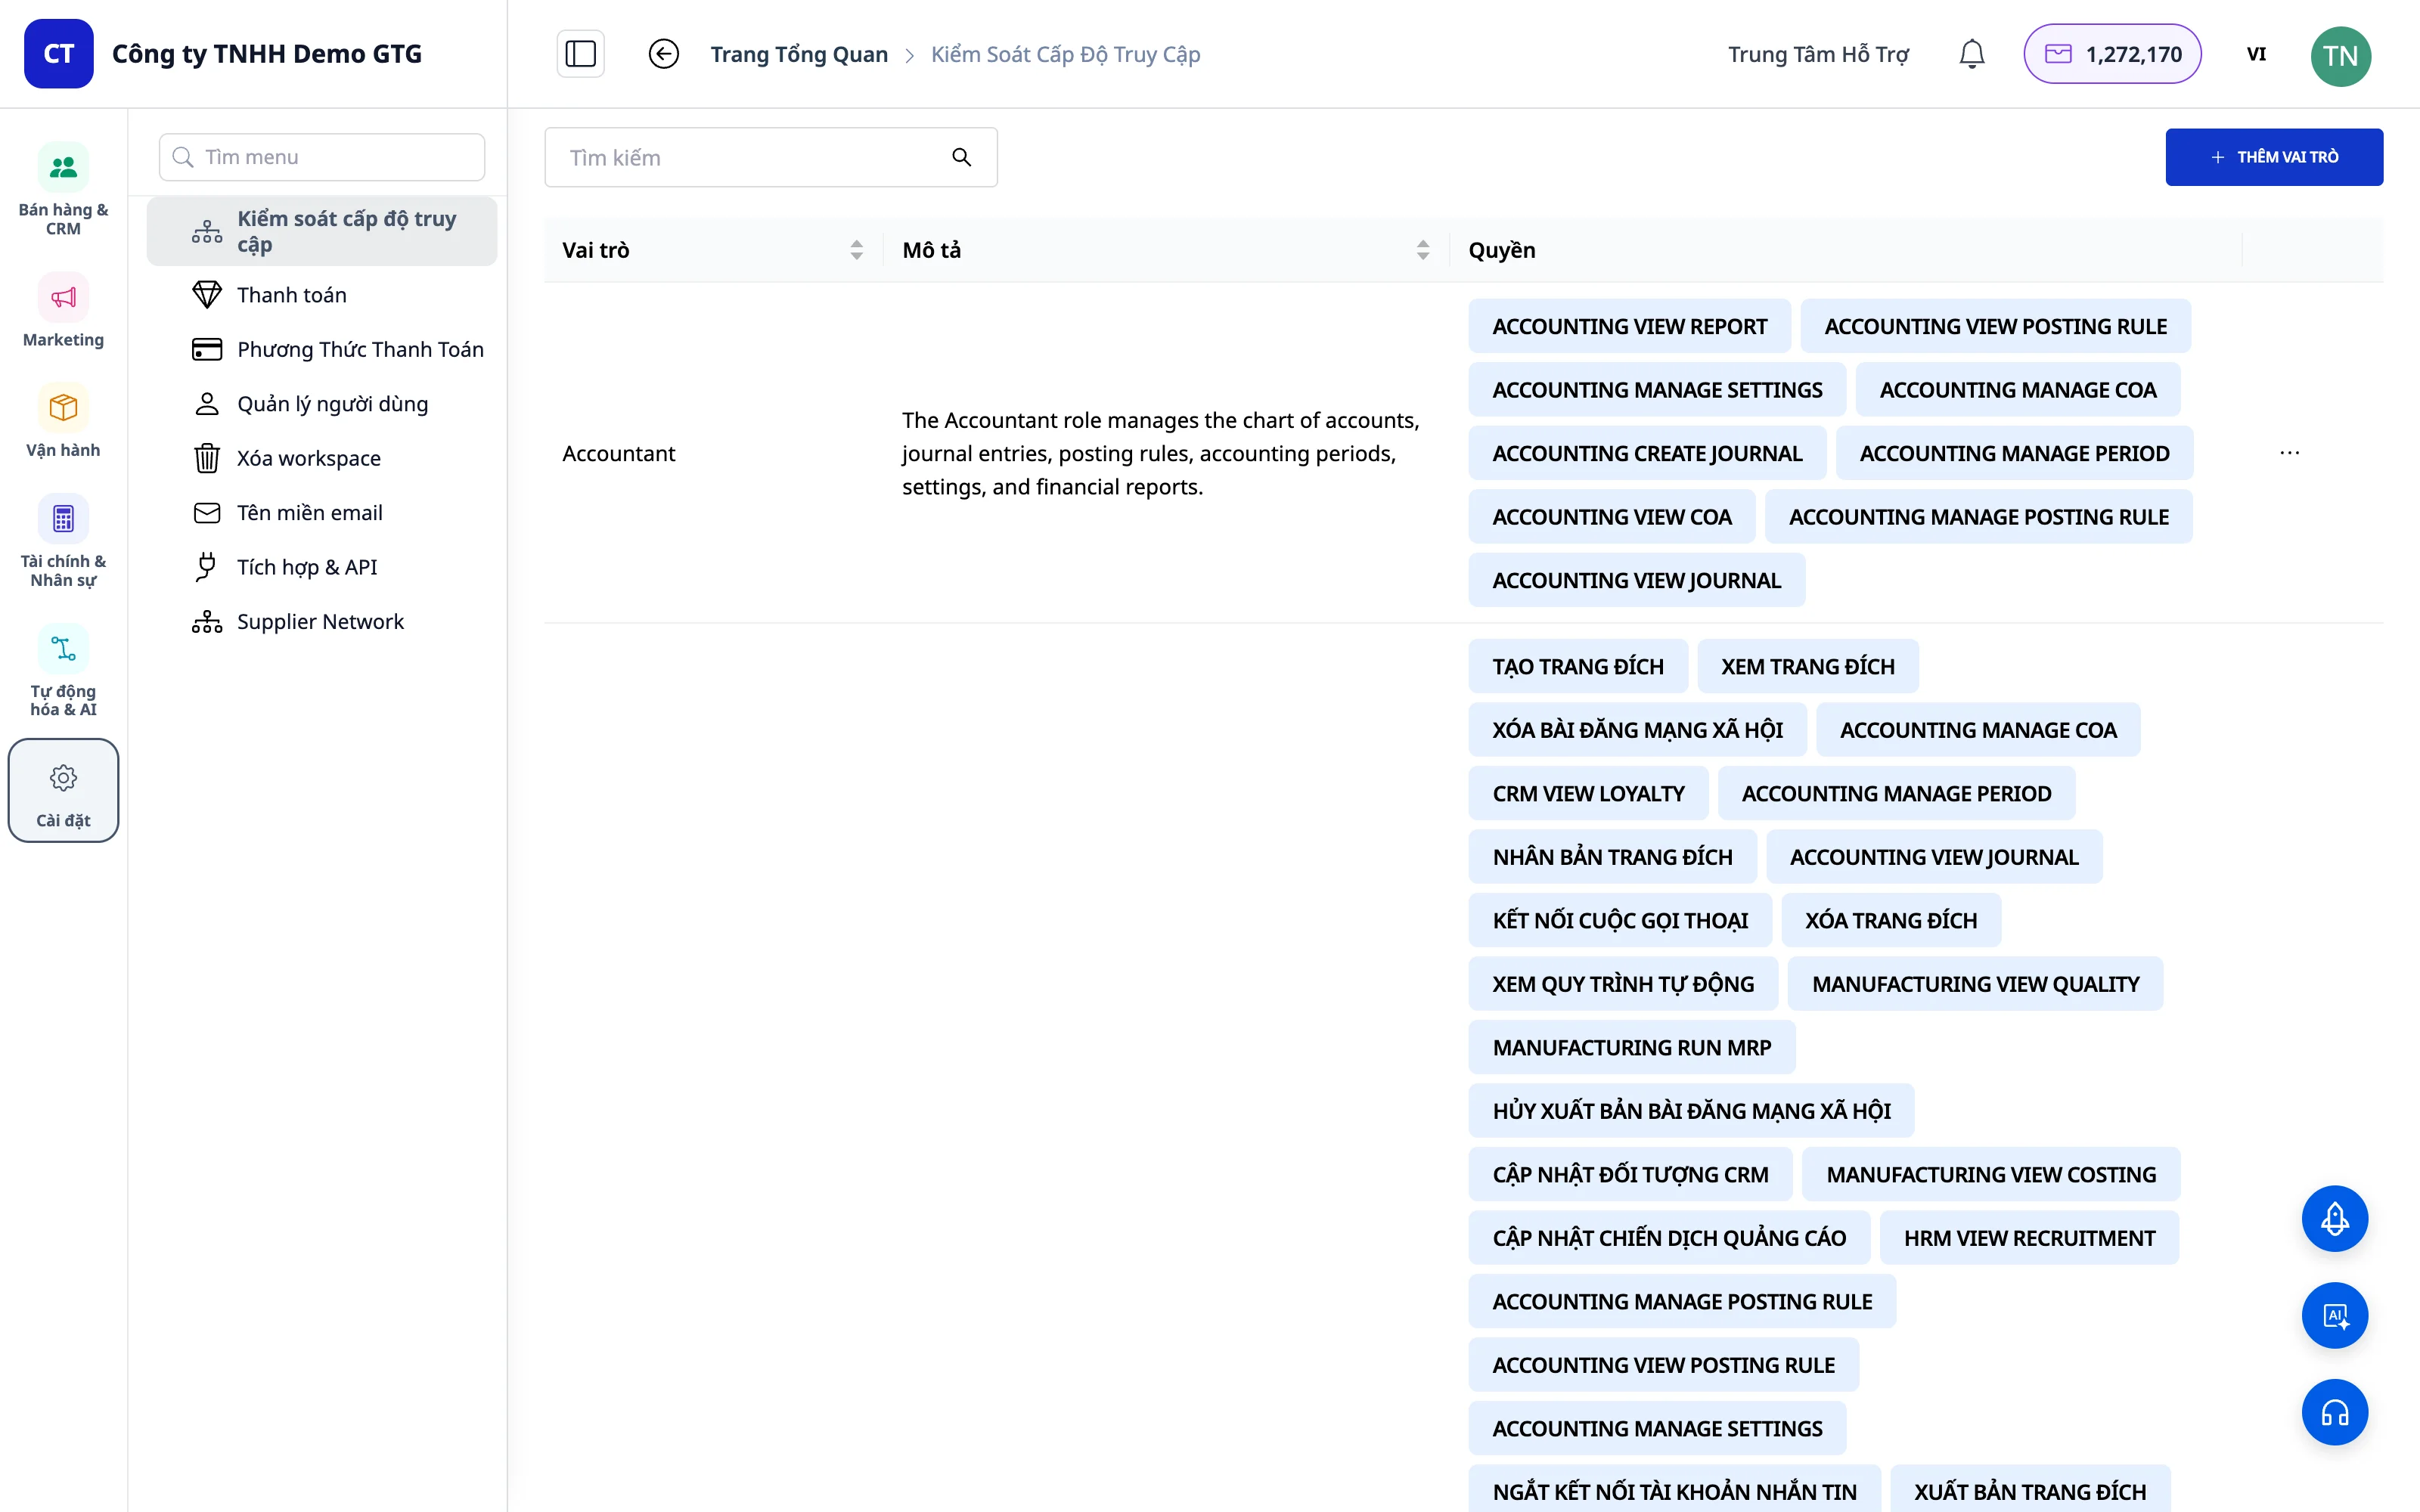
Skref 2: Nefndu Hlutverkið
Sláðu inn nafn fyrir nýja hlutverkið (t.d. „Sales“, „Support“, „Warehouse“).
Skref 3: Bæta við Lýsingu (Valfrjálst)
Stutt lýsing á þessu hlutverki til að auðvelda framtíðarstjórnun.
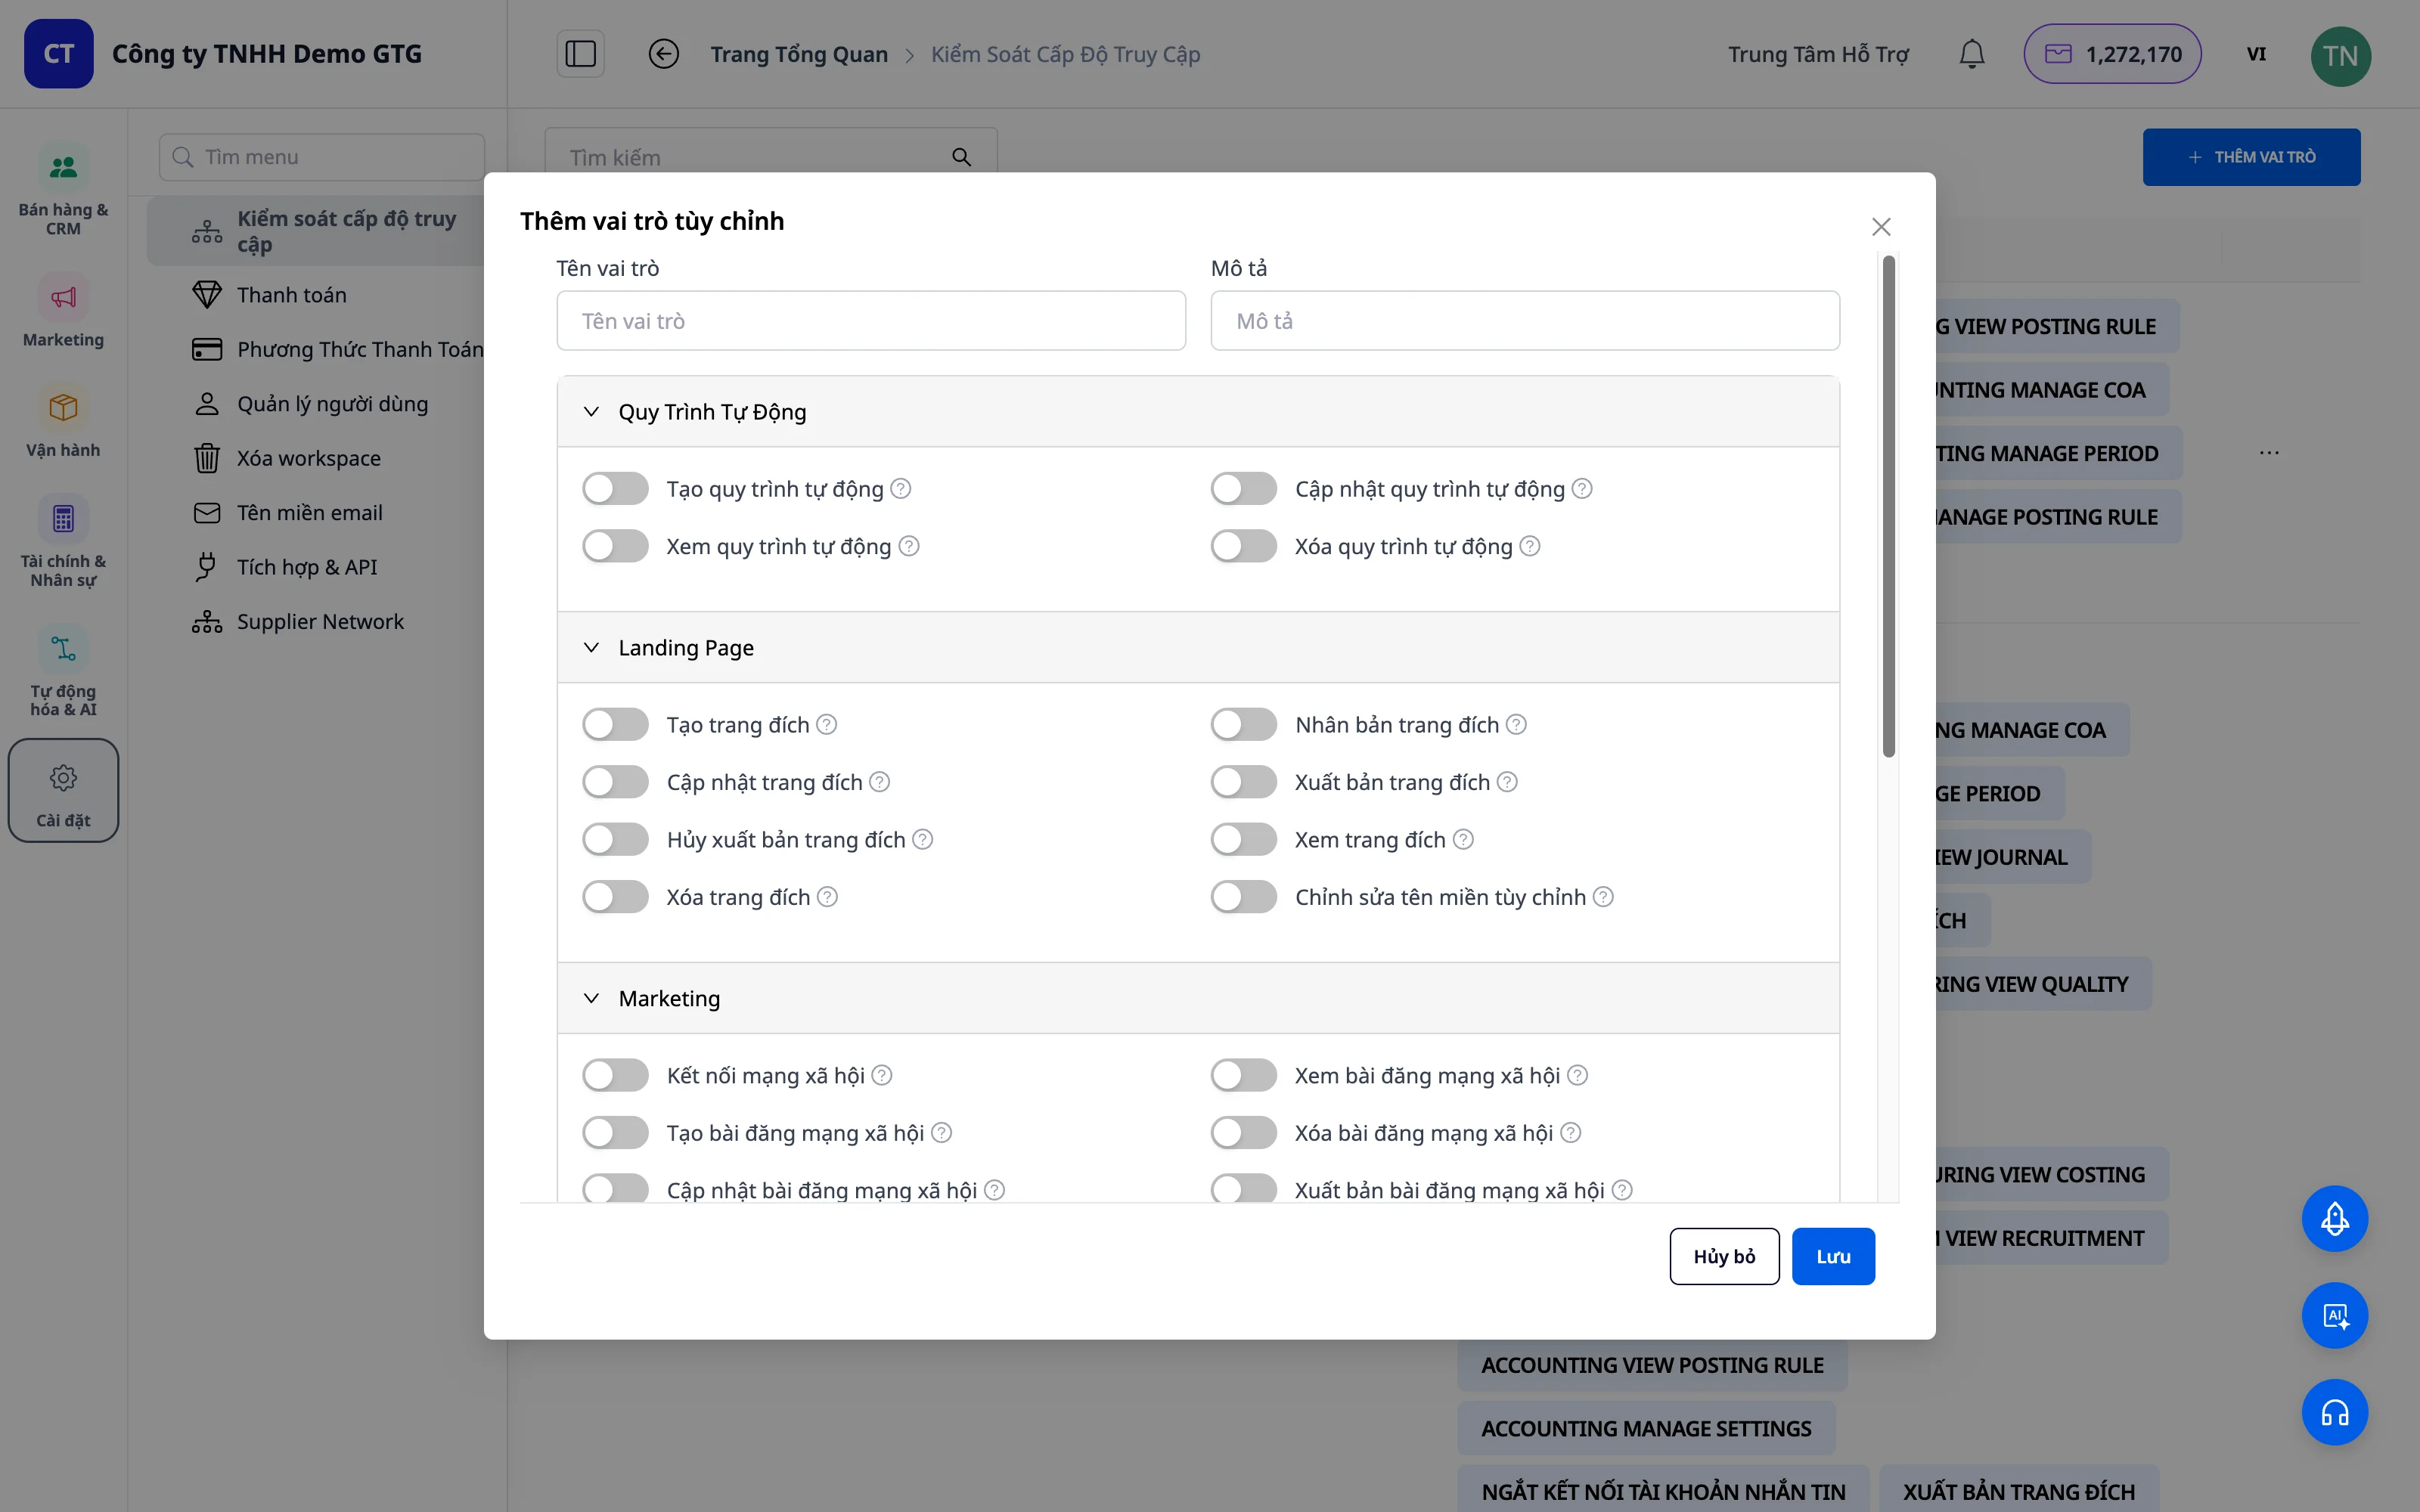 Dæmi:
- Nafn: Sales
- Lýsing: Sölufulltrúi, stýrir viðskiptavinum og pöntunum
Dæmi:
- Nafn: Sales
- Lýsing: Sölufulltrúi, stýrir viðskiptavinum og pöntunum
4. Sérsníða Heimildir
Heimildaruppbygging
Hver eining hefur sínar eigin heimildir:
Eining
├── Create (Búa til)
├── View (Skoða)
├── Update (Uppfæra)
├── Delete (Eyða)
└── Aðrar sérstakar heimildir
Kveikja/Slökkva á Heimildum
Notaðu sleðahnappinn til að kveikja/slökkva á hverri heimild: - Kveikt: Leyfa - Slökkt: Leyfa ekki
Heimildir eftir Einingu
Automation Workflow
| Heimild | Convention A | Lýsing |
|---|---|---|
| Create | AUTOMATION_WORKFLOW_CREATE |
Búa til nýja vinnuflæði |
| View | AUTOMATION_WORKFLOW_VIEW |
Skoða lista og upplýsingar um vinnuflæði |
| Update | AUTOMATION_WORKFLOW_UPDATE |
Breyta vinnuflæði |
| Delete | AUTOMATION_WORKFLOW_DELETE |
Eyða vinnuflæði |
Landing Page
| Réttindi | Lýsing |
|---|---|
| Create | Búa til nýja landssíðu |
| Update | Breyta landssíðu |
| Publish | Birta landssíðu |
| Unpublish | Aftengja birtingu |
| Delete | Eyða landssíðu |
| Modify Custom Domain | Stilla sérsniðið lén |
Markaðssetning
| Réttindi | Lýsing |
|---|---|
| View Social Posts | Skoða samfélagsfærslur |
| Manage Campaigns | Stjórna herferðum |
CRM
| Réttindi | Convention A | Lýsing |
|---|---|---|
| View All Contacts | CRM_VIEW_ALL_CONTACT |
Skoða alla tengiliði |
| View Object | CRM_OBJECT_VIEW |
Skoða upplýsingar um tengilið |
Tölvupóstur & skilaboð
| Eining | Réttindi |
|---|---|
| Búa til, Senda, Skoða, Eyða | |
| Messaging | Skoða, Svara, Stjórna |
Greiðslur
| Réttindi | Convention A | Lýsing |
|---|---|---|
| View Invoice | BILLING_VIEW_INVOICE |
Skoða reikning |
| Add Payment Method | BILLING_ADD_PAYMENT_METHOD |
Bæta við greiðslumáta |
Stillingar / Vinnusvæði
| Réttindi | Convention A | Lýsing |
|---|---|---|
| Manage Users | WORKSPACE_ACTION_USER |
Stjórna notendum |
| View Billing | WORKSPACE_VIEW_BILLING_MEMBER |
Skoða greiðsluupplýsingar |
Vista hlutverk
Eftir að þú hefur sérsniðið allt, smelltu á „Vista“ til að búa til hlutverk.
5. Úthluta hlutverki til notanda
Skref 1: Opna „Stjórna notendum“
„Listi yfir notendur“ hér eru allir notendur á vinnusvæðinu.
Skref 2: Finna notanda
Finndu notandann sem þú vilt úthluta réttindum til á listanum.
Skref 3: Velja hlutverk
Í dálknum „Hlutverk“, smelltu á fellivalmyndina til að opna listann yfir hlutverk.
Skref 4: Úthluta hlutverki
Veldu viðeigandi hlutverk úr fellivalmyndinni. Hlutverkinu verður úthlutað strax.
Skref 5: Staðfesta
Athugaðu að hlutverkið hafi verið úthlutað rétt.
6. Stjórna hlutverkum
Breyta hlutverki
- Smelltu á hlutverkið sem á að breyta
- Breyta heimildum
- Smelltu á Vista
Eyða hlutverki
- Smelltu á hlutverkið sem á að eyða
- Smelltu á Eyða hlutverki
- Staðfesta eyðingu
Athugið: Ekki er hægt að eyða sjálfgefnum hlutverkum (Administrator, Marketing Manager, Marketing Staff).
Raunhæf dæmi
Dæmi 1: Búa til „Sölumaður“ hlutverk
Markmið: Sölufólk þarf að geta stjórnað viðskiptavinum, sent skilaboð og tölvupóst.
Úthlutað réttindi:
- CRM: CRM_VIEW_ALL_CONTACT, CRM_OBJECT_VIEW
- Skilaboð: Öll
- Tölvupóstur: Öll
- Sjálfvirkni: AUTOMATION_WORKFLOW_CREATE, Skoða, Breyta
- Landssíða: Búa til, Breyta, Birta, Skoða
- Markaðssetning: Aðeins skoða
EKKI úthlutað réttindi:
- AUTOMATION_WORKFLOW_DELETE
- Eyða landssíðu
- Stjórna markaðsherferðum
Dæmi 2: Búa til „Stuðningsfulltrúi“ hlutverk
Markmið: Stuðningsfulltrúi þarf aðeins að geta skoðað og svarað skilaboðum viðskiptavina.
Úthlutað réttindi:
- Skilaboð: Skoða, Svara
- CRM: CRM_VIEW_ALL_CONTACT, CRM_OBJECT_VIEW
- Tölvupóstur: Aðeins skoða
Erlendir réttindi: - Öll önnur réttindi
Dæmi 3: Búðu til hlutverk „Fjármál“
Markmið: Að bókhald geti stjórnað reikningum og greiðsluaðferðum.
Veitt réttindi:
- BILLING_VIEW_INVOICE — Skoða reikning
- BILLING_ADD_PAYMENT_METHOD — Bæta við greiðsluaðferð
- WORKSPACE_VIEW_BILLING_MEMBER — Skoða reikningsupplýsingar
7. Samningur A - Nafn á réttindum DOMAIN_ACTION_OBJECT (Nýtt 5/2026)
Öll réttindanafngöng í GTG CRM eru samræmd samkvæmt Samningi A — DOMAIN_ACTION_OBJECT.
Hvernig á að lesa réttindana samkvæmt Samningi A
BILLING_VIEW_INVOICE
   │       │      │
   │       │      └── Hlutur: INVOICE (hlutur: reikningur)
   │       └── Aðgerð: VIEW (aðgerð: skoða)
   └── Lén: BILLING (svið: greiðsla)
Tafla yfir réttindanafngöng eftir svæði
| Svæði | Nafn á réttindum | Merking |
|---|---|---|
BILLING_ |
BILLING_VIEW_INVOICE |
Skoða reikning |
BILLING_ |
BILLING_ADD_PAYMENT_METHOD |
Bæta við greiðsluaðferð |
WORKSPACE_ |
WORKSPACE_ACTION_USER |
Stjórna notendum í vinnusvæði |
WORKSPACE_ |
WORKSPACE_VIEW_BILLING_MEMBER |
Skoða upplýsingar um reikningsaðild í vinnusvæði |
AUTOMATION_ |
AUTOMATION_WORKFLOW_CREATE |
Búa til sjálfvirkni flæði |
AUTOMATION_ |
AUTOMATION_WORKFLOW_DELETE |
Eyða sjálfvirkni flæði |
CRM_ |
CRM_OBJECT_VIEW |
Skoða CRM hluti |
CRM_ |
CRM_VIEW_ALL_CONTACT |
Skoða alla tengiliði |
Hvers vegna breyta nafni?
Áður fyrr voru réttindanafngöngin ekki samræmd: SEND_EMAIL, CREATE_LANDING_PAGE, VIEW_BILLING — erfitt að finna og skoða þegar vinnusvæði hafði mörg réttindi.
Samningur A leysir þetta með því að:
- Flokka eftir svæði → finna BILLING_ og sjá öll greiðsluréttindi strax
- Samræmd aðgerð → VIEW er alltaf skoða, CREATE er alltaf búa til
- Auðvelt að skoða → slá inn nafn á svæði til að sía út alla tengda réttindahópa
8. Stjórnandi fær sjálfkrafa aðgang að Stillingum
Stjórnandi fær sjálfkrafa úthlutað sérstökum WORKSPACE_* réttindum til að fá aðgang að Stillingarvalmyndinni.
Stjórnandi hefur sjálfkrafa öll Stillingarréttindi — þarf ekki að úthluta fleiri.
Mikilvægar athugasemdir
Bestu starfshættir
- Reglan um lágmarksréttindi: Gefðu aðeins út þau réttindi sem nauðsynleg eru fyrir hlutverkið
- Reglubundin endurskoðun: Athugaðu réttindi aftur þegar starfsmaður skiptir um stöðu
- Afritaðu áður en þú eyðir: Skráðu uppsetningu hlutverksins áður en þú eyðir
- Prófaðu réttindi: Skráðu þig inn með reikningi sem hefur réttindin til að prófa í raun
Öryggi
- Aðeins stjórnendur fá að stjórna heimildum
- Ekki deila stjórnendareikningum
- Allar breytingar á heimildum eru skráðar sjálfkrafa
Algengar Spurningar
Sp: Er hægt að úthluta mörgum hlutverkum til eins einstaklings?
S: Eins og er getur hver notandi aðeins fengið eitt hlutverk.
Sp: Hefur nýtt hlutverk strax áhrif?
S: Já, hlutverkið gildir strax eftir úthlutun.
Sp: Er hægt að afturkalla réttindi?
S: Hægt er að úthluta öðru hlutverki hvenær sem er.
Sp: Hvar birtast réttindanafngöng samkvæmt Samningi A?
S: Í Stillingarviðmóti → Heimildaskipting, sýnir hver réttindatengill nafn samkvæmt Samningi A til að auðvelda leit.
Samantekt
Með Heimildaskiptingareiginleikanum í GTG CRM:
- Stækkaðu öryggisteymið - hver sér um sína ábyrgð
- Stjórnaðu aðgangi að mikilvægum gögnum
- Convention A - stöðluð leyfisheit, auðvelt að sannreyna eftir sviðum
- Sjálfvirkur stjórnandi með stillingar - ekki meiri misstillingar
- Starfaðu faglega eins og stórt fyrirtæki