This guide walks you through the entire accounting lifecycle in GTG CRM according to the latest standards: from setting up the correct chart of accounts under Circular 99/2025/TT-BTC (effective from 01/01/2026), to operating daily automatic journal entries, managing incoming invoices from tax authorities, recording fixed assets and depreciation, to exporting XML for eTax submission and generating financial reports in PDF/Excel. Each section below is an independent workflow — you can jump directly to the part you need.
Requirements: GTG CRM account logged in; user has access to the Accounting module (see Authorization section at the end of the article). Accounting must be enabled in workspace settings.
Part 1: Initial Setup
Setup only needs to be done once. After completion, all journal entries will run automatically according to this configuration.
Step 1: Enable Accounting & Select Standard
Go to Settings → Accounting Settings.
Enable the accounting_enabled switch, then select the accounting_standard:
Standard | Applies to | Notes |
|---|---|---|
TT99/2025 | Enterprises | Replaces TT200 from 01/01/2026 — mandatory for fiscal year 2026 |
TT133/2016 | Business households, SMEs | Still valid; can voluntarily switch to TT99 |
TT200/2014 | Old accounting standard | Only for closing FY2025 or archiving; not for 2026 |
Save. The standard and chart of accounts are locked once the first journal entry is made — choose correctly from the start.
Step 2: Build Chart of Accounts
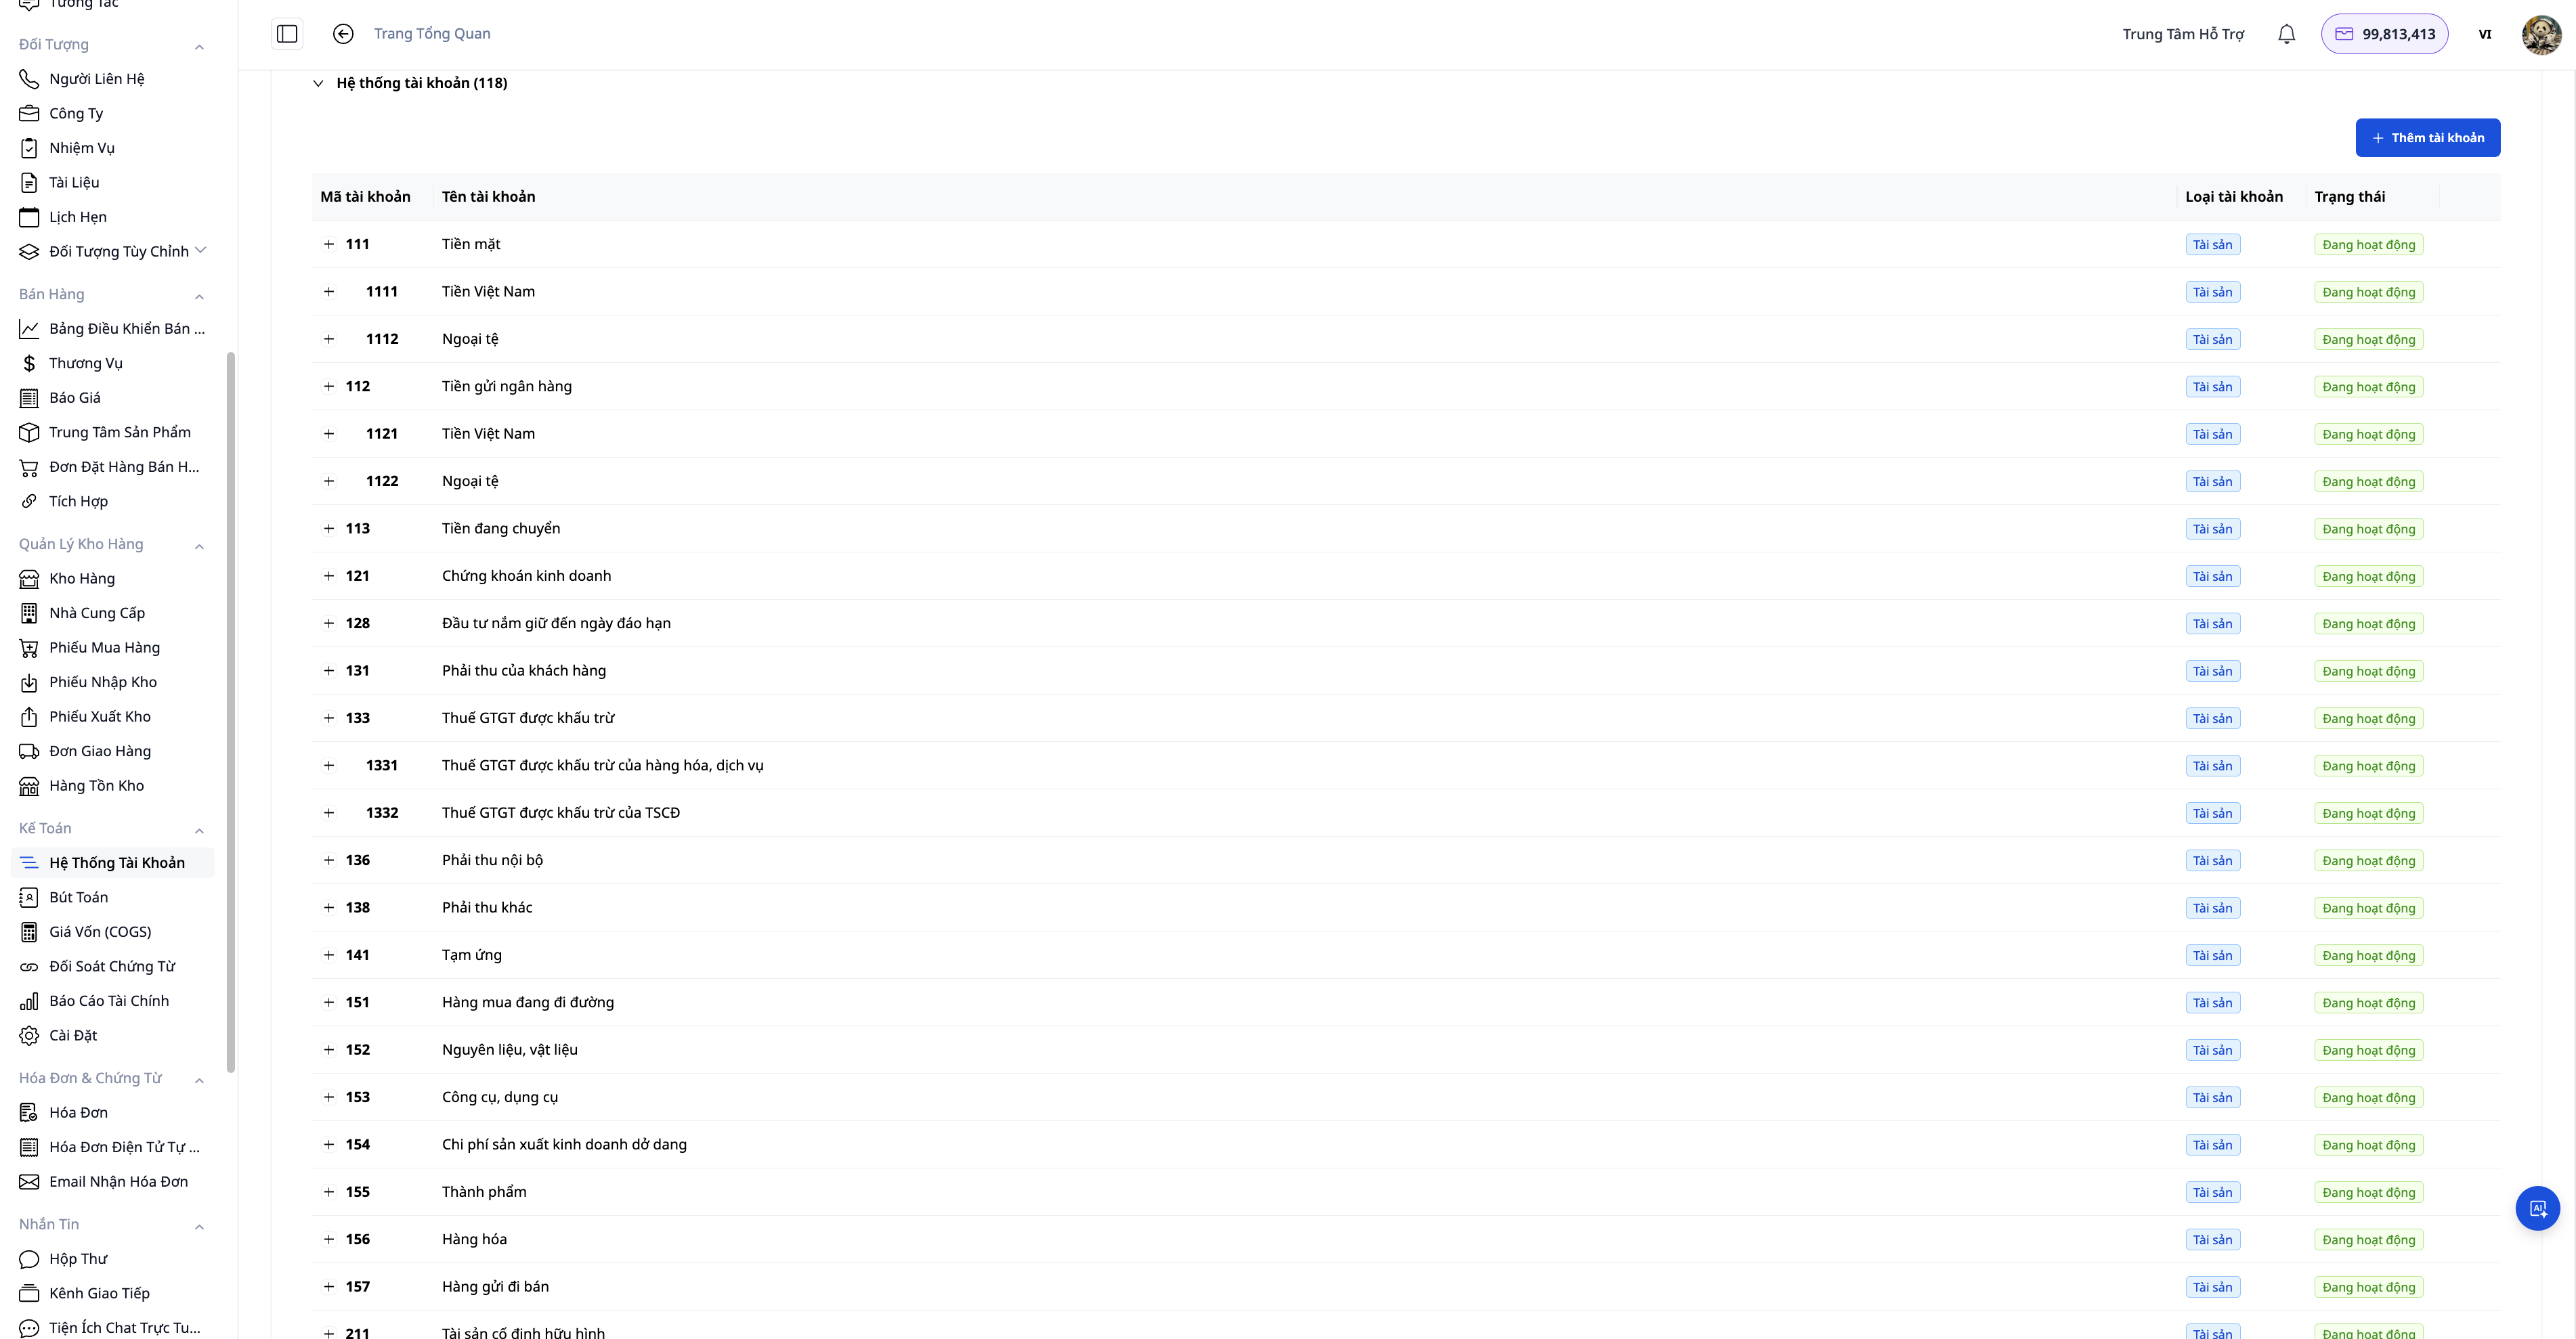
There are three ways to build the chart of accounts:
Method | When to use |
|---|---|
Apply CoA Template | Fastest — select VN (TT99/2025) or one of 11 countries, the system pre-builds all accounts and default posting rules |
AI Generate Setup | AI suggests a set of accounts suitable for the business type and country, explaining each option |
Import Chart of Accounts | You already have your own chart of accounts from previous software, import it for reuse |
After applying a template, you can add sub-accounts or edit names as needed for internal purposes — TT99/2025 allows businesses to create their own details. Use Reset to rebuild from scratch if necessary (can only reset before the first journal entry).
Step 3: Check Posting Rules
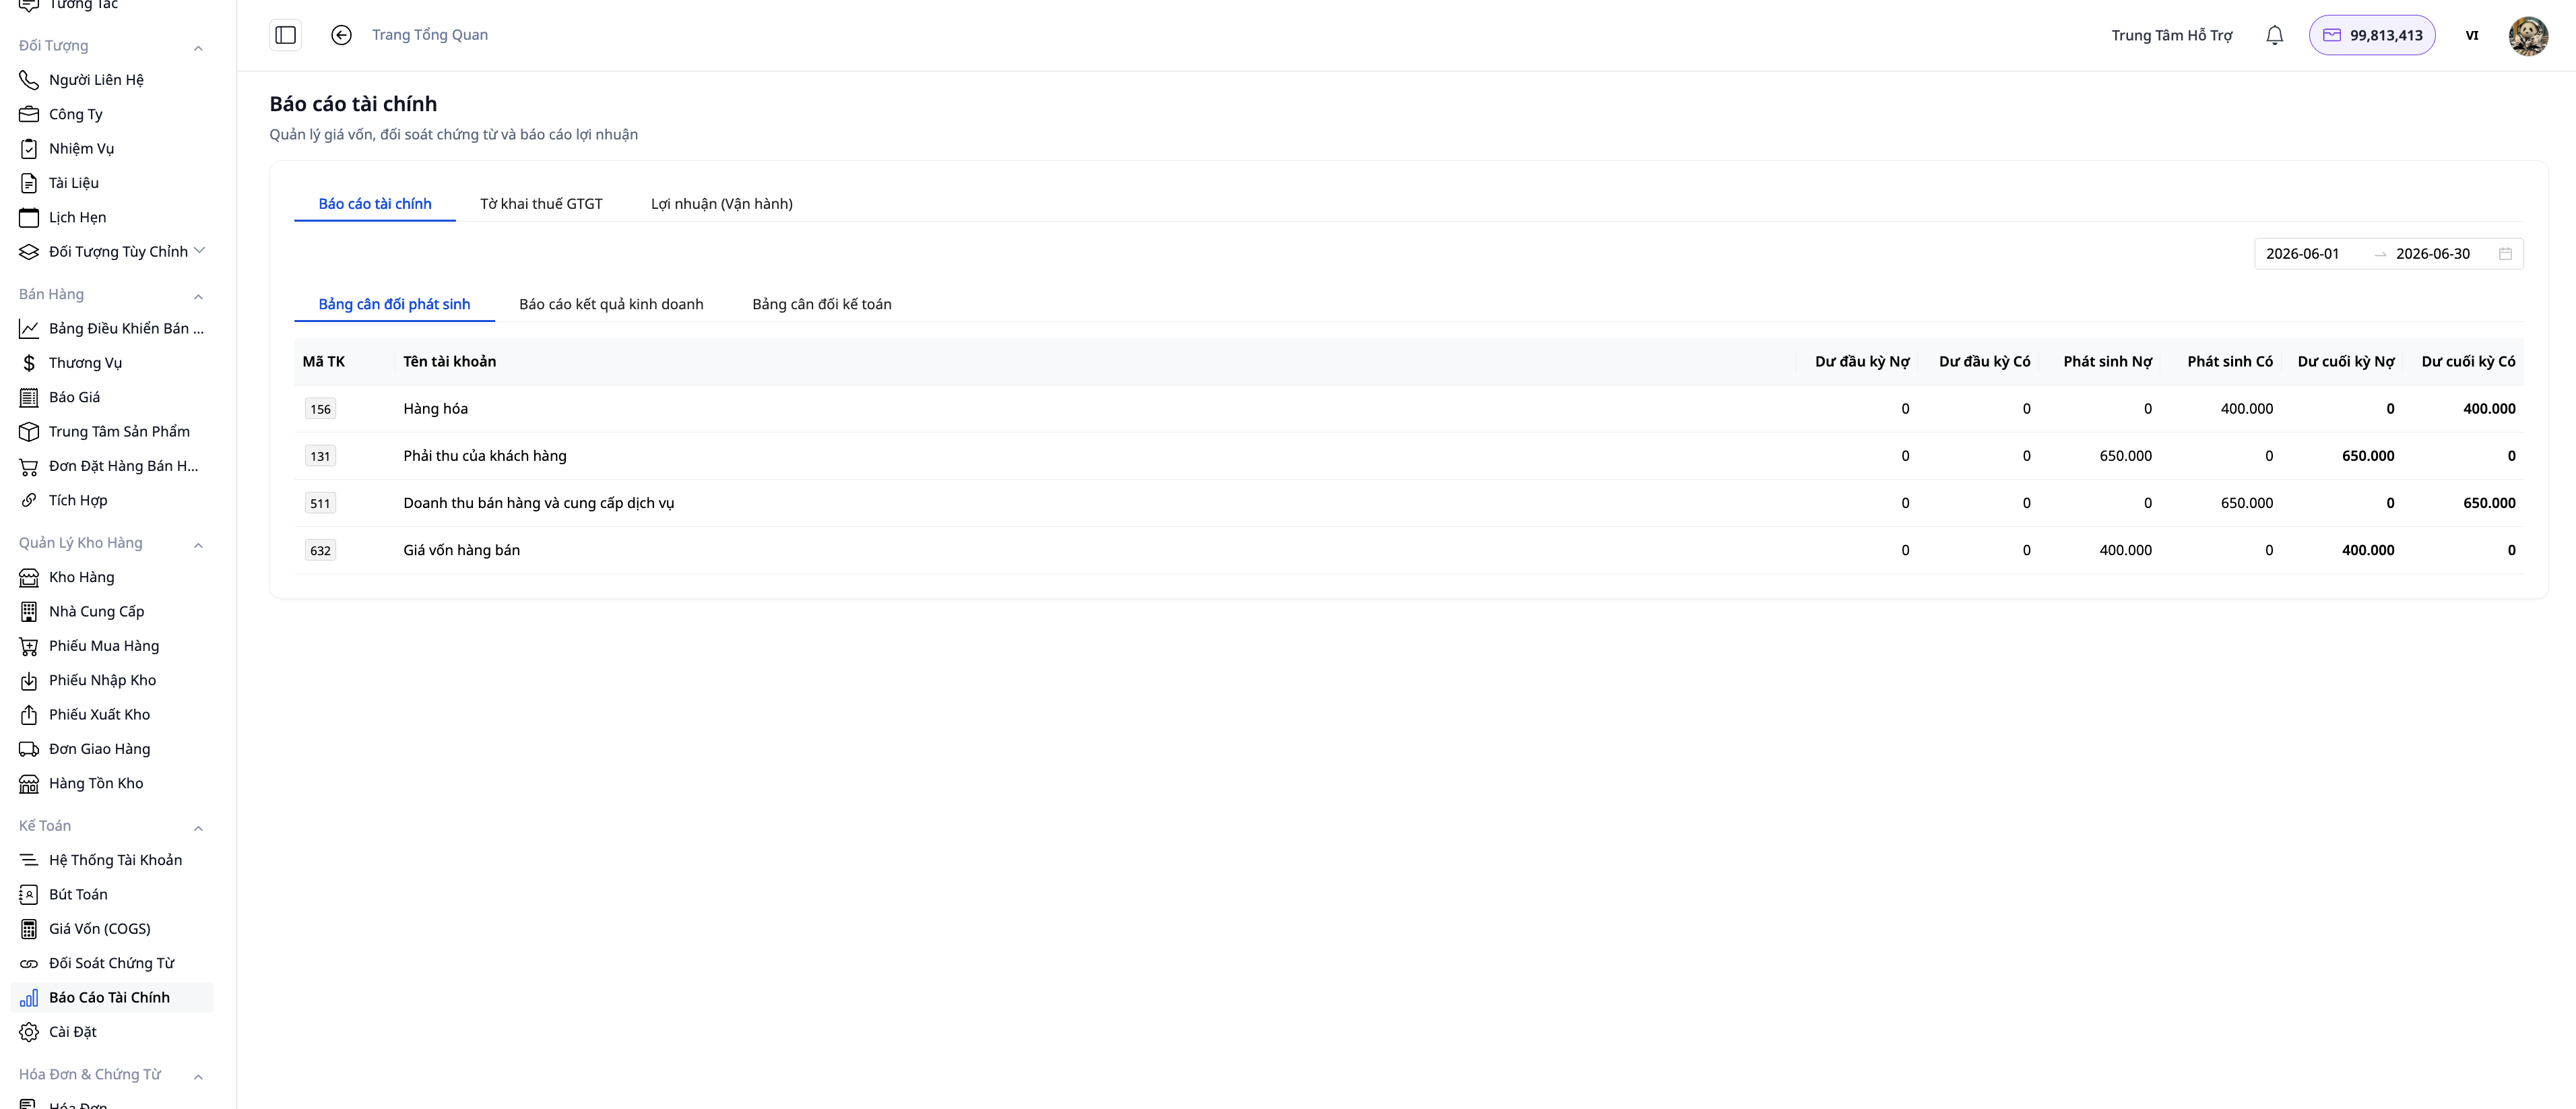
Accounting rules define which event generates which journal entry (e.g., sales revenue → Debit Account 131 / Credit Account 511; cost of goods sold → Debit Account 632 / Credit Account 156).
After applying the country template, common rules are pre-filled. You can:
Enable/disable each rule using the Active toggle without losing the charting configuration.
Edit the Debit/Credit accounts on each rule if the business has its own chart of accounts.
Step 4: Configure Revenue Recognition
In Accounting Setup, select Revenue Recognition Point (revenue_recognition_point):
INVOICE (default): Recognize revenue upon invoice issuance. Suitable for most retail and service businesses.
DELIVERY: Recognize revenue upon delivery/stock out. Used when the contract specifies the transfer of control at the actual delivery date.
The system automatically matches revenue with the Cost of Goods Sold (COGS) for the same period.
Part 2: Daily Operations
Step 5: Automatic Journal Entries — Orders, Invoices, Refunds
After setup, you don't need to manually record common transactions:
Completed Orders → the system generates revenue and cost of goods sold entries.
Electronic Invoices Issued → corresponding entries based on the selected recognition point.
Canceled Electronic Invoices (via S-Invoice/Viettel or MISA) → the system automatically generates reversing entries, ensuring the ledger and invoices always match.
Refunded Payments, Deposit Refunds, Returned Goods → entries for the correct transaction type, reversing the cost of goods sold proportionally (returning 3/10 products only reverses the cost of goods sold for those 3 products).
Go to Accounting → Journal Entries to view, filter, and reconcile all entries by date, period, or account number.
Step 6: Incoming Invoices — Connect GDT & Accounting Triage

GTG CRM connects directly to the General Department of Taxation's (GDT) electronic invoice system, automatically retrieving all incoming invoices for the business — one connection covers all suppliers.
Step 6.1 — Connect GDT Account
Go to Settings → Tax Authority Connection.
Enter your Tax Identification Number (MST) and the password for your account on the hoadondientu.gdt.gov.vn portal.
Select the historical period you wish to retrieve (Backfill history).
Click Test & Connect — the system authenticates and connects in seconds. The status will display Connected upon success.
Security Note: it is recommended to create a sub-account with only "Invoice Inquiry" permissions instead of using the main account.
Step 6.2 — Sync Incoming Invoices
Click Sync now or let the system sync automatically on schedule. After syncing, go to ERP → Invoice Management → Incoming to view all incoming invoices.
Each invoice clearly displays its source and document status:
Status | Meaning | Action |
|---|---|---|
Tax Authority / XML+PDF | Invoice with CQT code — GDT provided sufficient data and original file | Ready for accounting triage |
Tax Authority / Needs Document | Codeless invoice (telecom, bank) — GDT provided data but no original file | Download file from provider and upload |
Email / Needs Document | Detected via notification email, no attachment yet | Upload file or use Download link from provider |
Step 6.3 — Upload file for codeless invoices
Find the row with status "Needs Document" (typically for telecom, electricity, or bank invoices). Click Download↗ (from provider) to open the provider portal with the search code pre-filled, download the file, and then click Upload to attach it to the invoice.
Step 6.4 — Accounting Triage
Once the invoice has sufficient data and documents, open the invoice and perform the triage:
Check the amount, input VAT, and supplier.
Post to the accounting ledger (input VAT → Account 133; expenses → corresponding account based on expense type).
Input invoices are linked to customers/suppliers in the CRM, with clear accounts payable for each partner.
Step 7: Fixed Assets & Depreciation

The Fixed Assets module manages the entire asset lifecycle and automatically generates depreciation entries in the general ledger.
Step 7.1 — Add a new asset
Go to Accounting → Fixed Assets → + New.
Select a Category — e.g., "Machinery & Equipment", "Vehicles", "Intangible Assets". The system automatically populates: default accounting accounts (Cost, Accumulated Depreciation, Depreciation Expense), suggested useful life, and depreciation method.
Enter the Asset Name, Cost, Estimated Salvage Value, and In-service Date.
Choose a Depreciation Method: Straight-line, Declining-balance, or Units-of-production.
Click Save — the asset is created with a DRAFT status and displays an estimated monthly depreciation amount.
Step 7.2 — Activate asset & view depreciation schedule
Open the newly created asset → click Activate. The status changes to ACTIVE, and the system immediately generates a full depreciation schedule (number of rows = number of periods based on useful life), with each period in PROJECTED status.
Step 7.3 — Post depreciation
Click Run depreciation for manual posting, or enable automation for the system to run automatically at the beginning of each month (see Step 11).
When run, the system posts all due periods (including previous periods not yet posted since the activation date). Each period flips to POSTED and generates a balancing journal entry:
Debit Account 6274 (Depreciation of tangible fixed assets) — or the corresponding account based on asset type
Credit Account 2141 (Accumulated depreciation of tangible fixed assets)
Running again for the same period will return the old entry — do not create duplicate entries.
Step 7.4 — Import Existing Assets List
If your business already has an asset register, go to Fixed Assets → Import:
Upload CSV/Excel: The file can have any column structure — AI will automatically recognize and suggest column mapping (e.g., "Original Cost" column → Cost field, "Purchase Date" → Acquisition date). Review and adjust the mapping before confirming.
From Purchase Invoice: Select an input invoice already in the system — the asset's name, original cost, purchase date, and supplier will be automatically populated.
AI Reads Documents: Attach a contract or PDF invoice (text-based, not scanned) — AI will extract and pre-fill the fields.
Step 7.5 — Asset Disposal
Open the asset → Dispose → Sale (or Write-off), enter the actual recovery value and disposal date. Preview the disposal gain/loss before confirming. After confirmation, the system will:
Change the status to DISPOSED, close the depreciation schedule.
Generate disposal entries: remove the original cost (Credit Account 2112), remove accumulated depreciation (Debit Account 2141), record disposal income/expense (Account 711 or Account 811).
Part 3: Reports & File Export
Step 8: View Realtime Financial Reports
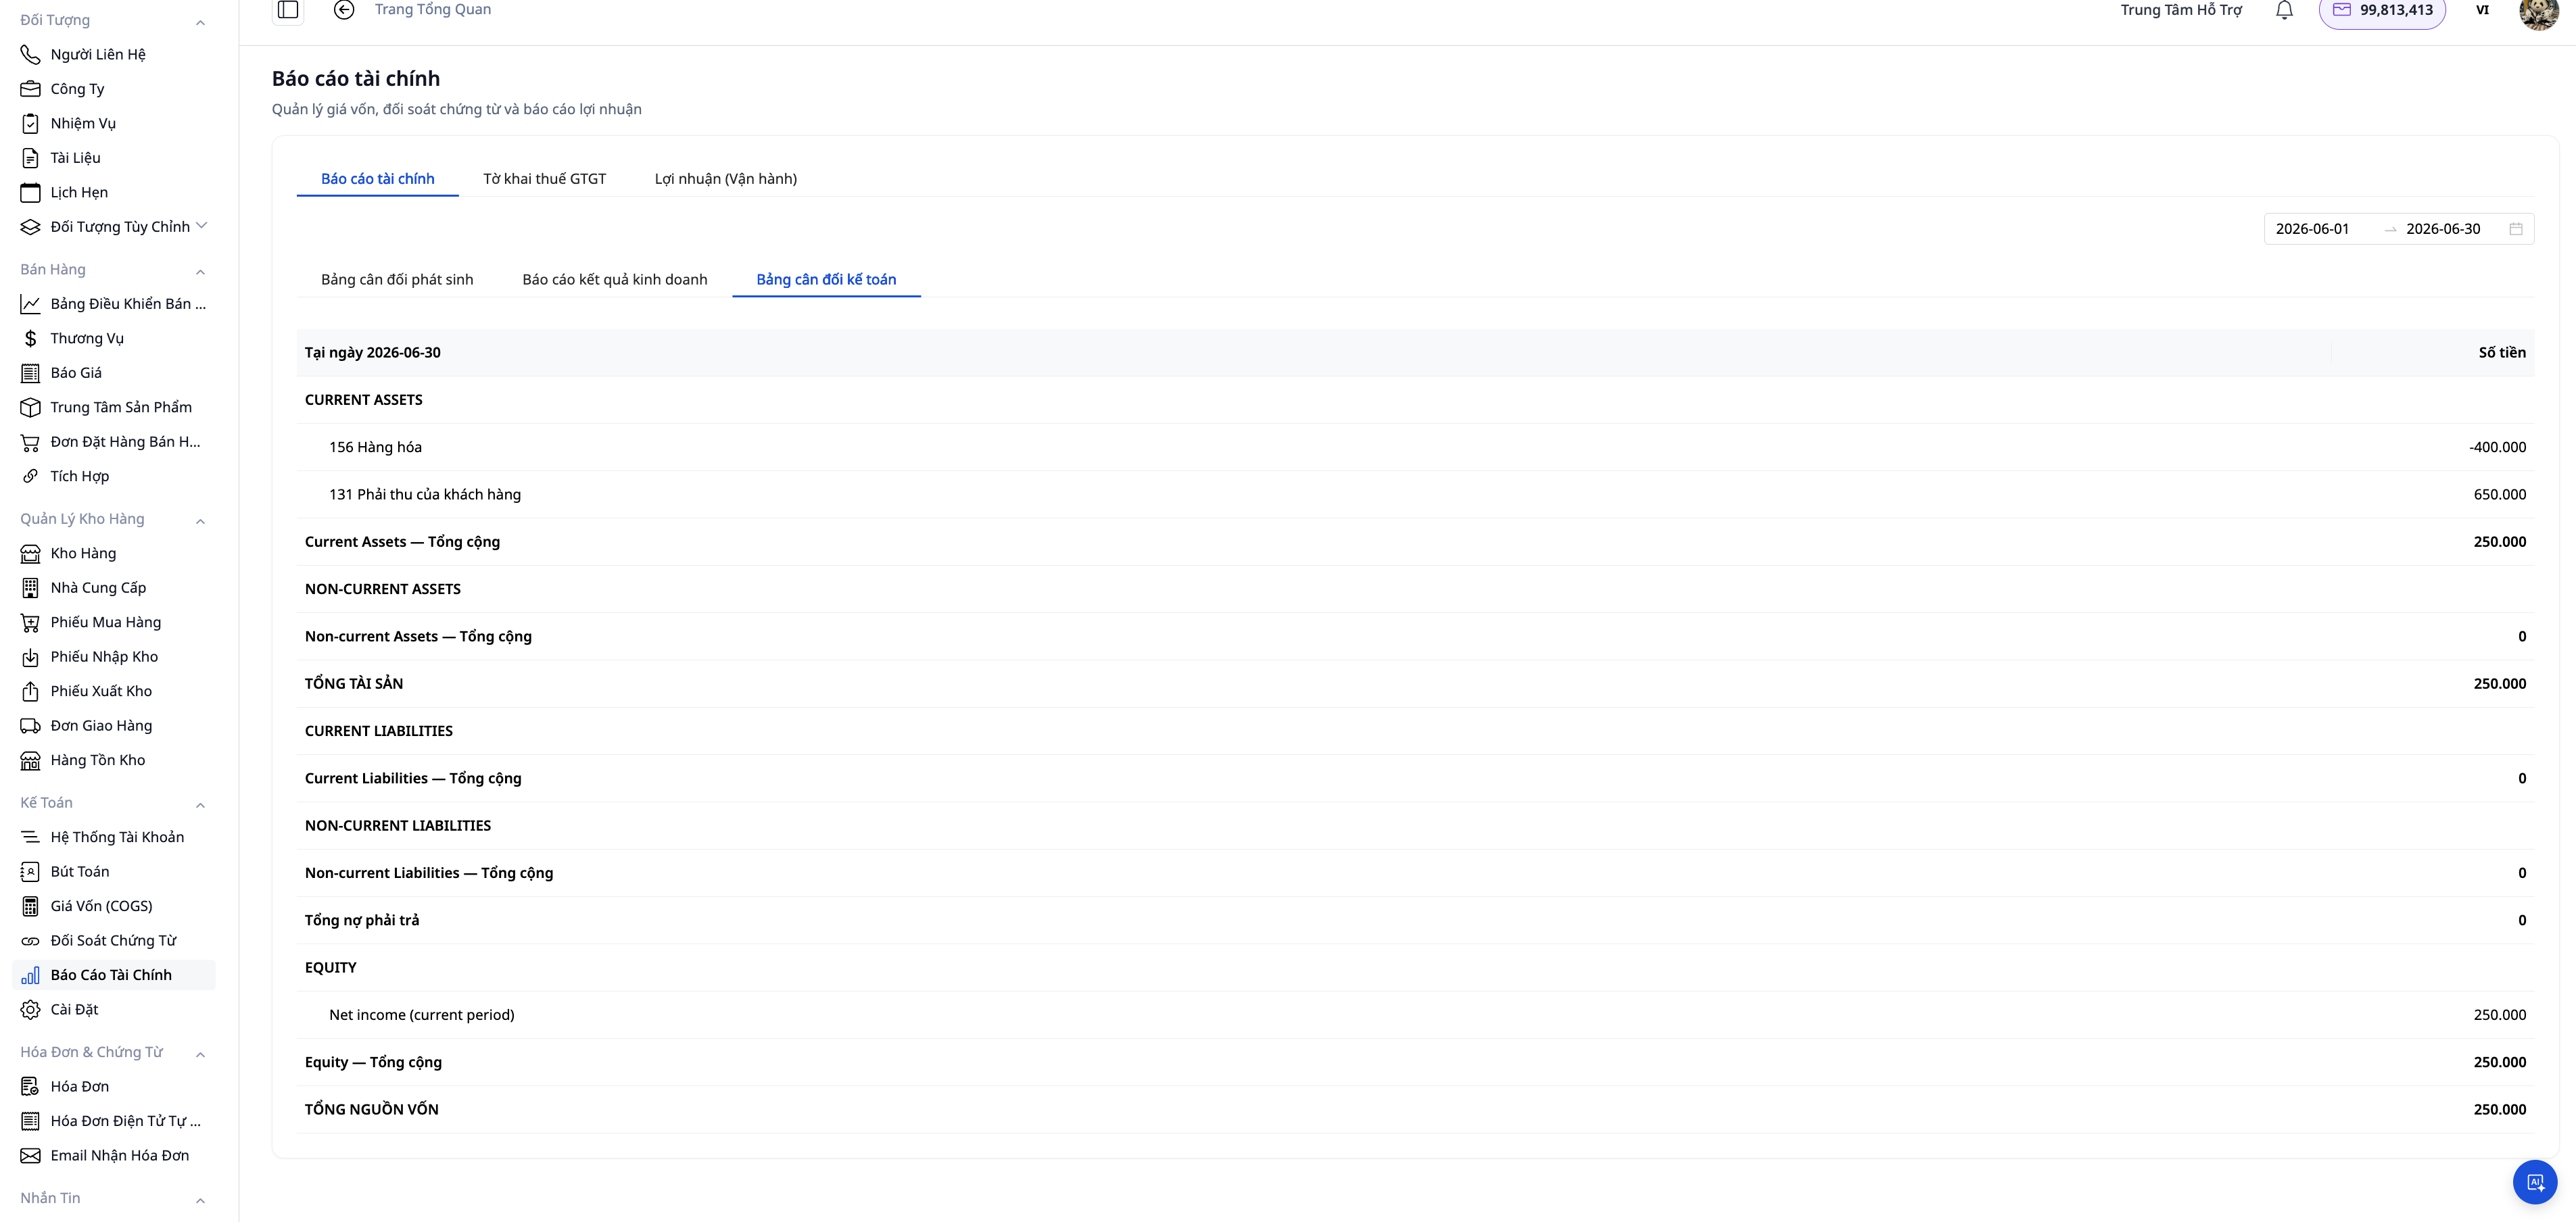
Go to Accounting → Reports, select the period, and view immediately:
Income Statement (B02-DN) — revenue, cost of goods sold, gross profit, net profit by period.
Statement of Financial Position (B01-DN) — assets = liabilities + equity. This is the official form name according to TT99/2025, replacing the old name "Balance Sheet".
Trial Balance — ending account balances, check for Debit/Credit balance before closing the books.
VAT Declaration Form — summarized output and input VAT ready for the tax filing period.
All reports are calculated from actual entries in the general ledger — no need to consolidate from Excel or wait for the chief accountant at the end of the month.
Step 9: Export Reports to PDF & Excel
On any report, click Export ▾ and select the format:
PDF: creates a document with print formatting, company header, suitable for signatures and seals. Use for submitting to banks (loan applications require signed financial reports), auditors, management, or investors.
Excel (XLSX): a clearly structured spreadsheet file — accountants can pivot, further consolidate, and perform inter-period comparisons. Data and currency formatting follow Vietnamese locale.
All available reports (B01-DN, B02-DN, Trial Balance, VAT, Profit Report, AR/AP aging, Cash Position) support both formats.
Step 10: Export XML for Tax Authorities (Financial Statements, VAT, CIT, PIT)

GTG CRM generates XML files with a structure conforming to HTKK's XSD templates — you download them, read any error messages if they appear, then submit to the electronic tax portal or import into HTKK.
Reports supported for XML export:
Report | Form Code | Declaration Period |
|---|---|---|
VAT Declaration | 01/GTGT | Quarterly |
Annual Financial Report (BCTC) | B01-DN + B02-DN + B03-DN + B09-DN | Fiscal Year |
Corporate Income Tax Declaration | 03/TNDN | Fiscal Year |
Personal Income Tax Settlement Declaration | 05/QTT-TNCN | Fiscal Year |
Steps to Perform:
Navigate to Accounting → Reports → Tax Reports.
Select the report type and declaration period.
Review the data on the screen — the indicators are automatically mapped from the general ledger according to TT99/2025 standards.
Click Export XML → download the
.xmlfile. If the declaration period has data that requires attention, the dialog box 'Check before submitting XML file' will appear. Read it carefully, click 'Understood', and then submit the file to the tax portal.Log in to thuedientu.gdt.gov.vn (eTax) or open HTKK desktop, and import the downloaded XML file.
Perform a final check on the tax authority's software before submitting.
The XML file has a structure that conforms to HTKK's XSD template. Please recheck using HTKK or iTaxViewer before submitting.
For quarters with revenue taxed at 8%: the file includes an appendix as per Decree 174/2025/ND-CP. The method of allocating 8% revenue to the declaration form follows HTKK's convention, which GTG CRM has not yet been able to reconcile with HTKK. Therefore, the dialog box will still issue a warning: please open the file in HTKK or iTaxViewer and reconcile before submitting.
Indicator [22] (deductions carried forward from the previous period) is always 0 in the file: if the previous period's declaration had a remaining balance in [43], please enter it into [22] in HTKK.
Who can create and export declarations: only Accountants and Administrators. Users with view-only report access can still see the list of reports and submission deadlines, but the 'Create Declaration' and 'Export XML' buttons will be grayed out with an instructional line — please ask your administrator to add you to the Accounting group.
Part 4: Accounting Automation
Step 11: Enable Automation

Navigate to Accounting → Settings → Accounting Automations, and enable the desired workflows:
Automation | Function |
|---|---|
Auto-invoice from orders | Automatically create and issue e-invoices when an order is completed |
Generate Revenue Journal Entry | Revenue entry when an invoice is issued |
Generate Cost of Goods Sold (COGS) Entry | COGS entry upon stock out |
Process Refunds / Returns | Automatic refund and cost of goods sold reversal entry |
For fixed assets, go to Accounting → Fixed Assets → Automations (button on the toolbar):
Automation | Function |
|---|---|
Post monthly depreciation | On the 1st of each month, automatically post the previous month's depreciation for all ACTIVE assets. |
Record asset disposal to ledger | Automatically generate a disposal journal entry when an asset is disposed of. |
Record asset revaluation to ledger | Automatically generate a revaluation journal entry when an asset is revalued (opt-in). |
The Debit/Credit entries for each automation are configured directly on the "Create Journal Entry" node within the workflow — no coding required, it's a single configuration point.
Accounting Permissions
Access to the Accounting module is controlled by specific permissions. Contact your workspace owner or administrator to be granted:
Permission | Functionality |
|---|---|
| View chart of accounts |
| Add/edit accounts |
| View journal entries |
| Create manual journal entries |
| View financial reports and export to PDF/Excel |
ACCOUNTING_EXPORT_TAX_REPORT | Prepare and export tax declarations (Generate declarations, Export XML) |
| Configure accounting settings |
| Create accounting periods, close books, carry forward production costs |
| Manage fixed assets |
| Post depreciation |
Workspace owners and administrators are granted all permissions by default.
Documentation belongs to GTG CRM