What You Will Be Able to Do After This Guide
Create a service in Catalog → create a mixed quote (product + service) → convert to contract → fill in Party B + acceptance milestones → send contract (.docx) → upload signed copy → issue invoices per installment → view journal entries.
Preparation
| # | Condition | Why It's Needed |
|---|---|---|
| 1 | Log in to GTG CRM, with CRM management permissions (create products, services, quotes, contracts). | To perform the entire workflow. |
| 2 | Have the Chart of Accounts (CoA) set up + (for invoicing) a workspace configured for invoicing/ERP. | To post invoices to the accounting ledger. |
| 3 | A contact/company to act as the customer (Party B). | Contracts require a signing party. |
Step 1 — Create Services in Catalog
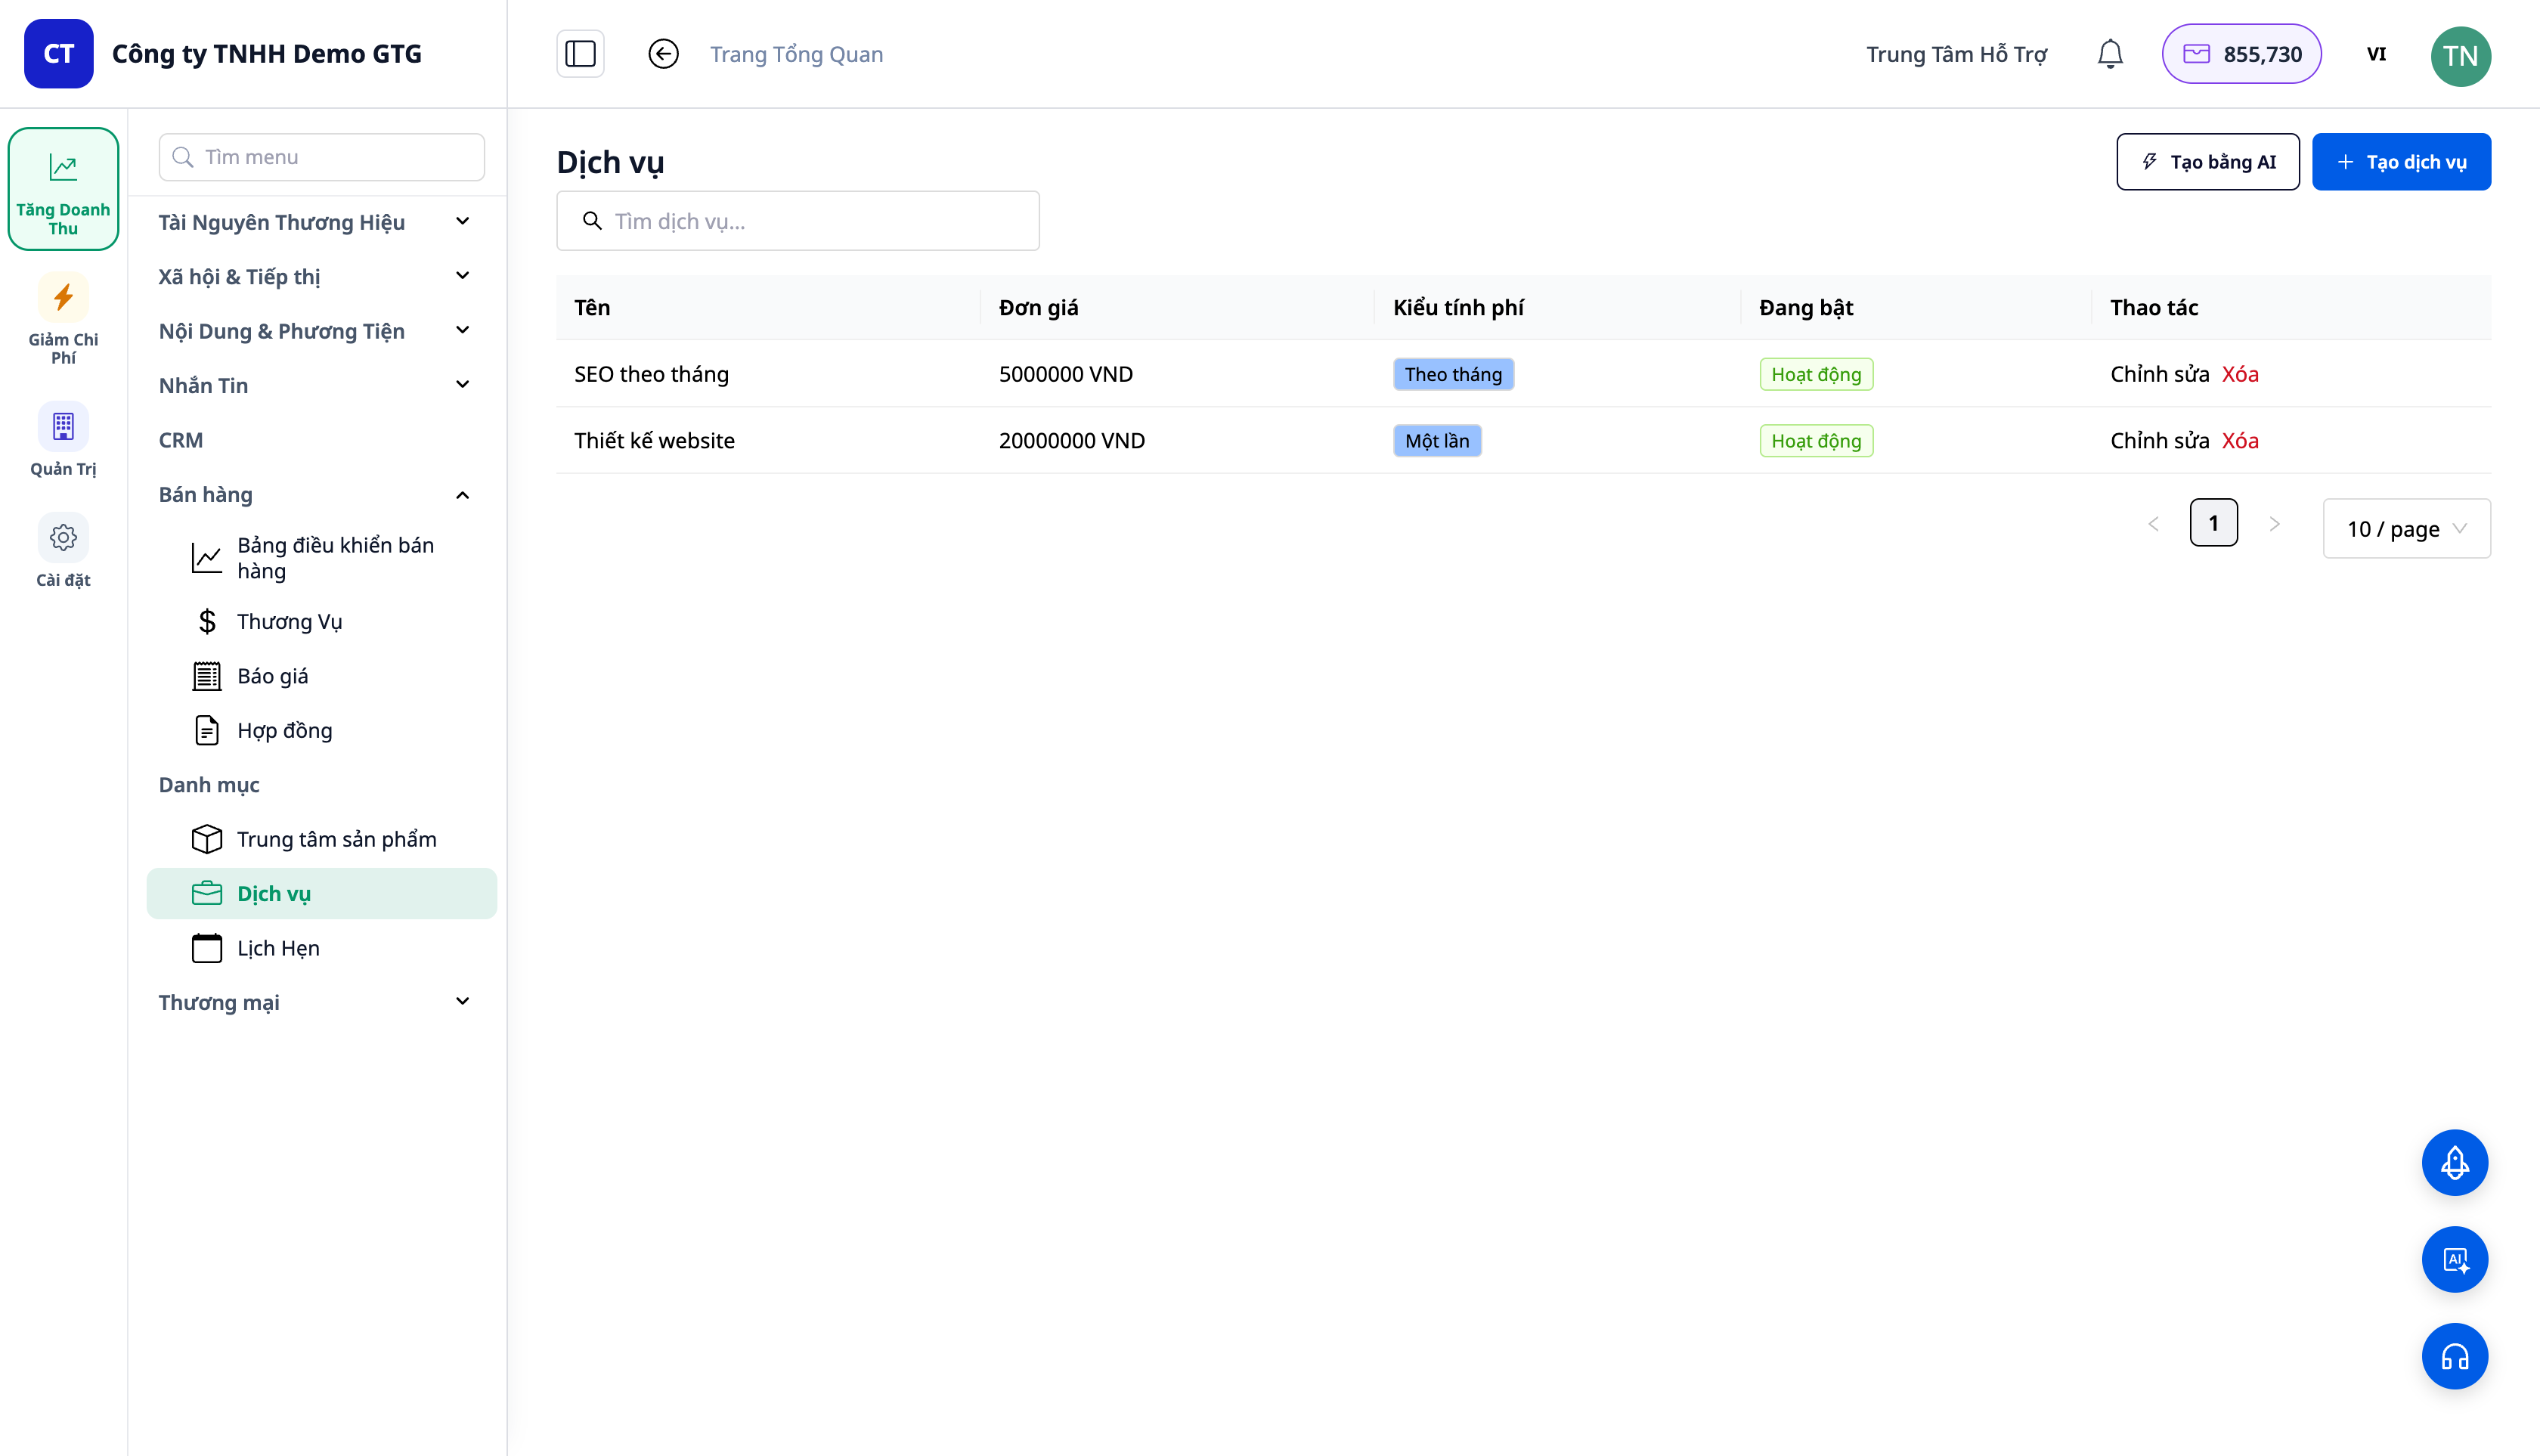
- Open CRM → Catalog → Services → Create.
- Create "Website Design" — price
20,000,000, billed One-time. Save. Then create "Monthly SEO" — price5,000,000, Recurring → monthly. Save.
✅ Expected Outcome: Services are listed under Catalog ▸ Services; each service has a price + billing cycle. (Products are under Catalog ▸ Products and can also be set to recurring.)
Step 2 — Create a Mixed Quote (Products + Services)
- Open CRM → Sales → Quotations → Create, select a contact.
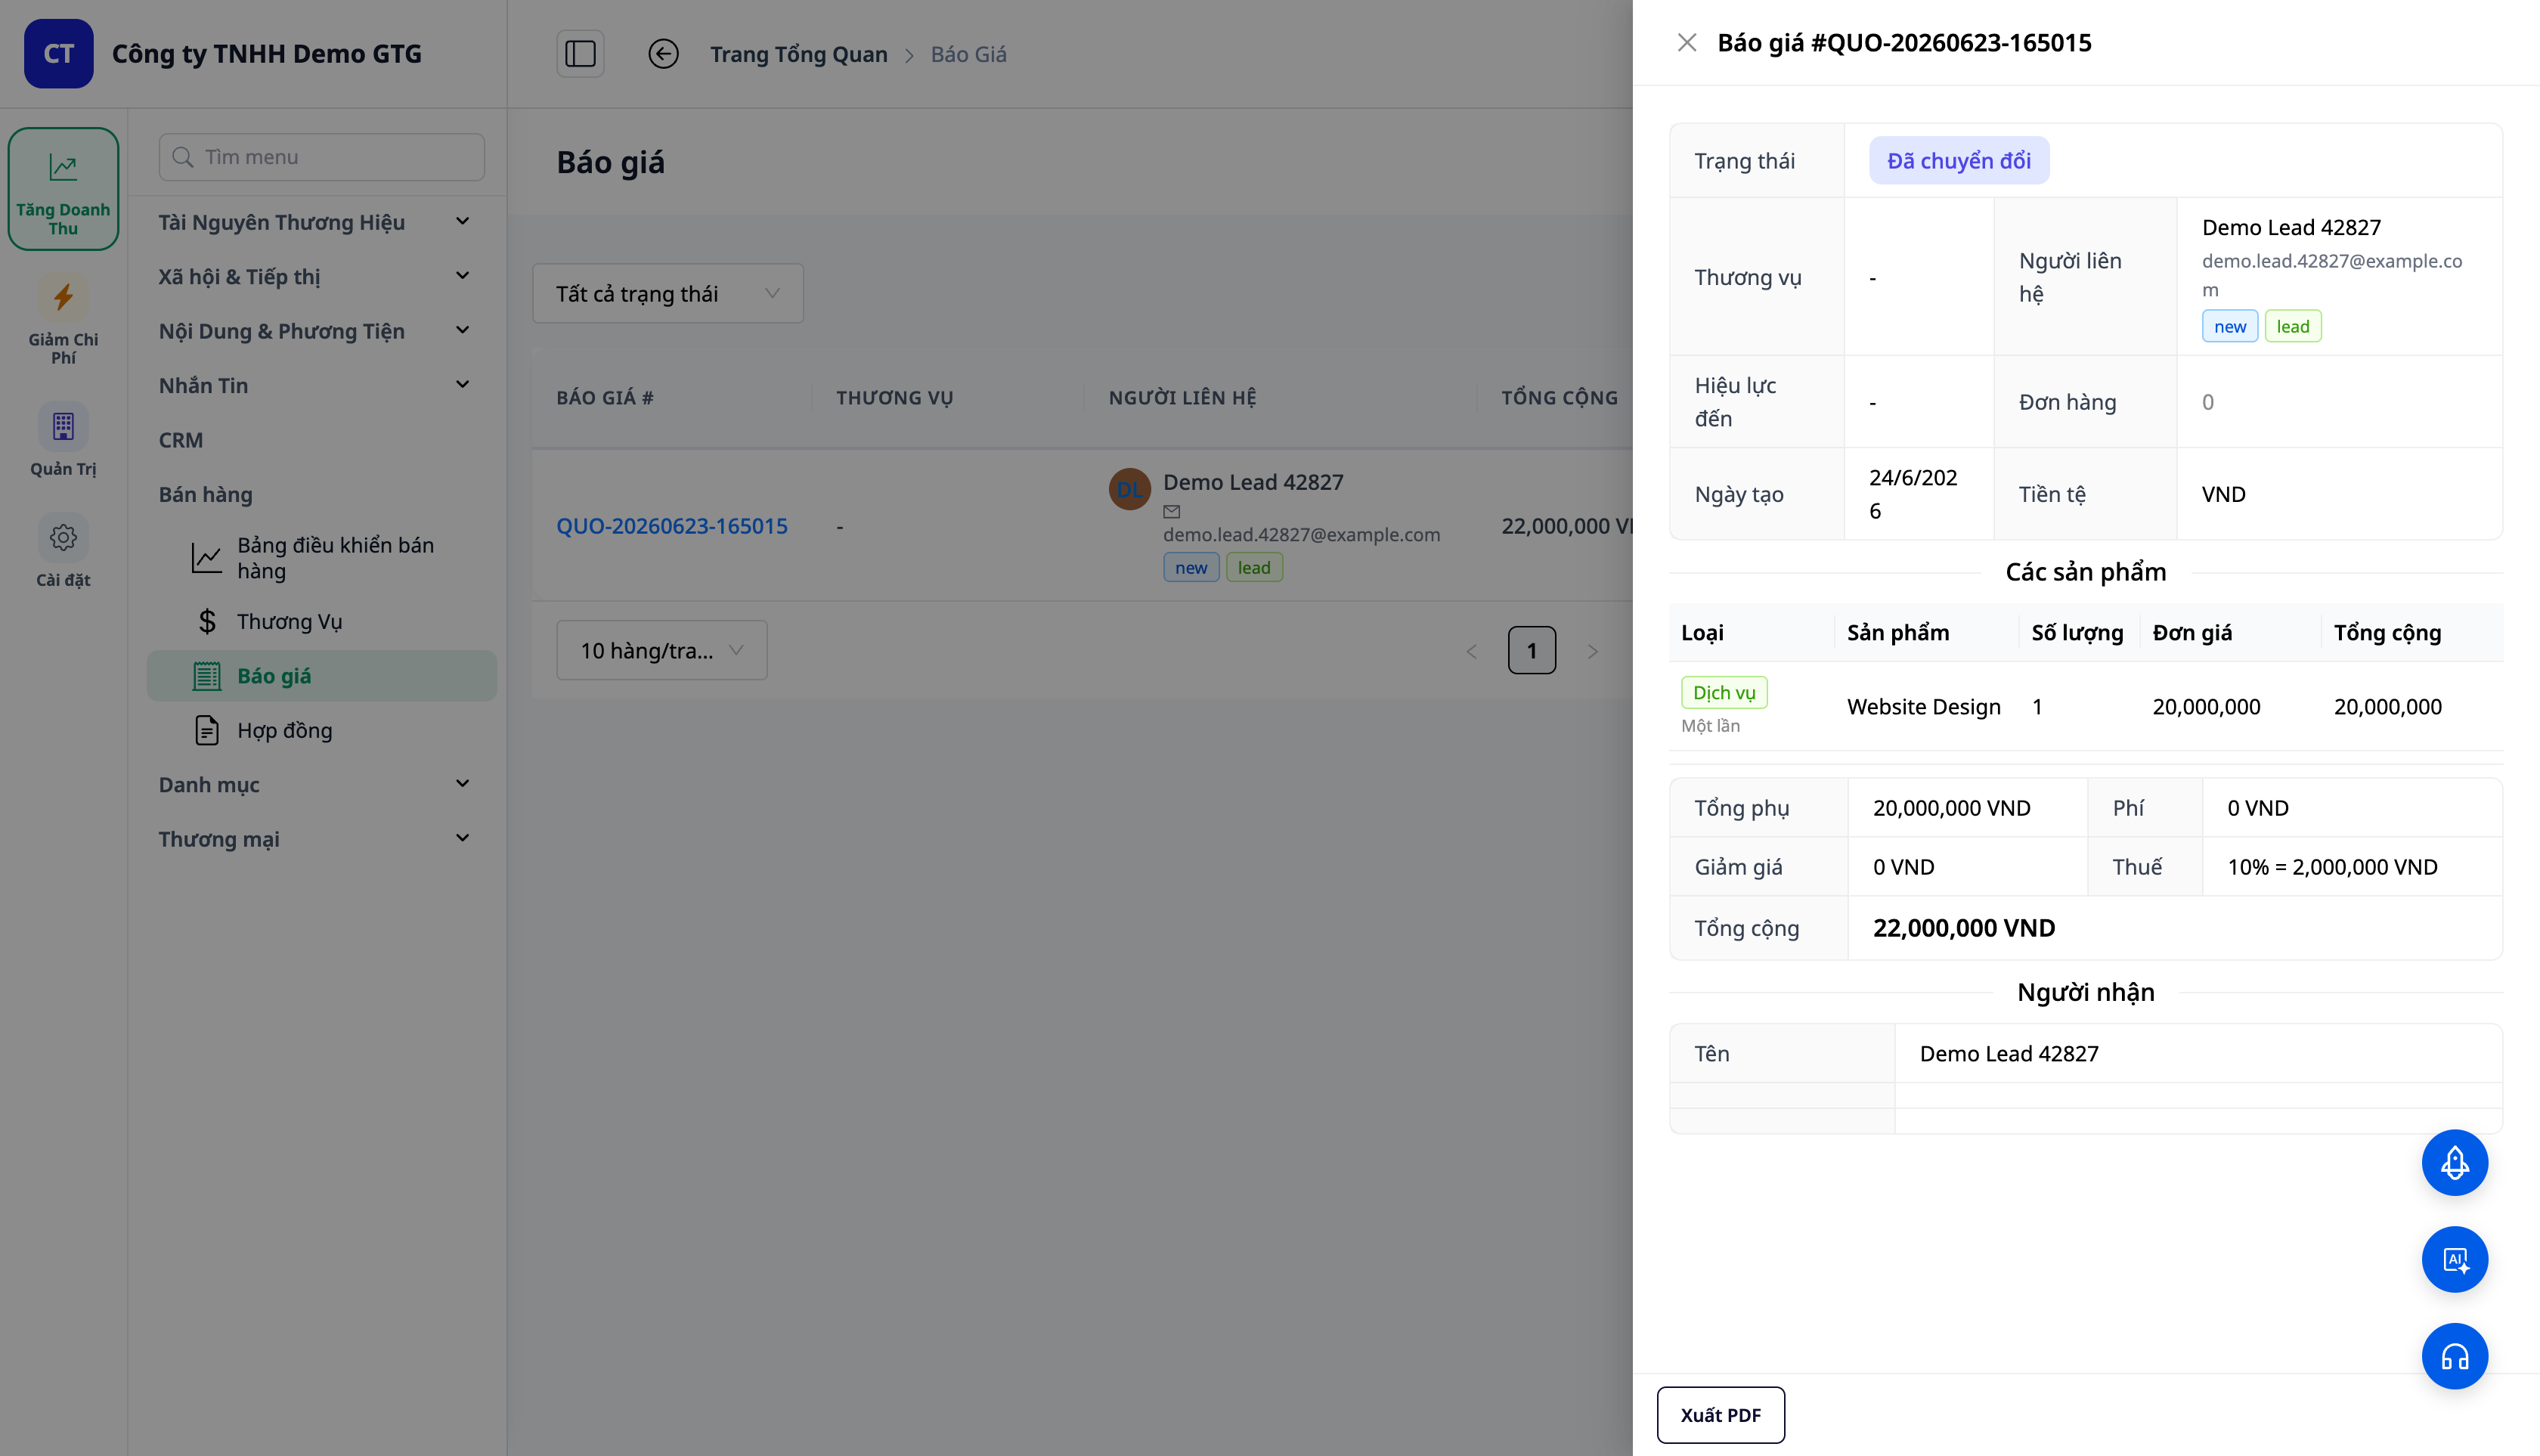
- Line 1: Type = Service → "Website Design" (1). Line 2: Type = Service → "Monthly SEO" (1). Line 3: Type = Product → "Hosting License" (quantity 3).
- Save the quote → Send → mark as Accepted (DRAFT → SENT → ACCEPTED).
✅ Expected Outcome: Each line has a Type tag (Service = green, Product = blue); service lines display the billing cycle. The total sums up all lines. When ACCEPTED, the Convert to Contract button appears.
Step 3 — Convert Quote → Contract
- Set the quote to Accepted: open the quote → Mark as Sent → Mark as Accepted (confirm).
- On the Accepted quote line in the Quotations table, click the Convert to Contract icon (action button on the line — NOT in the detail drawer; the drawer only has Convert to Order). Open the newly created contract in Sales → Contracts.
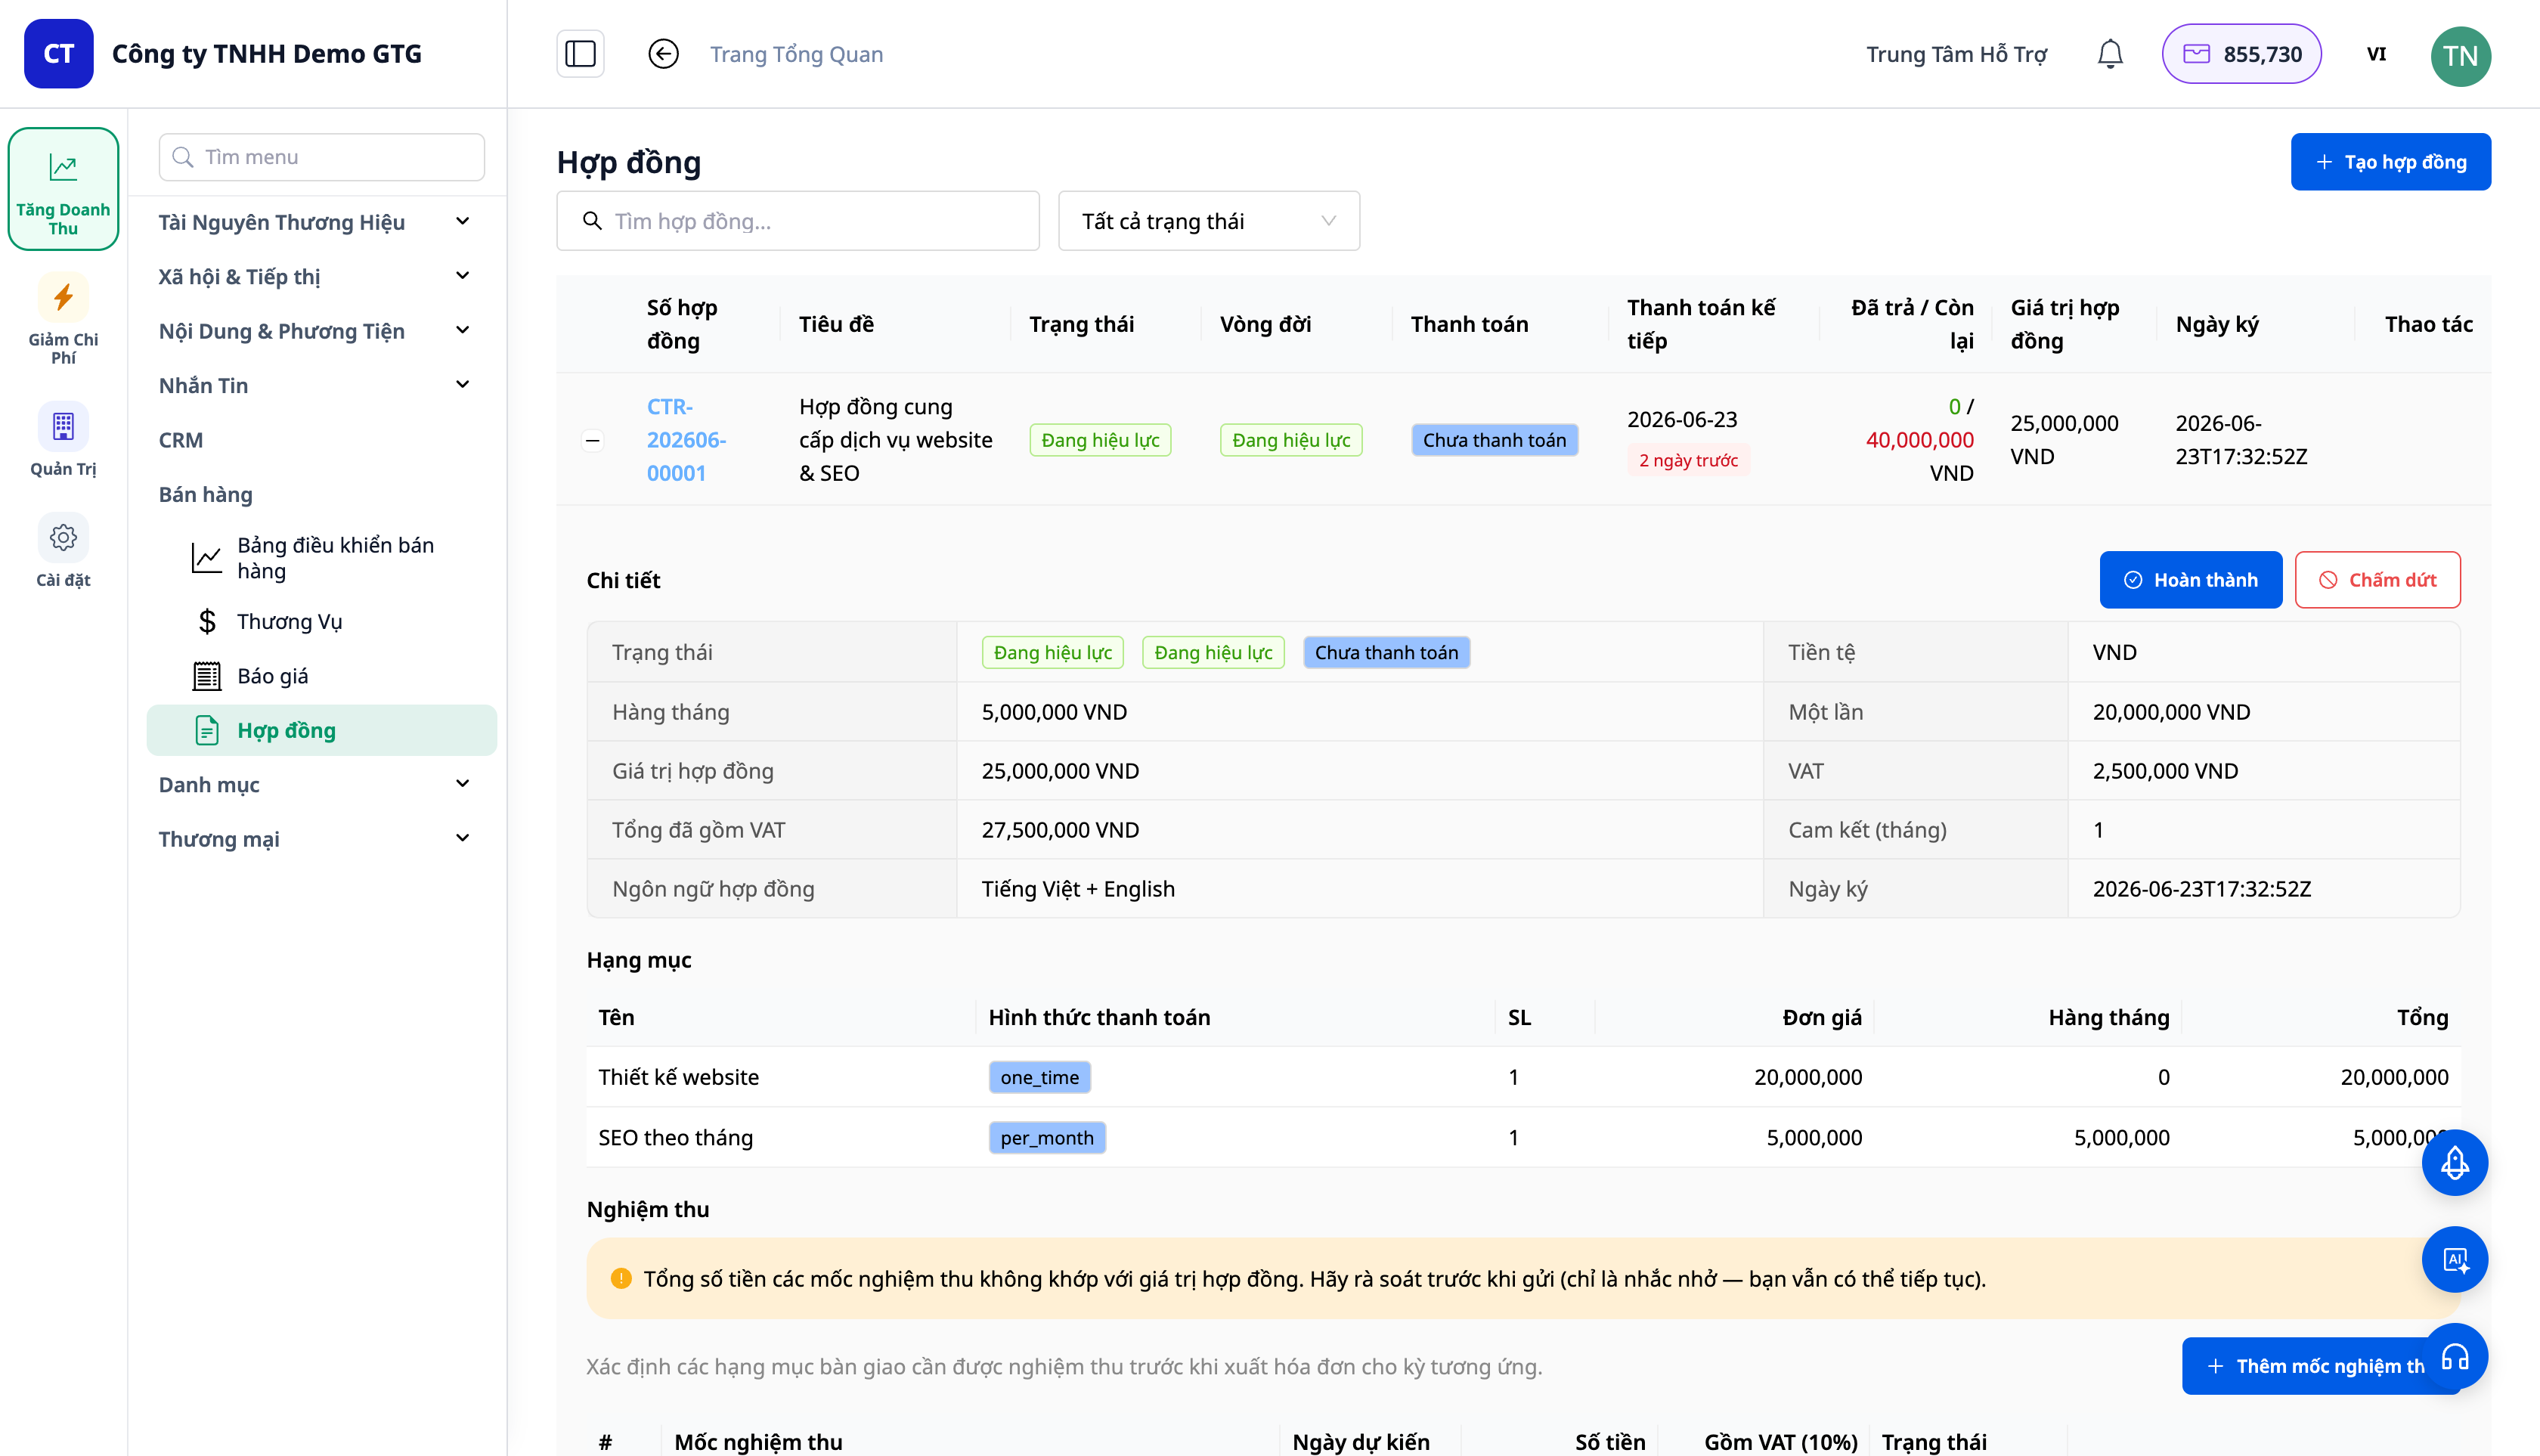
✅ Expected Outcome: A toast/result with a contract number in the format CTR-YYYYMM-NNNNN. The contract retains the type/cycle of each line; the total is split into a one-time total and a monthly total + VAT. The quote status changes to CONVERTED/ACCEPTED.
Step 4 — Fill in Party B and Acceptance Milestones
- Within the contract, open the Party B section → select a contact/company; information (legal name, tax ID, address, representative) will auto-populate if company enrichment data is available.
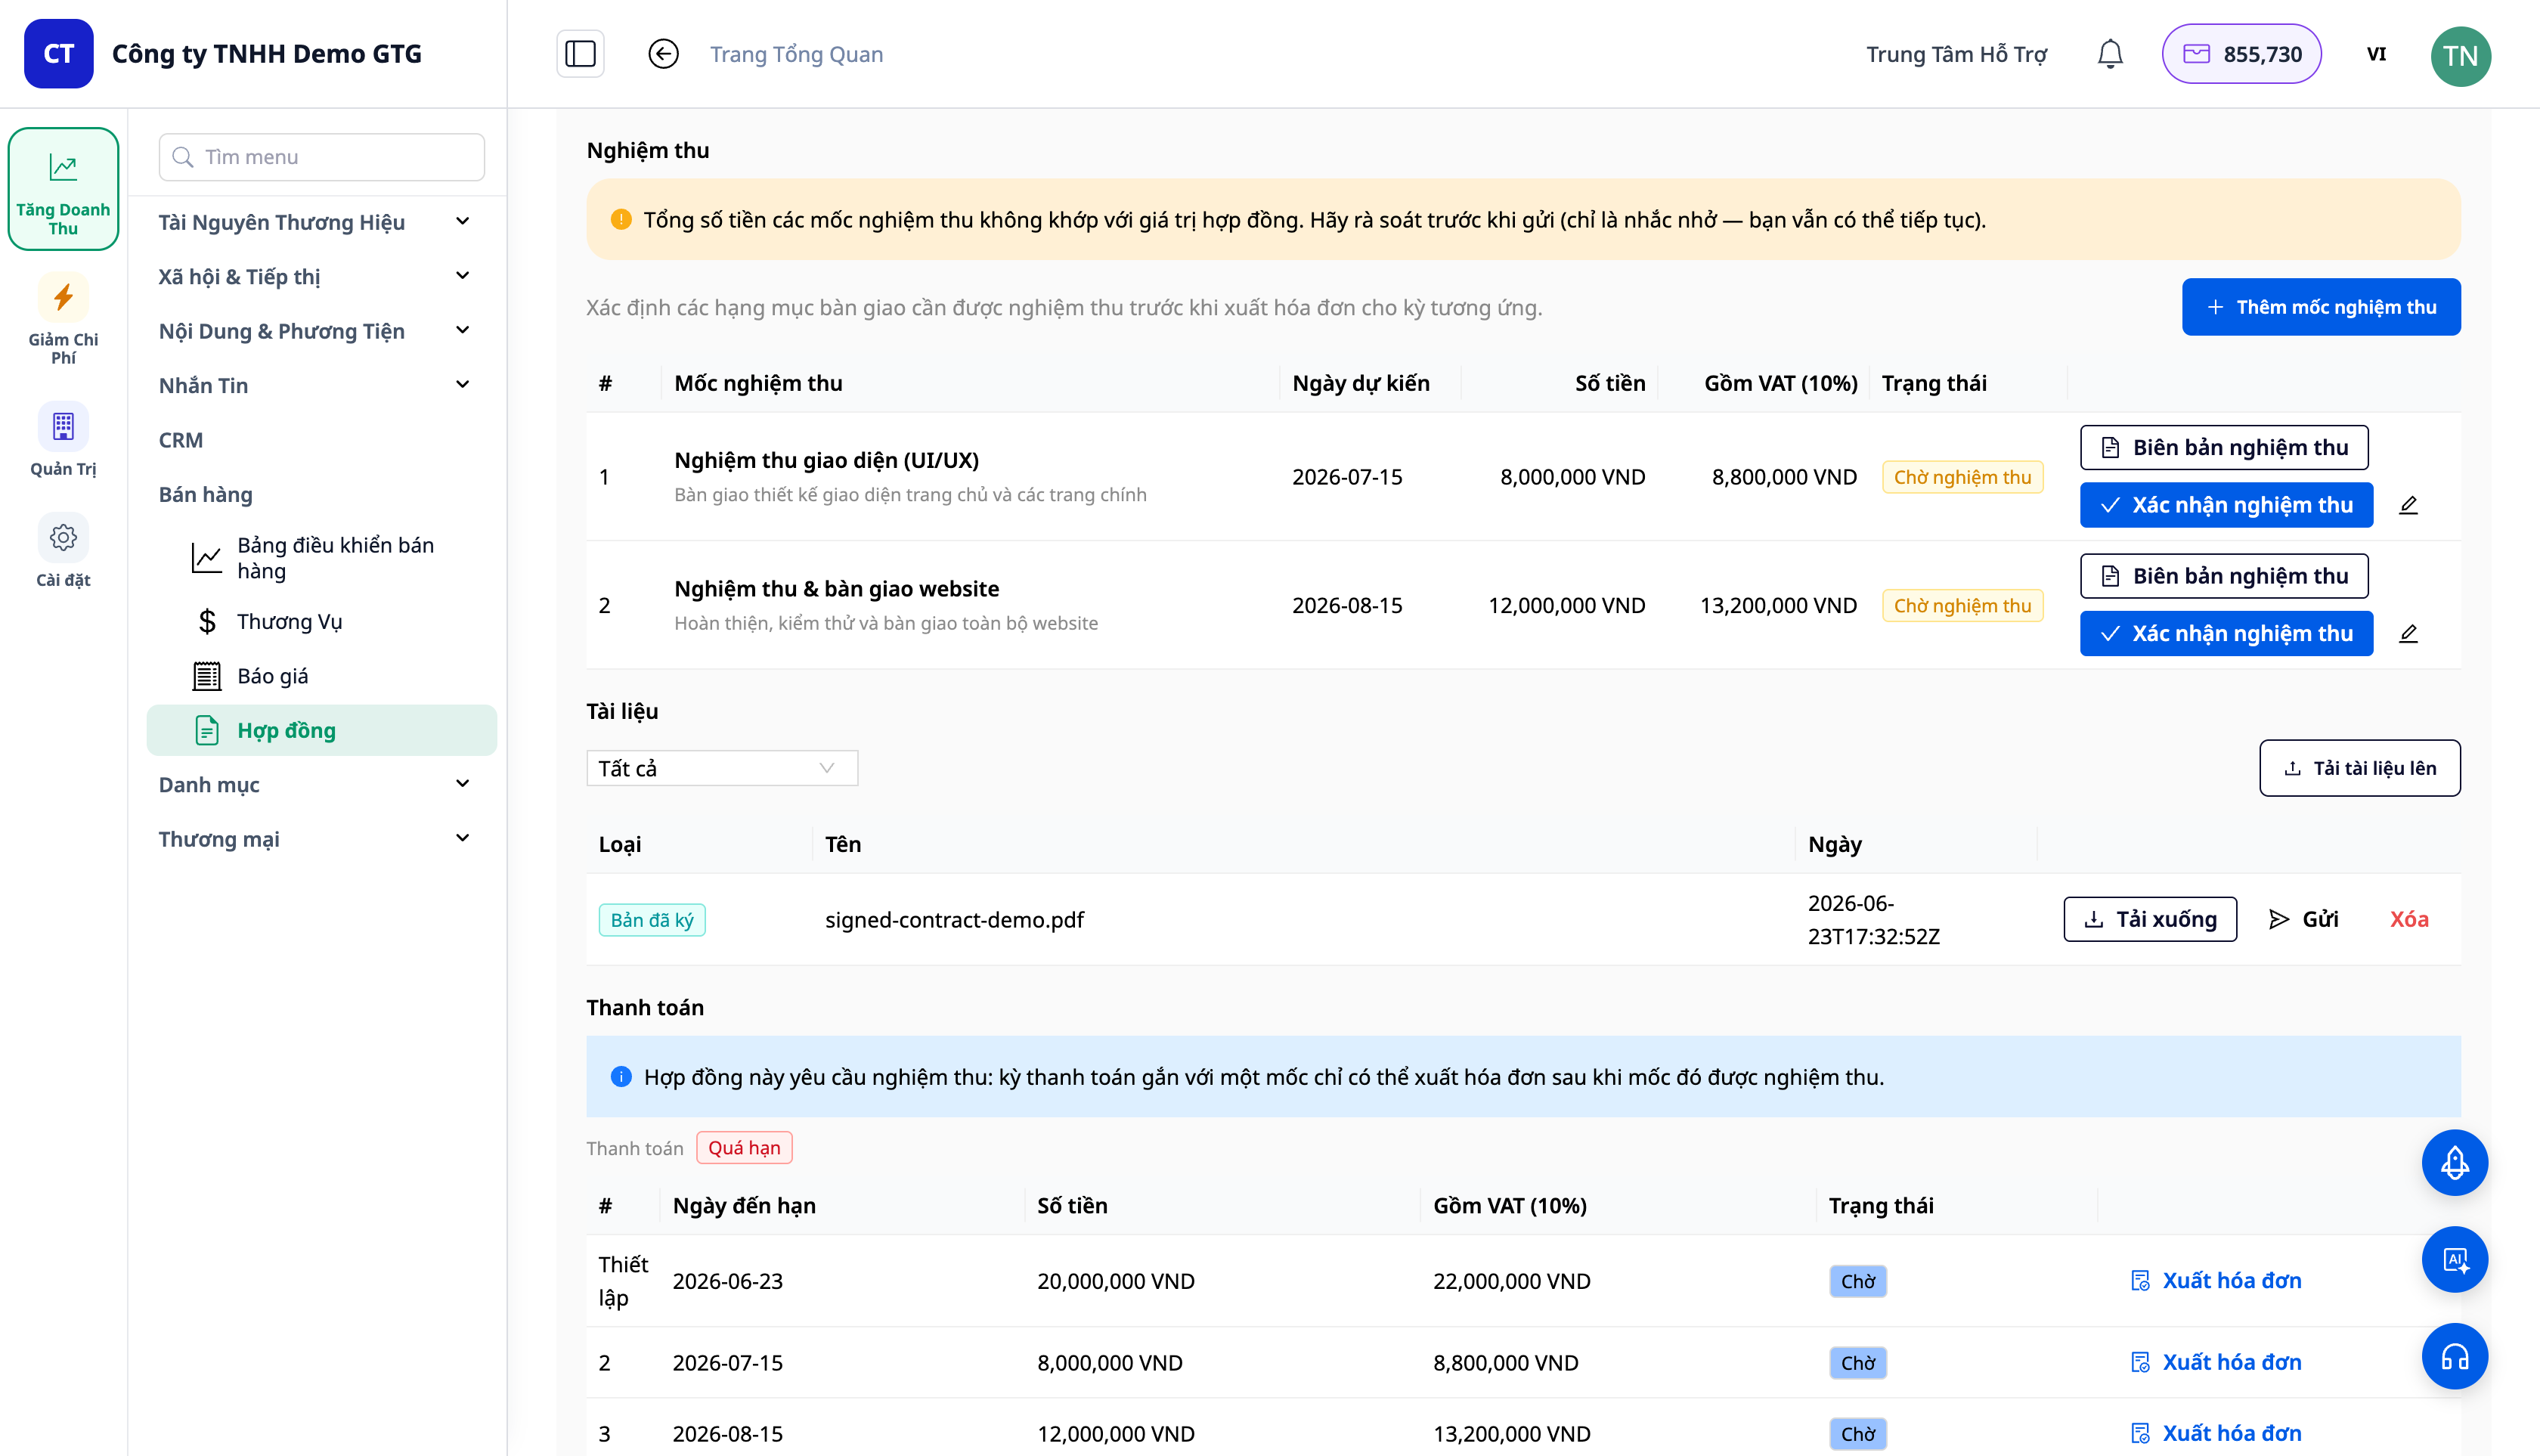
- Set acceptance milestones (Acceptance) to guide the payment schedule; (optional) enable bilingual.
✅ Expected Outcome: Party B is displayed in the contract; acceptance milestones create corresponding payment schedules.
Step 5 — Send Contract to Client (.docx)
- Open the contract details (click the + / contract number to open the panel). In the Documents section: click Generate contract to create a .docx version, or use Upload document to attach a contract file. Once a document is present, each document has a Send / Download button to send to the client.
✅ Expected Outcome: The system generates/attaches the contract document; Send (email to client) and Download buttons appear on the document line in the Documents section.
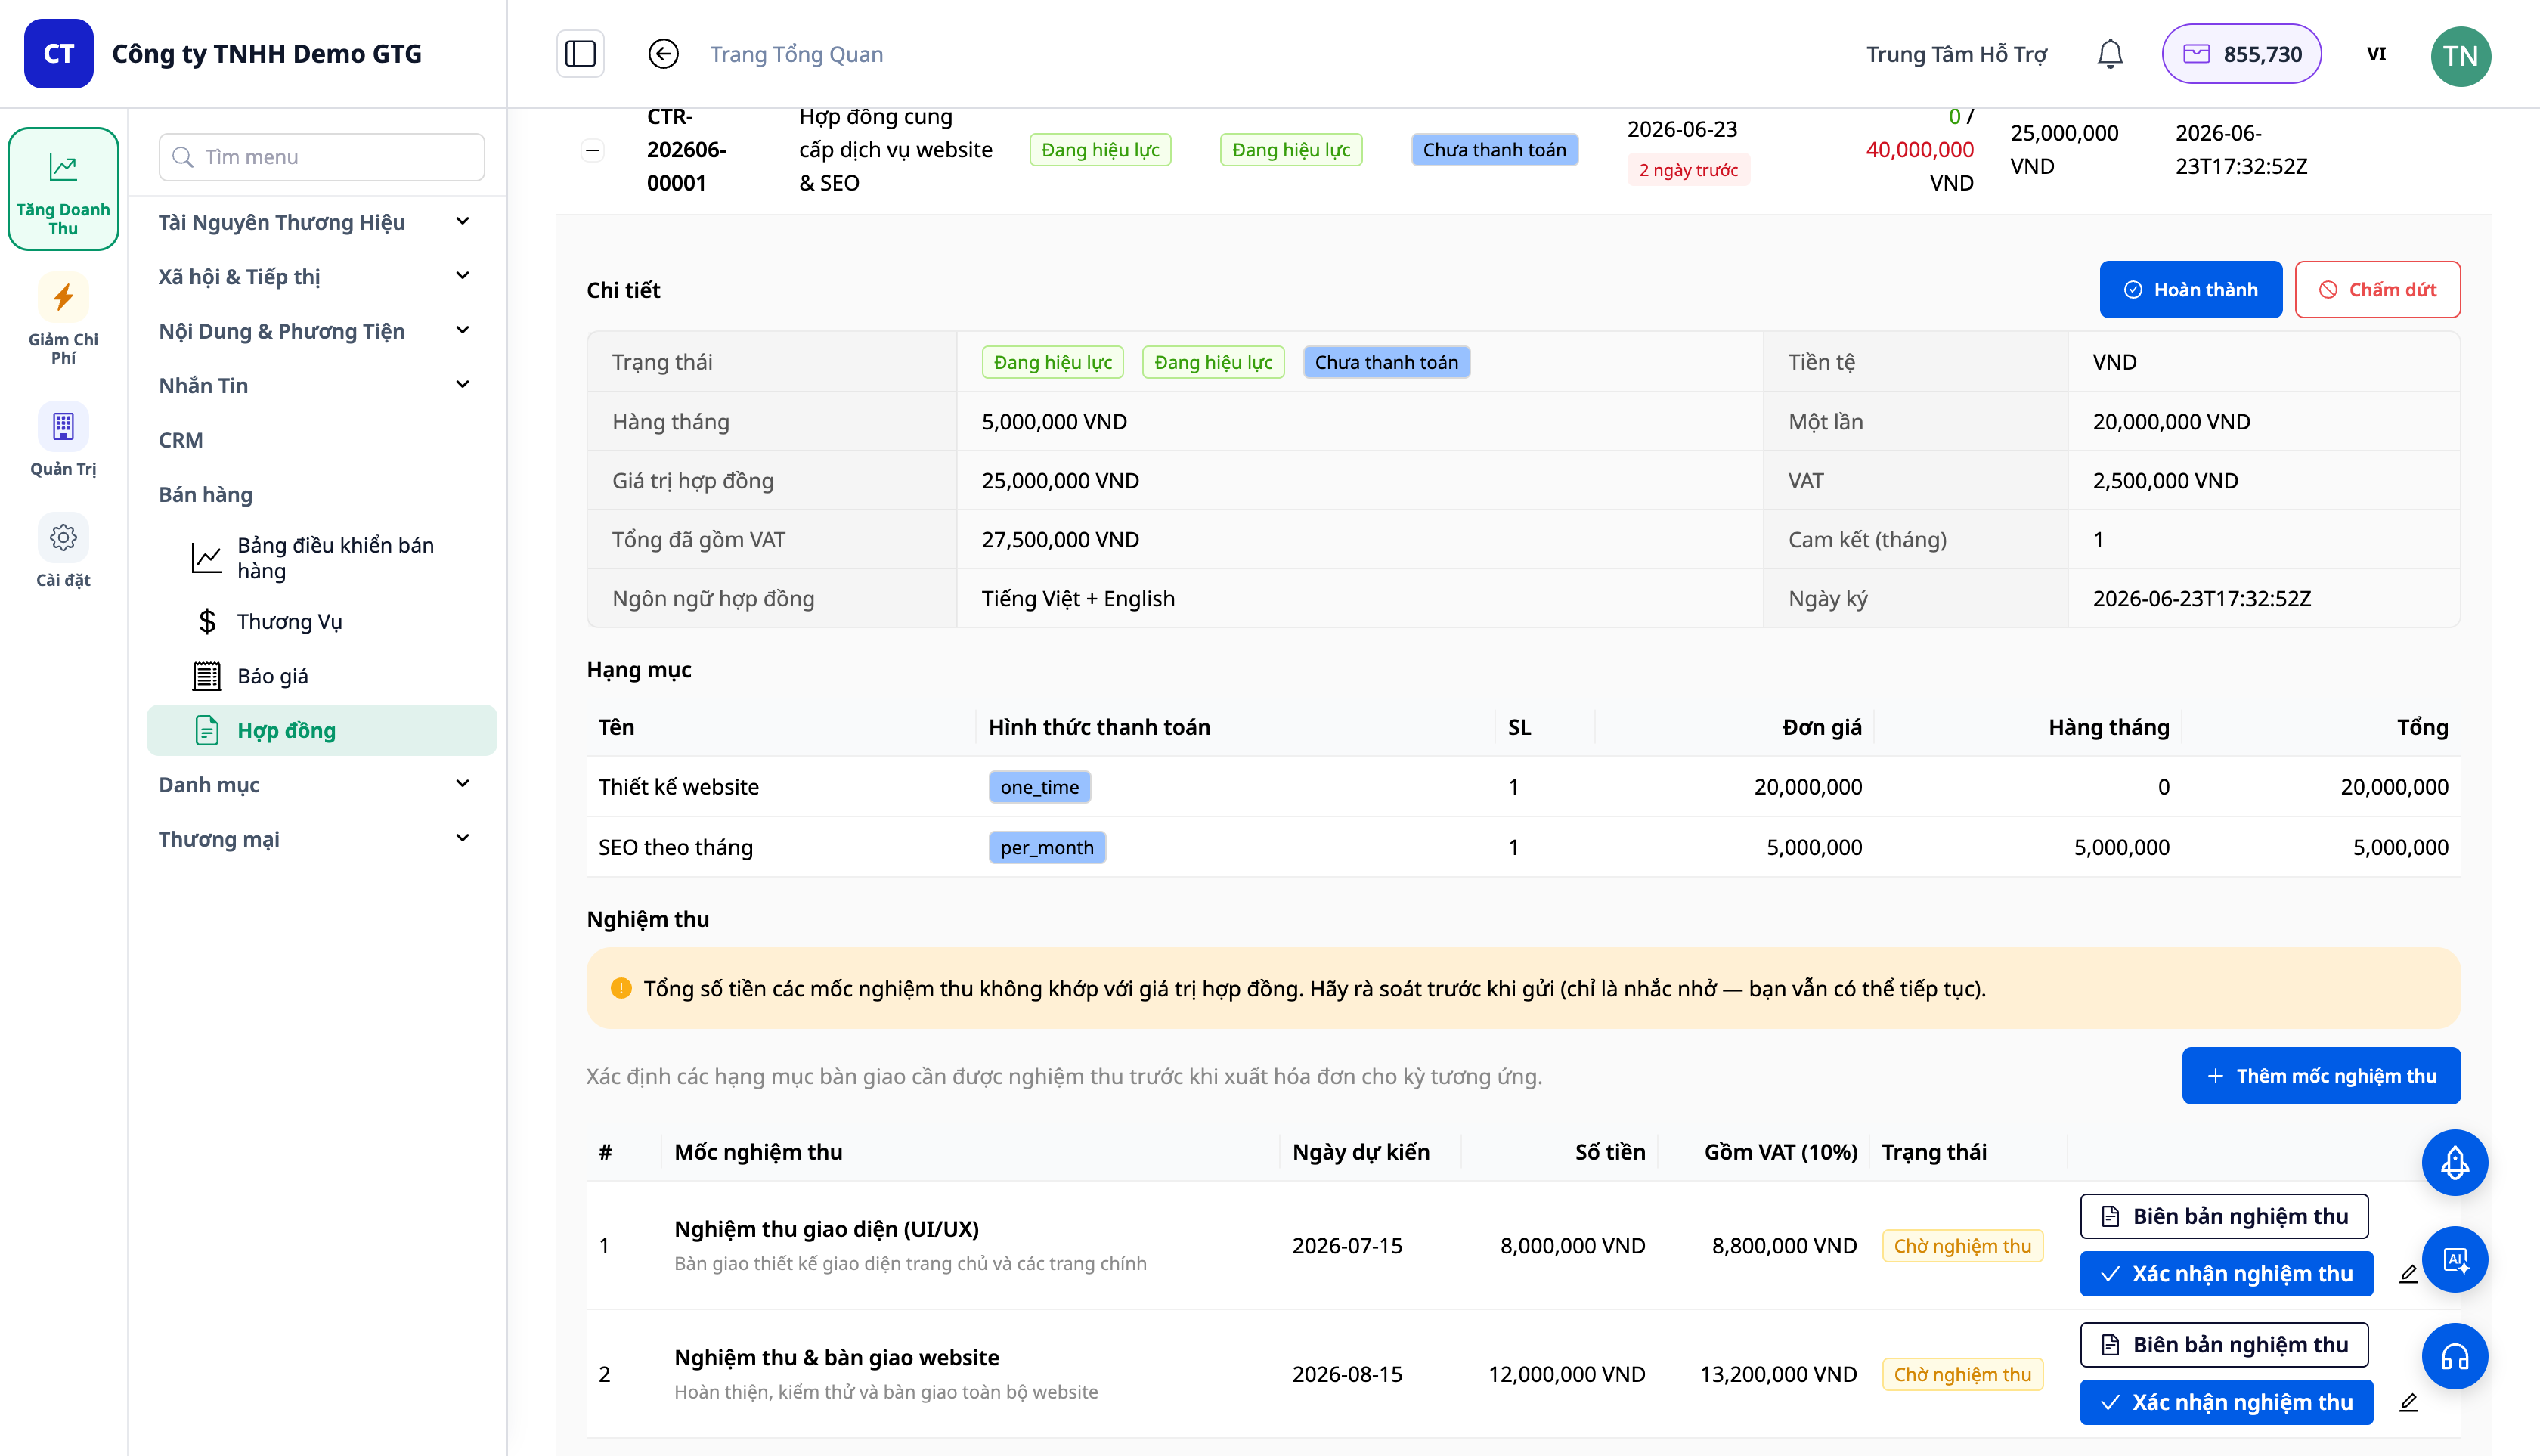
ℹ️ Note: The Documents section of a contract includes Generate contract + Upload document; after a document is present, each document line shows Send / Download. Fill in Party B (Step 4) before Generating contract; if Party B is not yet available, you can still use Upload document to attach the contract.
Step 6 — Upload Signed Copy
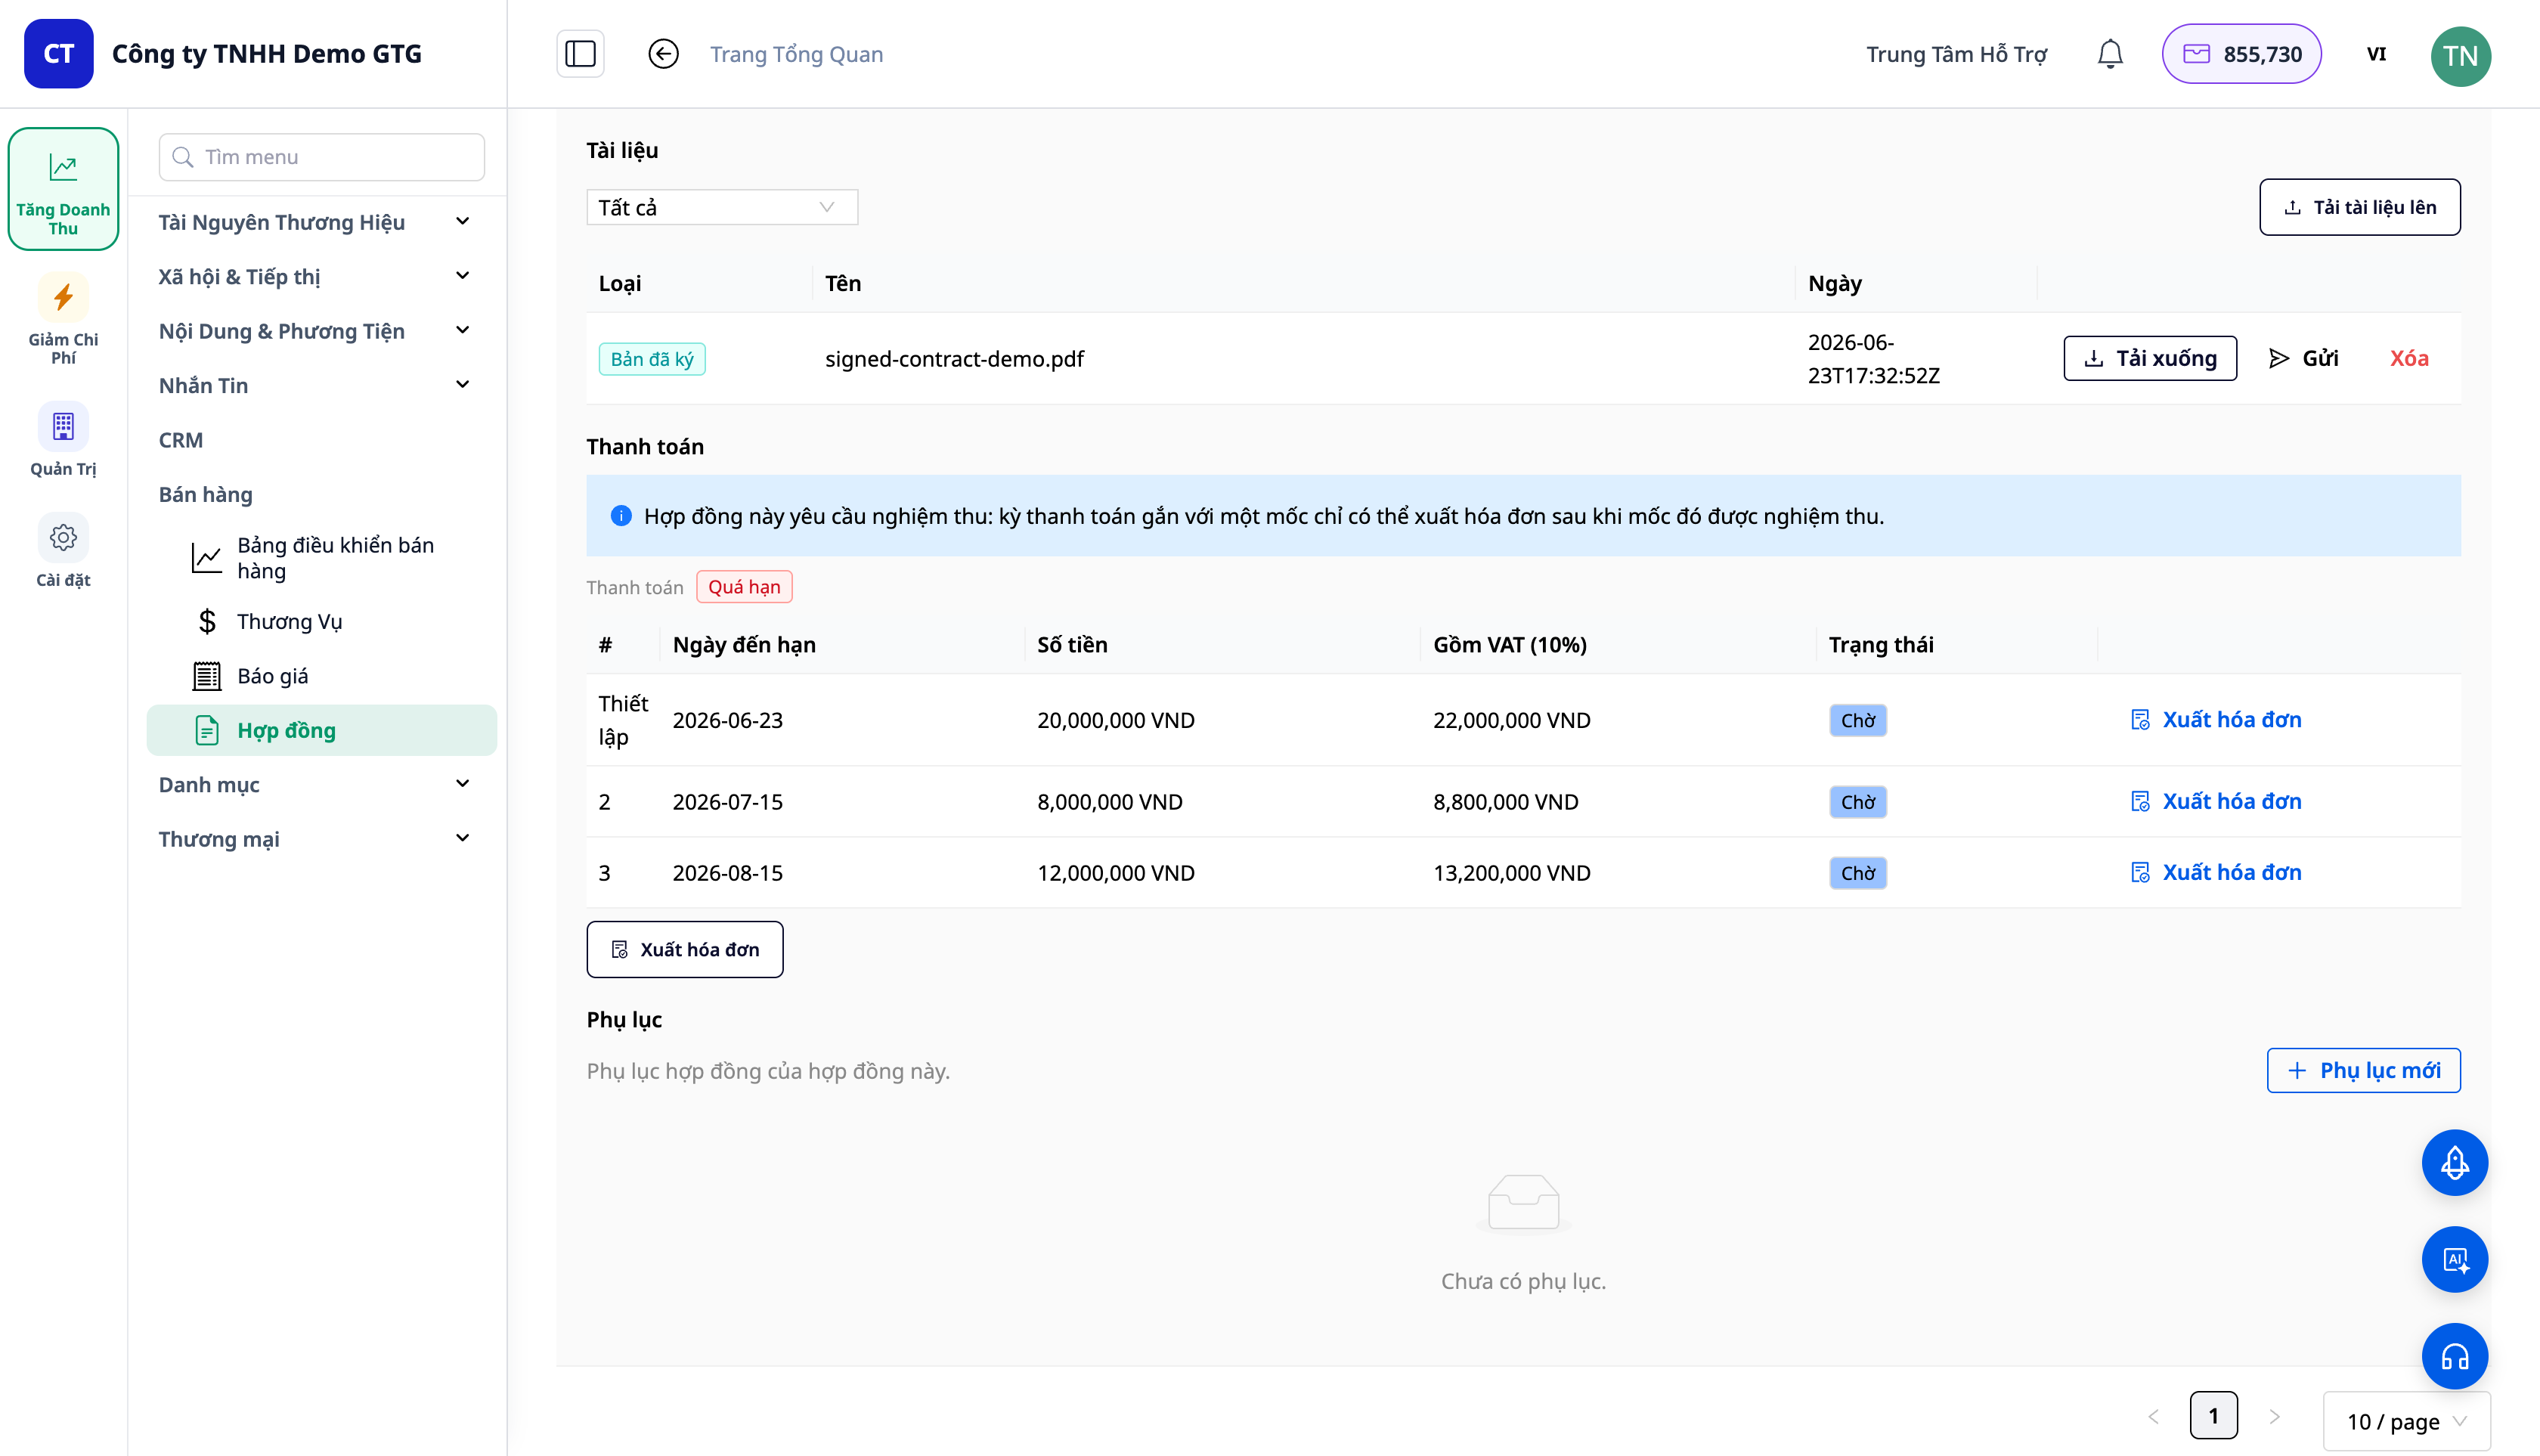
- After the client signs and returns it, in the Documents section, click Upload document → select the file (type Signed copy) → confirm. (Hint appears below: "Upload the signed contract to activate it.")
✅ Expected Outcome: The signed file is attached (Type Signed copy) along with the signing date; the contract automatically transitions to ACTIVE/Ongoing and Signed at is populated. The Billing schedule + Issue invoice button appear (no journal entry generated yet).
Step 7 — Issue Invoices Per Installment
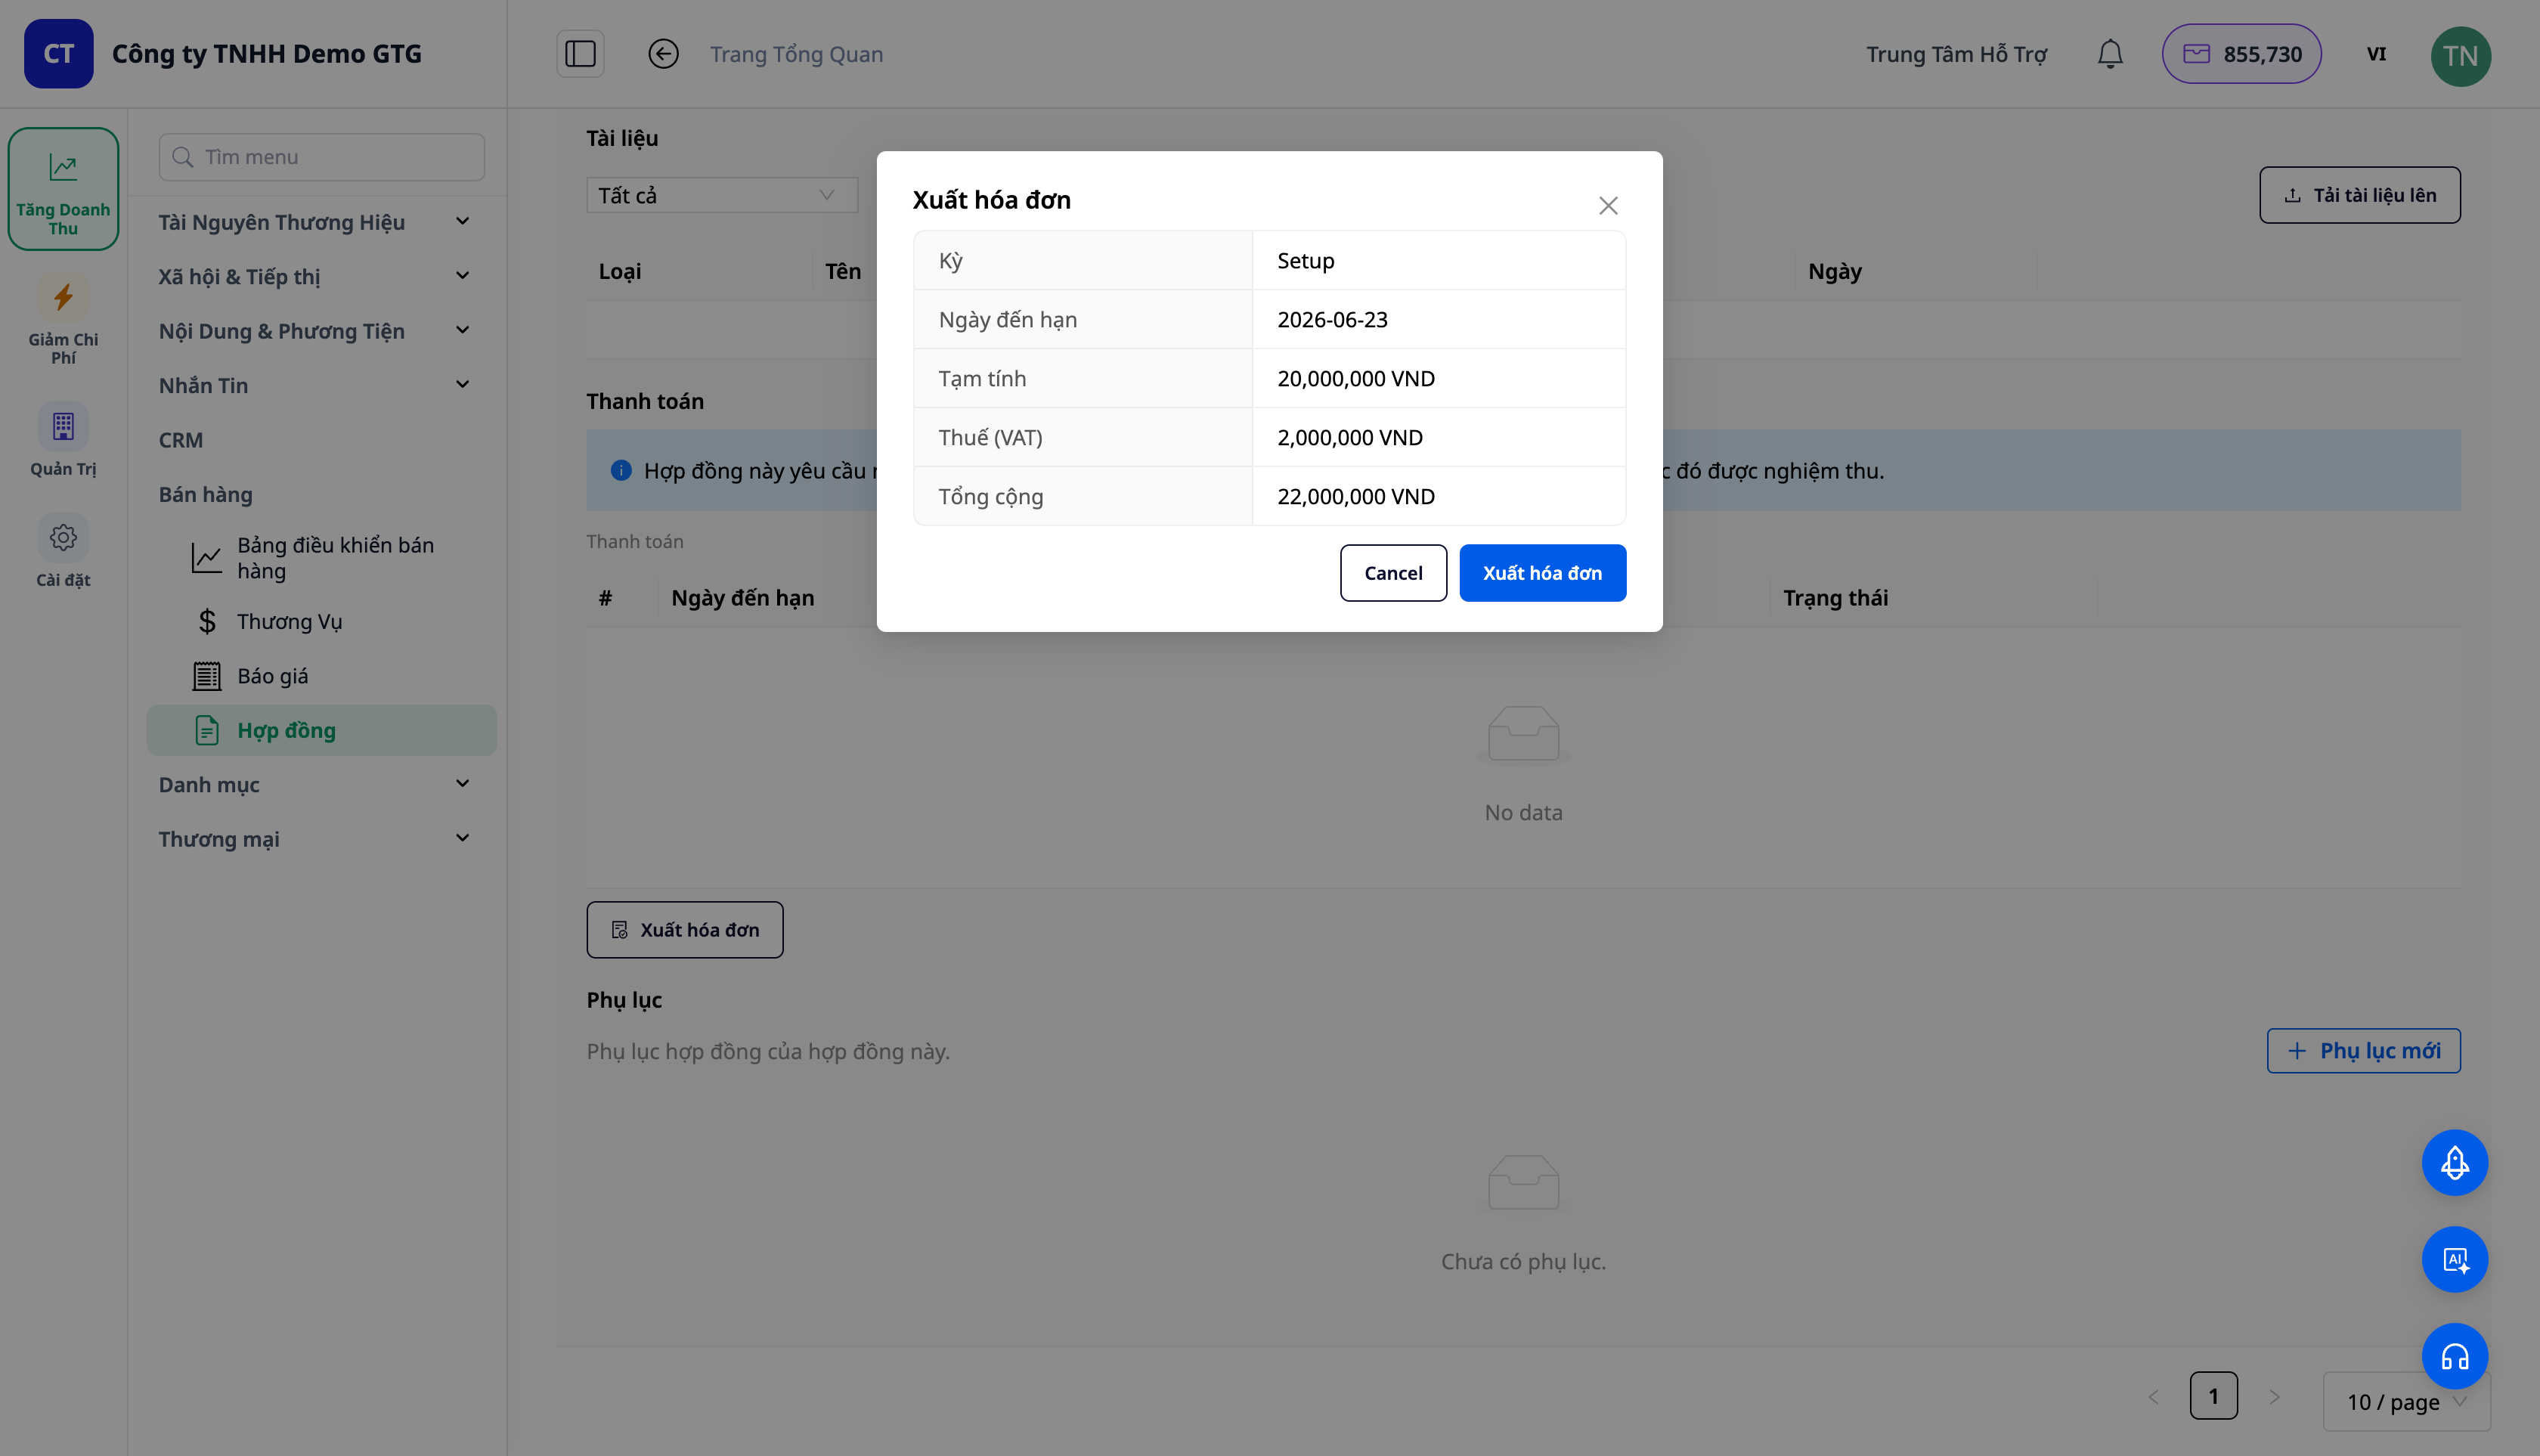
- On an active contract, in the Billing table, click Issue invoice for the installment to be invoiced → the Issue invoice modal opens with 3 options: Issue now / Save as draft / Mark paid now (with the note: "Issuing records revenue + receivable (AR). Marking paid records the cash receipt.") → select and confirm.
✅ Expected Outcome: An invoice for the payment installment is issued via the ERP/invoicing workflow; that installment is linked to the newly issued invoice; the payment status is updated.
⚠️ Prerequisite: Issuing invoices requires the workspace to have e-invoicing configured / connected to a tax provider. If not connected, the Issue invoice modal will still show a preview, but the issuing step will not be completed. After connecting e-invoicing, the installment will issue an invoice and automatically generate a journal entry (Step 8).
Step 8 — View Journal Entries
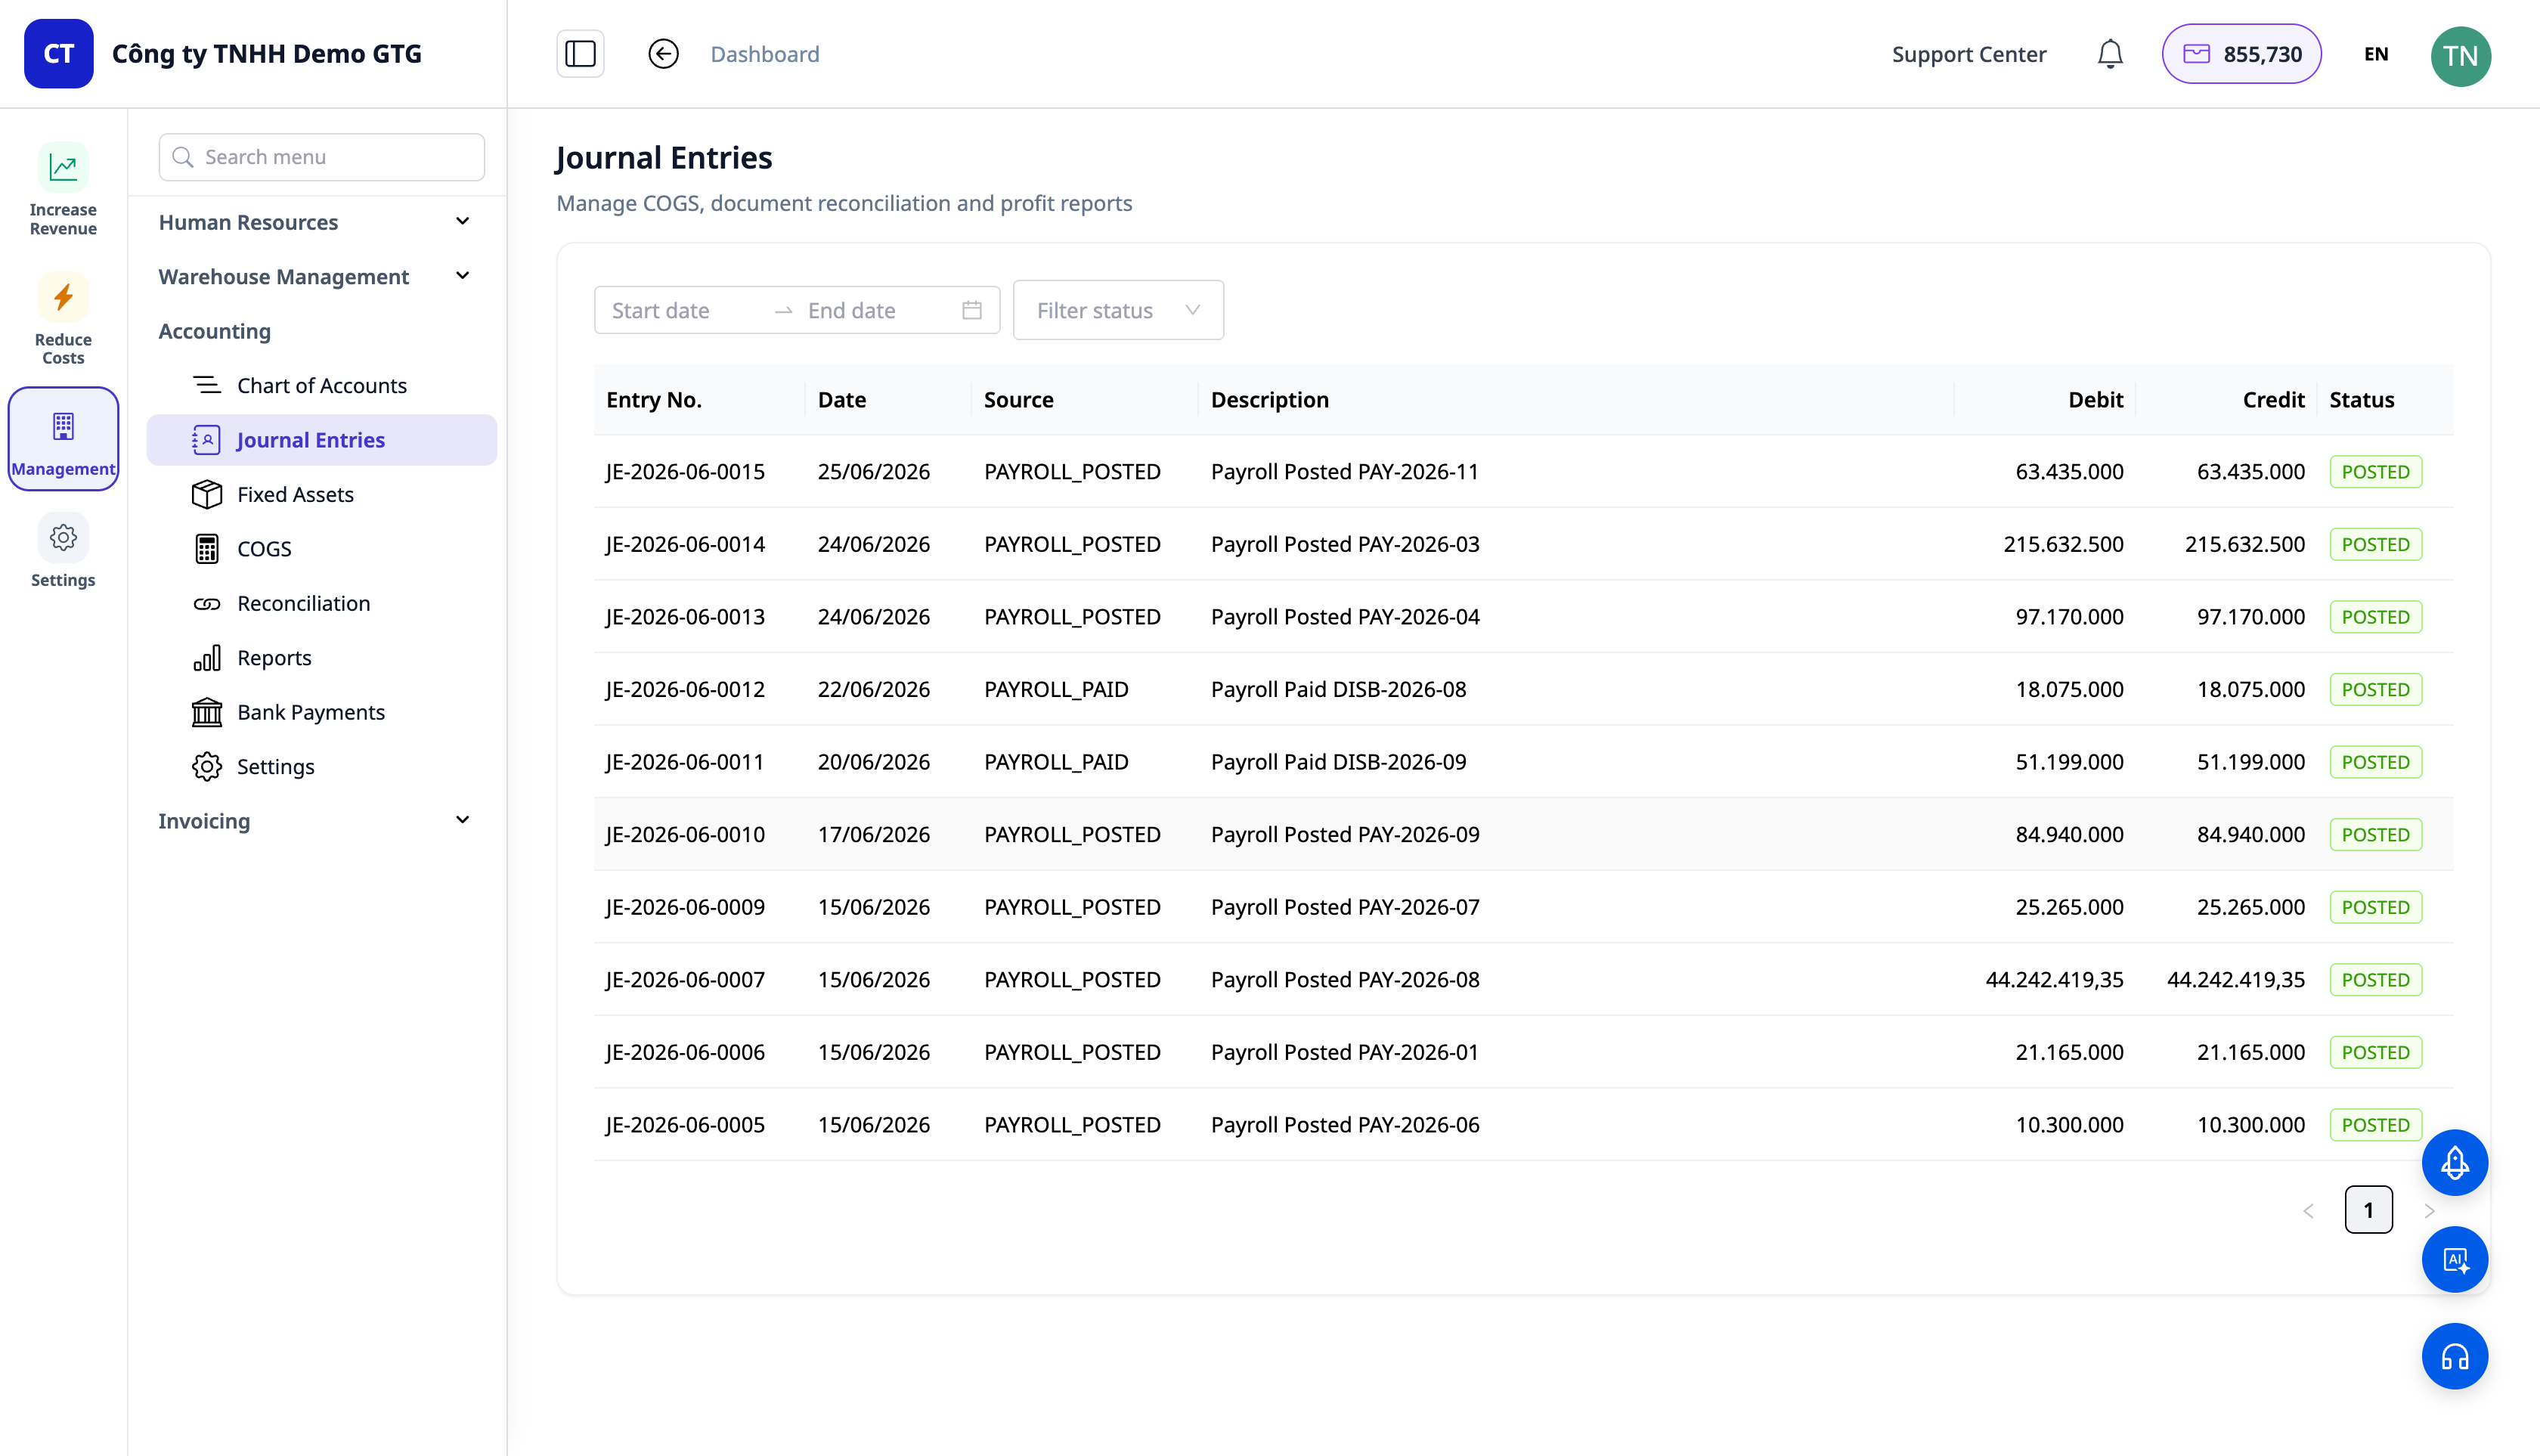
- Open Management → Accounting → Journal Entries.
✅ Expected Outcome: When an invoice is issued, a balanced journal entry is automatically created: Debit Accounts Receivable (131) / Credit Revenue (511) / Credit VAT (3331). When payment is recorded: Debit Cash (111/112) / Credit Accounts Receivable (131).
ℹ️ Note: The contract revenue journal entry (Debit 131 / Credit 511 / Credit 3331) only appears after an invoice has been successfully issued — meaning after e-invoicing has been connected (see Step 7).
Expected Outcome Quick Reference Table
| Action | Outcome You Will See |
|---|---|
| Create Service (Step 1) | Service in Catalog ▸ Services + price + cycle |
| Mixed Quote (Step 2) | Type tags per line; ACCEPTED → Convert to Contract button |
| Convert (Step 3) | CTR-2026-… ; one-time/monthly total split; quote CONVERTED |
| Party B + Milestones (Step 4) | Party B pre-filled; payment schedule by milestones |
| Send (.docx) (Step 5) | .docx email to client; SENT |
| Upload Signed (Step 6) | Signed by + time; SIGNED → ACTIVE; payment schedule created |
| Issue Invoice (Step 7) | Preview → confirm → installment invoice issued |
| Journal Entries (Step 8) | Debit 131/Credit 511+3331 entry; payment Debit 111/Credit 131 |
Notes
- Quote → Order still only copies product lines (services belong to contracts) — this is by design.
- Importing Product Catalog supports any spreadsheet format (AI auto-maps columns); importing services is a future roadmap feature.
- VAT: if tax is set to 0%, VAT based on the workspace's country (e.g., 10% for VN) can still be applied from the price list — this is the existing behavior.