What you can do after this guide
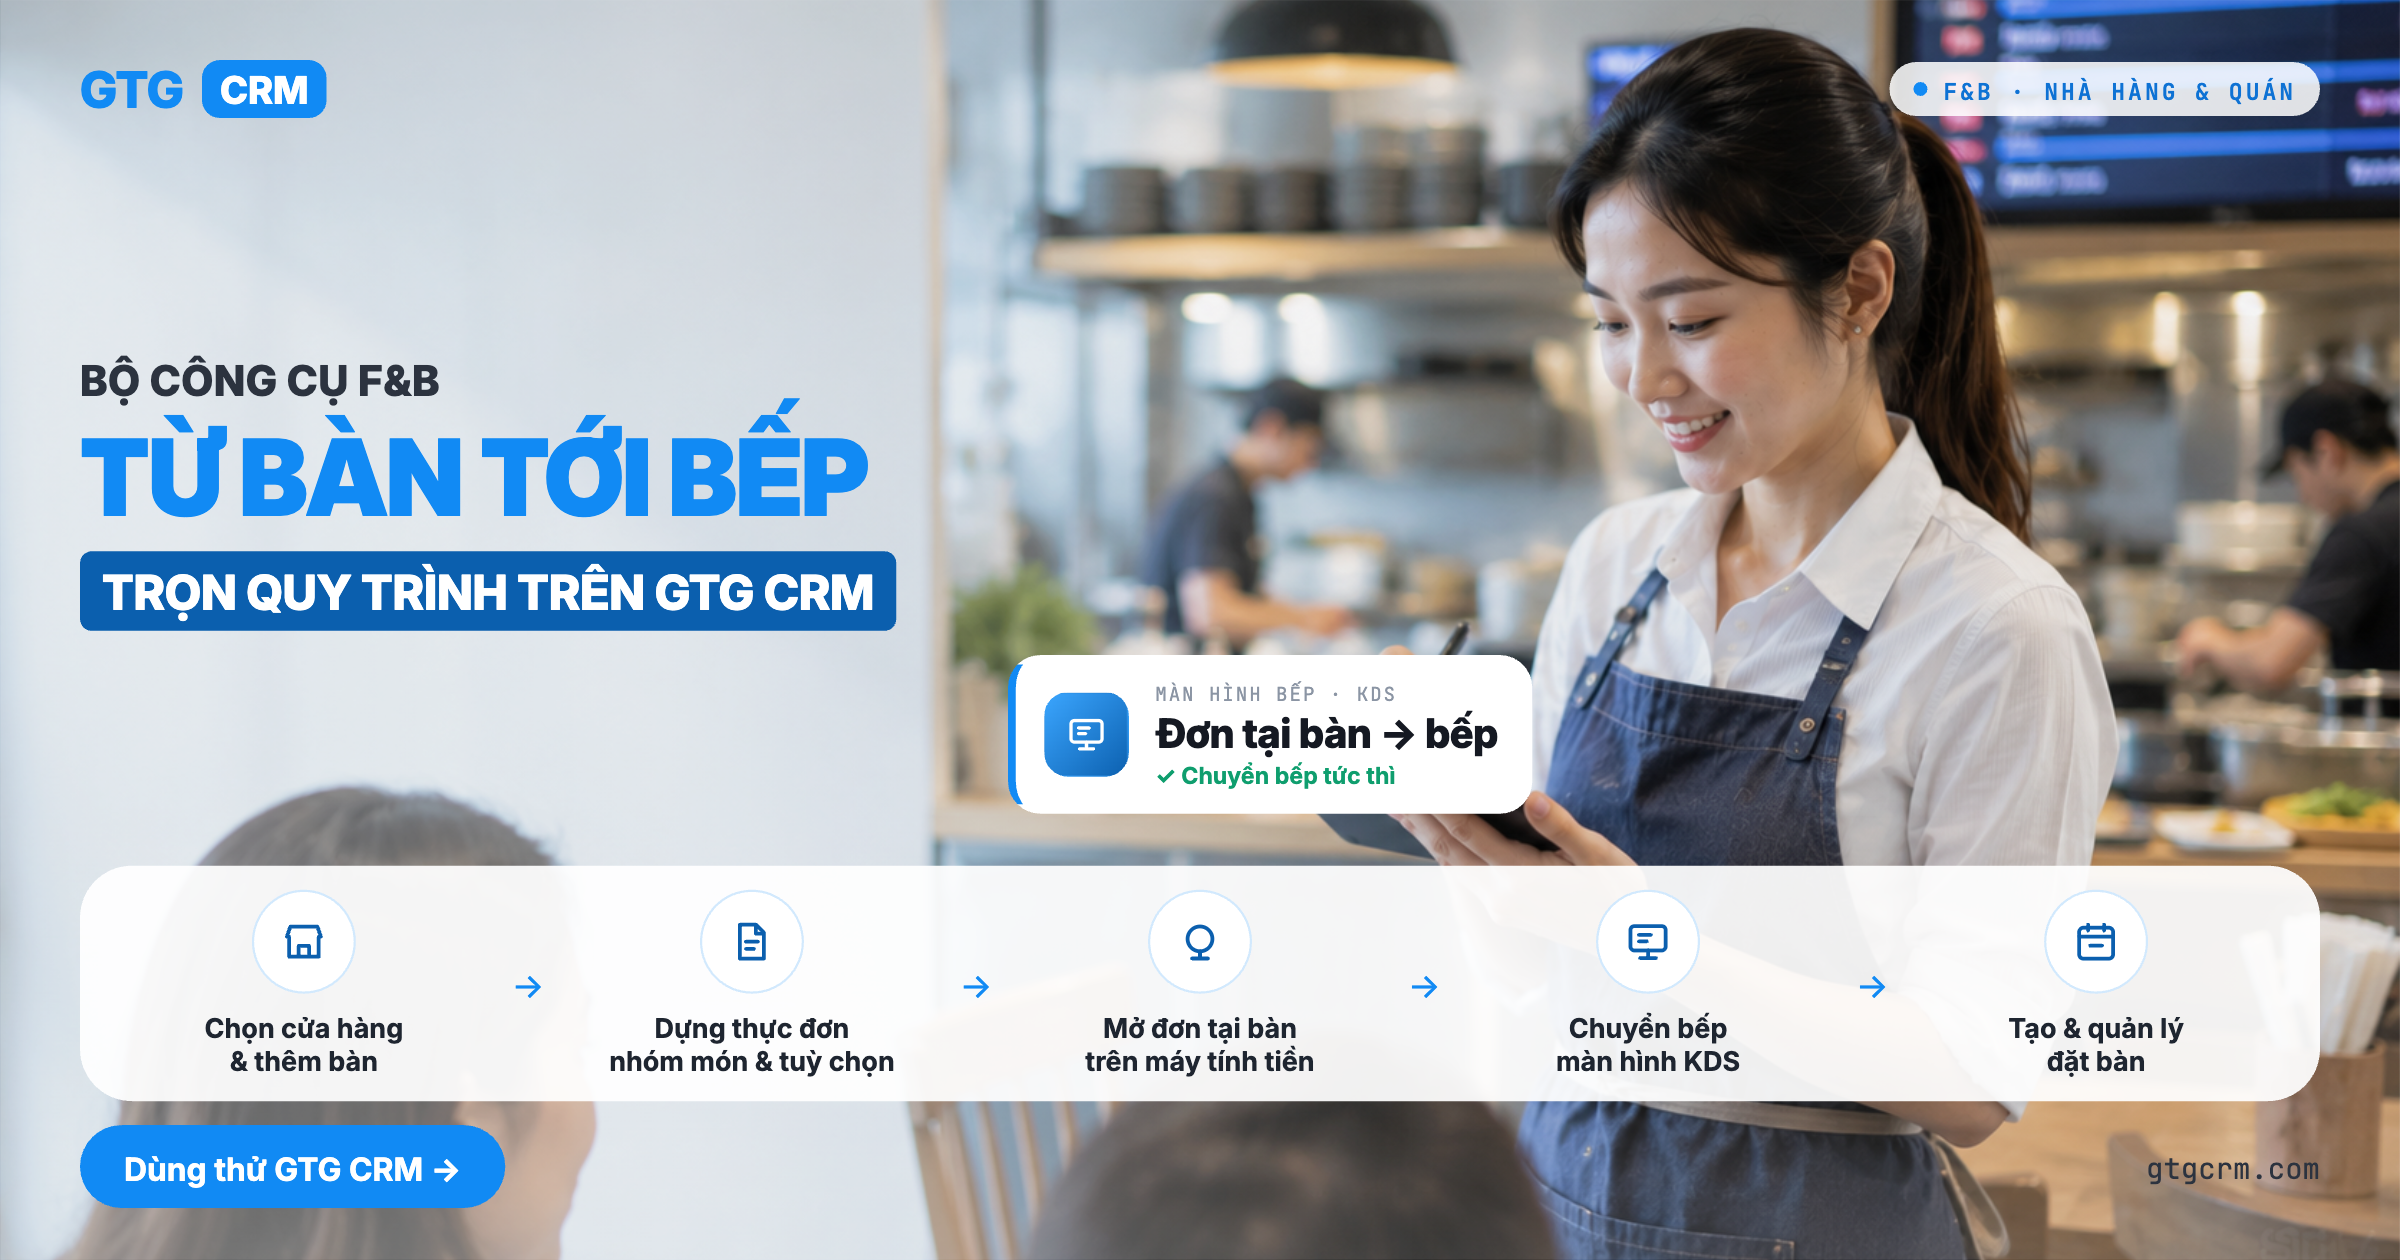
Select a store (point of sale) and add tables → build a menu with item groups and items → open an order for a table and send it to the kitchen on the cash register → watch the chef process orders on the kitchen screen (New → In Progress → Ready) → create and manage a table order. From setup to serving customers at their tables, all within the same system.
Don't have an overview of the features yet? Check out the article Restaurant & Cafe Management (F&B) to understand what this toolset can do.
Preparation
1. Log in to GTG CRM with an account that has F&B / menu management permissions (usually the owner or manager). — Only users with permissions can build menus, select stores, and add tables.
2. Have at least one warehouse in your workspace. — The warehouse is used as the store (point of sale) for the cash register and is where ingredients are deducted from.
3. Have a few items/products already created in the Product Hub to add to the menu. — The menu is built by selecting items from the product catalog.
4. Cashiers have permission to sell on the cash register (POS); chefs have permission to operate the kitchen screen. — Each person performs their specific role (cashier sells, chef runs the kitchen).
Step 1 — Select a store (point of sale) and add tables
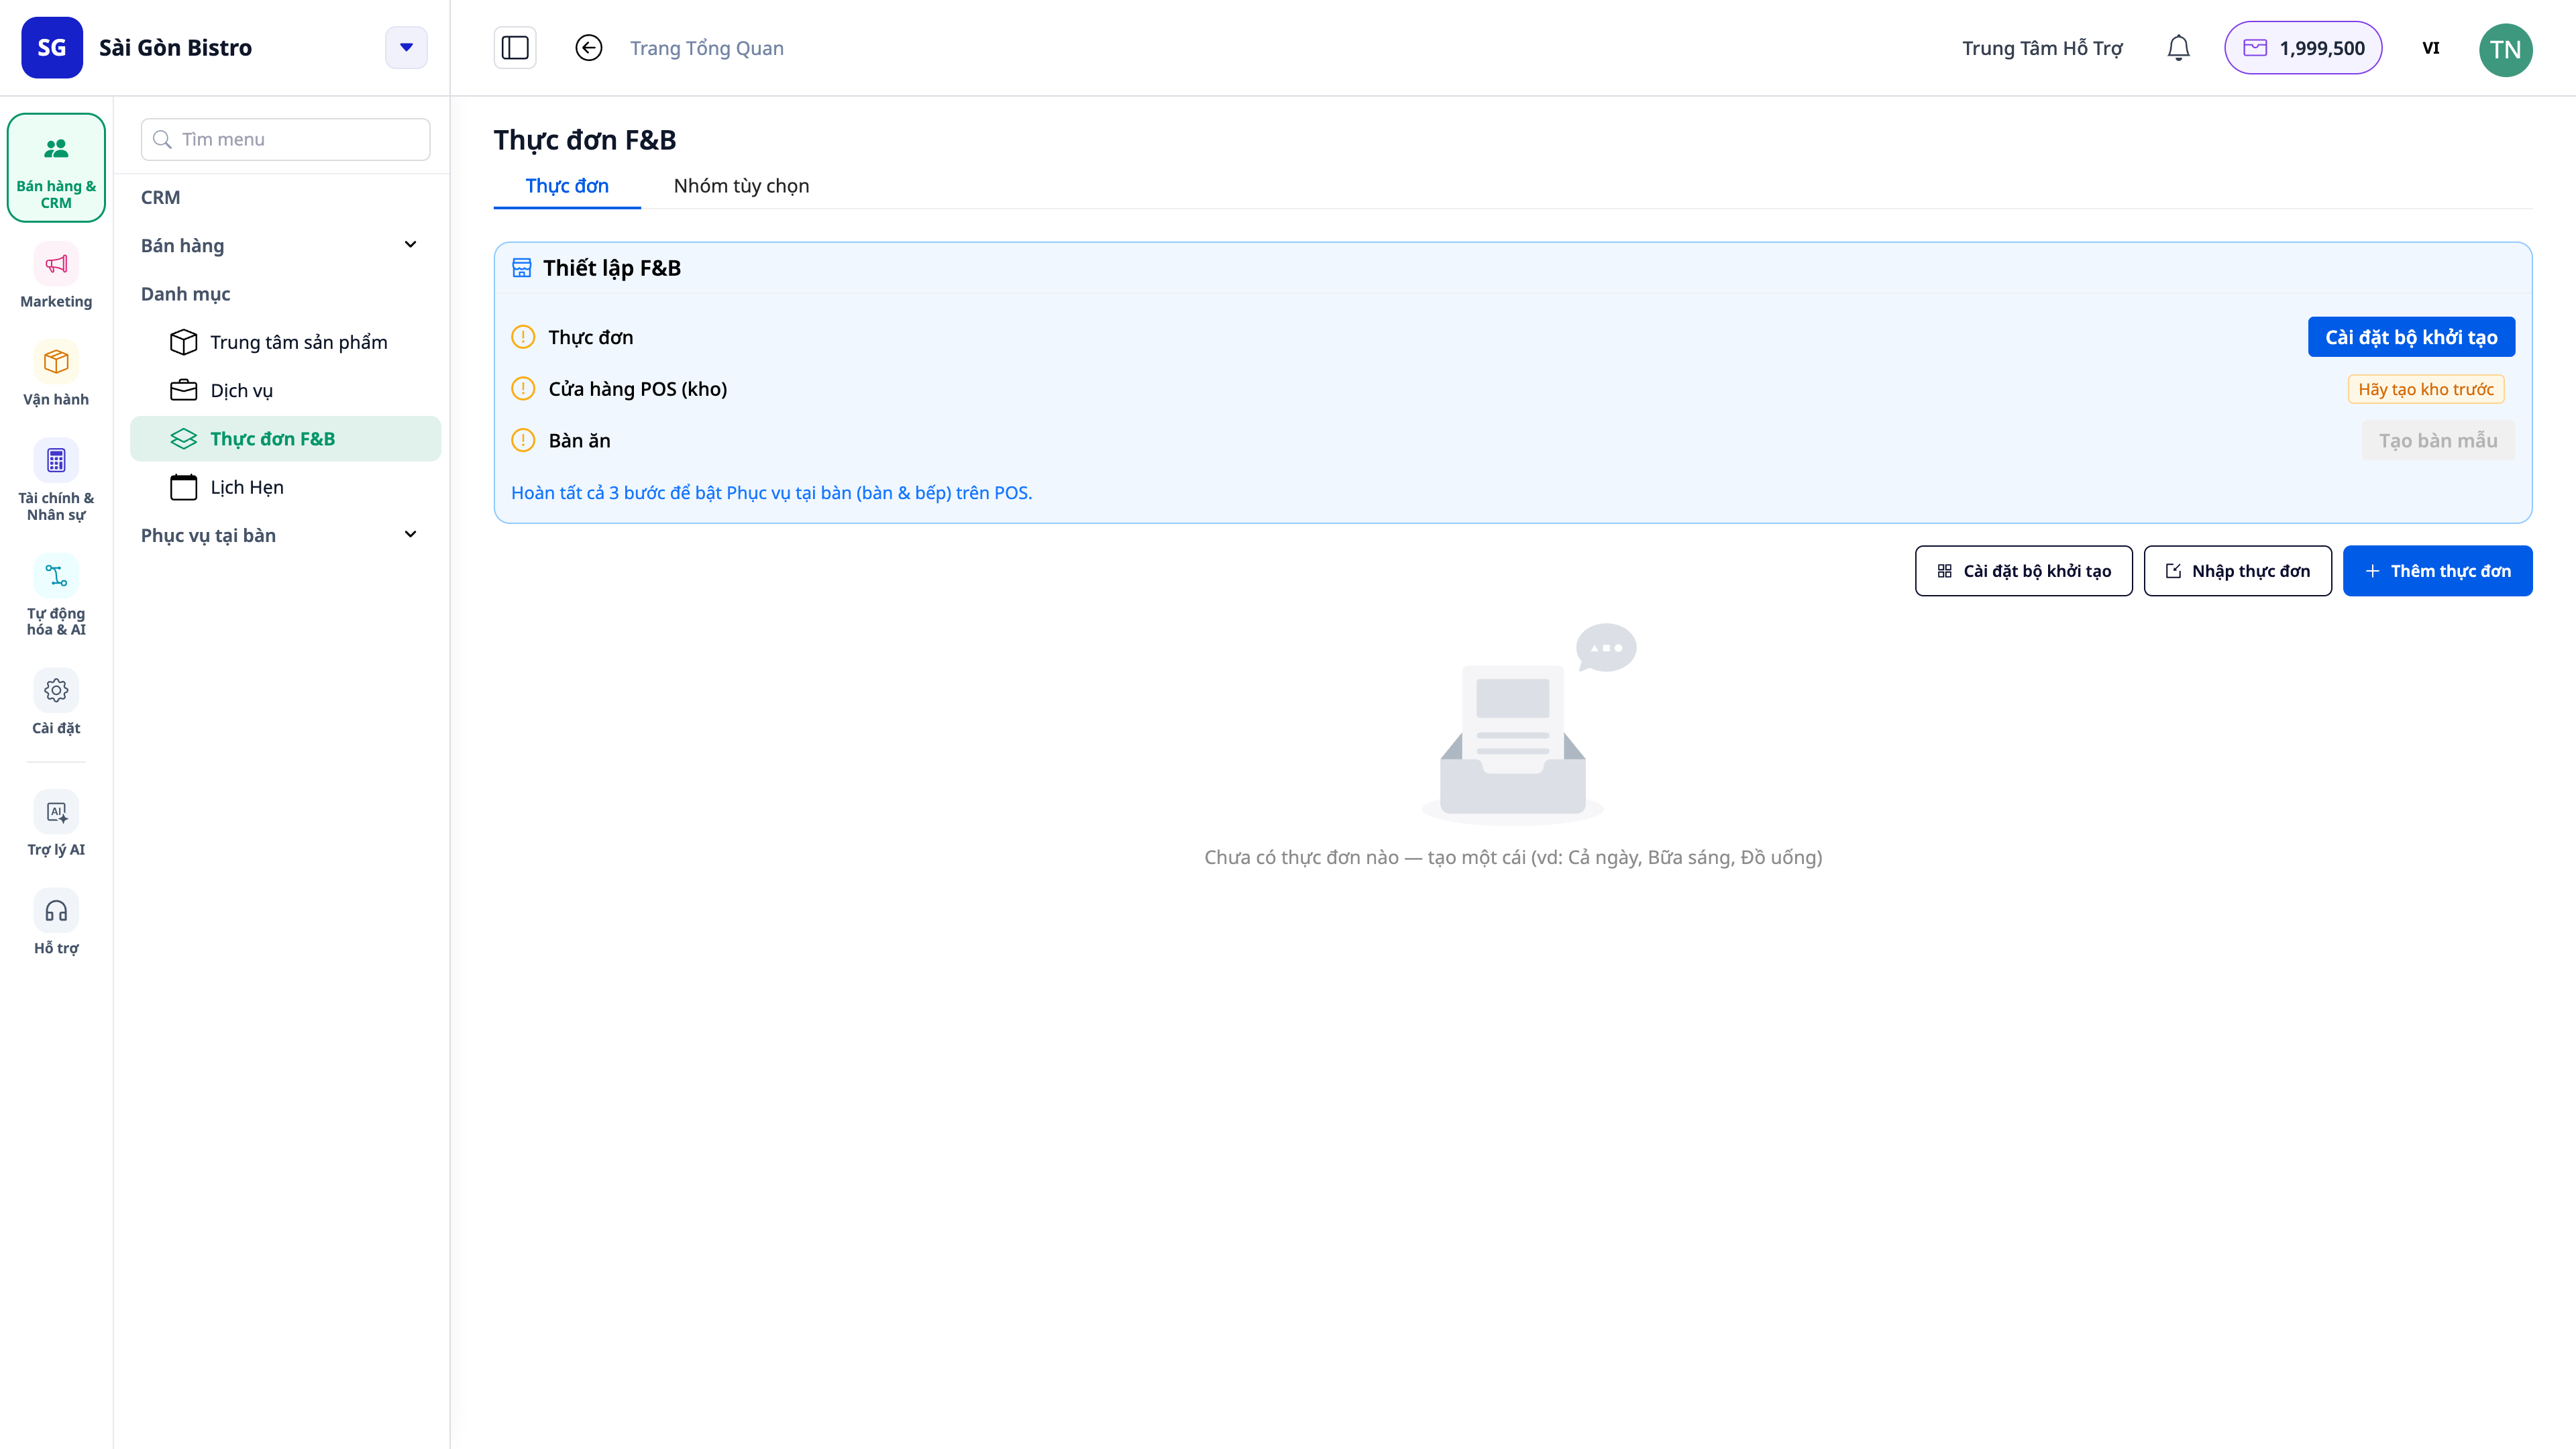
Go to Sales & CRM → Catalog → F&B Menu.
On the blue tab "Set up F&B", on the line POS store, click Select store → (select) your warehouse (e.g., Main Warehouse) → click Set as store.
Click Add sample tables to quickly create a few tables (for dine-in service only).
✅ Expected result: The Store line shows a green checkmark and the message "Store set up"; the table list includes T1–T5 (each table seats 2–6 people). The setup tab displays three checkmarks ✓: Menu · Store · Tables — ready for dine-in service.
💡 Tip: If your workspace has only one warehouse, the system may automatically set it as your store — just double-check for the green checkmark.
Step 2 — Build your menu: create a menu, add item groups, and items
Still on the F&B Menu, click New menu → enter a name (e.g., Menu) → save.
Click Add section → enter a group name (e.g., Drinks, Main Courses).
Within the newly created group, click Add a product to this section → (select) an item from the catalog (e.g., Milk Coffee).
✅ Expected result: The item appears under the correct group with its selling price (e.g., Milk Coffee under "Drinks" at 35,000₫). Repeat to add other items.
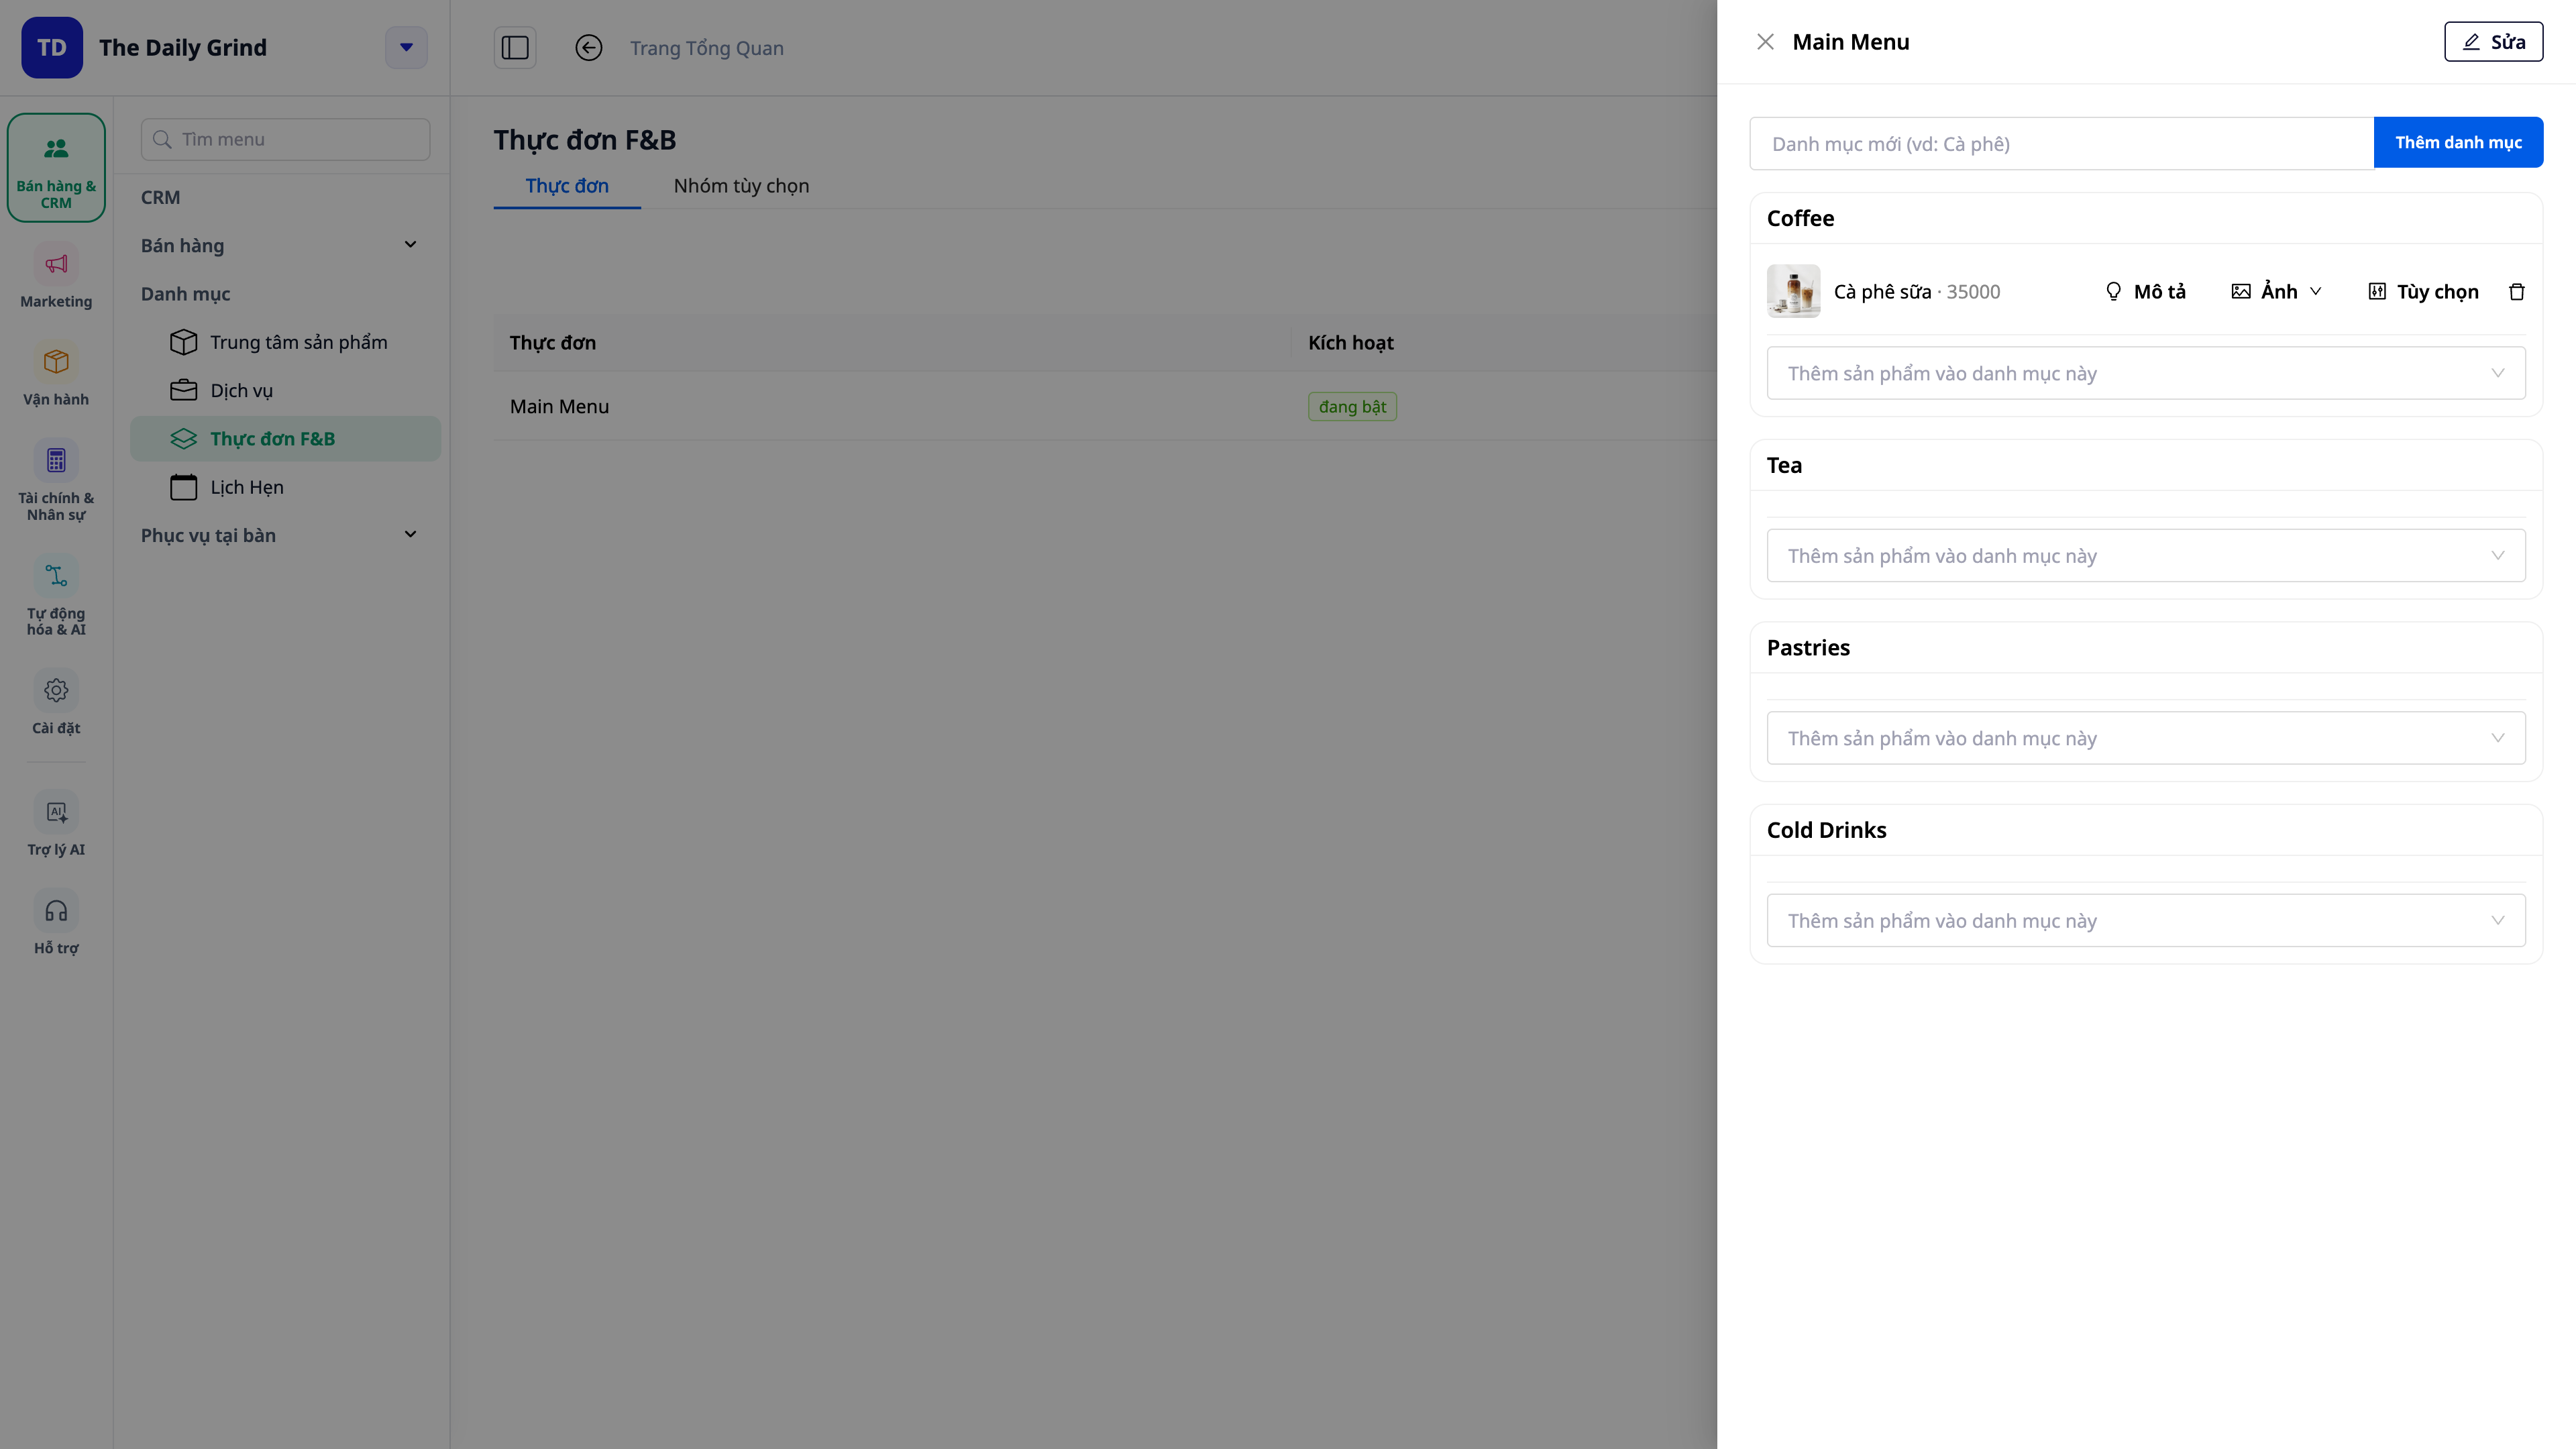
💡 Item options (optional): If an item has options — size, sugar/ice level, or toppings with extra charge — open that item and add option groups with their additional prices. Customers can select options when ordering, and the price will be calculated correctly and automatically.
ℹ️ Want to temporarily mark an item as "out of stock"? Simply disable the availability status for that item — customers and cashiers won't be able to order it. Enable it again when it's back in stock.
Step 3 — Open an order at a table and send to kitchen (cash register / POS)
Open the Cash Register (POS) application and access your store (log in with the same account).
Go to the F&B tab → tap a table (e.g., T1) → Open check → enter Number of guests (e.g., 2) → Open.
Tap on an item (e.g., Iced Milk Coffee) to add it to the table's order; select options if available.
On the open order, tap Fire to kitchen.
✅ Expected Result: An order opens for Table T1 (currently "In Service"), showing items and the total cost; after firing, the button changes to Mark as Served.
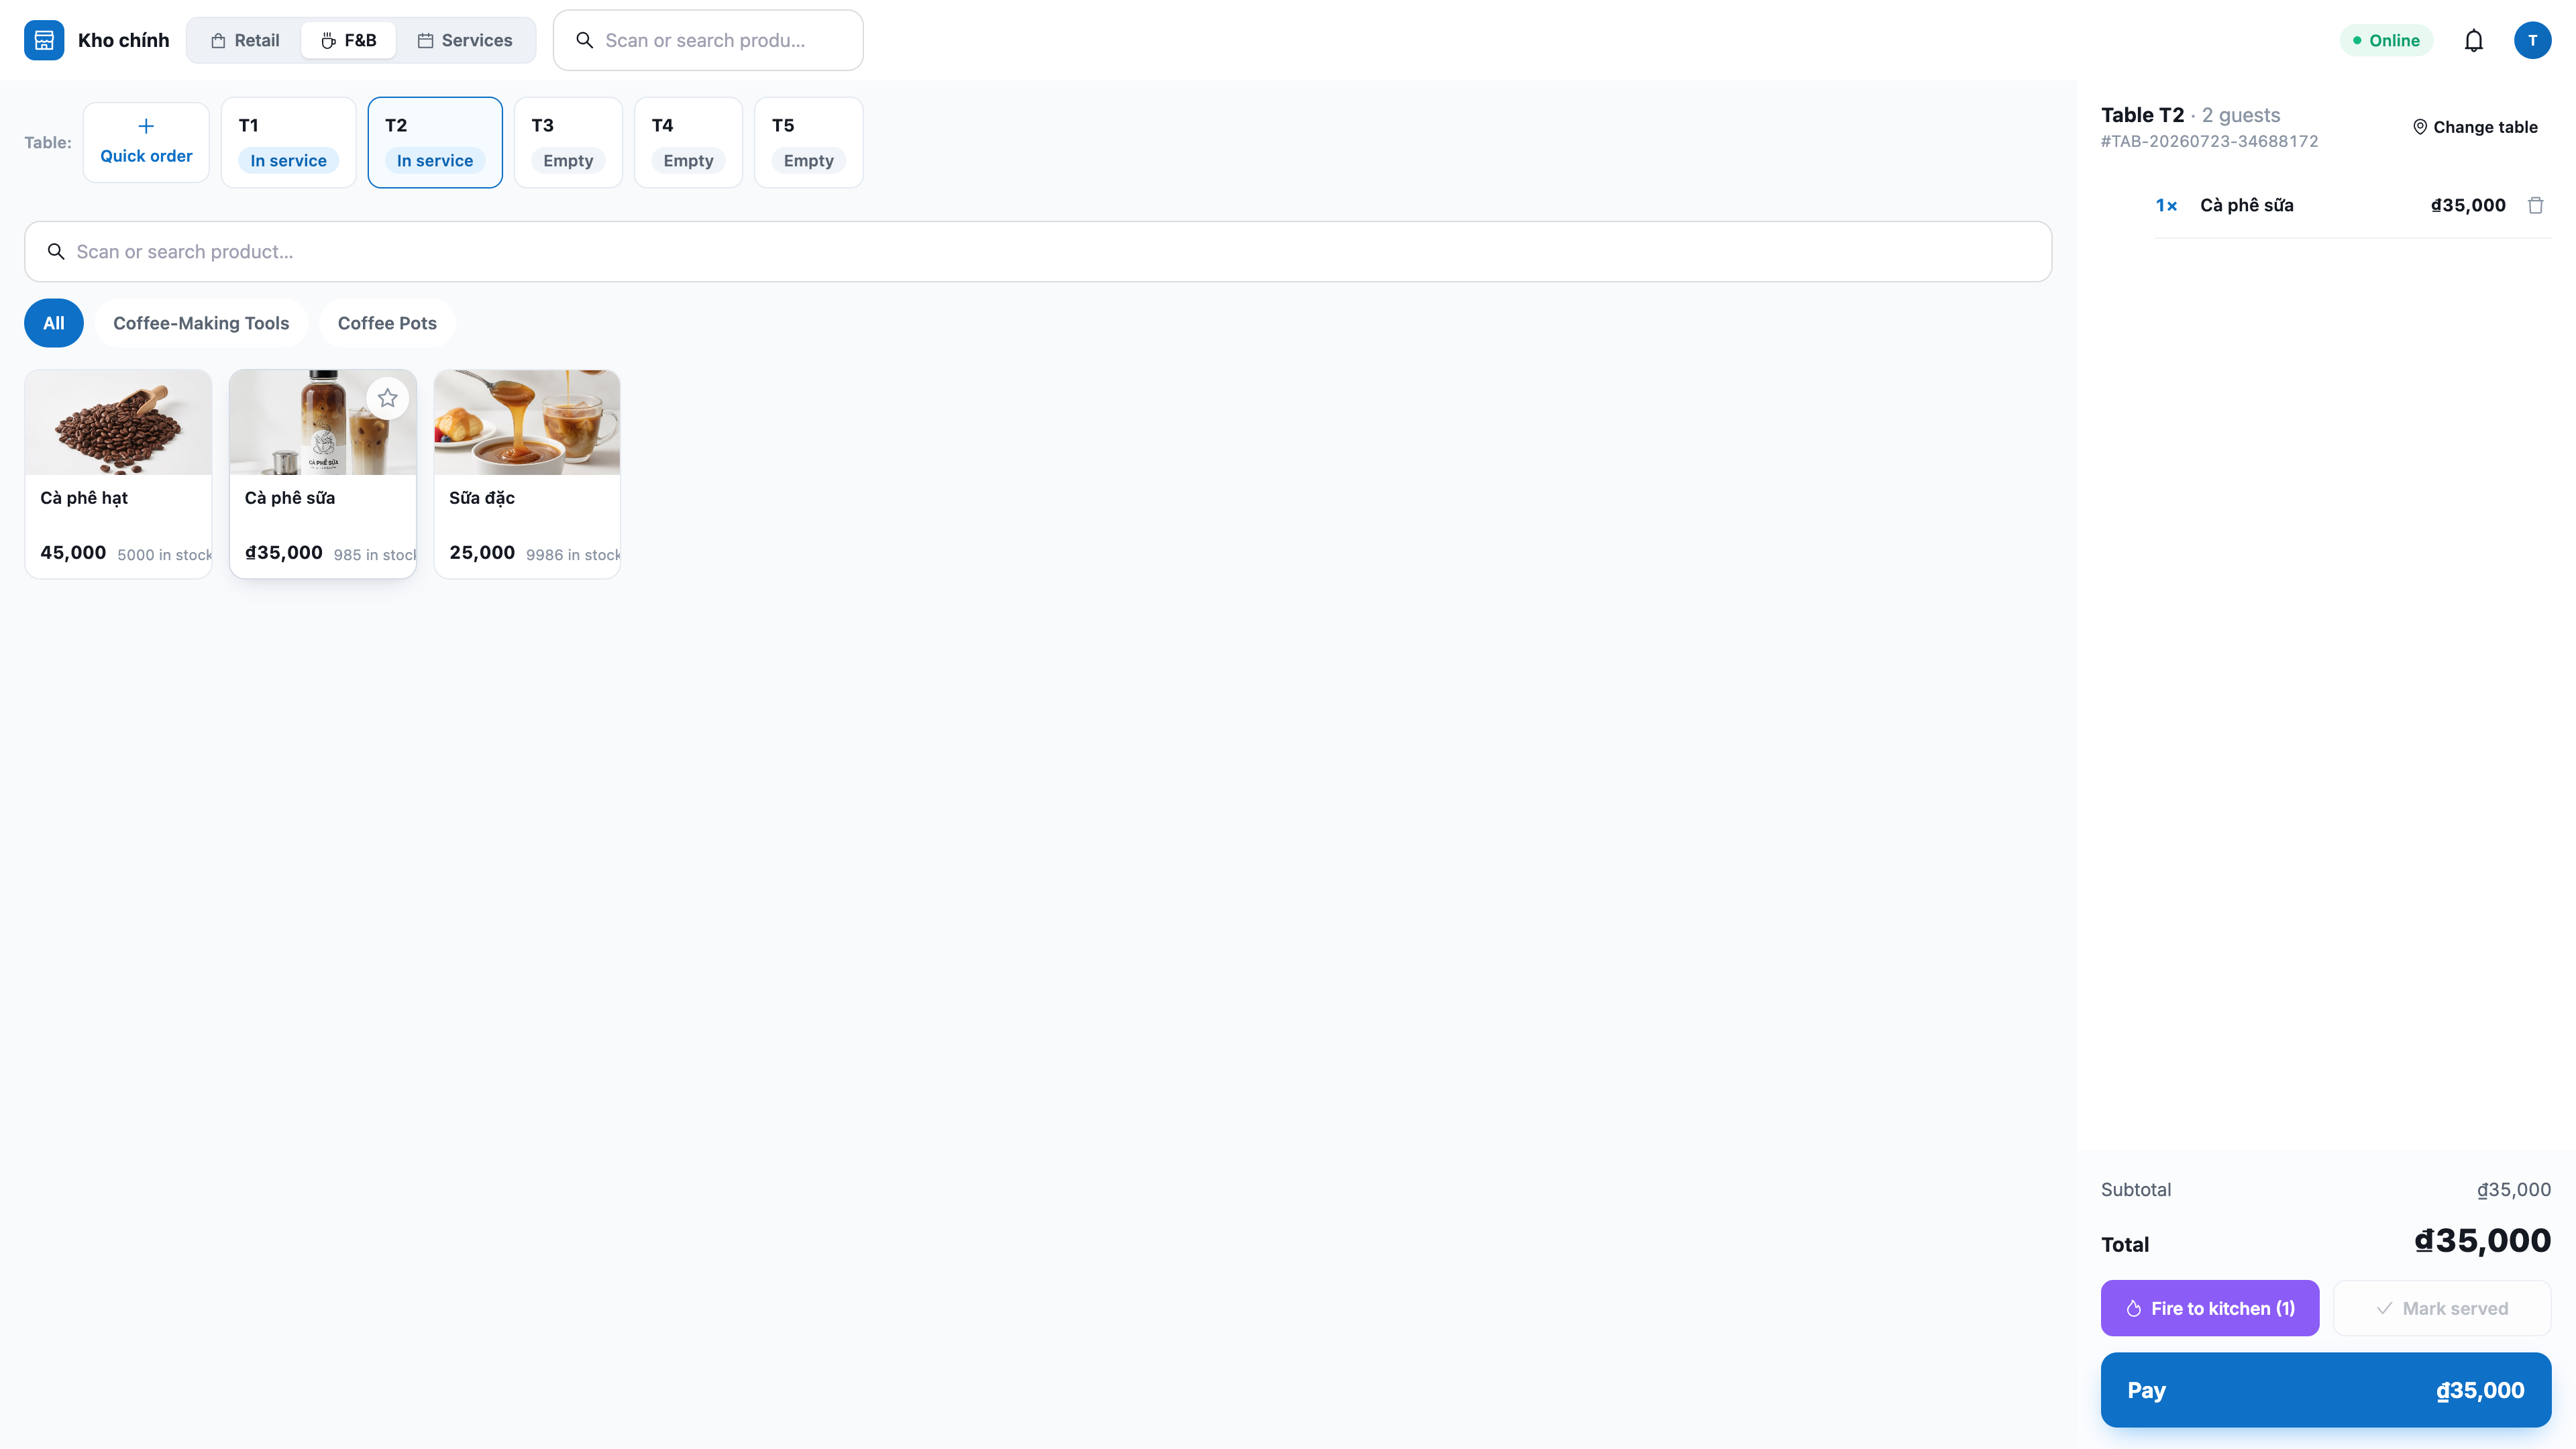
💡 For counter takeaway sales, use Quick Order: tap item → Pay → select payment method (cash / card / transfer).
Step 4 — Run Kitchen Display System (KDS): New → In Progress → Ready
The chef opens the Kitchen Display System (KDS) app—a separate app for the kitchen—and logs in with the same account.
Select the workspace → choose the Station as Kitchen → tap Enter kitchen.
Wait for the ticket just fired in Step 3 to appear in the New/Queued column.
On that ticket, tap Start, then when done, tap Ready.
✅ Expected Result: The ticket appears on the kitchen board within 2–3 seconds after firing, showing the table number, items + quantities, and a wait time timer; tapping Start then Ready moves the ticket through the New/Queued → In Progress → Ready columns. Tickets left for too long change color to warn (green → yellow → red).
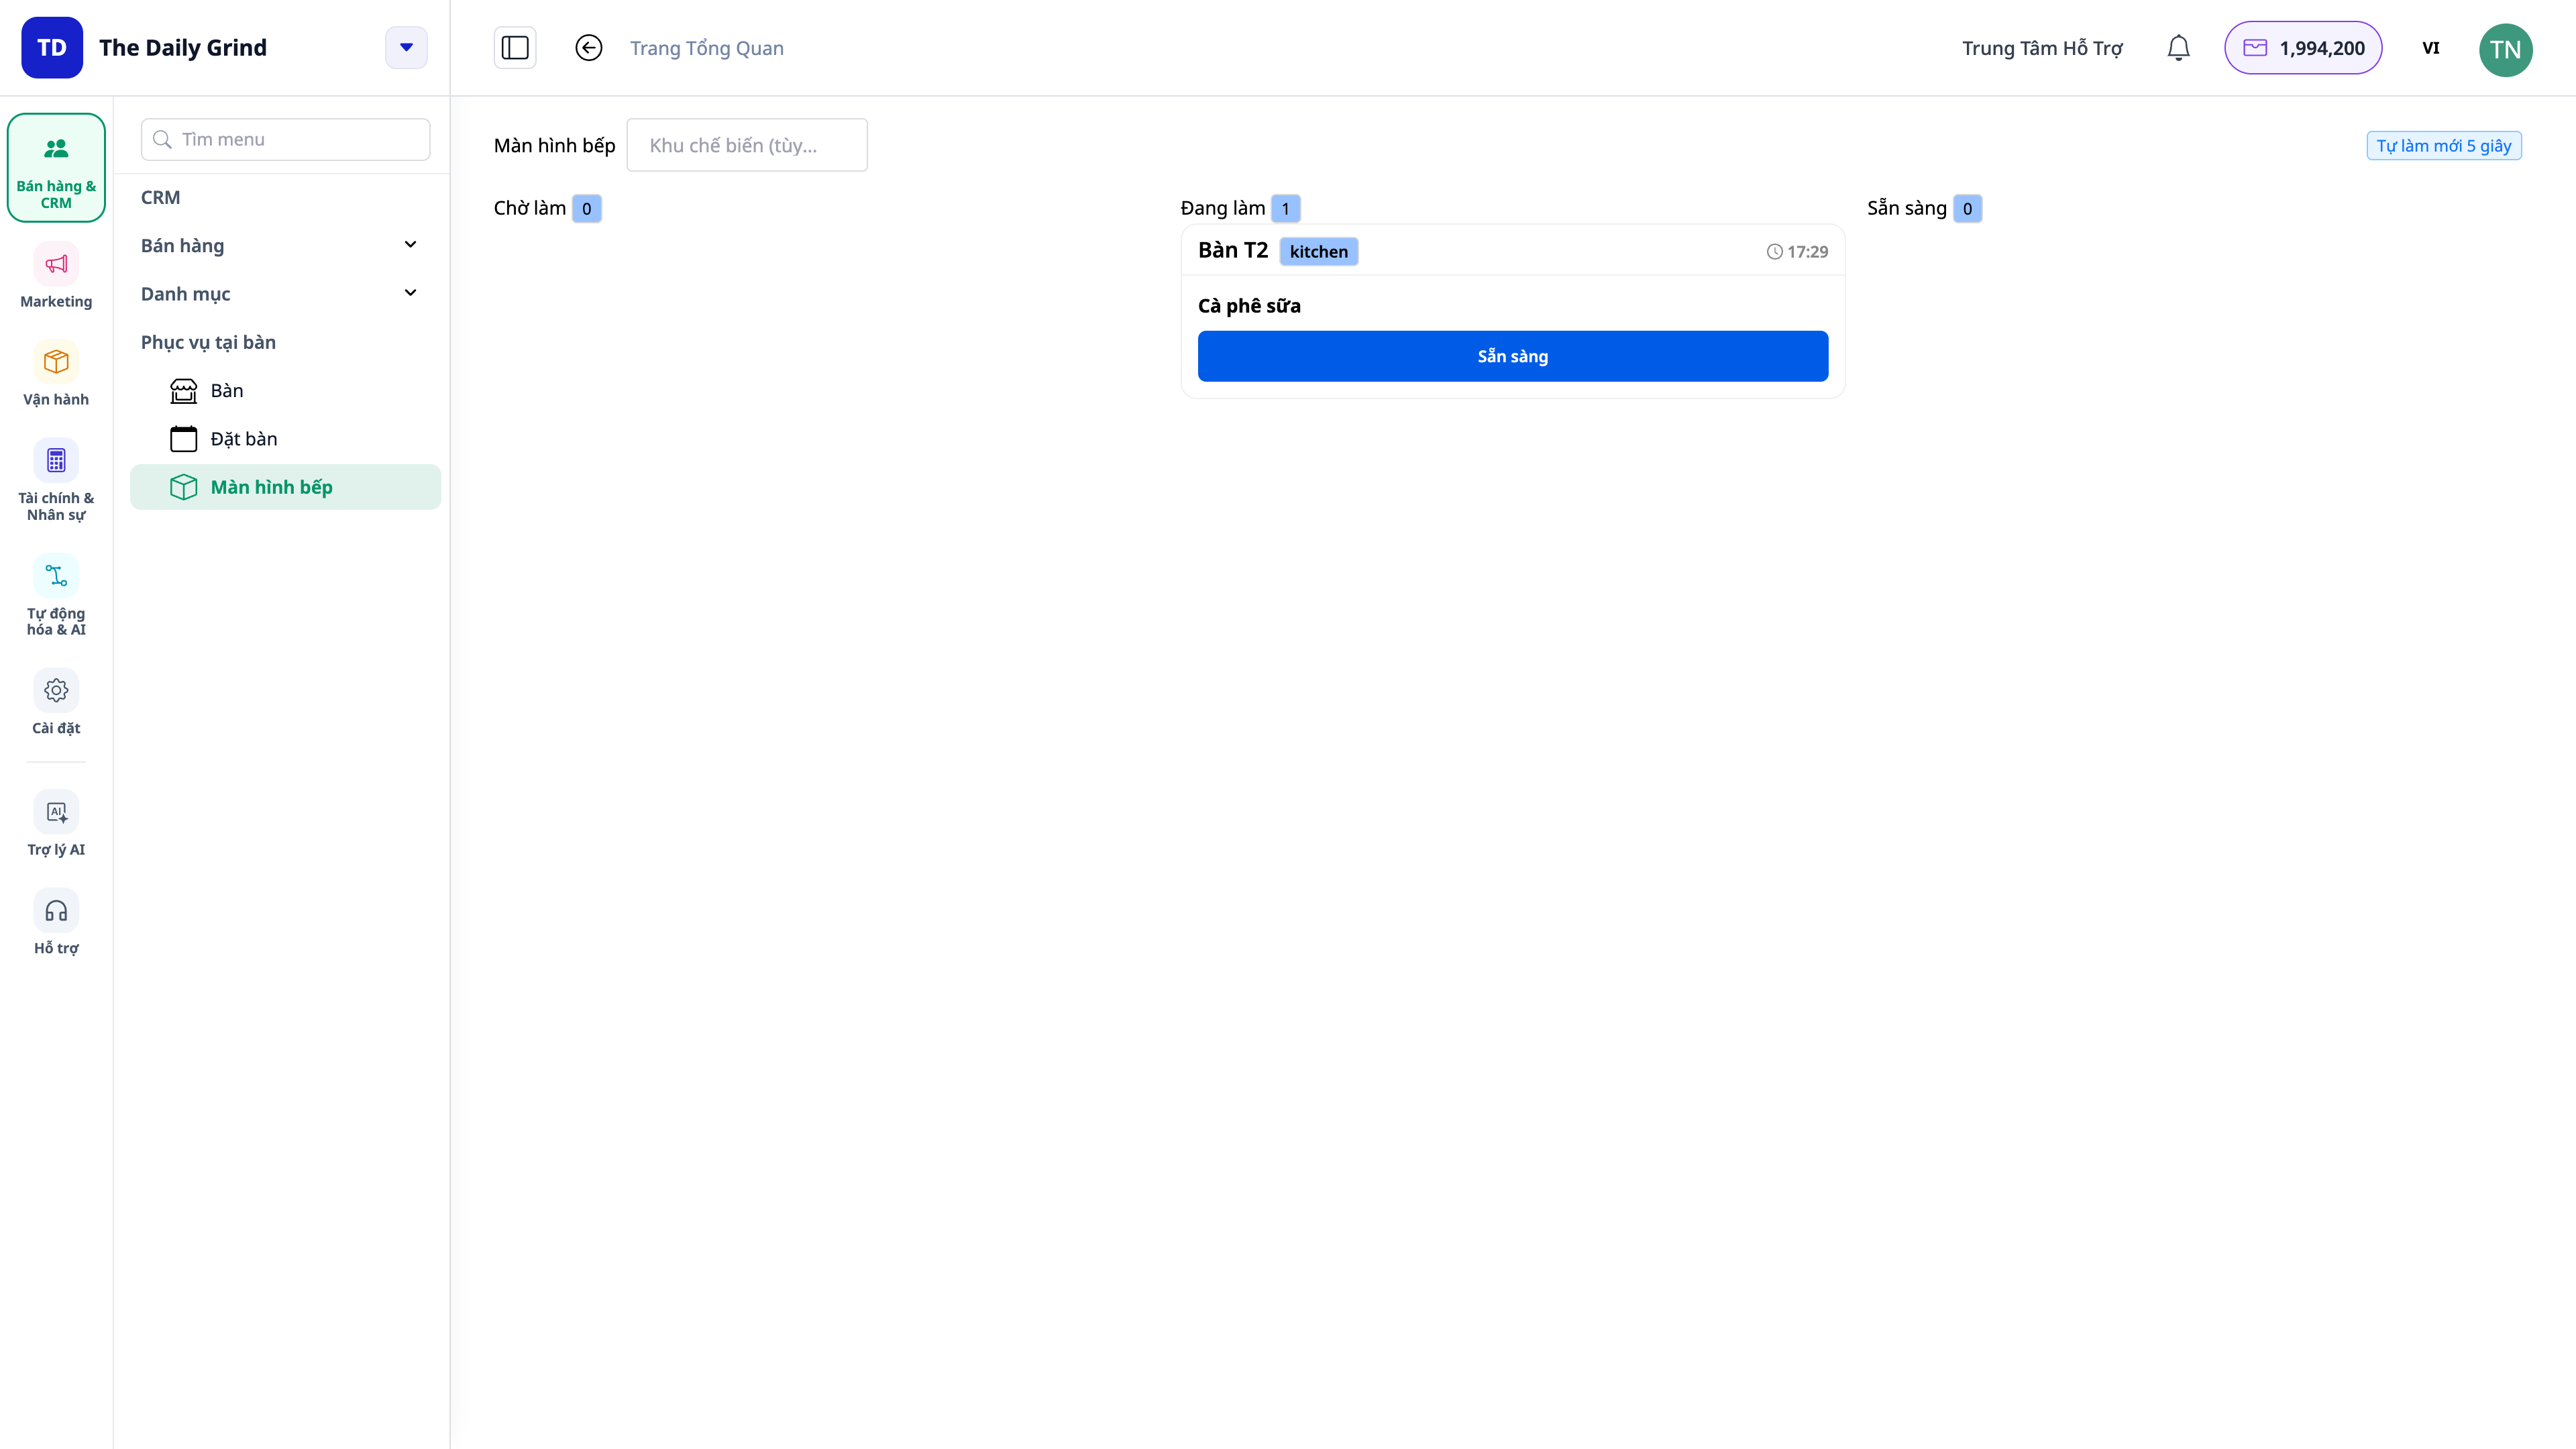
ℹ️ The kitchen display auto-refreshes every few seconds, so new tickets might take up to ~3 seconds to appear. Reloading the page keeps the kitchen board open on the selected station, without needing to log in again. Managers can also quickly view the kitchen board in the system under Sales & CRM → Dine-in → Kitchen Display.
Step 5 — Create and Manage Reservations
In the system, navigate to Sales & CRM → Dine-in → Reservations.
Tap to create a new reservation → enter the customer's name, number of guests, date and time, and desired table (if any).
Save the reservation.
✅ Expected Result: The reservation appears in the Reservations list with the table / number of guests / time. If you try to book a table currently occupied for the immediate time slot, the system will report no suitable tables are available and suggest an alternative empty table; however, booking that table for a later time slot (after the current guest leaves) will be successful.
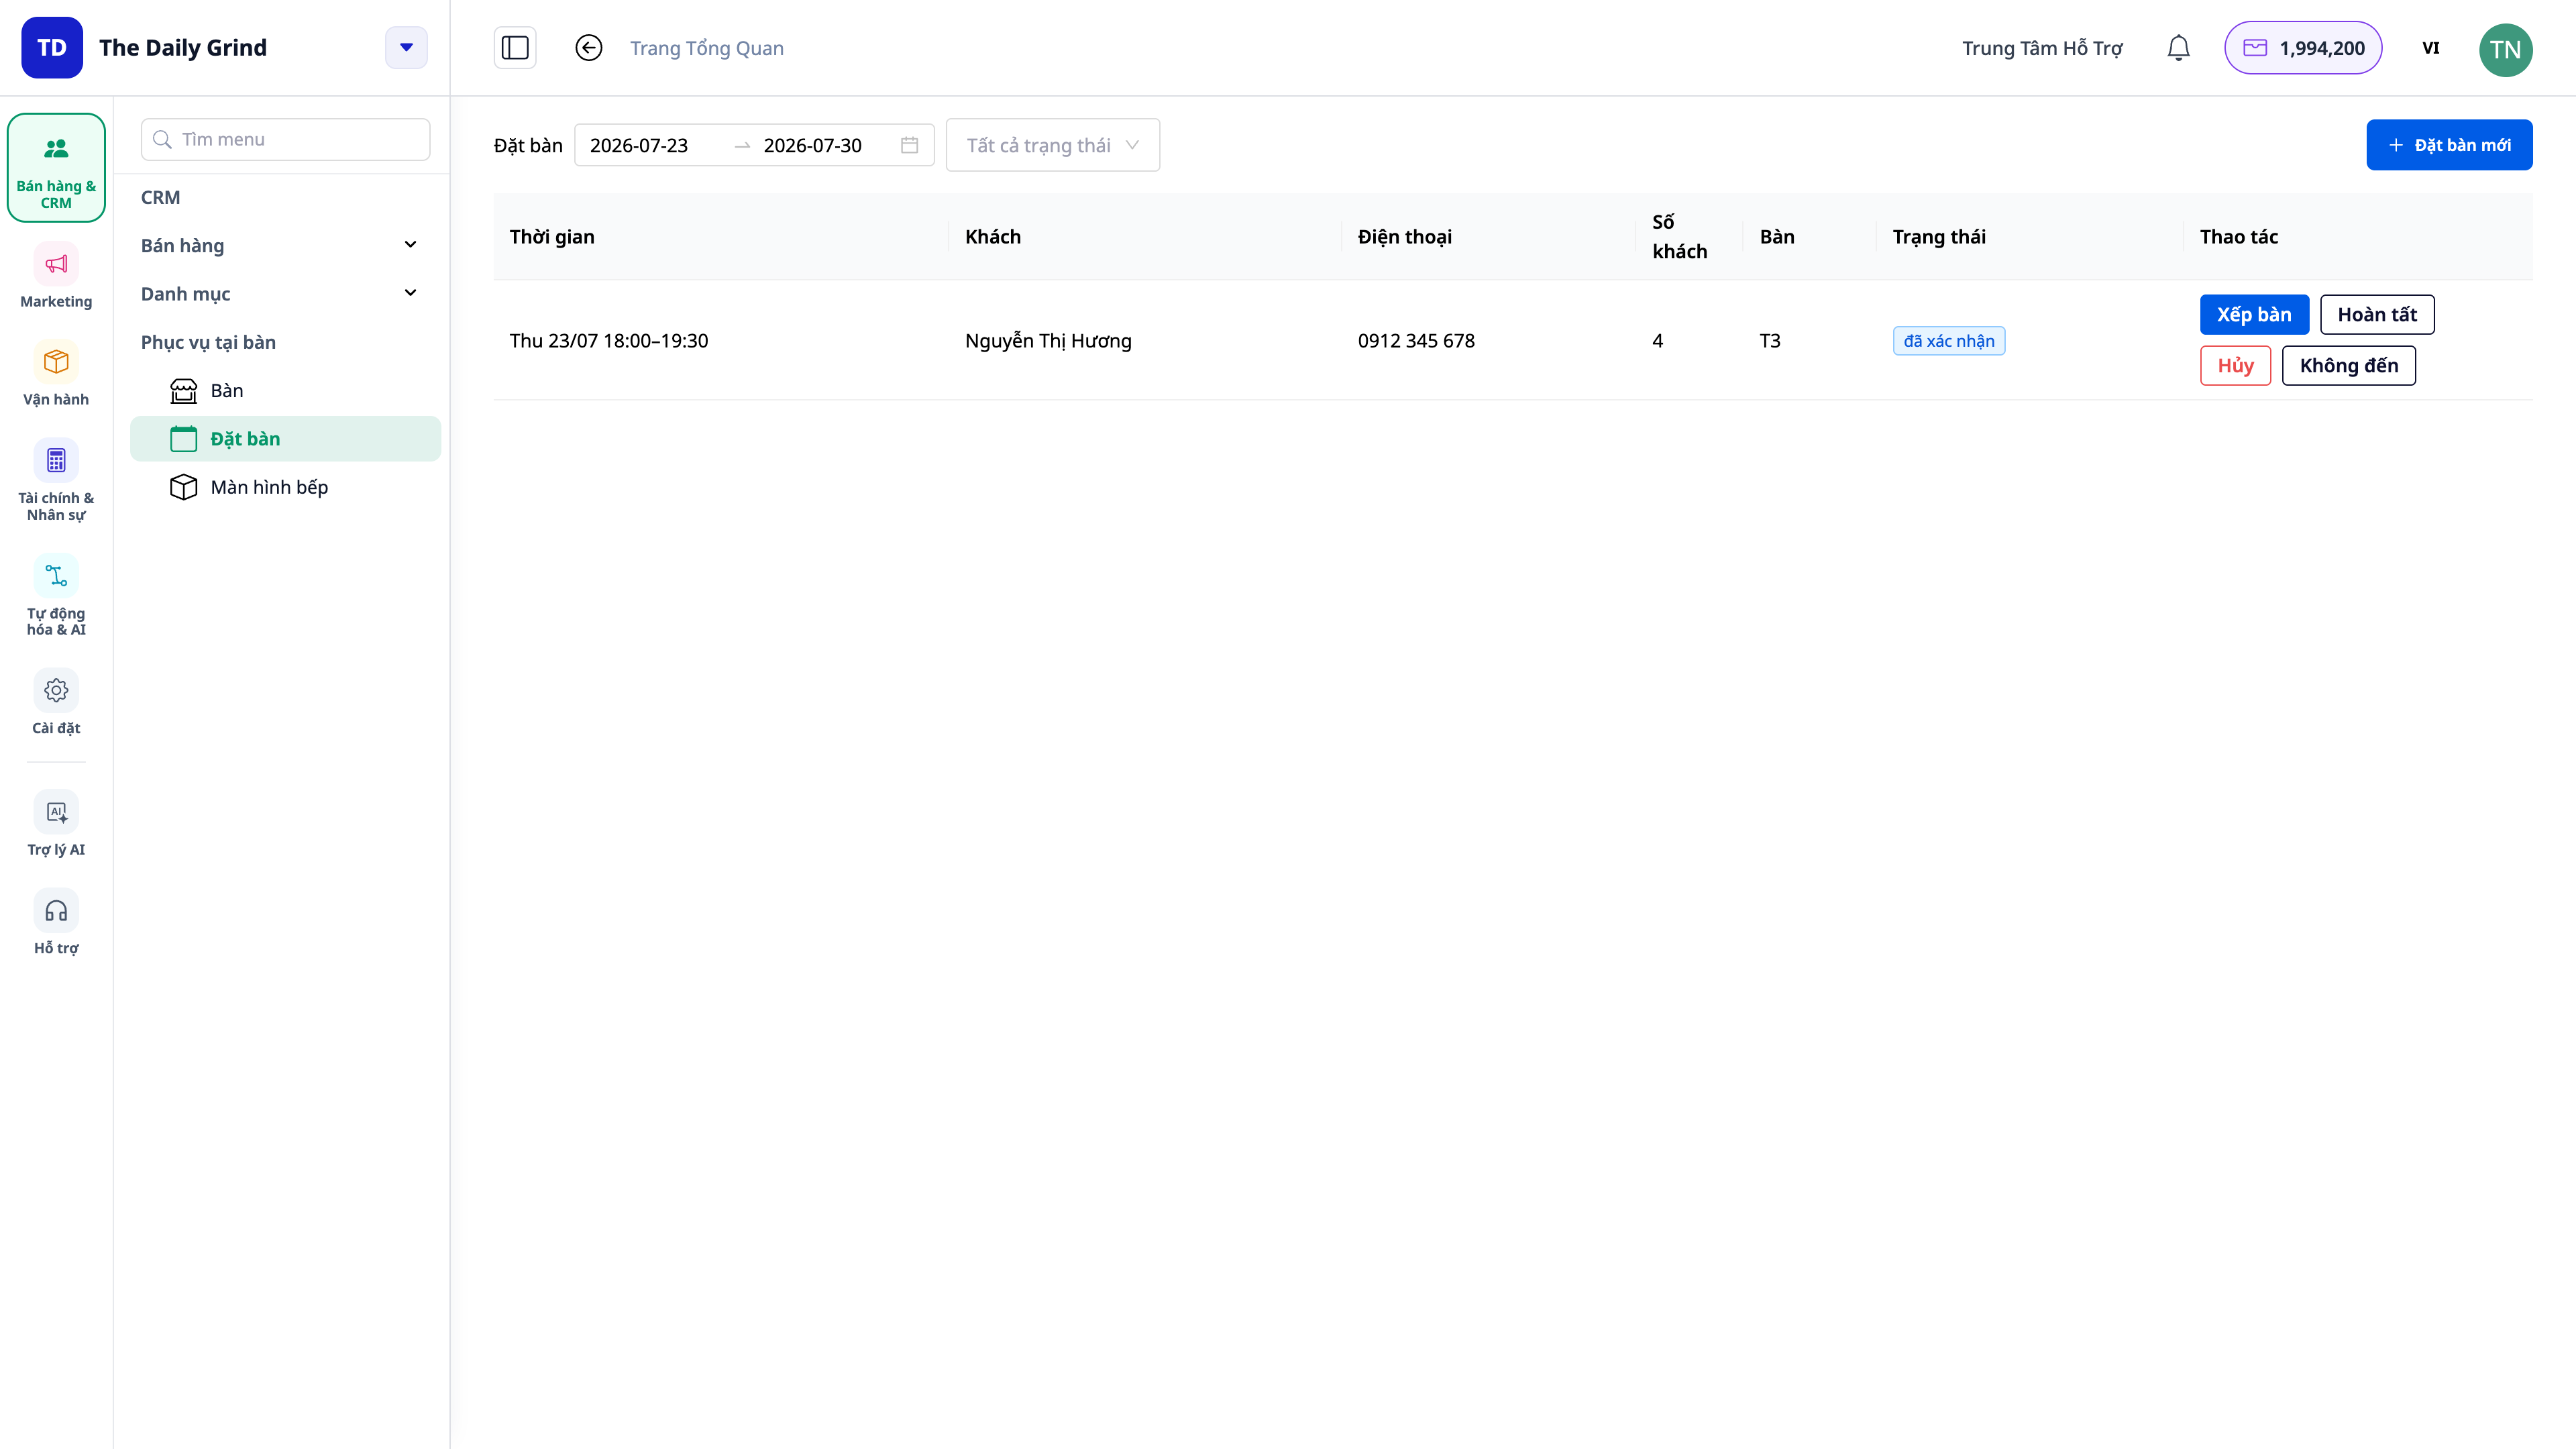
💡 Reservations also appear on the bookings calendar (Sales & CRM → Bookings) according to the restaurant's local time.
Quick Reference: Expected Results
Select warehouse as store — Store line shows a green checkmark + "Store set"
Add sample tables — Tables T1–T5 appear (2–6 seats)
Add items to group — Items appear under the correct group with selling price
Turn off item availability status — Customers/cashiers cannot order that item
Open order at table — Table status changes to "In Service"; order shows items + total cost
Fire to kitchen — Button changes to "Mark as Served"; ticket appears on kitchen display in ~2–3 seconds
Tap Start / Ready on kitchen display — Ticket moves from New/Queued → In Progress → Ready
Book an occupied table for the current time — Reports "no suitable tables available", suggests alternative empty table
Book for a later time slot — Reservation is created and appears in the list
Notes
Kitchen Display System (KDS) is a separate application for the kitchen, logged in with the same account; chefs need KDS operation permissions to open and run orders.
Point of Sale (POS) is also a separate application; cashiers need POS sales permissions.
The Dine-in tab only appears when the store has tables set up — please complete Step 1 first.
The kitchen display refreshes every few seconds (not real-time push), so new orders may take up to ~3 seconds to appear — this is normal operation.
Currently, all orders are sent to a common kitchen station; routing items to multiple separate stations (kitchen/bar/grill) is a feature that will be added later.
Want to track the cost of each item (auto-deducting ingredients, bookkeeping)? Attach recipes to your items in the product catalog — see the Production Management guide for building recipes.