What you can do after this guide
Enable the Loyalty program → choose scoring method based on your business model → set up tiers (name + color) → assign care scenarios for tier changes → view points and tiers on customer profiles and the dashboard. After the first night, your customers will be automatically scored and assigned tiers.
Not yet clear on the overview? Preview the Loyalty Program article, and refer to how to optimize customer data in CRM for more accurate scoring.
Preparation
| # | Condition | Why it's needed |
|---|---|---|
| 1 | Log in to GTG CRM with Manage Loyalty (CRM_MANAGE_LOYALTY) permission. | To enable and configure the program. |
| 2 | Have contact data and purchase/order history. | Points are calculated from actual customer purchase behavior. |
| 3 | (Recommended) Be familiar with Automation to use care scenarios. | Tier change scenarios run via automated workflows. |
Step 1 — Enable the Loyalty Program
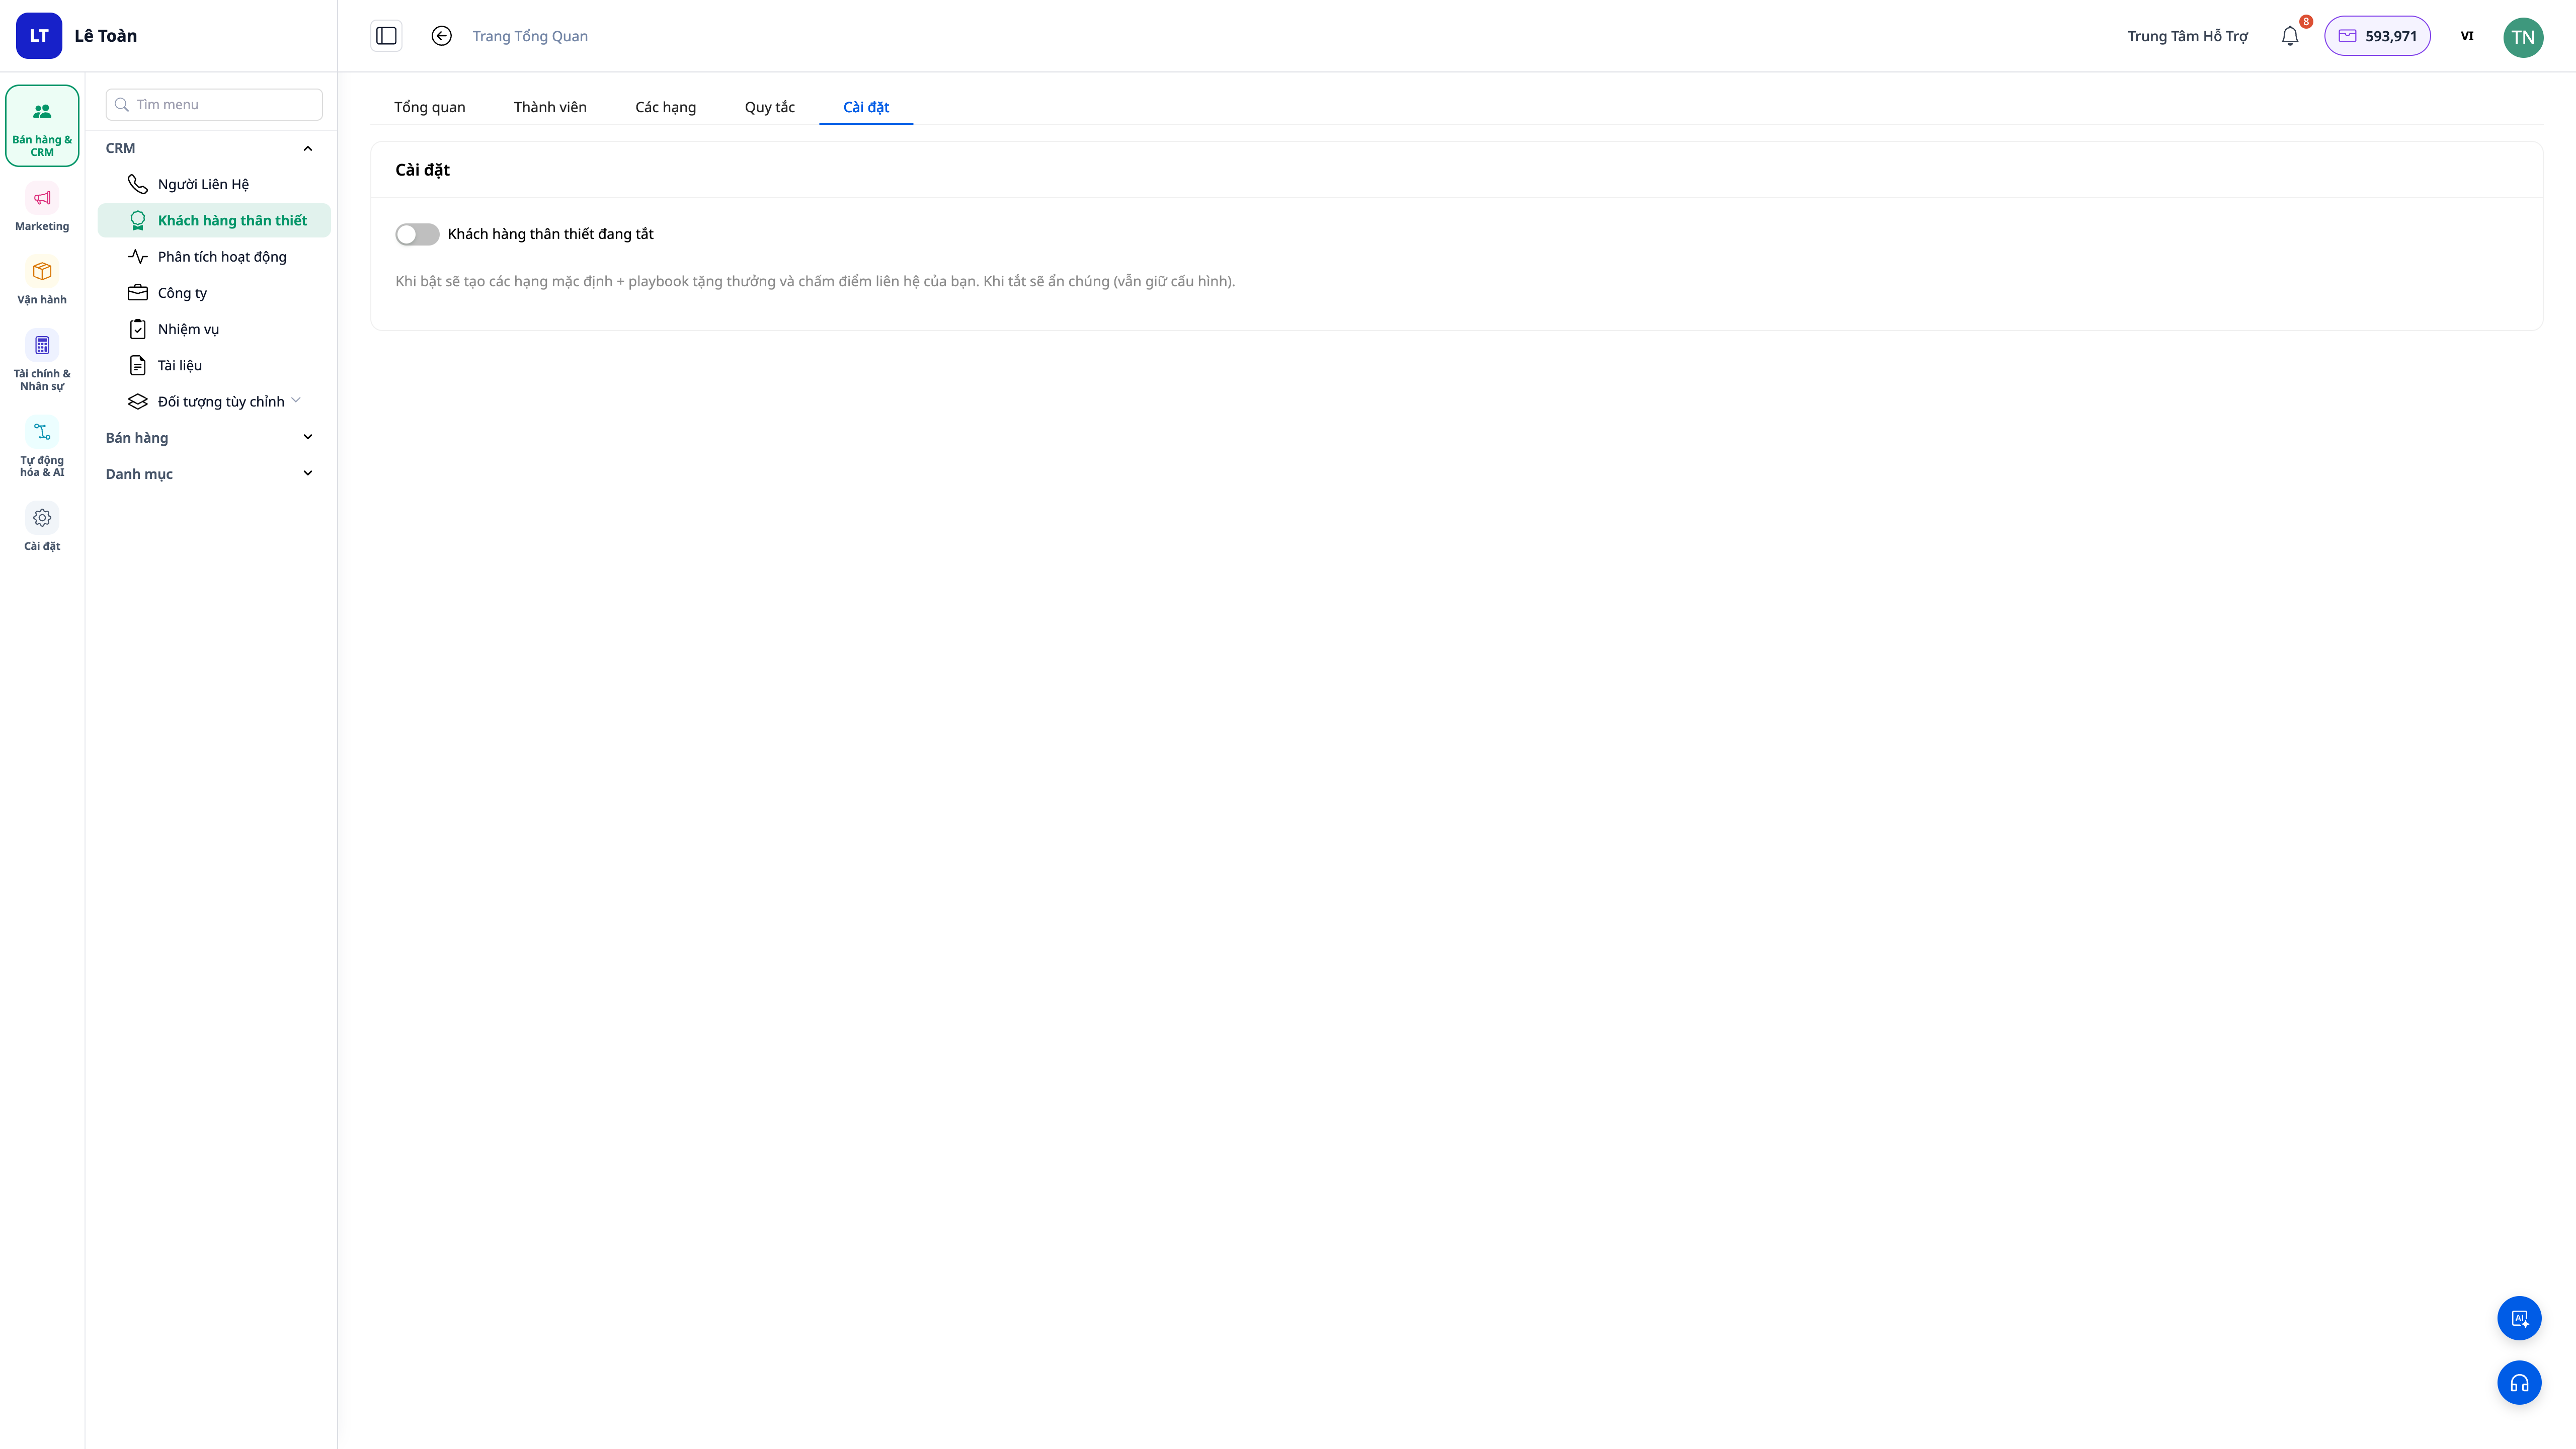
- Go to CRM → Loyalty.
- Enable the program.
✅ Expected outcome: The Loyalty program is activated; a sample care scenario playbook is pre-installed for you to use or edit; the Loyalty tab starts appearing on contact profiles.
Step 2 — Choose Scoring Method Based on Business Model
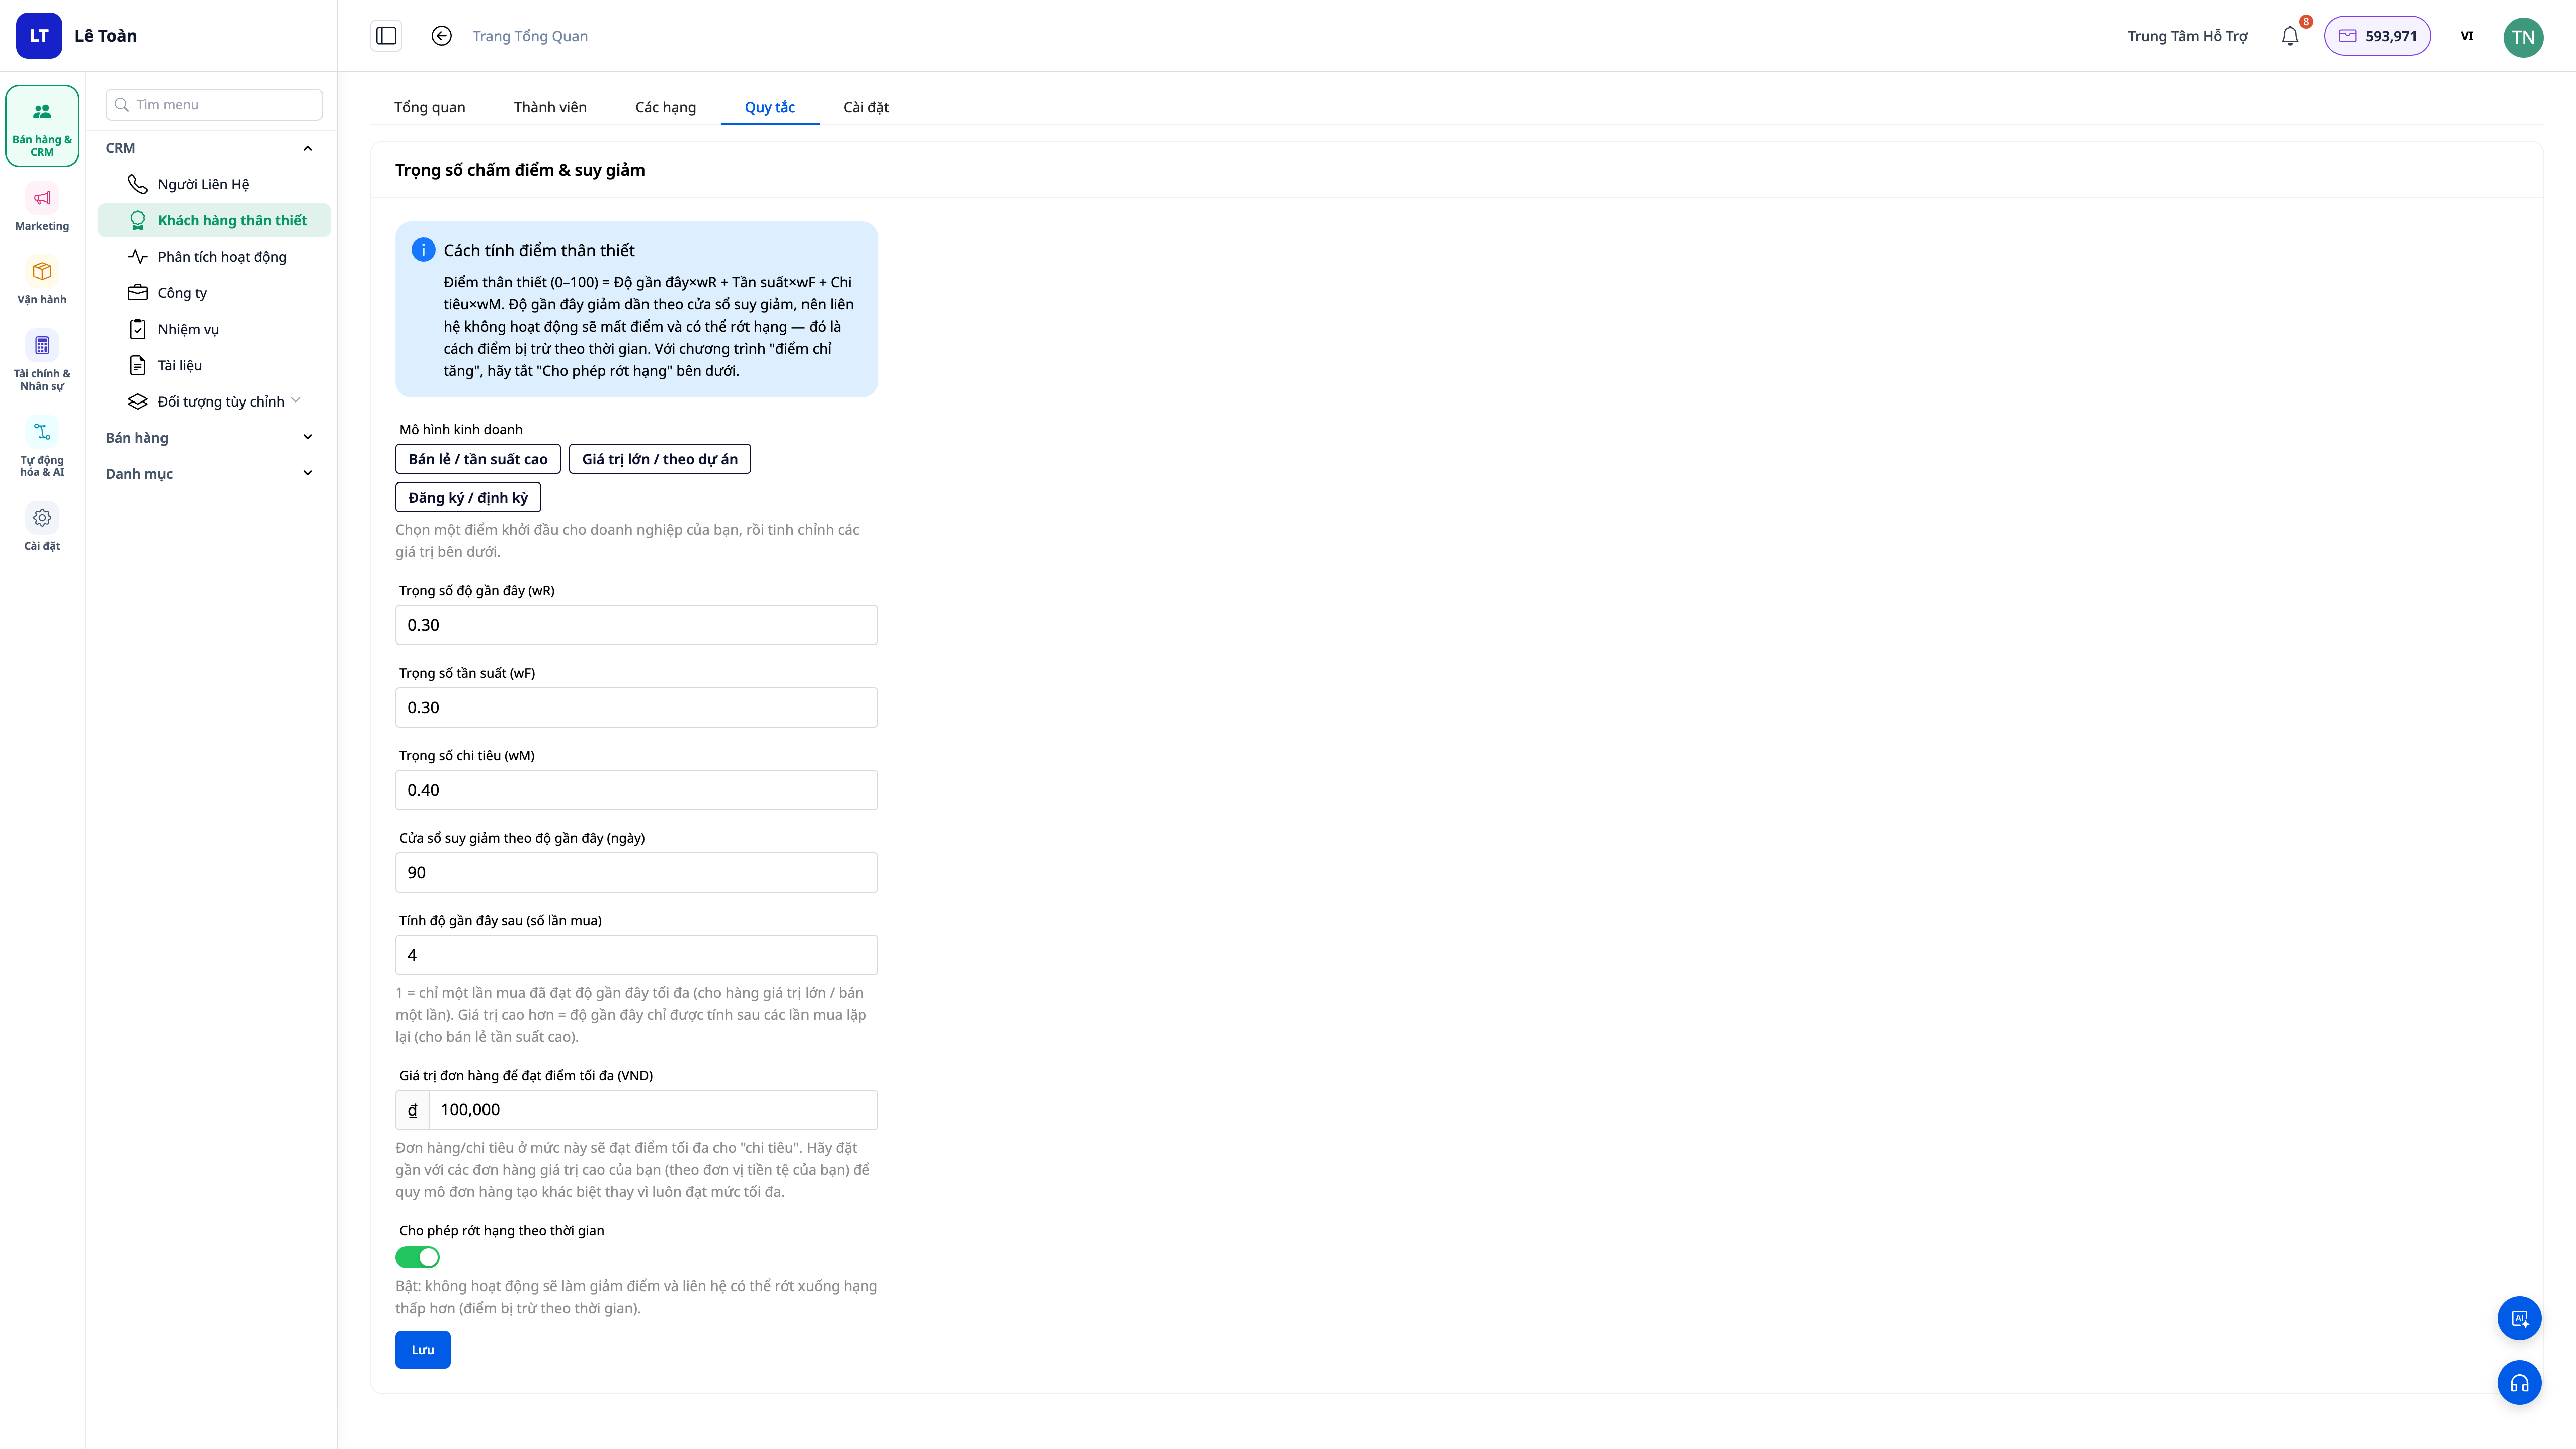
- Open the scoring configuration section.
- Select a preset that suits your model (retail, service, subscription, etc.).
- Fine-tune the weights of three factors: recency, frequency, monetary if desired.
✅ Expected outcome: The scoring model is saved; the system will use it to calculate points each night, with a decay mechanism over time (customers who haven't purchased for a while will naturally lose points).
Step 3 — Set Up Tiers (Name + Color)
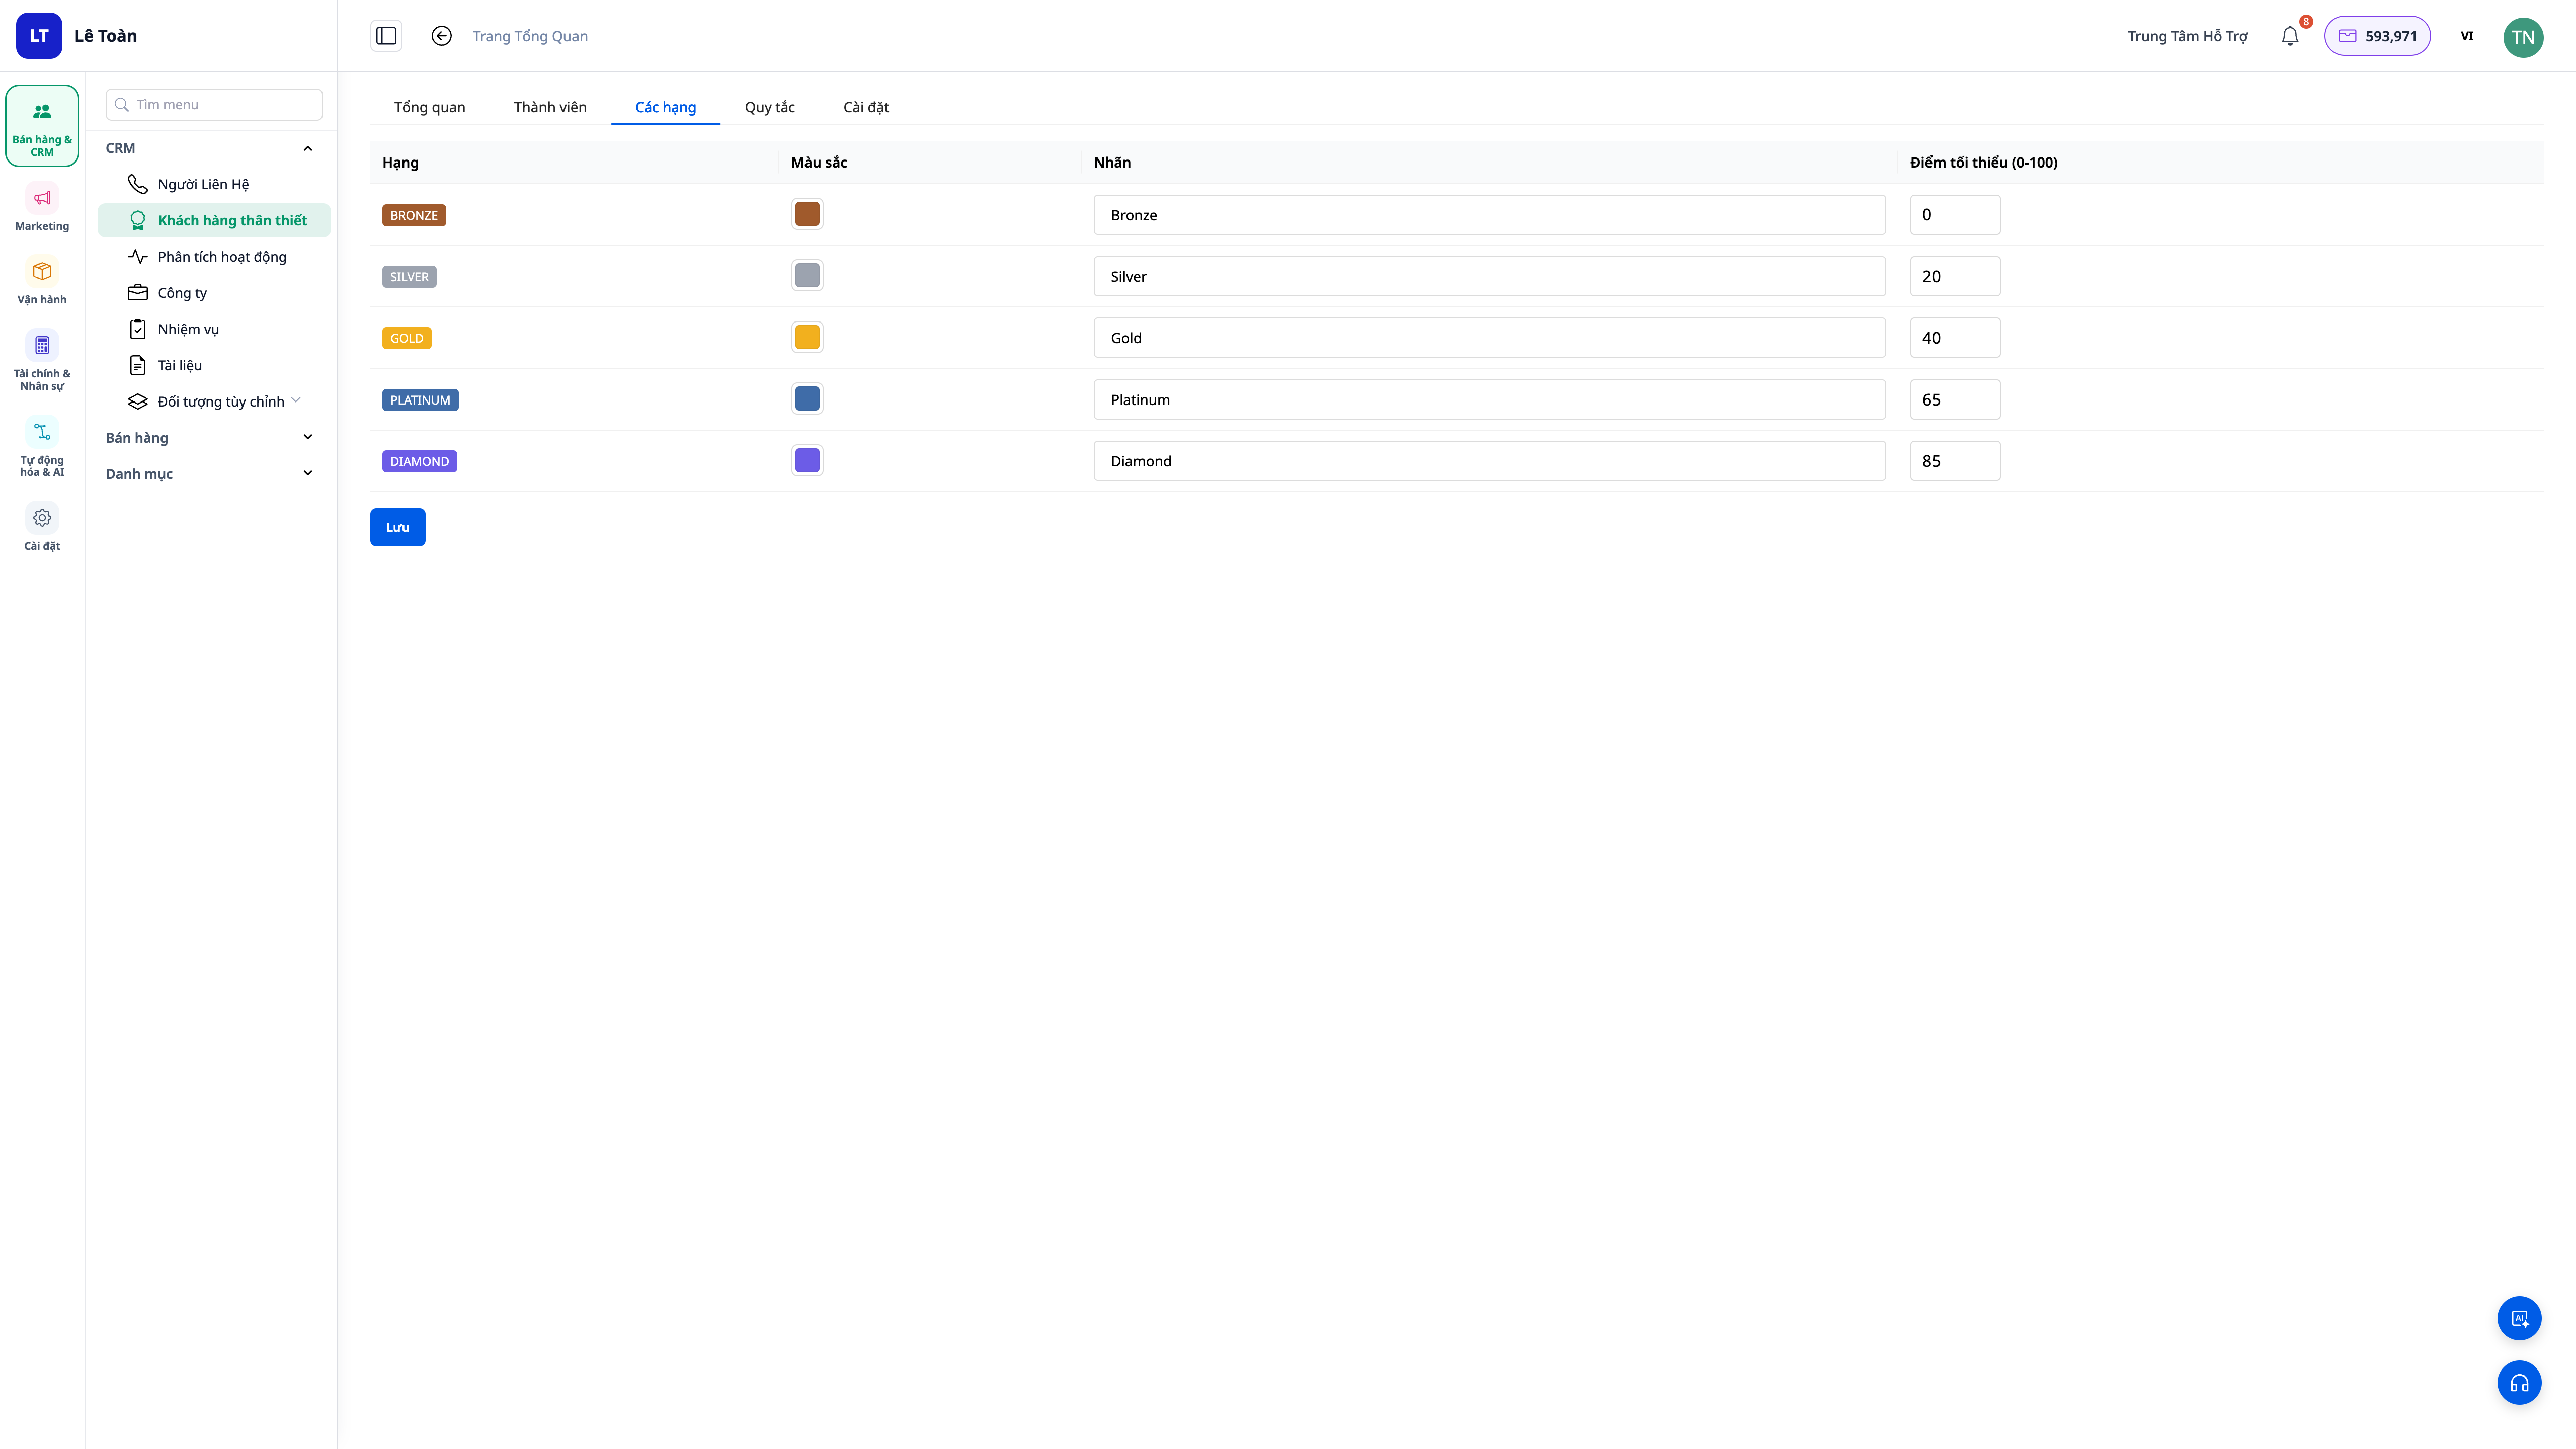
- Open the tier configuration section.
- Create tiers, assign names (e.g., Bronze / Silver / Gold / Diamond) and colors for each tier.
- Enable/disable the allow demotion option according to your policy.
✅ Expected outcome: The tier list displays the correct names and colors you set; tier badges will appear on the contact list and the Loyalty tab of each profile.
Step 4 — Assign Care Scenarios for Tier Changes
- Go to the tier-change playbook section.
- Select actions for when a customer moves up a tier (thank you, offers, task assignment) and when they move down a tier (re-engagement scenario).
✅ Expected outcome: When a customer moves up or down a tier, the corresponding scenario automatically runs — you won't have to monitor and do it manually.
Step 5 — View Points, Tiers, and Dashboard
- Open a contact profile, go to the Loyalty tab: view current points, tier, and tier change history.
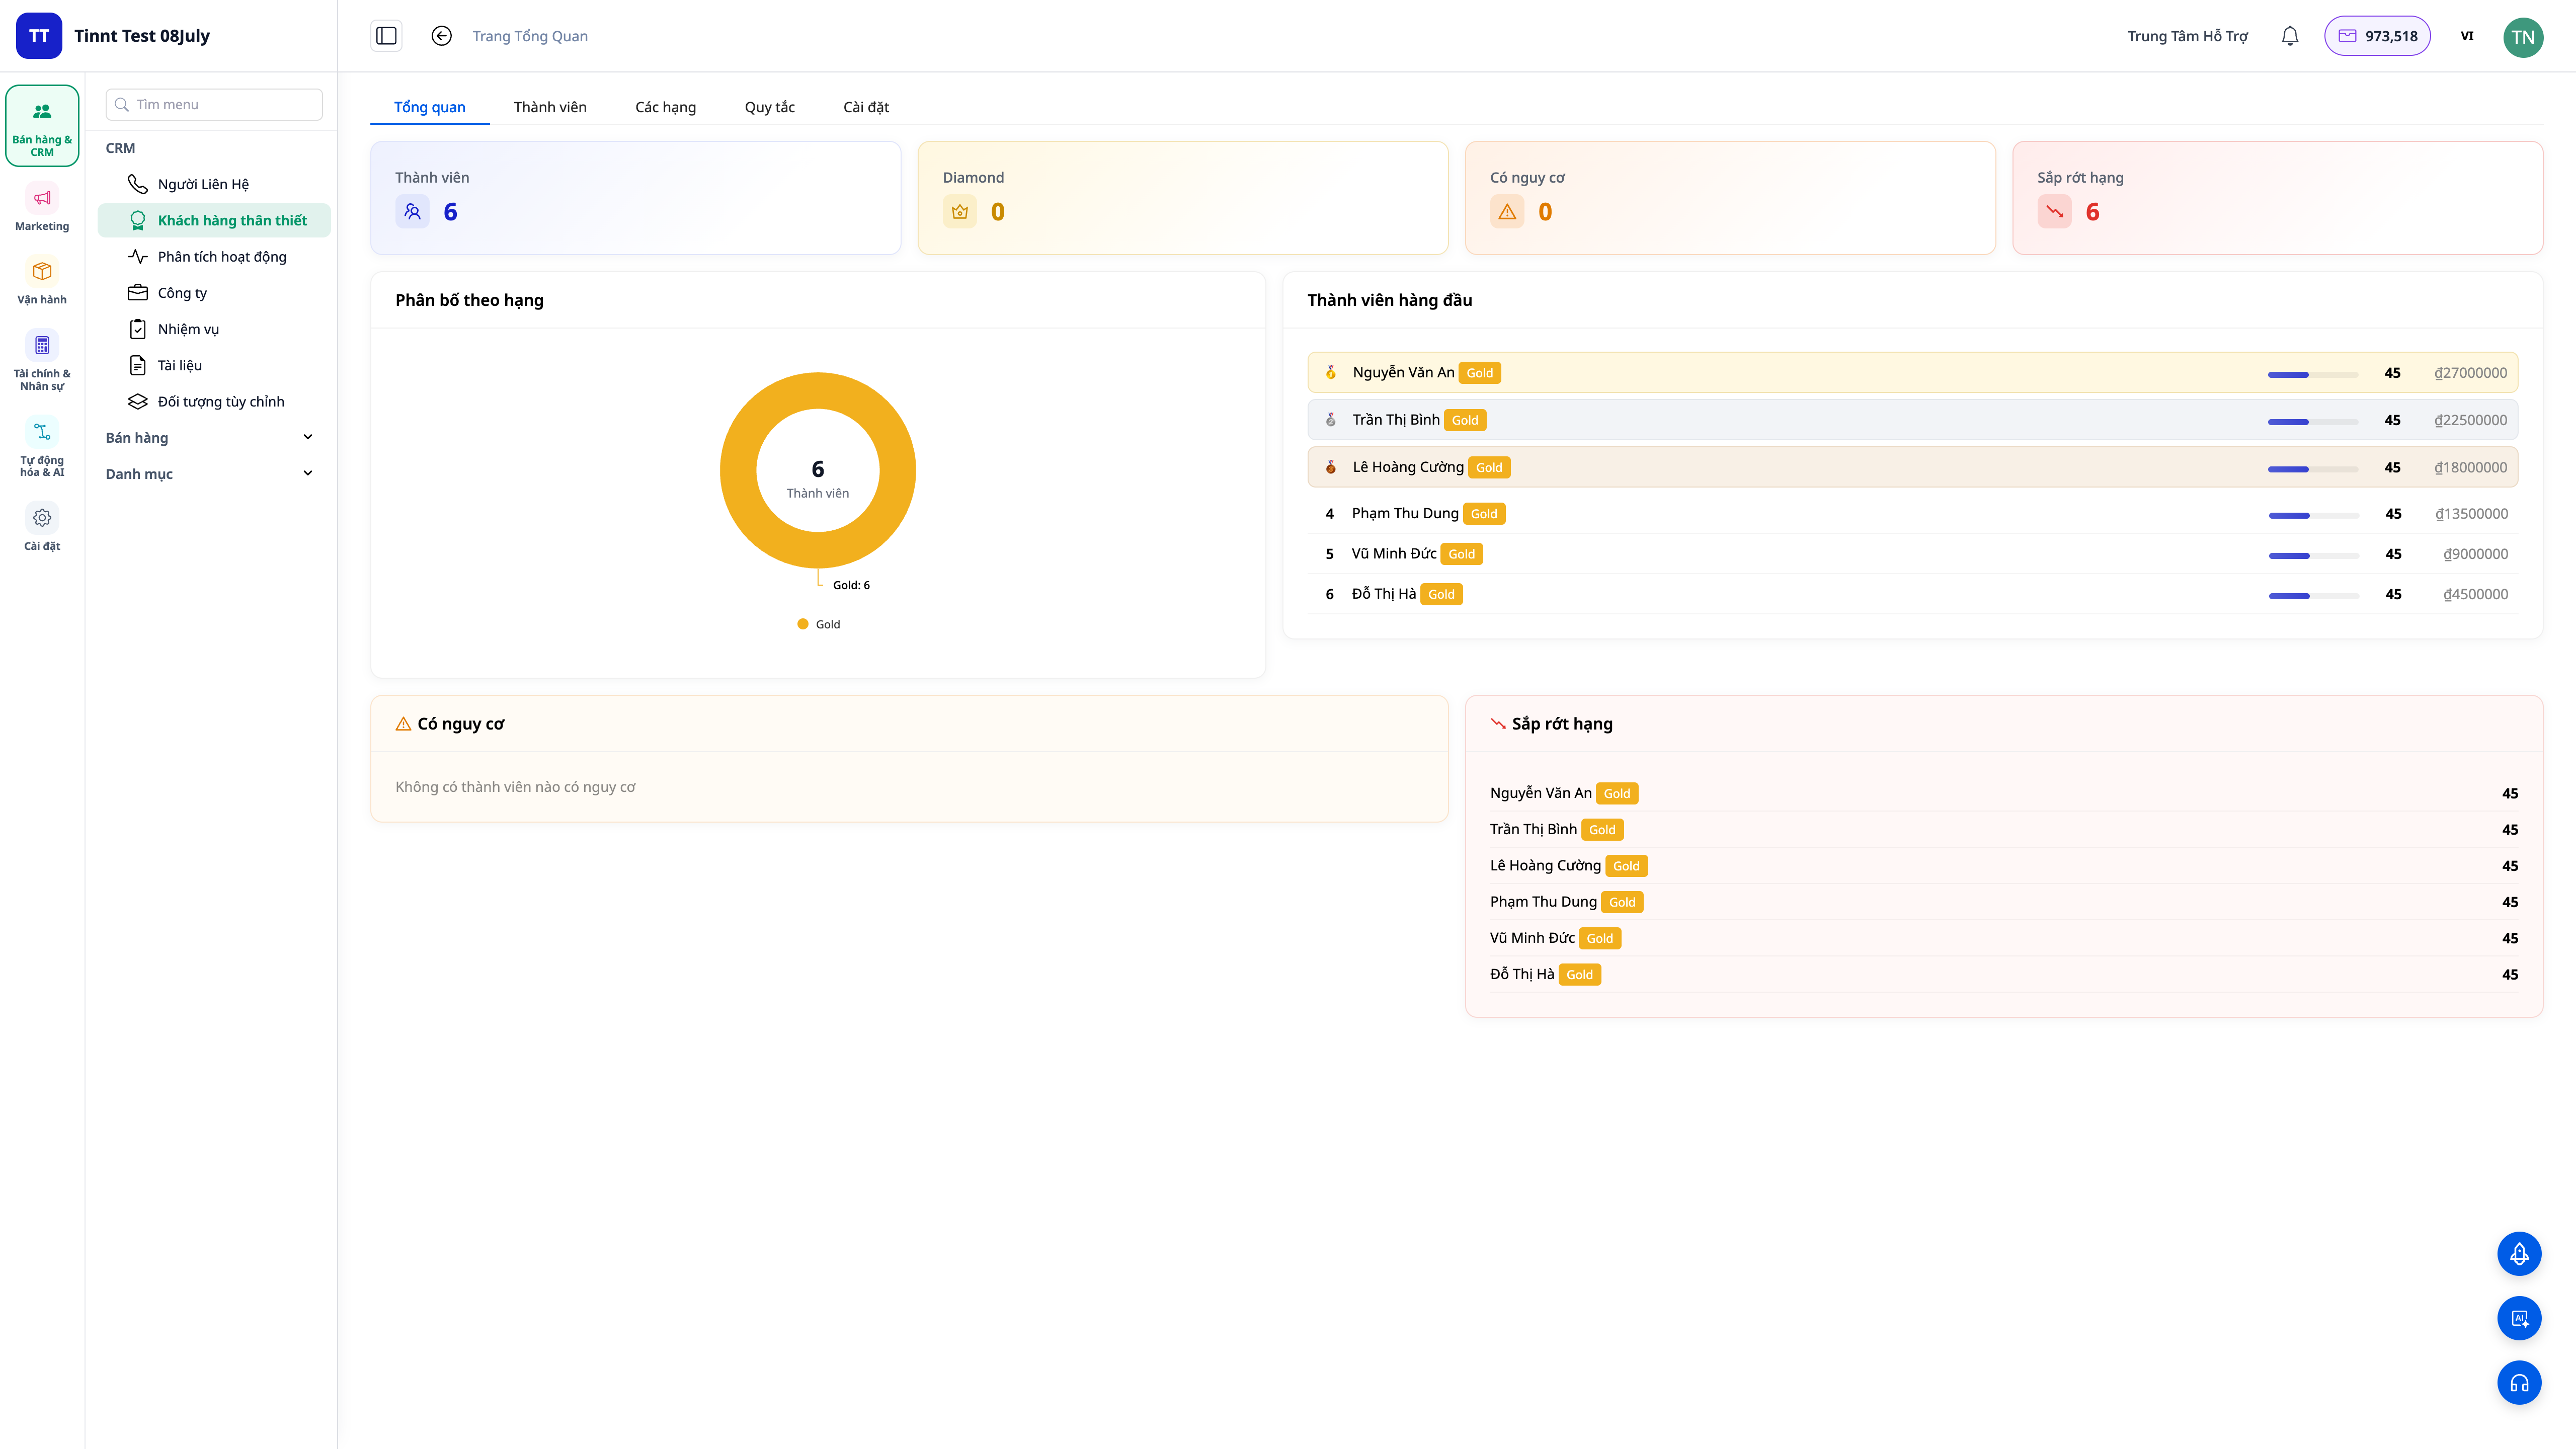
- Open the Loyalty Dashboard for an overview: number of customers per tier, leaderboards, trends.
✅ Expected outcome: The Loyalty tab on the profile shows points + tier + history; the dashboard displays KPI cards and customer leaderboards.
Quick Reference Table of Expected Outcomes
| Action | Outcome you will see |
|---|---|
| Enable Loyalty | Program activated + sample playbook pre-installed |
| Select scoring preset | Point model saved, recalculated nightly |
| Set up tiers | Tier badges with correct names + colors on lists and profiles |
| Assign tier change scenarios | Scenarios run automatically when customers move tiers |
| Open dashboard | KPI cards + leaderboards + trends |
Notes
- Points are recalculated nightly — configuration changes today will be reflected in points/tiers from the next calculation onwards, not instantly.
- The decay mechanism over time causes customers who haven't purchased for a while to lose points — this is an intentional feature to identify customers who are about to churn.
- The demotion option is up to you to enable/disable; if disabled, customers only move up tiers, not down.