Table of Contents
What You Can Do After This Guide
Define master data (units of measure, work centers, product categories) → build product recipes (BOM) → create and run a production order → see the system automatically calculate finished goods cost and post the journal entry → run planning (MRP) to know what to buy and what to make. From raw materials to finished goods with accurate cost, all within the same system.
Not yet familiar with the features? Preview the Manufacturing Management article to understand what the module does.
Preparation
| # | Condition | Why It's Needed |
|---|---|---|
| 1 | Logged into GTG CRM, with the Manufacturing permission (View/Action for BOM, Production Orders; and a separate Costing permission to view cost/variance). | Manufacturing permissions are granted by the workspace administrator; cost figures are only visible to users with Costing permission. |
| 2 | Have a Chart of Accounts set up in Accounting. | To allow the finished goods cost of goods manufactured (COGM) journal entry to be posted to the general ledger. |
| 3 | Have created products/materials and have warehouses. | Production orders deduct materials from a source warehouse and receive finished goods into a destination warehouse. |
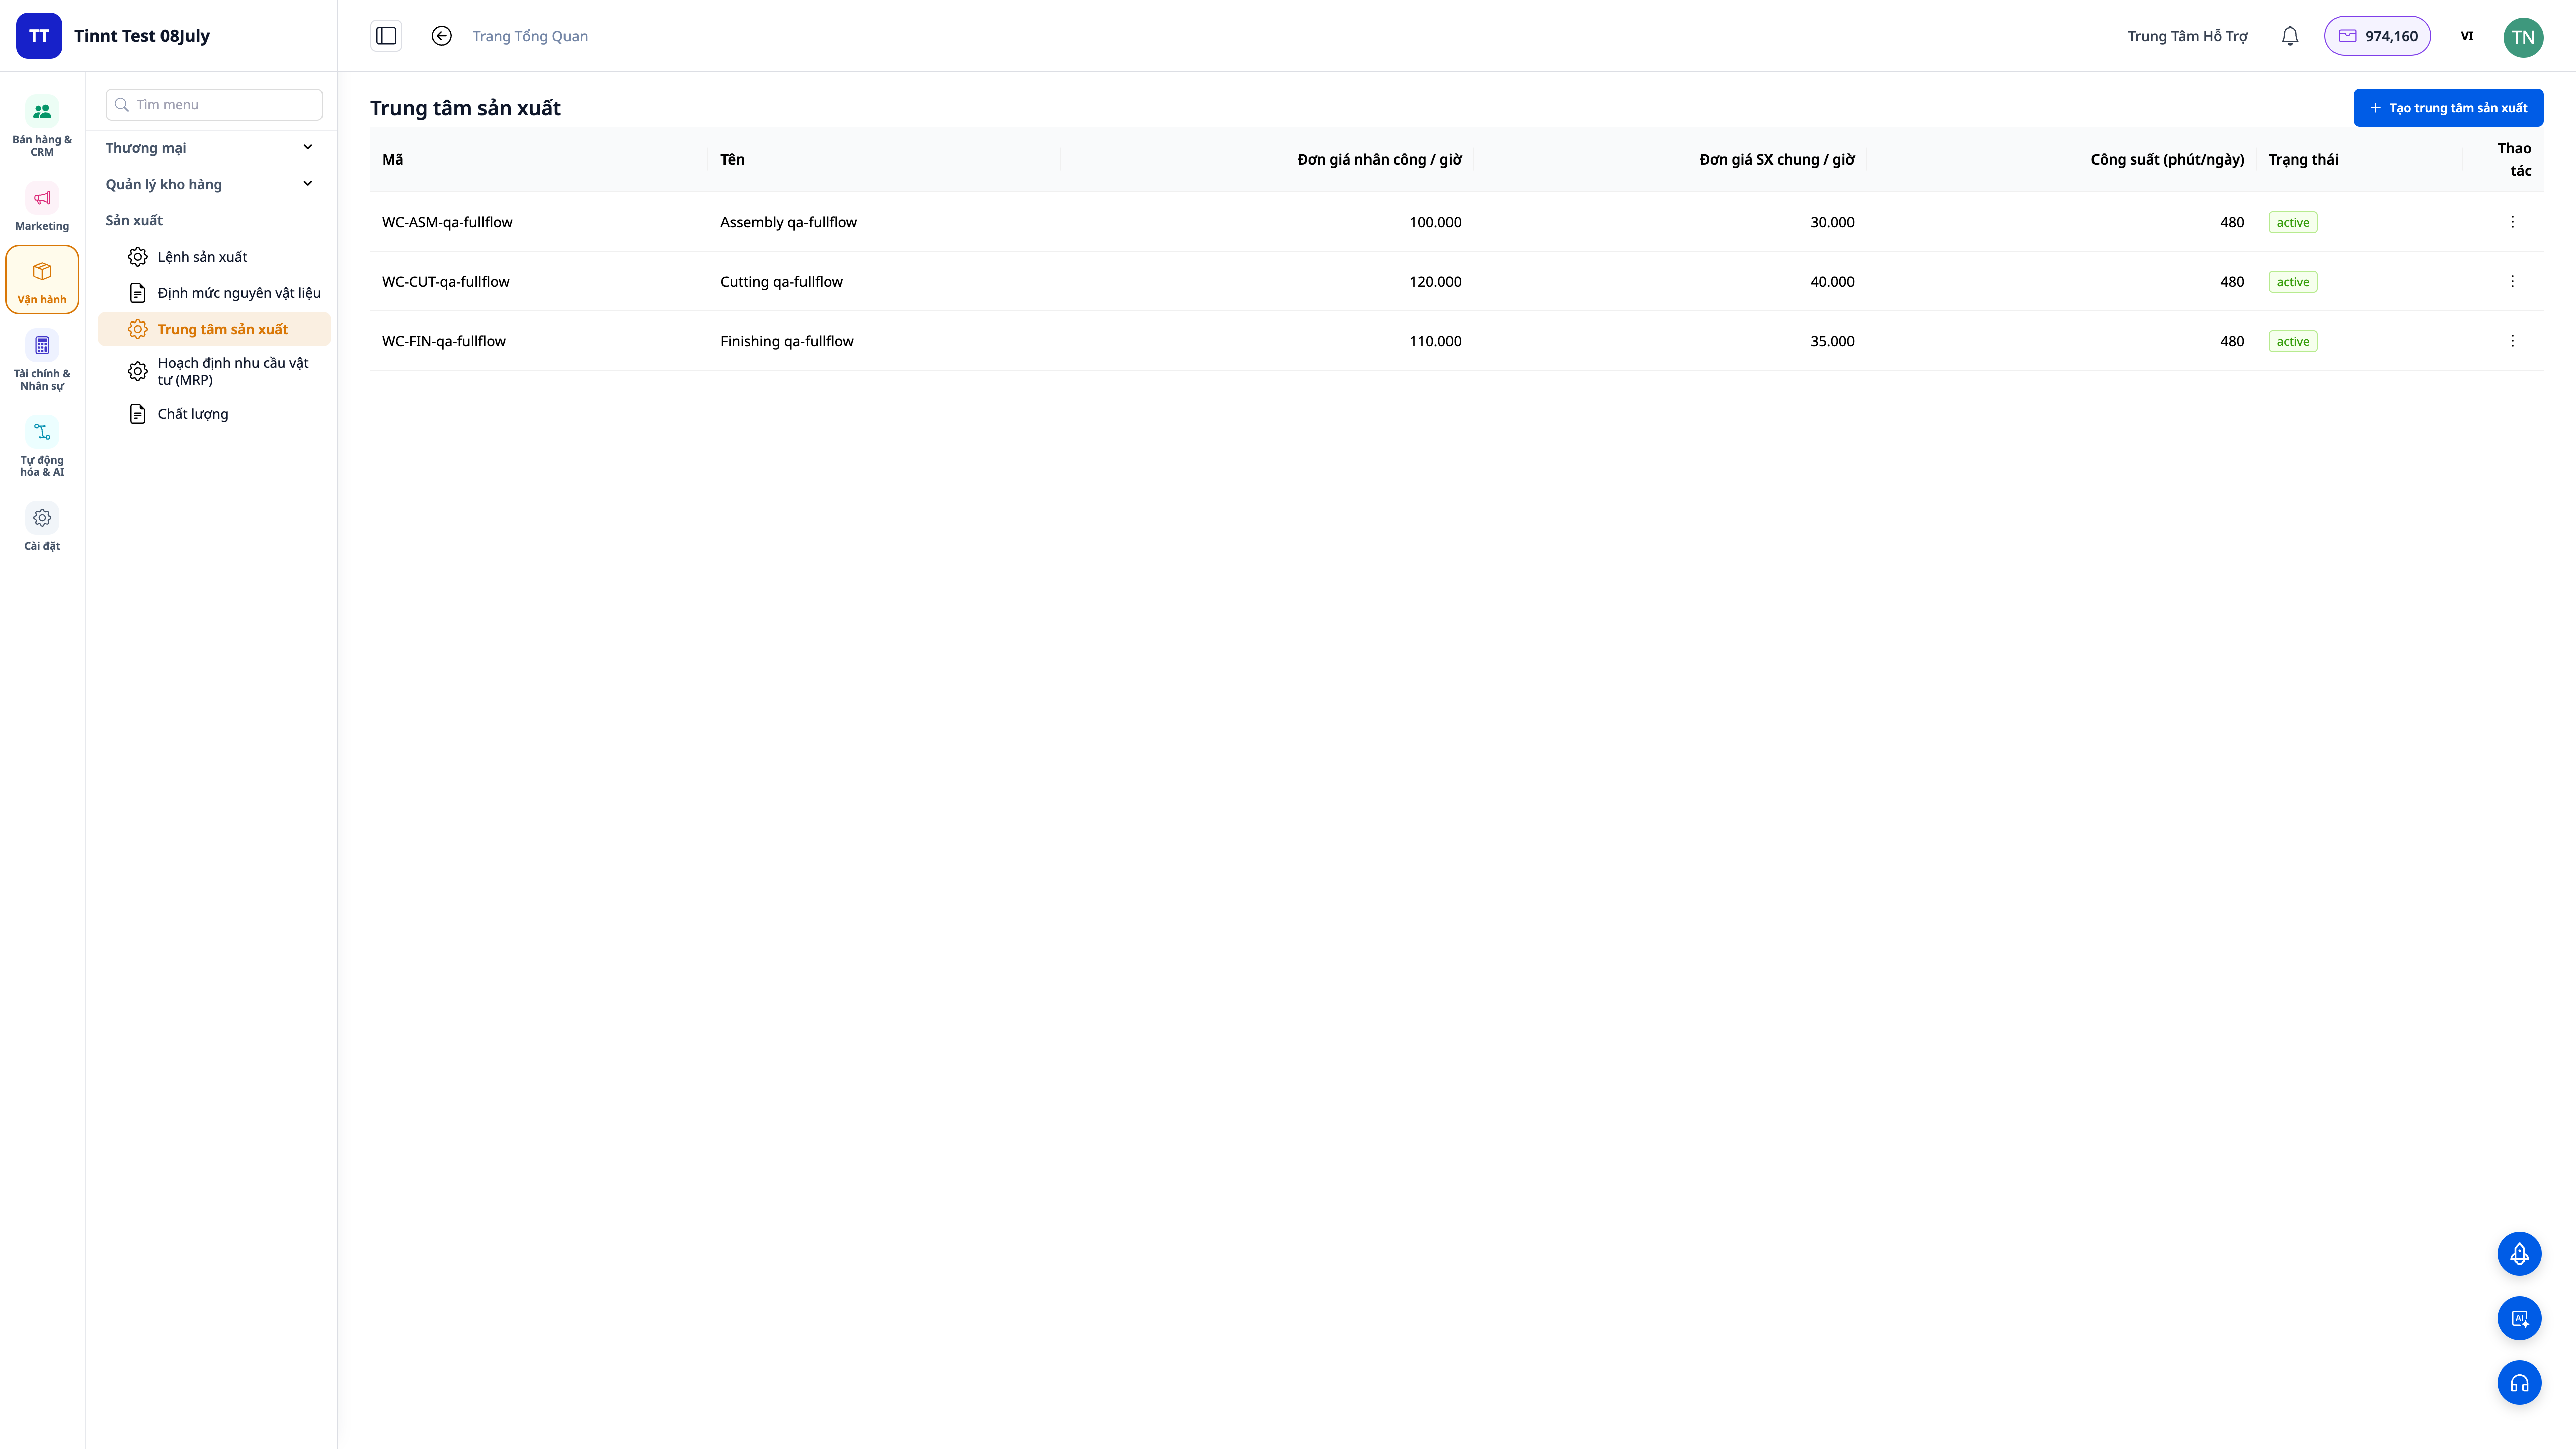
Step 1 — Define Master Data (Units of Measure, Work Centers, Product Categories)
- Open Manufacturing ▸ Settings. Standard units (kg, g, L, pcs, box, hour…) are pre-installed; add custom units if needed.
- Go to Work Centers: create the centers where tasks are performed (Cutting, Assembly, Finishing…). Set the labor rate and overhead cost per hour for each center — these two figures contribute to the cost.
- For each product, mark its type: Raw Material / Component / Finished Good / Packaging, and set its inventory unit.
✅ Expected Result: A list of units of measure, at least one work center with its labor rate + overhead cost/hour, and products correctly categorized.
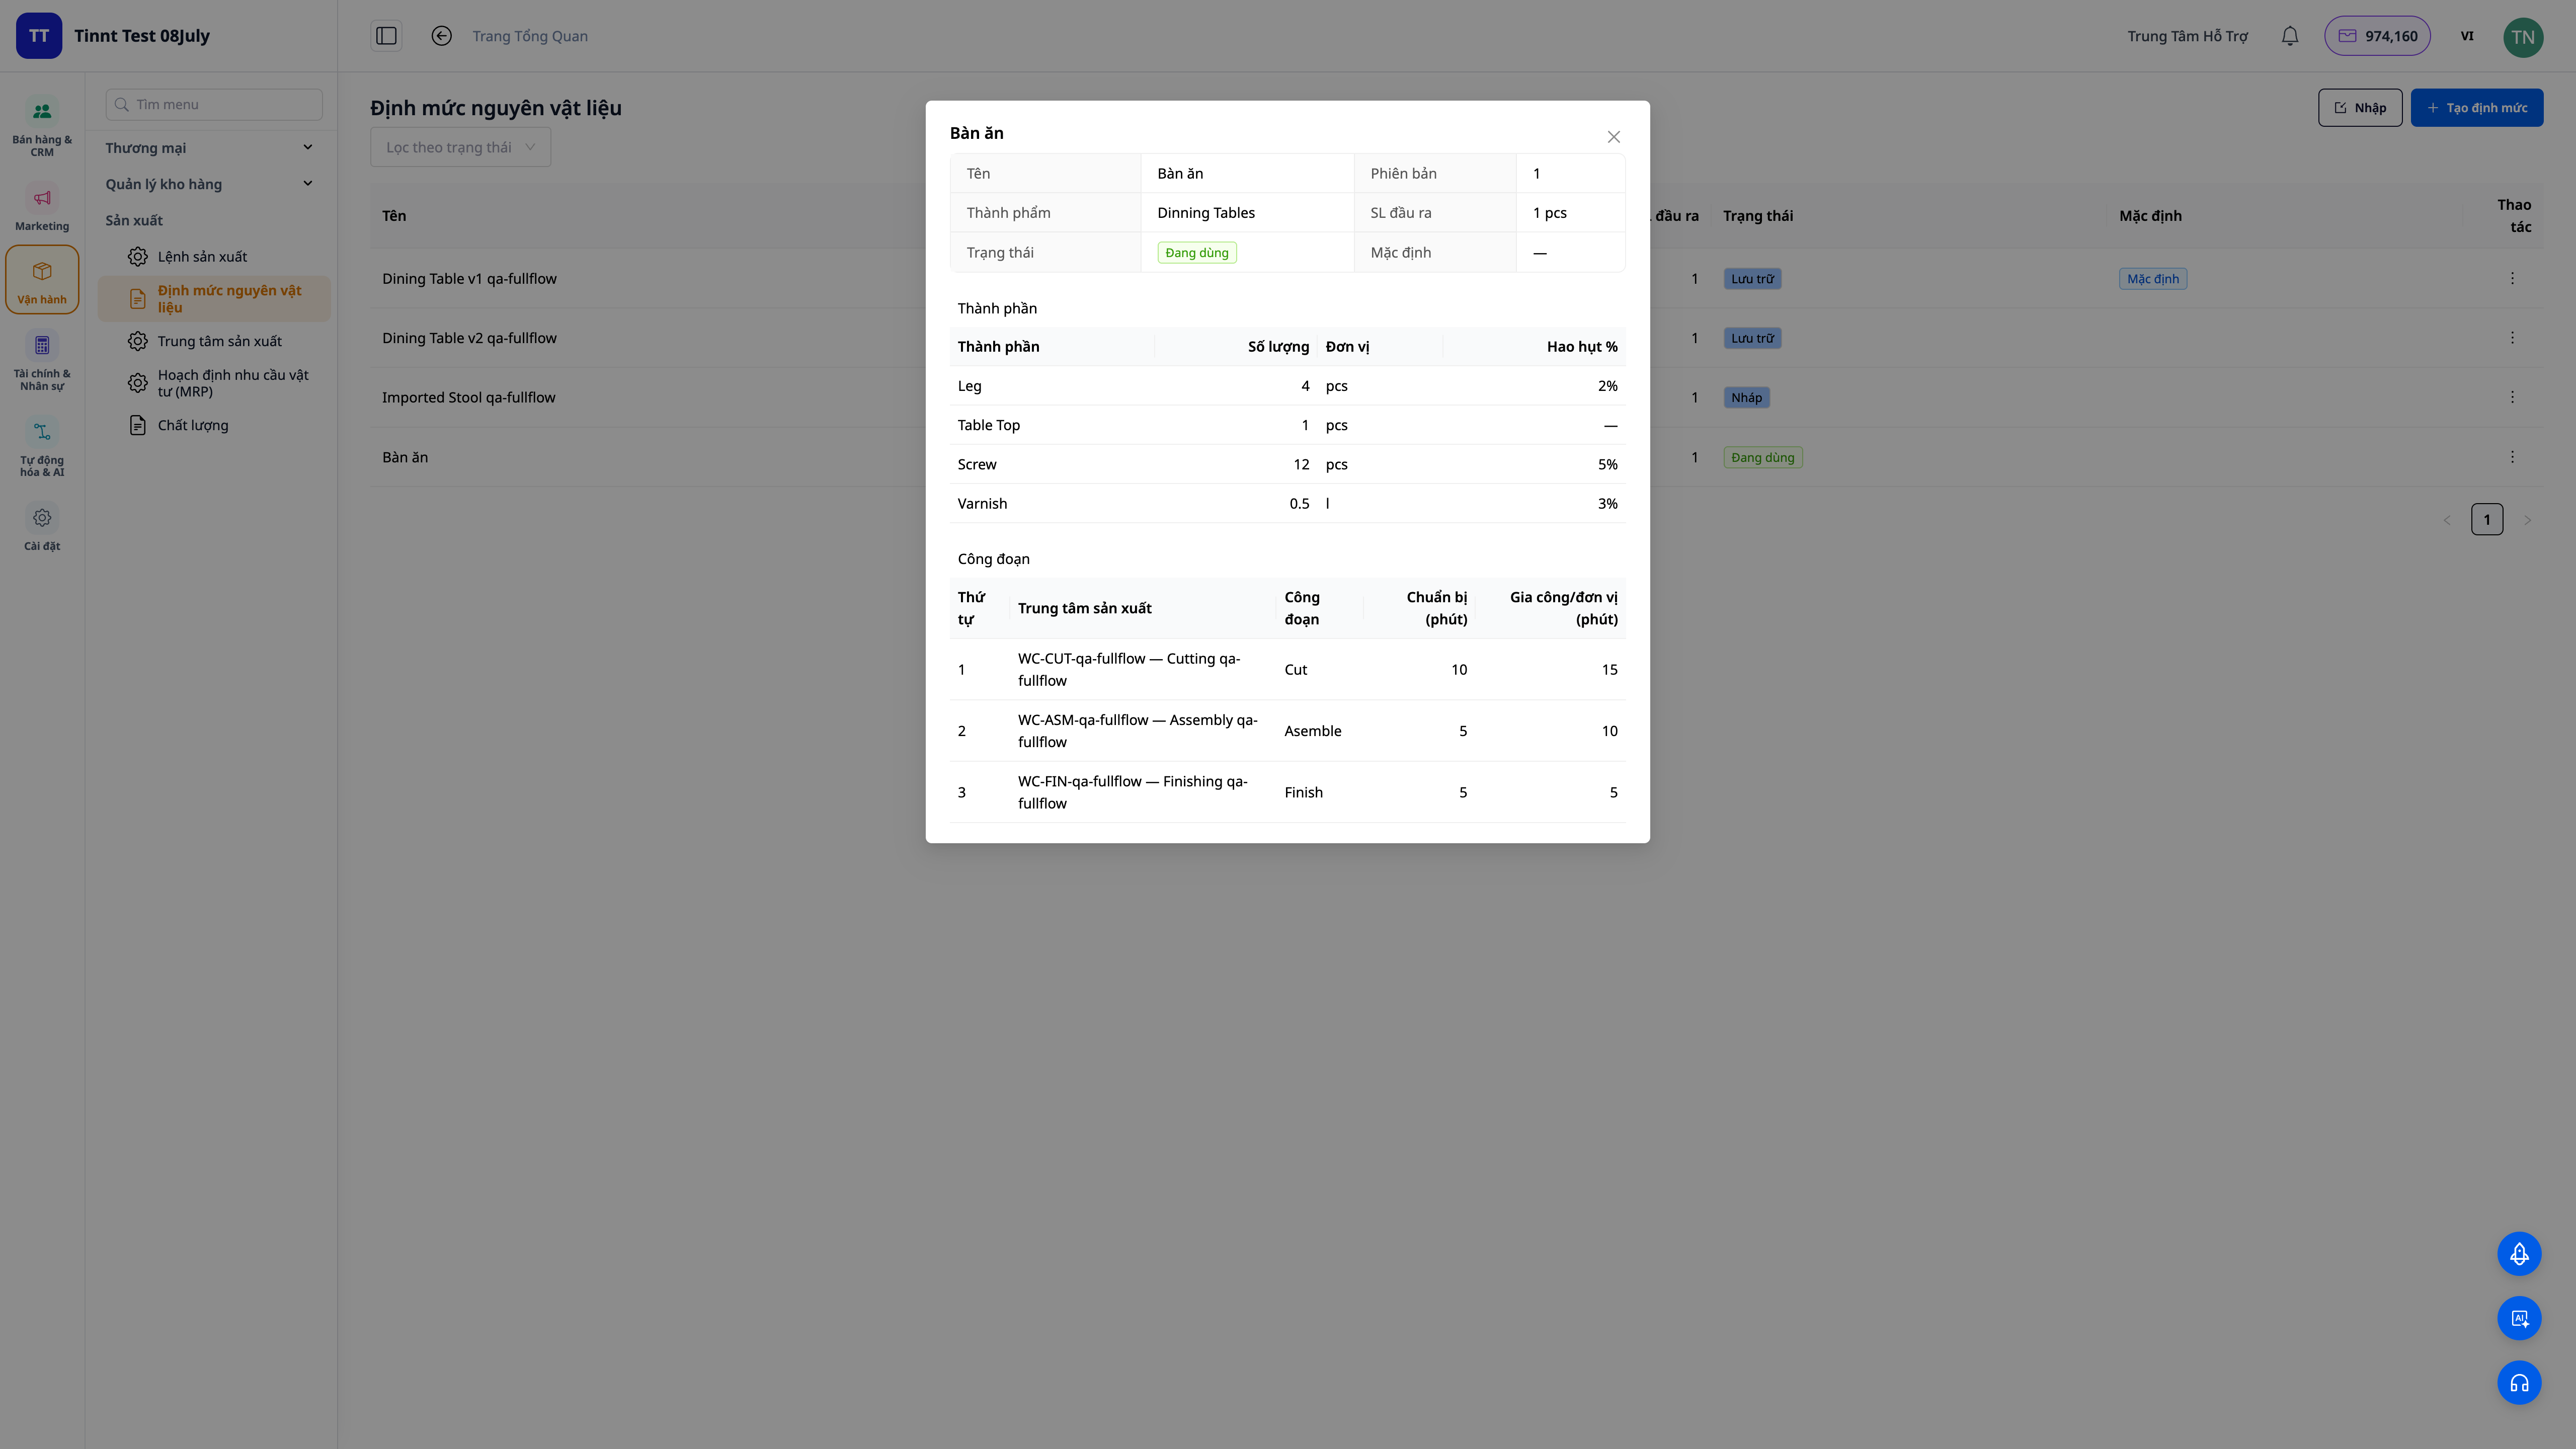
Step 2 — Build Product Recipes (BOM)
- Go to Manufacturing ▸ Bills of Materials ▸ New.
- Select the finished product, then list each material: quantity, unit, scrap percentage.
- Add operations (routings): specify which work center each operation runs on, and the setup time + run time per unit.
- Click Activate when the recipe is ready.
✅ Expected Result: BOM is in Activated status, showing all materials (including scrap) and operations. If a component itself has its own BOM, the system recognizes this as a multi-level recipe.
💡 Tip: Have your material list/BOM in Excel? Use the download template, or drag and drop your file directly, and let AI match the columns — saving you manual input.
Step 3 — Create Production Orders
- Go to Manufacturing ▸ Production Orders ▸ New.
- Select the product, recipe (BOM), and quantity to produce.
- Choose the source warehouse (for raw materials) and the destination warehouse (for finished goods).
✅ Expected Result: A production order is created, and the system automatically explodes the recipe into a list of materials and operations required for that quantity (including scrap).
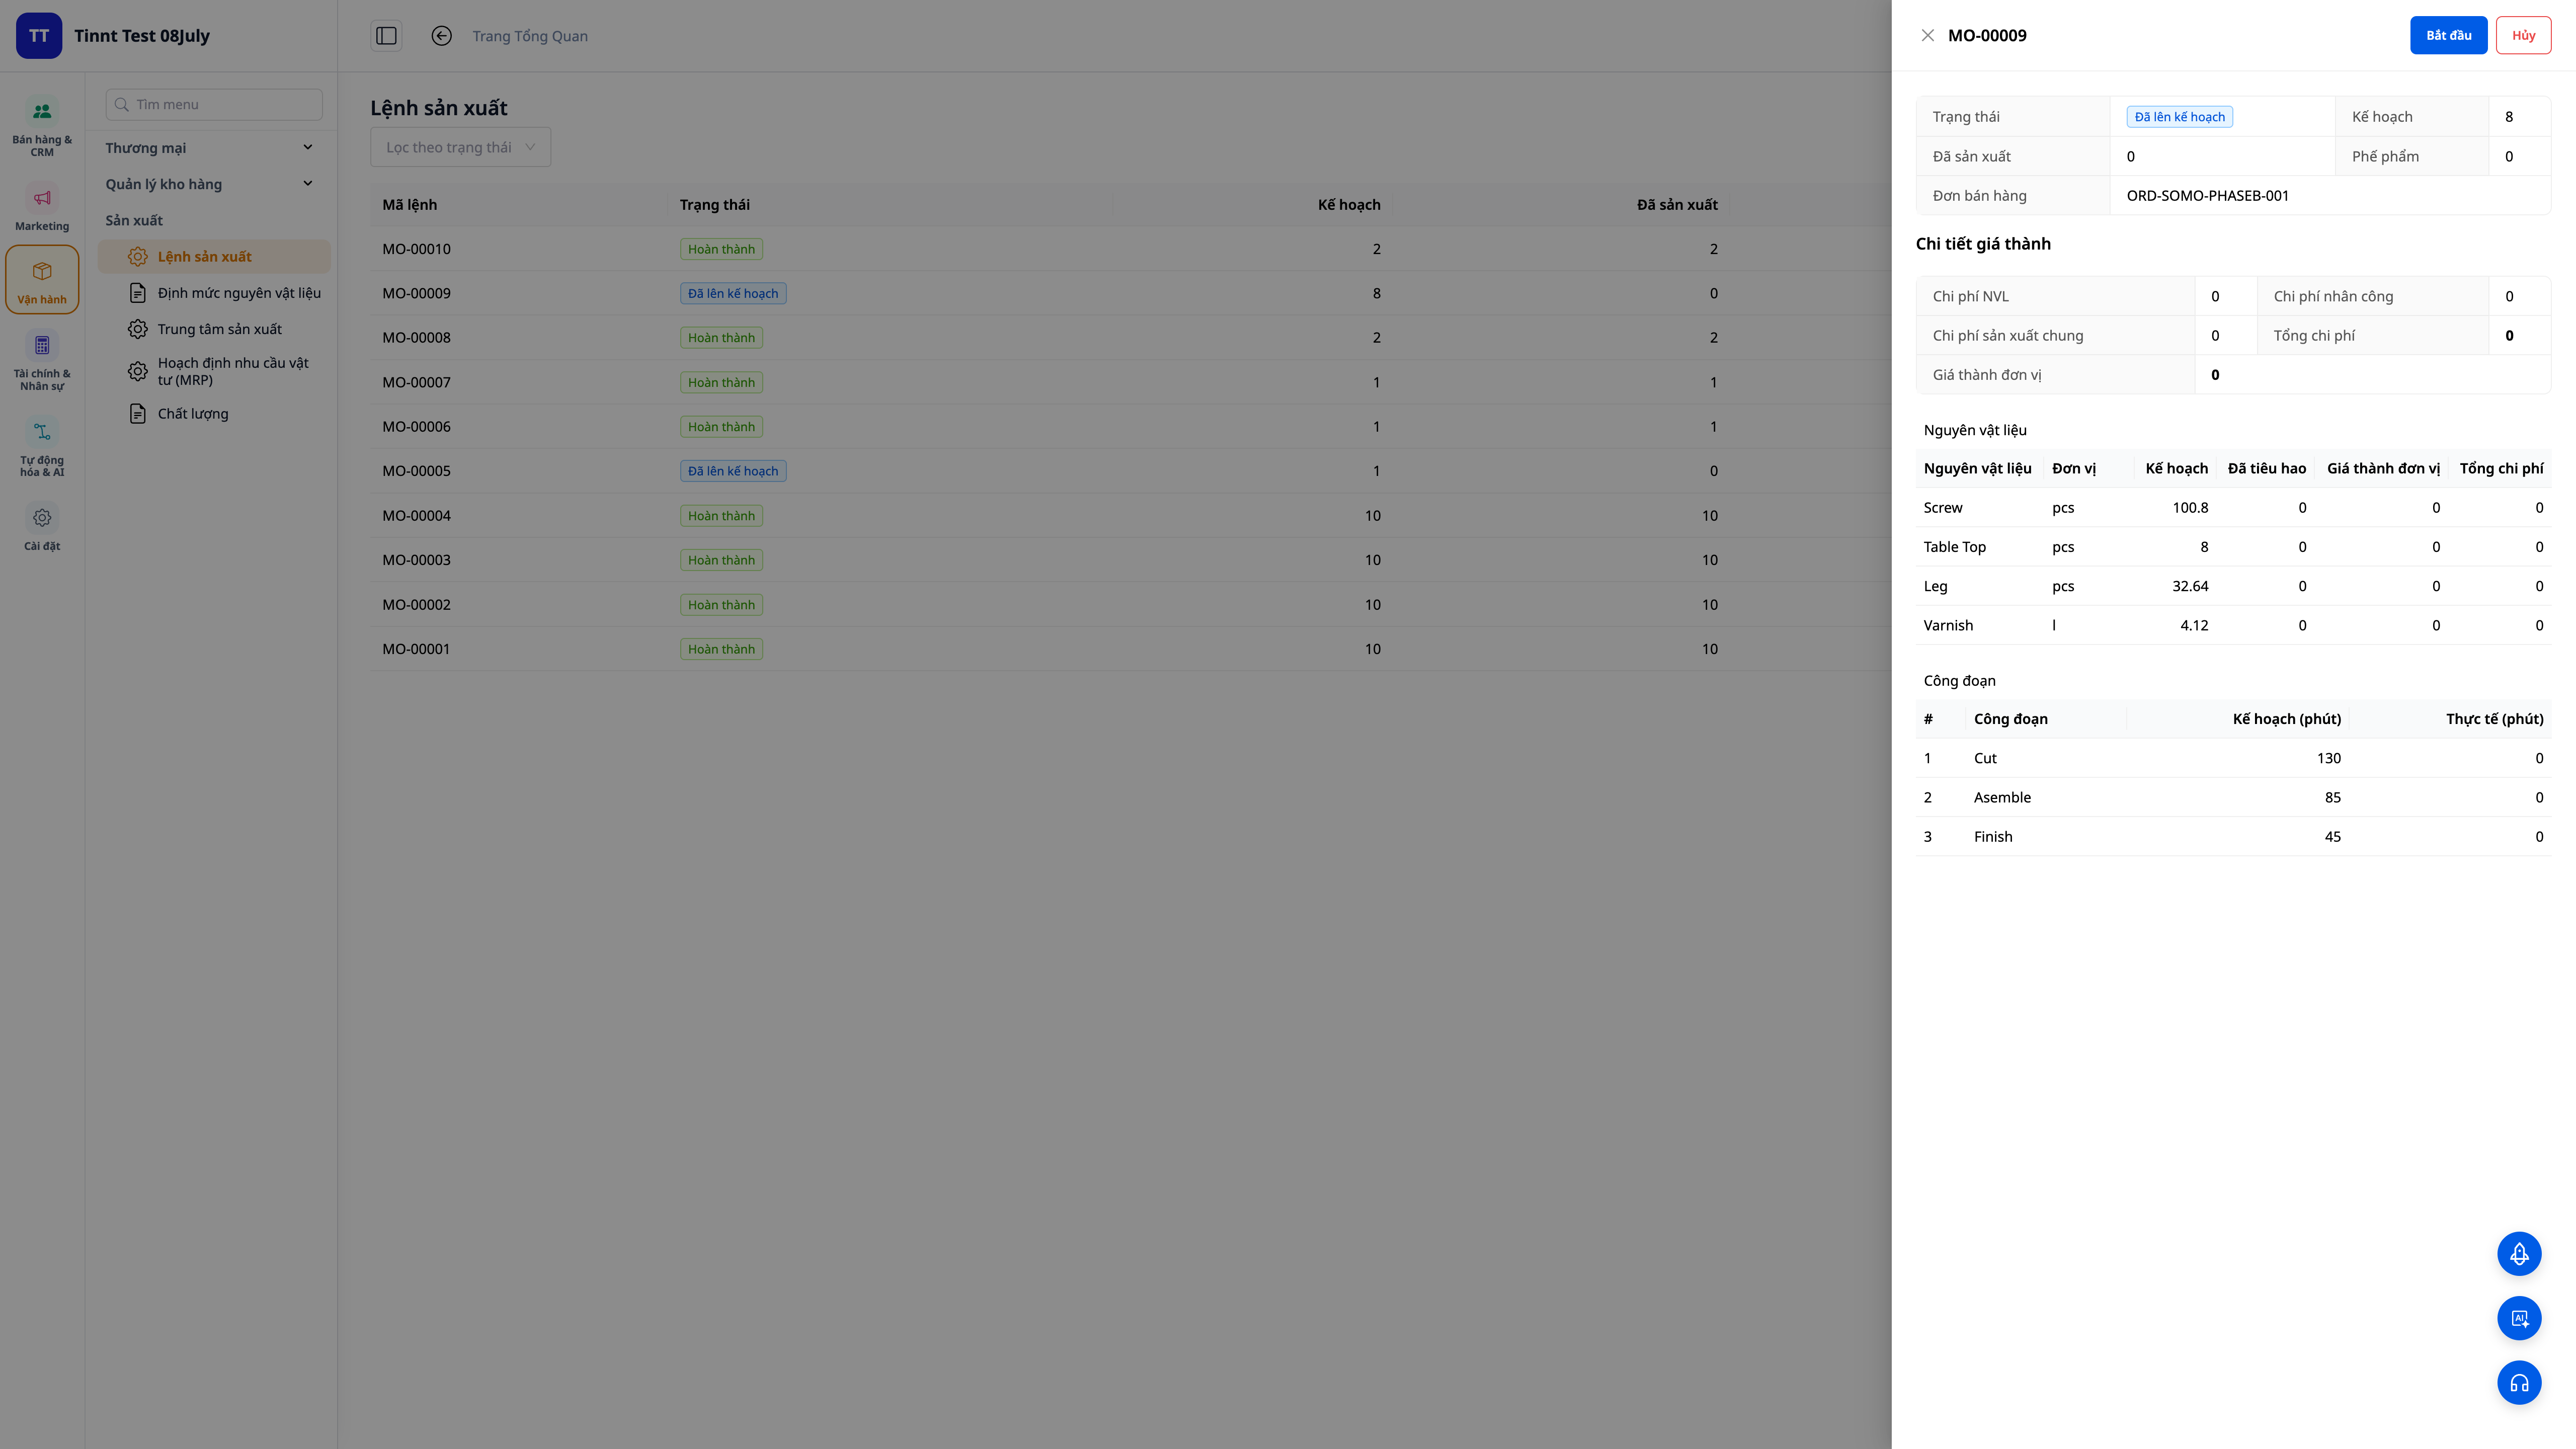
Step 4 — Start Production (Deduct Materials)
- On the production order, click Start.
✅ Expected Result: Materials are deducted from the source inventory. If there are insufficient materials, the system displays a clear shortage warning (it doesn't silently proceed).
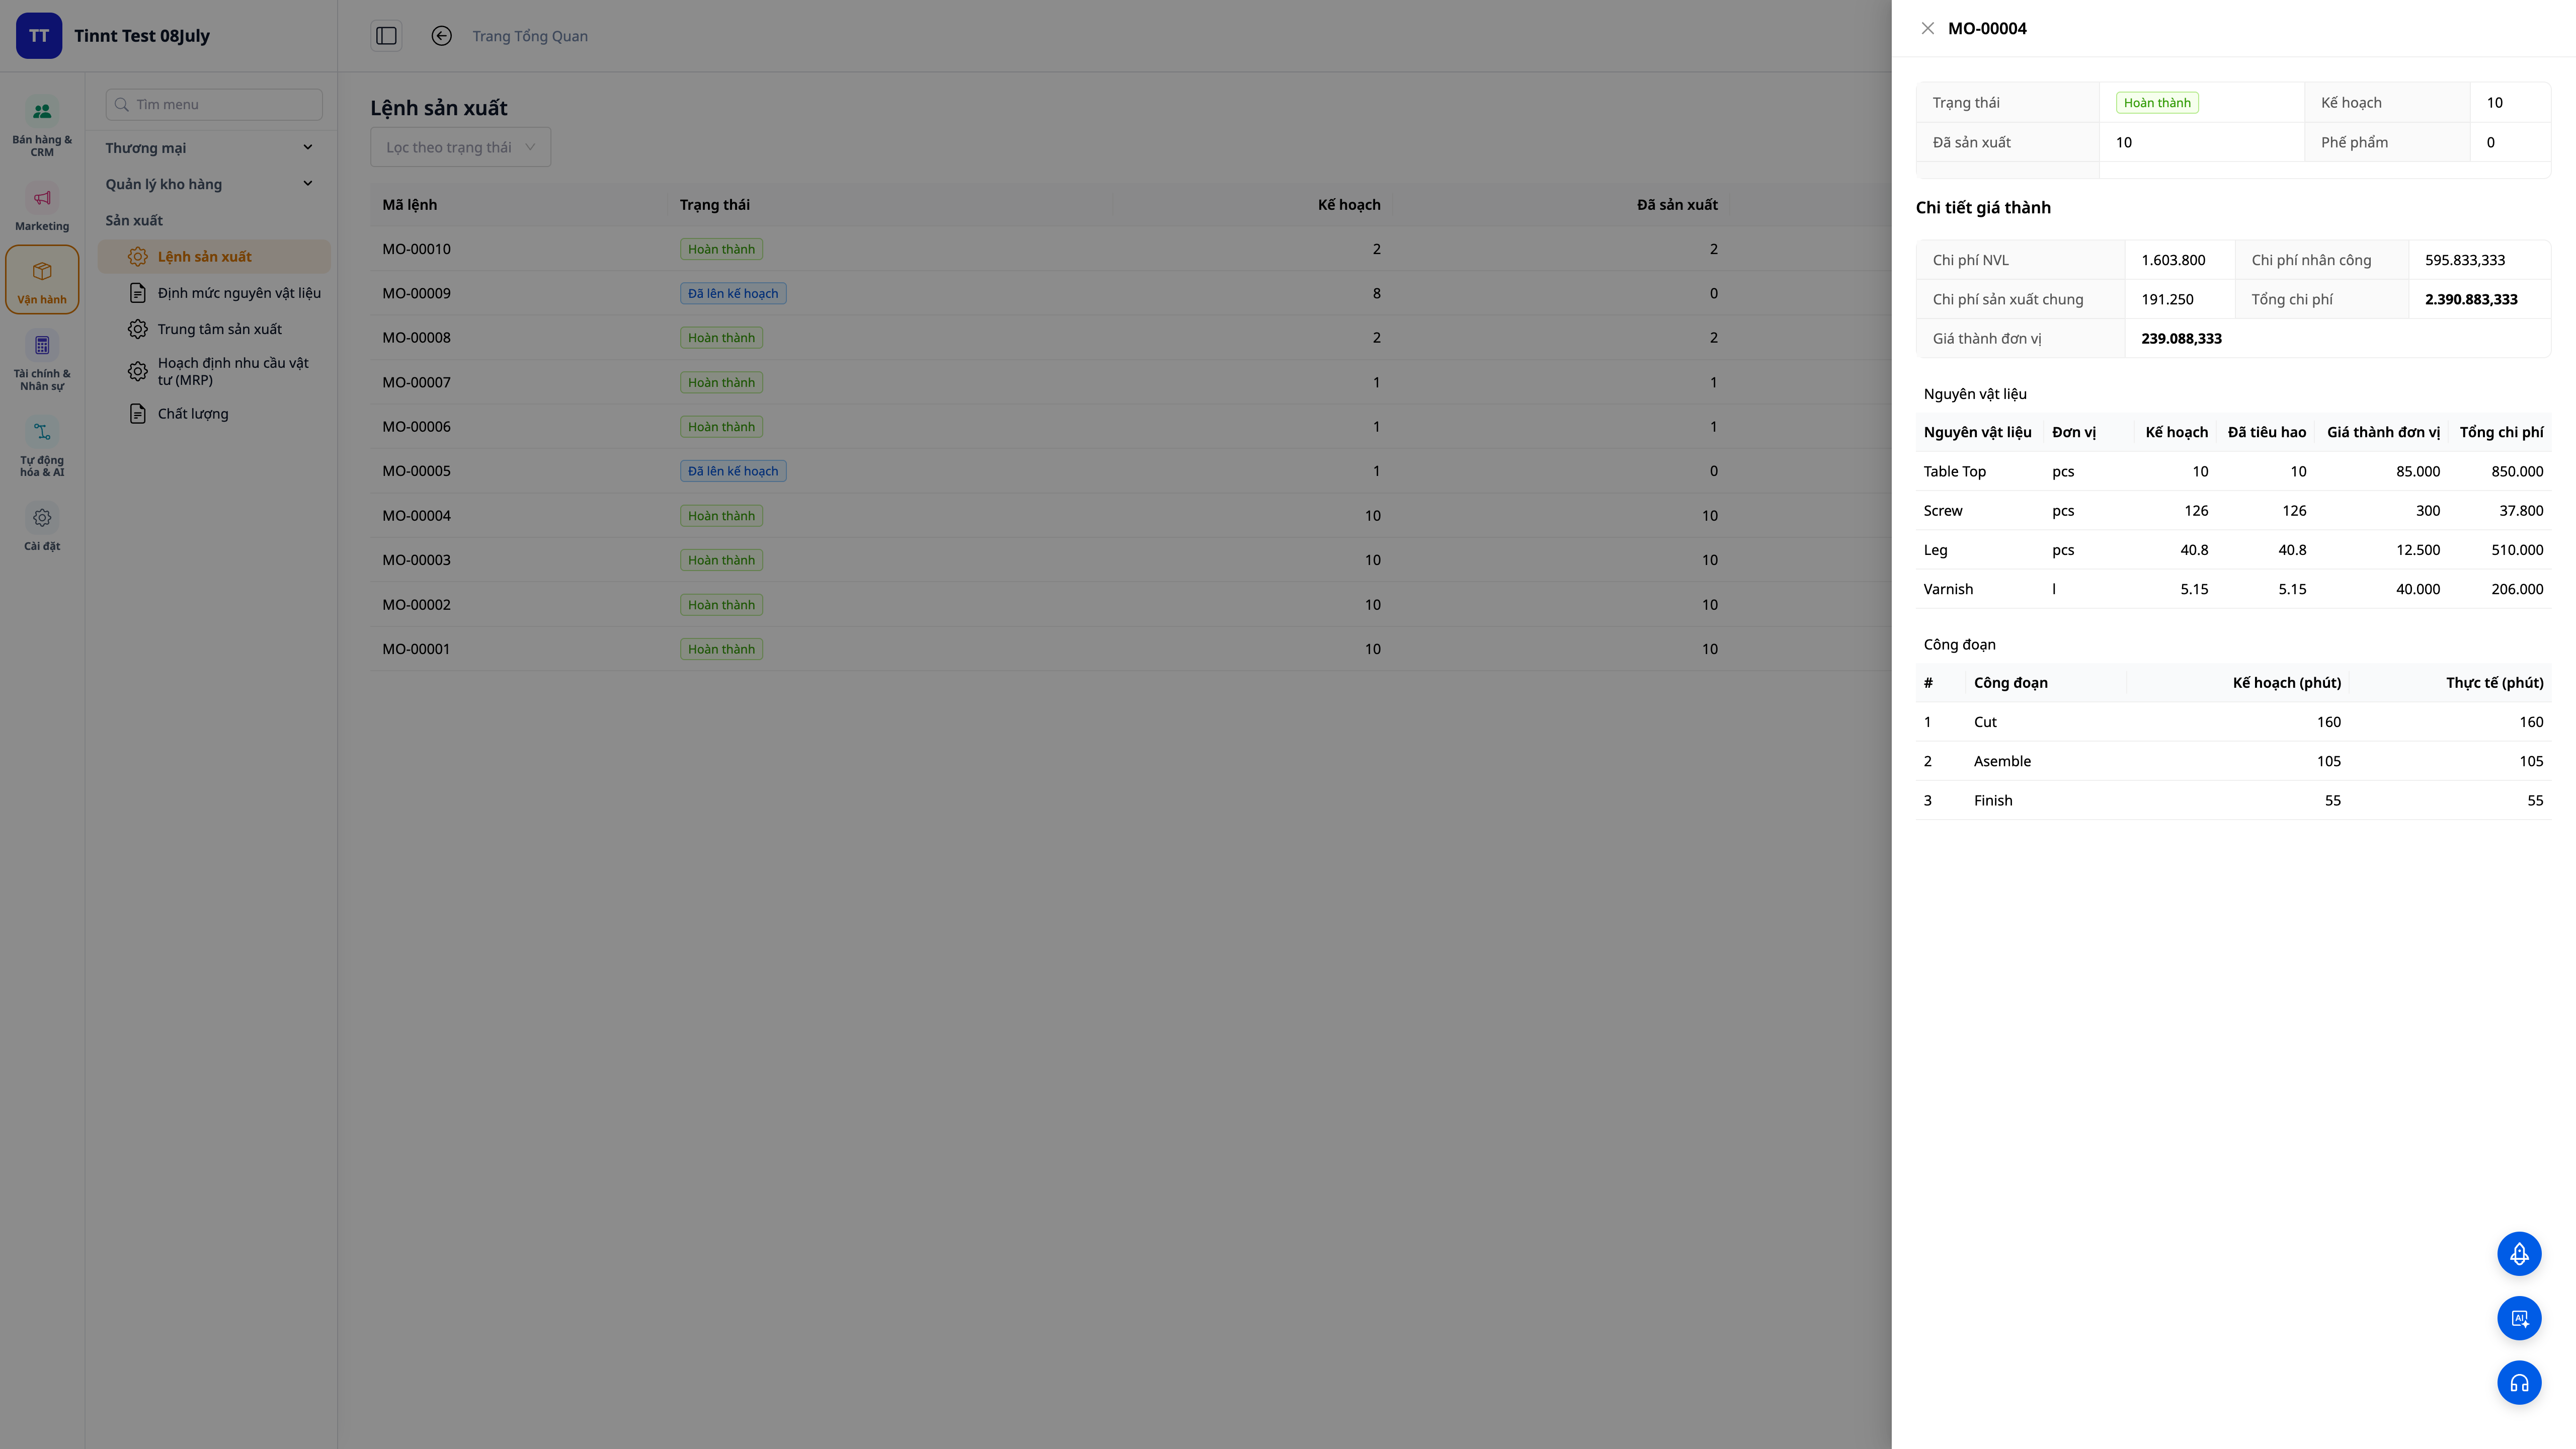
Step 5 — Complete and View Auto-Calculated Cost
- Click Complete, enter the quantity produced (and scrap if any), and the actual time.
✅ Expected Result: The system calculates the unit cost = (materials + labor + overhead) ÷ quantity produced; finished goods are received into the destination warehouse at this cost; a cost of goods manufactured (COGM) journal entry is posted to the ledger. If you have set a standard cost, the order will also show the variance (actual vs. standard).
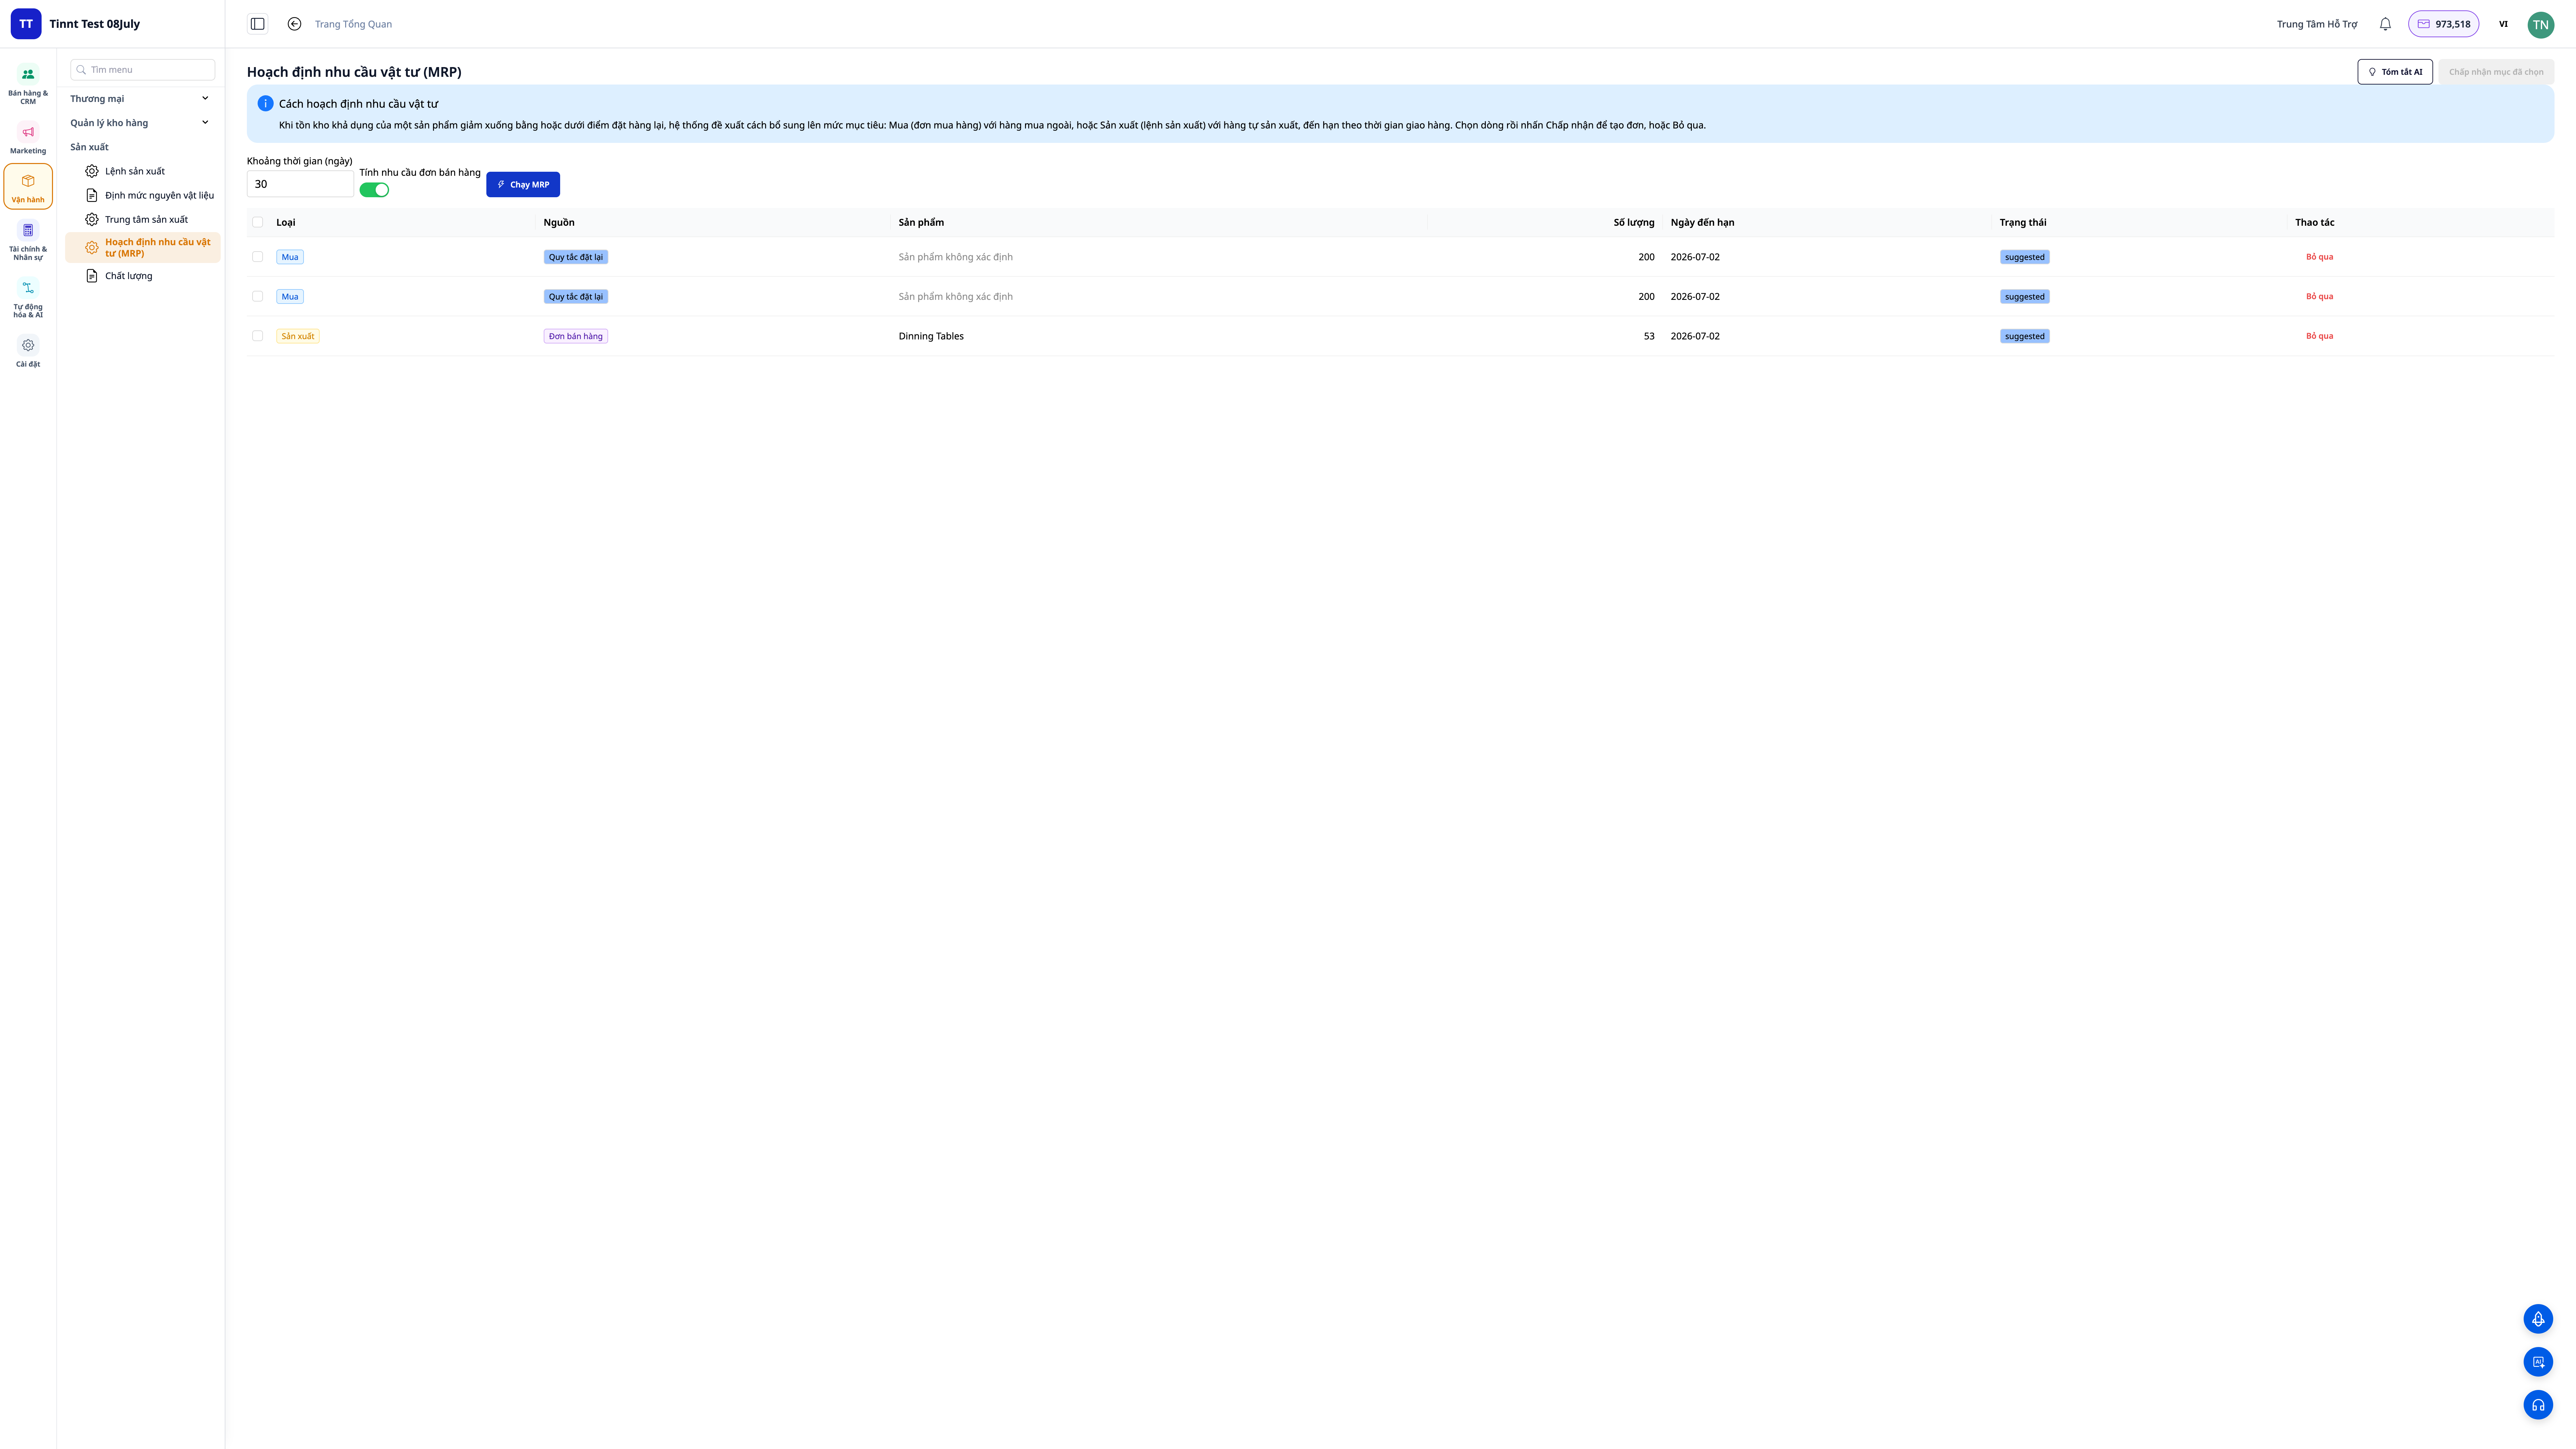
Step 6 — Plan Purchases and Production (MRP)
- Set inventory levels (minimum / reorder point / target) for each product.
- Go to Manufacturing ▸ Planning (MRP). If you want to plan based on sales orders, enable "Include sales-order demand" before running.
- Click Run. Review the suggested Purchase Orders (what to buy) and Manufacturing Orders (what to make), with each suggestion indicating its source.
- Approve the suggestions you want to use — approved "make" suggestions will become new production orders.
✅ Expected Result: A list of purchase/make suggestions appears, with each line tagged by its demand source (inventory levels / sales orders / both); approved "make" suggestions are converted into new production orders.
Quick Reference Table of Expected Results
| Action | What You Will See |
|---|---|
| Define Work Centers | Labor rate + overhead cost/hour set |
| Activate BOM | Activated status, with complete materials + operations |
| Create Production Order | Recipe automatically explodes into materials and operations |
| Click Start | Materials deducted from inventory, shortage warnings if any |
| Click Complete | Unit cost automatically calculated, finished goods received at correct cost, COGM journal entry posted |
| Run MRP | Purchase/make suggestions with demand sources |
Notes
- Cost and variance figures are only visible to users with Costing permission.
- The cost update for self-manufactured items is effective from now on — old production orders created before enabling this feature will not have their costs recalculated retroactively.
- You do not need to manually maintain inventory for sales orders — sales orders reserve the required stock, and finished goods produced flow directly to fulfill those reservations.
- Journal entries for cost of goods require the Chart of Accounts to be set up in Accounting to be posted.
Maybe You Should Read These
Grow. Thrive. Go.
User Guide: Setting Up the Loyalty Program on GTG CRM
Grow. Thrive. Go.
User Guide: Task Management 2.0 on GTG CRM
Guide
ACCOUNTING & INVOICE
Grow. Thrive. Go.
Accounting & E-Invoice User Guide
Guide
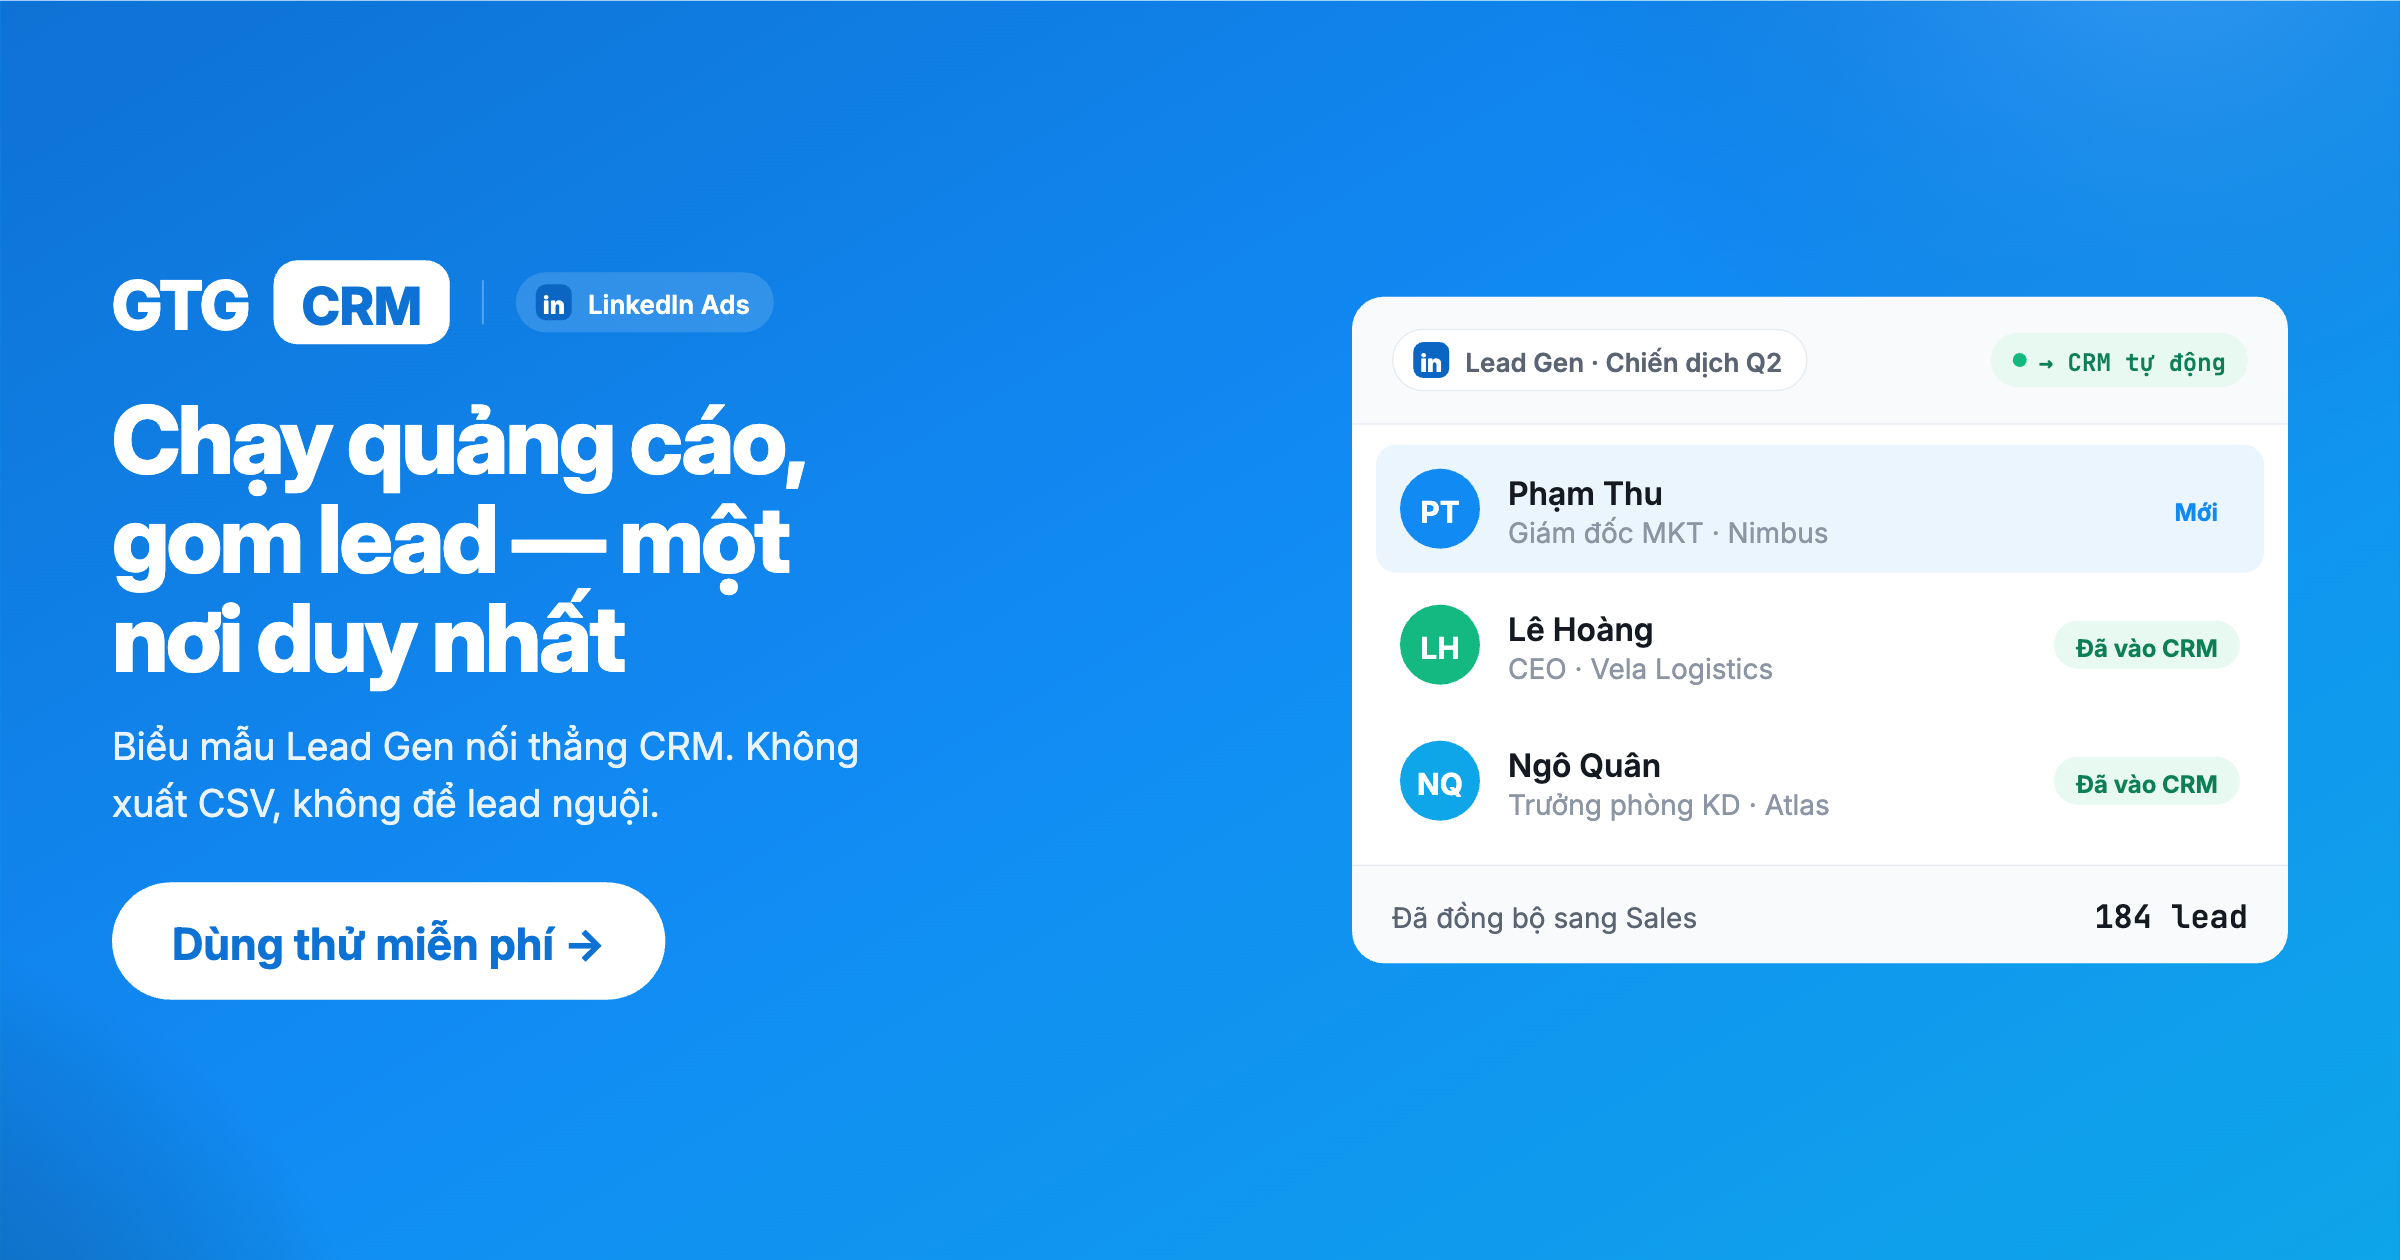
LINKEDIN ADS
Grow. Thrive. Go.
LinkedIn Ads User Guide - GTG CRM

Guide
AI BIZ EMAIL
Grow. Thrive. Go.
AI Biz Email: Create and Send Professional Marketing Emails

Guide
AI PRODUCT CREATION
Grow. Thrive. Go.
AI-Powered Product Creation Guide

Guide
FORM BUILDER
Grow. Thrive. Go.
Customer Information Collection Form Builder Guide

Guide
ARTICLE INTEGRATION
Grow. Thrive. Go.
Guide to Integrating GTG CRM Articles with Your Website

Guide
AI SECTION CREATION
Grow. Thrive. Go.
Guide to Creating Website Sections with AI

Guide
AI EMAIL CAMPAIGN
Grow. Thrive. Go.
AI Email Campaign Guide

Guide
AI WEBSITE CREATION
Grow. Thrive. Go.
AI Full Website Creation Guide

Guide
AI ARTICLE GENERATION
Grow. Thrive. Go.