1. Access CRM
Step 1: Log in to GTG CRM
Log in to your GTG CRM account.
Step 2: Open the Contact menu.
From the menu bar on the left, click "Contact" .
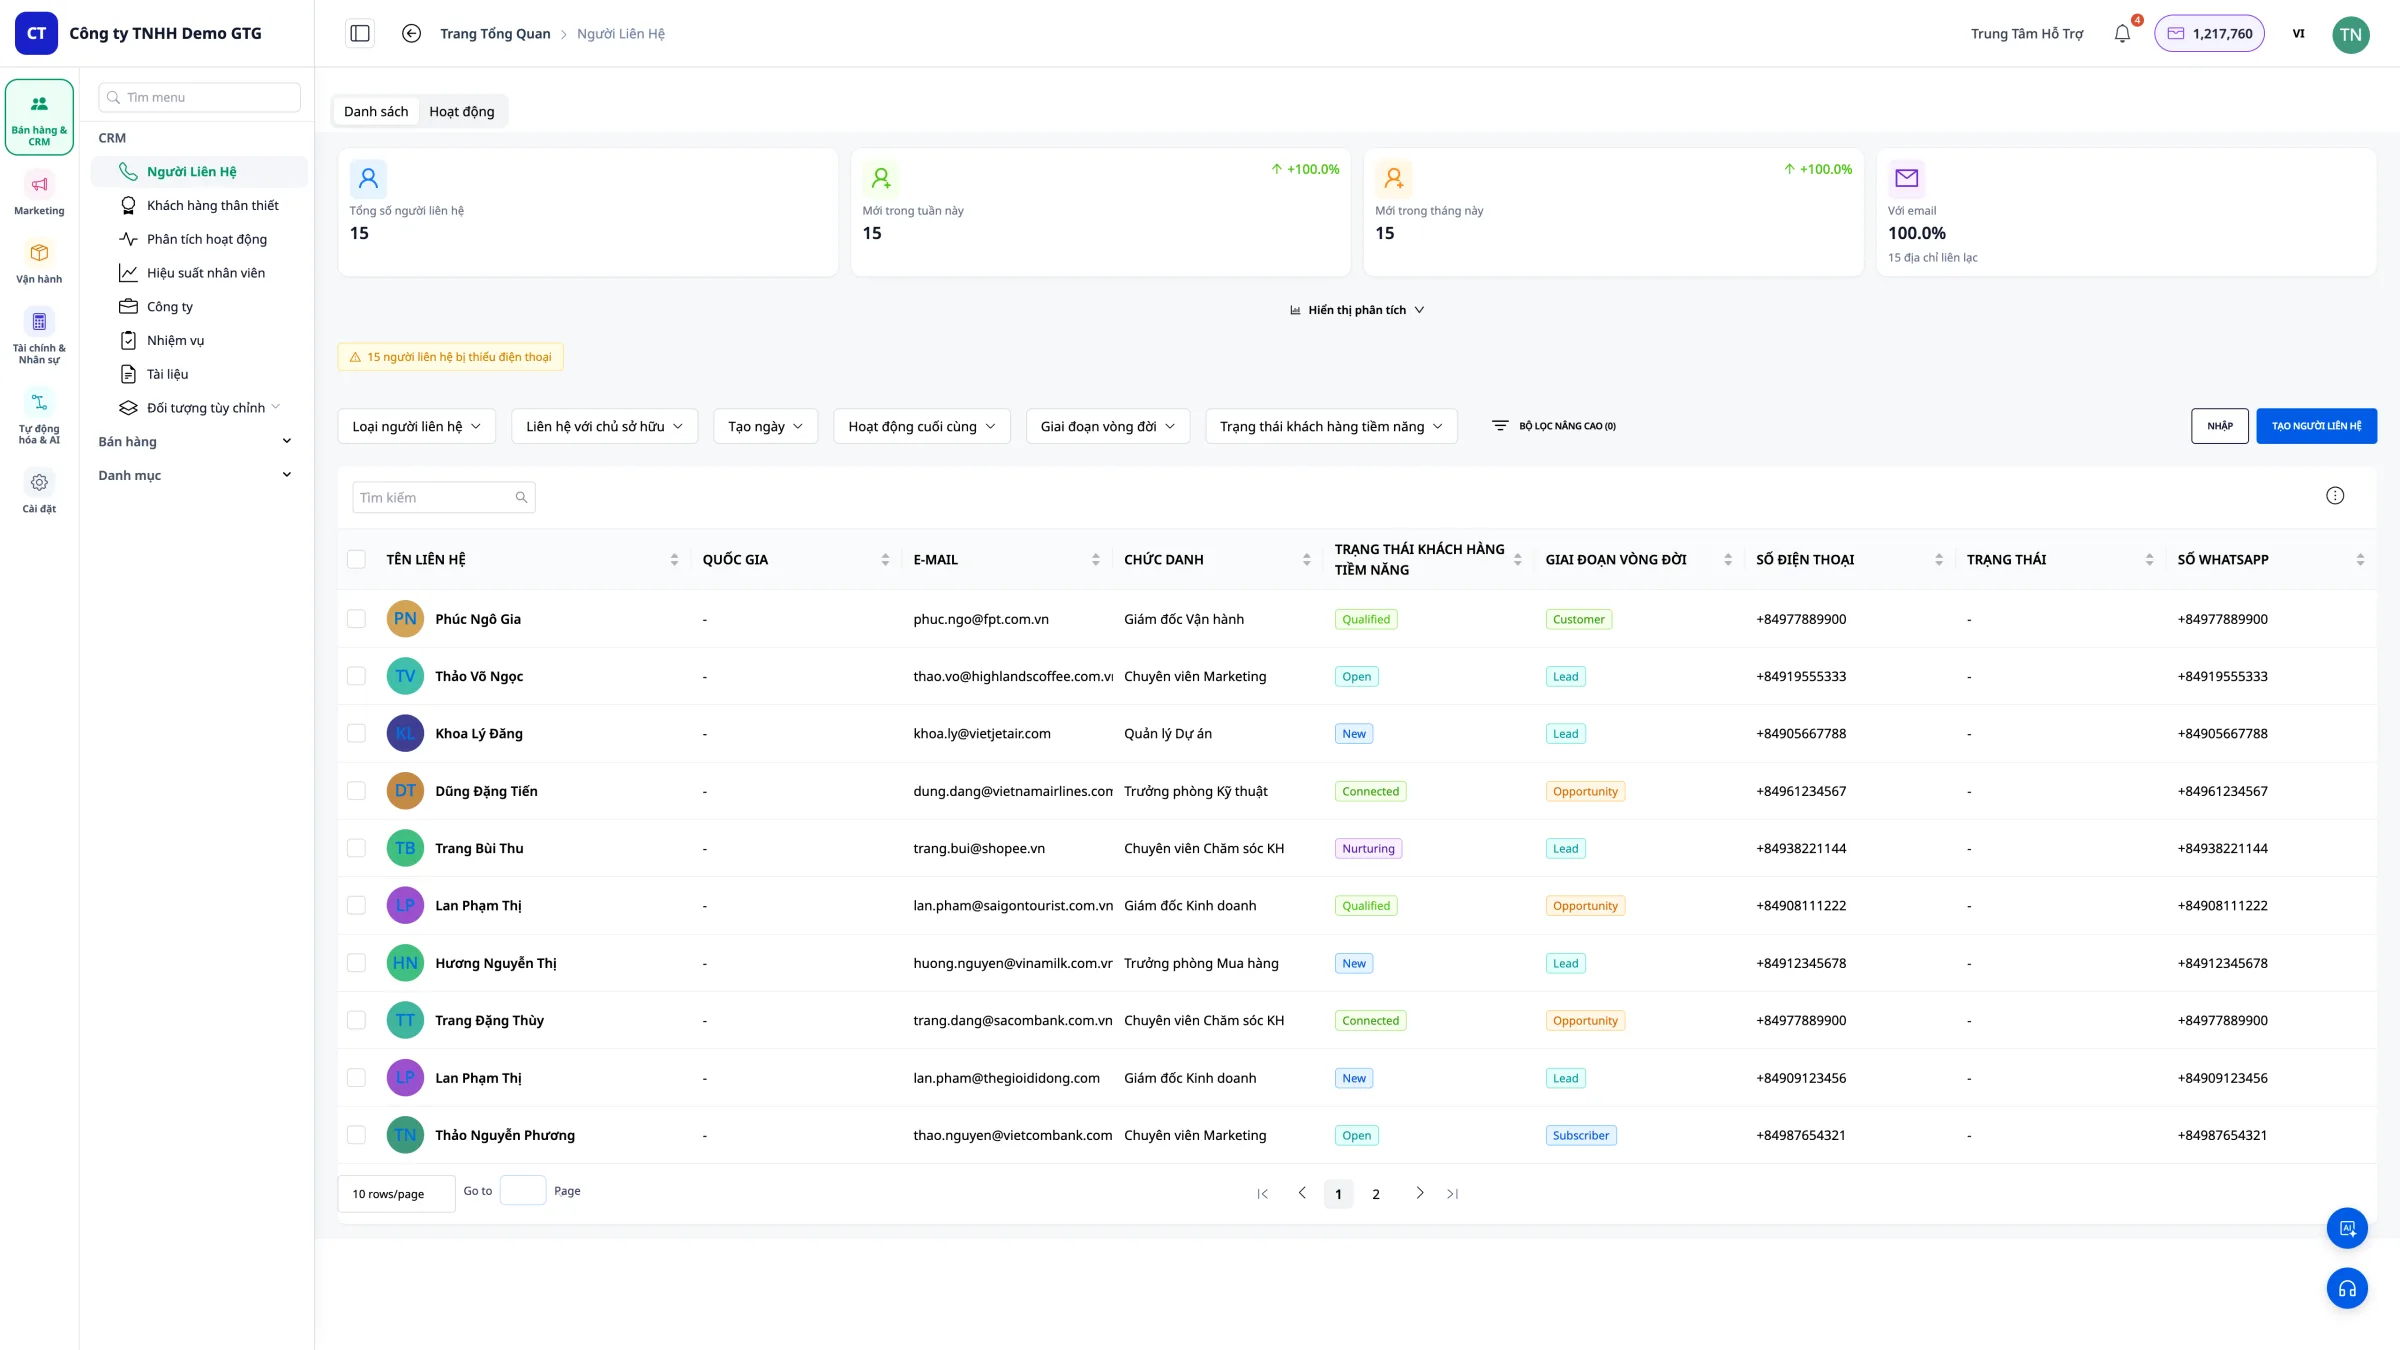
Main interface
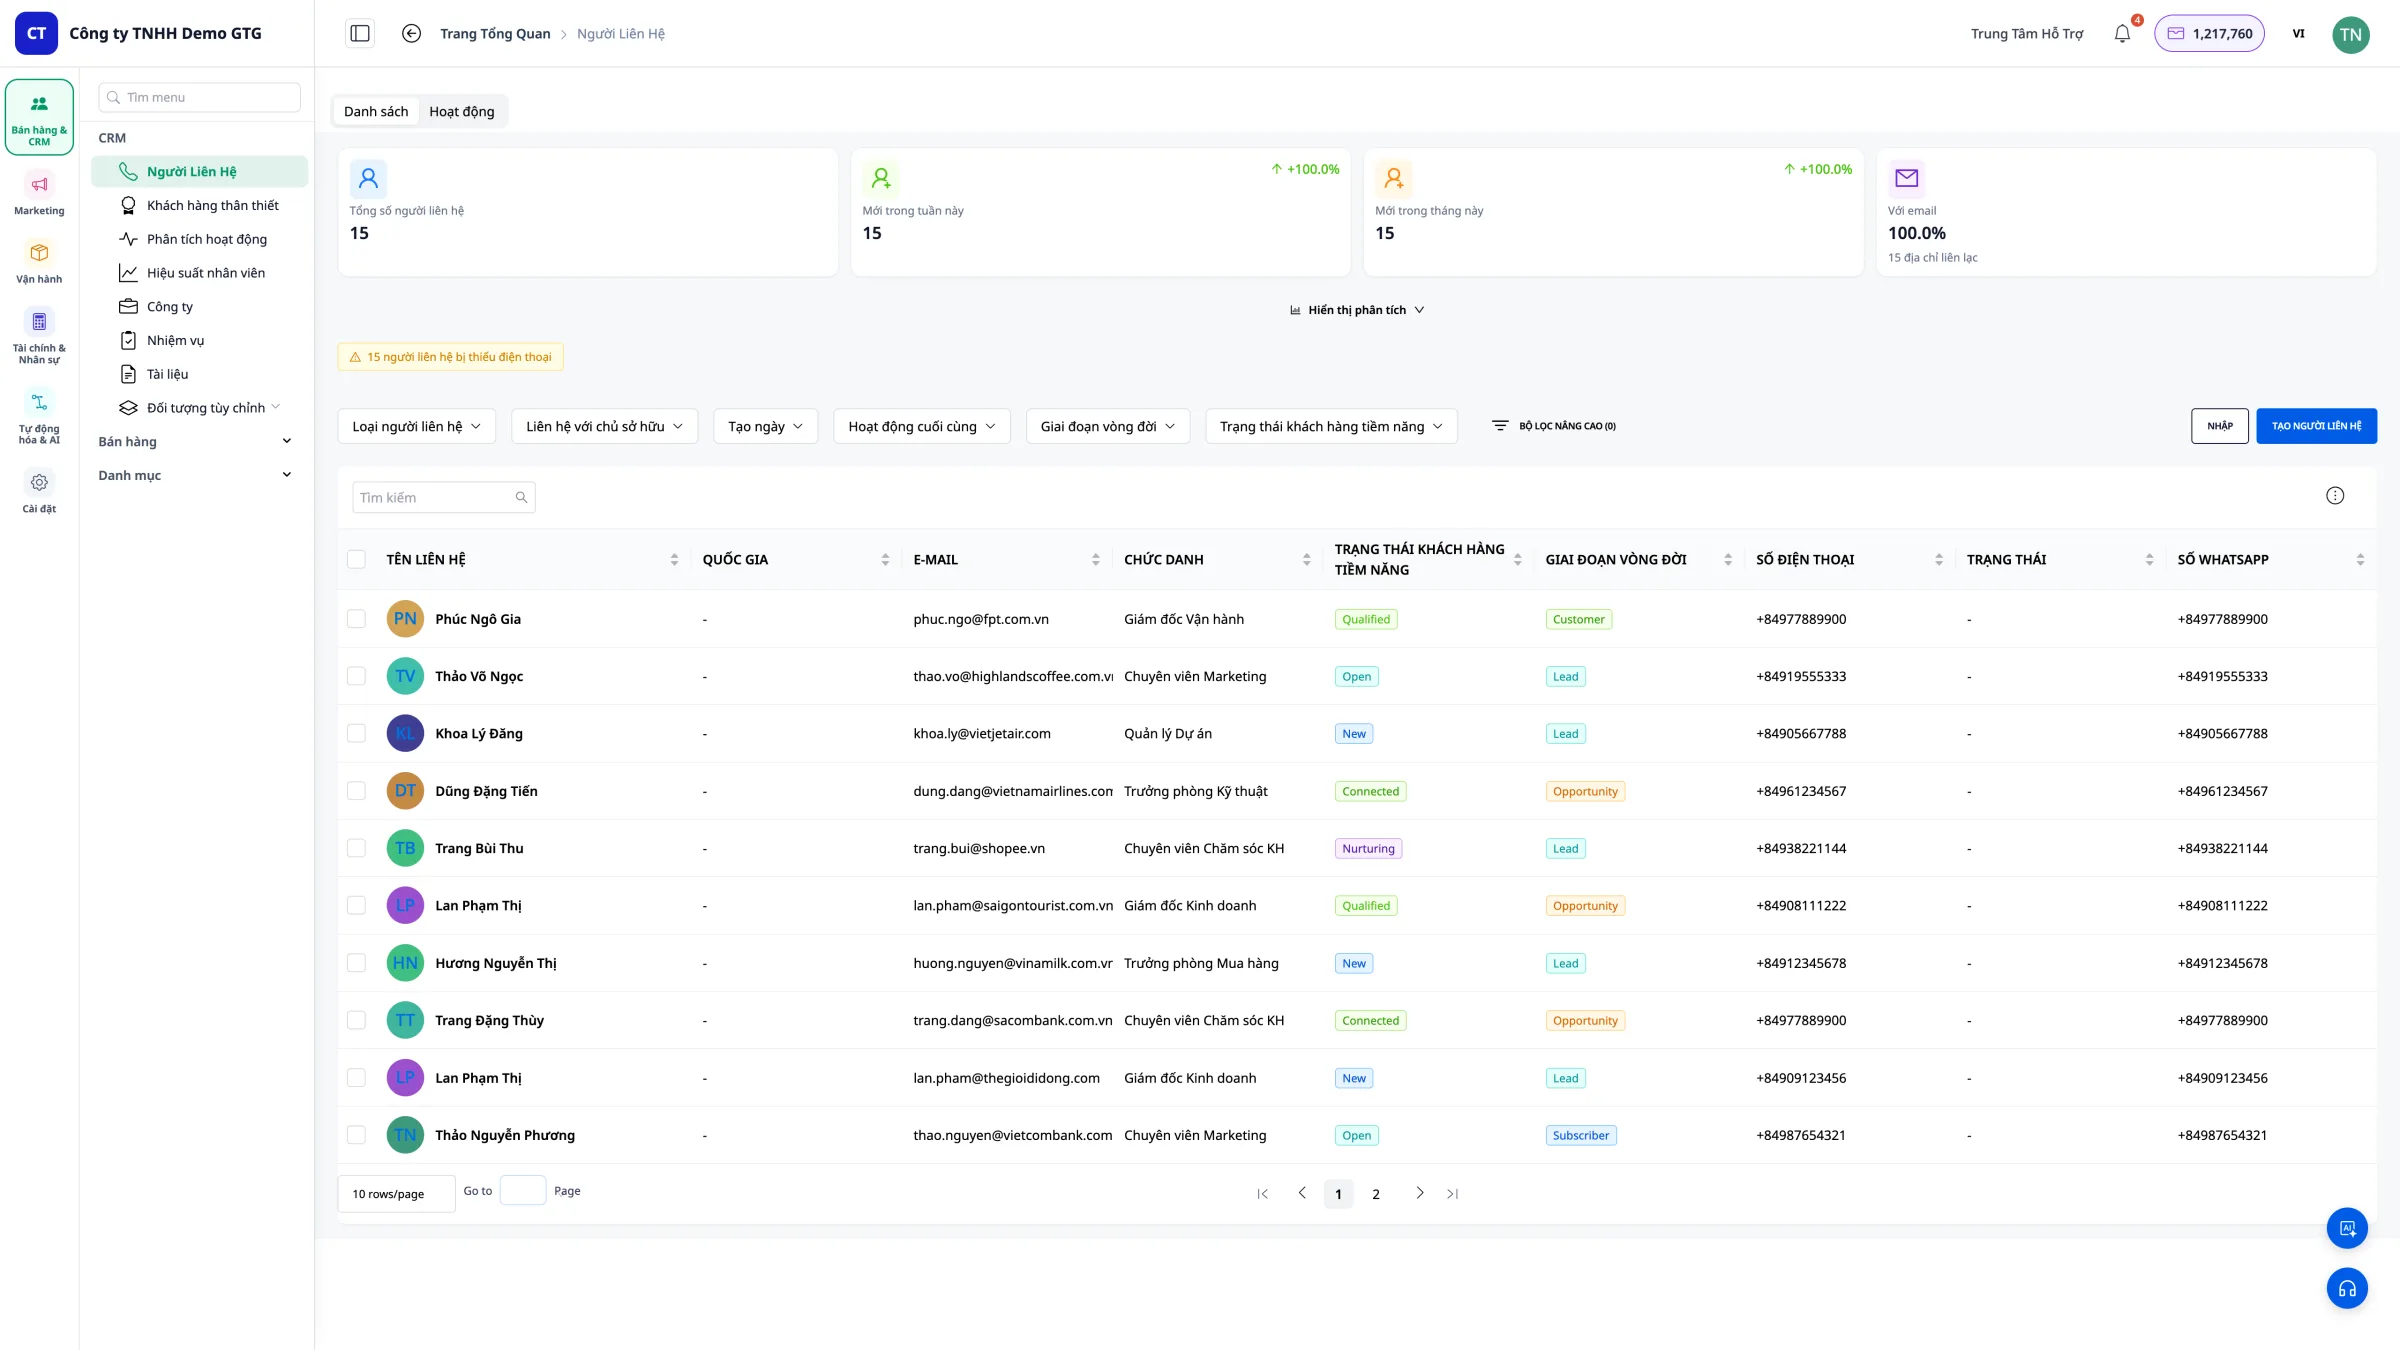
You will see a list of all contacts (customers) in the system.
2. View the Contact List
Information displayed
The contact list displays the following columns of information:
| Information | Describe |
|---|---|
| Name | Customer name |
| Email address | |
| Phone number | Contact phone number |
| Nation | Guest's country |
| Status | New, In Progress, Converted... |
| Source | Facebook, Zalo, Landing Page... |
| Person in charge | The staff member in charge |
Automated data source
Contacts are automatically routed to the CRM from: - Facebook Messenger - Customers messaging the Fanpage - Gmail - Customers sending emails - Landing Page - Customers filling out forms or messaging via Live Chat
3. Create a New Contact
When is manual creation necessary?
When there are customers from sources that GTG CRM hasn't automatically acquired (phone calls, in-person meetings, etc.).
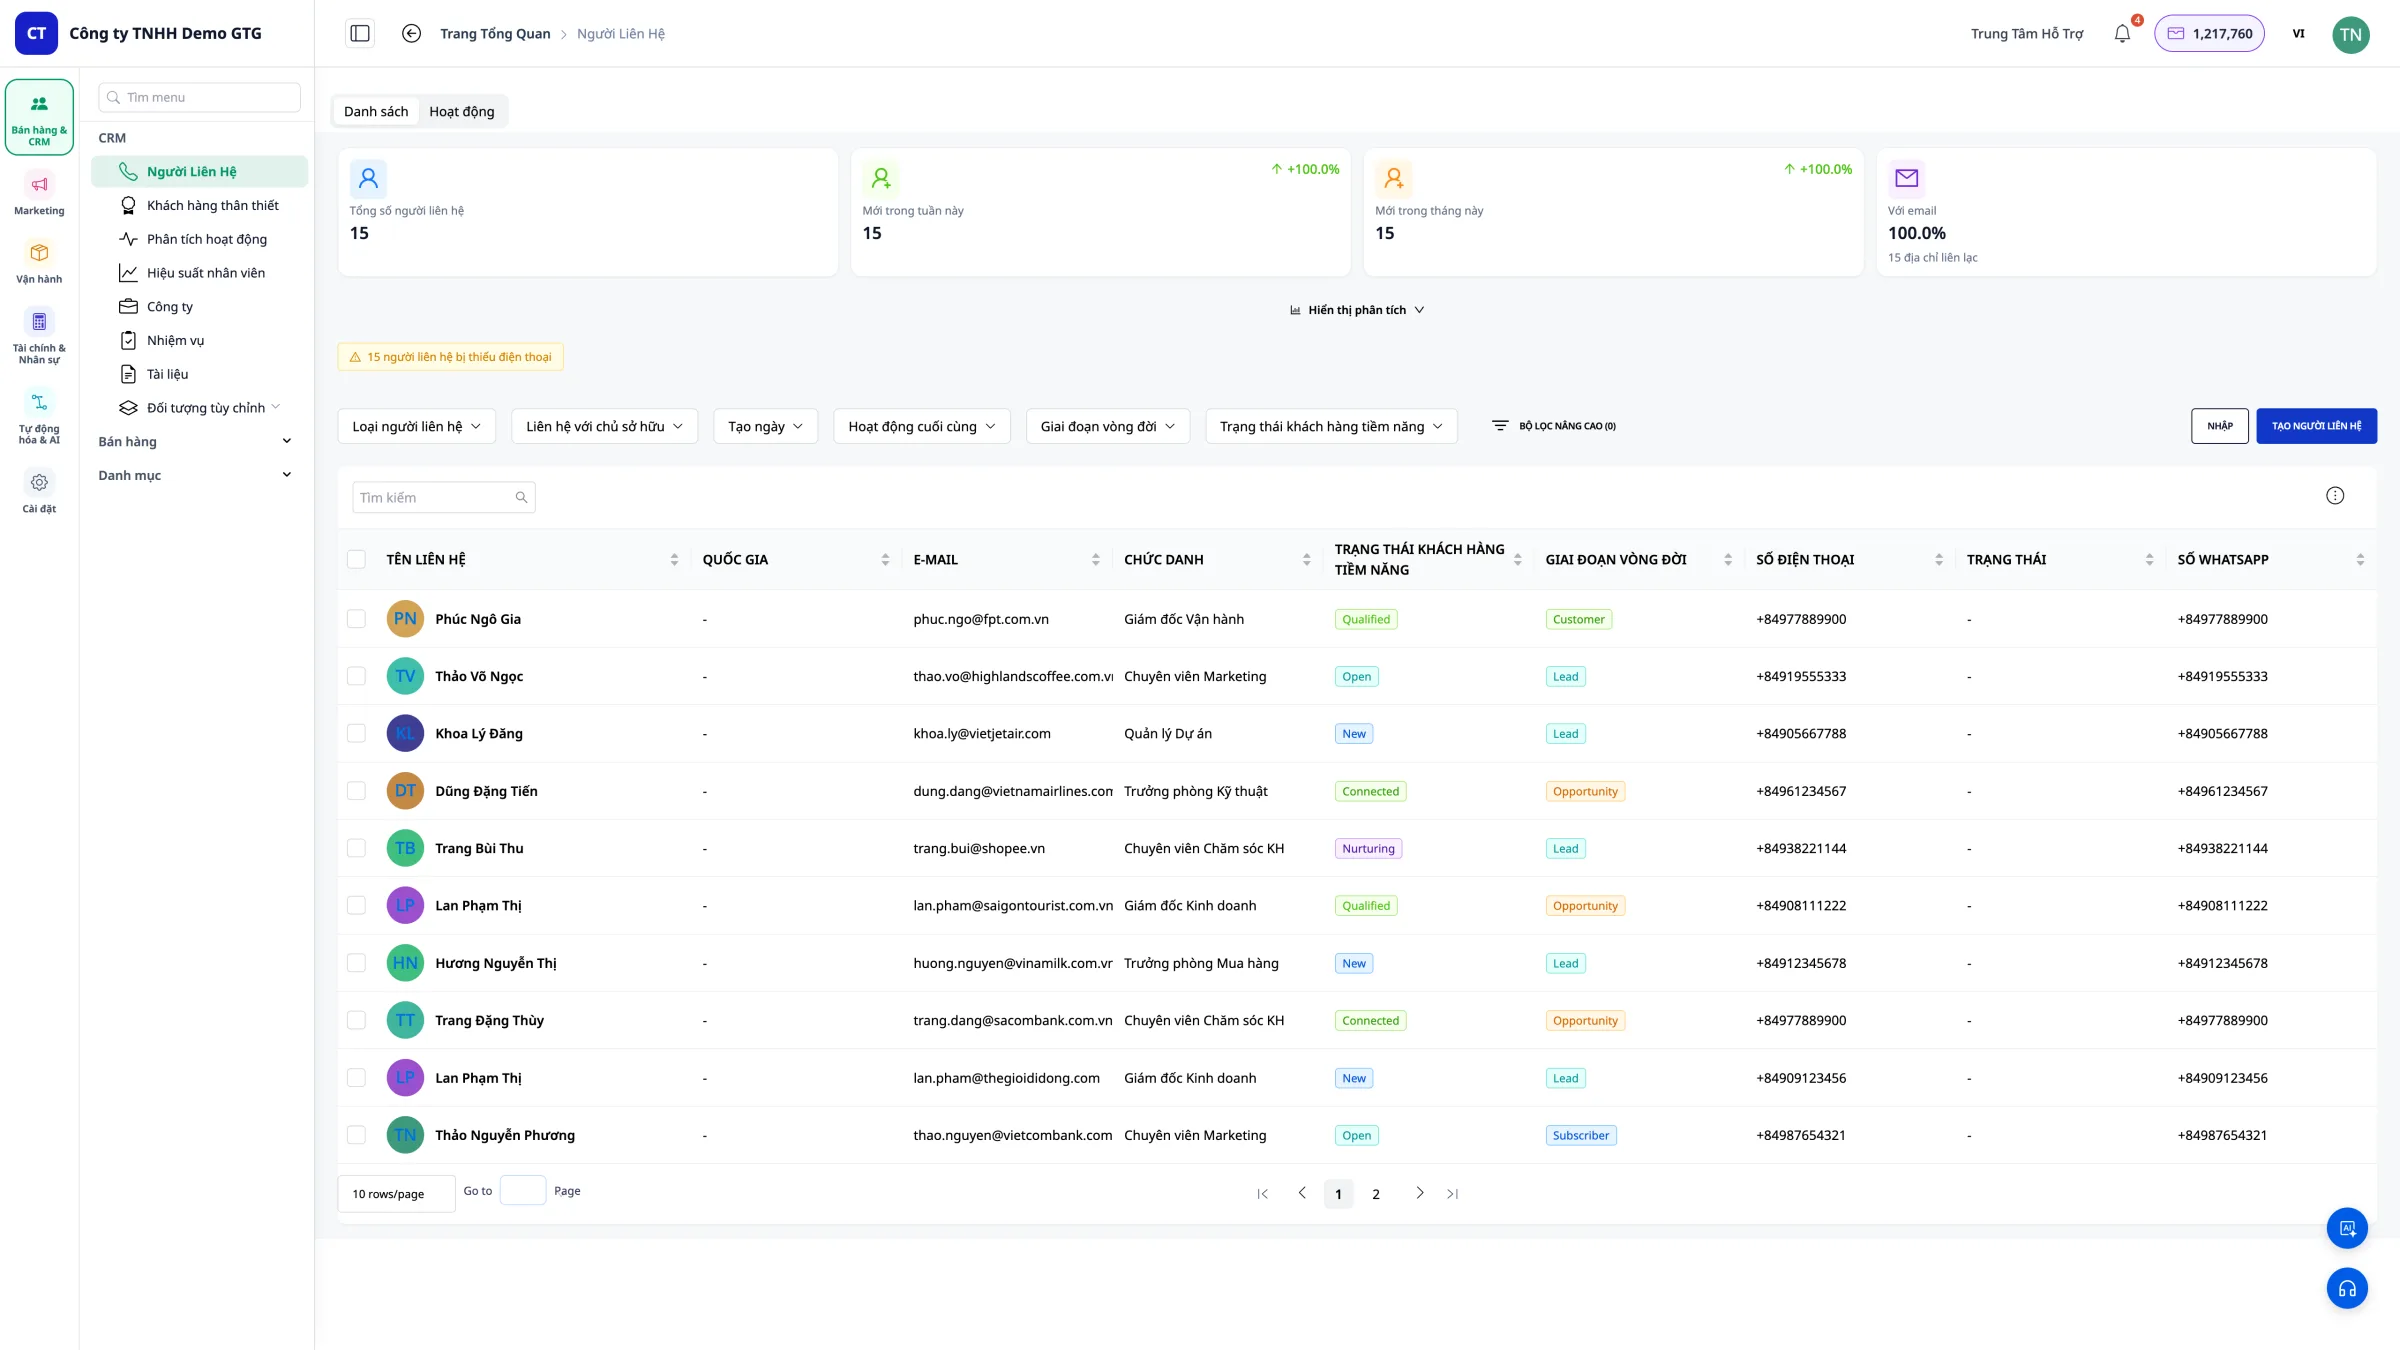
Step 1: Click "Create contact"
Click the "Create Contact" button in the upper right corner of the screen.
Step 2: Enter the information
Fill in the customer information: - Full Name (required) - Email (required) - Phone Number - Address - Country - Notes
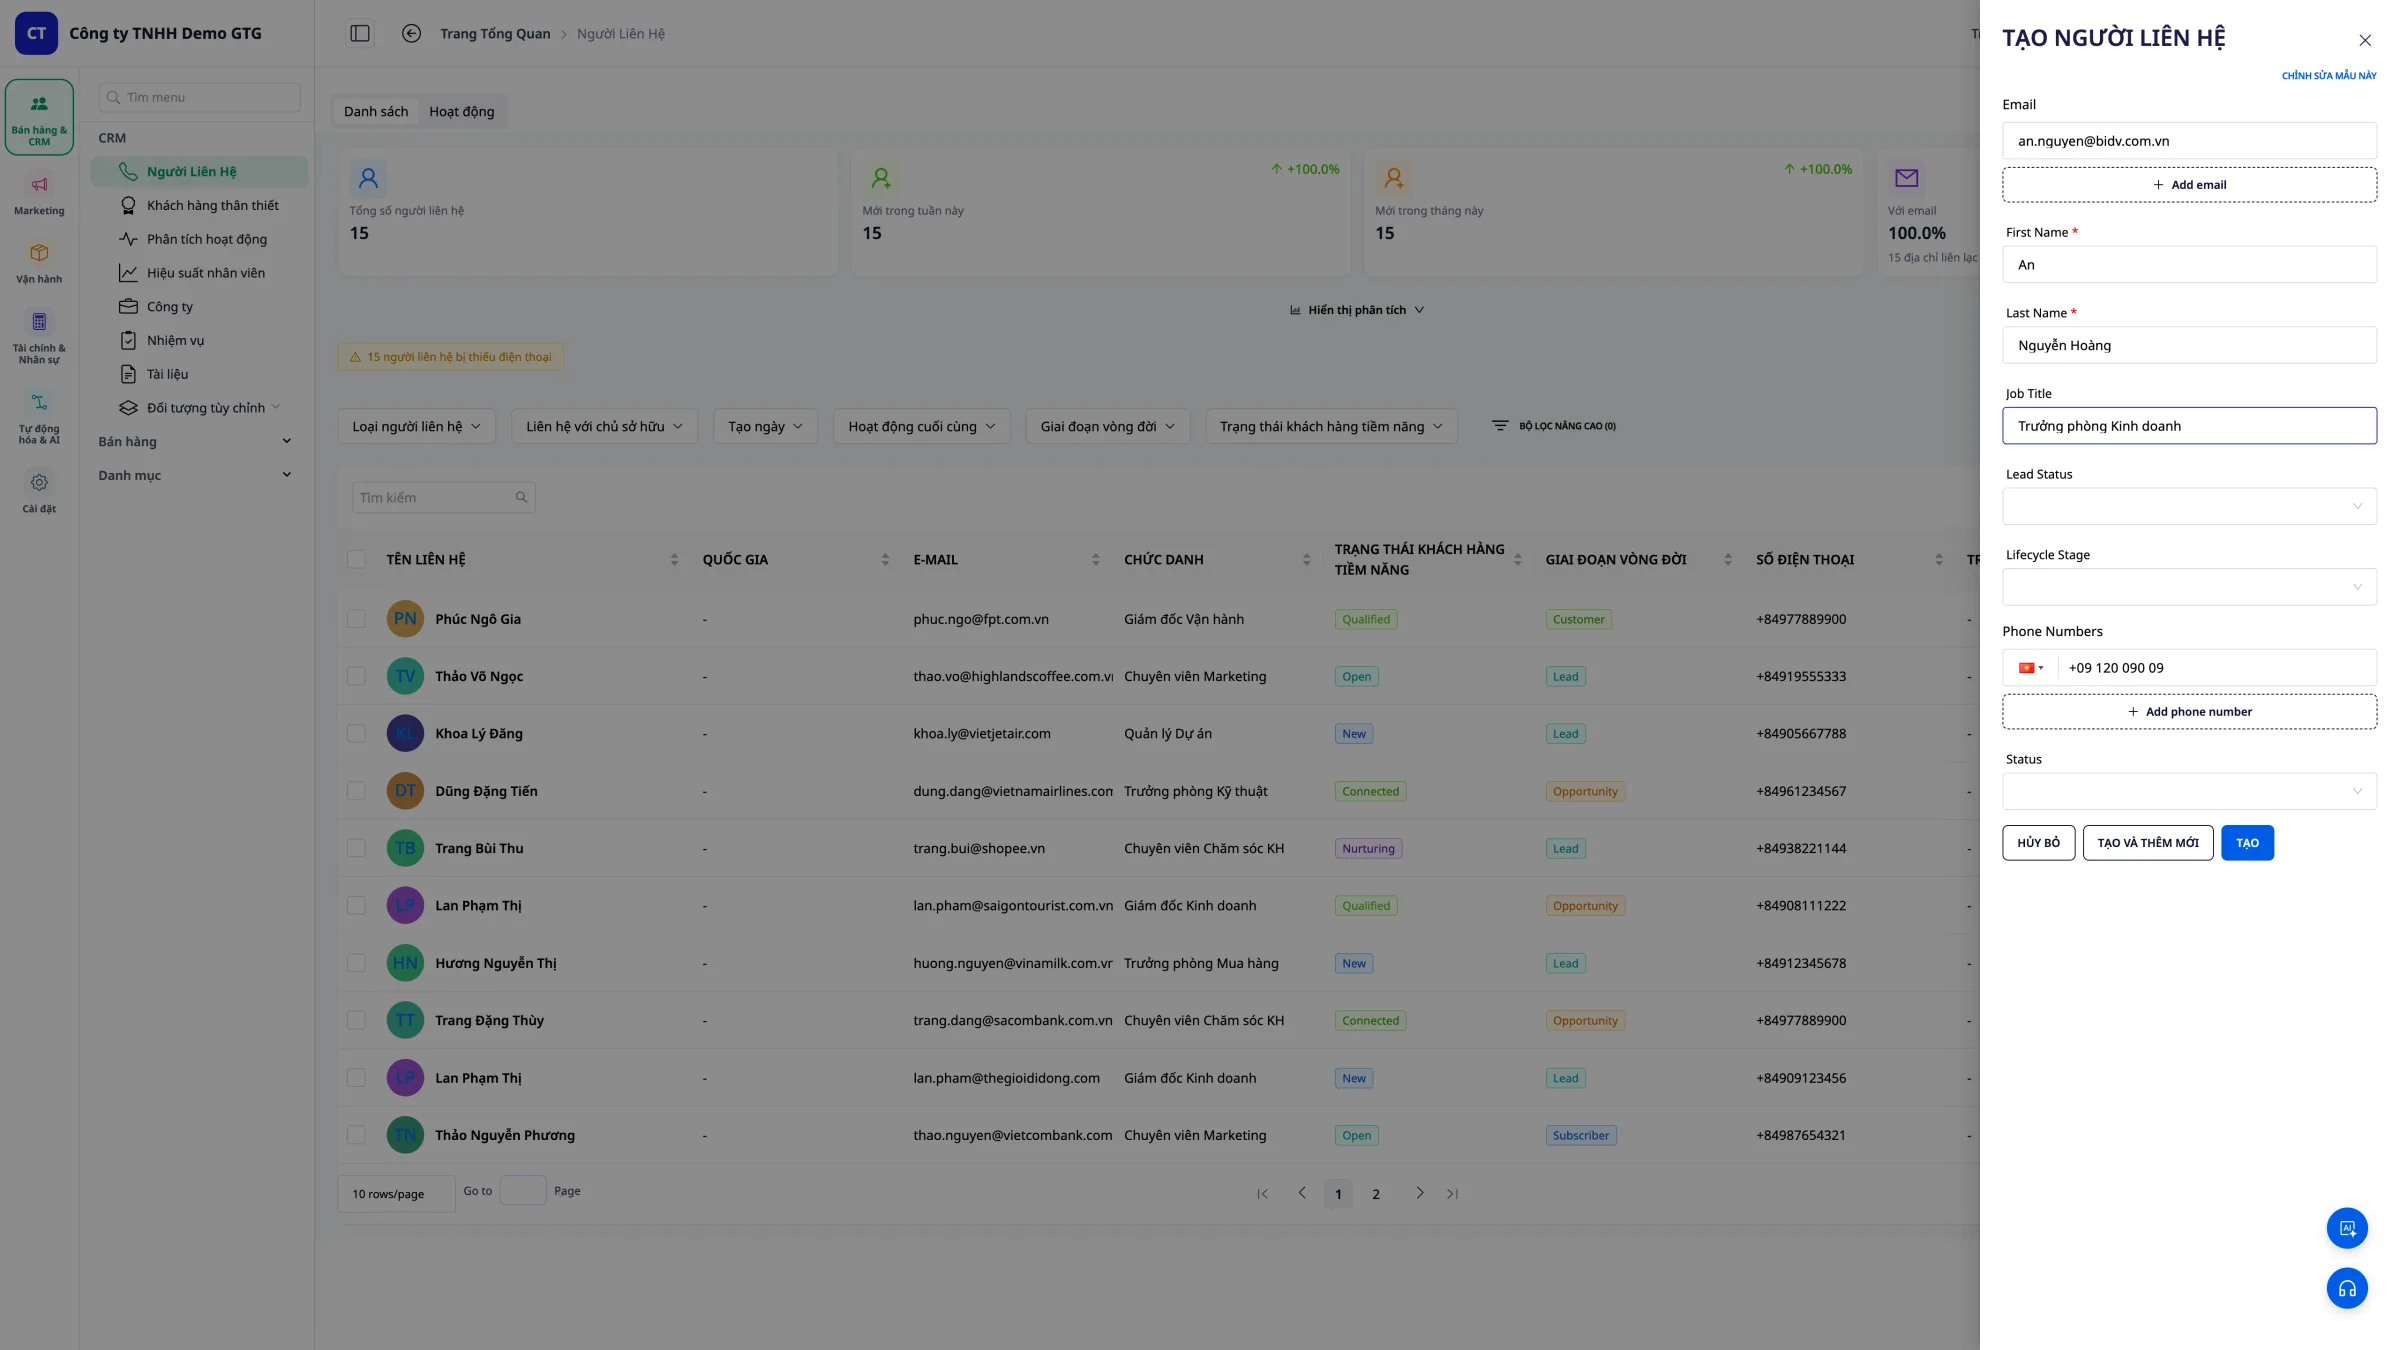 Tip: The more detailed you are, the easier it will be to manage later!
Step 3: Save the contact
Click "Save" to add the contact to the list.
4. Import data from CSV
When is importing necessary?
Once you have the customer data file (from Excel, a legacy system, etc.) available.
Step 1: Prepare the CSV file
The CSV file must be in the correct format:
| Required column | Describe |
|---|---|
| Email address | |
| first Name | Name |
| lastName | Surname |
| phone | Phone number |
| address | Address |
Step 2: Click "Import data"
Click the "Import Data" button on the toolbar.
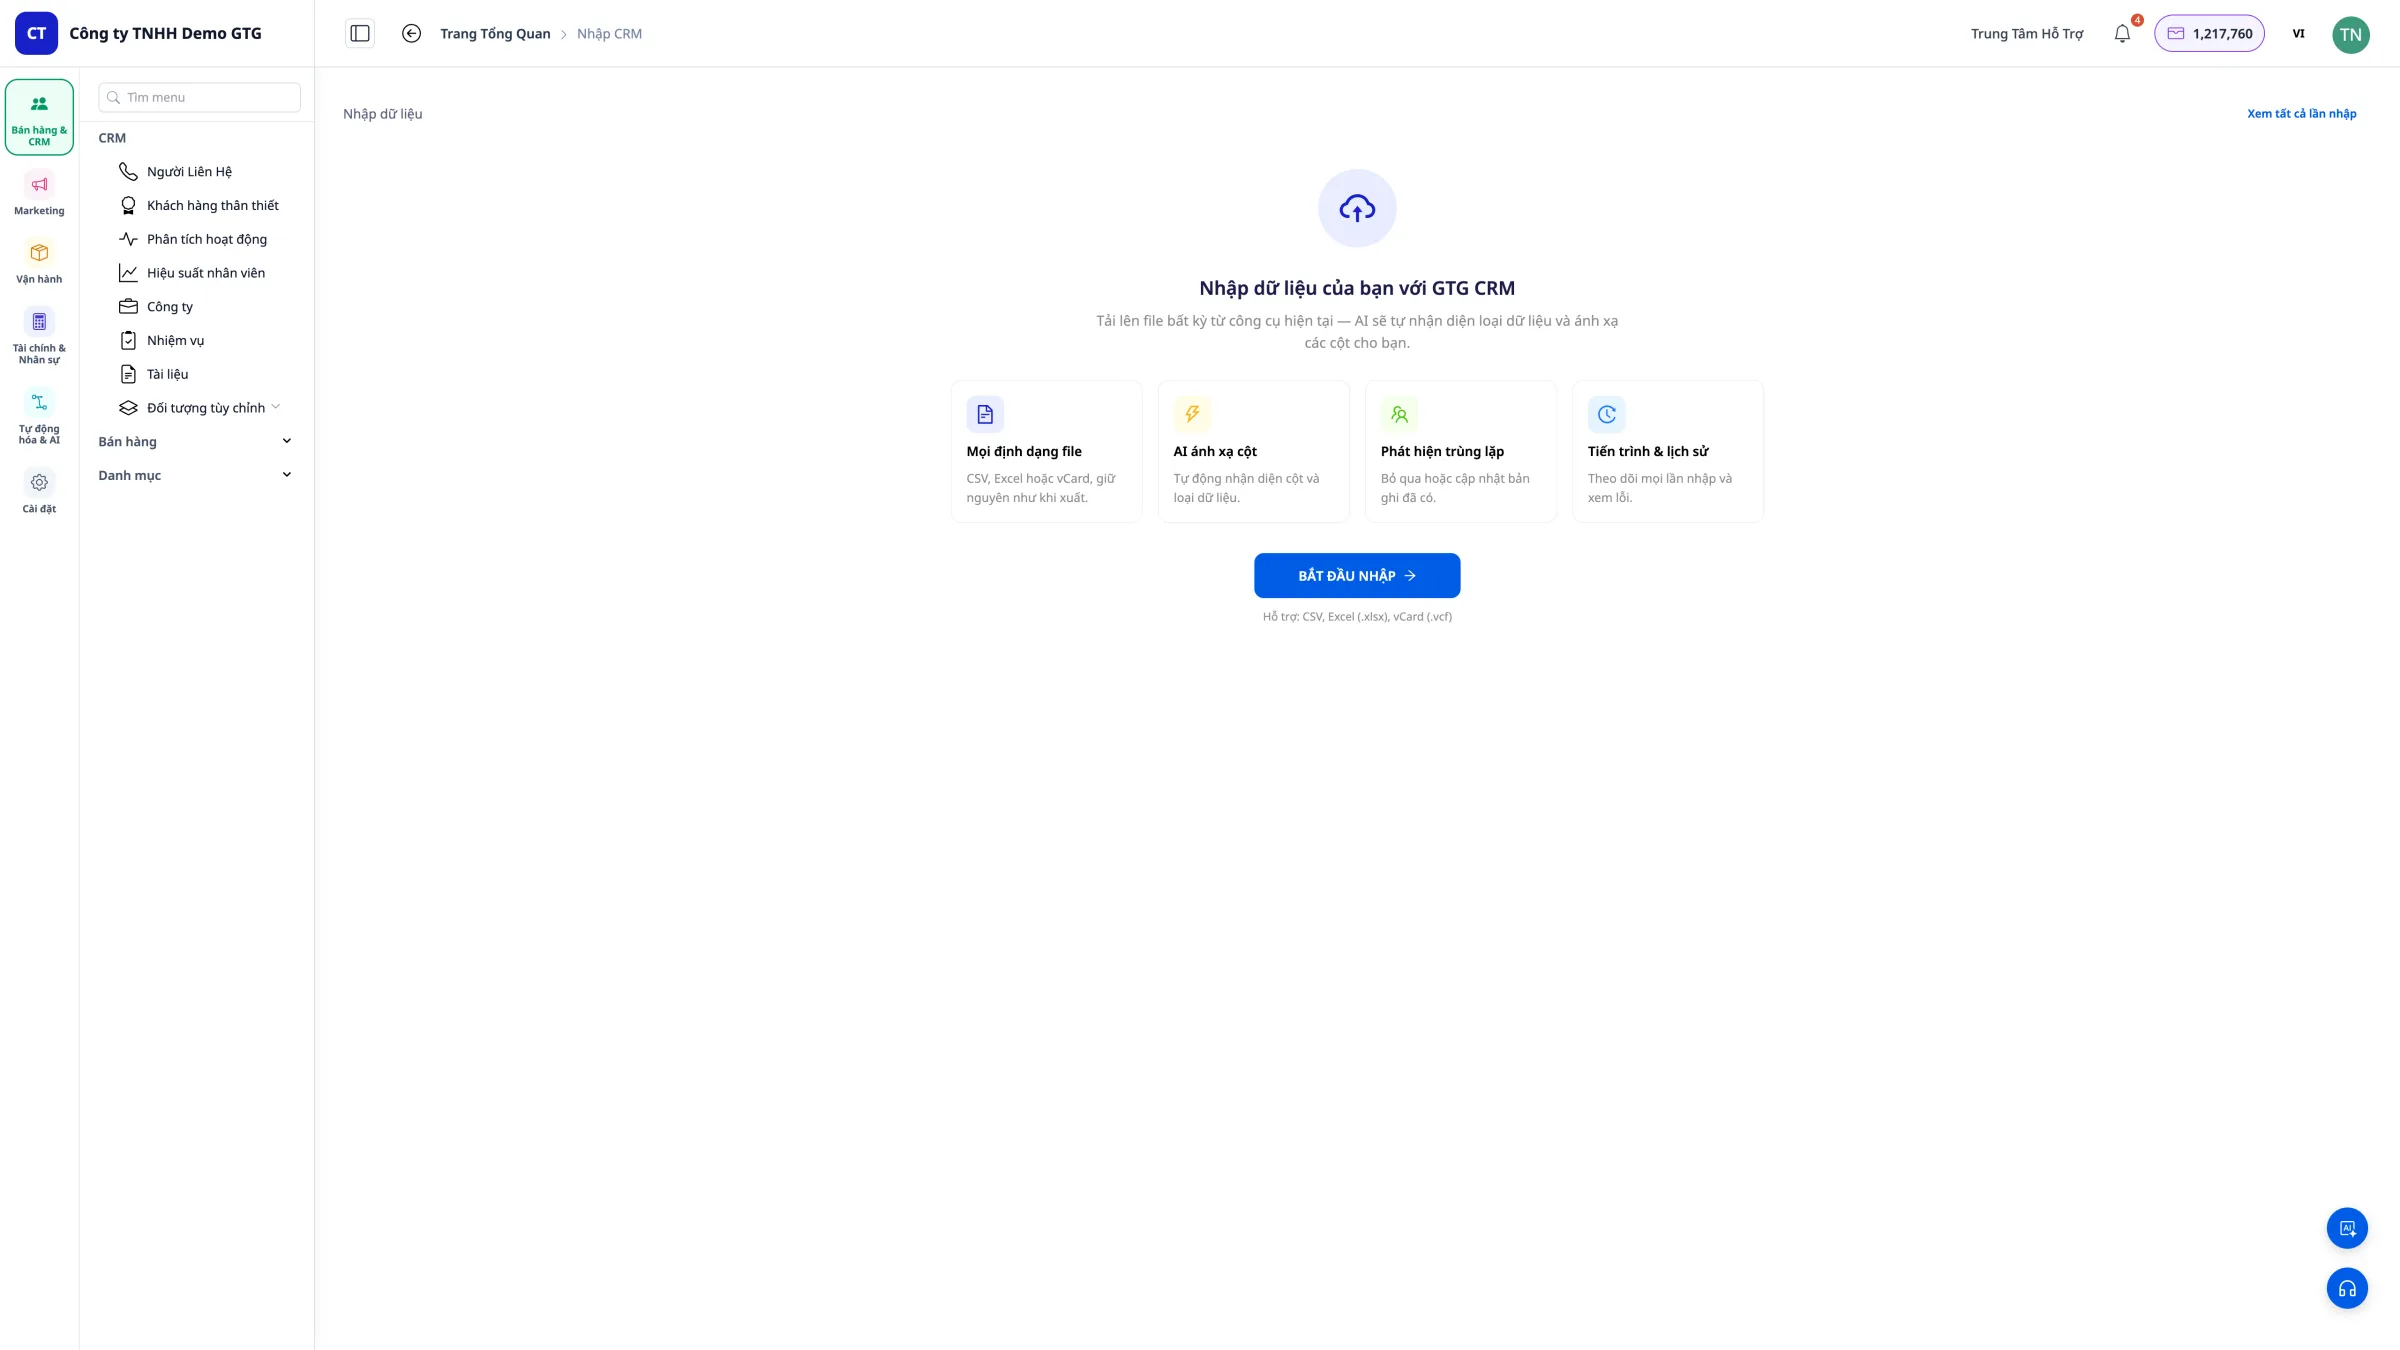
Step 3: Select the CSV file
Click "Select file" and choose the prepared CSV file.
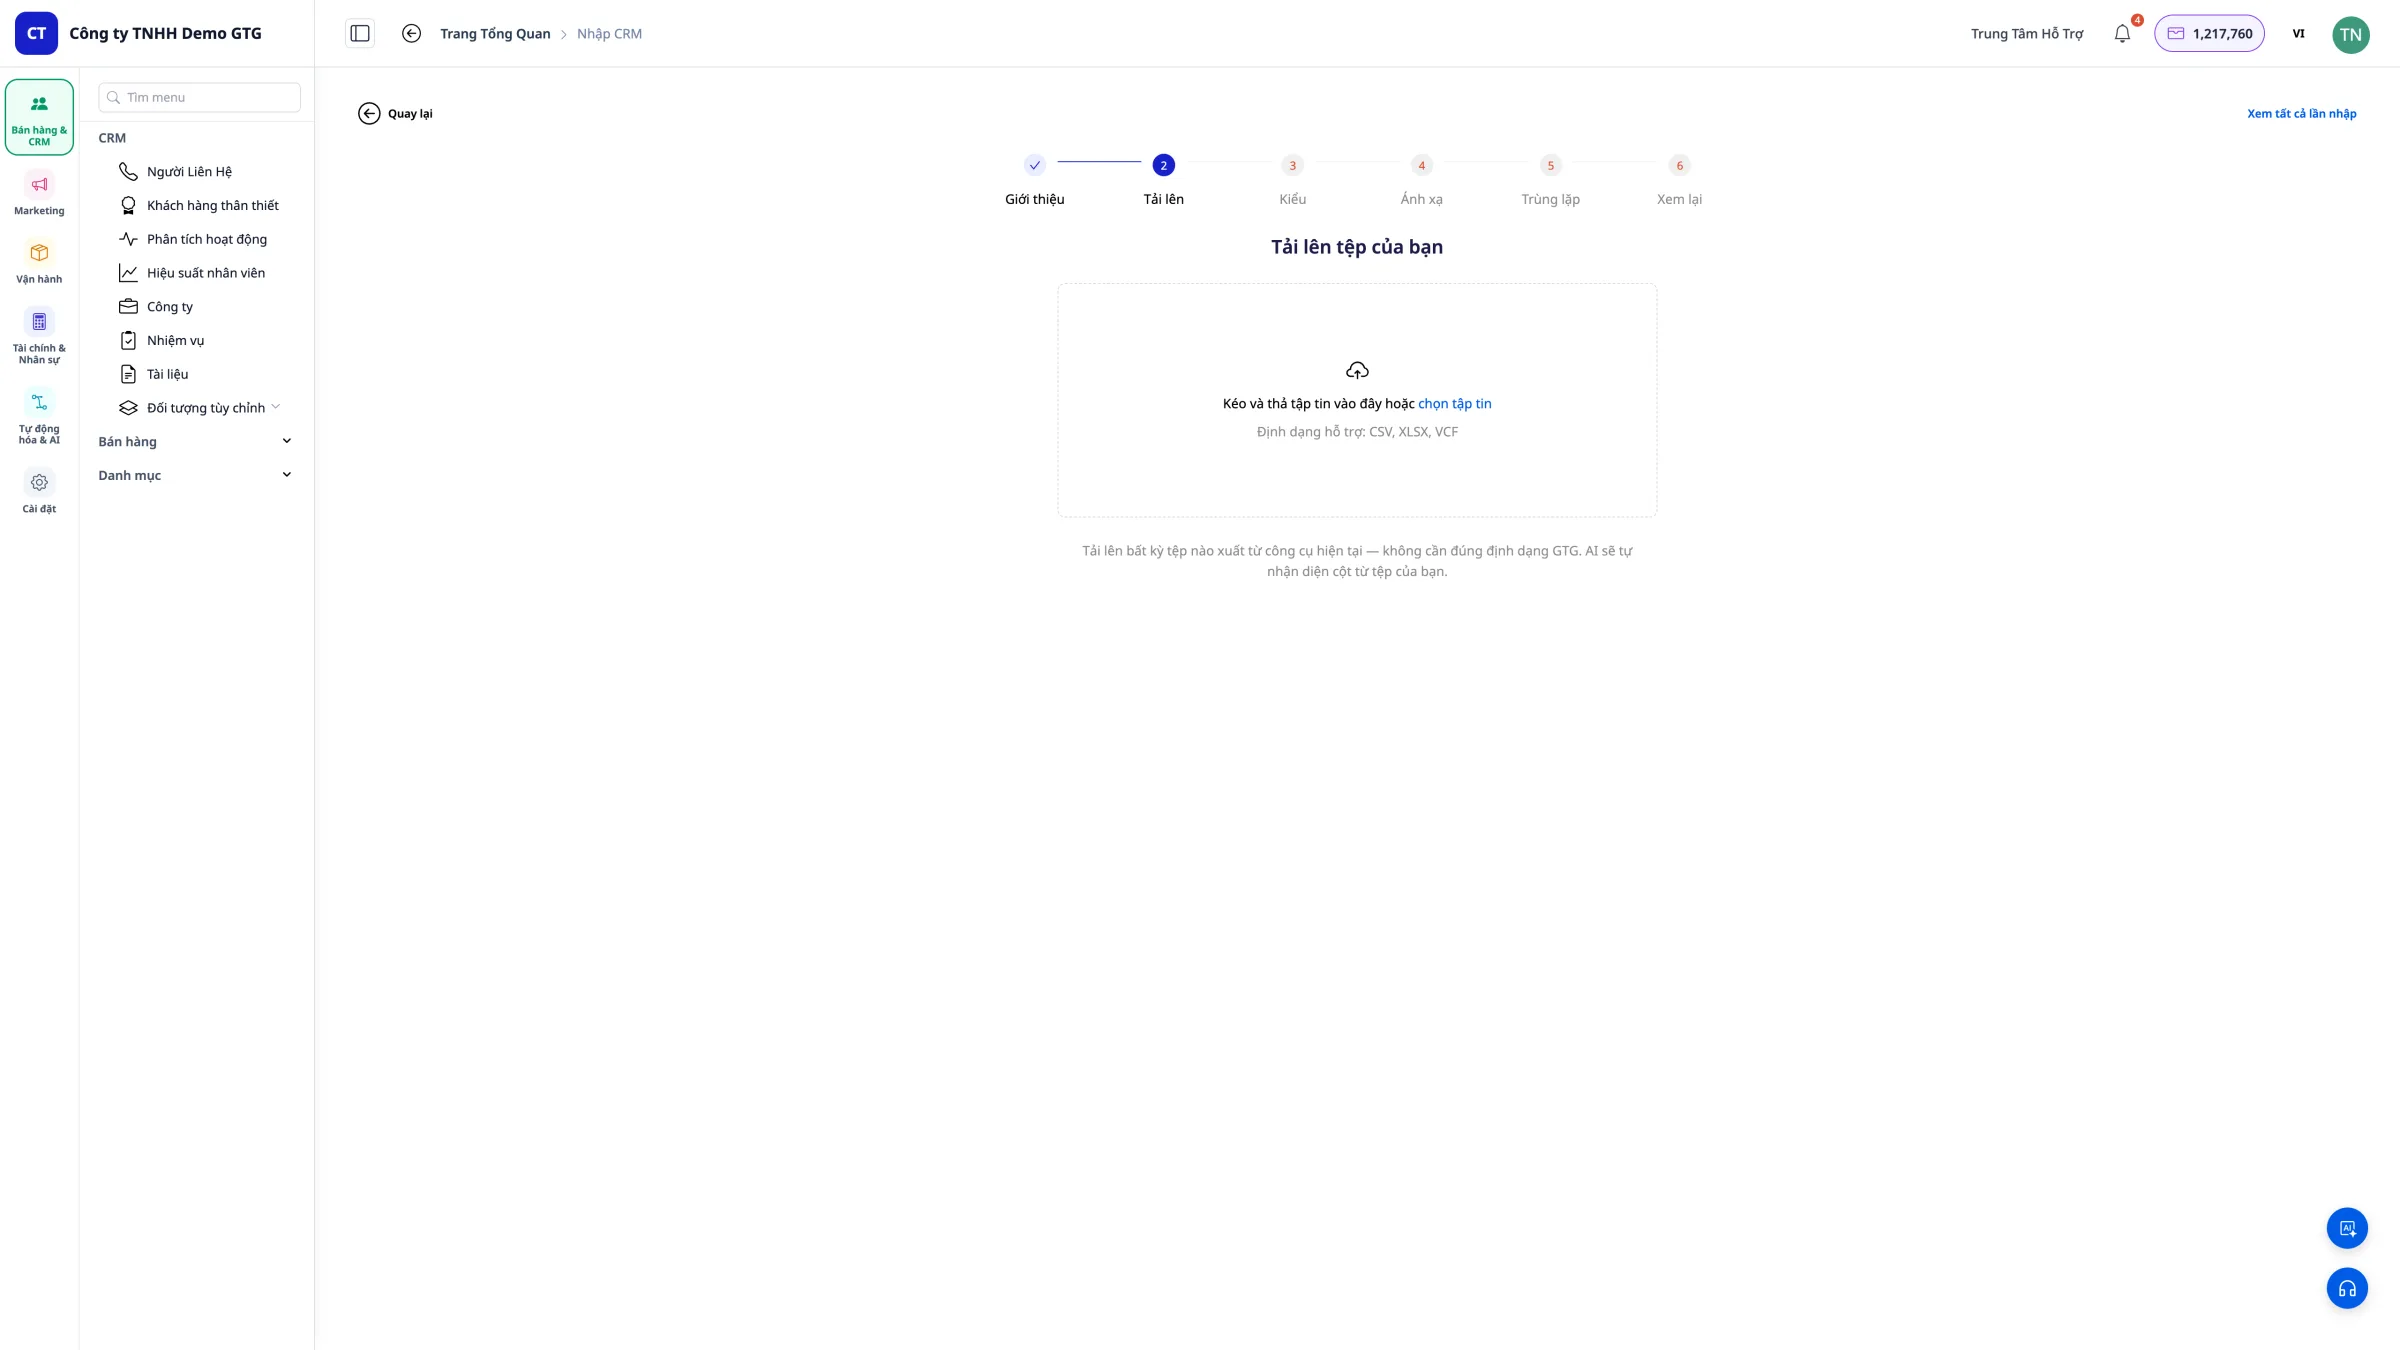
Step 4: Confirm Import
Review the data and click "Import" to complete the process.
Note: The email column is REQUIRED in the CSV file.
5. Customize the Display Columns
Step 1: Open column settings
Click "Edit column" on the toolbar. 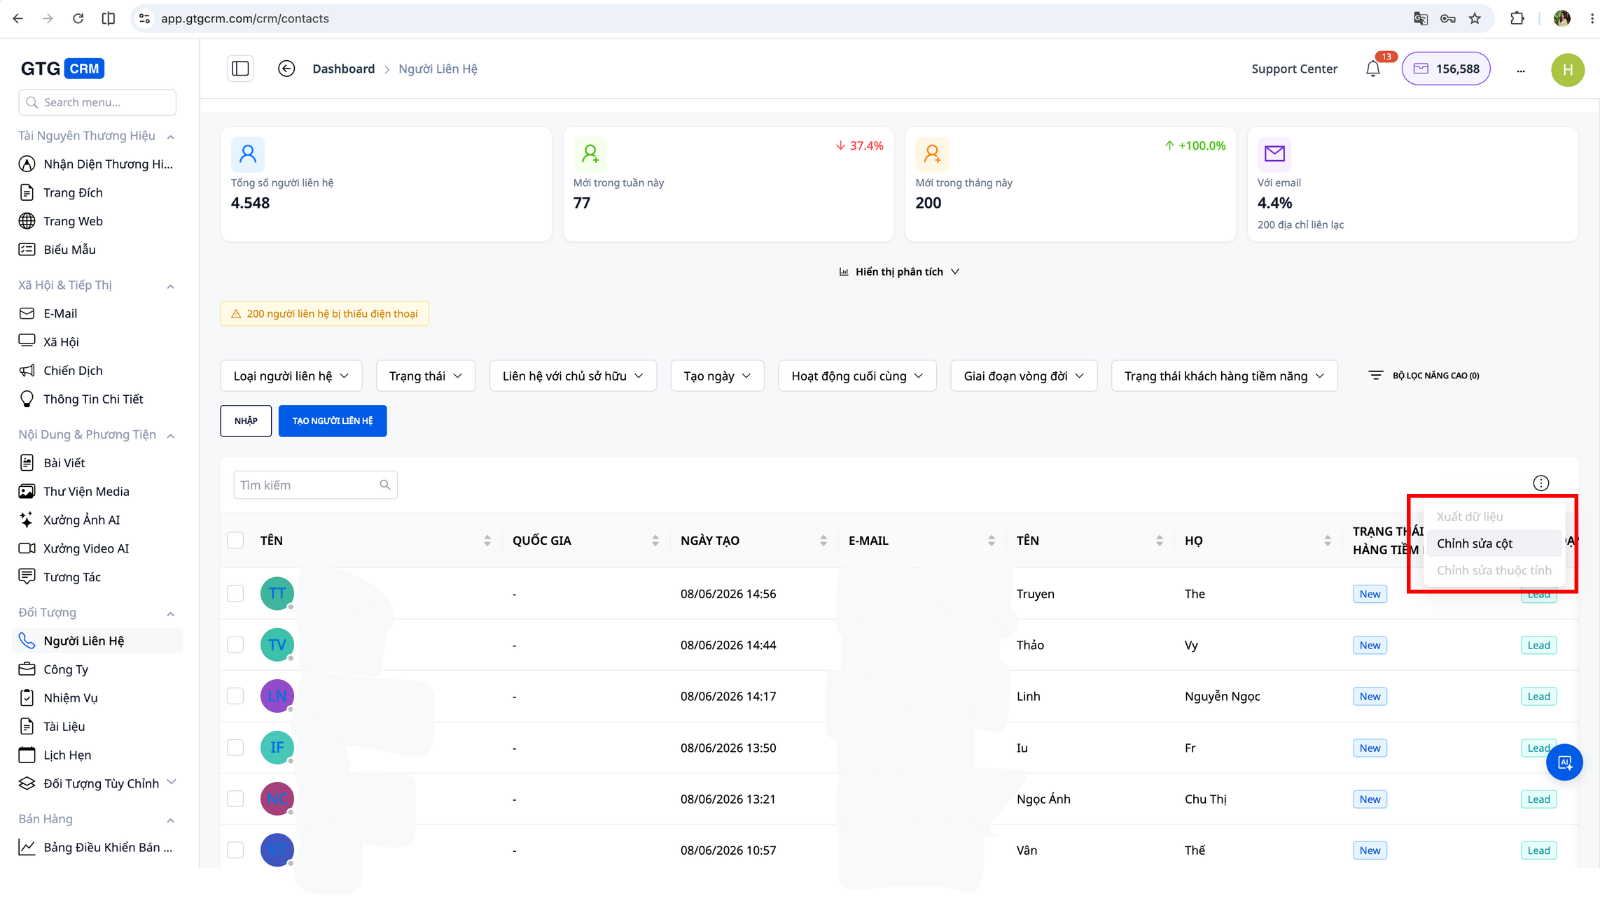
Step 2: Add a new column
Select the columns you want to display: - Check the columns you want to display - Uncheck columns you don't need
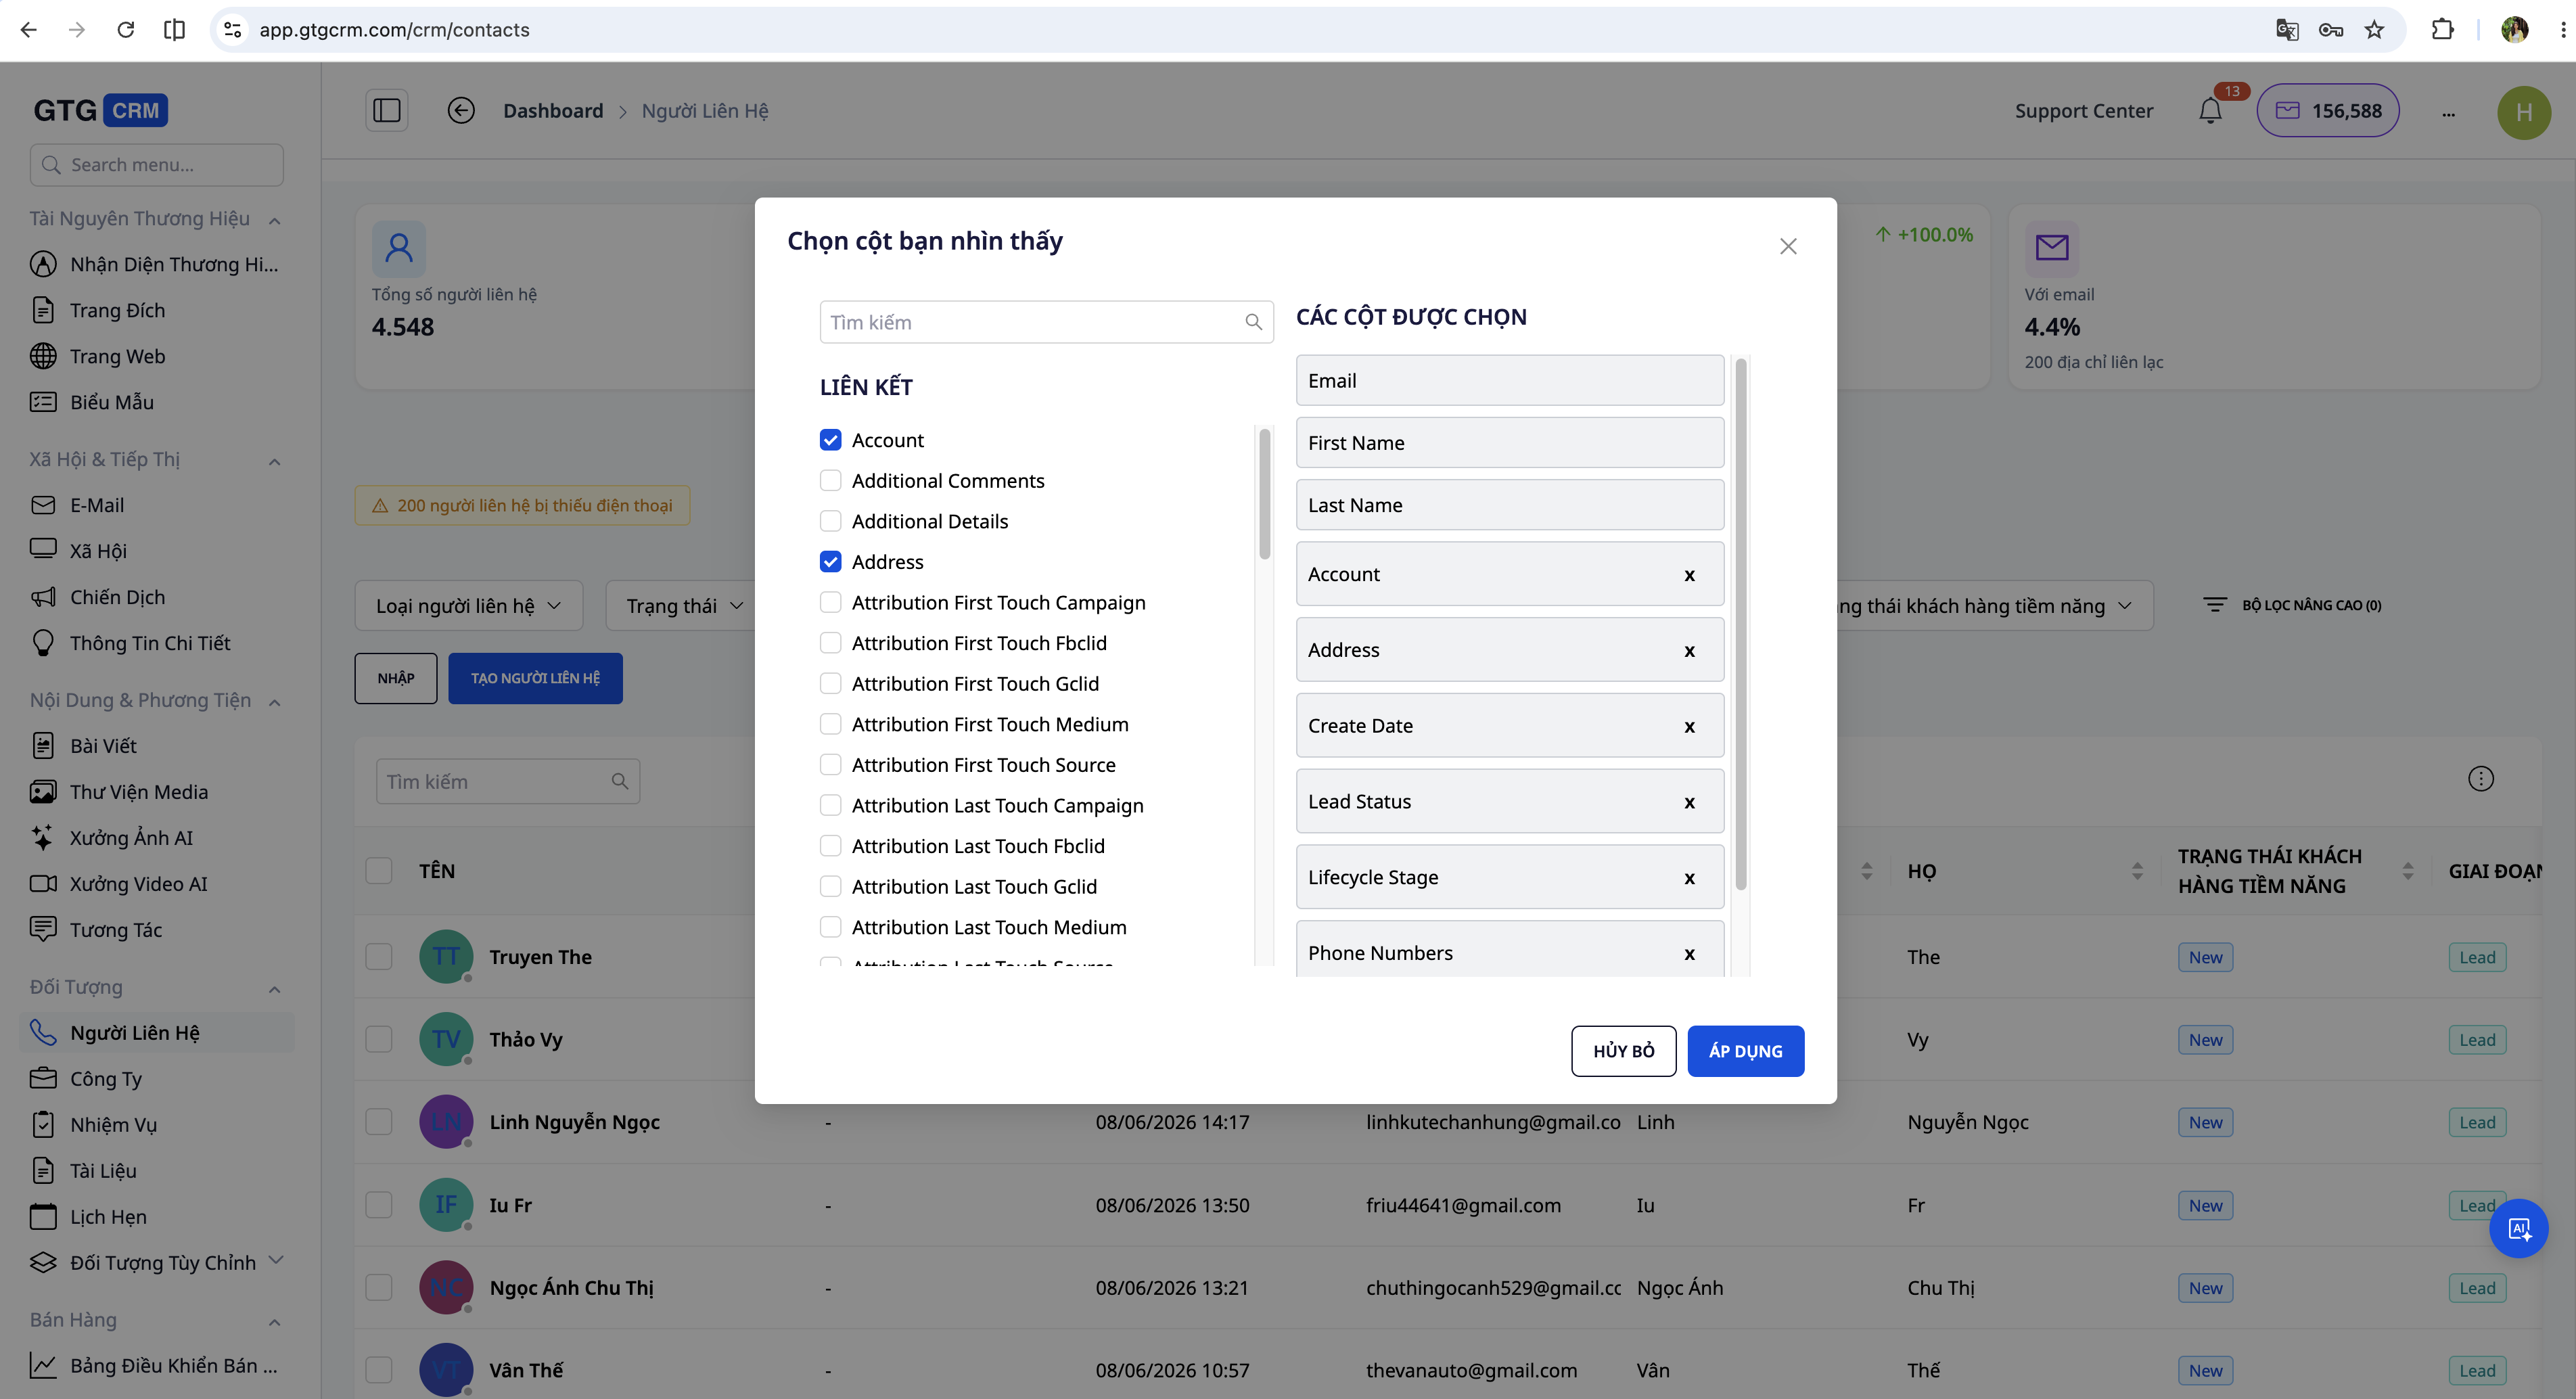
Step 3: Save settings
Click "Save" to apply the changes.
6. Use Filters
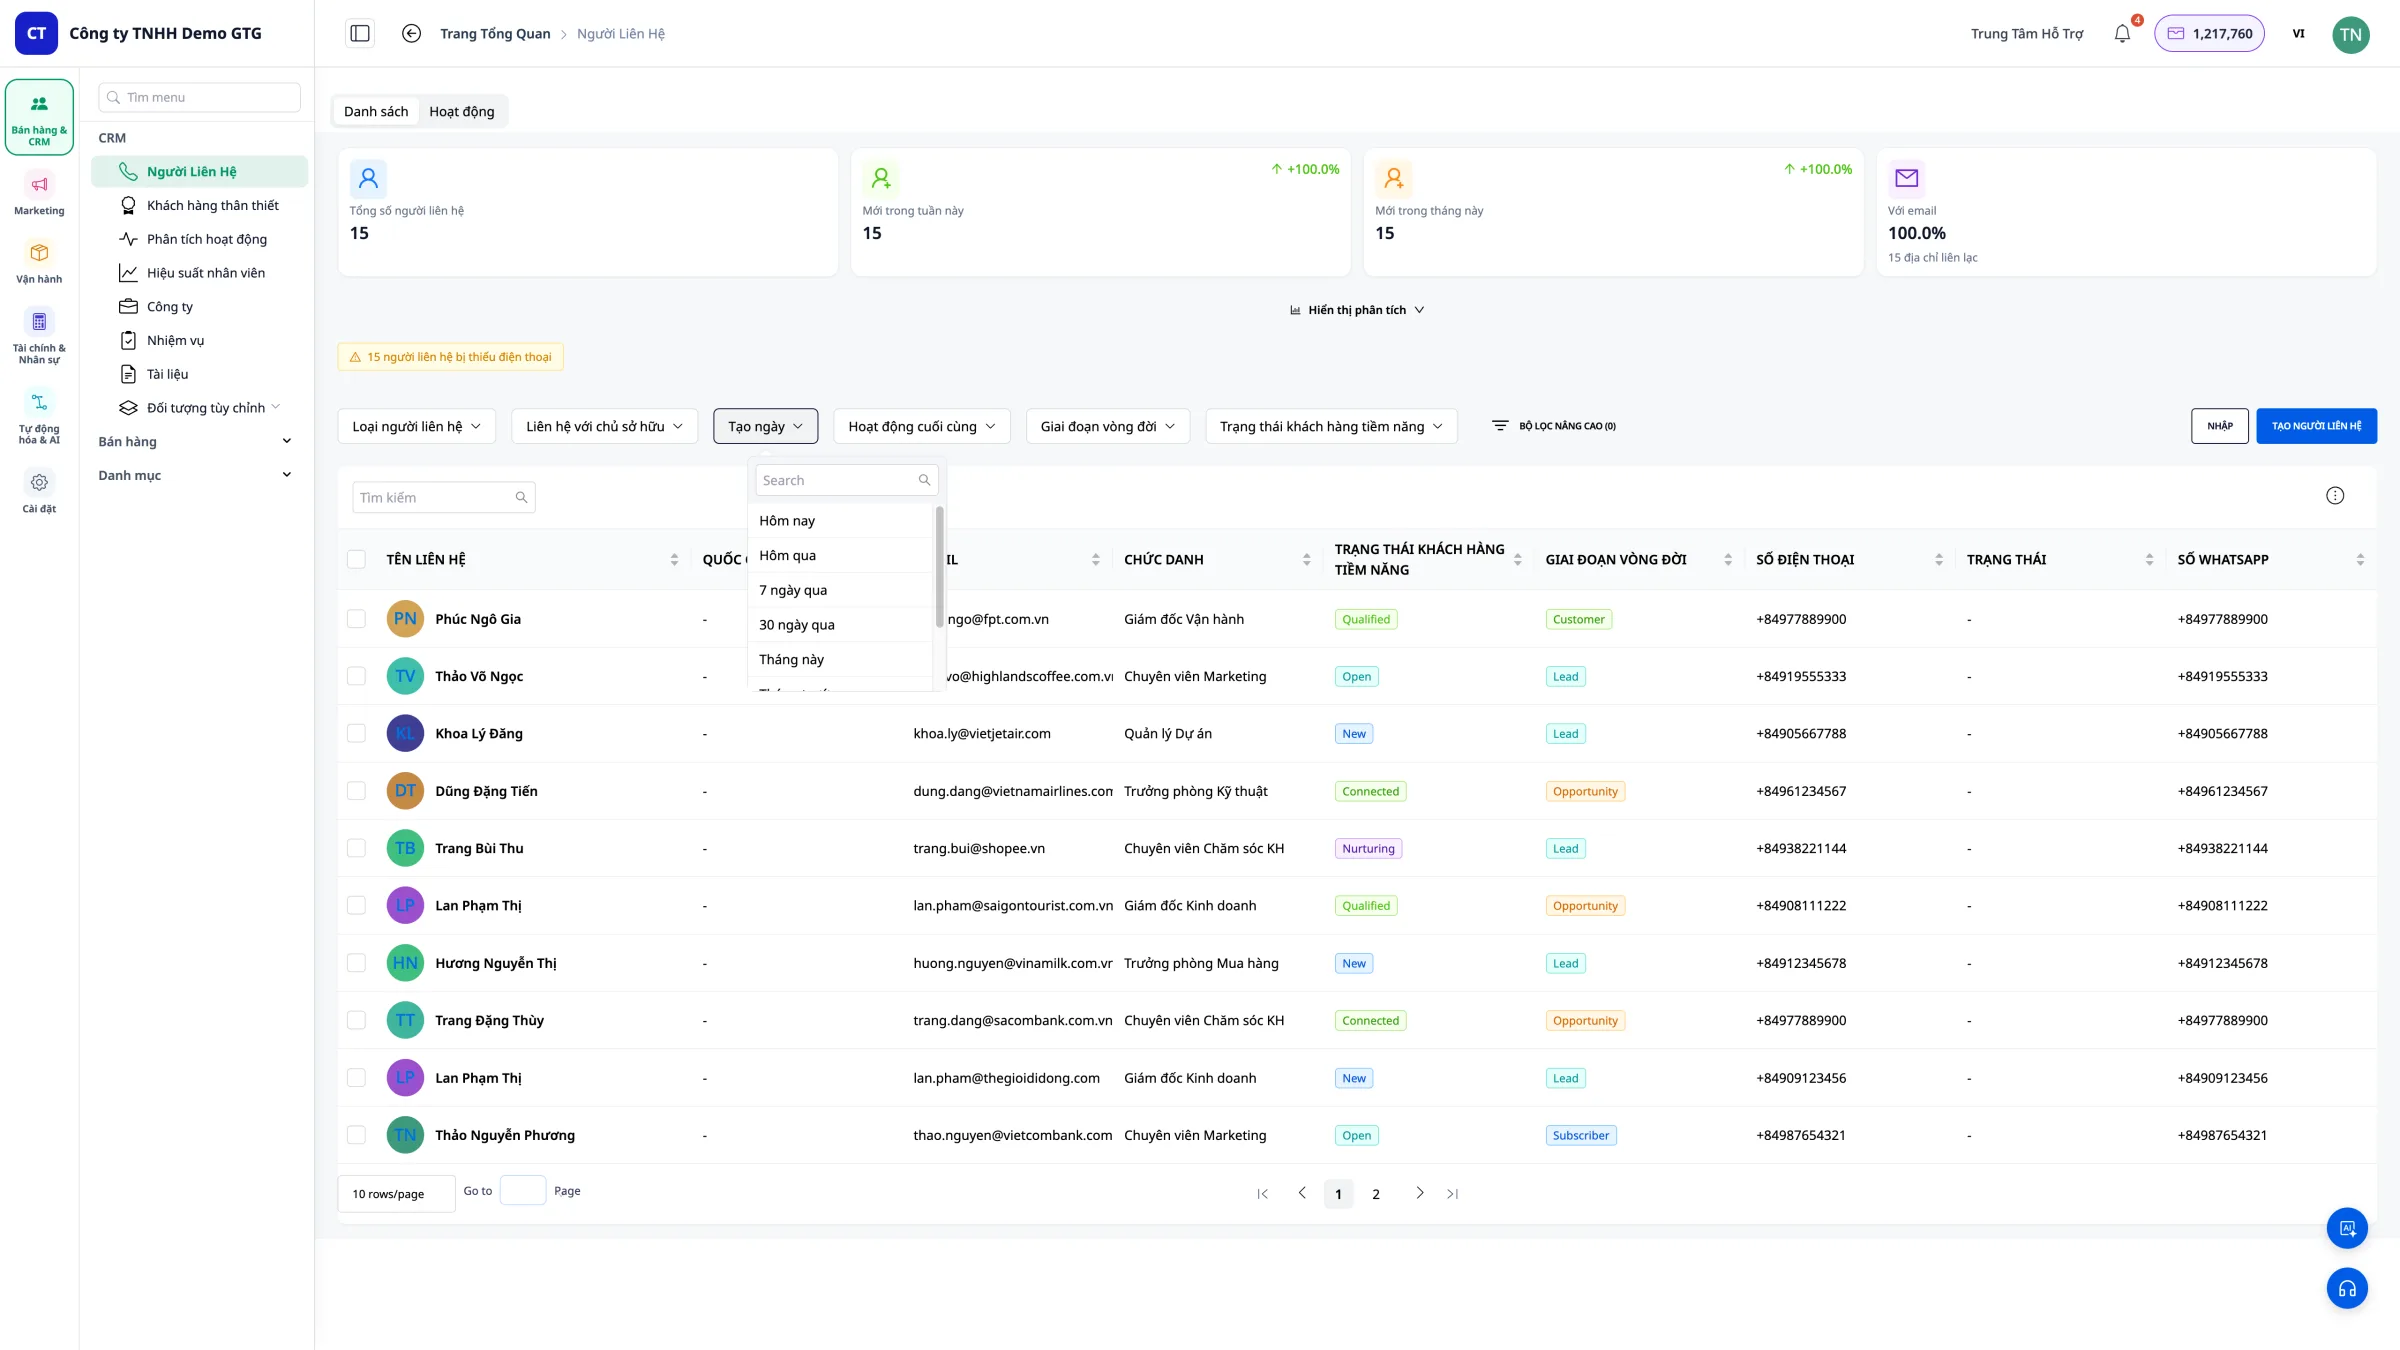
6.1 Filter by Date
View customers by time period: - Today - New customers today - Yesterday - Customers yesterday - Last 7 days - This month - Custom - Select time period
6.2 Filtering by State
- New - New Guest
- In Progress
- Converted
- Lost - Lost customers
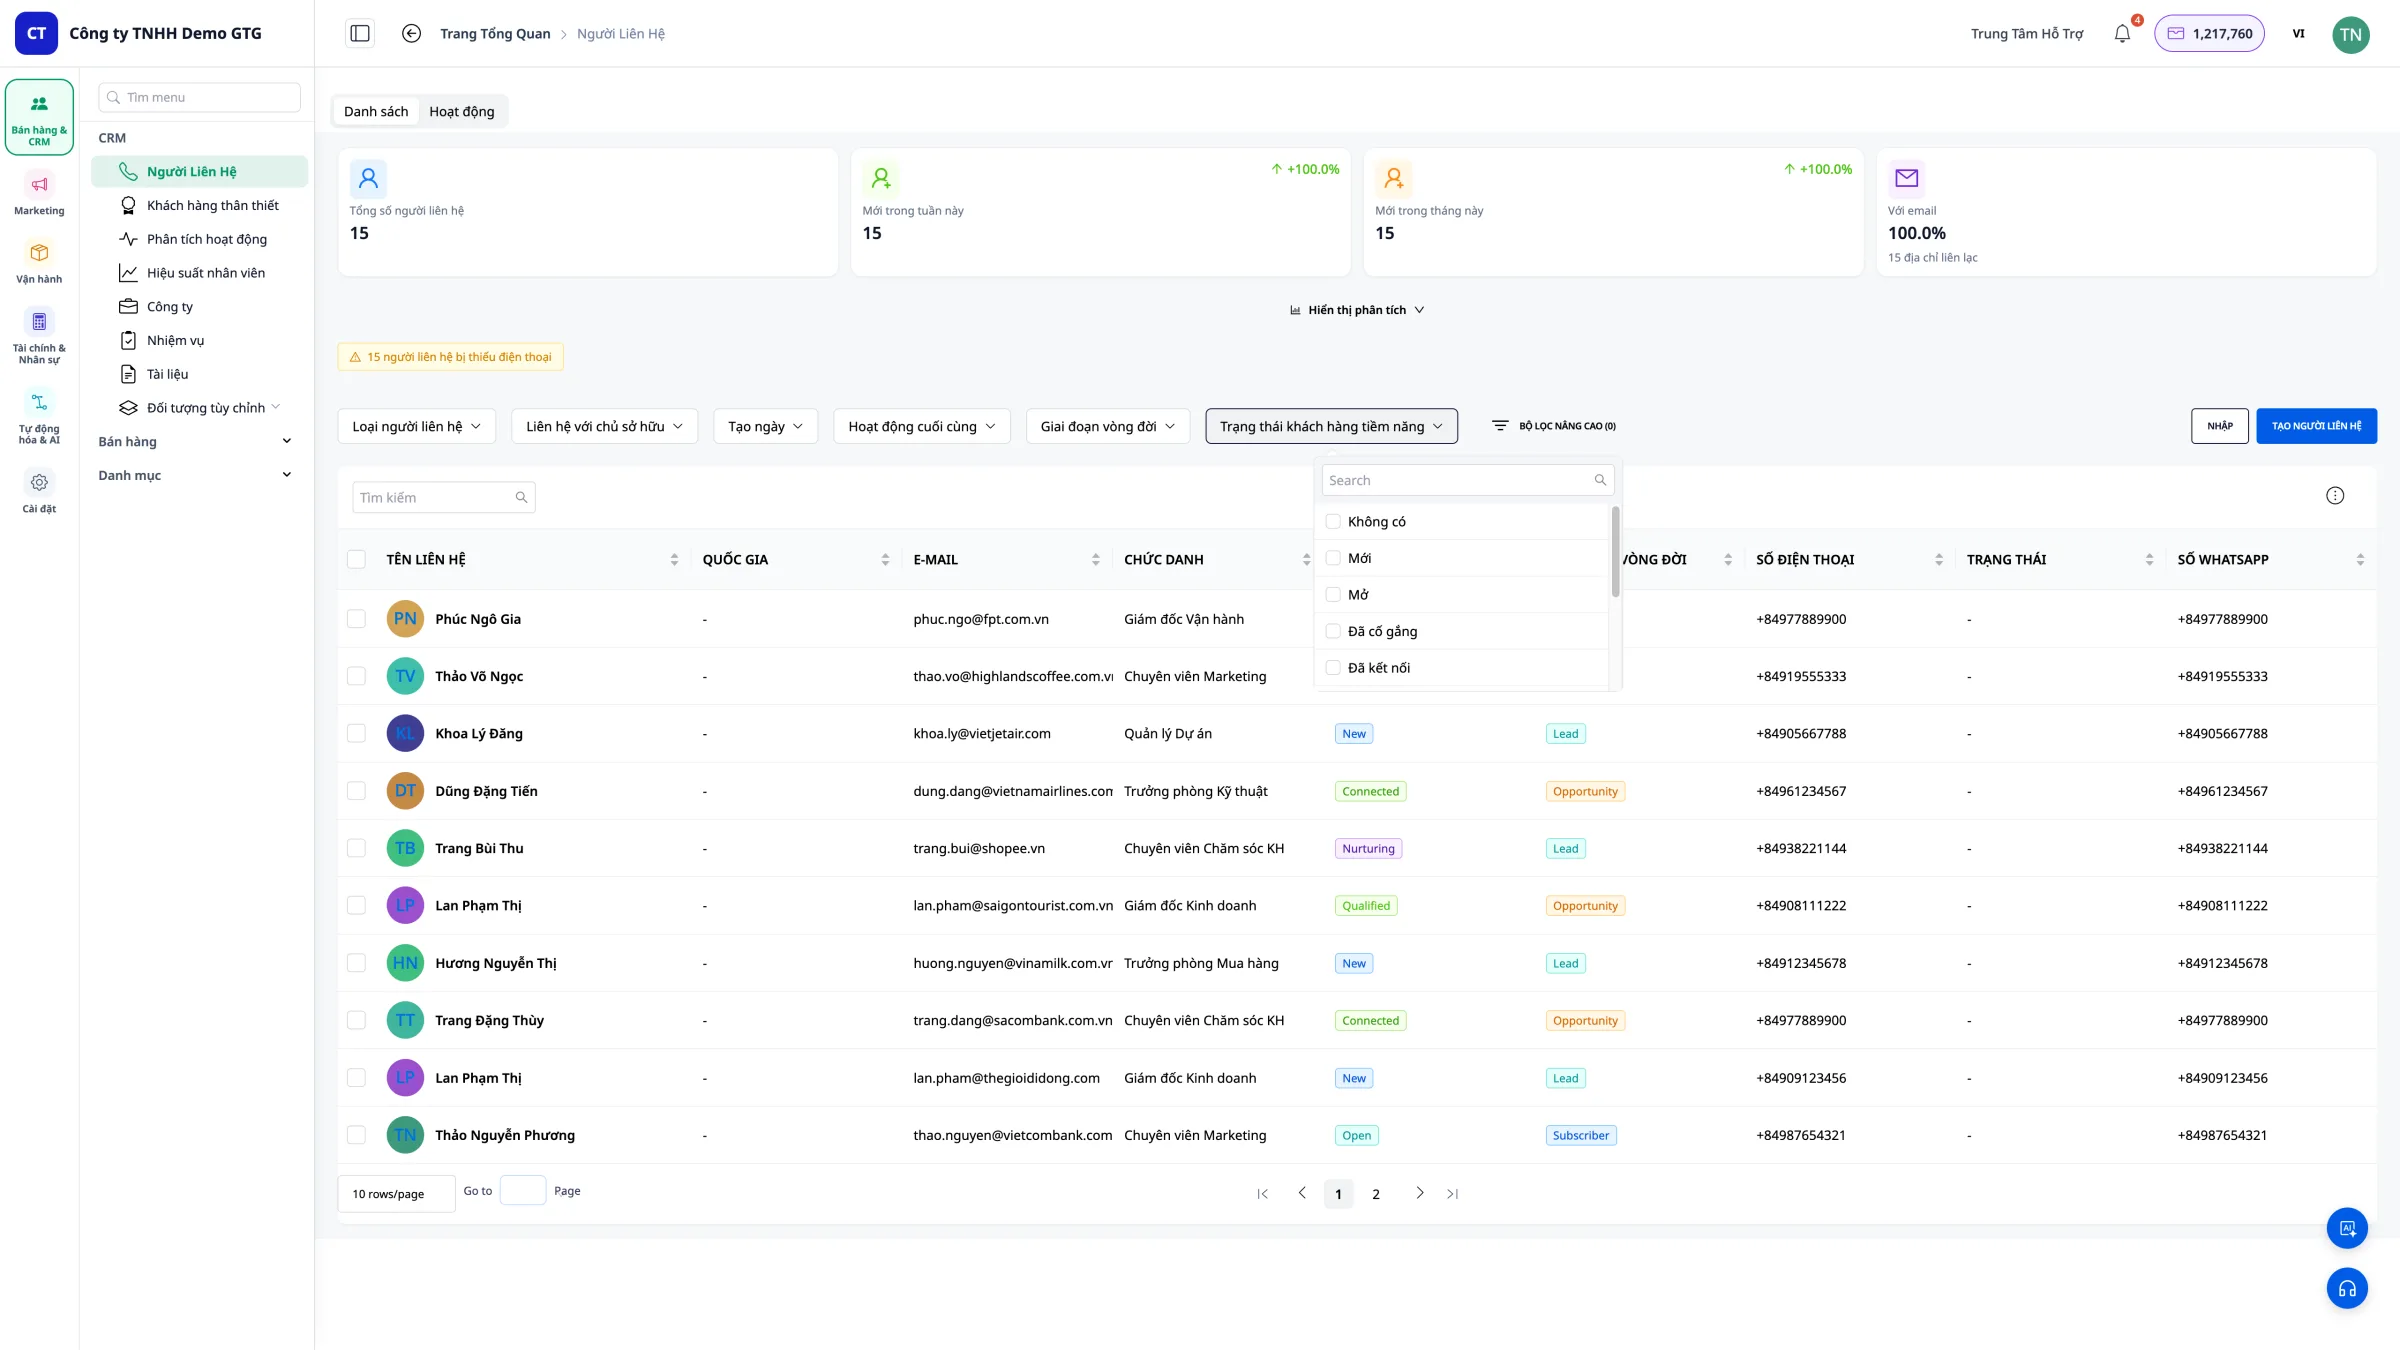
6.3 Advanced Filters
Step 1: Click "Advanced Filters"
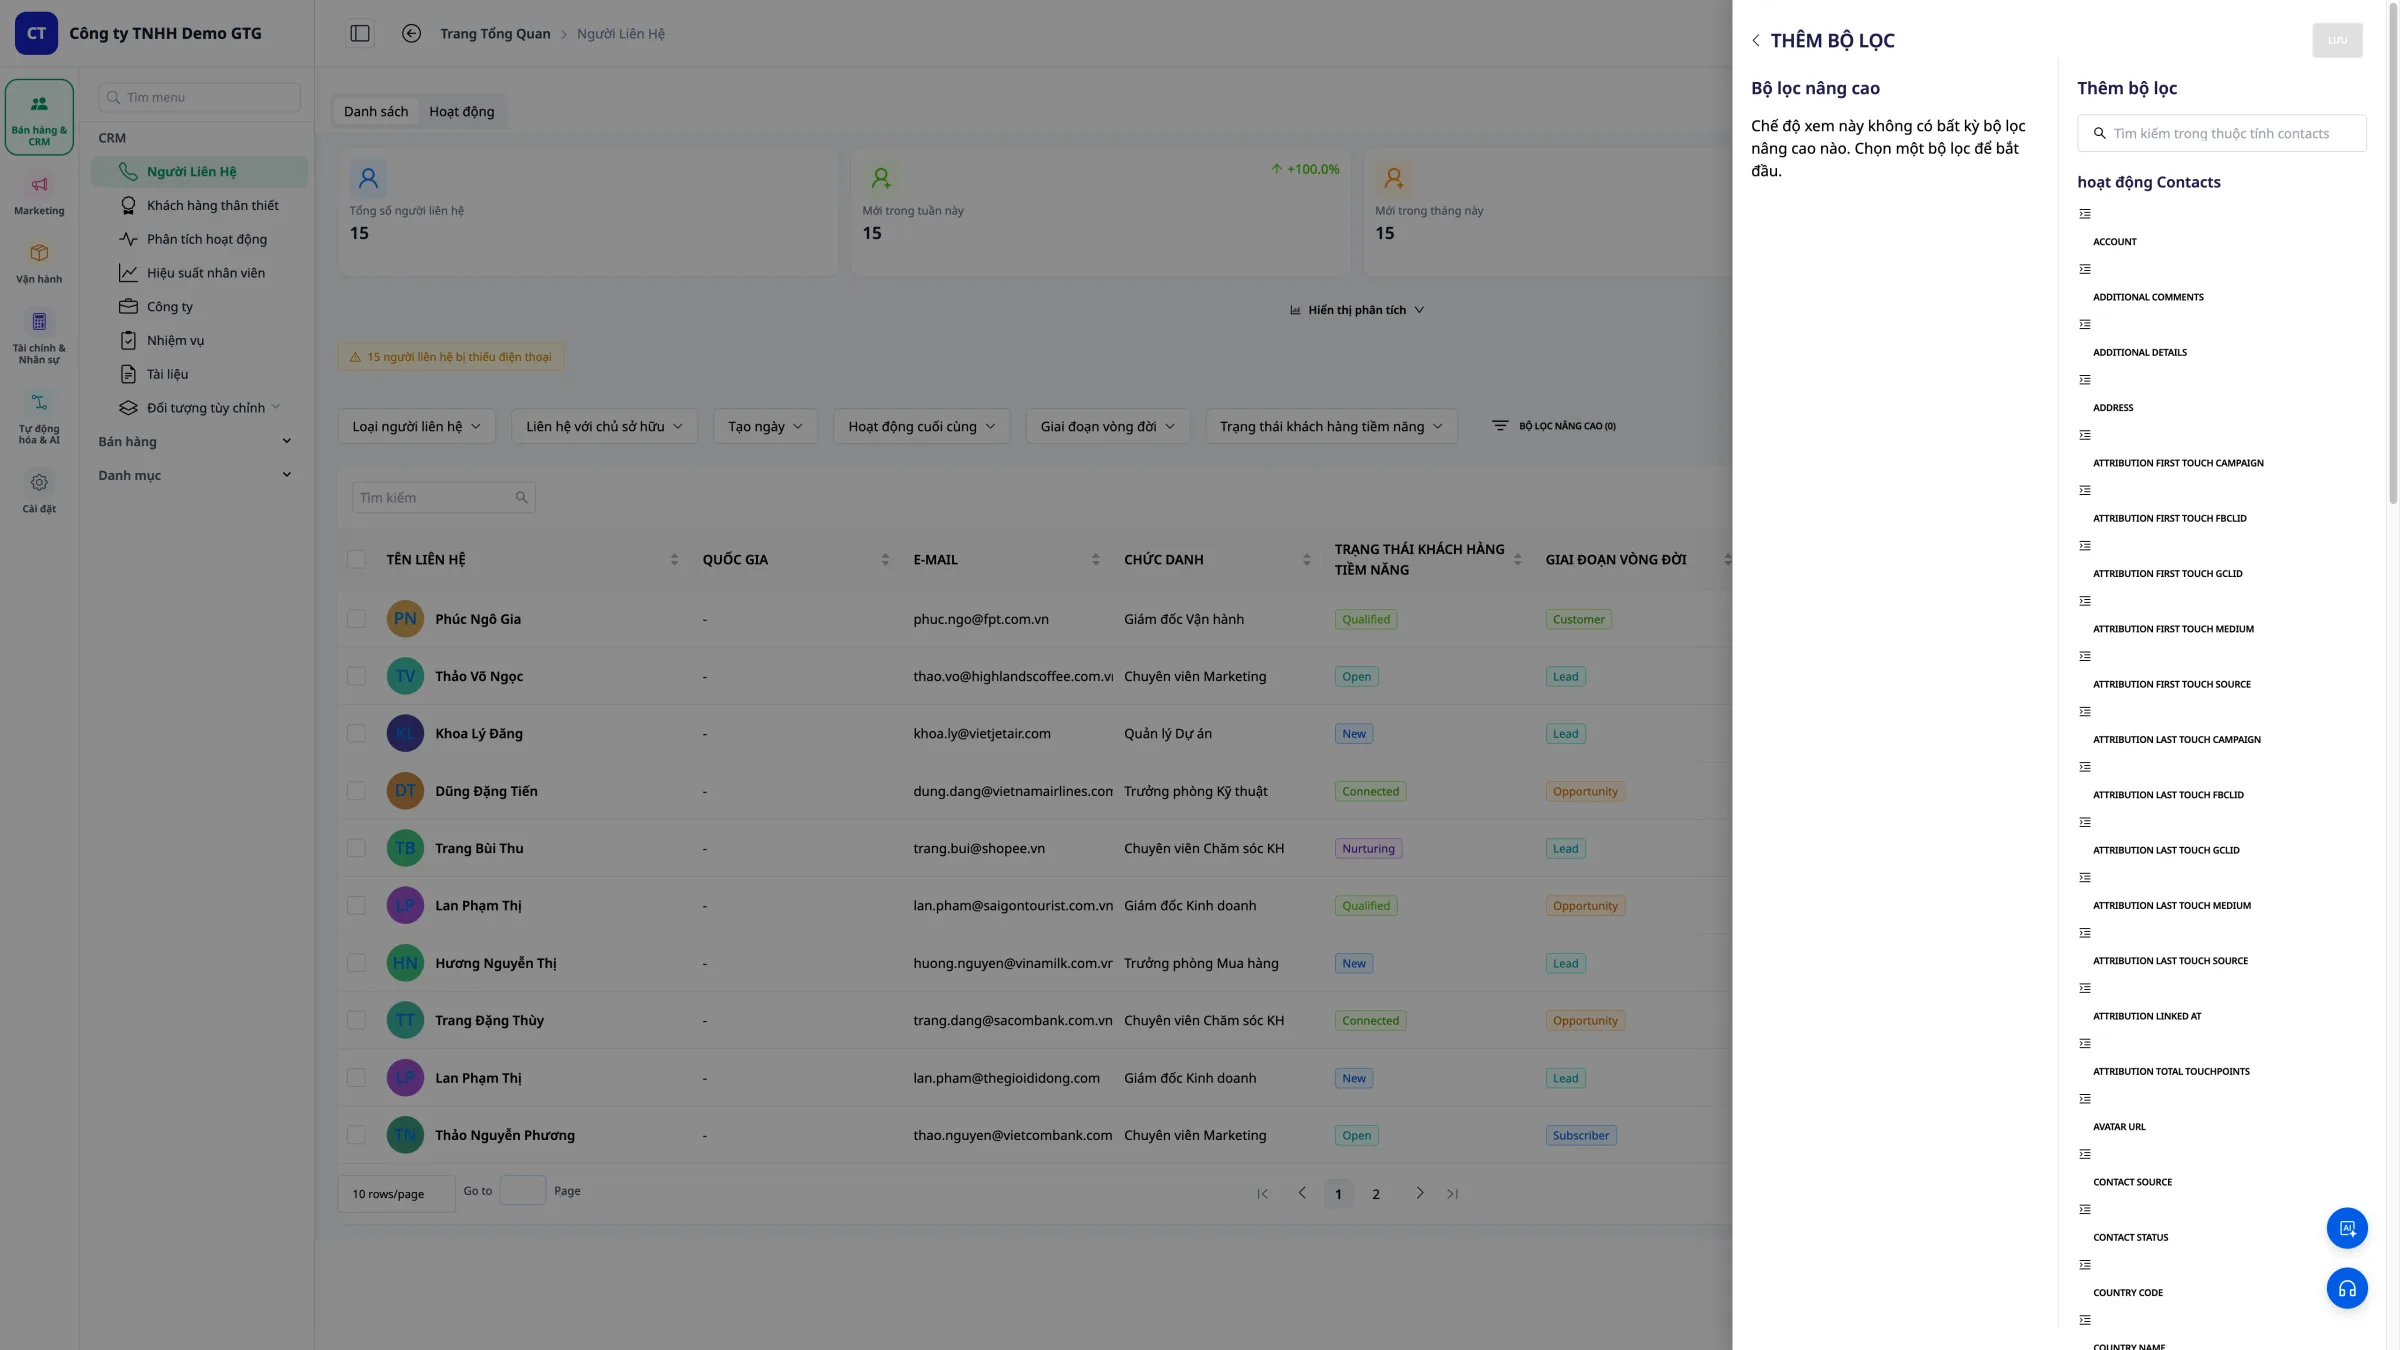 Step 2: Select the field you want to filter (Address, Product, Source...)
 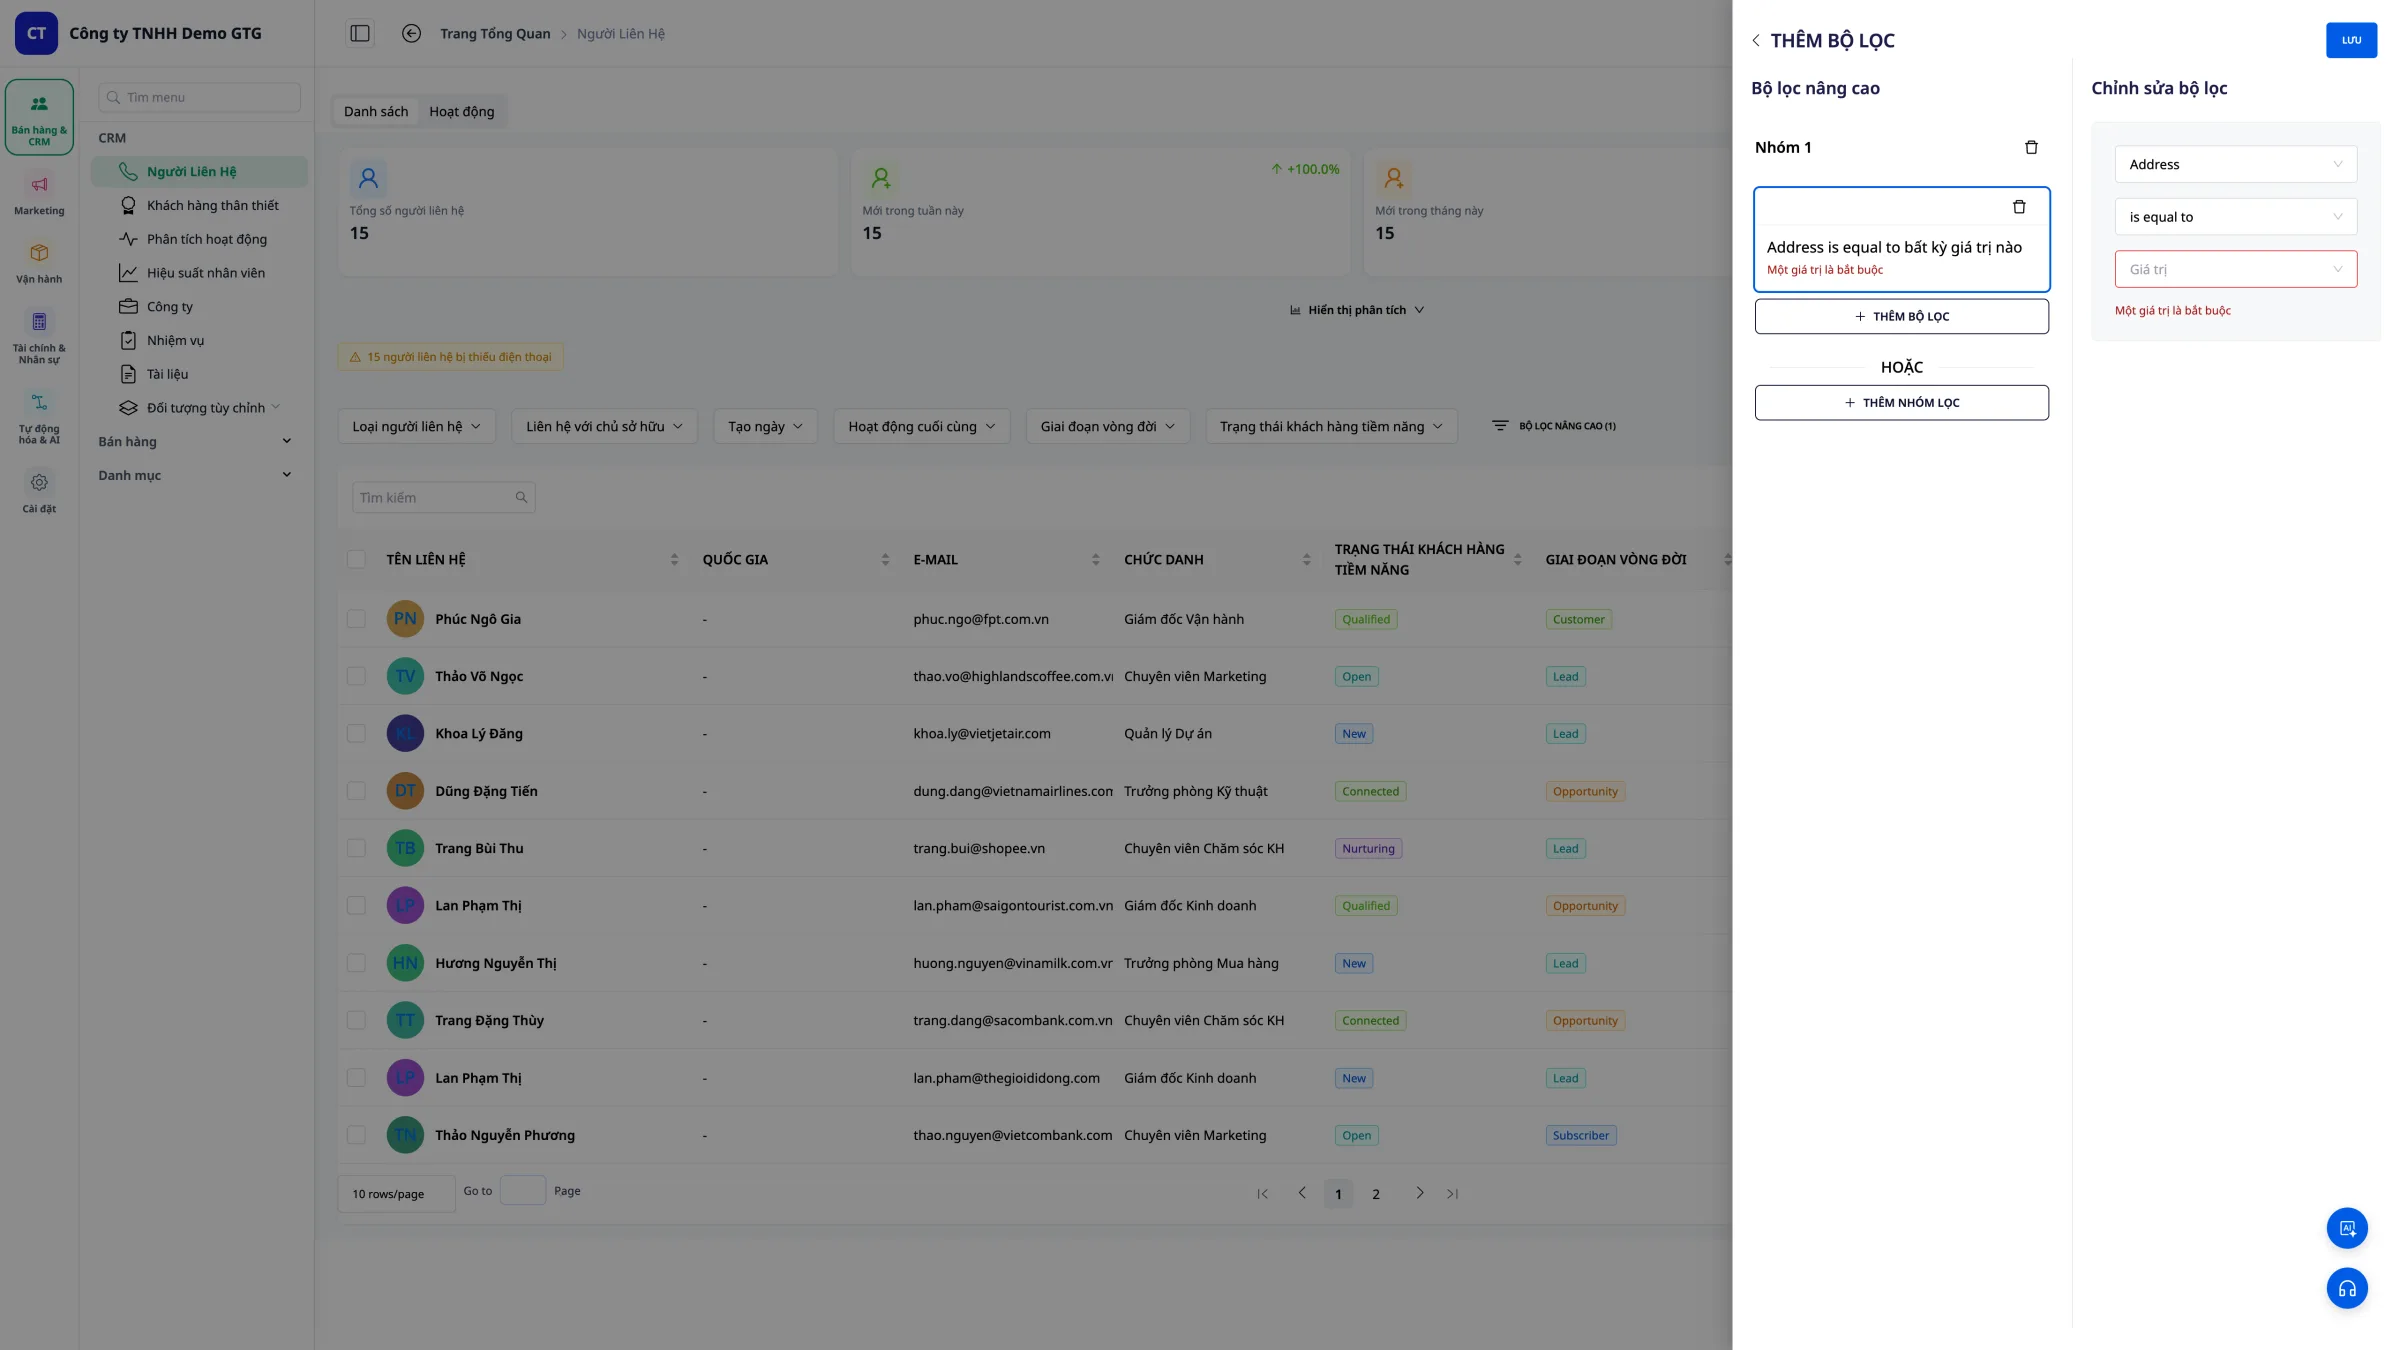 Step 3: Enter the value you are looking for.
Example: To find customers in District 5 - Select: Address - Enter: District 5
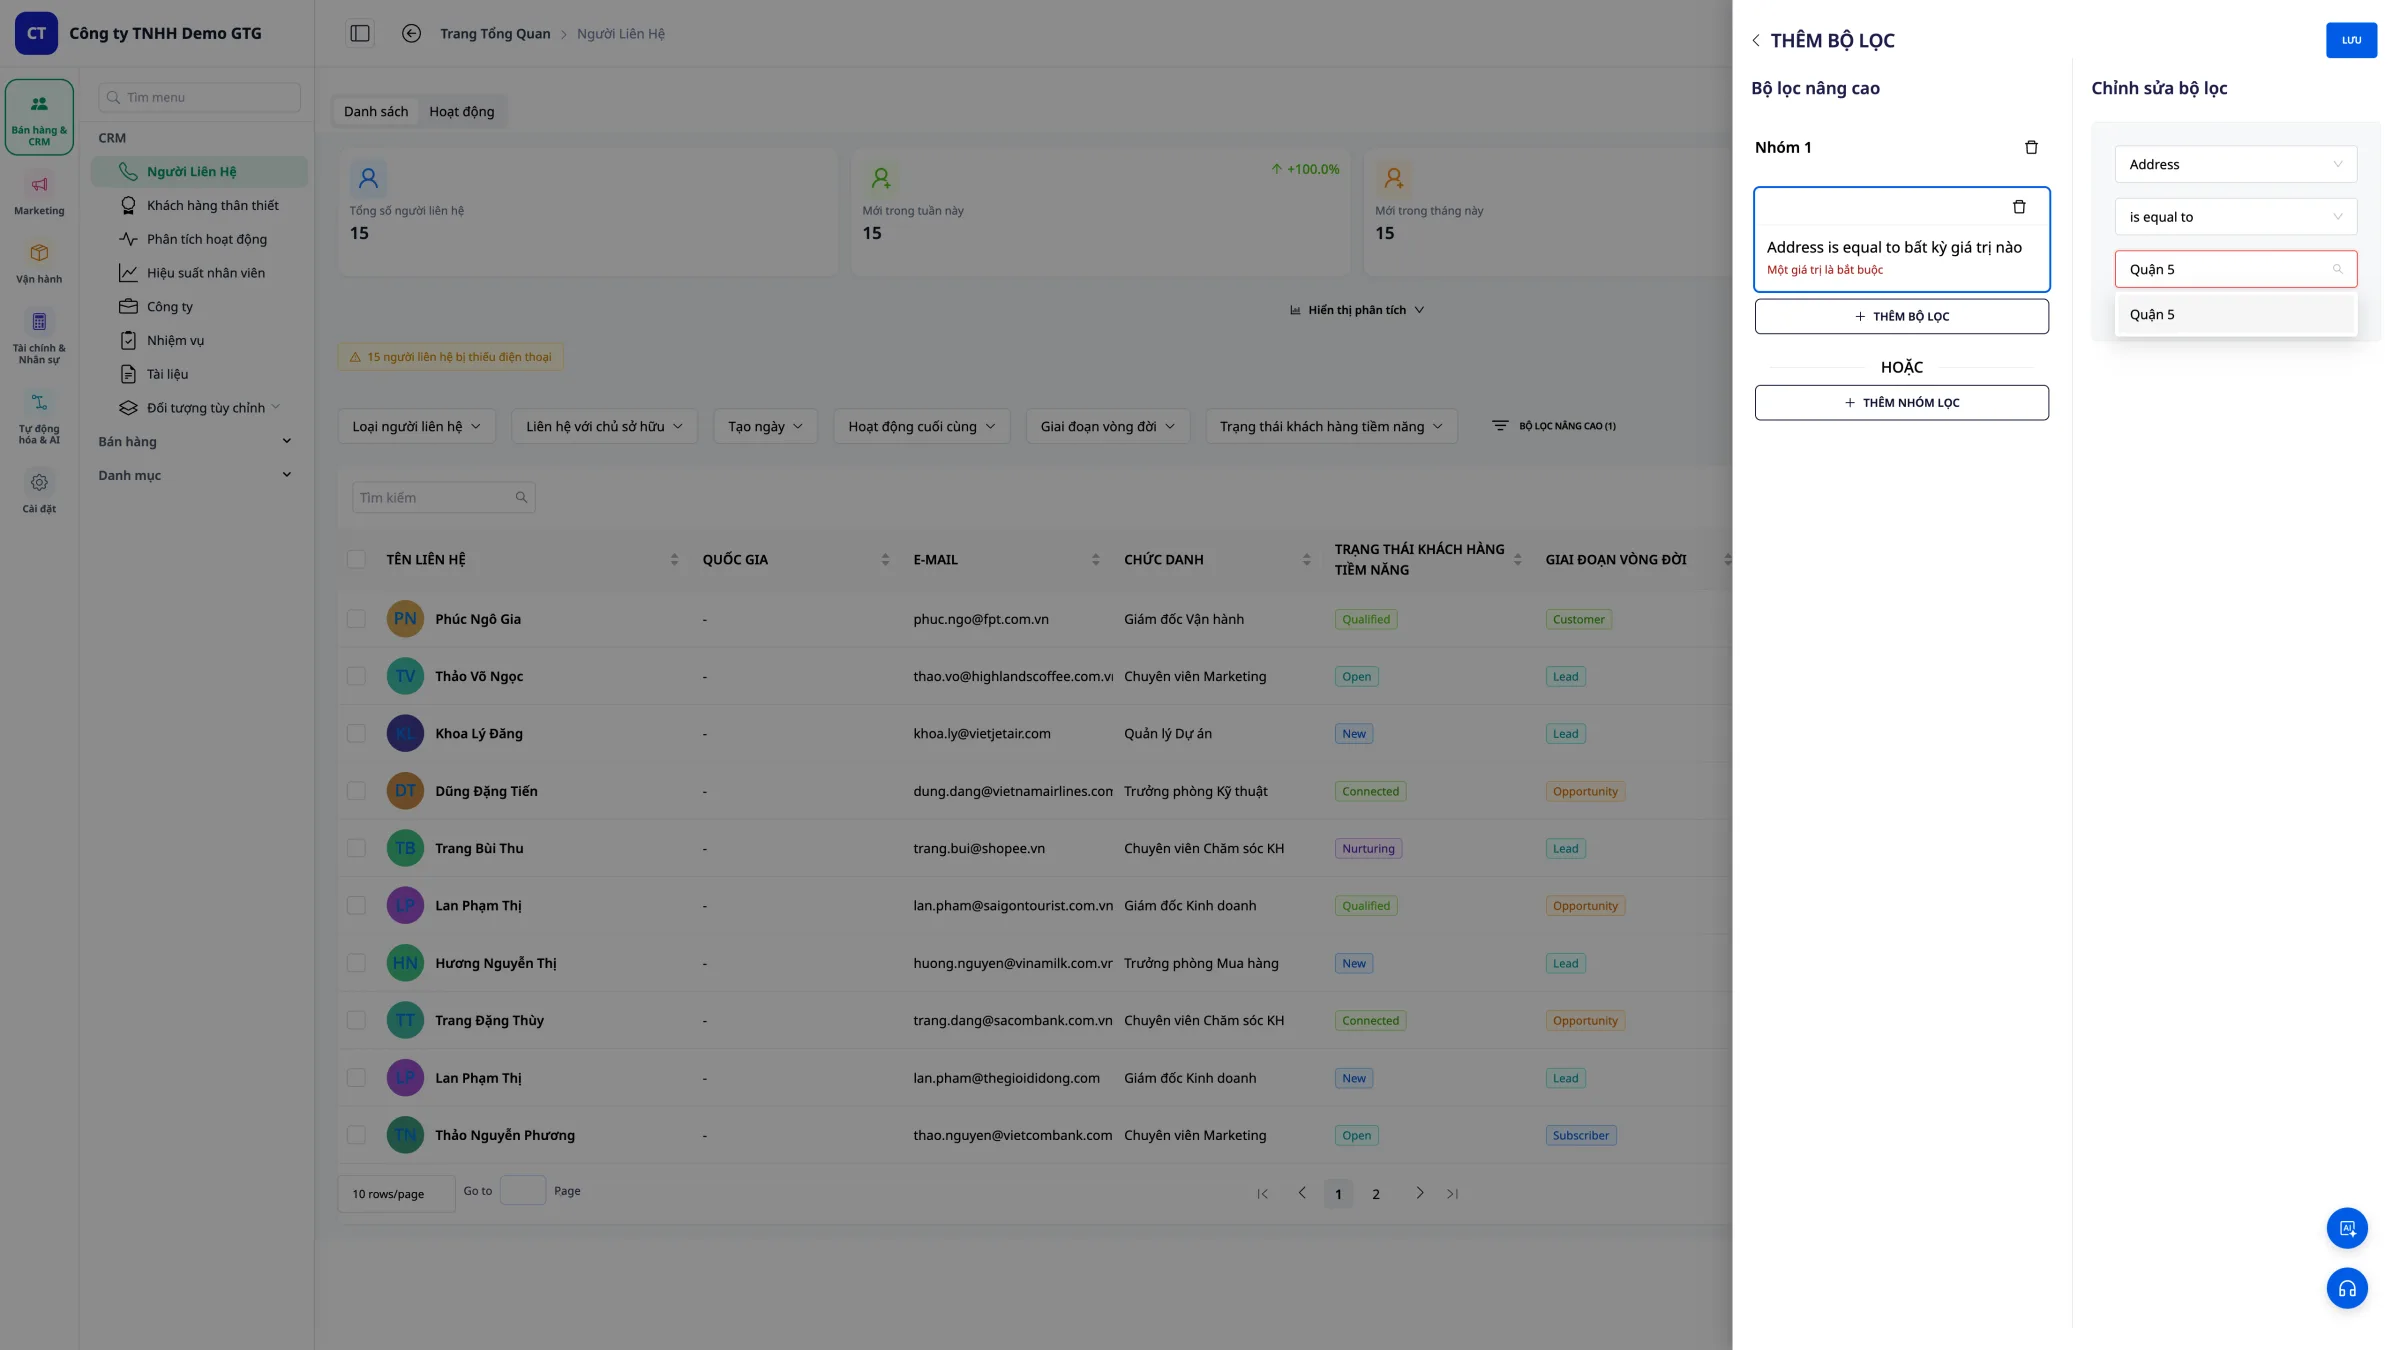
6.4 Combining Multiple Filters
- Address = District 5 AND
- Product purchased = Shirt
7. Edit Contact
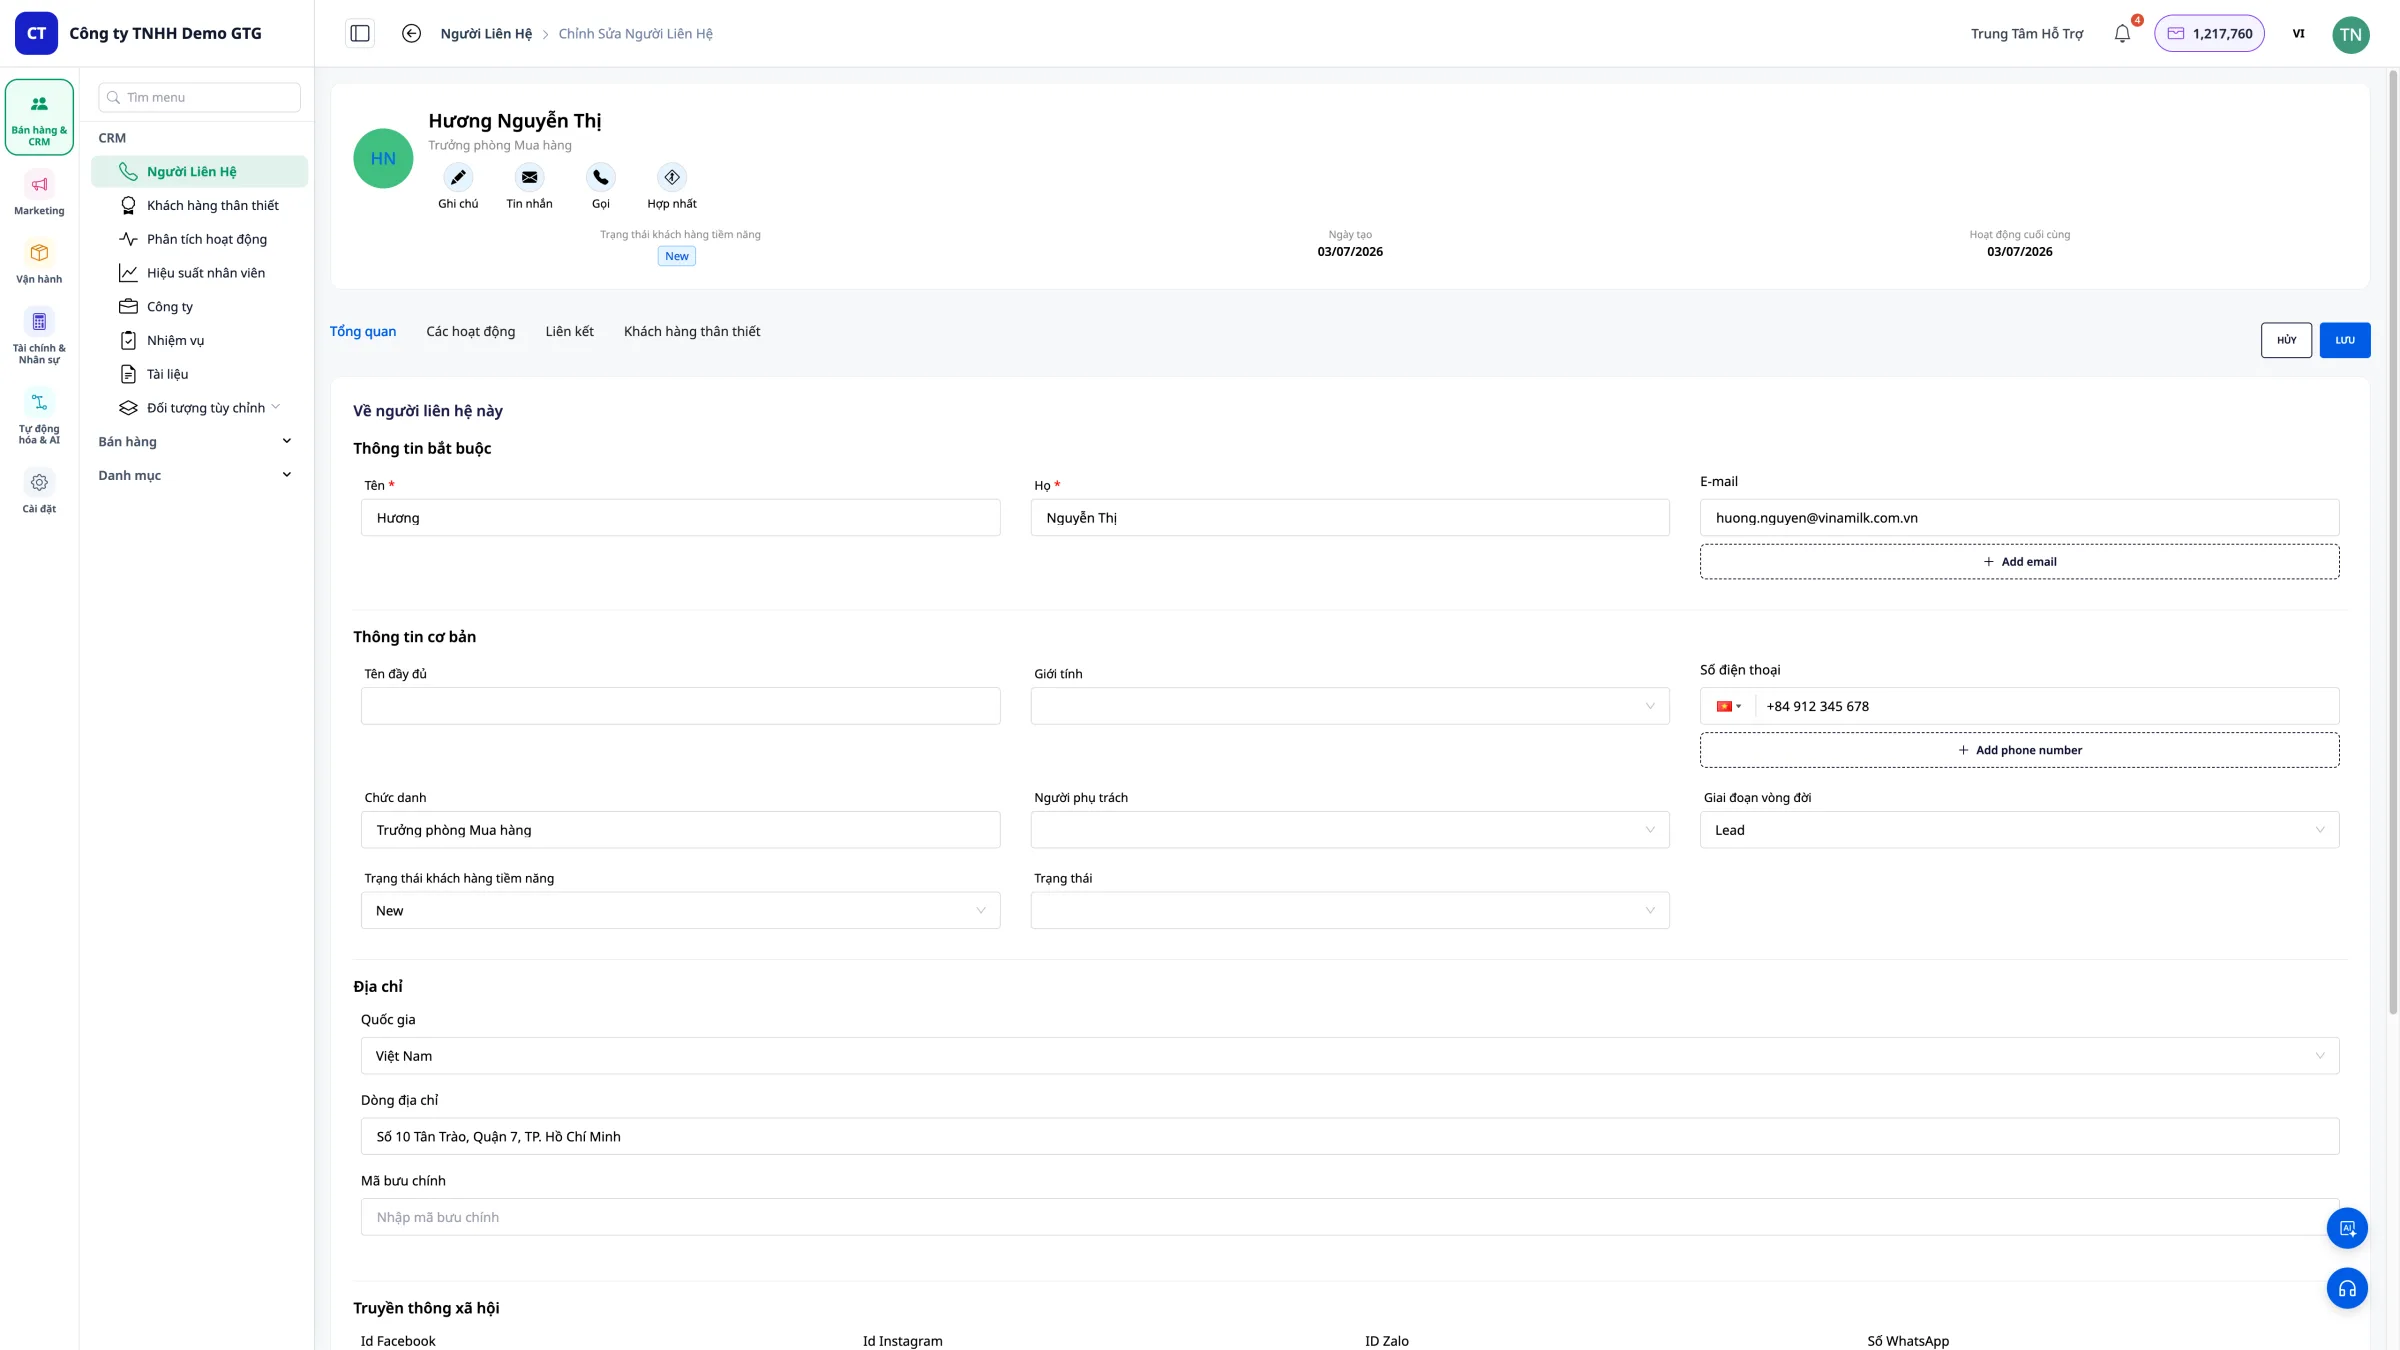
Click on the contact's name to open their details page.
Here you can edit: - Personal information - Address - Phone number - Notes - Status
8. Assigning Responsible Persons
Purpose
Assigning customers to responsible staff allows for: - Clear division of labor - Performance monitoring - Avoiding duplicate customer care
Step 1: Open Contact Details
Click on the contact you want to assign to.
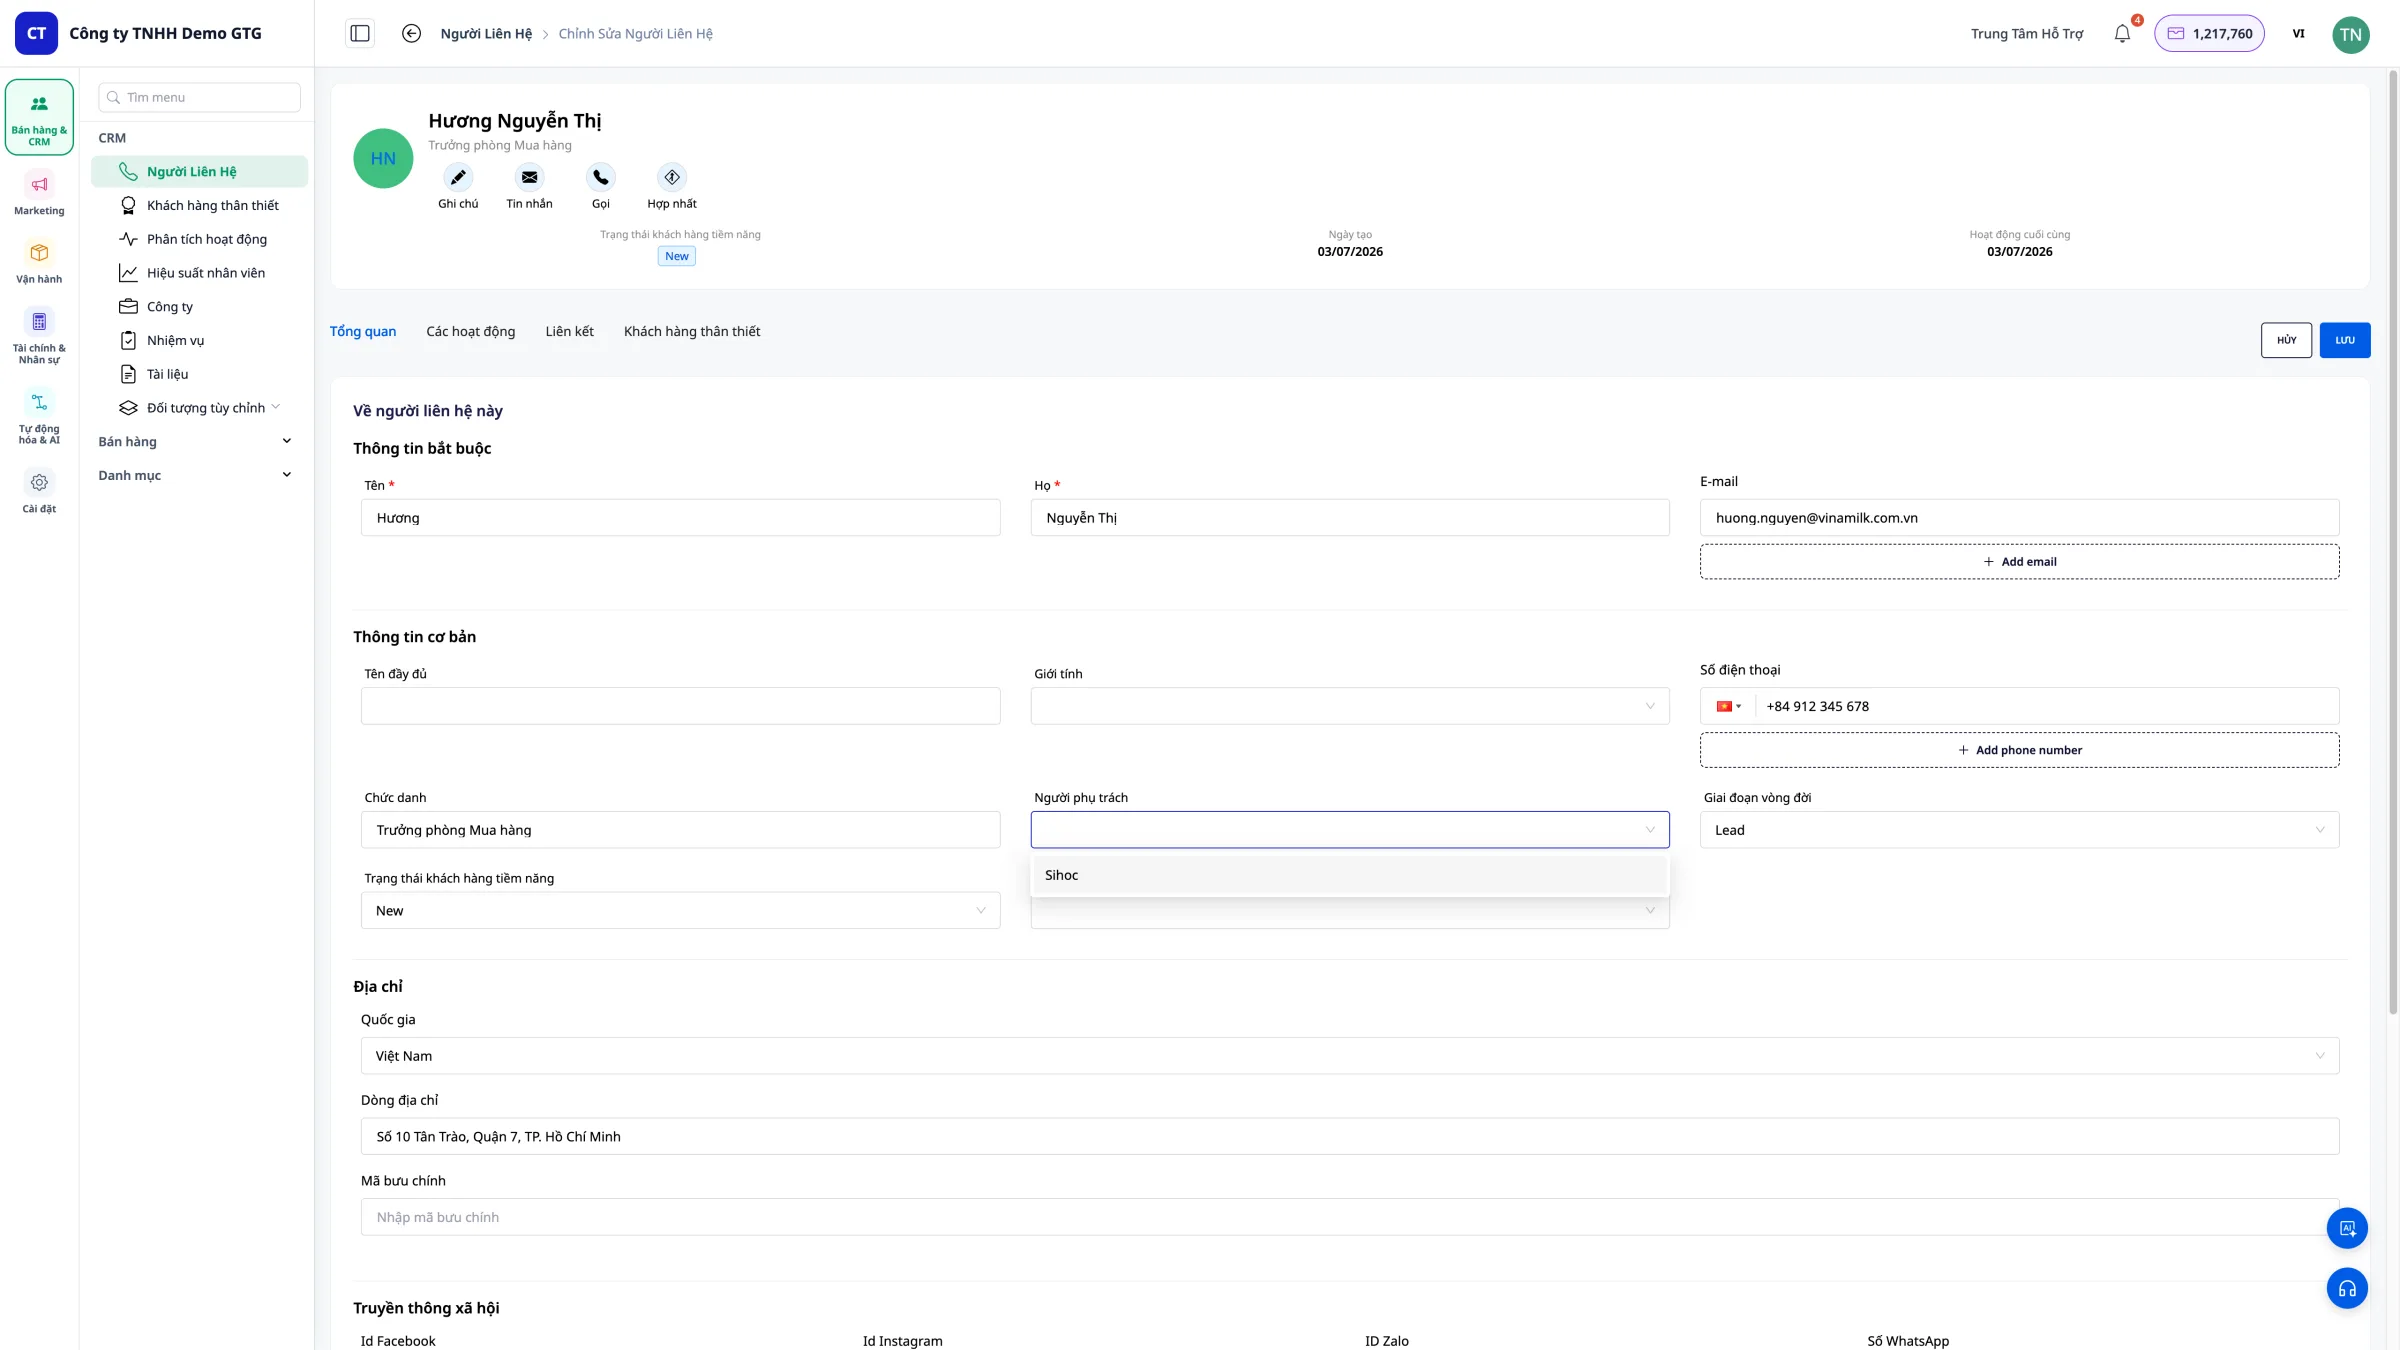
Step 2: Select the person in charge.
In the "Person in Charge" section, click to select an employee.
Step 3: Change the Person in Charge
If you need to transfer the responsibility to someone else: 1. Click on the current person's name. 2. Select the new person from the list. 3. Save the changes.
9. Attach Files & Links to Tasks
Each task in CRM can attach files from Asset Manager and external links - all relevant documents are right within the task, no need to search elsewhere.
9.1 Accessing Contact Tasks
Step 1 : Click on the contact's name to open their details page.
Step 2 : Select the "Task" tab on the contact details page.
Step 3 : Click "Create Task" or open an existing task.
9.2 Attaching Files from Asset Manager
Step 1 : In the Task form, find the "Attached Documents" section.
Step 2 : Click "Add file" .
Step 3 : Select files from Asset Manager : - Search for files by name - Or browse by folder - Supports all file types: PDF, DOCX, XLSX, PPTX, JPG, PNG, MP4...
Step 4 : Click "Select" to attach the file to the task.
Result : The file appears in the task with its name, file type, and size.
Example application :
Task: "Gửi báo giá Q3 cho khách Nguyễn Thị B" 📎 bao-gia-q3-2026.pdf (245 KB) 📎 bang-gia-san-pham.xlsx (38 KB)9.3 Attach External LinksTask: "Gửi báo giá Q3 cho khách Nguyễn Thị B" 📎 bao-gia-q3-2026.pdf (245 KB) 📎 bang-gia-san-pham.xlsx (38 KB)
Step 1 : In the Task form, find the "Links" section.
Step 2 : Click "Add link" .
Step 3 : Enter the information: - URL : Paste the link here (Google Drive, Google Sheets, Figma, website, etc.) - Title : The display name for the link (e.g., "May Report")
Step 4 : Click "Add" to save the link.
Example application :
Task: "Review thiết kế landing page mới" 🔗 Figma Design → https://figma.com/... 🔗 Brief brief khách hàng → https://docs.google.com/... 🔗 Trang tham khảo đối thủ → https://example.com/...9.4 Viewing and Managing AttachmentsTask: "Review thiết kế landing page mới" 🔗 Figma Design → https://figma.com/... 🔗 Brief brief khách hàng → https://docs.google.com/... 🔗 Trang tham khảo đối thủ → https://example.com/...
When you open the task, all attachments and links are displayed at the bottom:
| Type | Display | Operation |
|---|---|---|
| File | File type icon + name + size | View, Download, Delete |
| Link | Icon + title + domain | Open link, Delete |
9.5 Usage Tips
- Quotation : Attach the PDF file to the "Send Quotation" task.
- Contract : Attach the contract DOCX file to the "Sign Contract" task.
- Design : Attach the Figma link to the "Review Design" task.
- Report : Attach the Google Sheets link to the "Review data" task.
- Product image : Attach JPG/PNG to the "Confirm image" task.
10. Custom Object
10.1 What is a Custom Object?
Custom Objects allow businesses to create custom data types in addition to Contacts – for example, Contracts, Projects, Warranty Orders, Appointments, etc.
Each type of Custom Object can have different custom fields and be linked to Contacts in the CRM.
10.2 Creating Custom Object Types
Step 1 : Go to Settings → Custom Object .
Step 2 : Click "Create New" .
Step 3 : Name the type (e.g., "Contract") and add the necessary fields: - Text - Number - Date - Dropdown (select from list) - Checkbox
Step 4 : Click "Save" to create the new type.
10.3 Adding Custom Object Records to Contacts
Step 1 : Open the contact details page.
Step 2 : Select the corresponding Custom Object tab (for example, "Contract").
Step 3 : Click "Add record" .
Step 4 : Fill in the configured fields.
Step 5 : Click "Save" .
10.5 Example of Using Custom Objects
Example 1: Contract
Loại: Hợp đồng Trường: Số hợp đồng, Ngày ký, Giá trị, Trạng thái, Ngày hết hạn → Liên kết với Contact khách hàngExample 2: Warranty CertificateLoại: Hợp đồng Trường: Số hợp đồng, Ngày ký, Giá trị, Trạng thái, Ngày hết hạn → Liên kết với Contact khách hàng
Loại: Bảo hành Trường: Mã sản phẩm, Ngày mua, Thời hạn BH, Tình trạng → Liên kết với Contact mua hàngExample 3: AppointmentLoại: Bảo hành Trường: Mã sản phẩm, Ngày mua, Thời hạn BH, Tình trạng → Liên kết với Contact mua hàng
Loại: Lịch hẹn tư vấn Trường: Ngày hẹn, Địa điểm, Nhân viên tư vấn, Ghi chú → Liên kết với Contact được tư vấnBusiness Contact ManagementLoại: Lịch hẹn tư vấn Trường: Ngày hẹn, Địa điểm, Nhân viên tư vấn, Ghi chú → Liên kết với Contact được tư vấn
Automatic sorting
Contacts with a company domain email address will automatically be categorized as "Business" :
- abc@fpt.com.vn → Business
- xyz@gtgcrm.com → Business
- user@gmail.com → Personal
Access
Click the "Businesses" menu in the sidebar to view the B2B list.
Usage tips
What should be done
- Enter complete information - Easy to search and manage
- Status Update - Know which stage the customer is in
- Take thorough notes - Note down important information
- Clear assignment of responsibilities - One person in charge of each customer.
- Use filters - Find your target customer group quickly
- Attach files to tasks - Important documents are always at your fingertips.
It shouldn't be done.
- Leave email blank - Email is a required field for identification.
- Duplicate entries - Check before creating new ones
- Not updated - Outdated information will be inaccurate.
Summary
CRM in GTG CRM helps you:
- Automated customer acquisition from all channels.
- Create and import contacts easily.
- Customize the display columns flexibly.
- Search with advanced filters
- Edit information quickly
- Assign clear responsibilities to individuals.
- Attach the Asset Manager file and external link to the Task.