Feature Overview
You already have a Google AdSense account. You paste the code into your website's script field, then realize you can't pick where the ad appears, you don't know whether it has shown yet, and you're not sure whether it might appear on the checkout page.
In GTG CRM, you paste the Google code once and choose where the ad appears on your website, without needing a developer. Ads you add on this screen are not loaded on the shop, cart, checkout, account, or login pages.
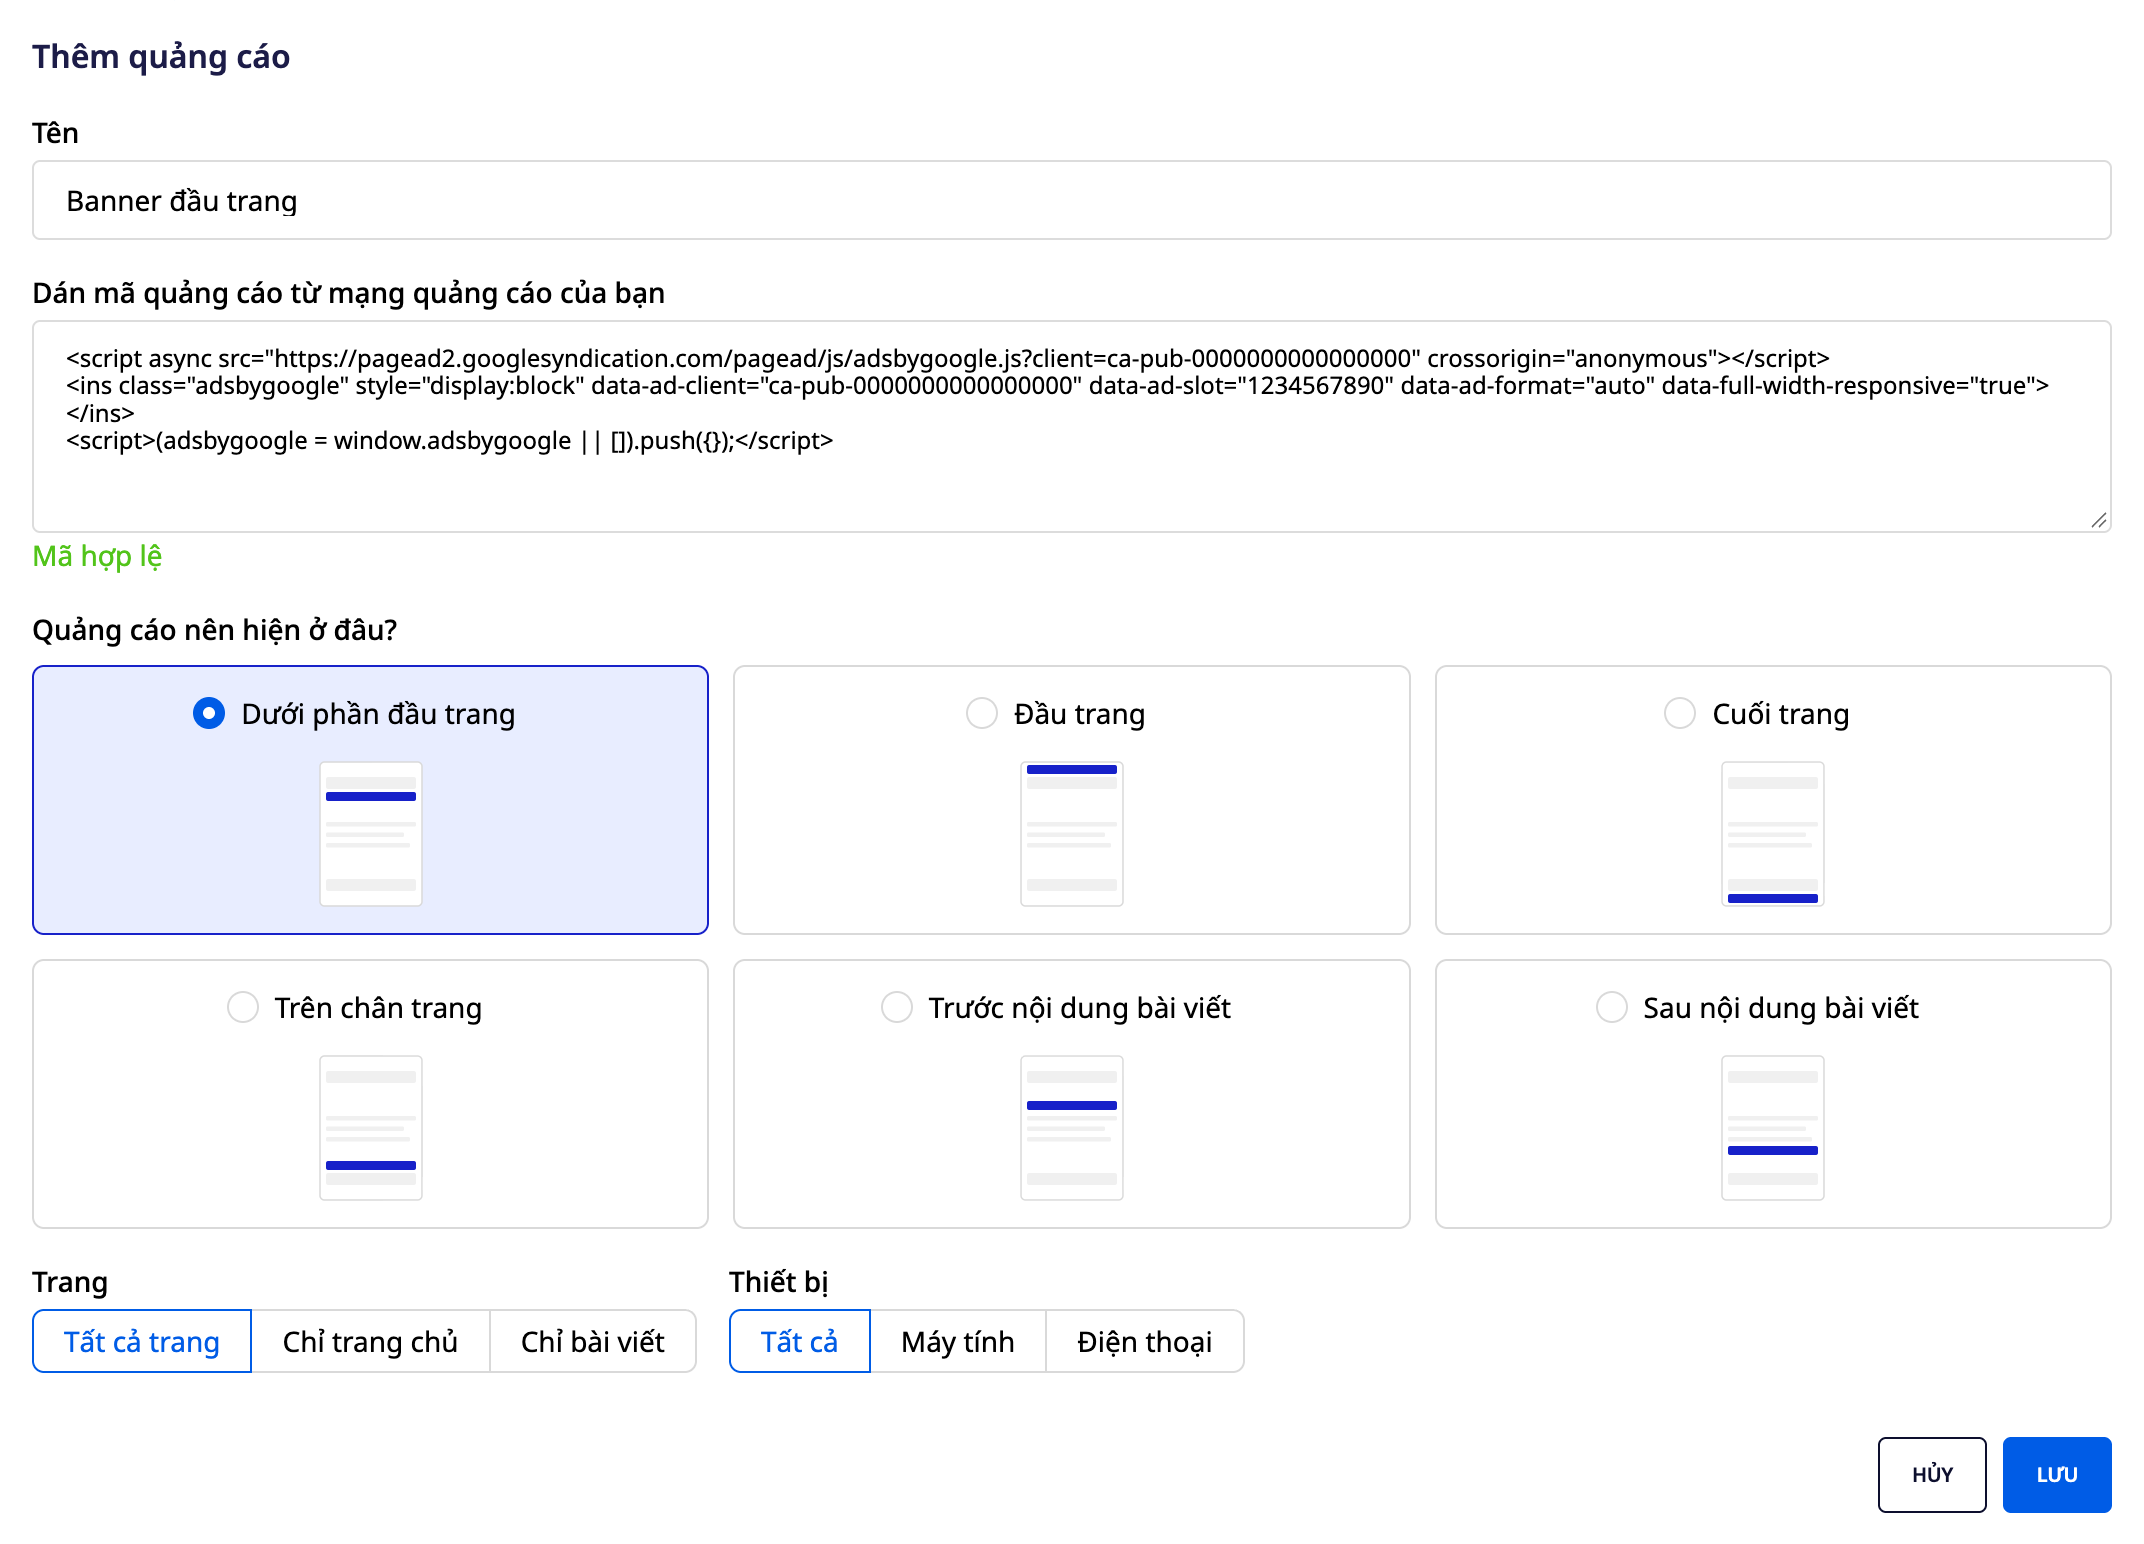
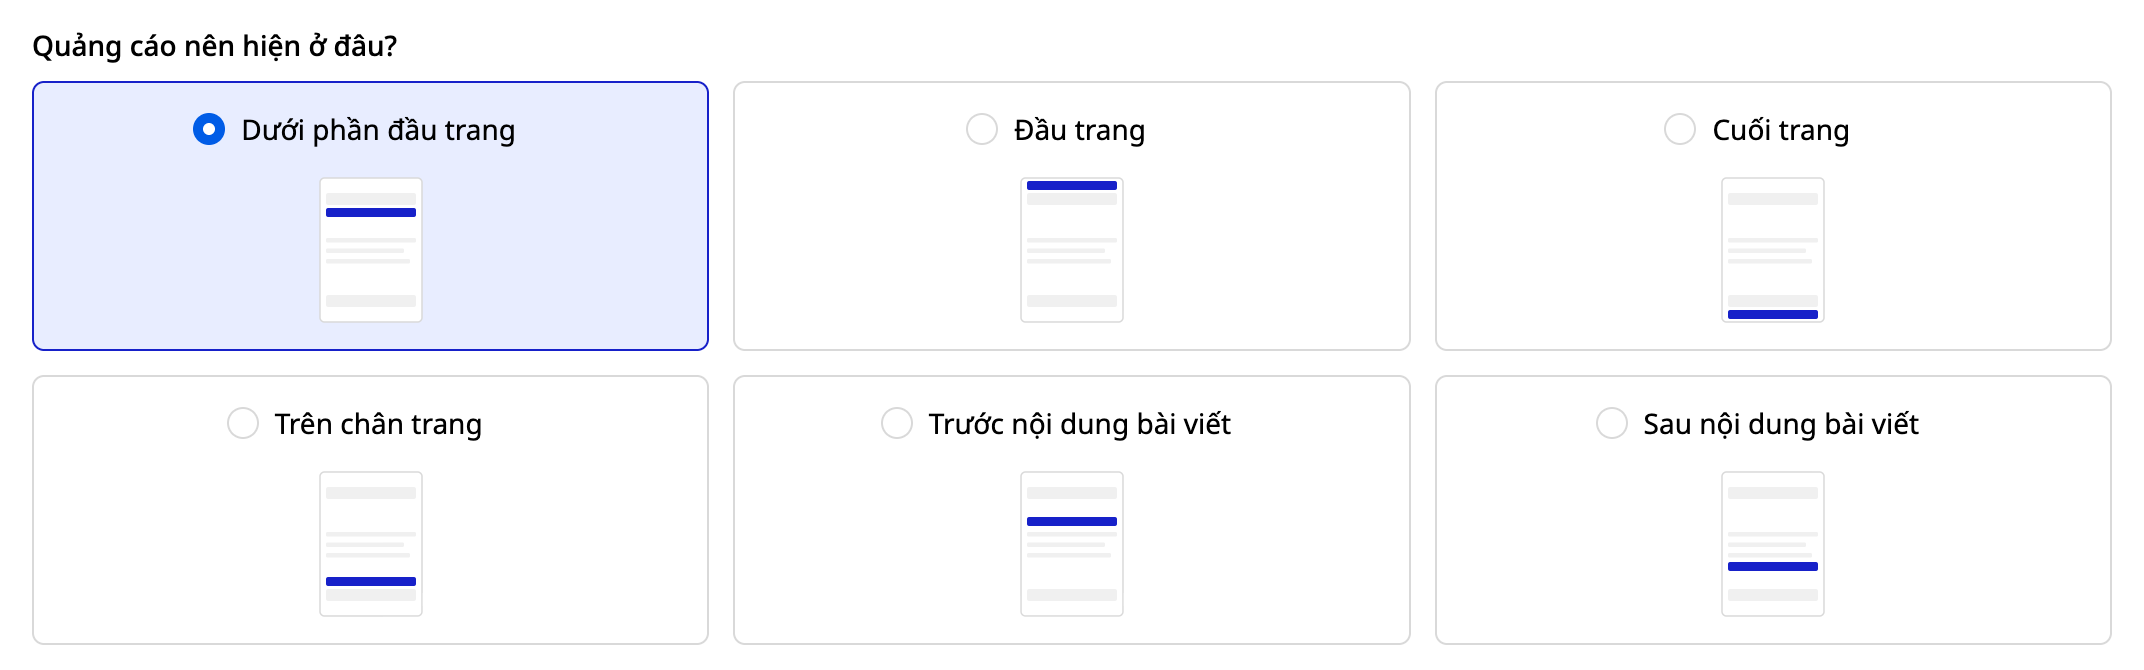
Everything sits on a dedicated Ads screen for each website: paste the code (the screen shows "Valid code" or tells you exactly which part to remove), choose one of six fixed positions using a visual diagram, then click Save. The screen handles three things automatically: ads only load after the visitor accepts ads in the cookie banner, each ad carries an Ad label, and the ads.txt file is published right on this screen.
Problems Businesses Face
| Old approach | Consequence |
|---|---|
| Pasting ad code into the website's shared script field | No control over placement, and no way to see whether the ad is running |
| Ad network code runs as soon as the visitor opens the page | Visitor data may be sent out before the visitor has a chance to make a choice |
| The ad network requires an ads.txt file but it's unclear where to put it | The network may restrict or stop serving ads on your site |
| Someone pastes the wrong code or changes it without anyone knowing | Ads shift position or disappear and you don't know why |
GTG CRM brings all of this into one screen within your website management area, with a plain-language status line for each ad.
Key Highlights
1. Paste the code, click save, see the ad's status
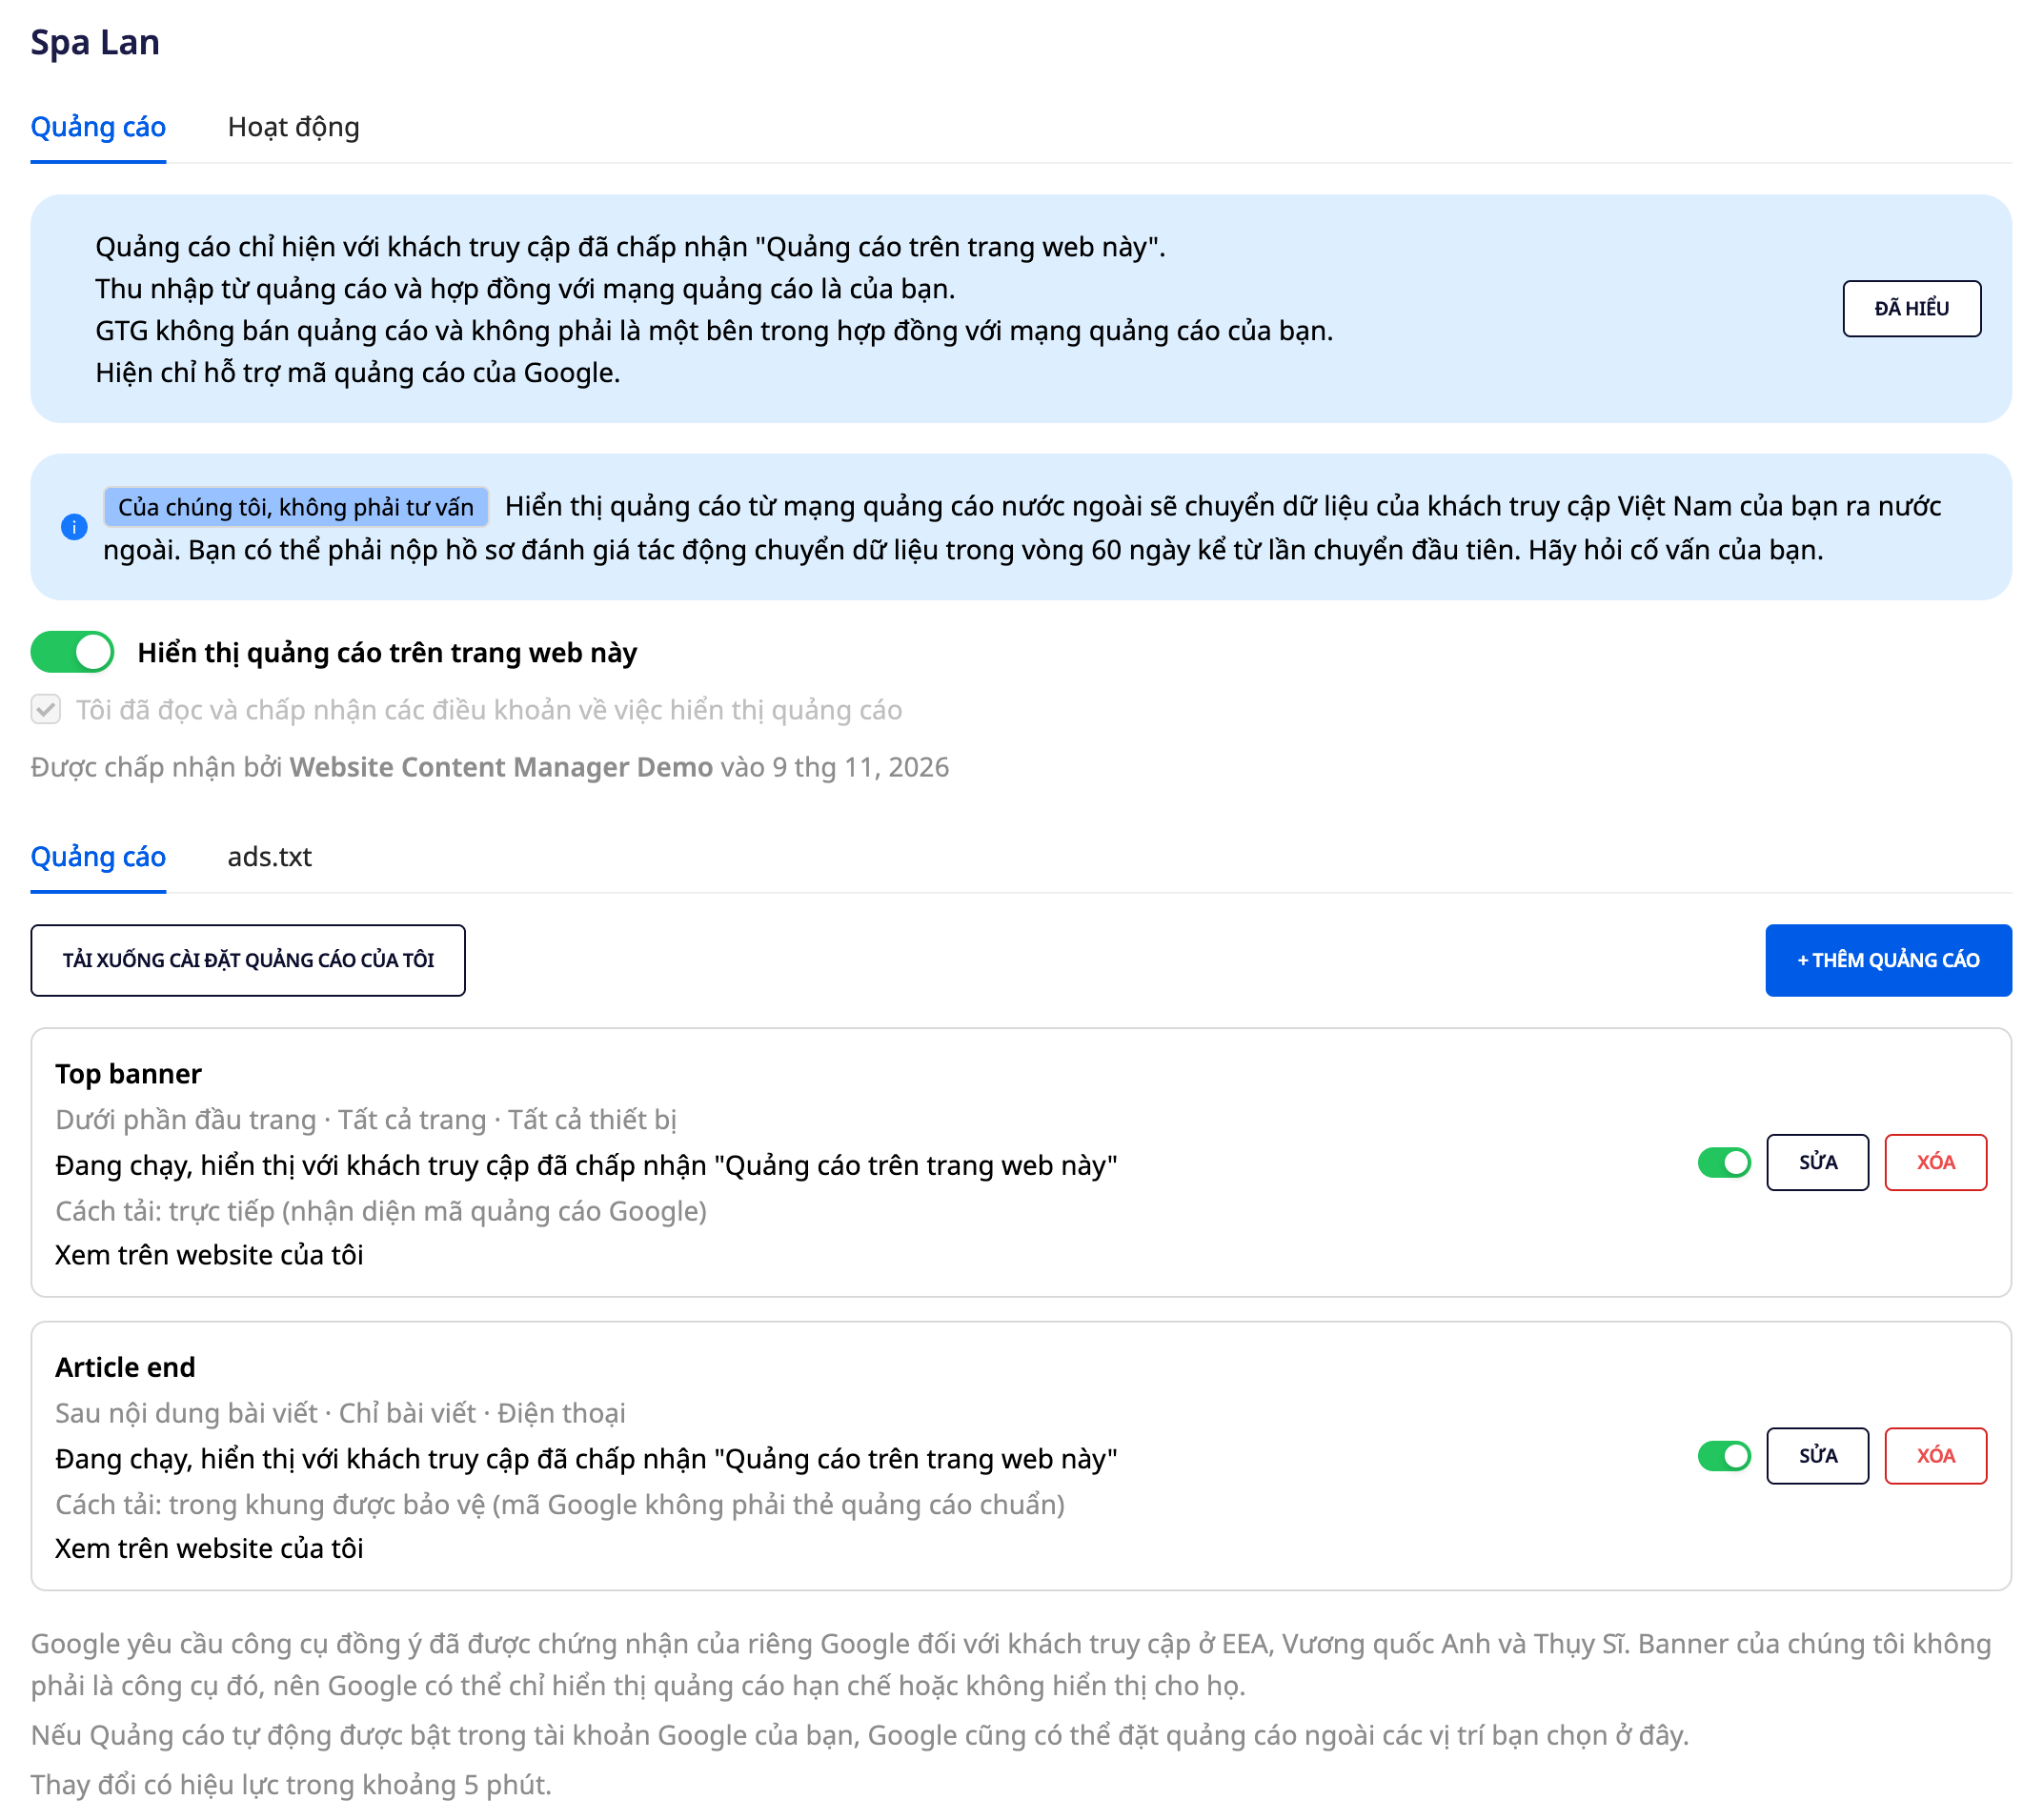
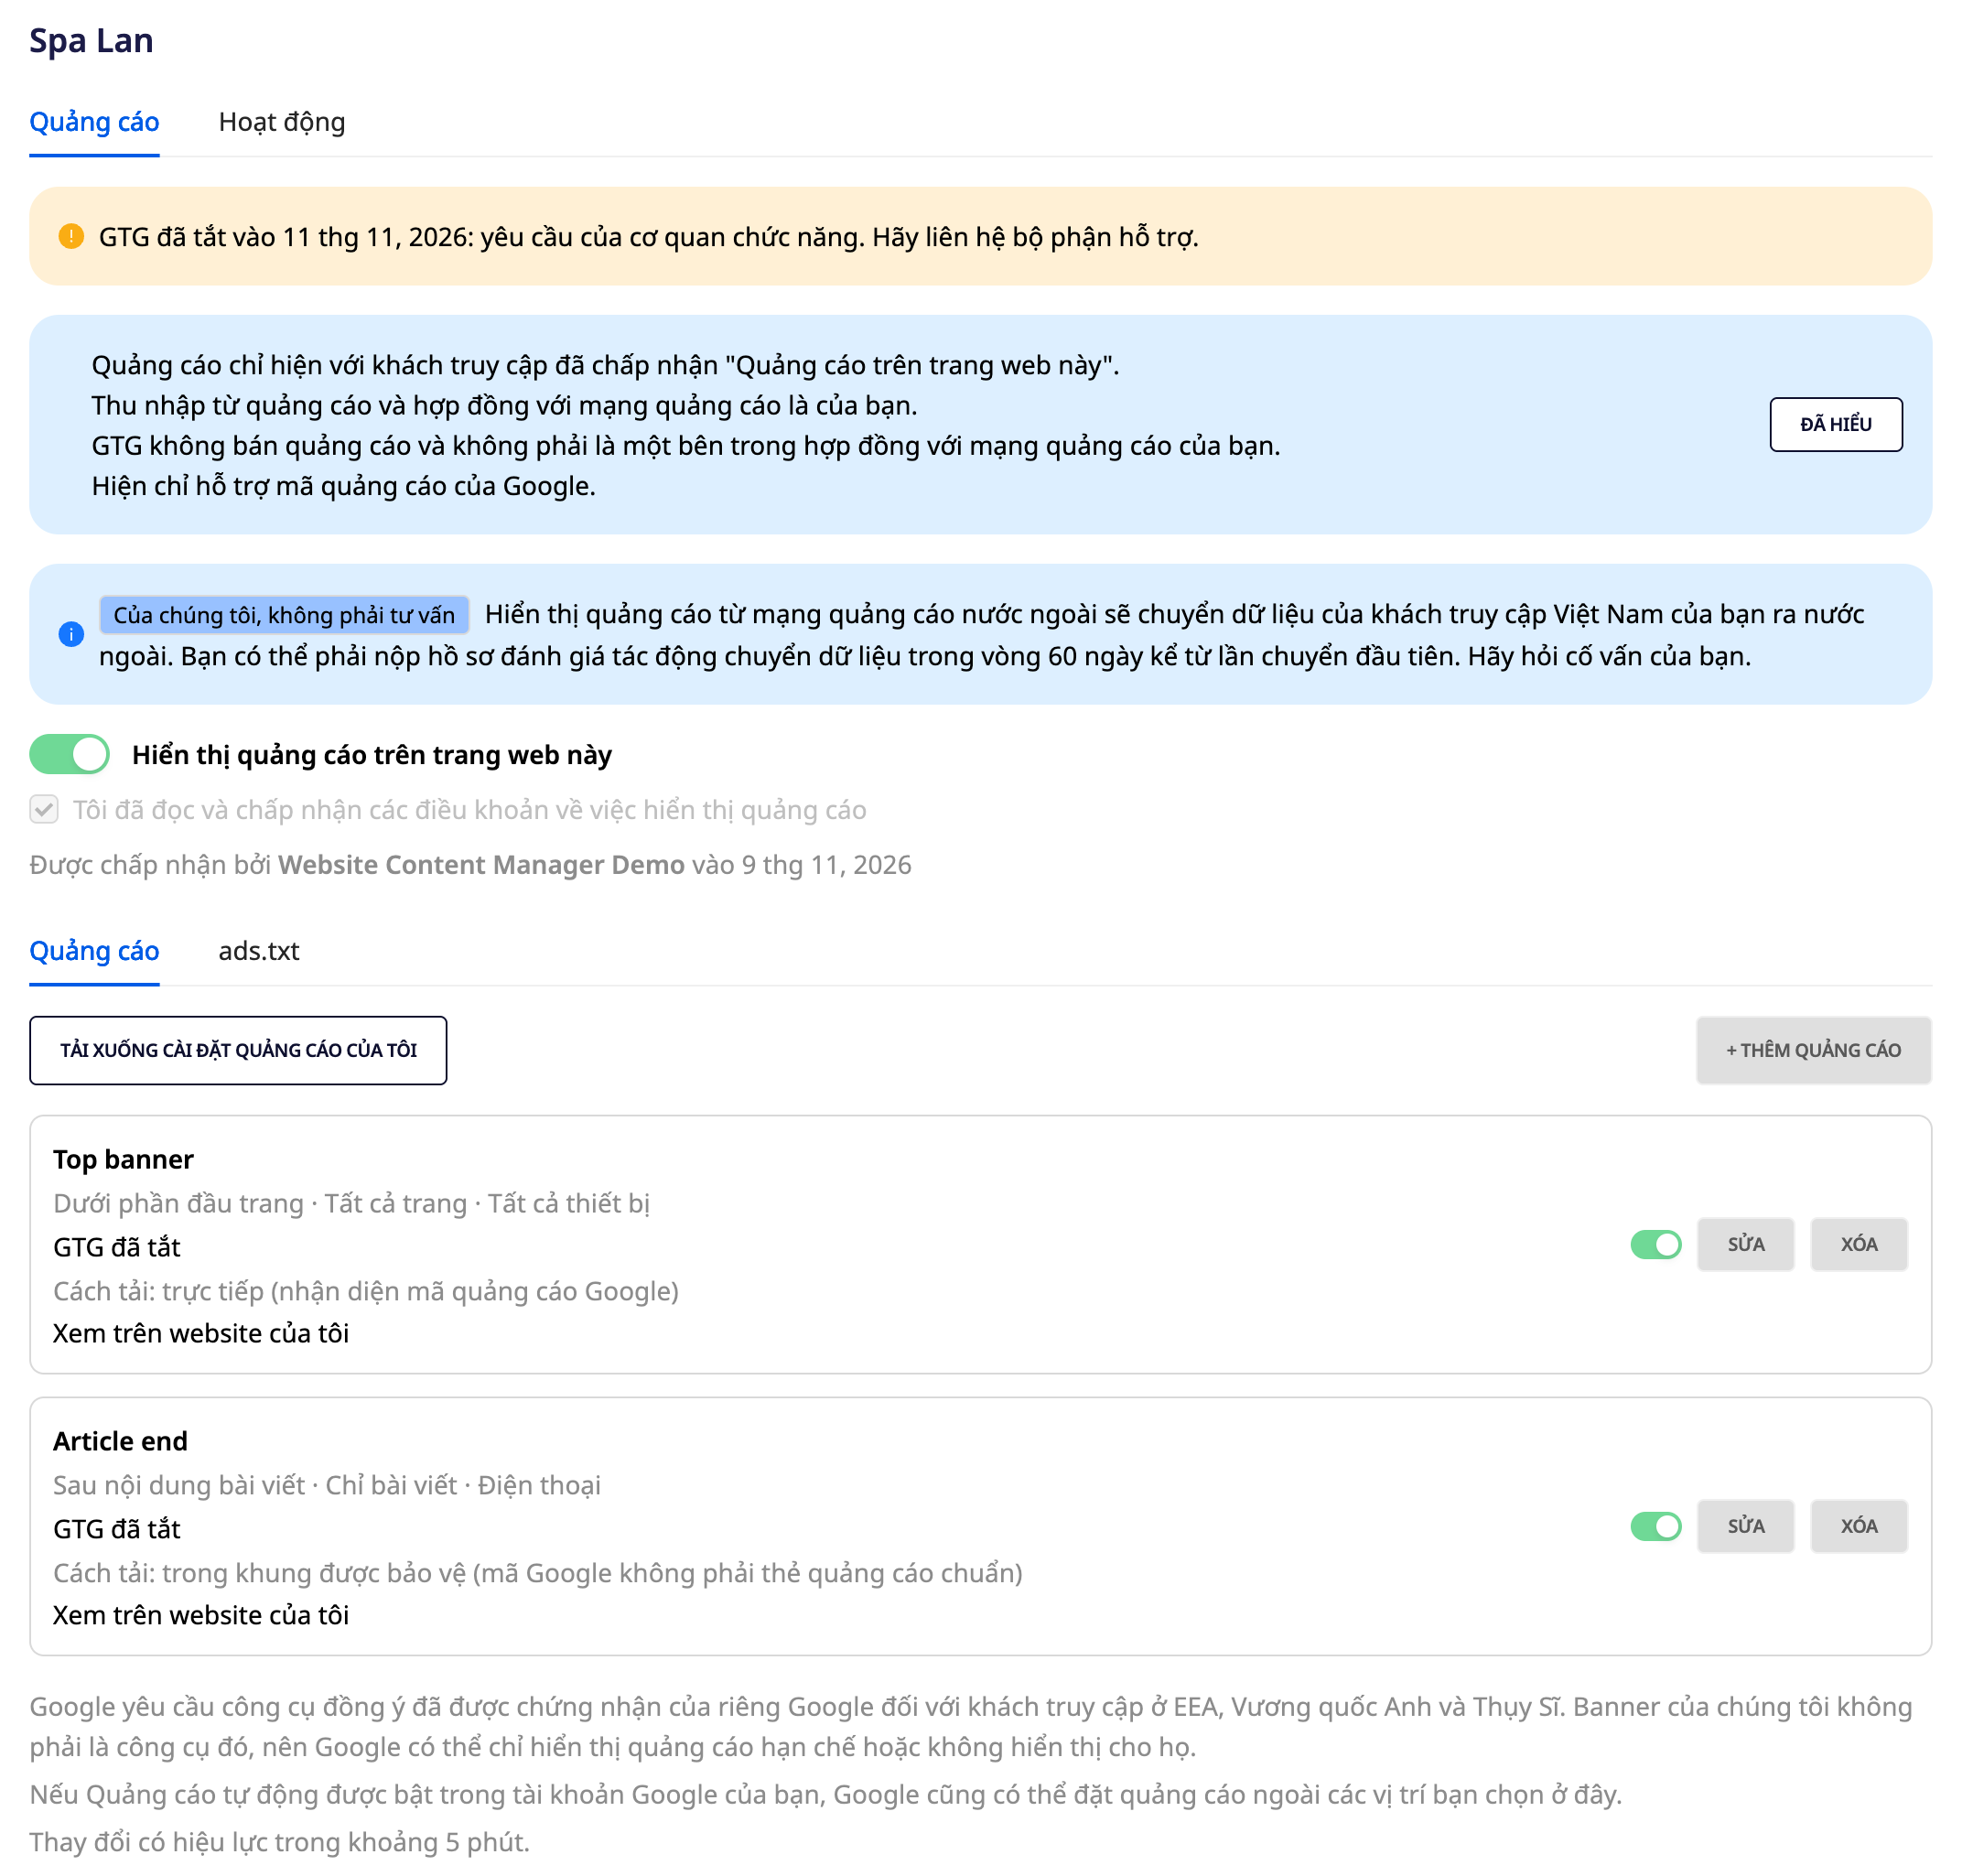
Go to Marketing ▸ Brand Assets ▸ Websites, then click the Ads link in your website's row. Turn on Show ads on this website, tick the box to accept the terms for displaying ads, then click + Add ad. Give it a name only you will see, paste the Google code, and choose a position. Whether the ad network accepts the code is checked when you click Save. For step-by-step instructions with screenshots, see User Guide: Ads on GTG CRM Websites.
After saving, each ad shows a line such as Header banner · Below header · All pages · All devices along with a plain-language status: Running, Pending when the website has not been published yet, or Off. Each ad also has its own toggle to pause it without deleting it. This way you can tell whether an ad is ready or waiting on something, without having to open the website and guess.
- Limits: up to 12 ads per website, each code no larger than 20 KB, and names no longer than 80 characters. Currently only Google AdSense and Google Ad Manager codes are accepted; codes from other networks are rejected with a line explaining why.
2. Six Fixed Positions, Chosen from a Diagram
You choose one of six positions: Below header, Top of page, Bottom of page, Above footer, Before article content, and After article content. The two positions inside an article automatically set the Page option to Article only and lock it, since they only exist within articles. For the other four positions, you choose All pages, Homepage only, or Article only, and choose to show them on Desktop, Mobile, or both. Users with no technical background can place ads in the right spot without typing any technical addresses.
3. Visitors Choose First, Ads Appear Afterward, and Are Labeled
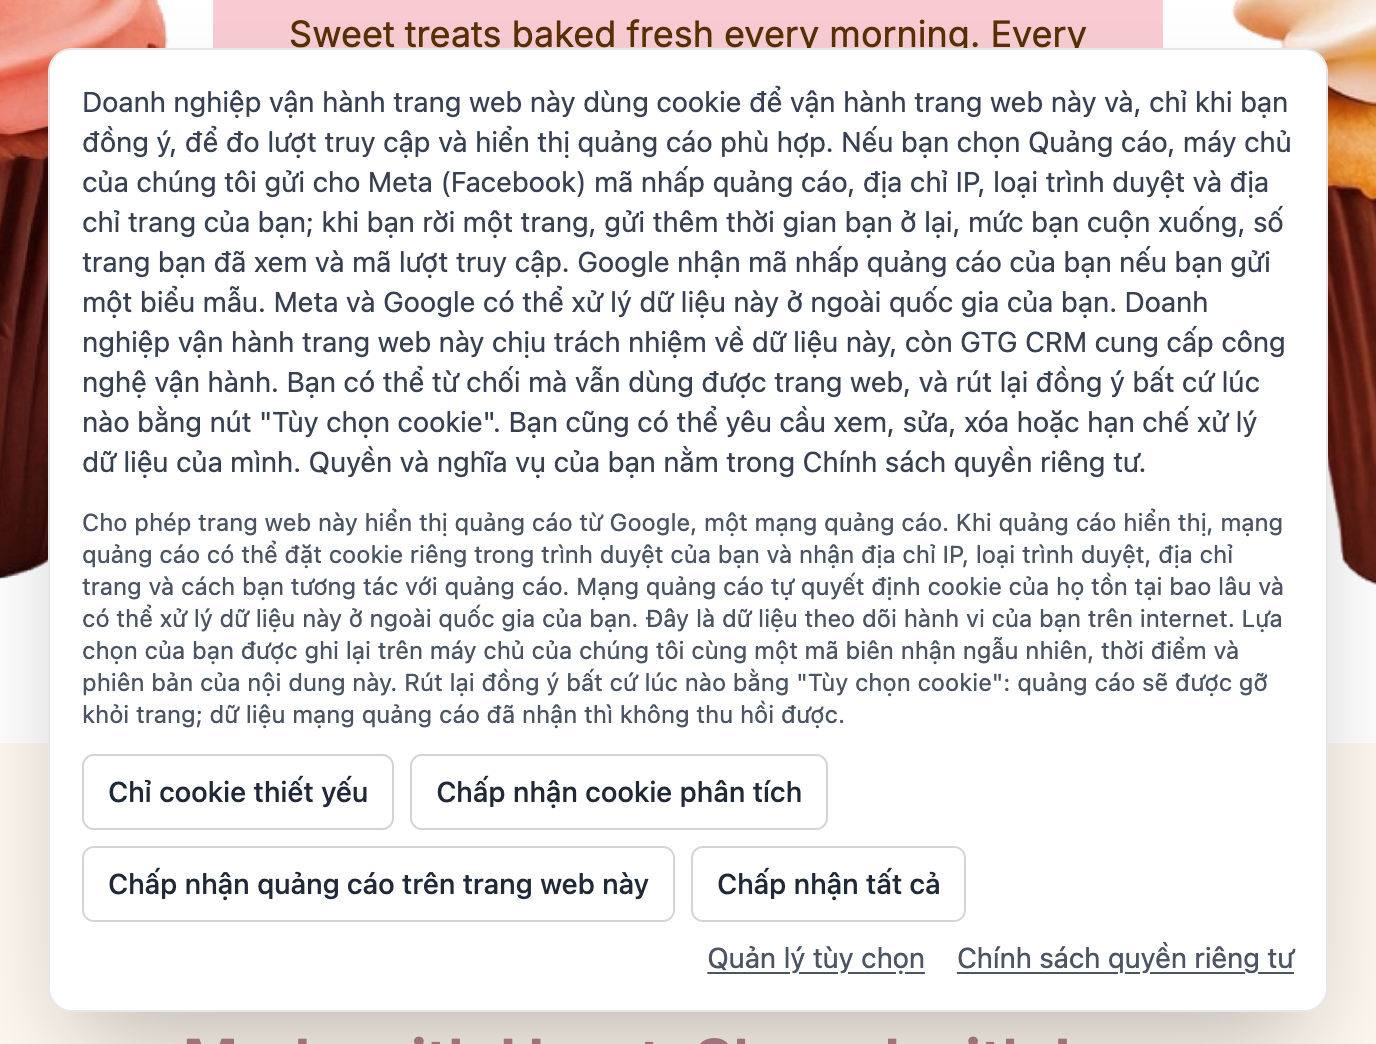
On a visitor's first visit to the website, the cookie banner has a dedicated Accept ads on this website button, placed alongside the other buttons. In Manage options, there is a separate checkbox named Ads on this website. Clicking the accept-all button also counts as the visitor agreeing to ads. Before the visitor makes a choice, no requests from this screen are sent to the ad network, and no ads are displayed. After the visitor makes a choice, each ad has an Advertisement label above it so it isn't mistaken for page content. If a visitor unchecks the option, the page reloads once and the ads disappear.
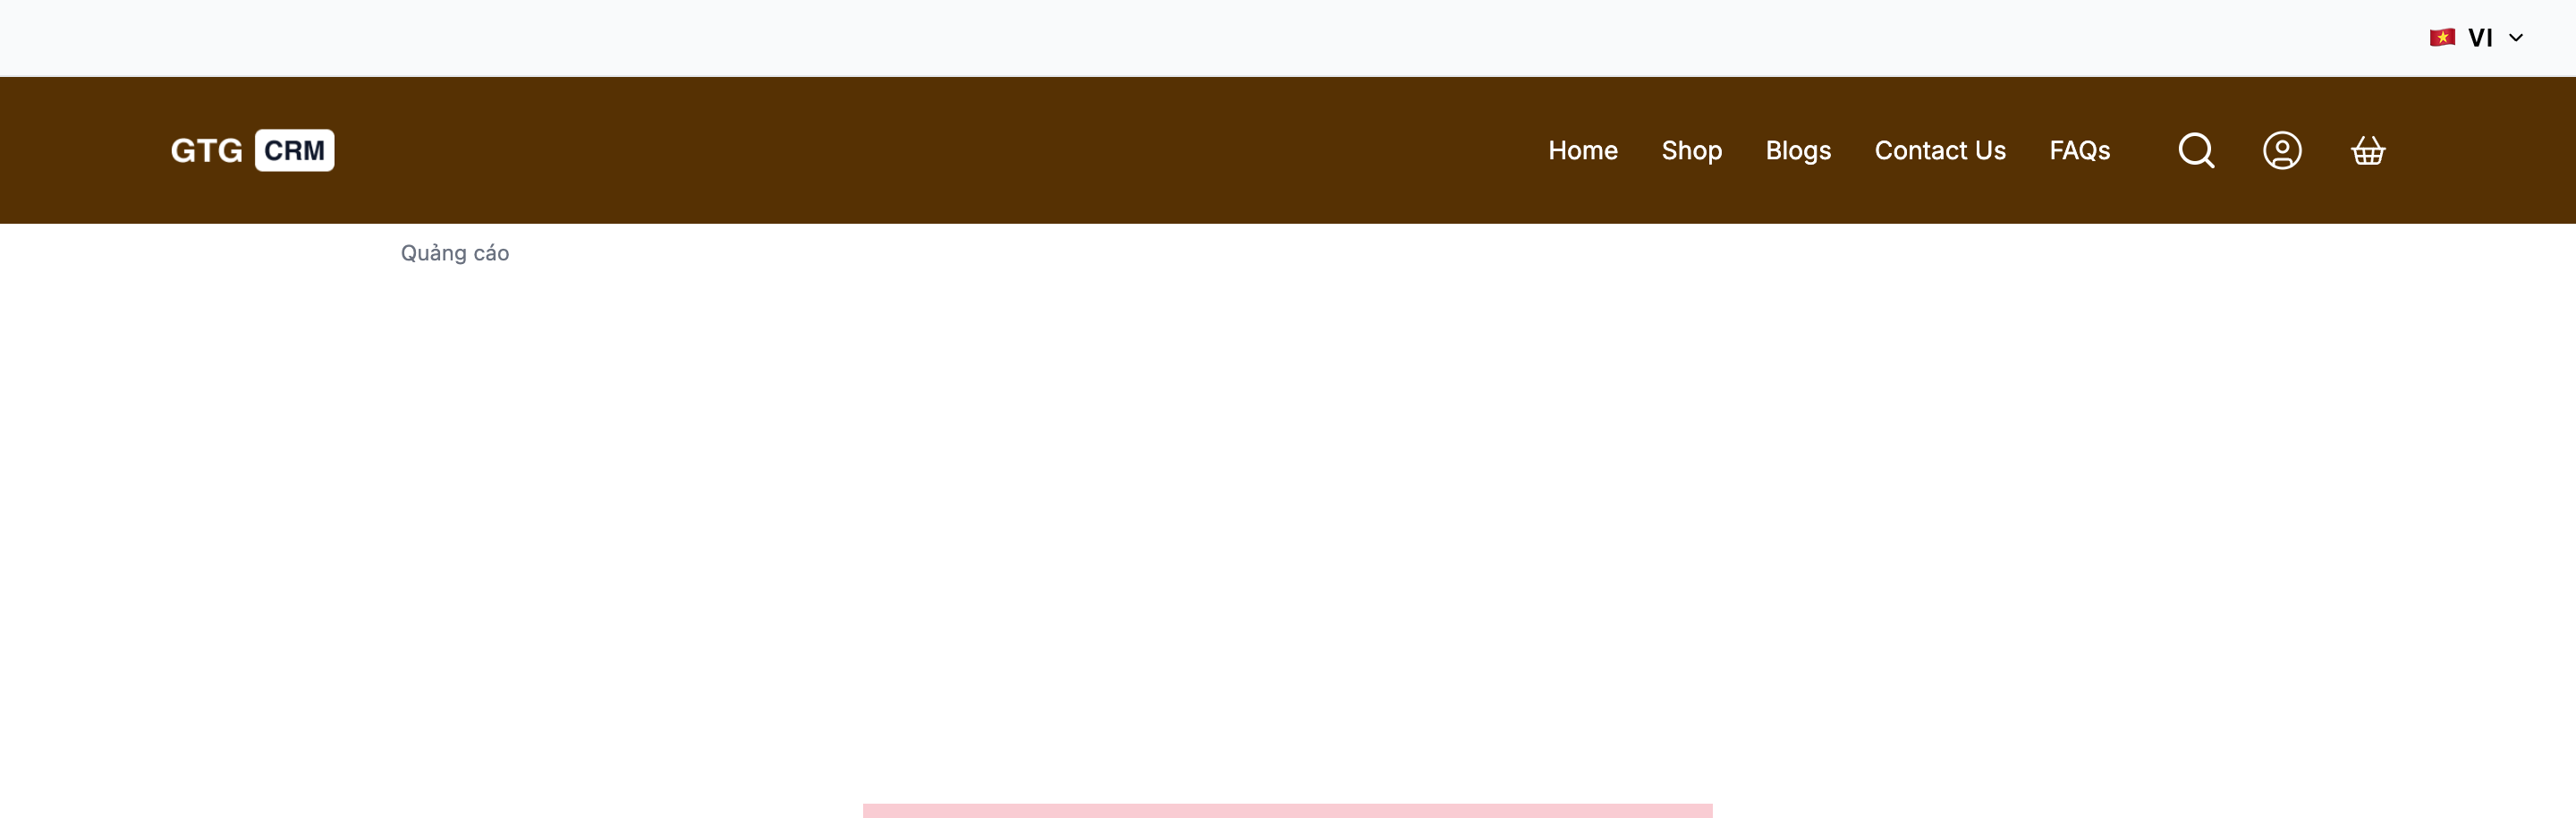
Ads you add on this screen do not appear on the shop, product pages, cart, checkout, account, login, order pages, referral program pages, or invoices. Any custom page you build that includes a form, checkout, booking, or login is also excluded.
- Limitation: this button is not a consent tool certified by Google. For visitors in the European Economic Area, the United Kingdom, and Switzerland, Google requires that tool, so Google may show only limited ads or non-personalized ads. The cookie and privacy information your visitors see remains your responsibility.
4. The ads.txt File Checks Each Line
Open the ads.txt tab, paste the line provided by the ad network, and click Save ads.txt. You will see Valid: 1 line and the file's address. If a line is incorrect, the screen shows the number of the incorrect line, and the file currently in use is not changed. Deleting all content and saving will remove the file.
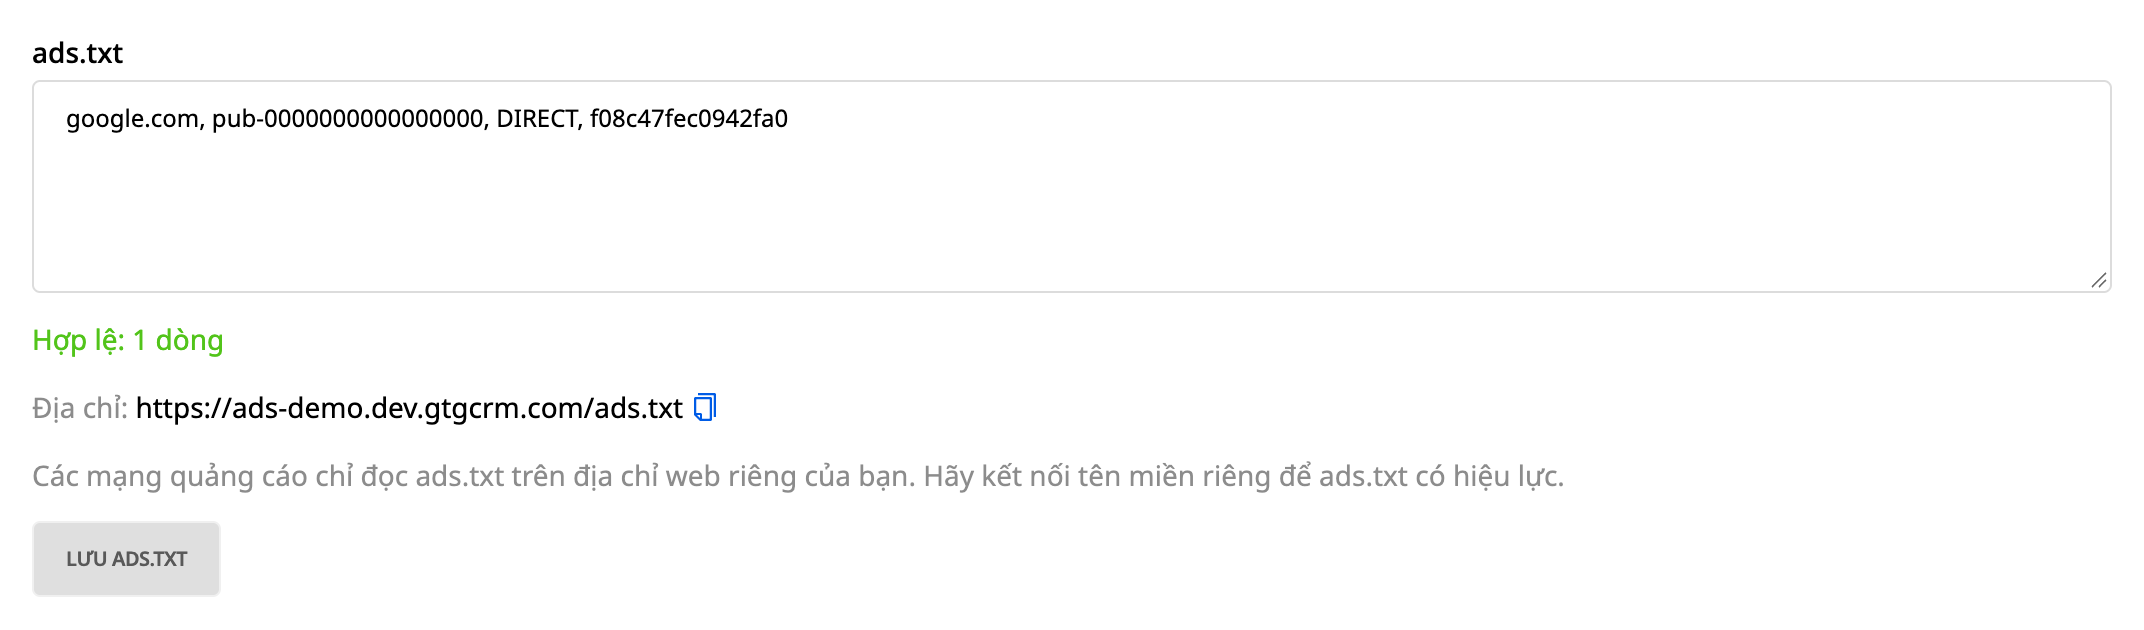
- Limitation: ad networks only read ads.txt at your own web address. For addresses in the form yourdomain.gtgcrm.com, the file will still display, but the network will not accept it; the screen includes a note reminding you to connect a custom domain. The public file is cached for up to 5 minutes before it refreshes.
5. Turn On and Off, and Take Your Settings Anywhere at Any Time
You can turn ads on or off on your website at any time; changes take effect within about 5 minutes, and your ad settings are saved. The Activity tab records changes, for example each ads.txt update. The ad settings download button gives you a file with all ads, placements, and ads.txt content.
Who Is This For?
- Shop owners with a blog or content site who already have a Google AdSense account and want to place ads on their website.
- Website managers who need to place, edit, or pause ads without asking a developer.
- Business owners who want to keep control over turning ads on and off and be able to export all settings out of the system.
What You Should Know Before You Start
- Contracts and ad revenue are between you and Google. The ad network is your own provider. GTG CRM does not sell, place, or approve ads, and does not take a percentage of your earnings. Saving ad settings does not use any credits.
- You need a Google AdSense account. Sign up at adsense.google.com/adsense/signup. According to Google's help center (as we read it on 08/11/2026), signing up for AdSense is free; Google requires applicants to be at least 18 years old, own the website content, and comply with Google's policies. Google decides whether to approve your account, whether to serve ads, and how much to pay. GTG CRM does not promise any level of income.
- Google Ad Manager is also supported. We do not list Ad Manager's fees because Google has not published any figures where we checked; please see Google's terms.
- Google only, for now. Codes from other ad networks are rejected until GTG CRM adds support.
- Websites only. Landing pages do not have this feature yet.
- GTG only uses the right to turn off ads on a website when a government authority or the ad network requests it, or when ads violate the terms. In that case, the screen shows a GTG has turned this off notice with the date and reason, the switches are locked, and the Activity tab records the shutdown and the re-enabling.
- You are responsible for the ad network's policies, the ads.txt file, cookie information and privacy that your visitors see, and the ads displayed. Consult your advisor if needed.
How Do You Get Started?
You need three things: a published website with a web address, your AdSense account, and your GTG CRM account. Go to Marketing ▸ Brand Assets ▸ Websites, then click Ads in the row for your website.
Free trial — no credit card required.