What you'll be able to do after this guide
Customers message you, ask about pricing, then go silent for three days. If you only keep track of this in your head, you won't know who is at which step or how much revenue you can still close this month. This guide shows you how to set up your sales pipeline, create your first deal, move deals through each stage, close them as won or lost with a reason, and review your revenue forecast, all on one Deals screen.
Before you start
- You're signed in with permission to view and create CRM records. Your workspace administrator grants these permissions. If your account has view-only access, you can still open the screen but won't see the create buttons (see Step 7).
- It helps to have a few contacts in the Contacts section ready to attach to deals. No contacts yet? See the CRM user guide.
- Want the bigger picture on growing revenue? See Grow revenue with GTG CRM.
- On some other screens (for example, a contact's activity timeline), this same object is still called "transactions." This guide uses the term "deals," as shown on the Deals screen.
Step 1. Open the Deals screen
- Open the Sales & CRM menu, go to the Sales group, and select Deals.
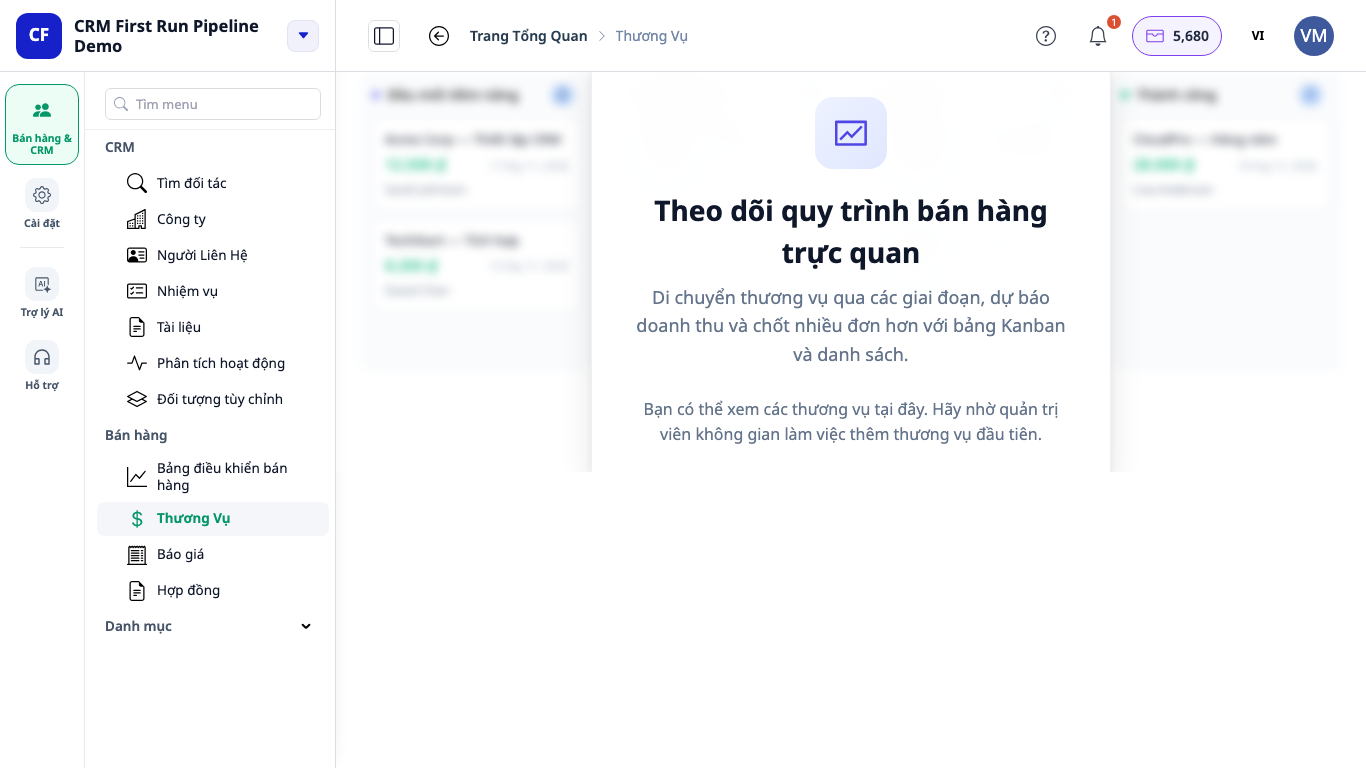
- If your workspace doesn't have a sales pipeline yet, you'll see a card titled "Track your sales pipeline visually" with a "Set up sales pipeline" button (do Step 2).
- If you have a pipeline but no deals yet, you'll see a card with the same title and a "Create your first deal" button, with a faded preview of the screen behind it in your language.
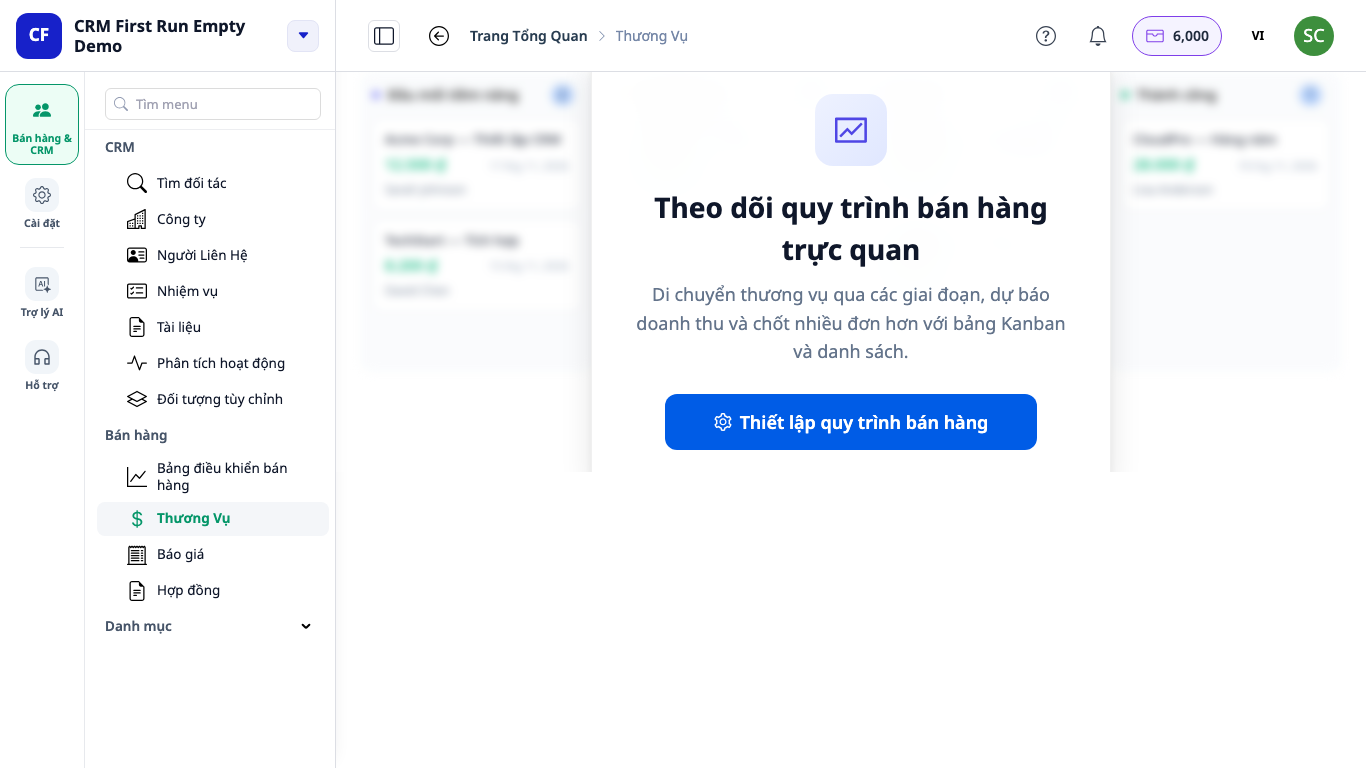
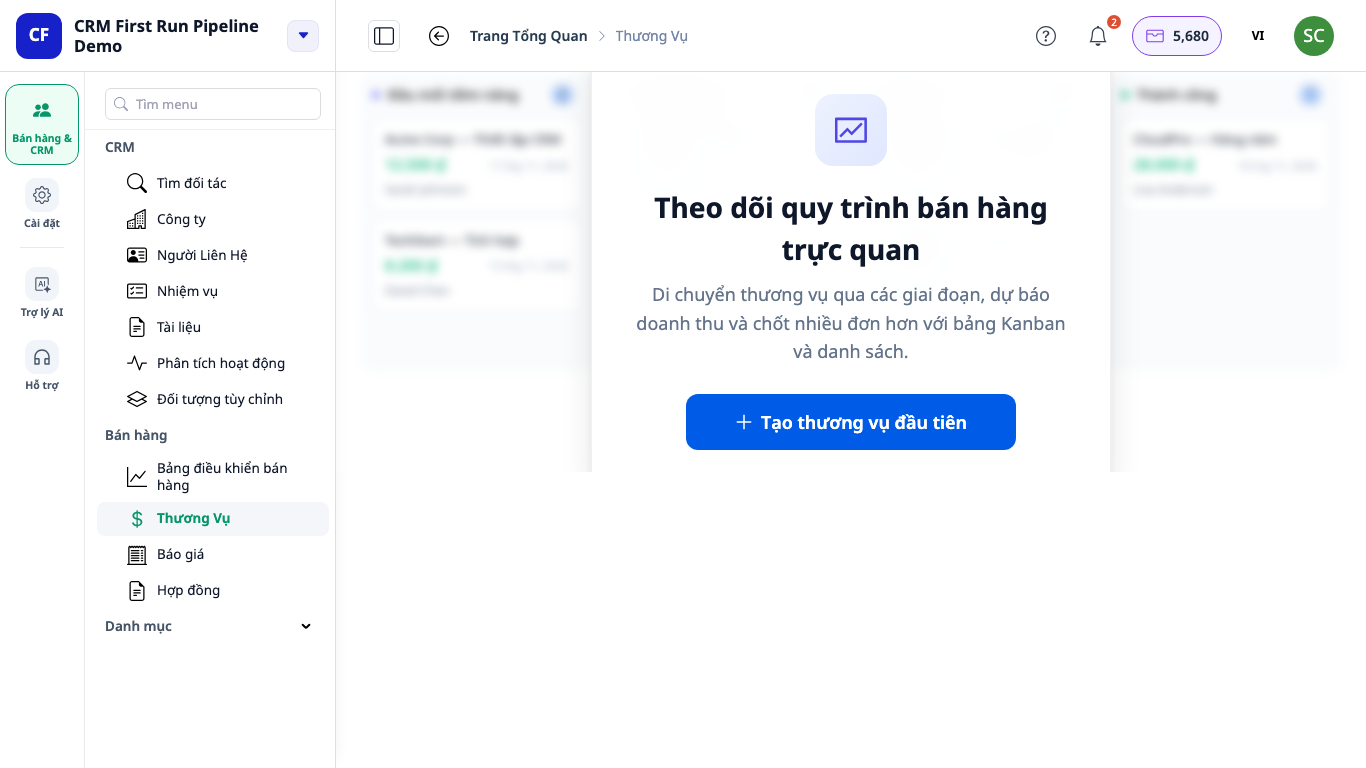
✅ Expected result: one of the two cards above, or the deals table if you already have deals.
Step 2. Build your sales pipeline (Pipeline settings)
- Click "Set up sales pipeline", or click the Pipeline settings button at the top of the Deals page.
- Click New pipeline and give it a name (for example, Sales pipeline).
- Don't want to start from scratch? Check "Include default stages" to get the stages Qualified → Meeting → Proposal → Negotiation → Won/Lost, then rename them to match how you sell.
- To build your own: click Add stage for each real step in your process, such as Prospecting, Evaluation, Proposal, and Negotiation. Each stage has a Win probability (%). Mark one stage as the "Won stage" and one as the "Lost stage" (in the stage list, these show the labels Won and Lost).
- You can't switch a stage that currently contains deals between open, won, and lost. Move those deals out first.
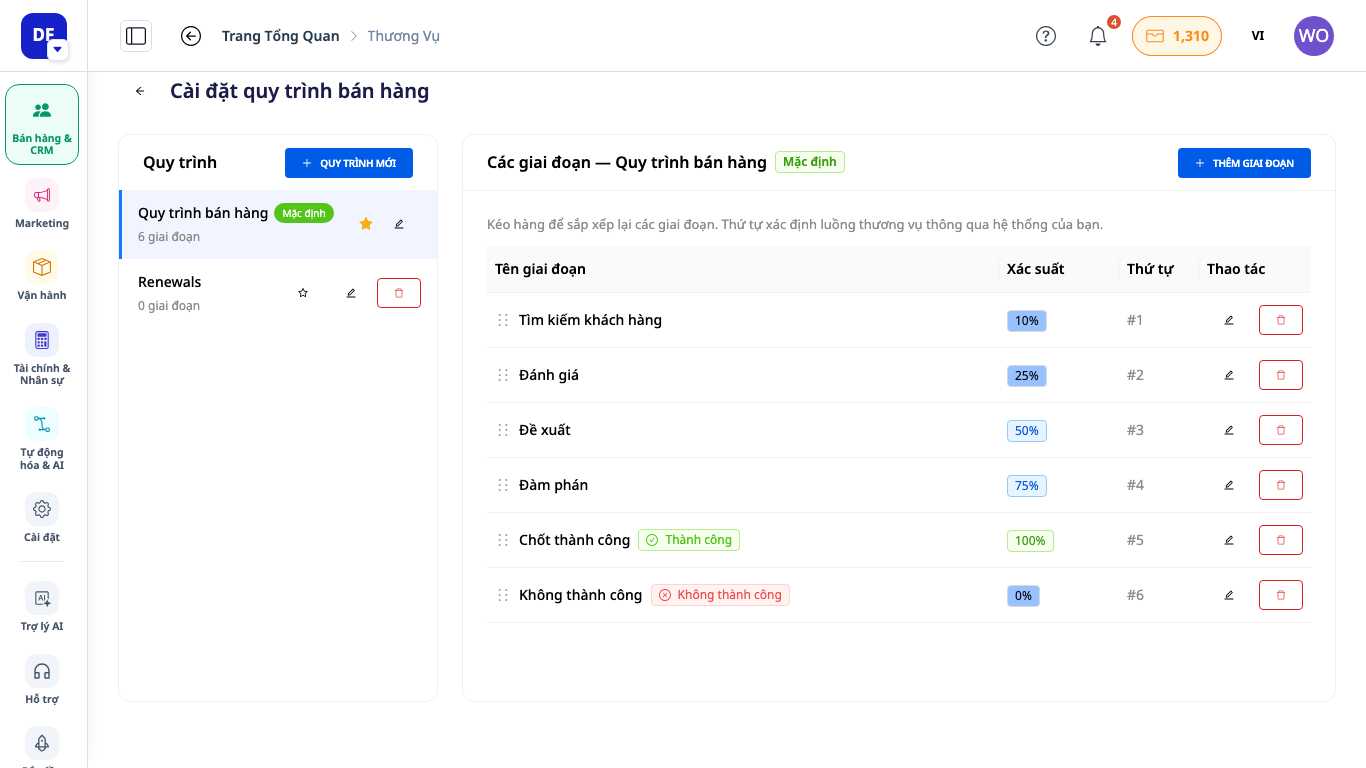
✅ Expected result: the Stages list on the right shows your stages in the order you set. New deals can now be assigned to this pipeline.
Step 3. Create your first deal
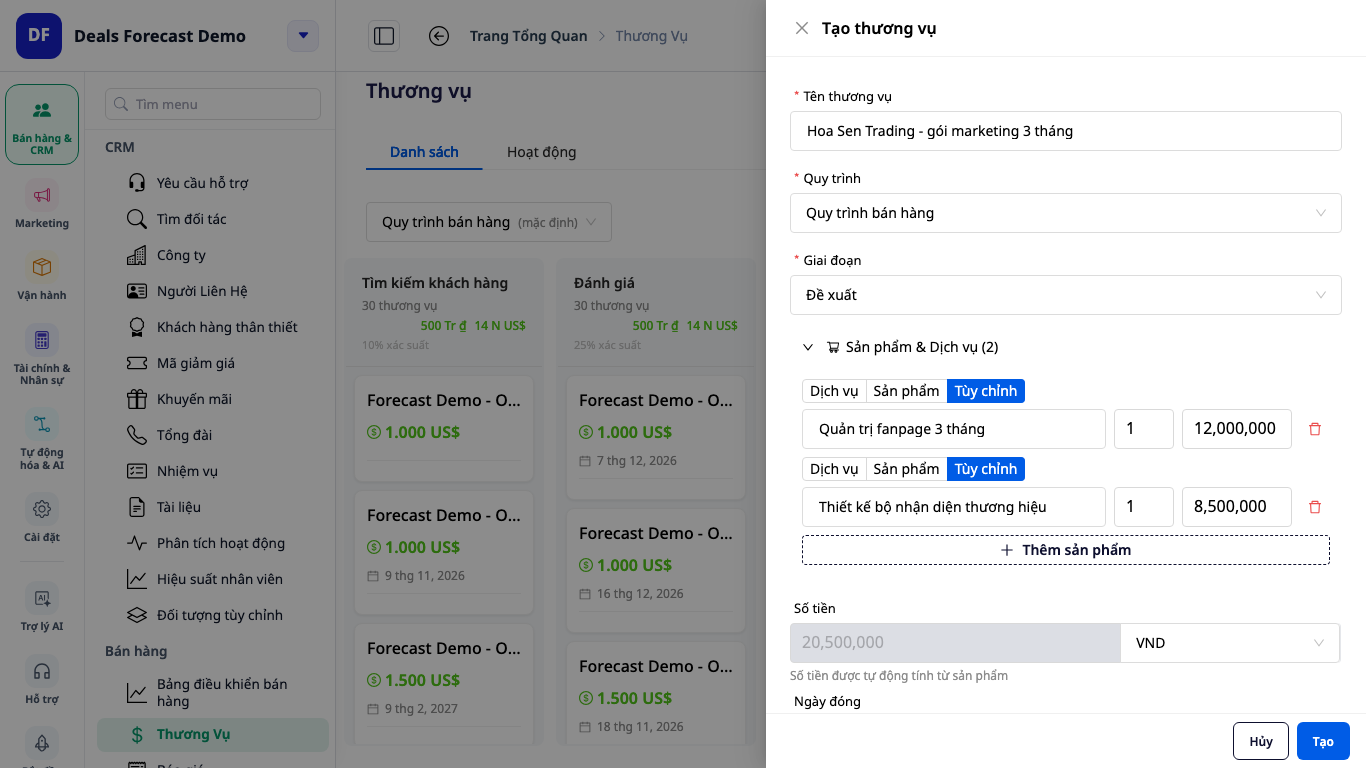
- Click "Create first deal" (or Create deal at the top of the page once you already have deals). The form opens in the right-side panel. The Cancel and Create buttons always stay at the bottom of the panel, so they remain visible even on a small laptop screen.
- Enter the Deal name (for example, ABC Company, 3-month marketing package), then select a Pipeline and a Stage.
- If applicable, add Products & Services. The Amount is calculated automatically from the product lines. If there are no products, enter the Amount and select a Currency (the default is your company's currency).
- Set the expected Close date, Owner, Priority, Description, Company, and Related contacts (each contact has a role, such as Decision Maker).
- Click Create.
✅ Expected result: a "Deal created successfully!" notification appears, and the deal is placed in the correct stage on the board.
Step 4. Track on the Kanban Board or List
- The view switcher at the top has two modes: Kanban board (drag and drop deals between stages) and List (a table with one deal per row, with the columns Name, Amount, Stage, Status, Priority, Close date, Owner, Contact person, Created, and the Search deals field).
- Each column header shows the number of deals and their total amount, with one total per currency. Amounts in different currencies are never added together. Dates, times, and amounts are displayed in the language you are using.
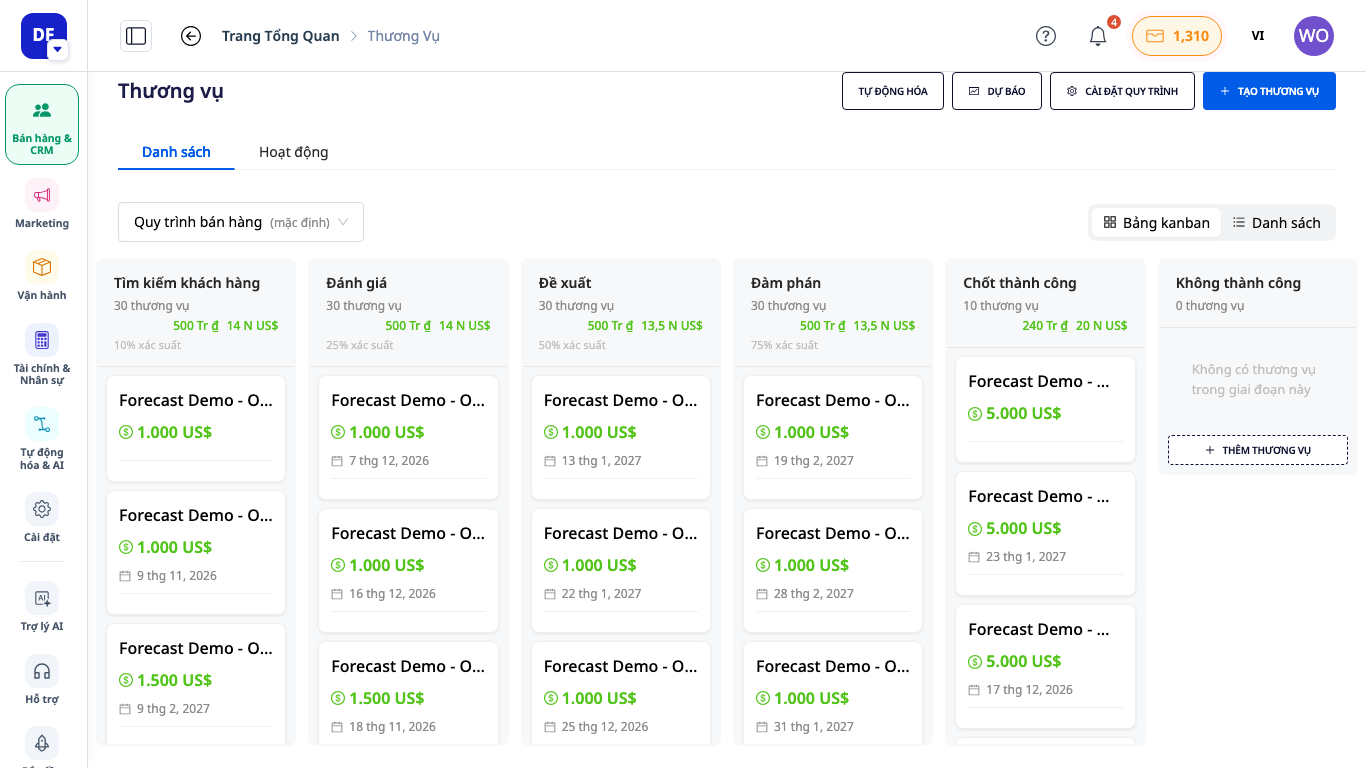
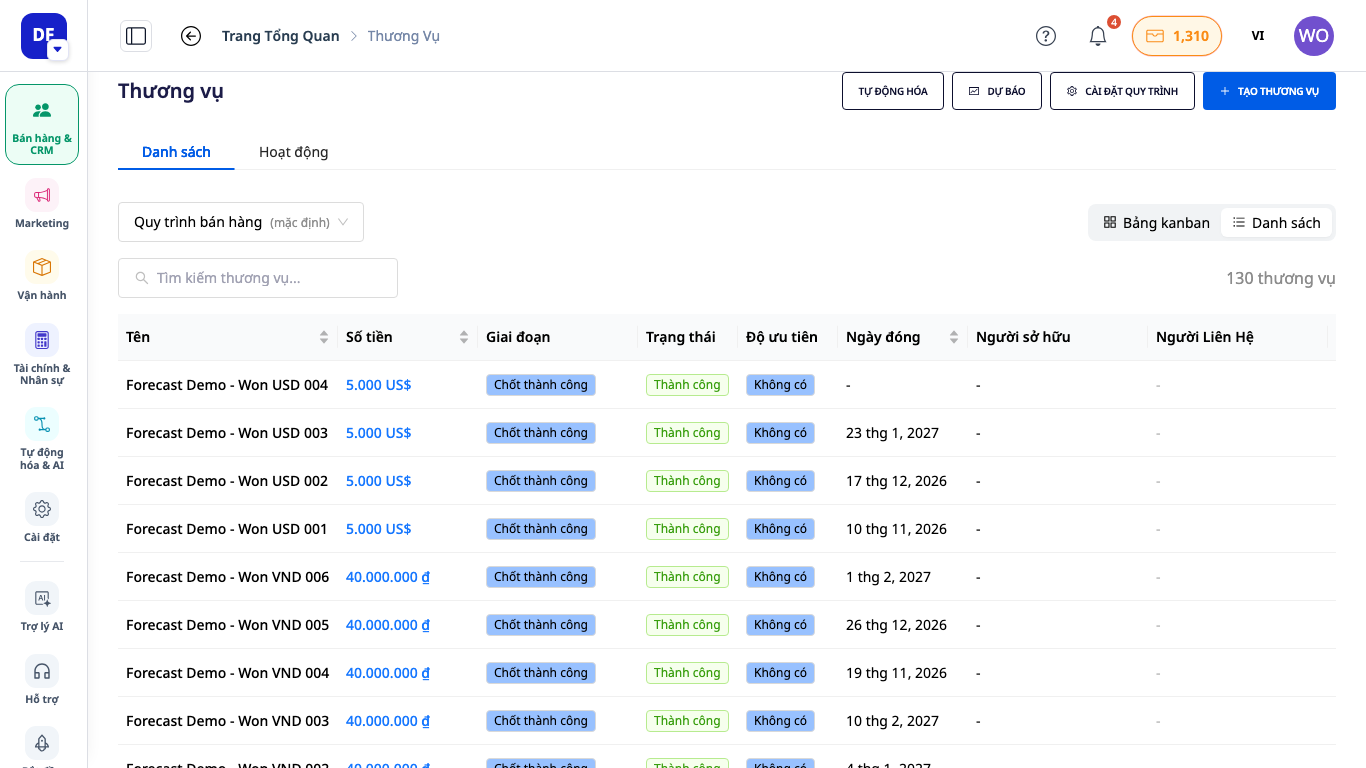
✅ Expected result: dragging a card to another column changes the deal's stage. Dropping it into a Won or Lost stage opens the Close deal dialog (enter a reason or final amount). Nothing is saved until you confirm.
Step 5. Open a Deal and Mark It as Won or Lost
- Click a card to open the deal page, which has the tabs Overview, Contacts, Quotes, Contracts, Documents, Stage history, and Activities. On narrow screens, tabs that don't fit are grouped under the … menu so the buttons at the top of the page remain visible. To link a task to a deal, create the task from Tasks, then select the deal in the task form (see Task Management 2.0 Guide).
- An open deal has Won, Lost, and Delete buttons at the top of the page, and an Edit button in the Deal information card (Overview tab). To mark a deal as Won, enter the final amount if it differs from the recorded one (leave it blank to keep the current amount). To mark a deal as Lost, enter a reason (required) so you can later see why the deal was lost.
- To reopen a closed deal, select an open stage. The system will ask for confirmation.
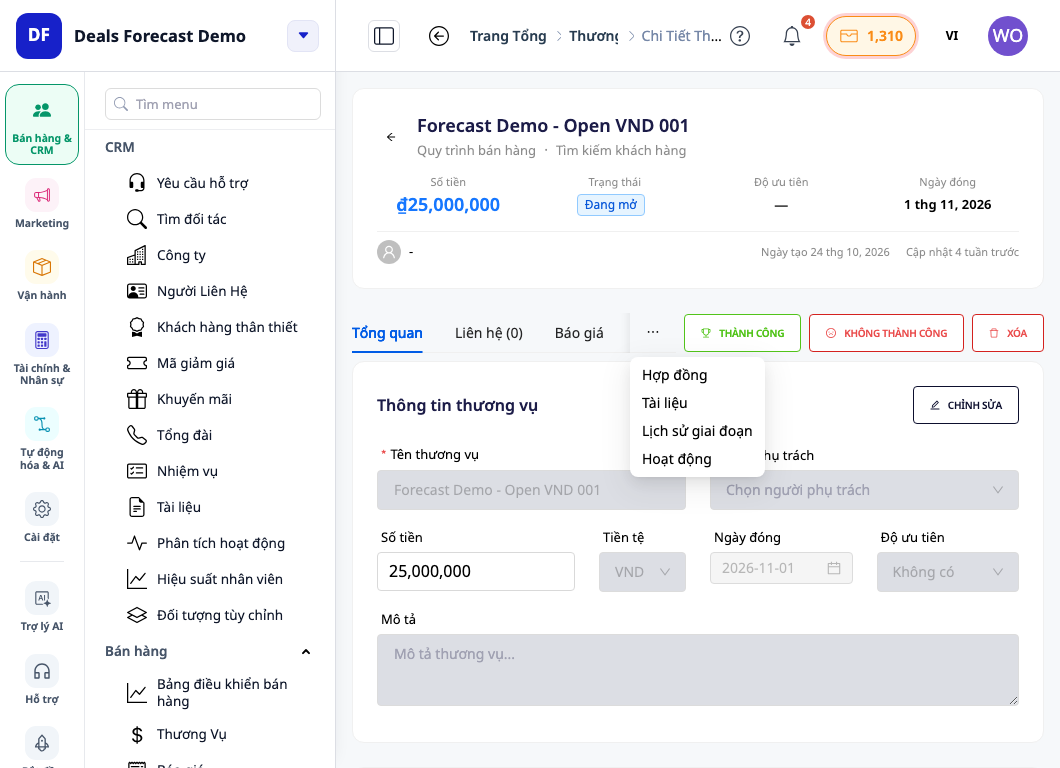
✅ Expected result: the won deal sits in the closed-won stage of the pipeline, and the Won revenue card in the Forecast includes its amount.
Step 6. View the revenue forecast
- From the Deals page, click the Forecast button at the top of the page (next to Automation, Pipeline settings, and Create deal). The Deal and revenue forecast page opens with four cards: Open pipeline, Weighted forecast, Won revenue, and Average probability. You can group the results by Stage, Month, Quarter, or Owner.
- When you select a date range, deals without a close date are listed separately and do not disappear. The forecast is an estimate, not a commitment.
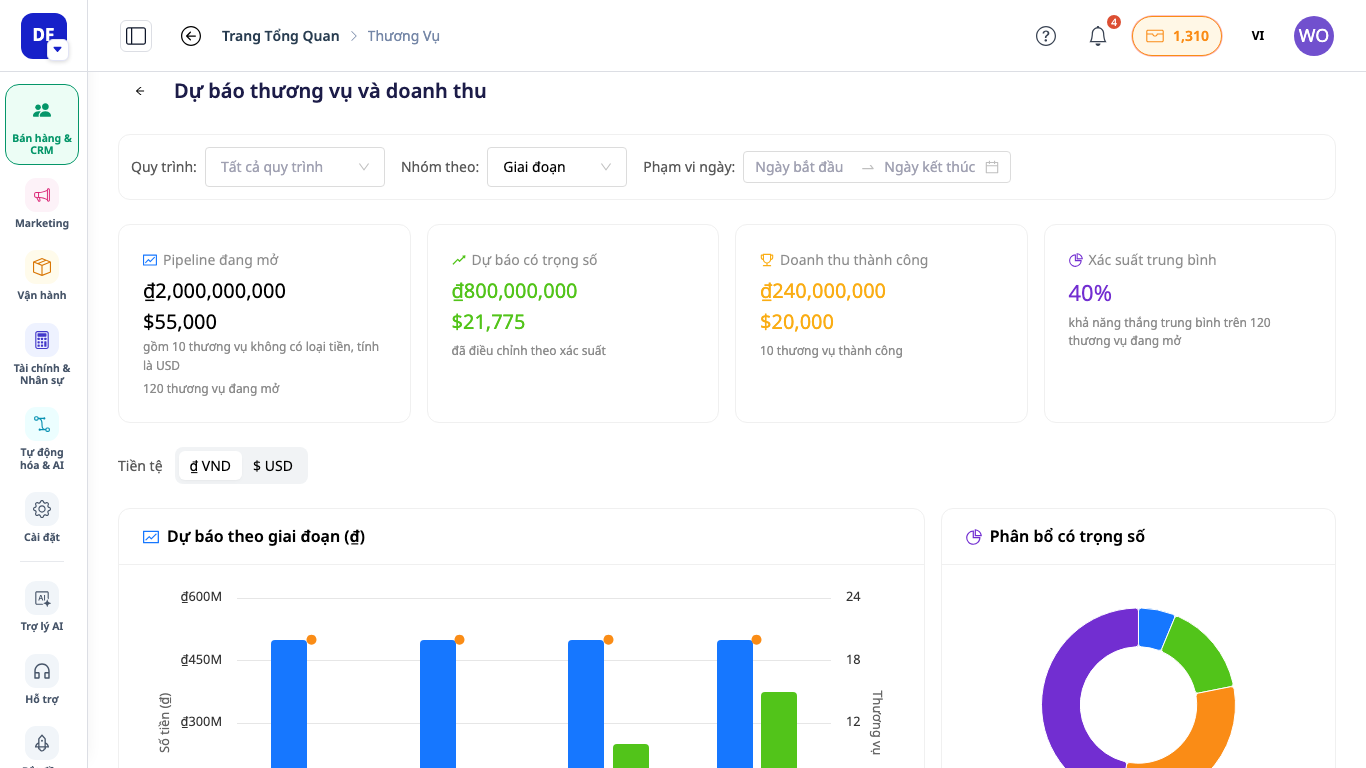
✅ Expected result: each of the four cards shows its own amount for each currency. Change Group by and the chart and table below update accordingly.
Step 7. When the account has view-only access
- The Deals screen is empty: instead of a button, you see a message saying you can view deals here and asking your workspace administrator to add the first deal. There is no create button, no add option at the end of a column, and no edit, won, lost, or delete actions. Pipeline settings are read-only.
- To get more permissions: ask your administrator to change your role (see section 9 of the Permissions User Guide).
Quick reference for expected results
| Action | What you see |
|---|---|
| Open Deals | A card saying "Set up your sales pipeline" or "Create your first deal" |
| New pipeline + Add stage (or tick the default stages) | Stages in the correct order |
| Create (right panel) | "Deal created successfully!" |
| Drag a card | Stage changes |
| Drop into the closing stage | Close deal dialog box |
| Forecast button | Four cards |
| View-only account | A message asking your administrator, with no create button |
Pipelines, stages, and deals can all be edited later (if you delete a pipeline or stage, the deals in it must be moved first), so go ahead and build a draft first.