Table of Contents
1. Access Messaging
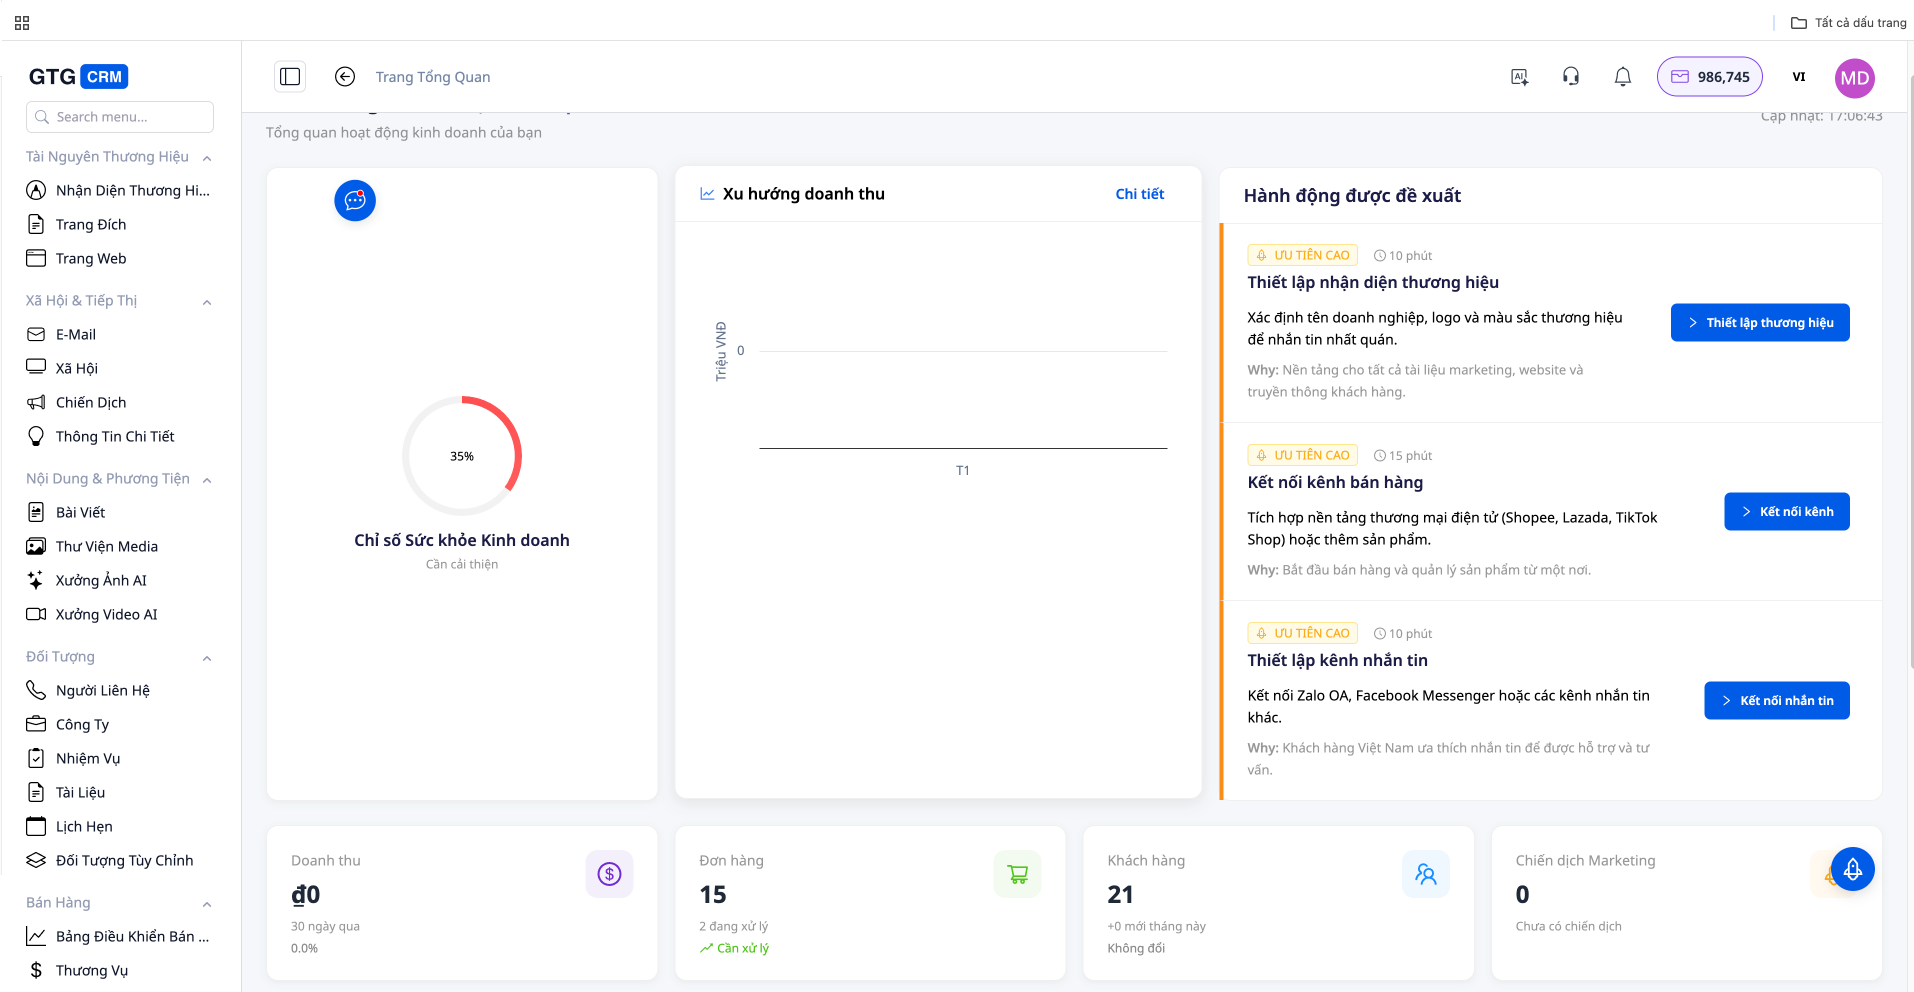
Step 1: Log in to GTG CRM
After logging in, look at the toolbar on the left.
Step 2: Open Messaging
In the Interactions section, click on Messages .
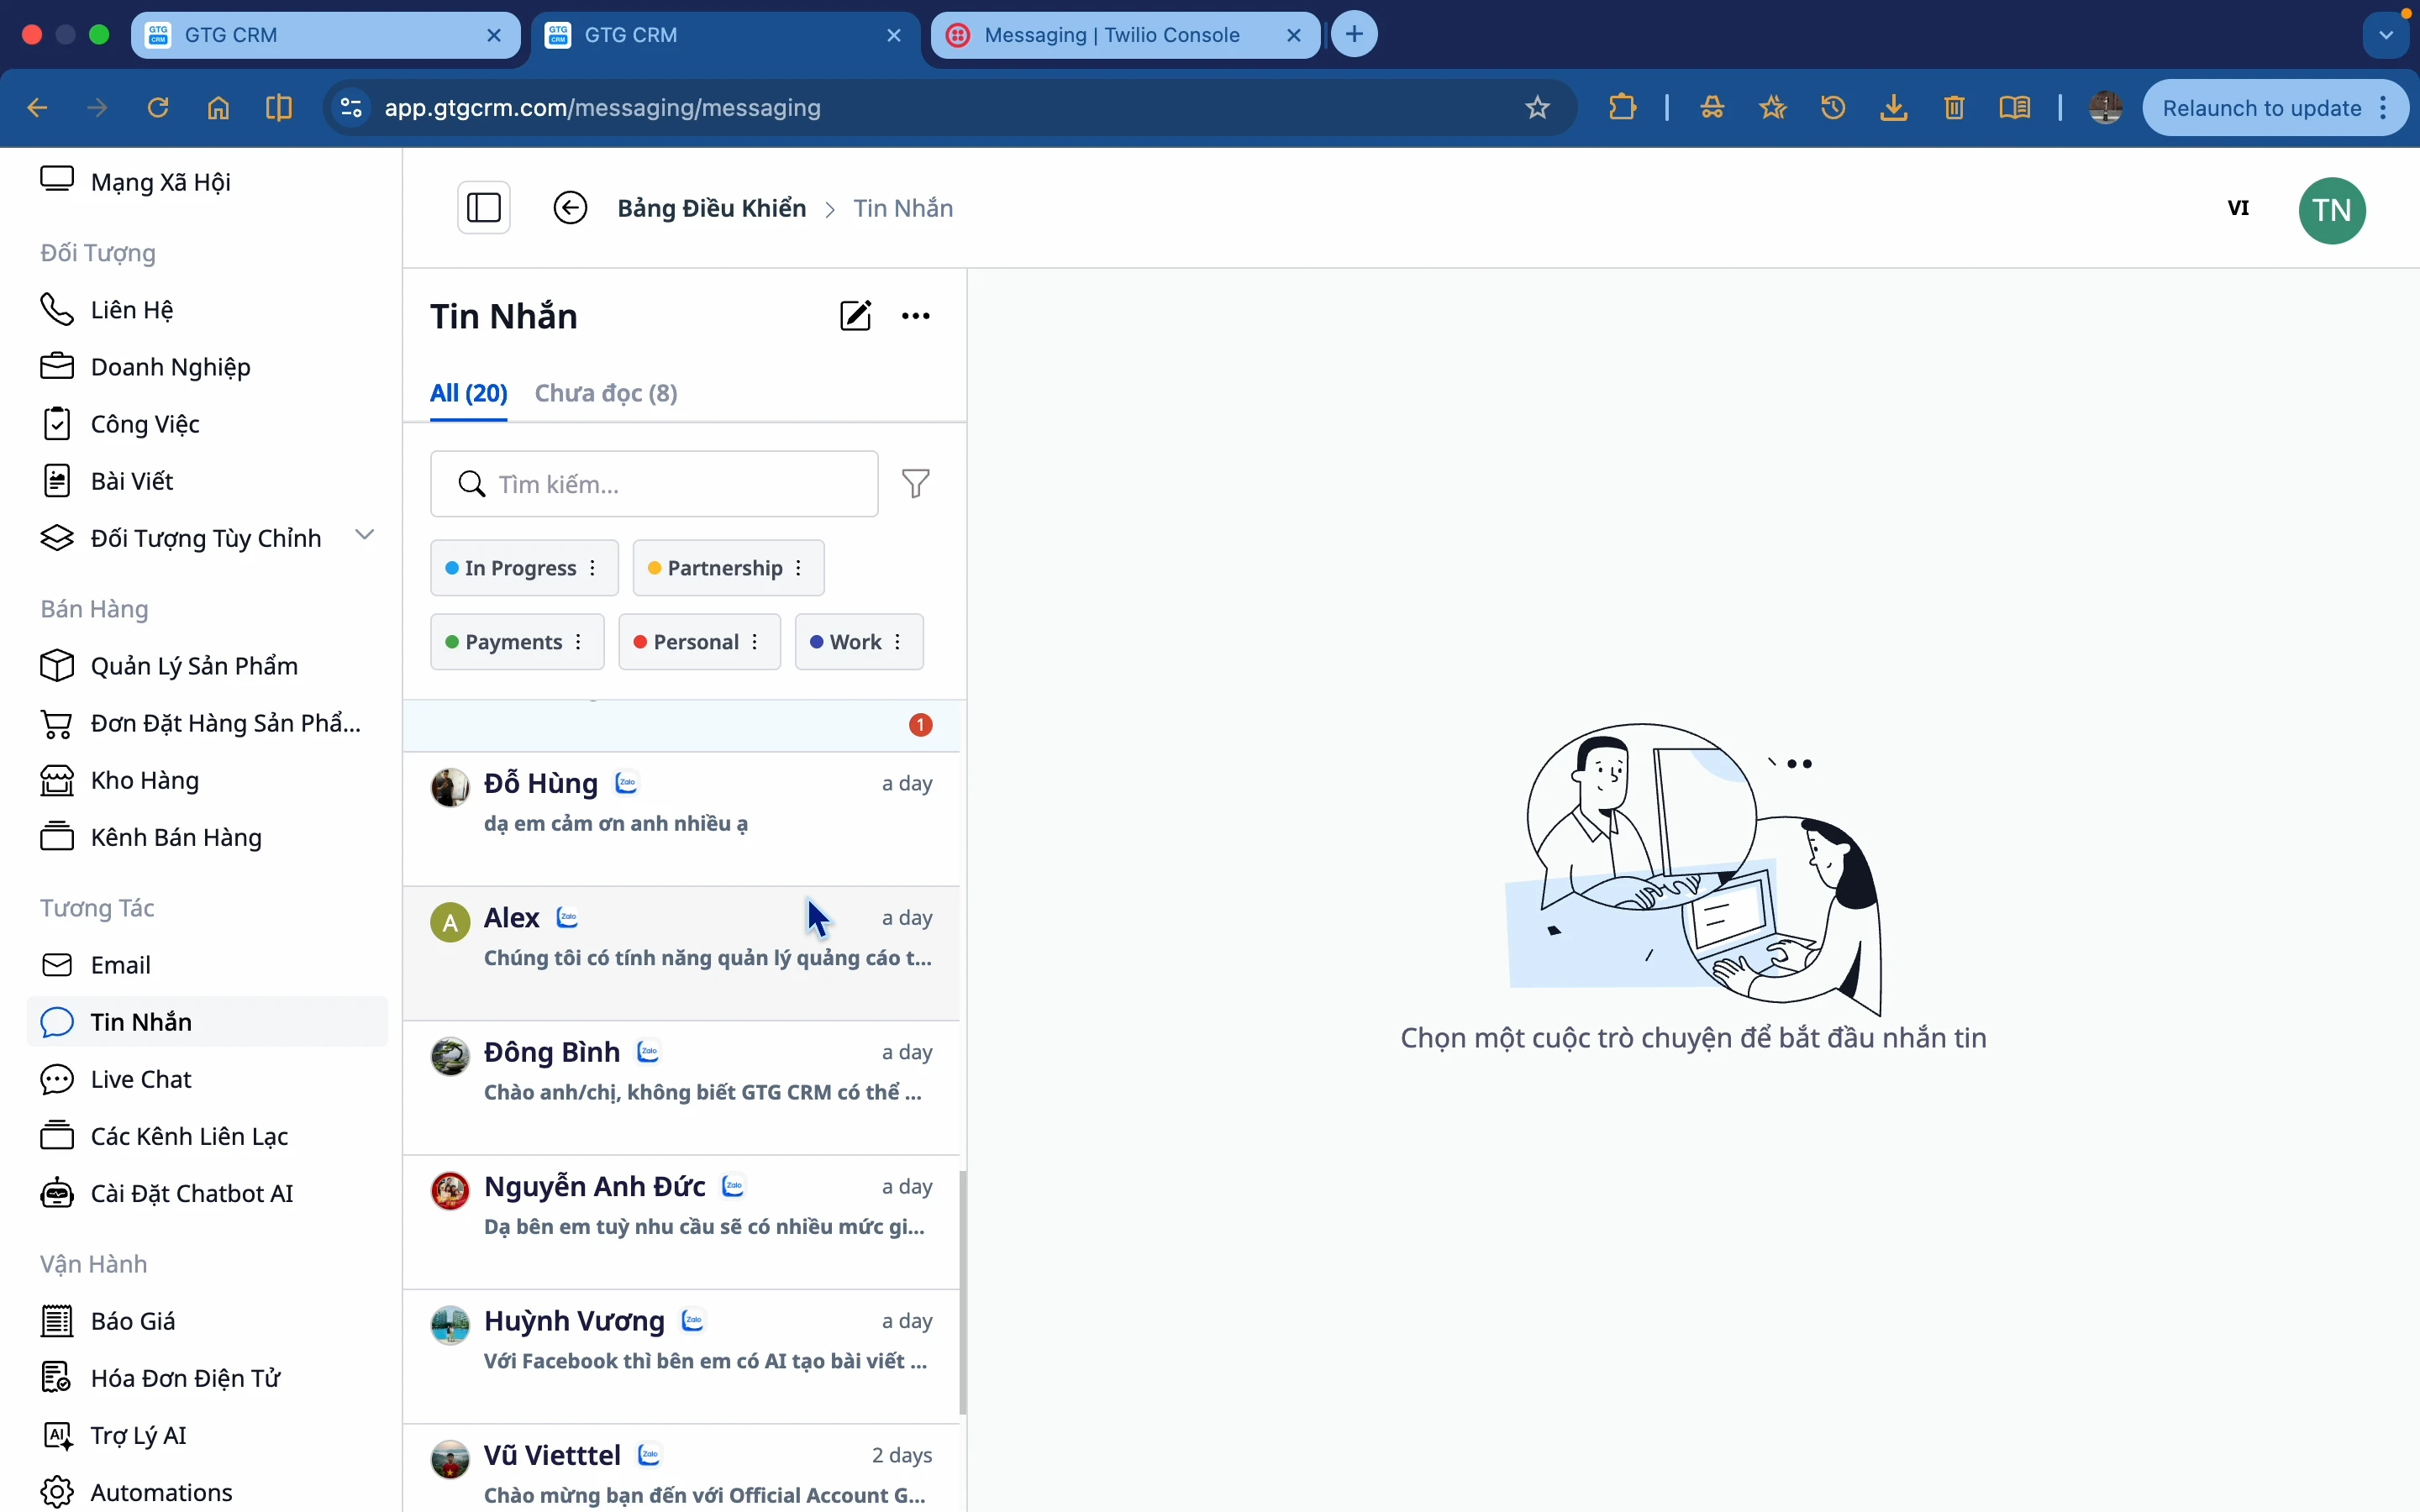
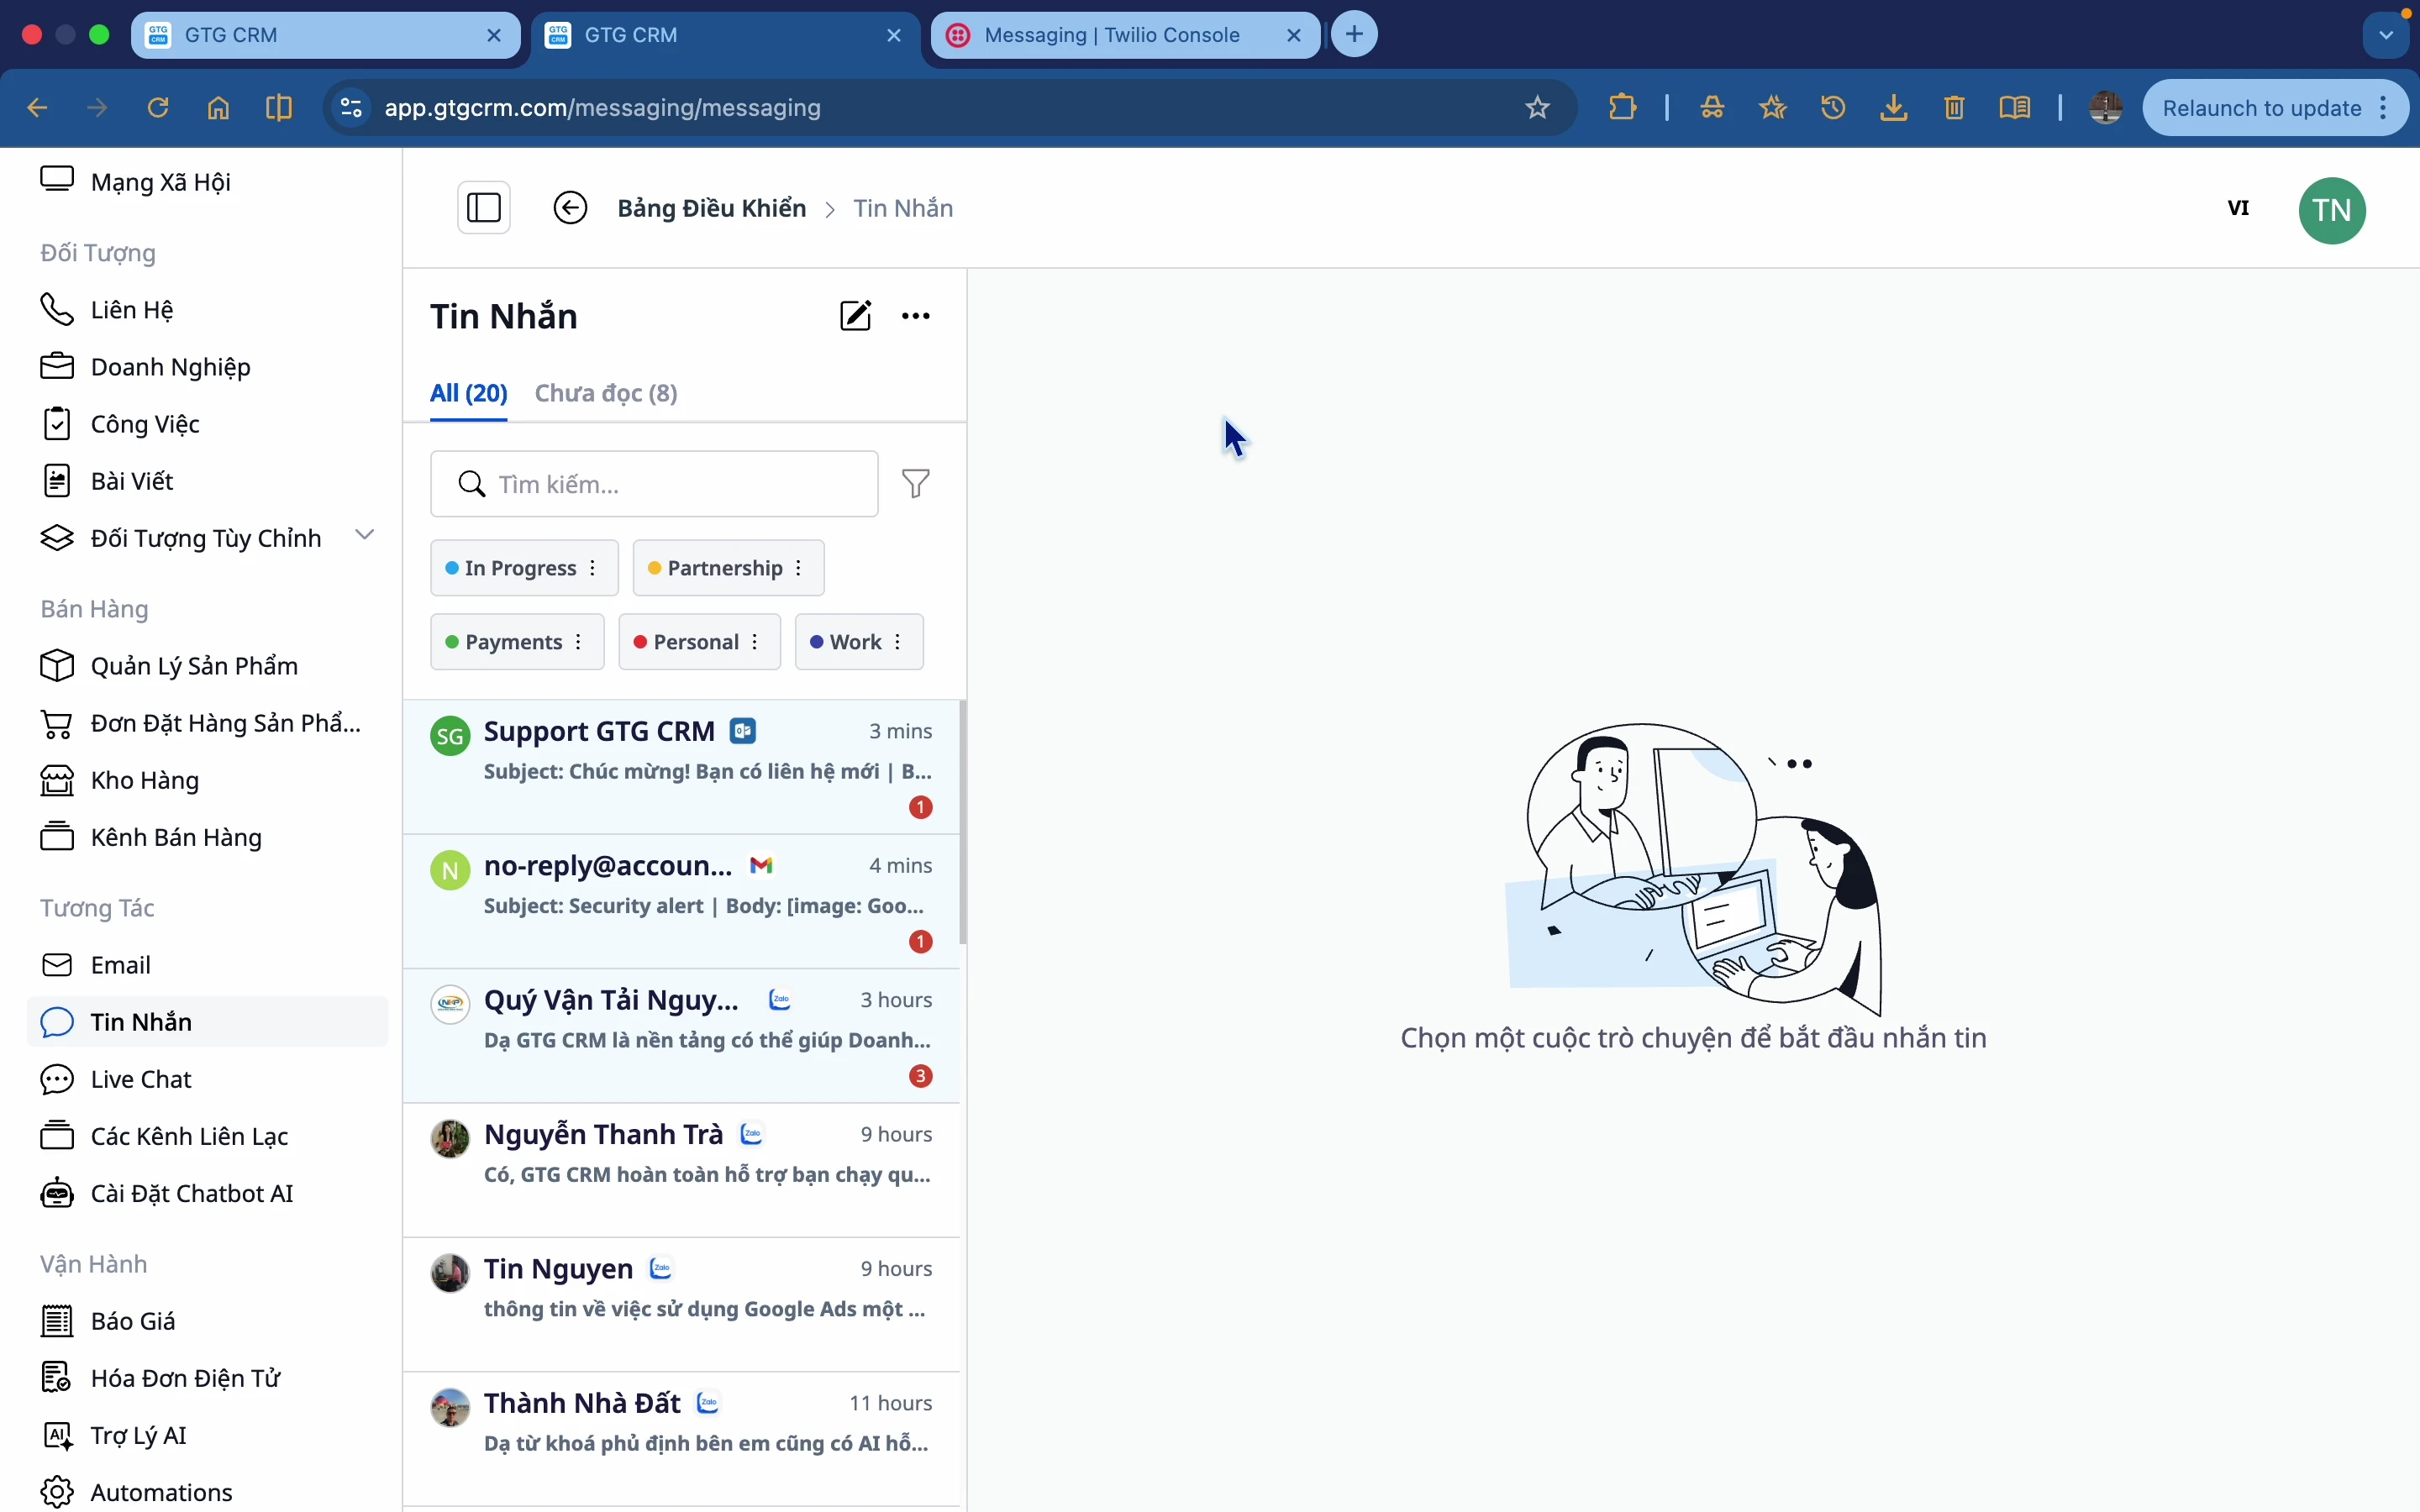
Step 3: Messaging Interface
This is the Messaging interface of GTG CRM.
2. Connecting communication channels
Important: Before using Messaging, you need to connect your communication channels to GTG CRM.
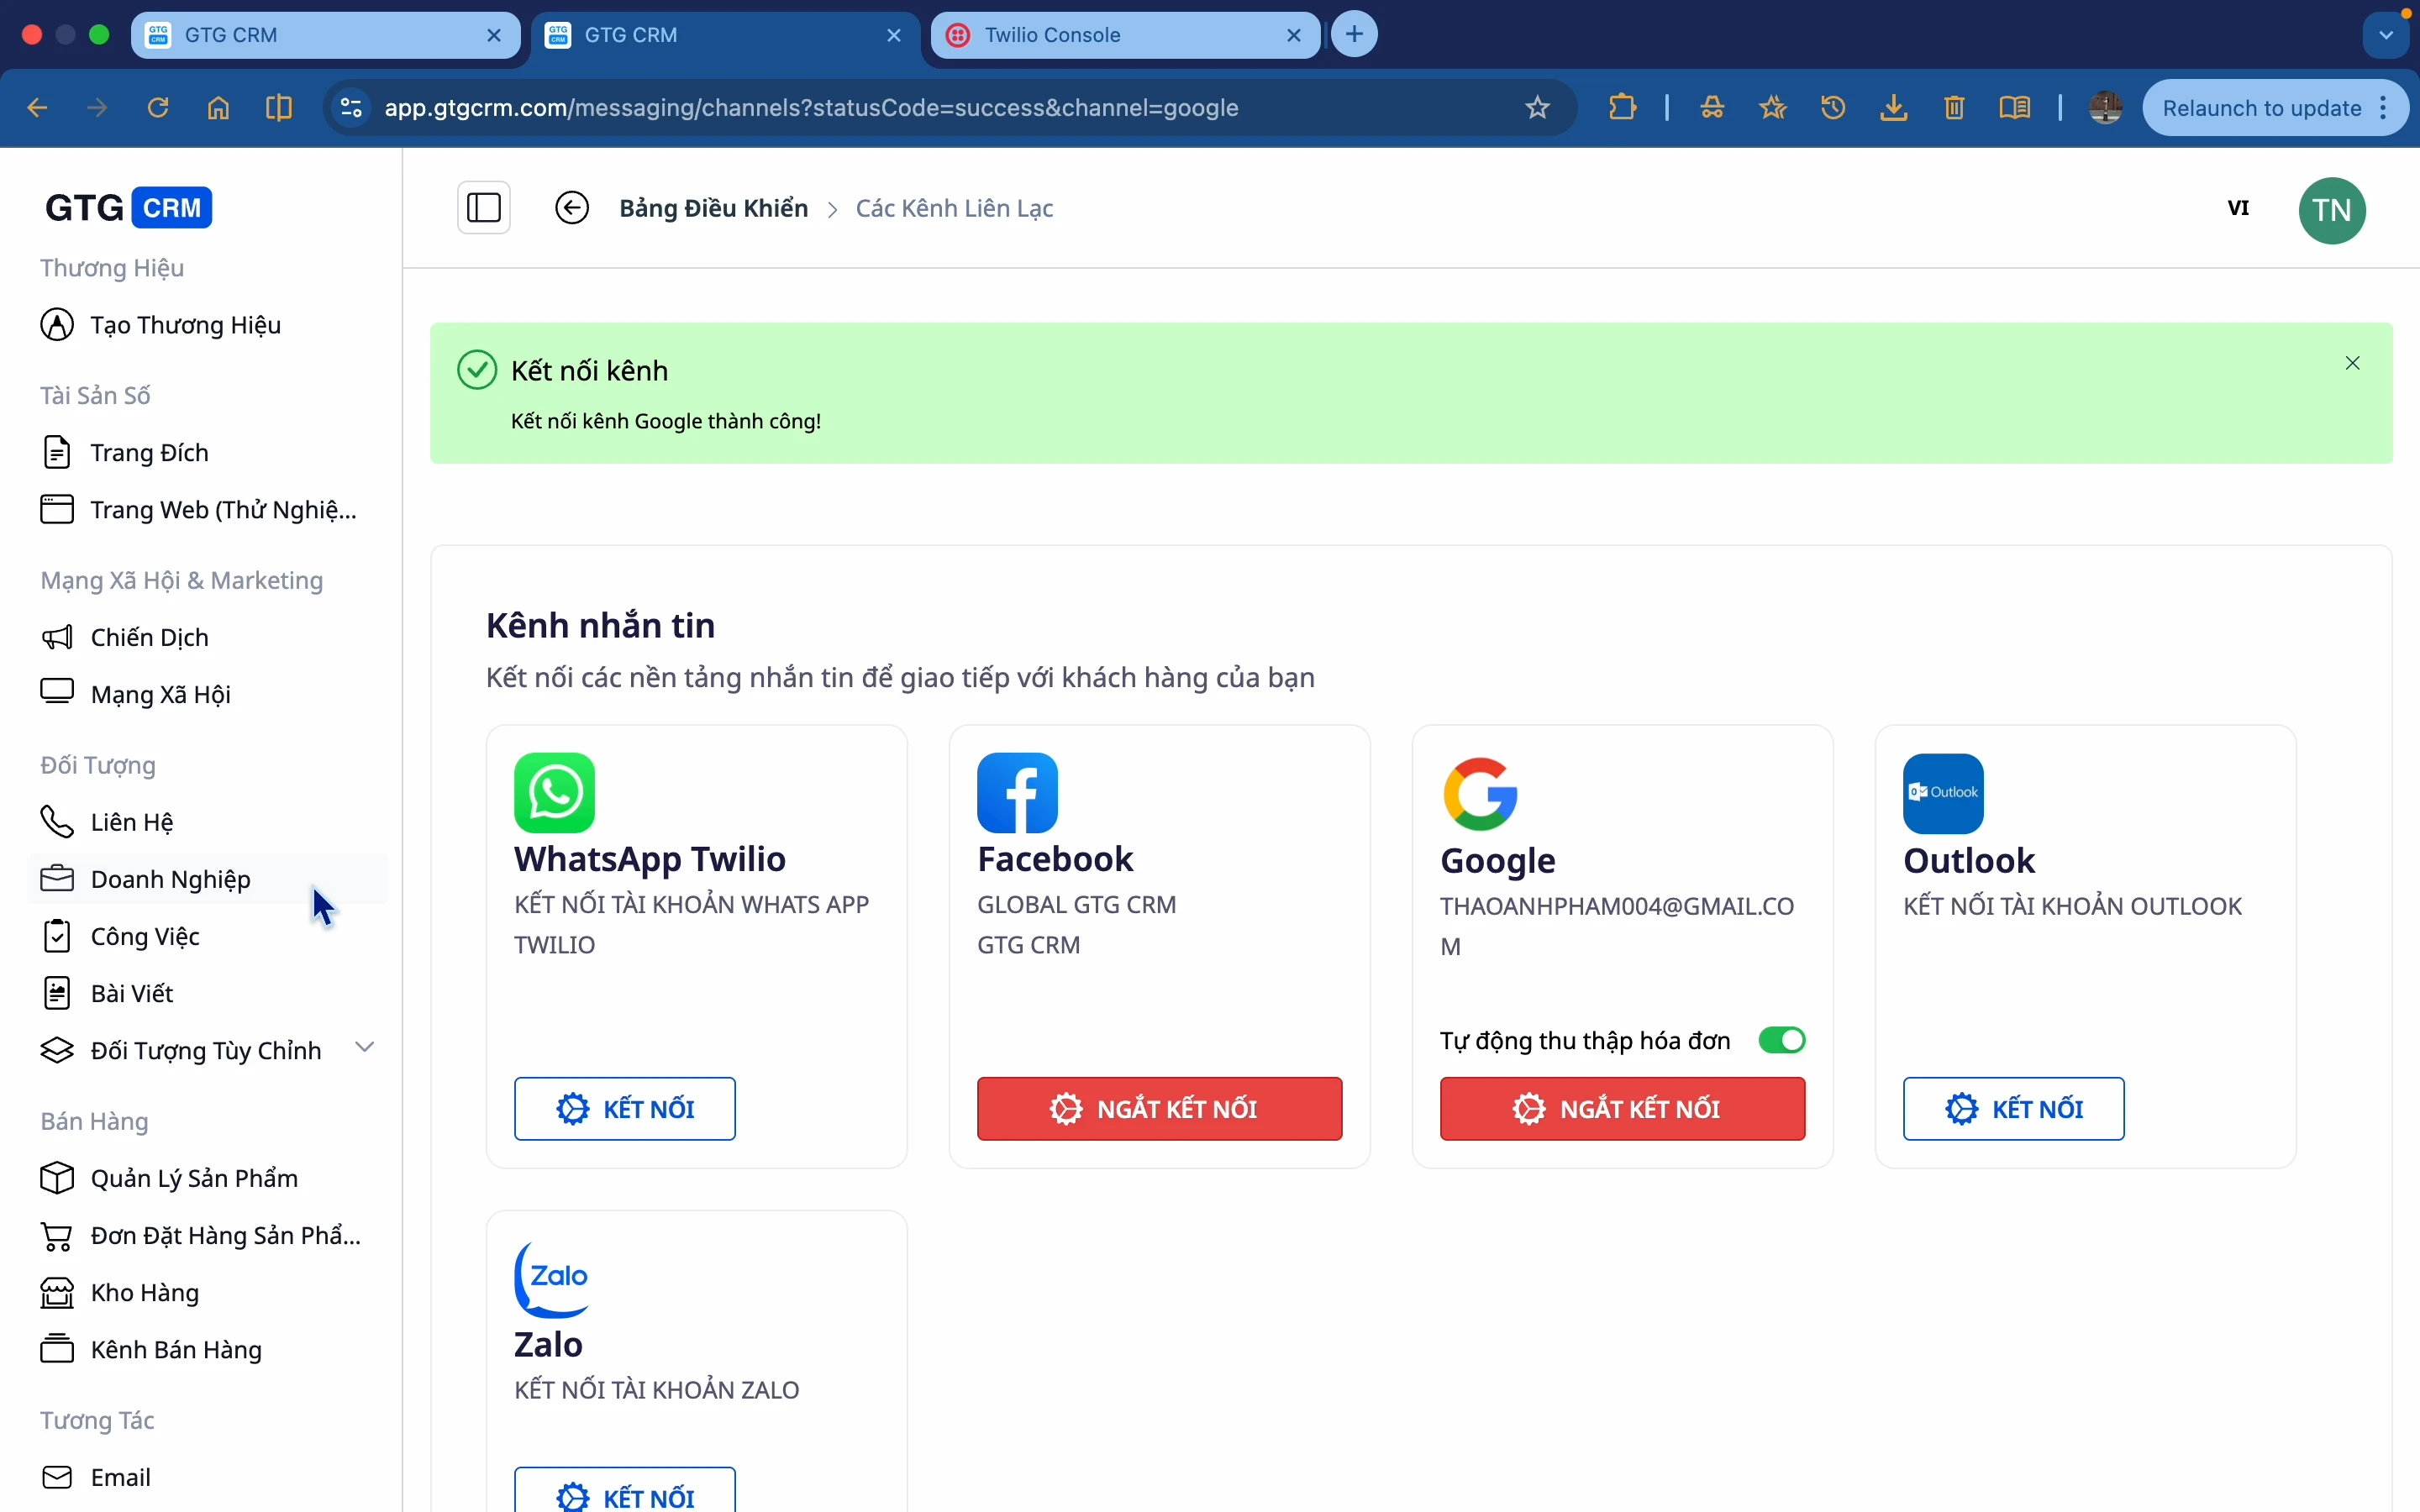
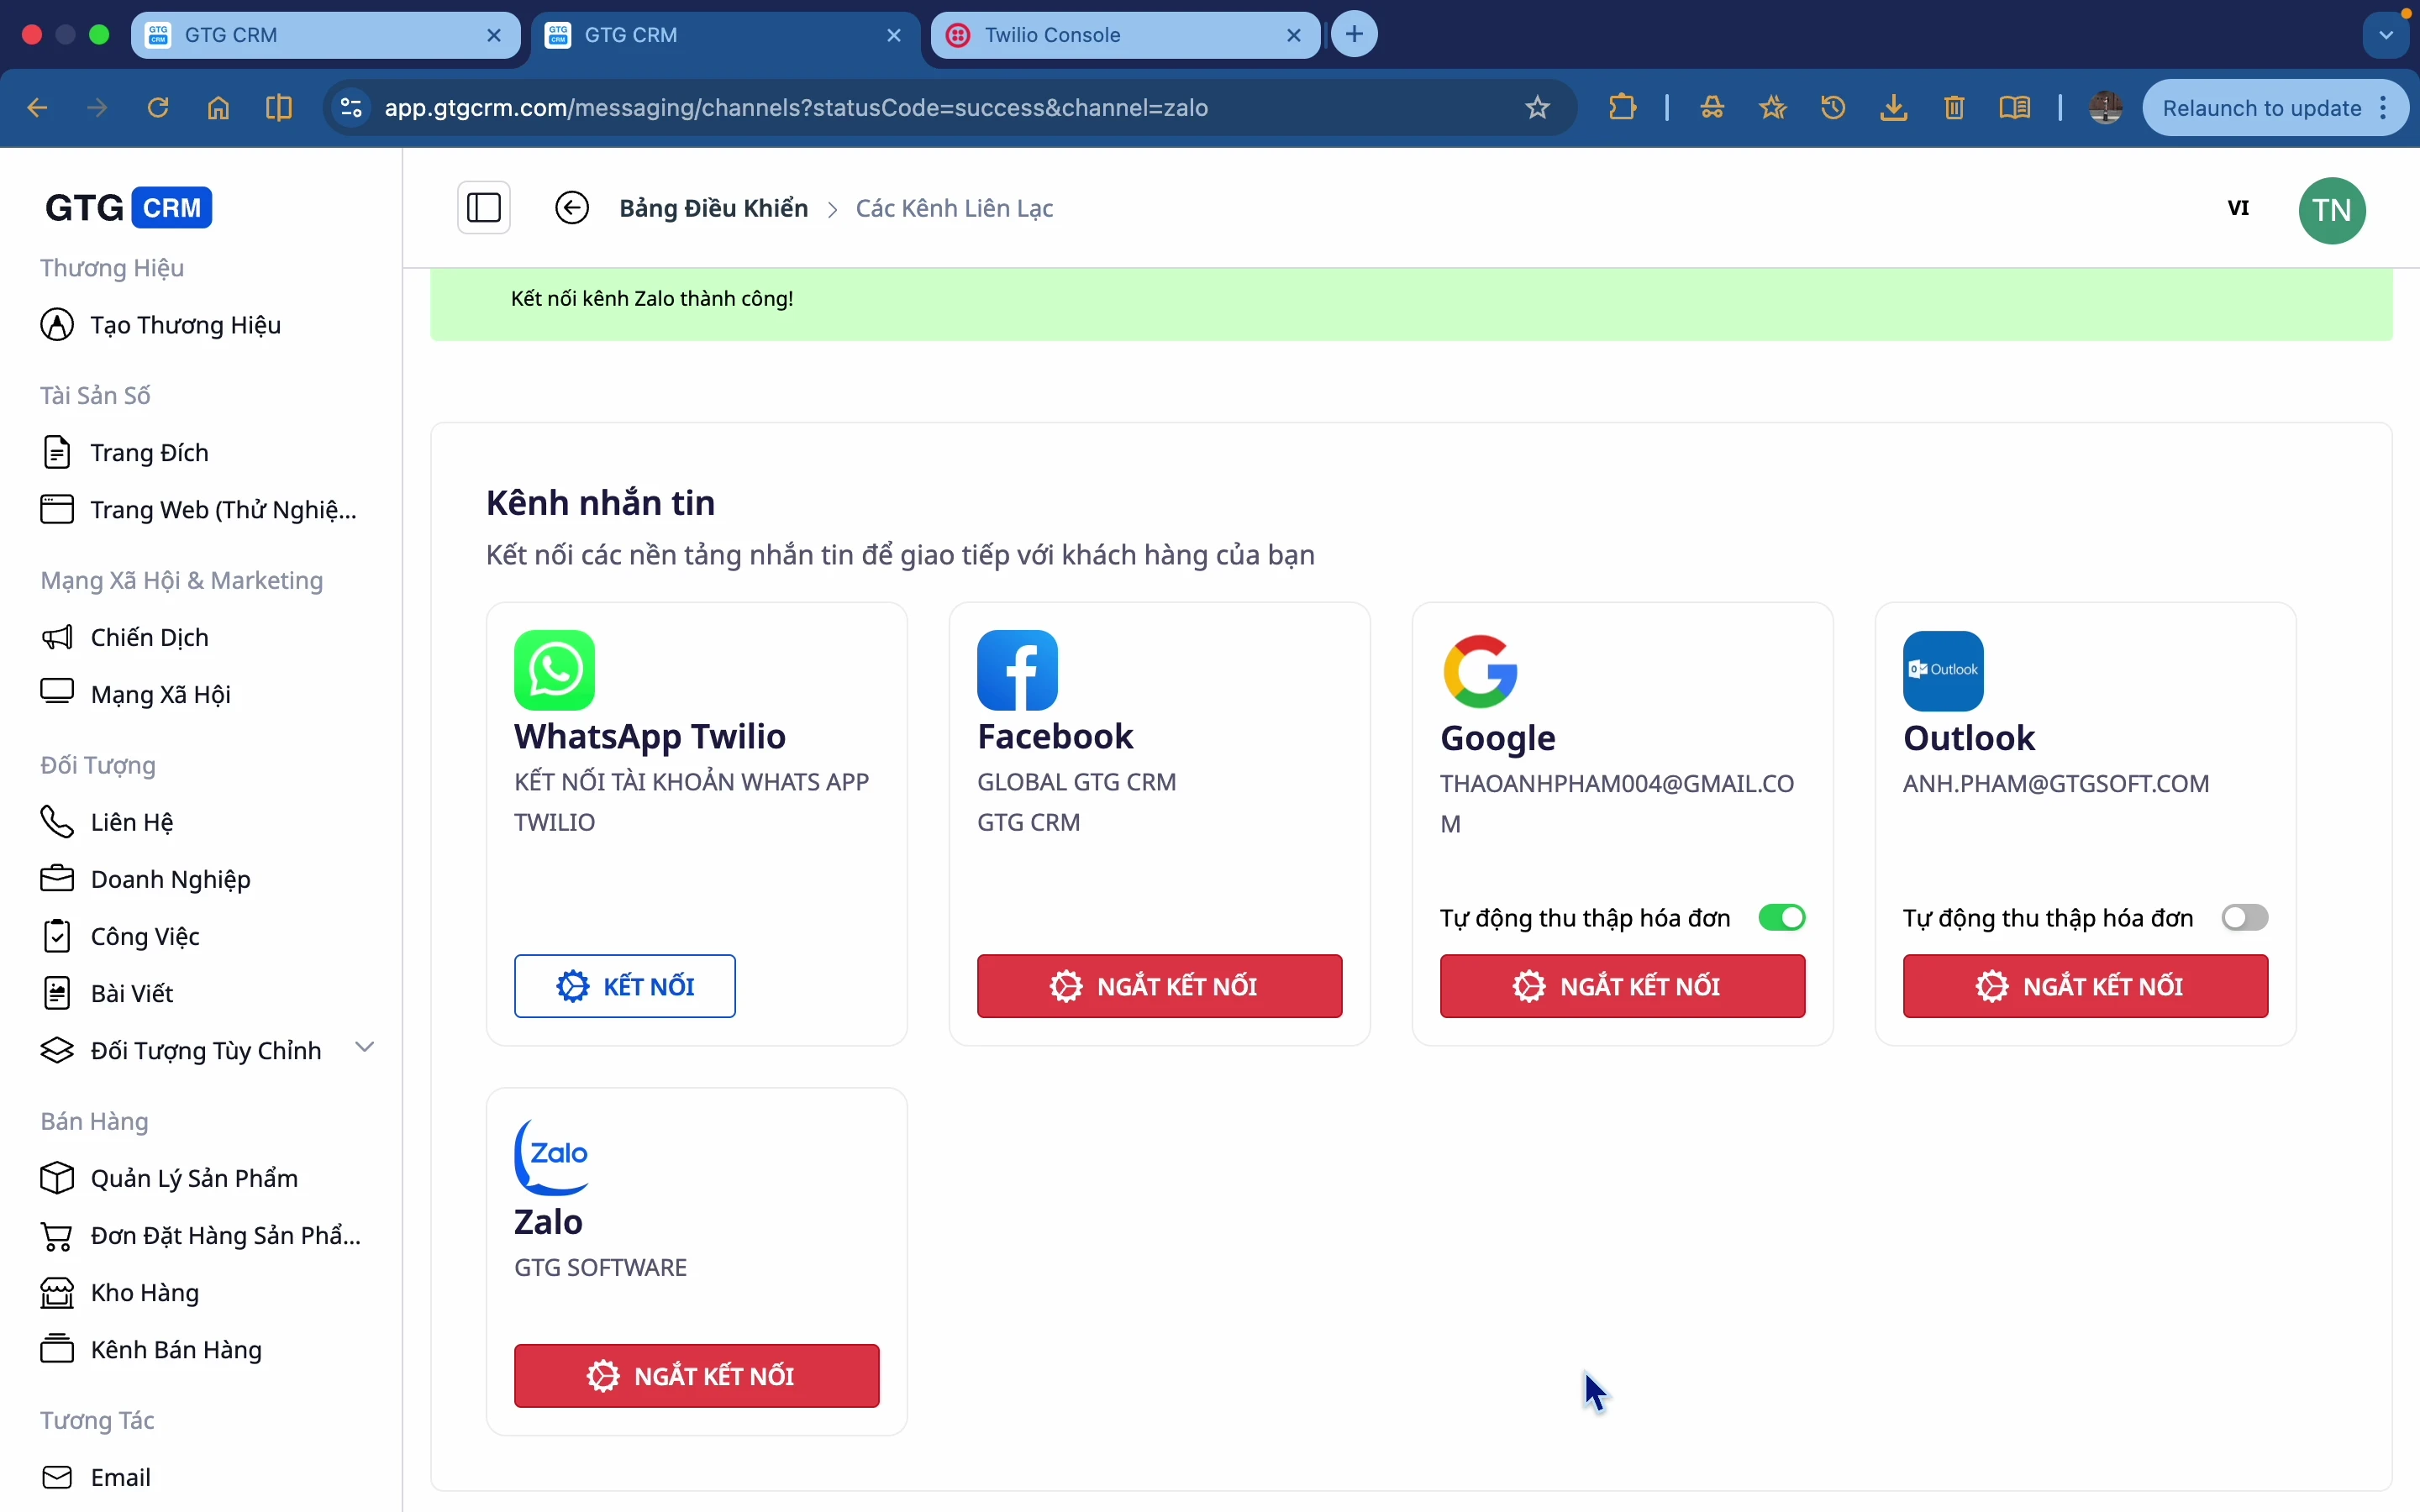
Step 1: Open communication channel settings
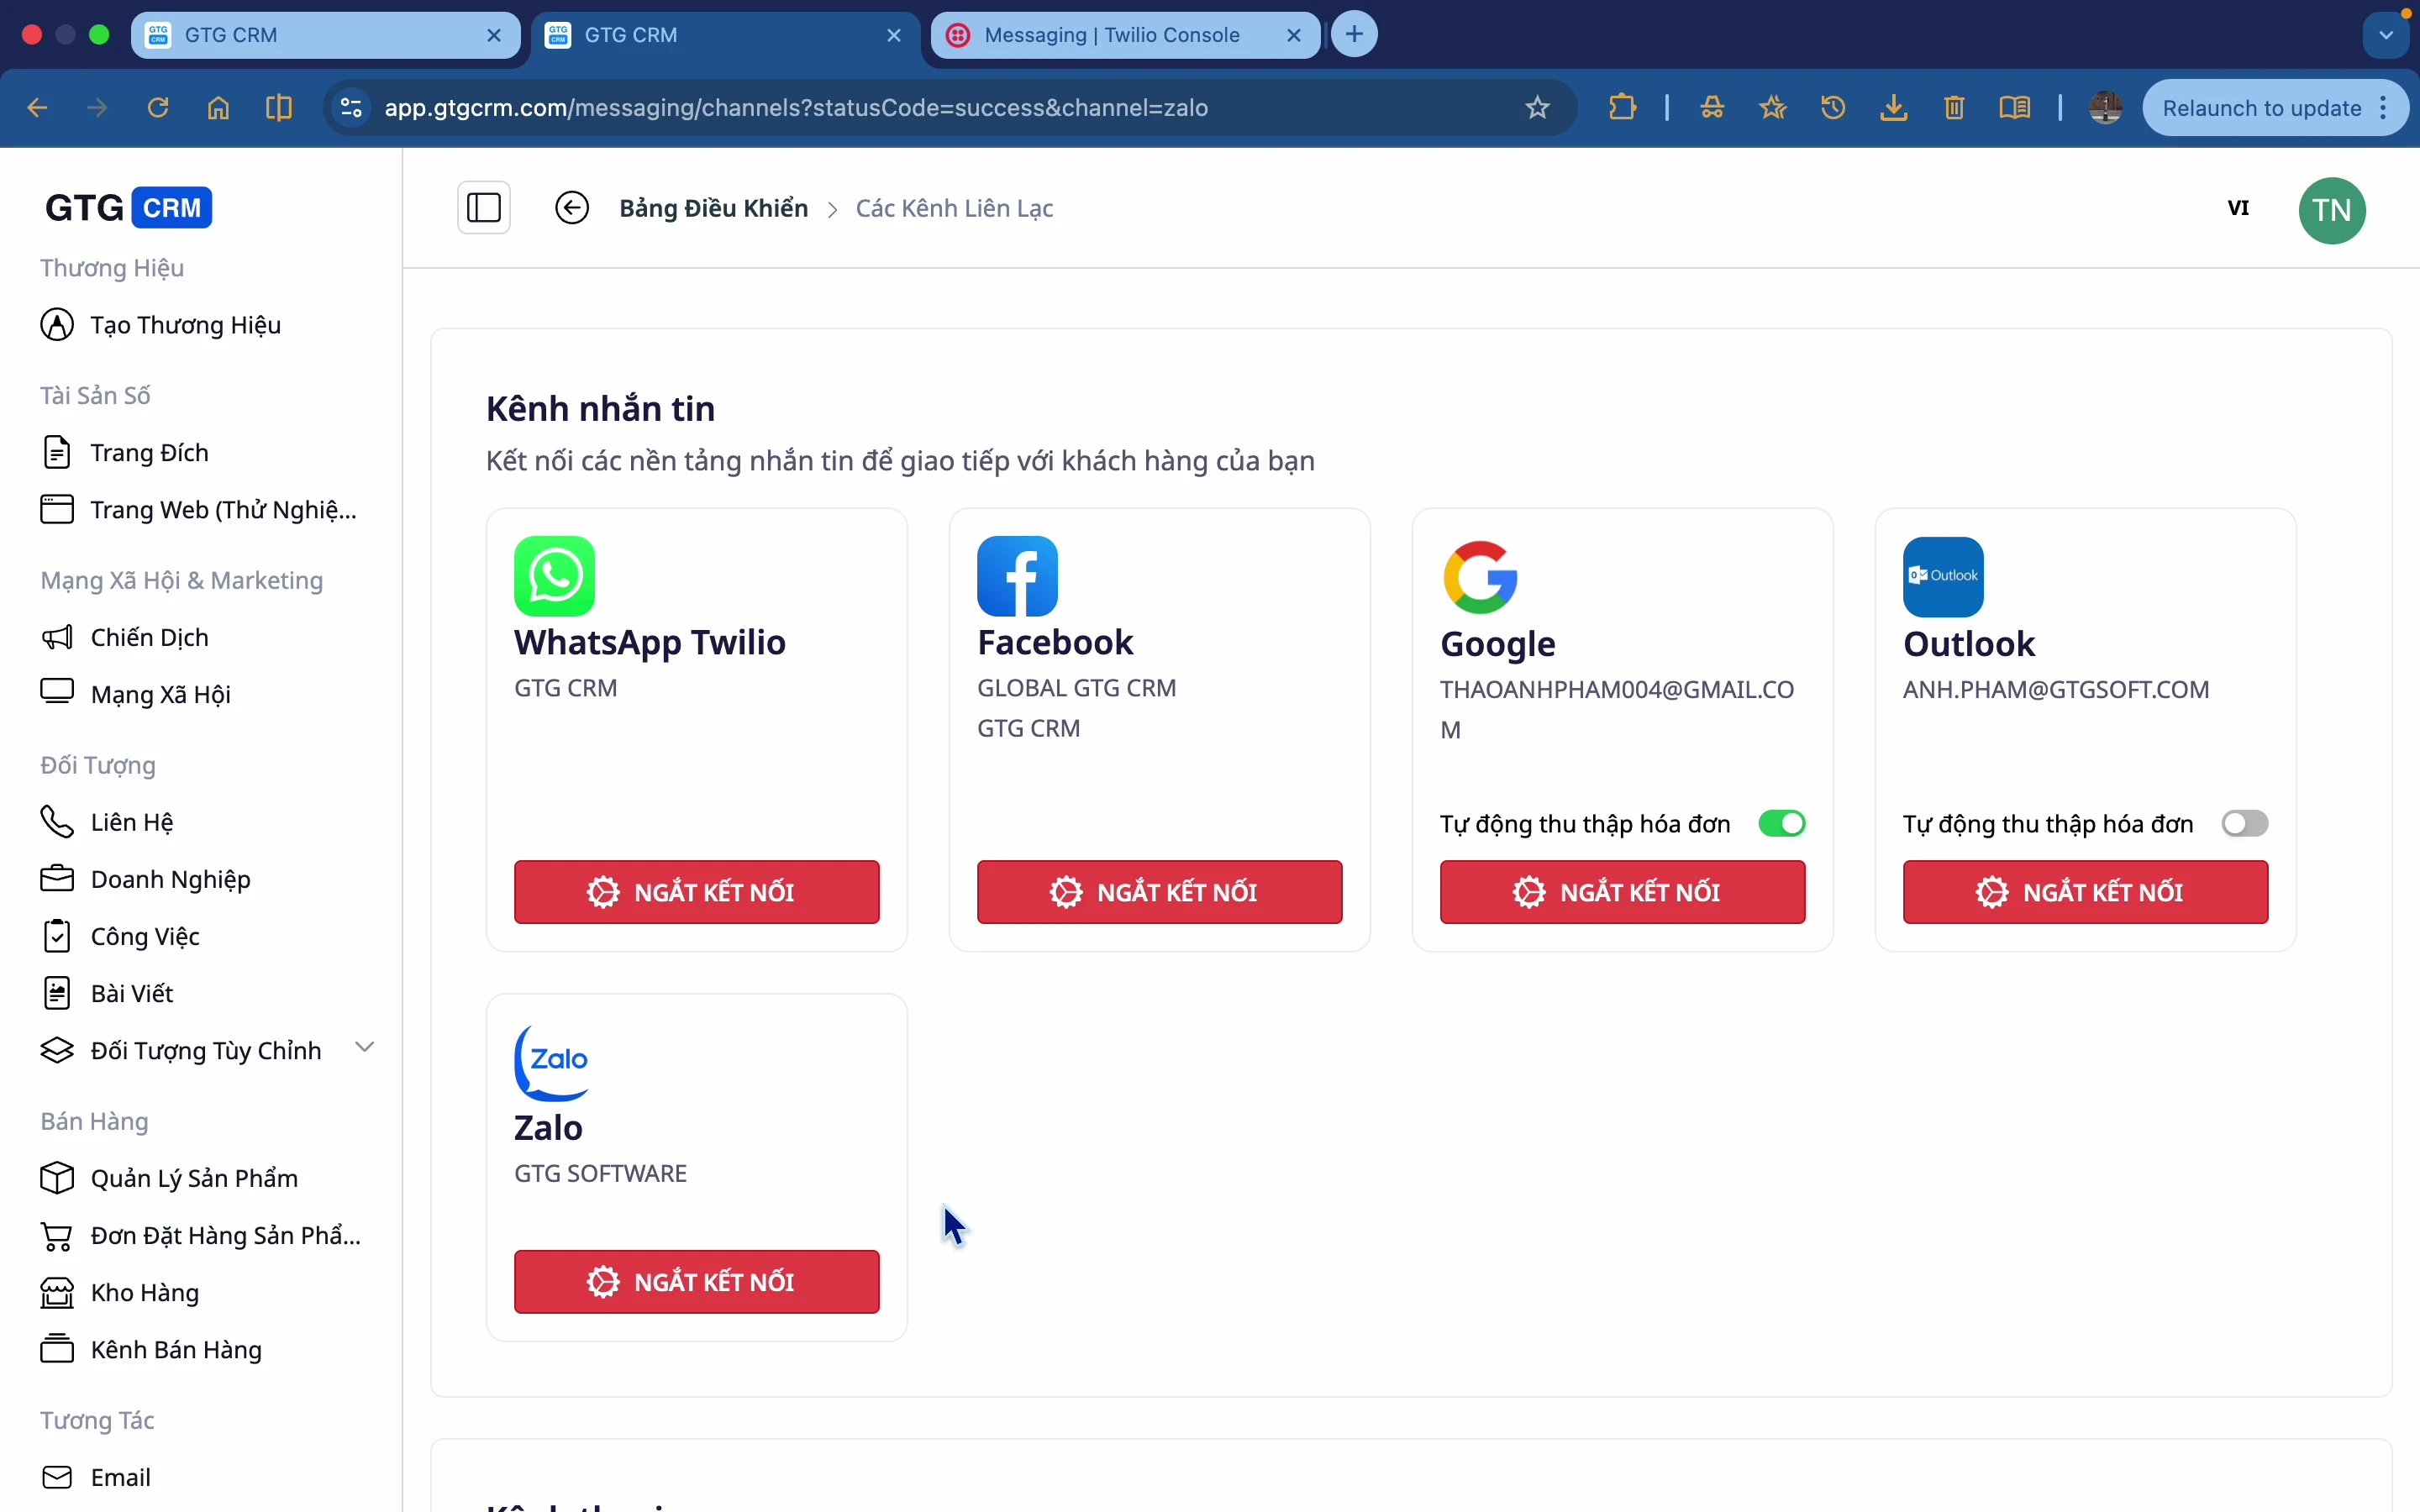
Click on Communication Channels .
GTG CRM supports 5 channels:
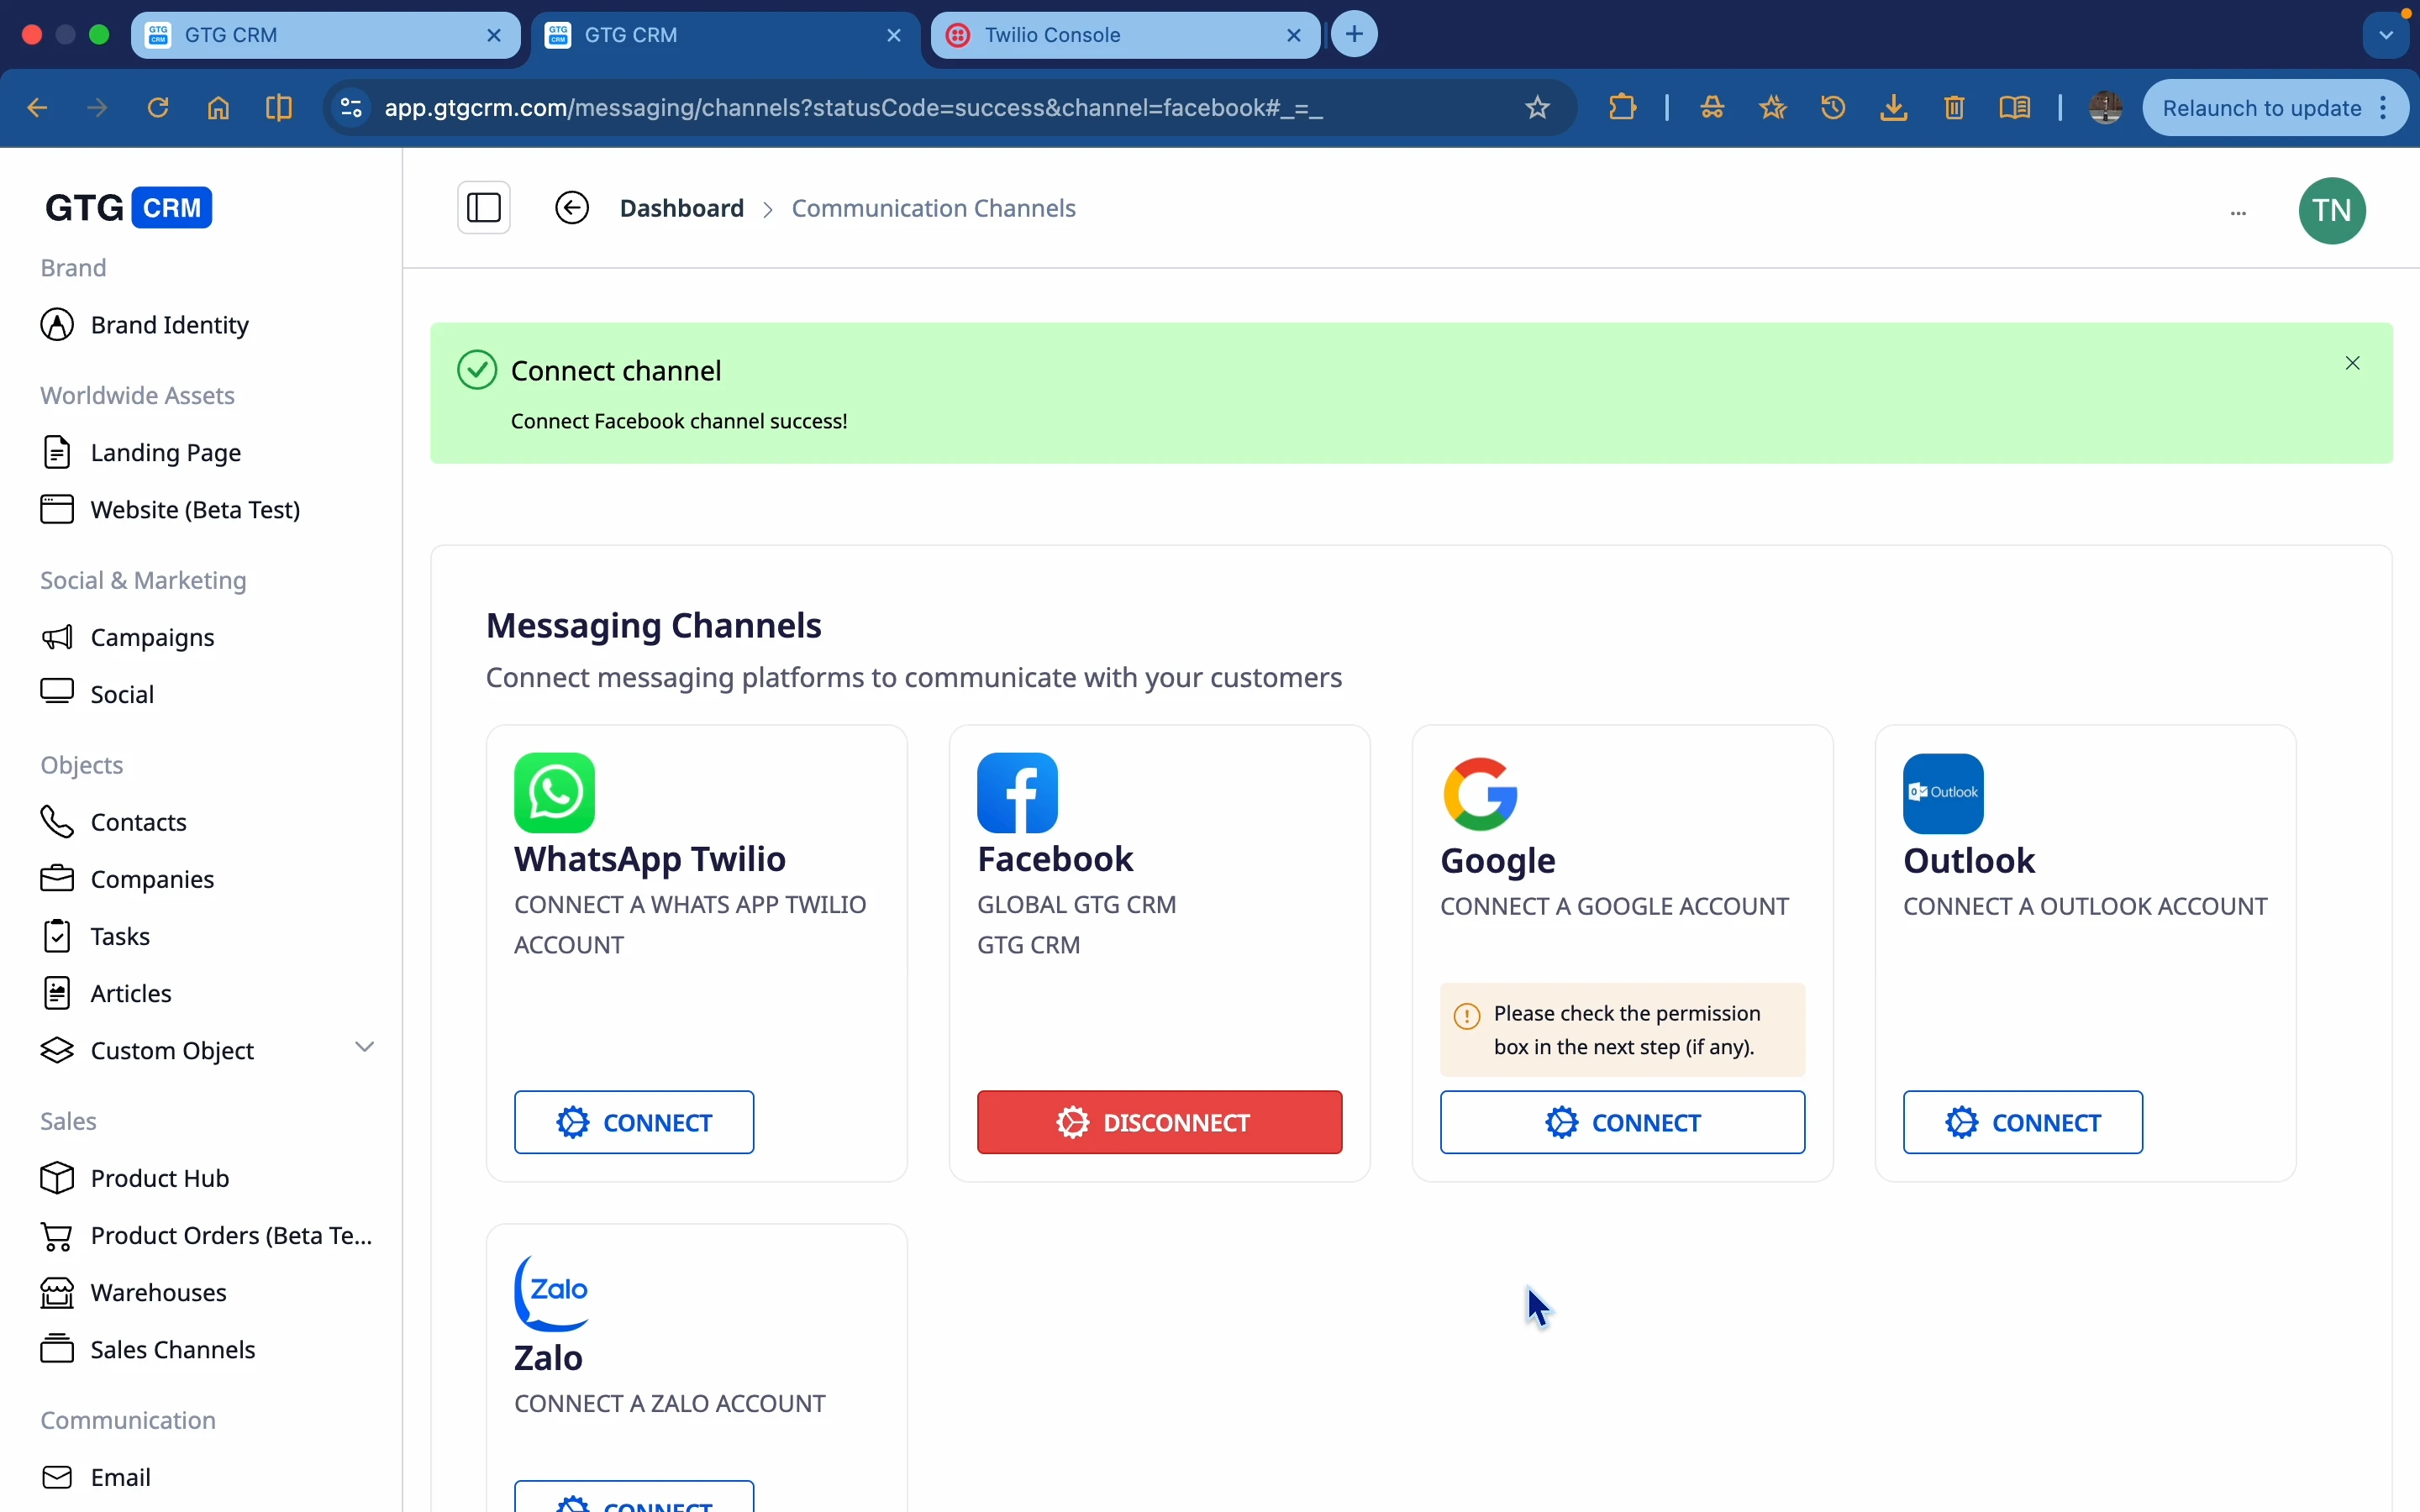
Connect to Facebook
Step 1: Click the Connect button on Facebook.
Step 2: Log in to your Facebook account.
Step 3: Grant permissions to GTG CRM.
Step 4: The Facebook Pages you administer will automatically appear.
Connect to Google (Gmail)
Step 1: Click the Google Connect button.
Step 2: Select your Google account.
Step 3: Grant access permissions.
Optional - Automatically collect invoices:
Enable this feature so the system automatically downloads invoices from email.

Connect to Outlook
Step 1: Click the Connect button in Outlook.
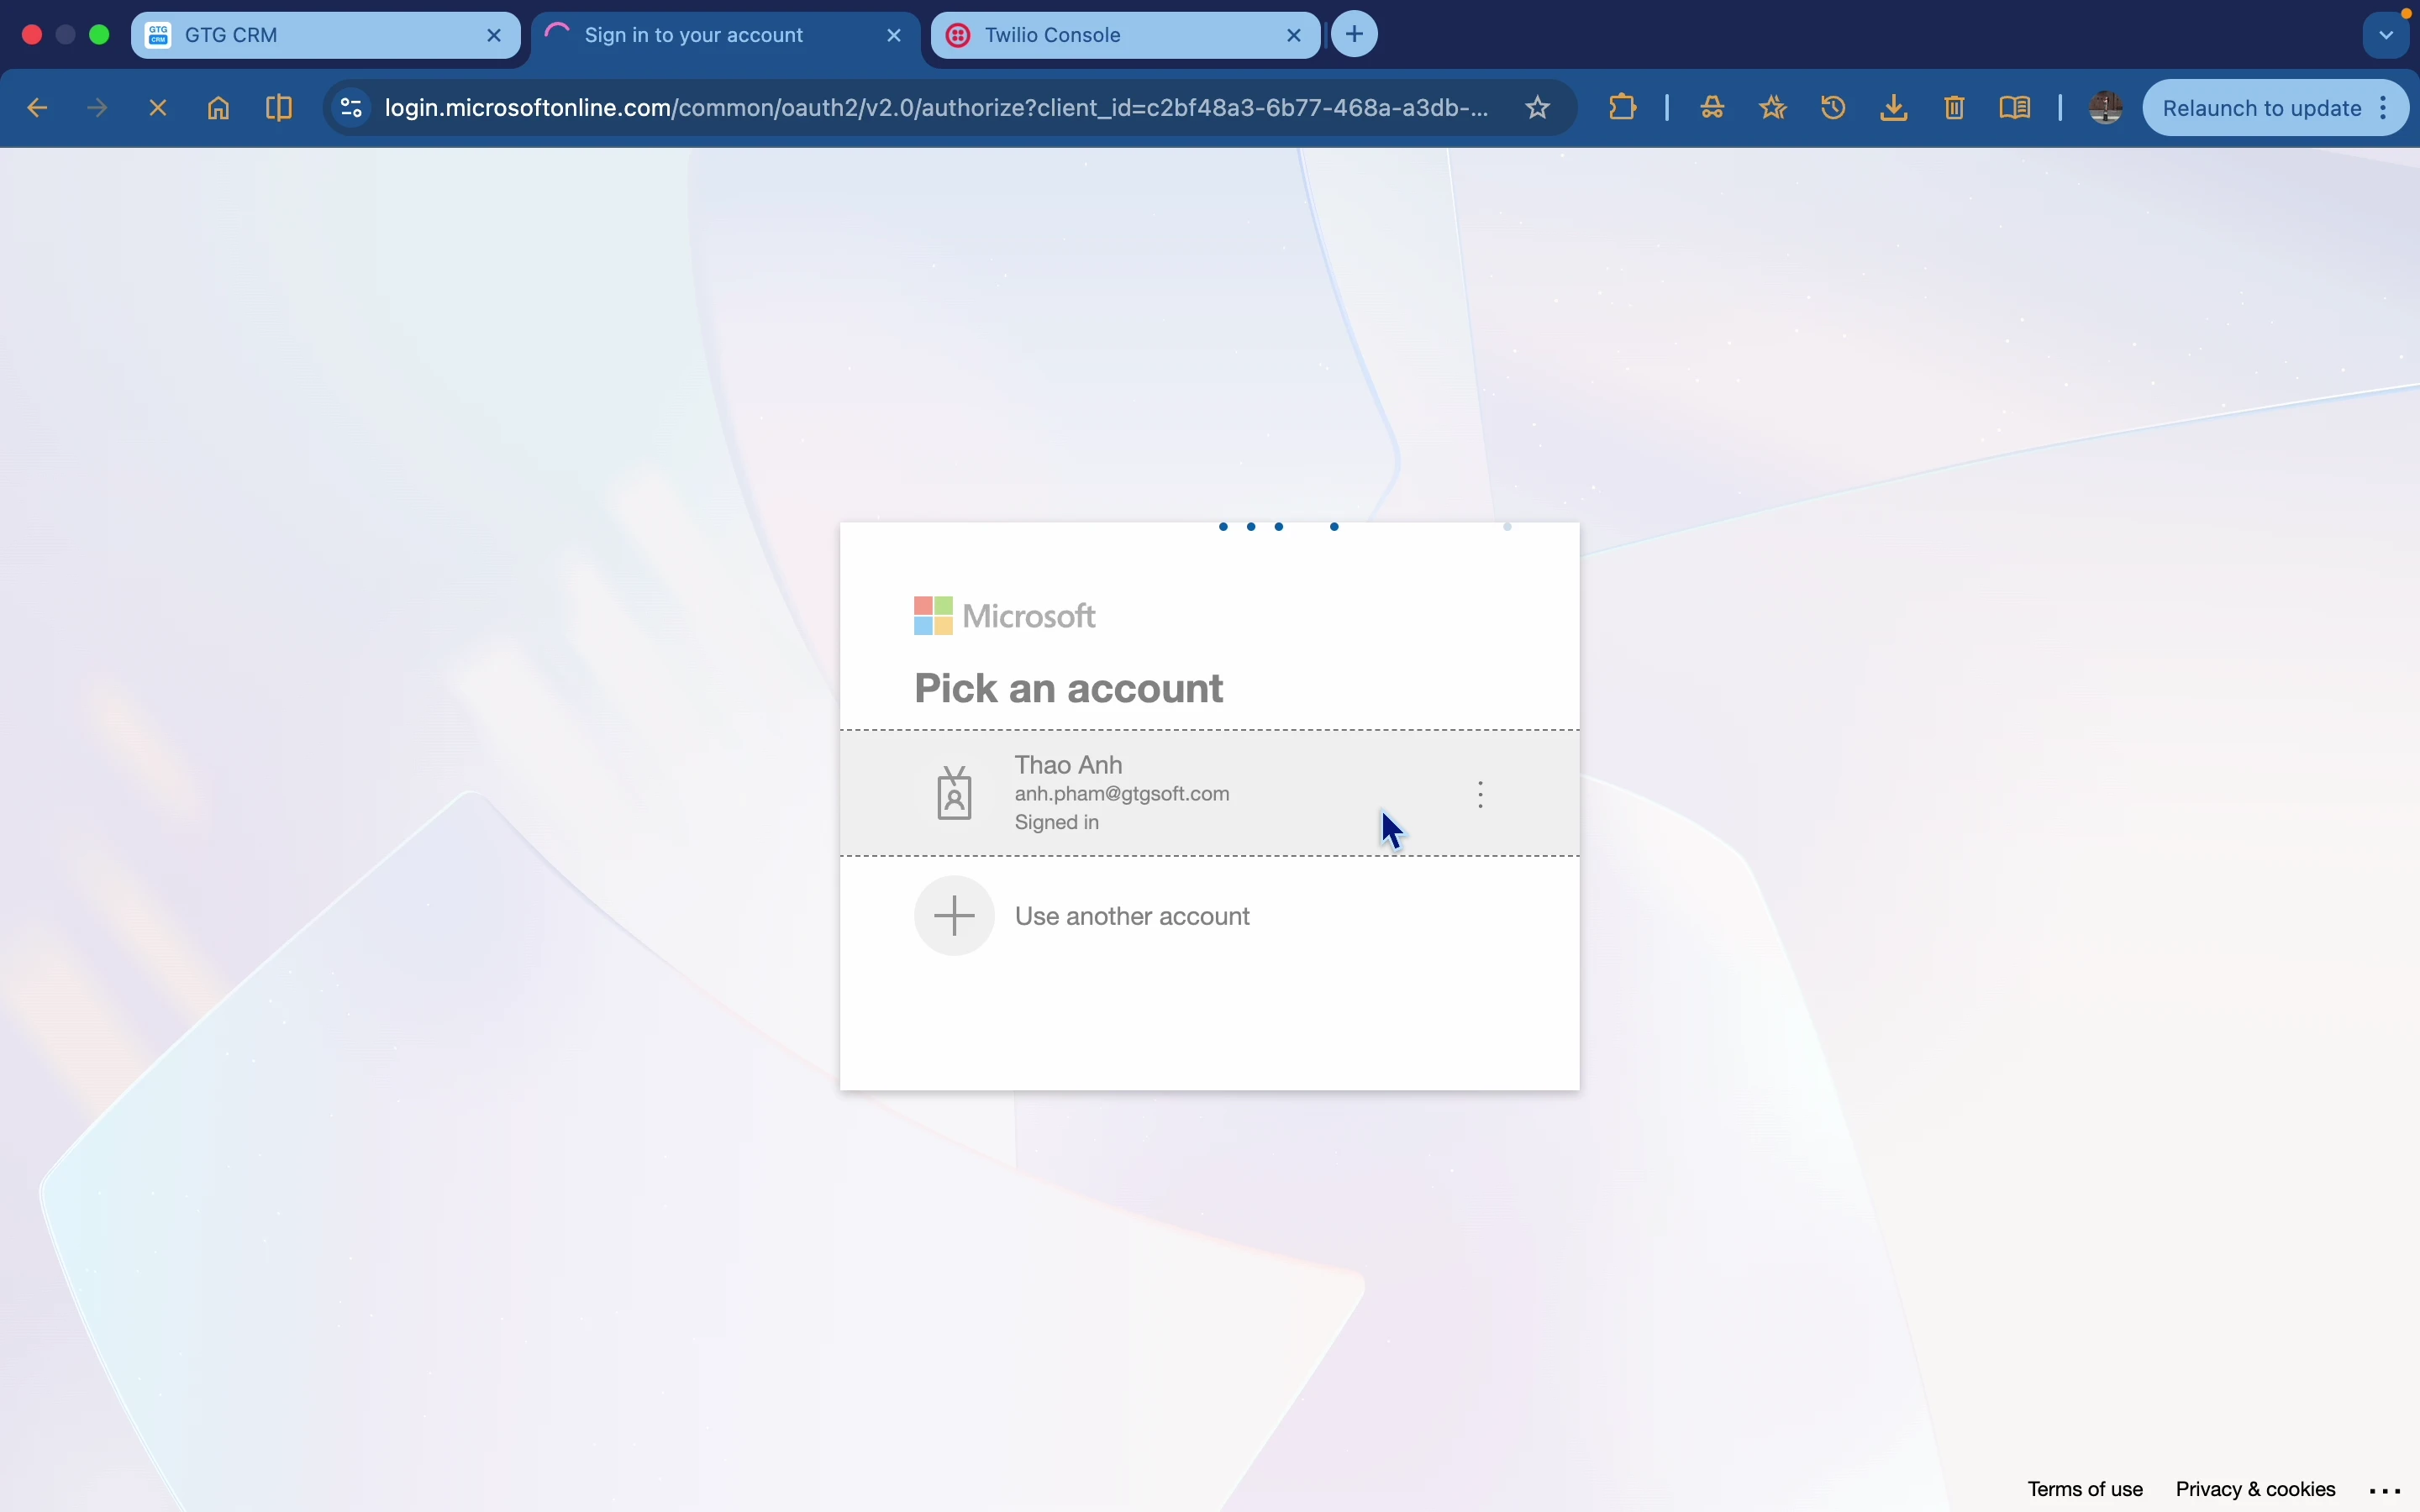
Step 2: Log in to your Microsoft account.
Step 3: Grant access permissions.
Connect with Zalo
Step 1: Click the Connect button on Zalo.
Step 2: Log in to your Zalo account.
Step 3: Grant permissions to GTG CRM.
Connect WhatsApp (Twilio)
Note: WhatsApp requires integration via the Twilio platform with several configuration steps.
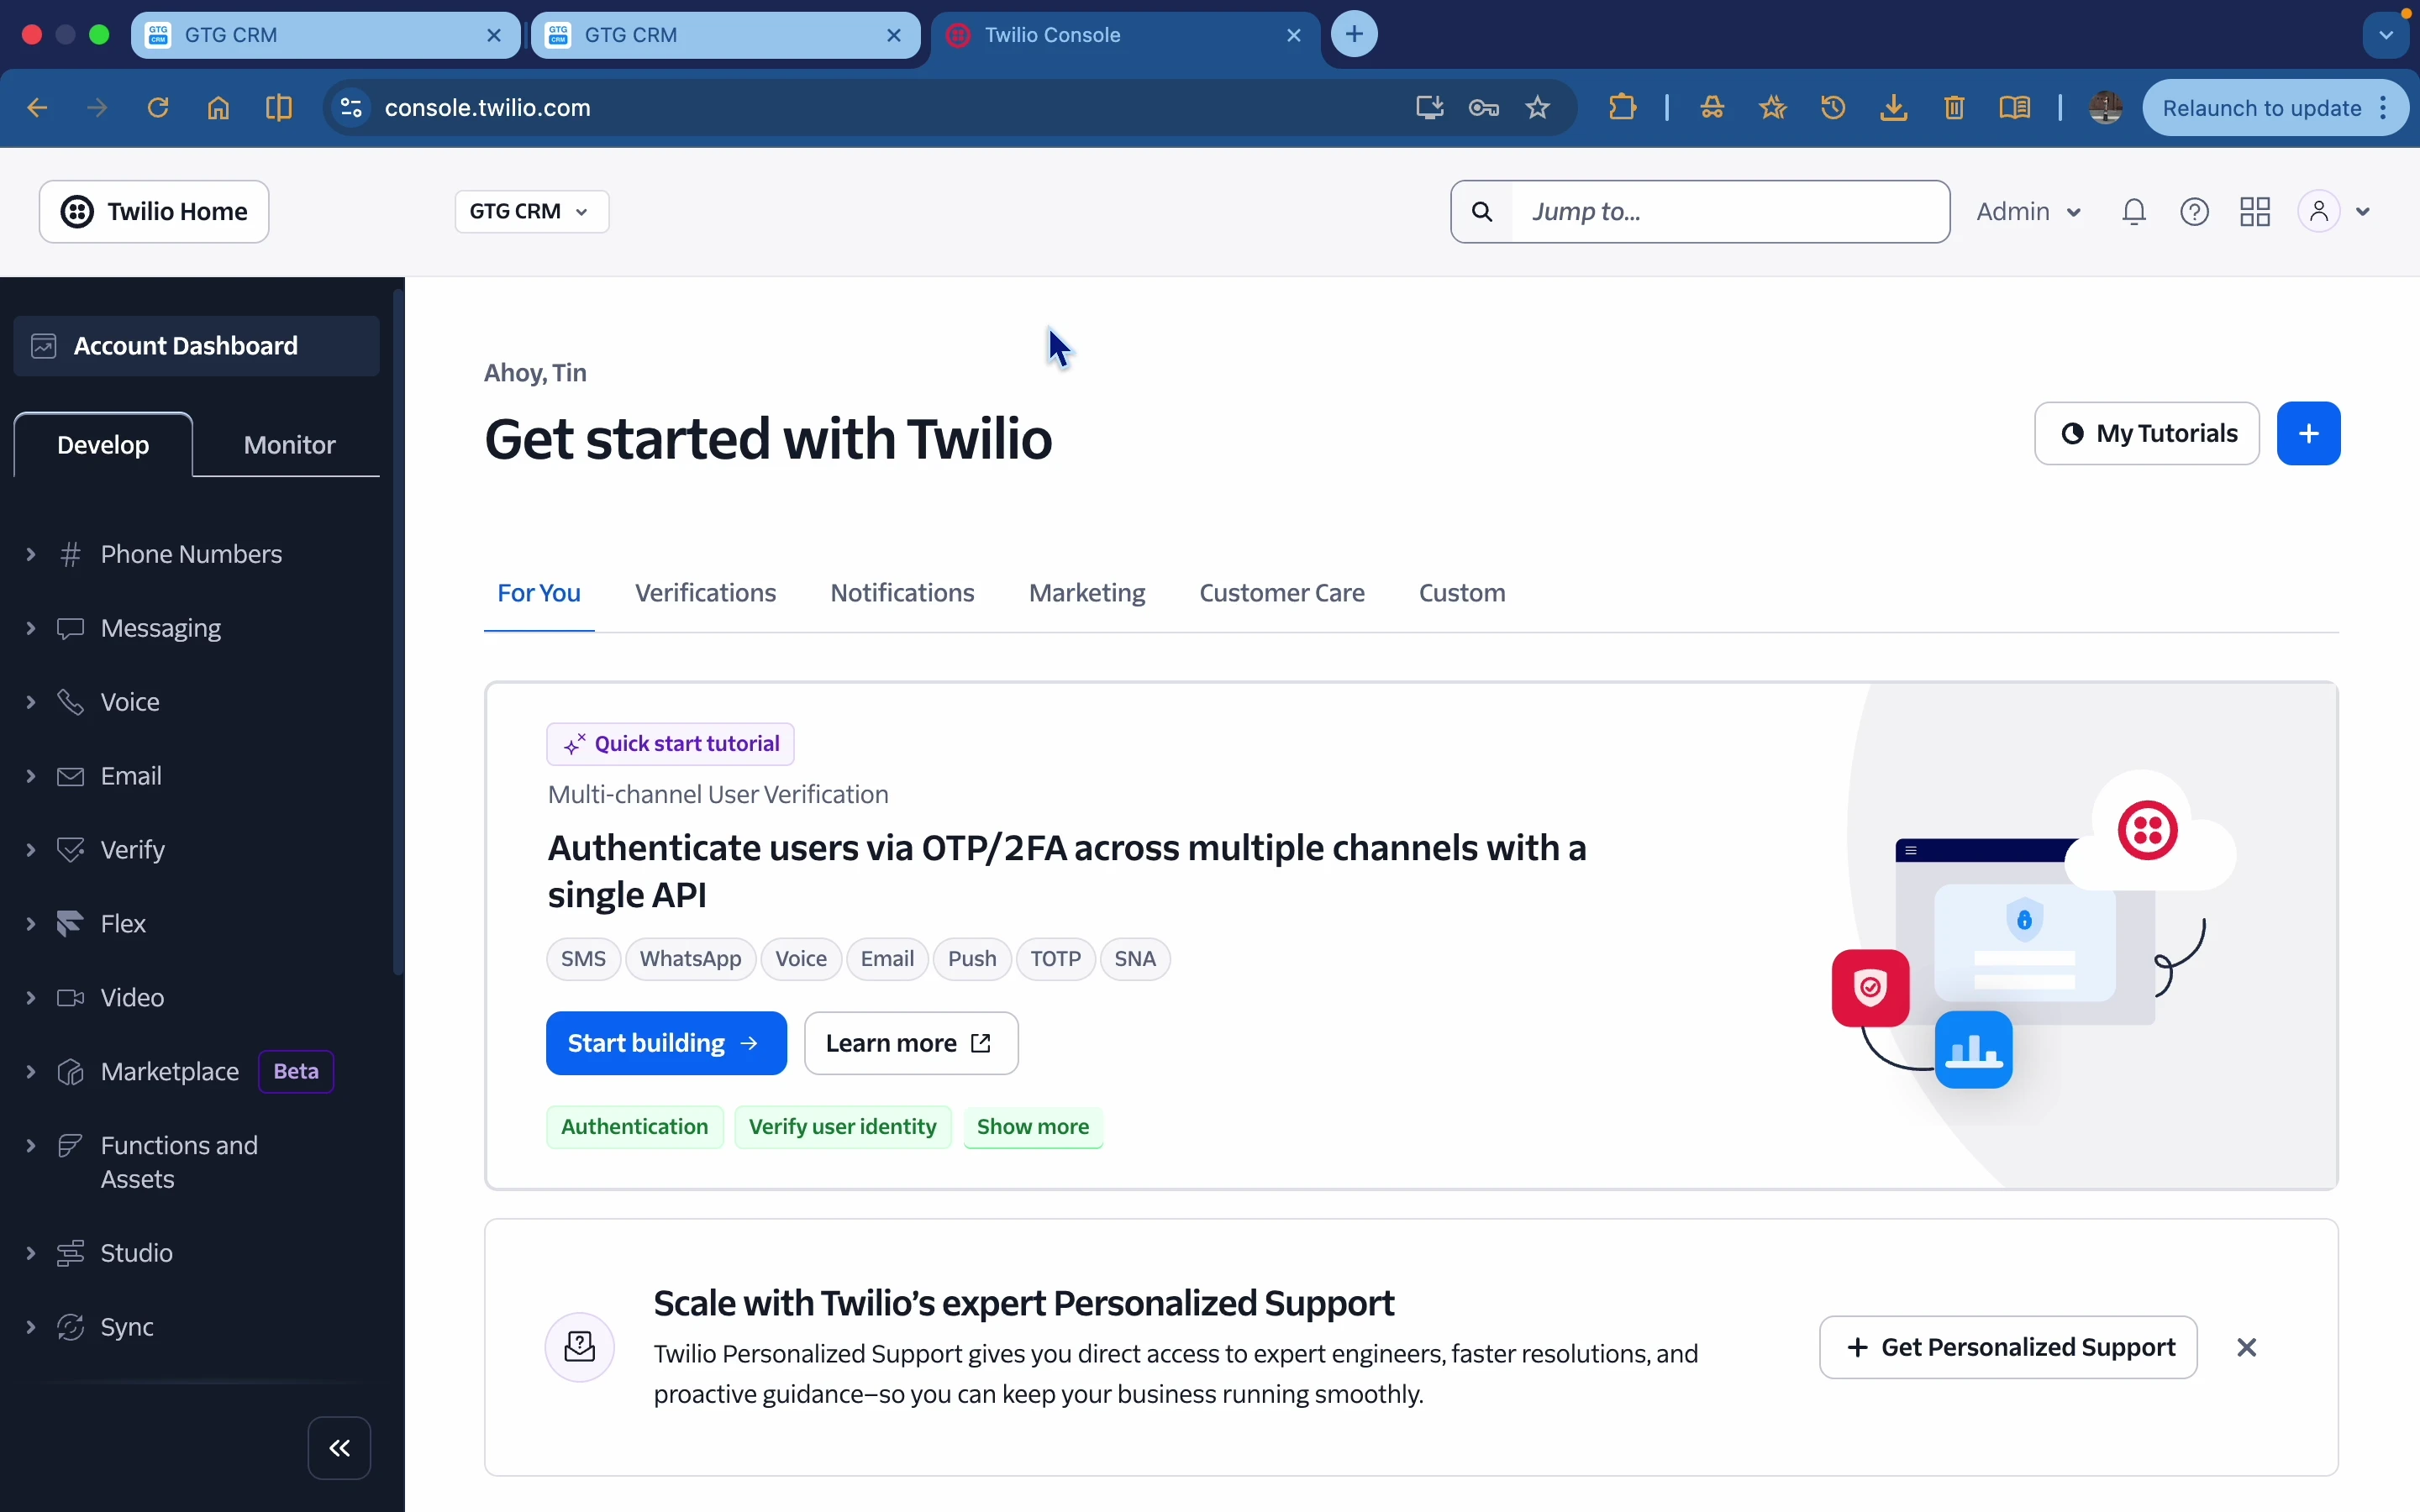
Step 1: Click the Connect button on WhatsApp Twilio.
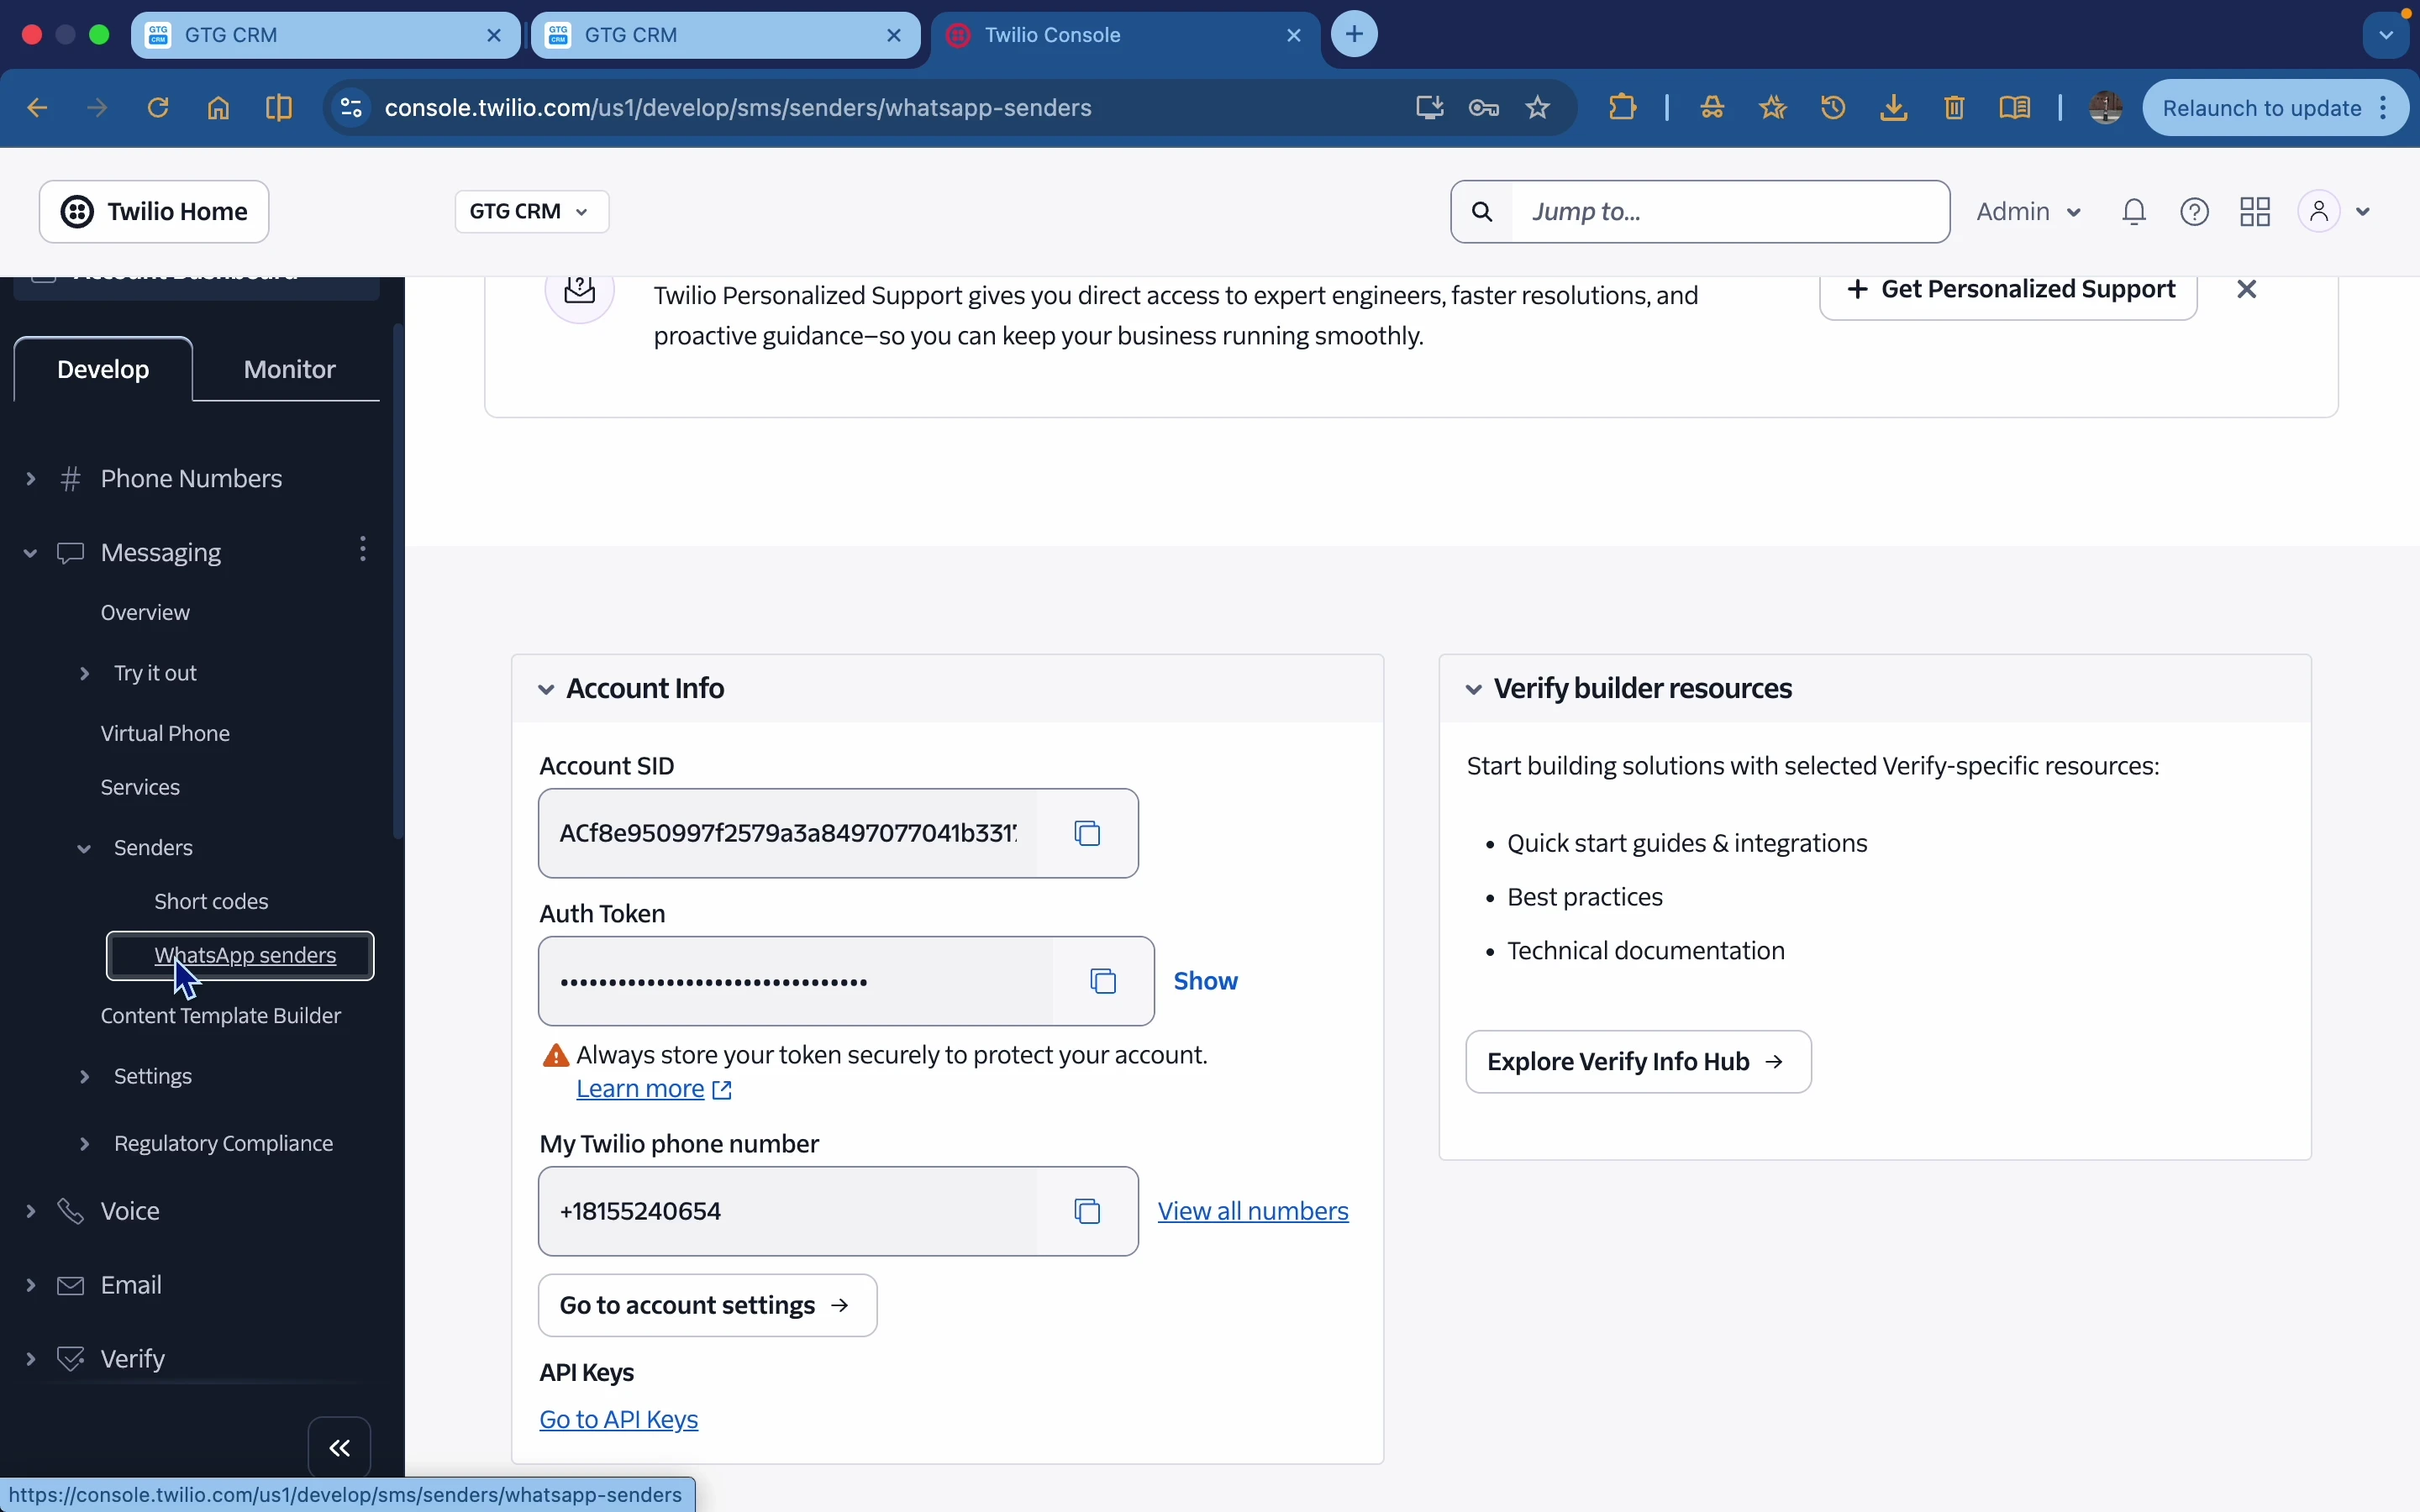
Step 2: Access the Twilio Console (console.twilio.com).
Step 3: Retrieve the Account SID and Auth Token from the Account Dashboard.
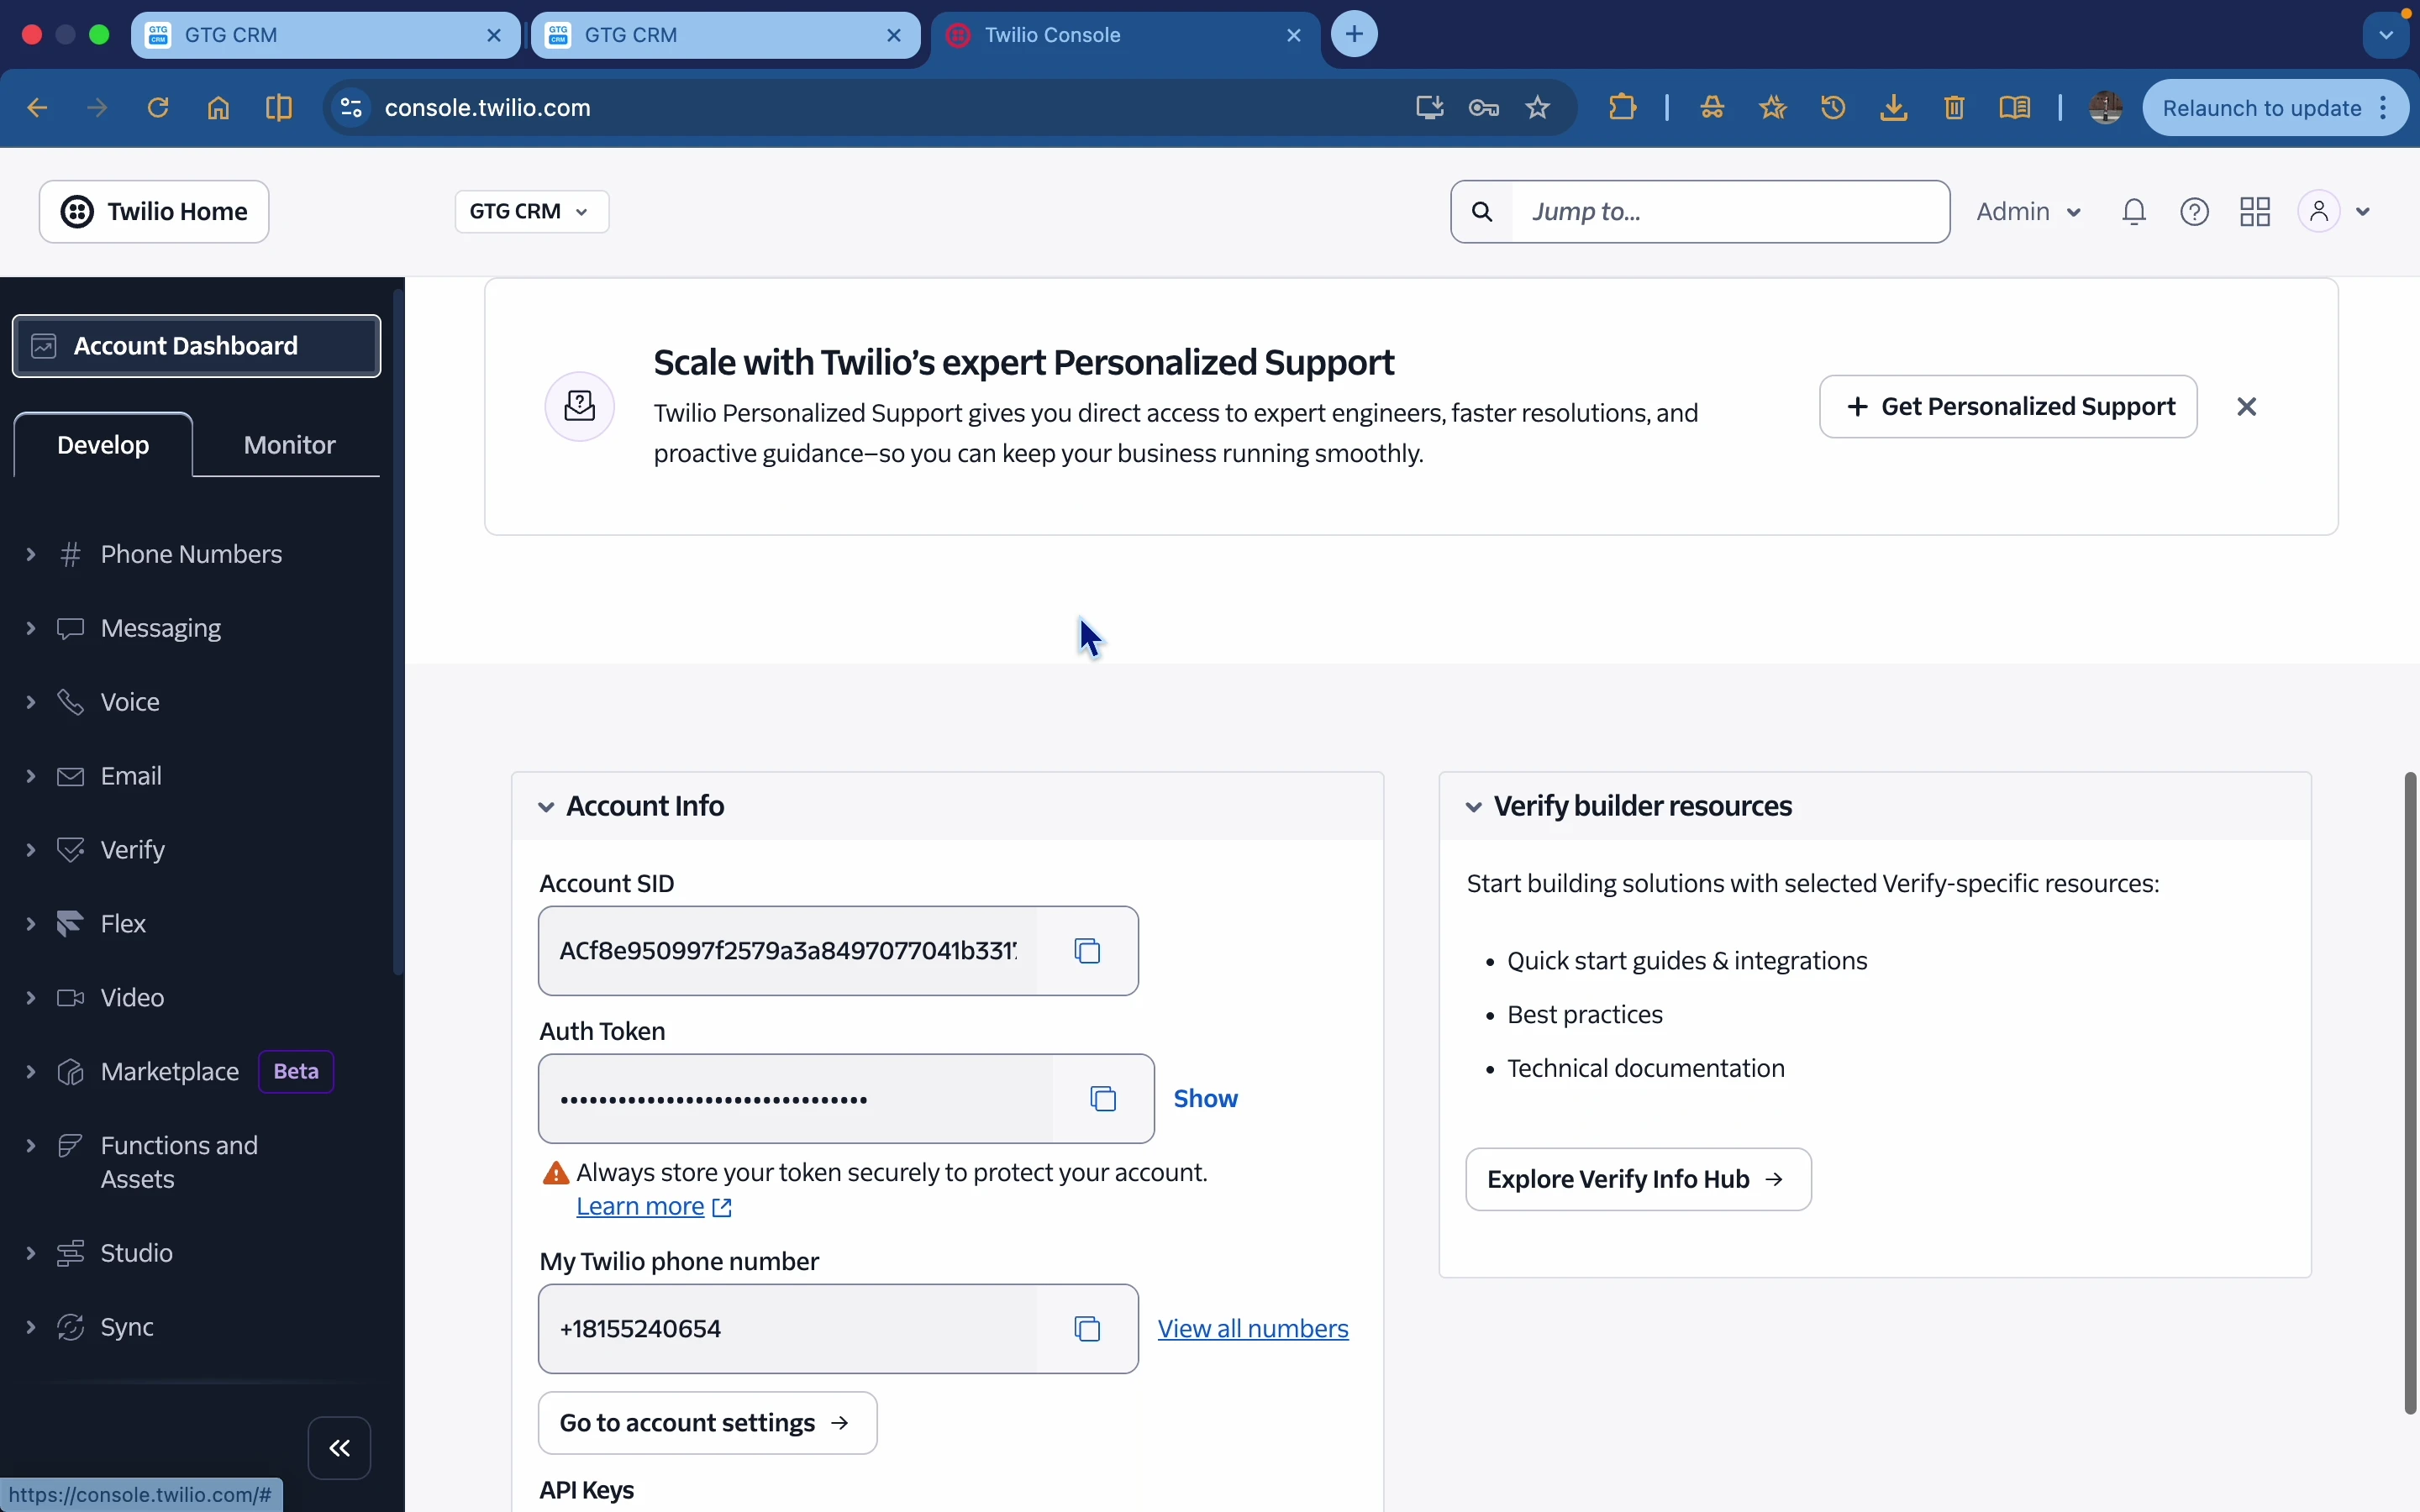
Step 4: Enter the Account SID and Auth Token into GTG CRM.
Step 5: Click Generate Messaging Service .
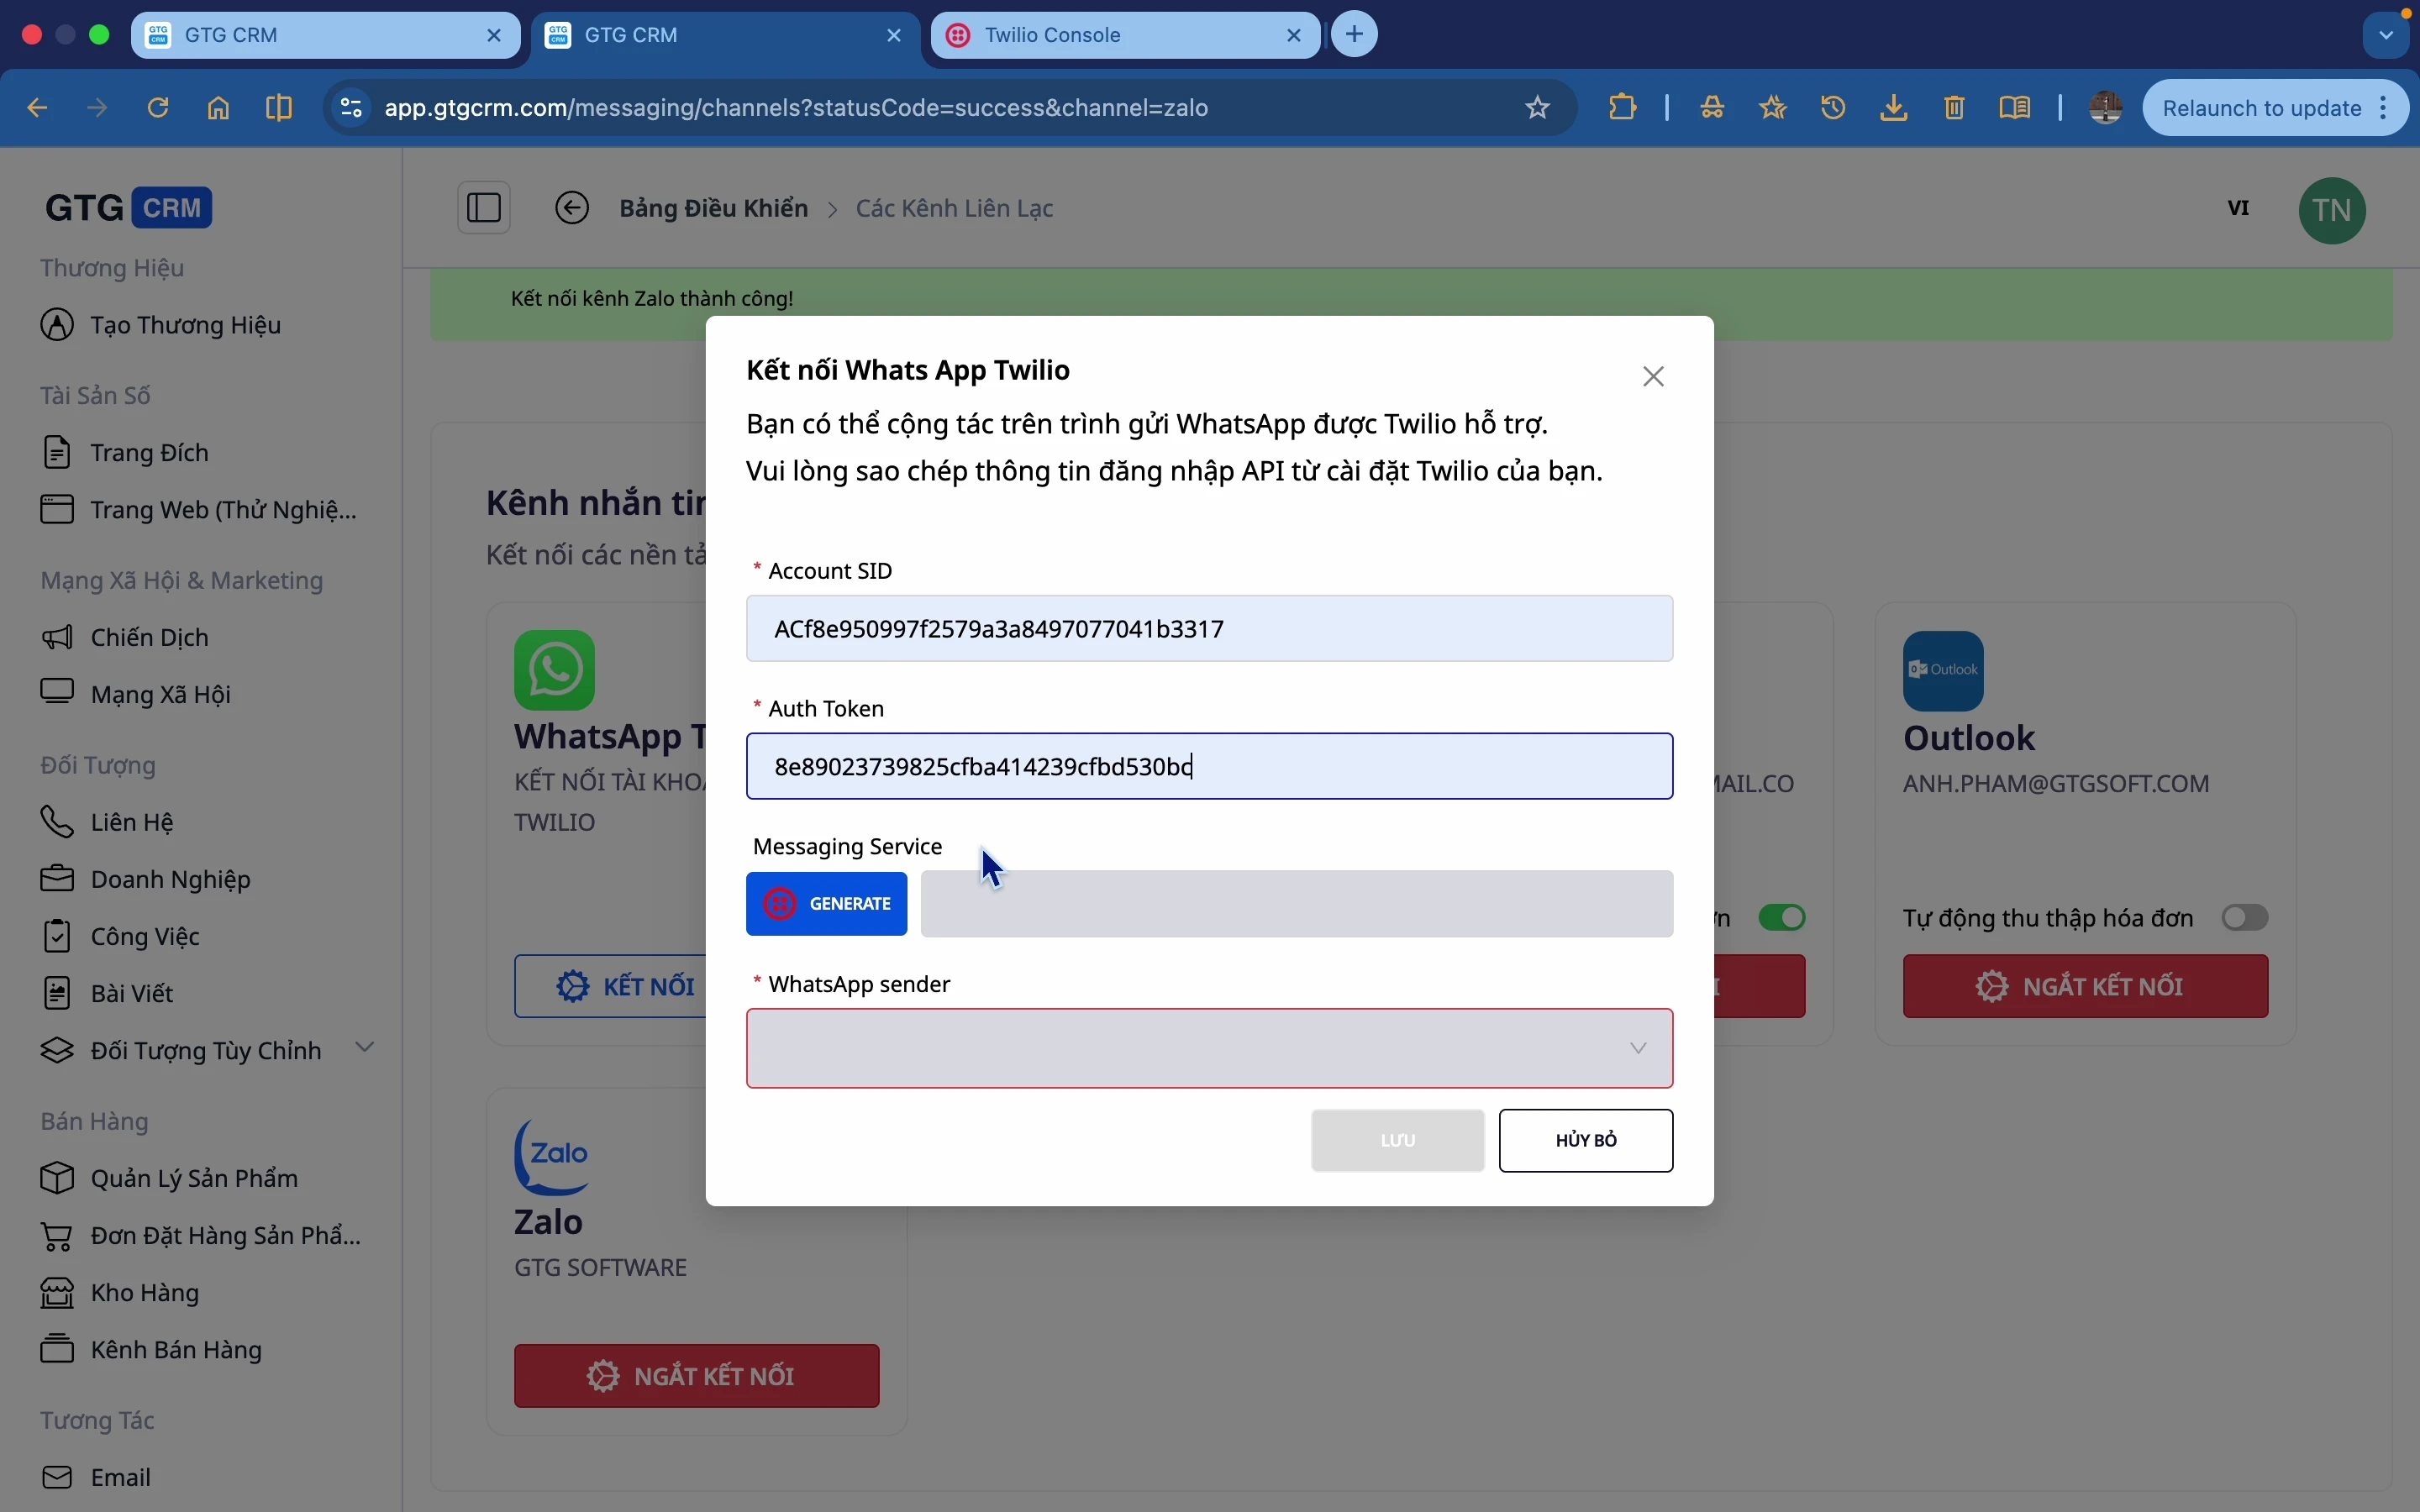
Step 6: Remember the suffix of the Messaging Service (e.g., "masterbot").
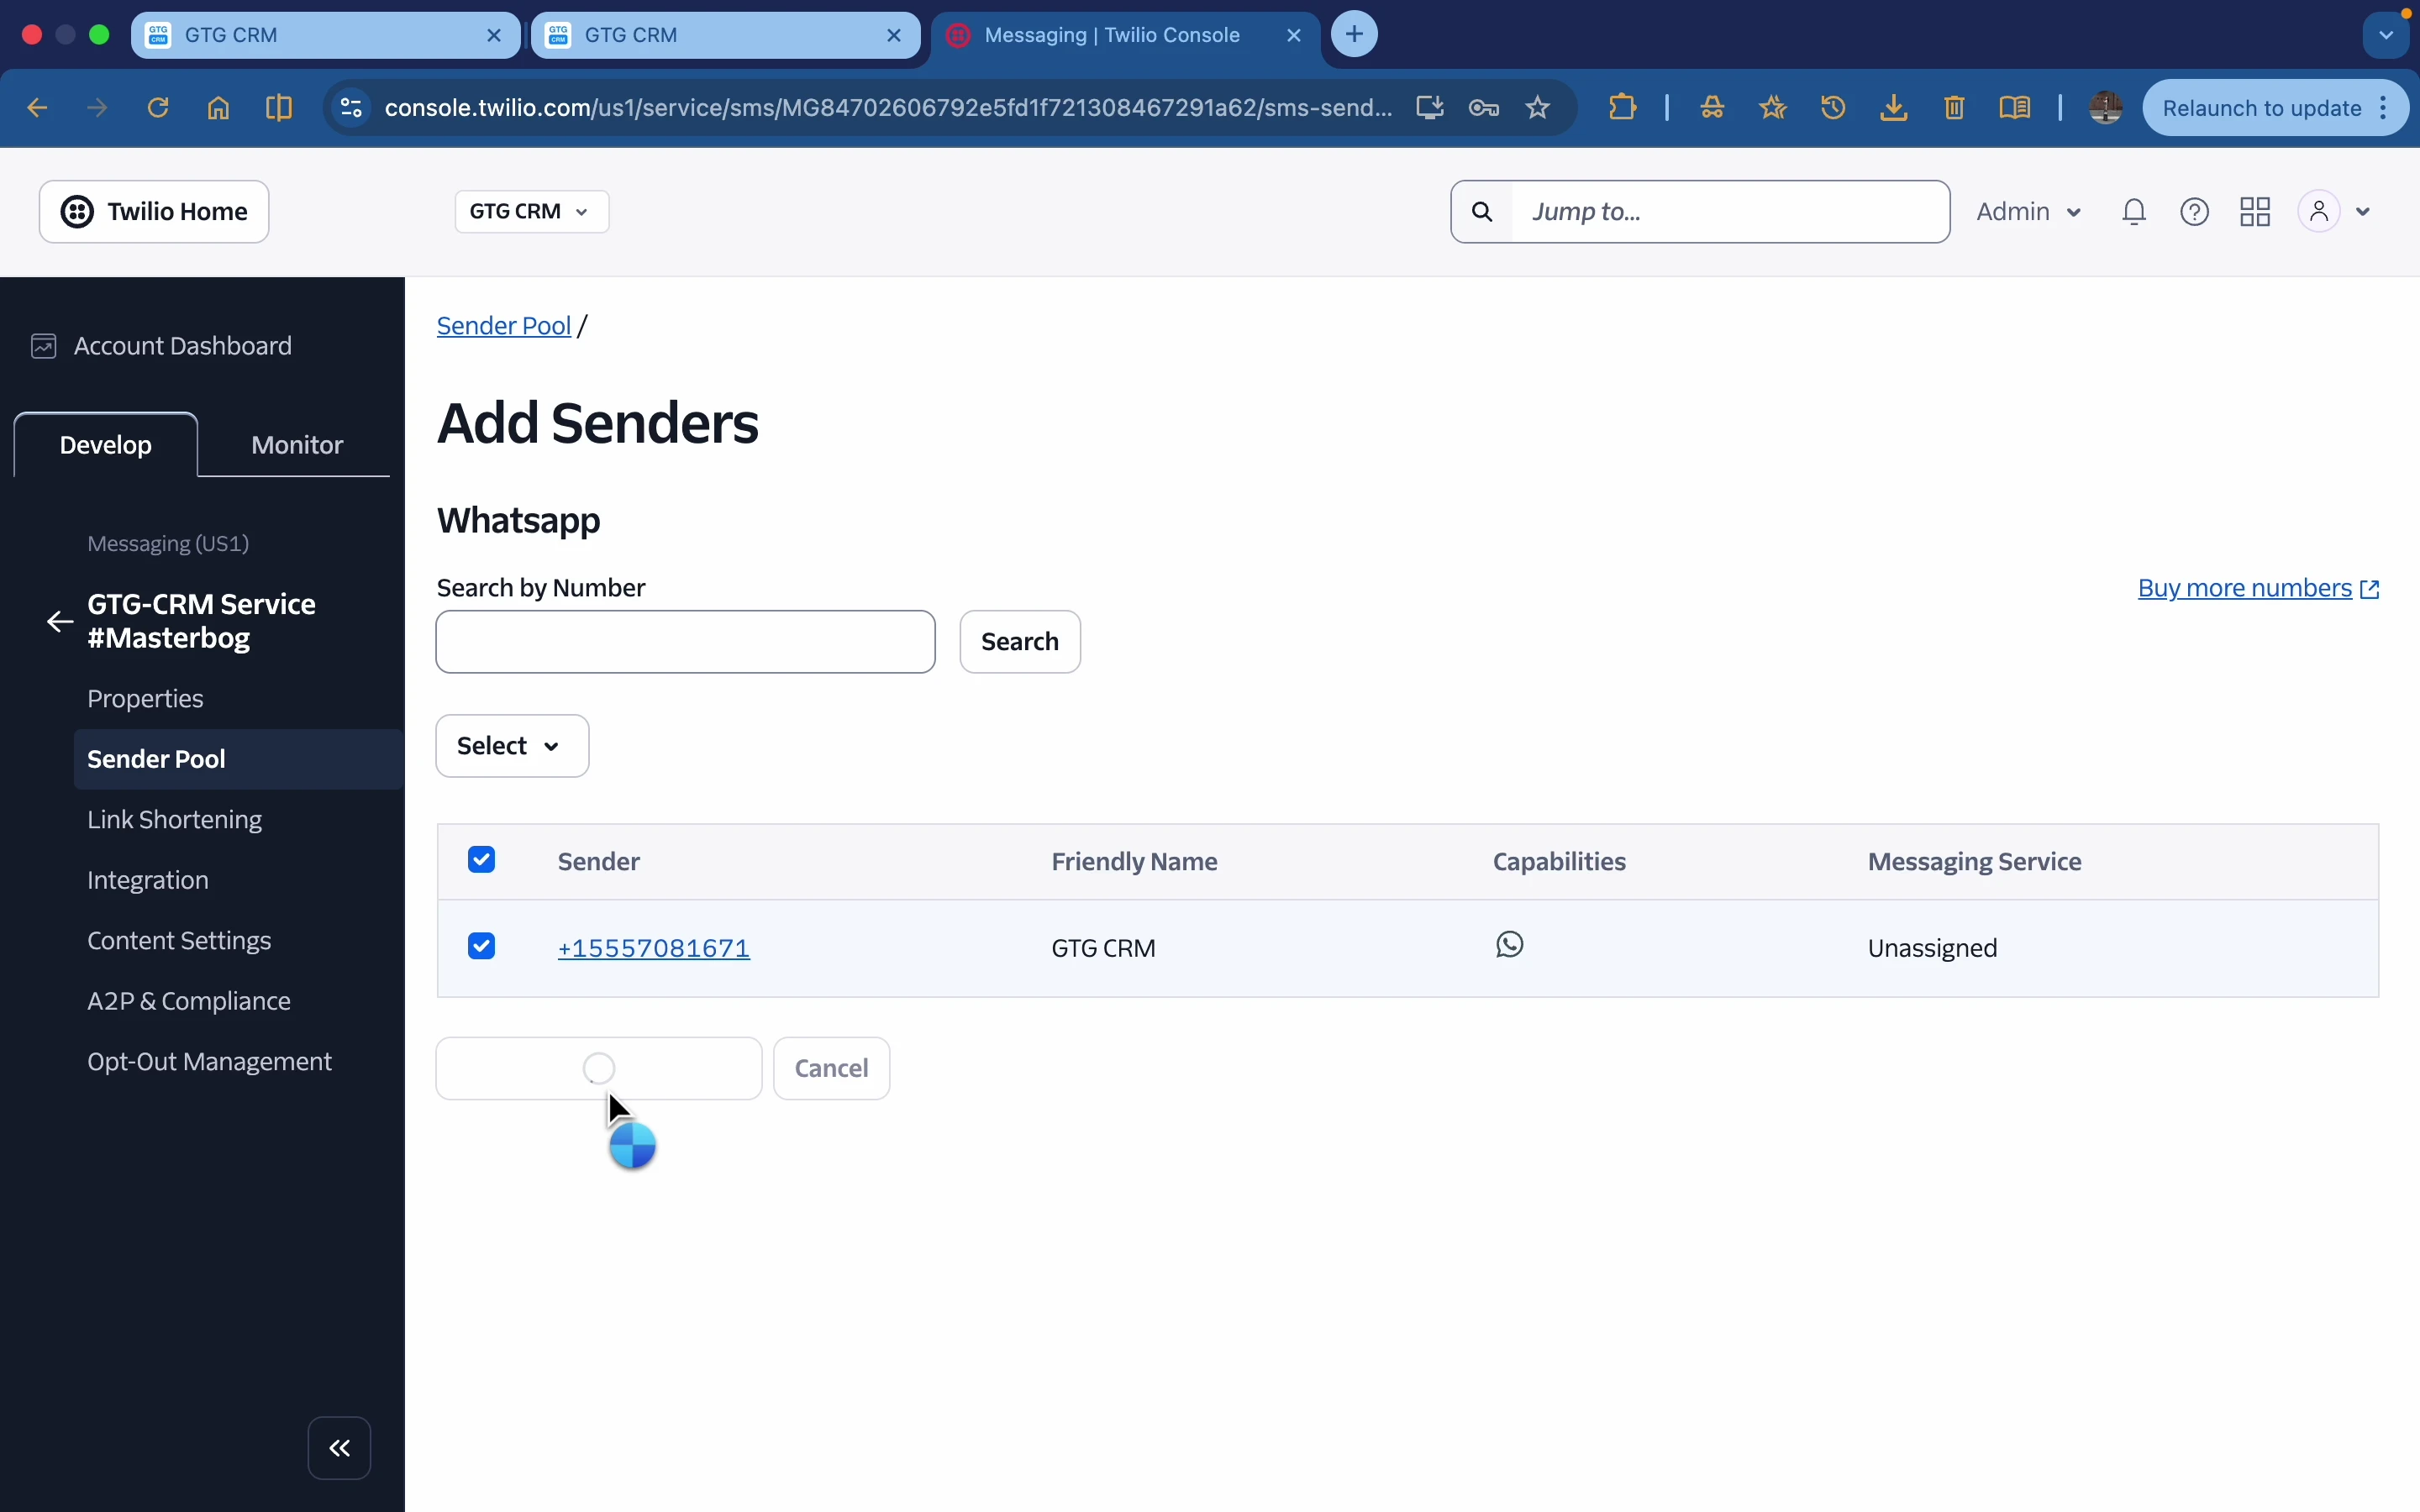
Step 7: Go back to Twilio Console → Messaging → Sender → WhatsApp Sender.
Step 8: Select your Twilio number and find the Messaging Service with the corresponding suffix.
Step 9: Add WhatsApp Number.
Step 10: Return to GTG CRM and confirm the connection.

3. Use Unified Inbox
Once the channels are connected, all messages will be gathered in one place.
Unified Inbox interface
Ingredients:
- Inbox list : Displays all conversations
- Chat area : Conversation content
- Customer Information : Contact Details
4. Compose and send messages
Send messages via Messenger/Zalo/WhatsApp
Step 1: Select the conversation from the list.
Step 2: Enter the message content.
Step 3: Add components (optional):
- 📎 Attached file
- 😀 Emoji
- 🖼️ Image
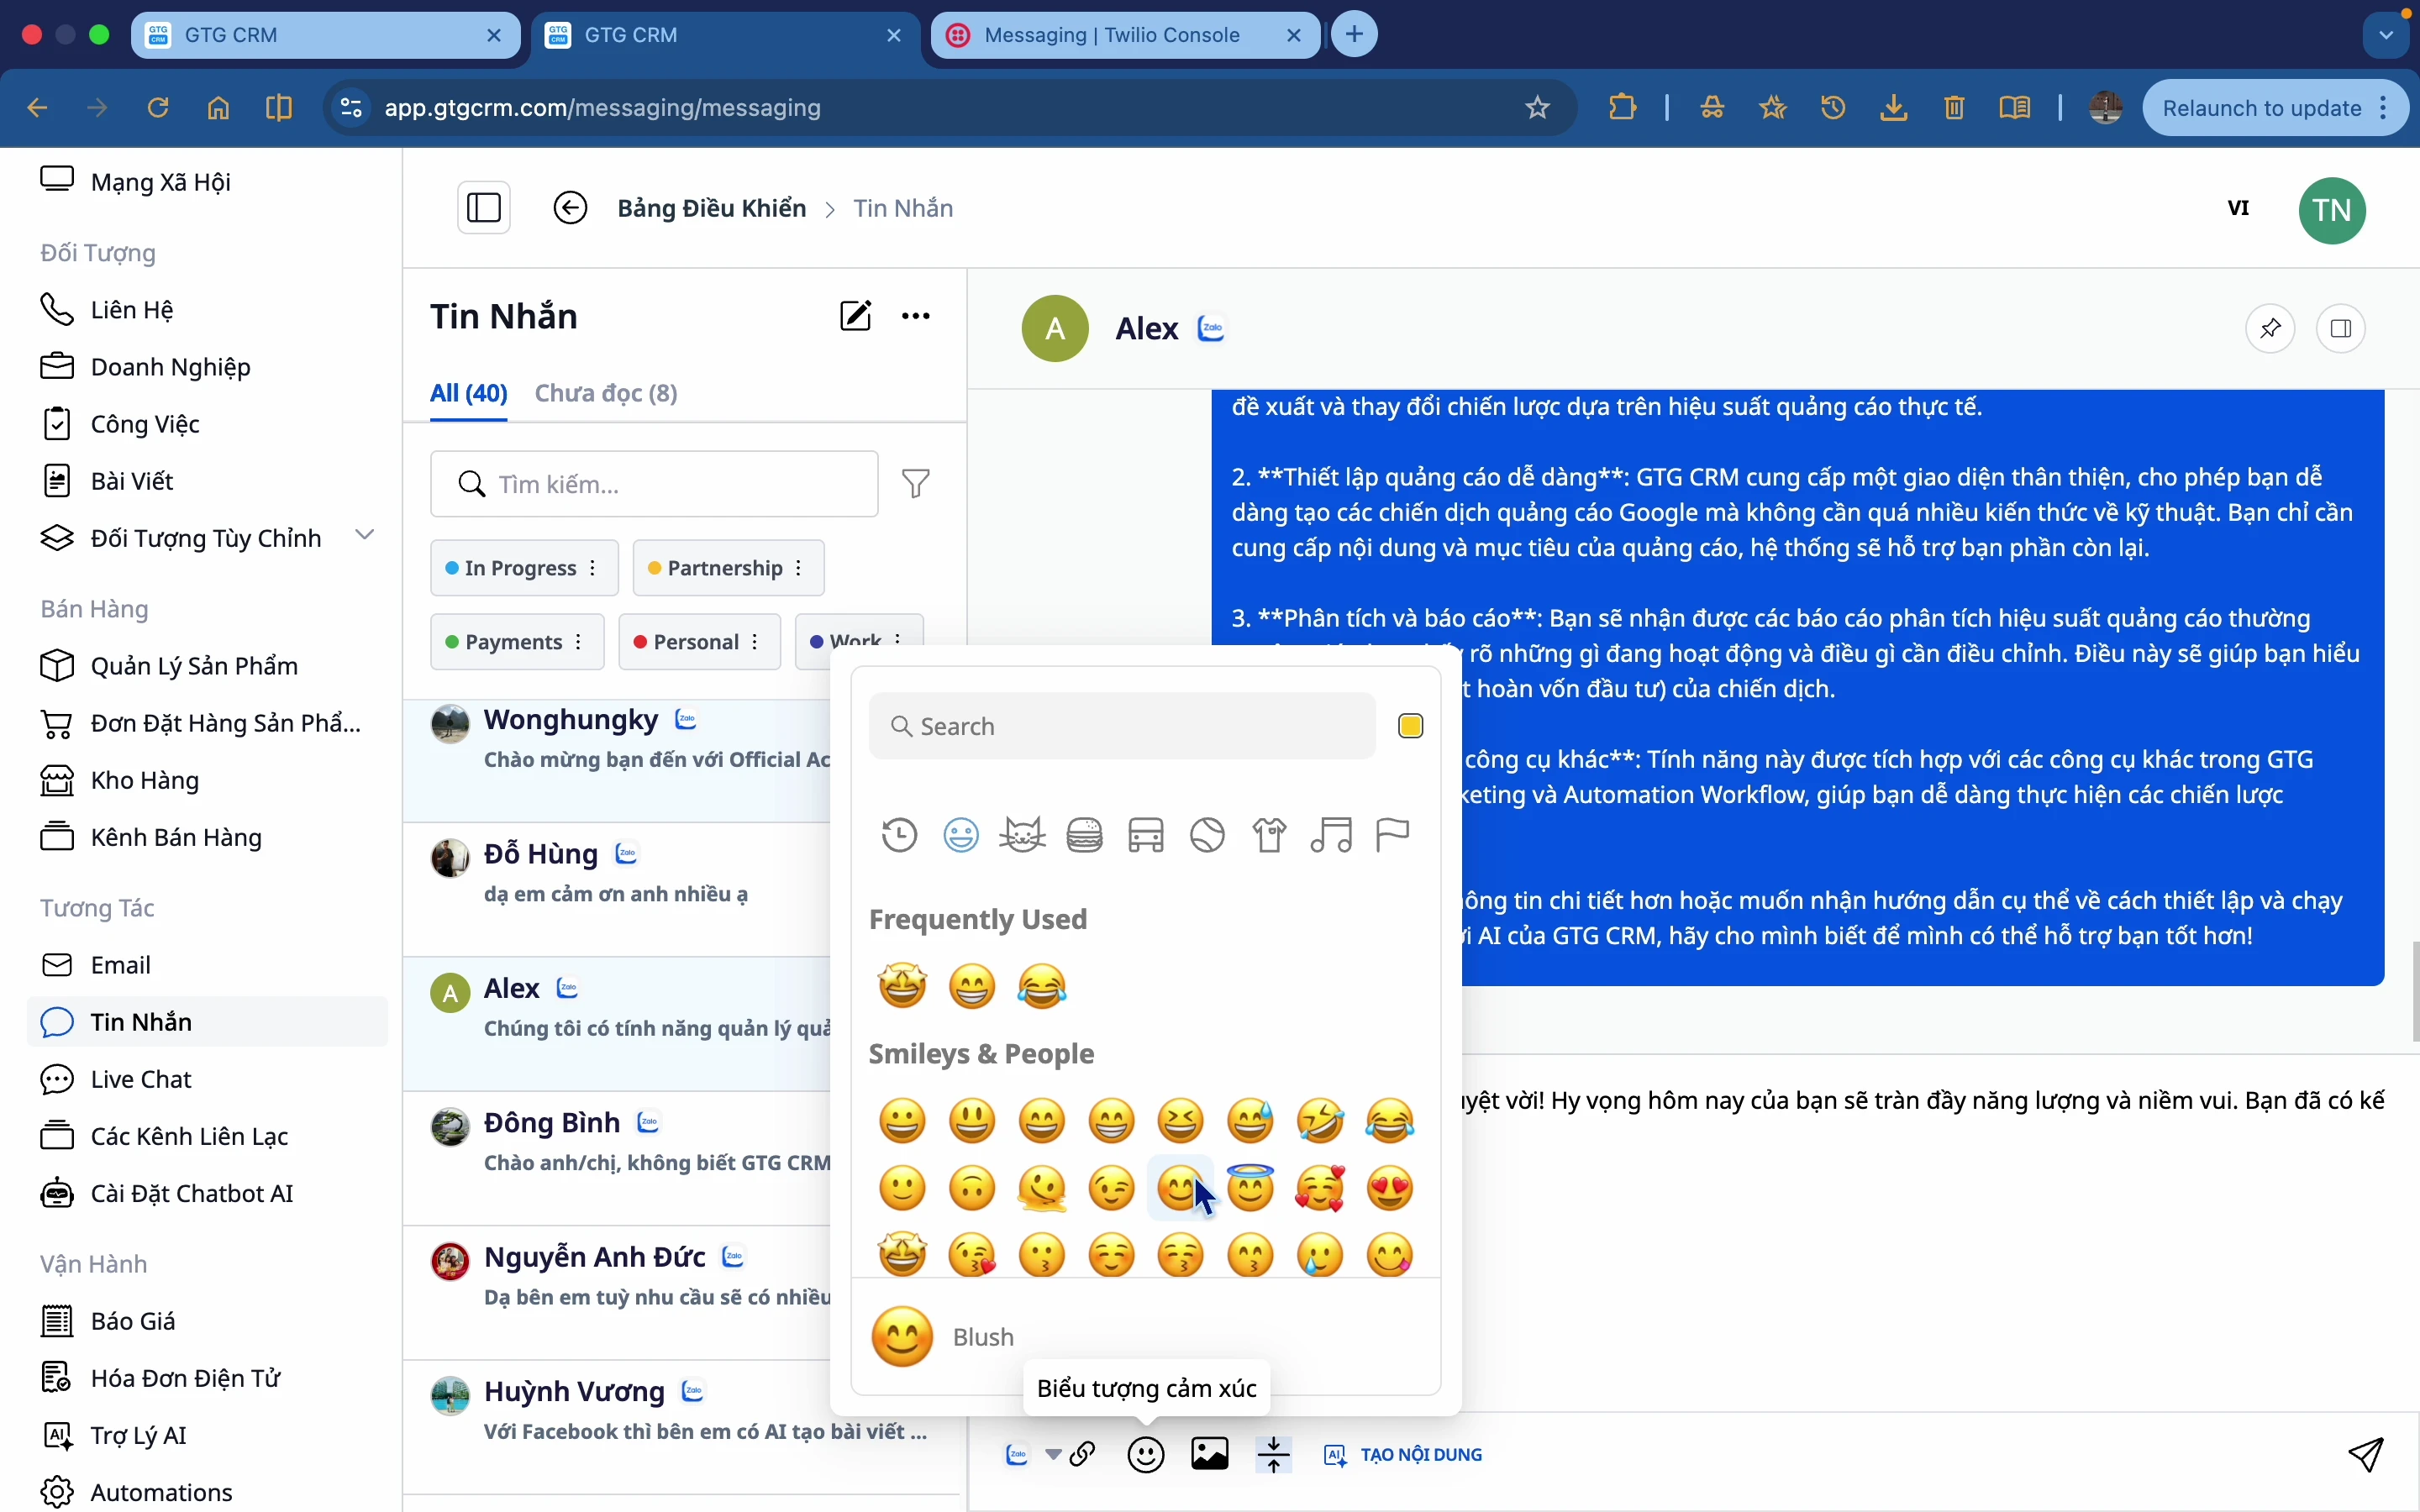
Step 4: Click Submit .
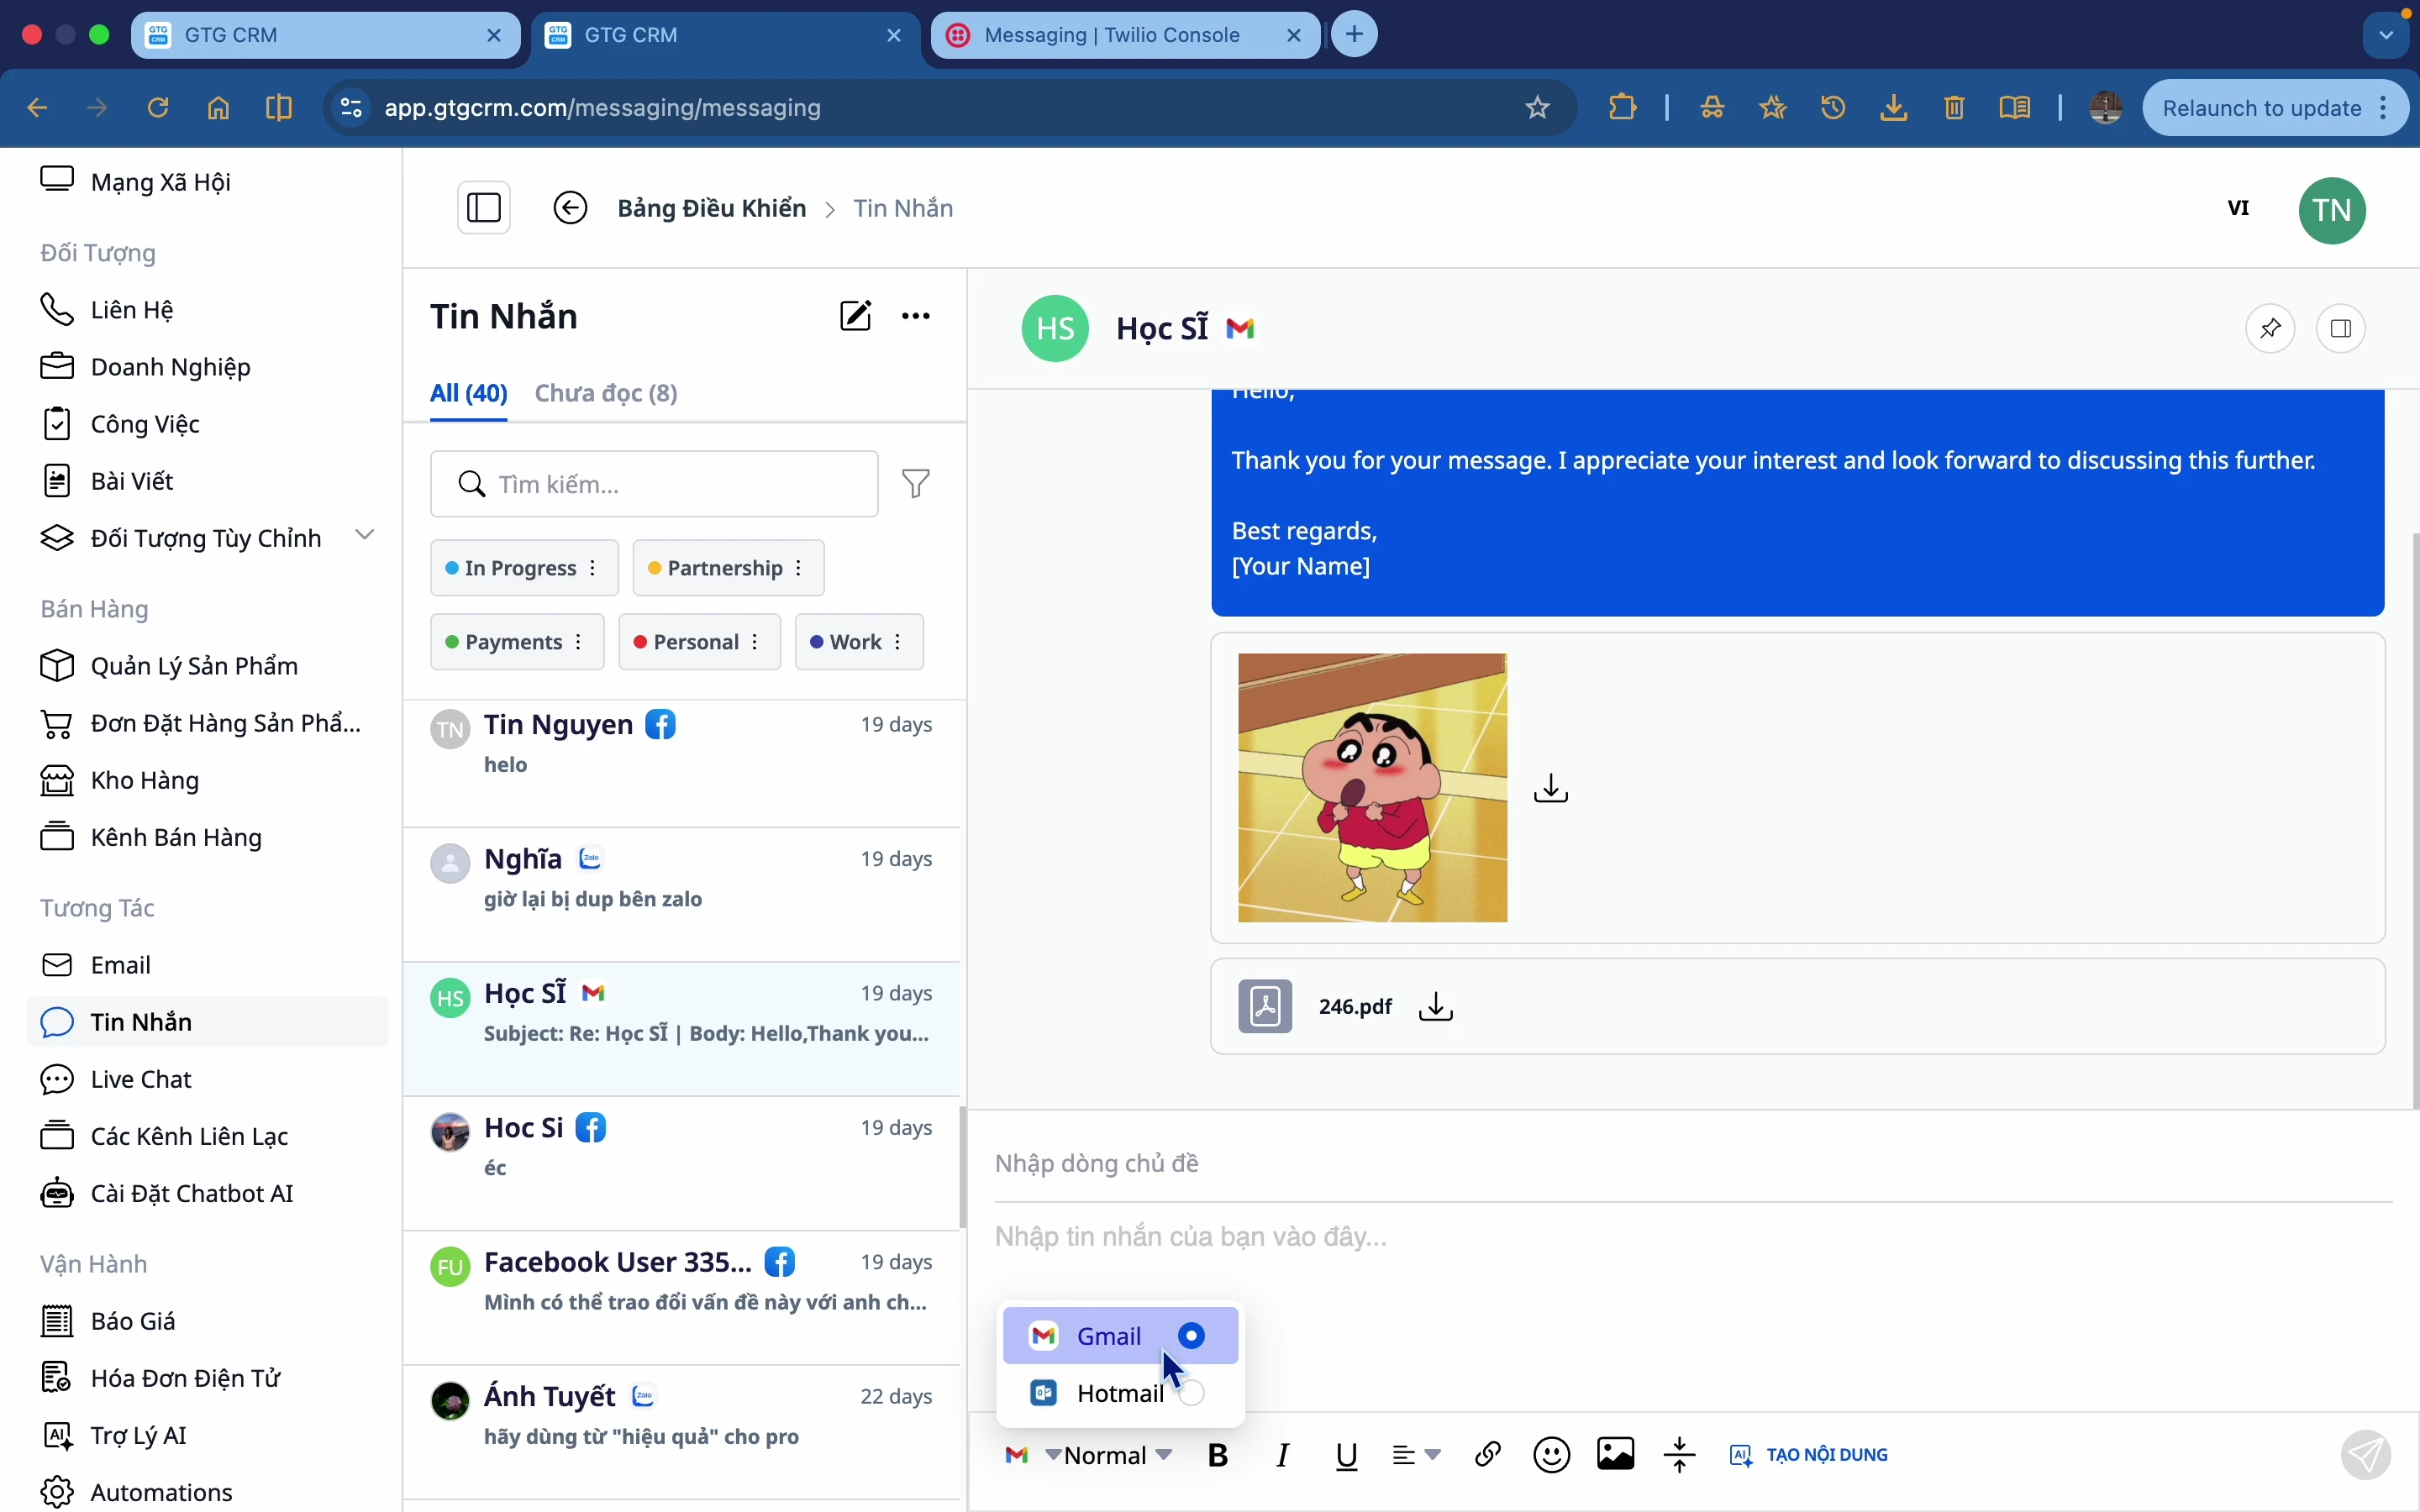
Send an email (Gmail/Outlook)
Step 1: Select a contact with an email address.
Step 2: Choose a sending channel (Gmail or Outlook).
Step 3: Enter the Subject.
Step 4: Compose the email content.
Step 5: Format the text:
- Bold
- Italic
- Underline
- Alignment: Left, Center, Right
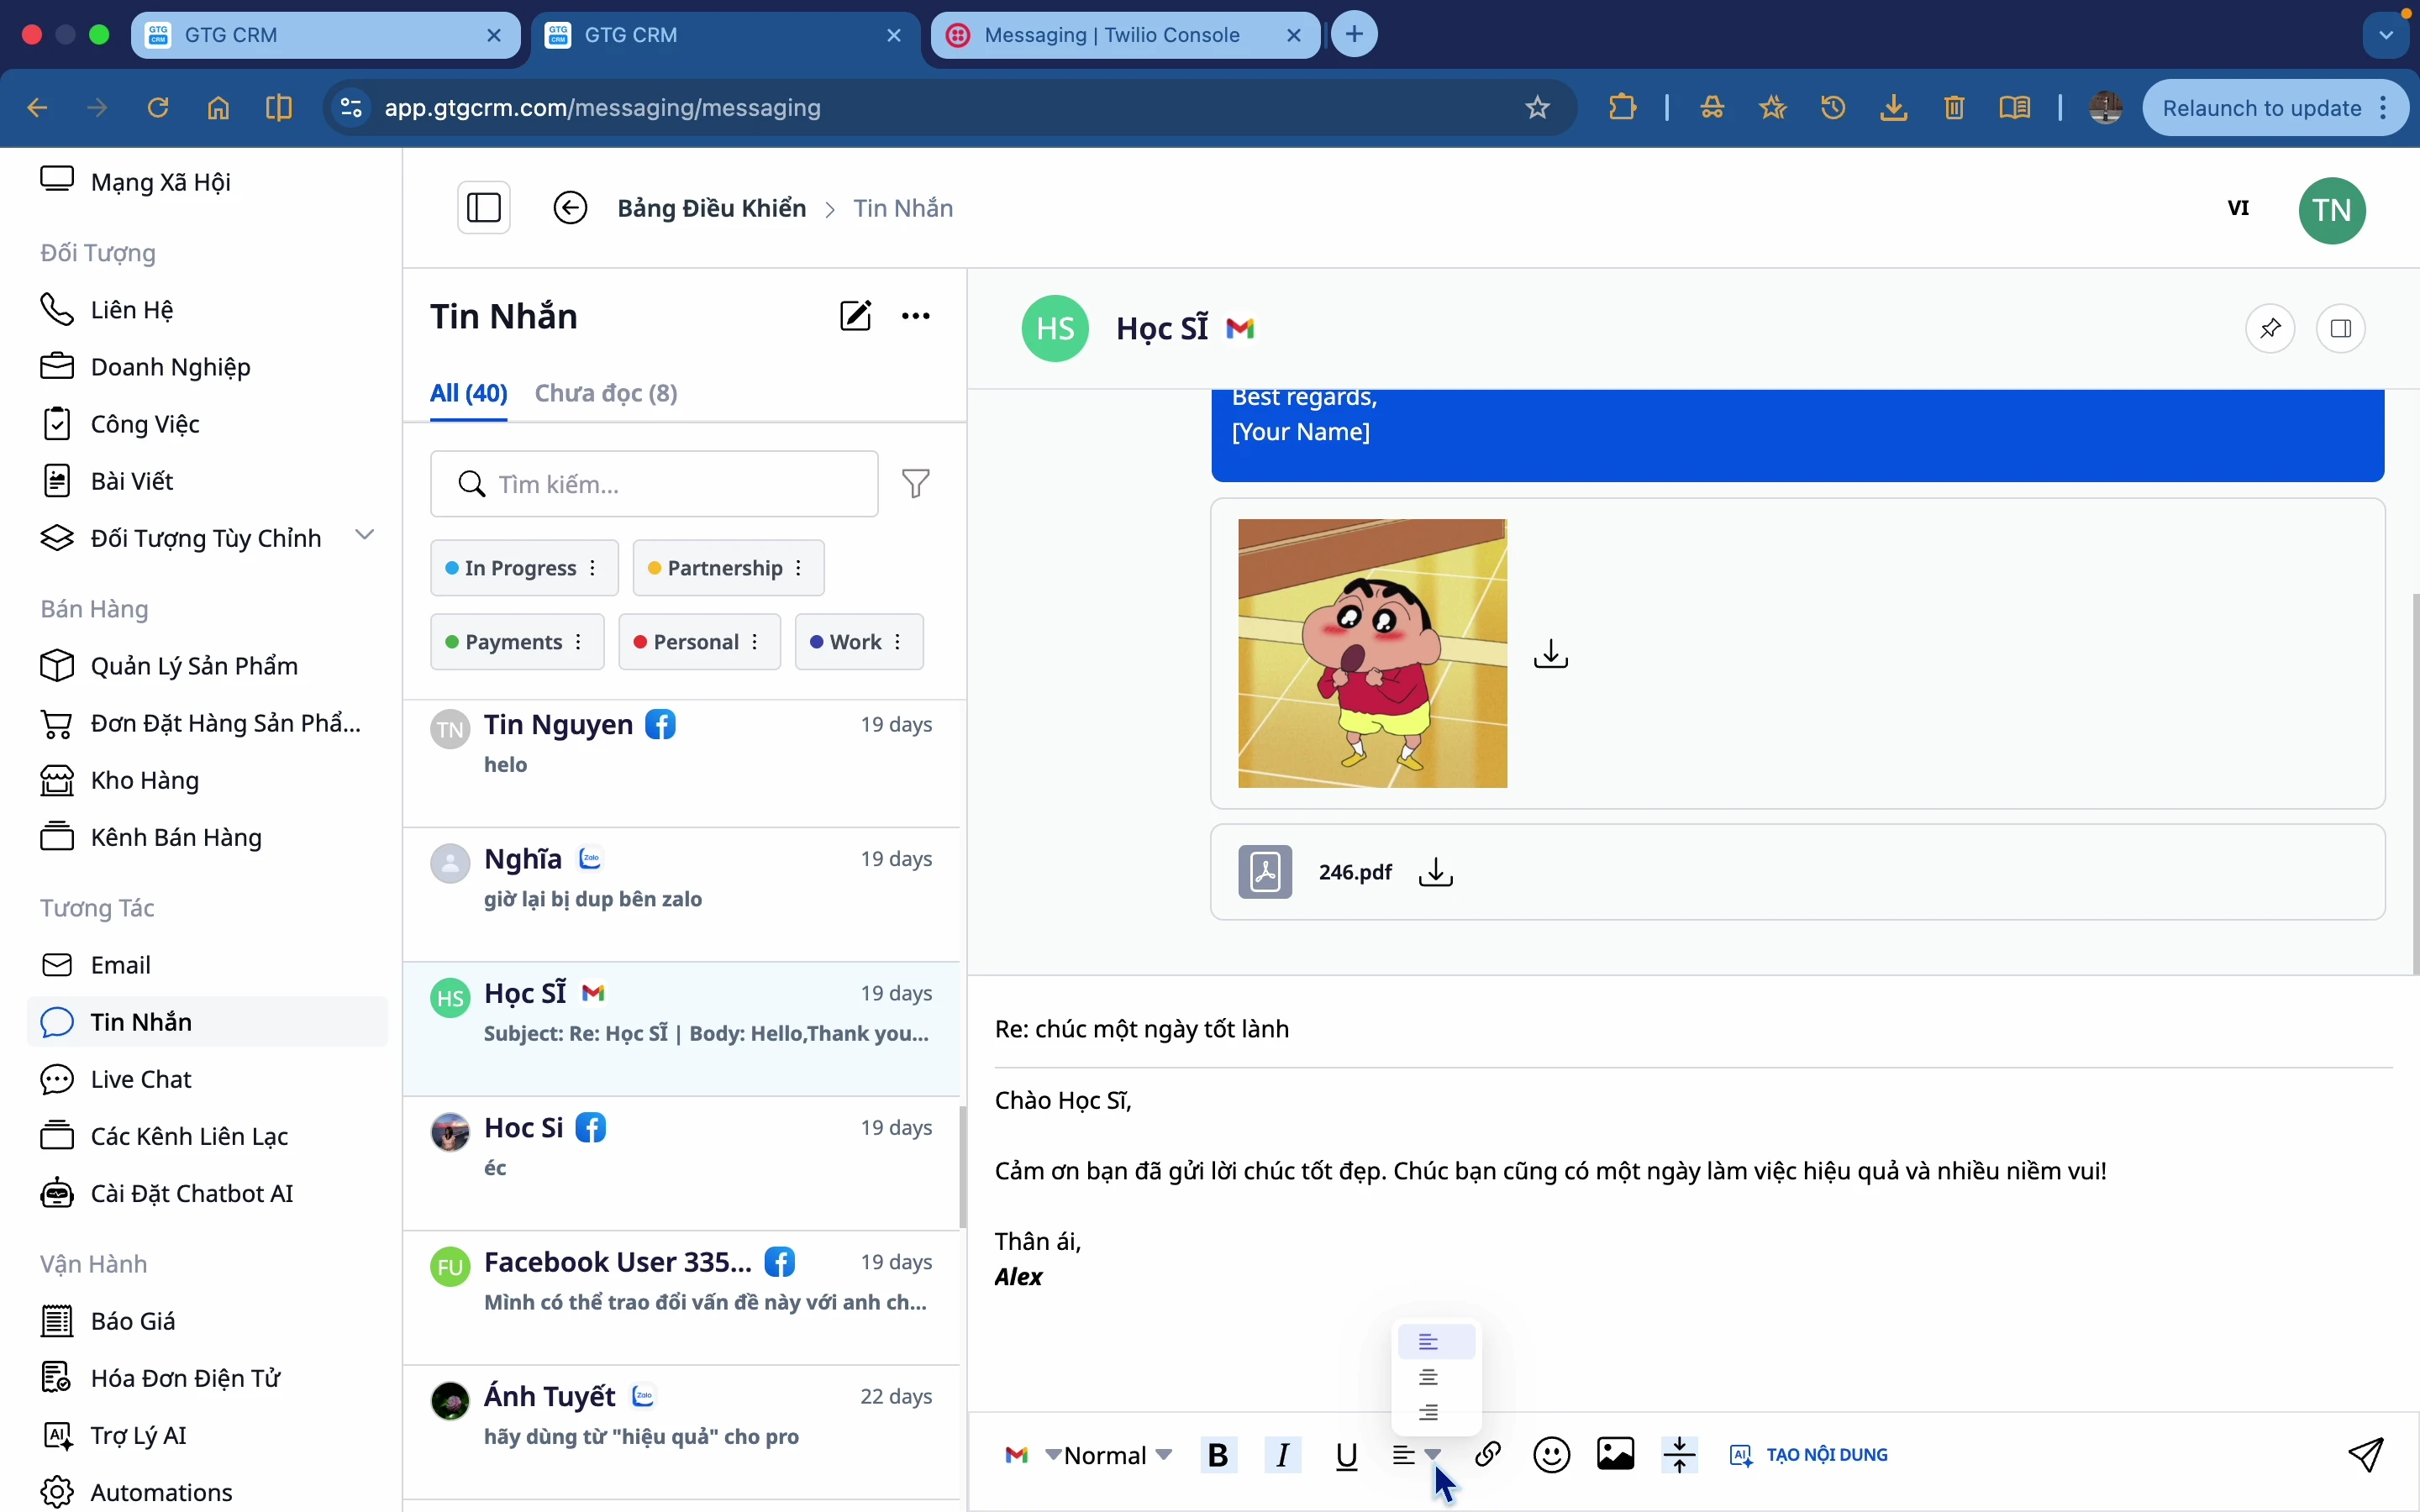
Step 6: Click Submit .
5. Using AI to create content
When you don't know what to say, use AI to suggest content.
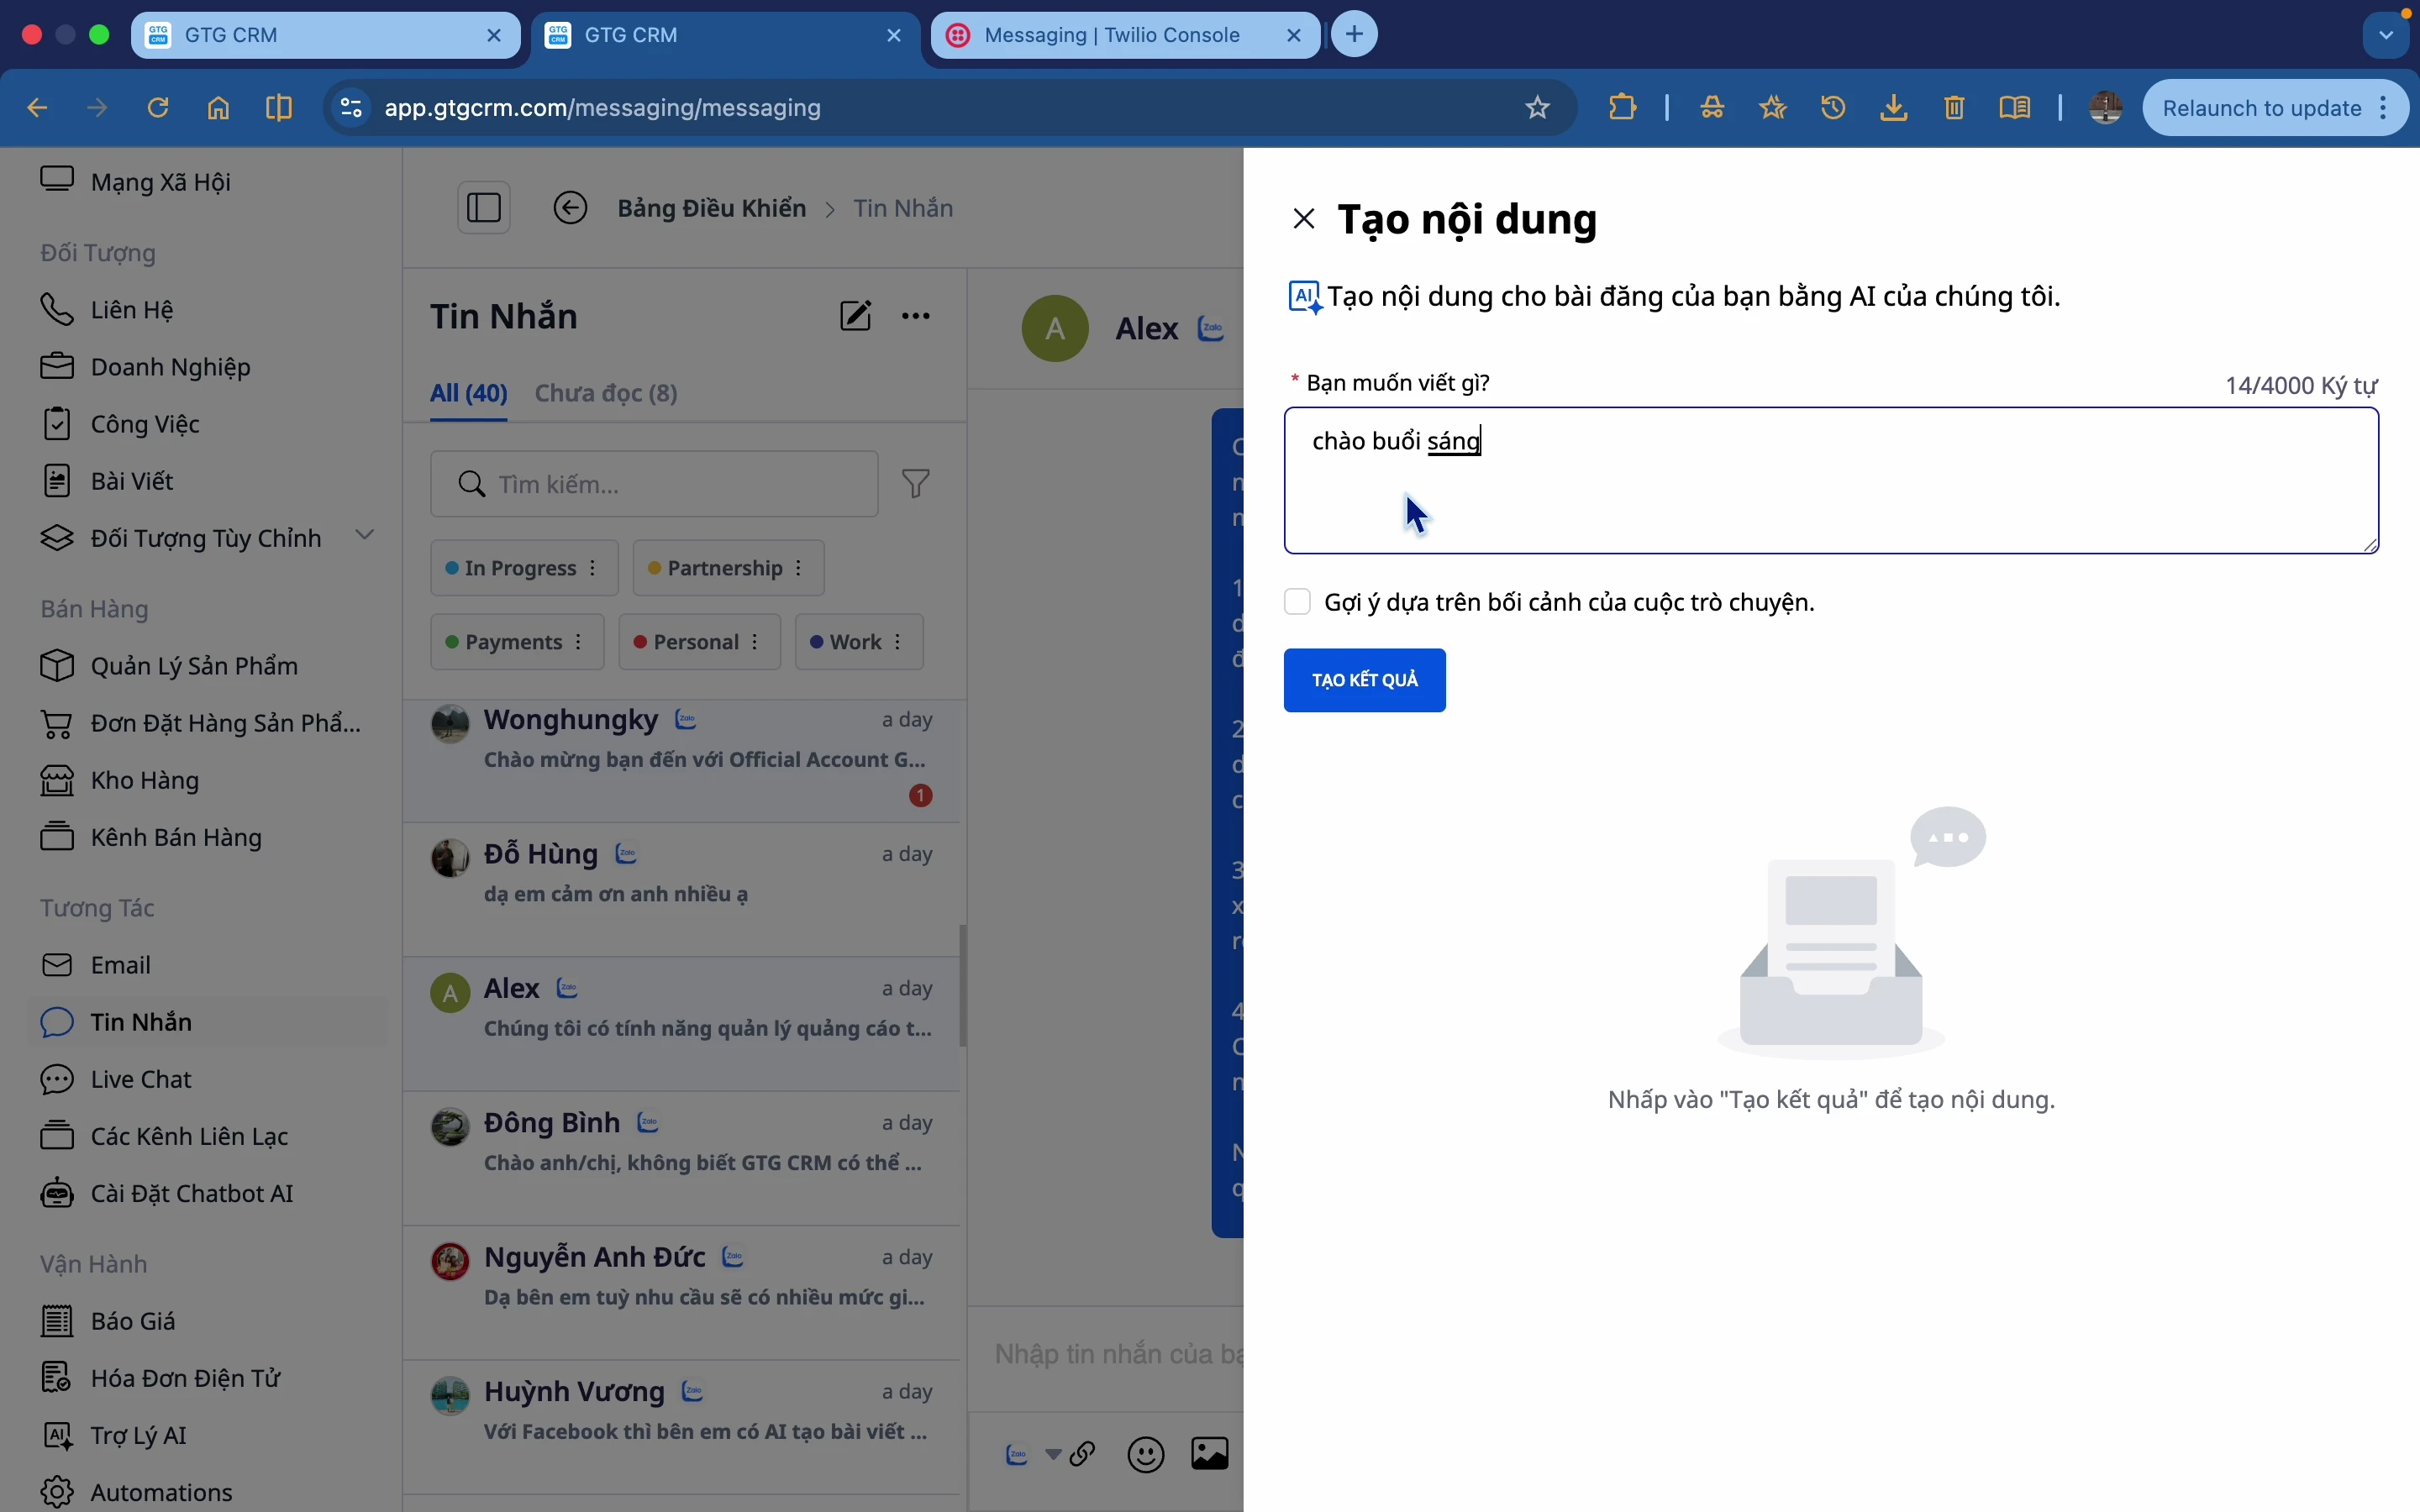
Step 1: Open AI for content creation.
Click on the AI content creation icon.
Step 2: Enter your request
Briefly describe what you want to say (for example, "Good morning, Alex").
Step 3: Generate results
Click Generate Results . The AI will suggest 3 options.
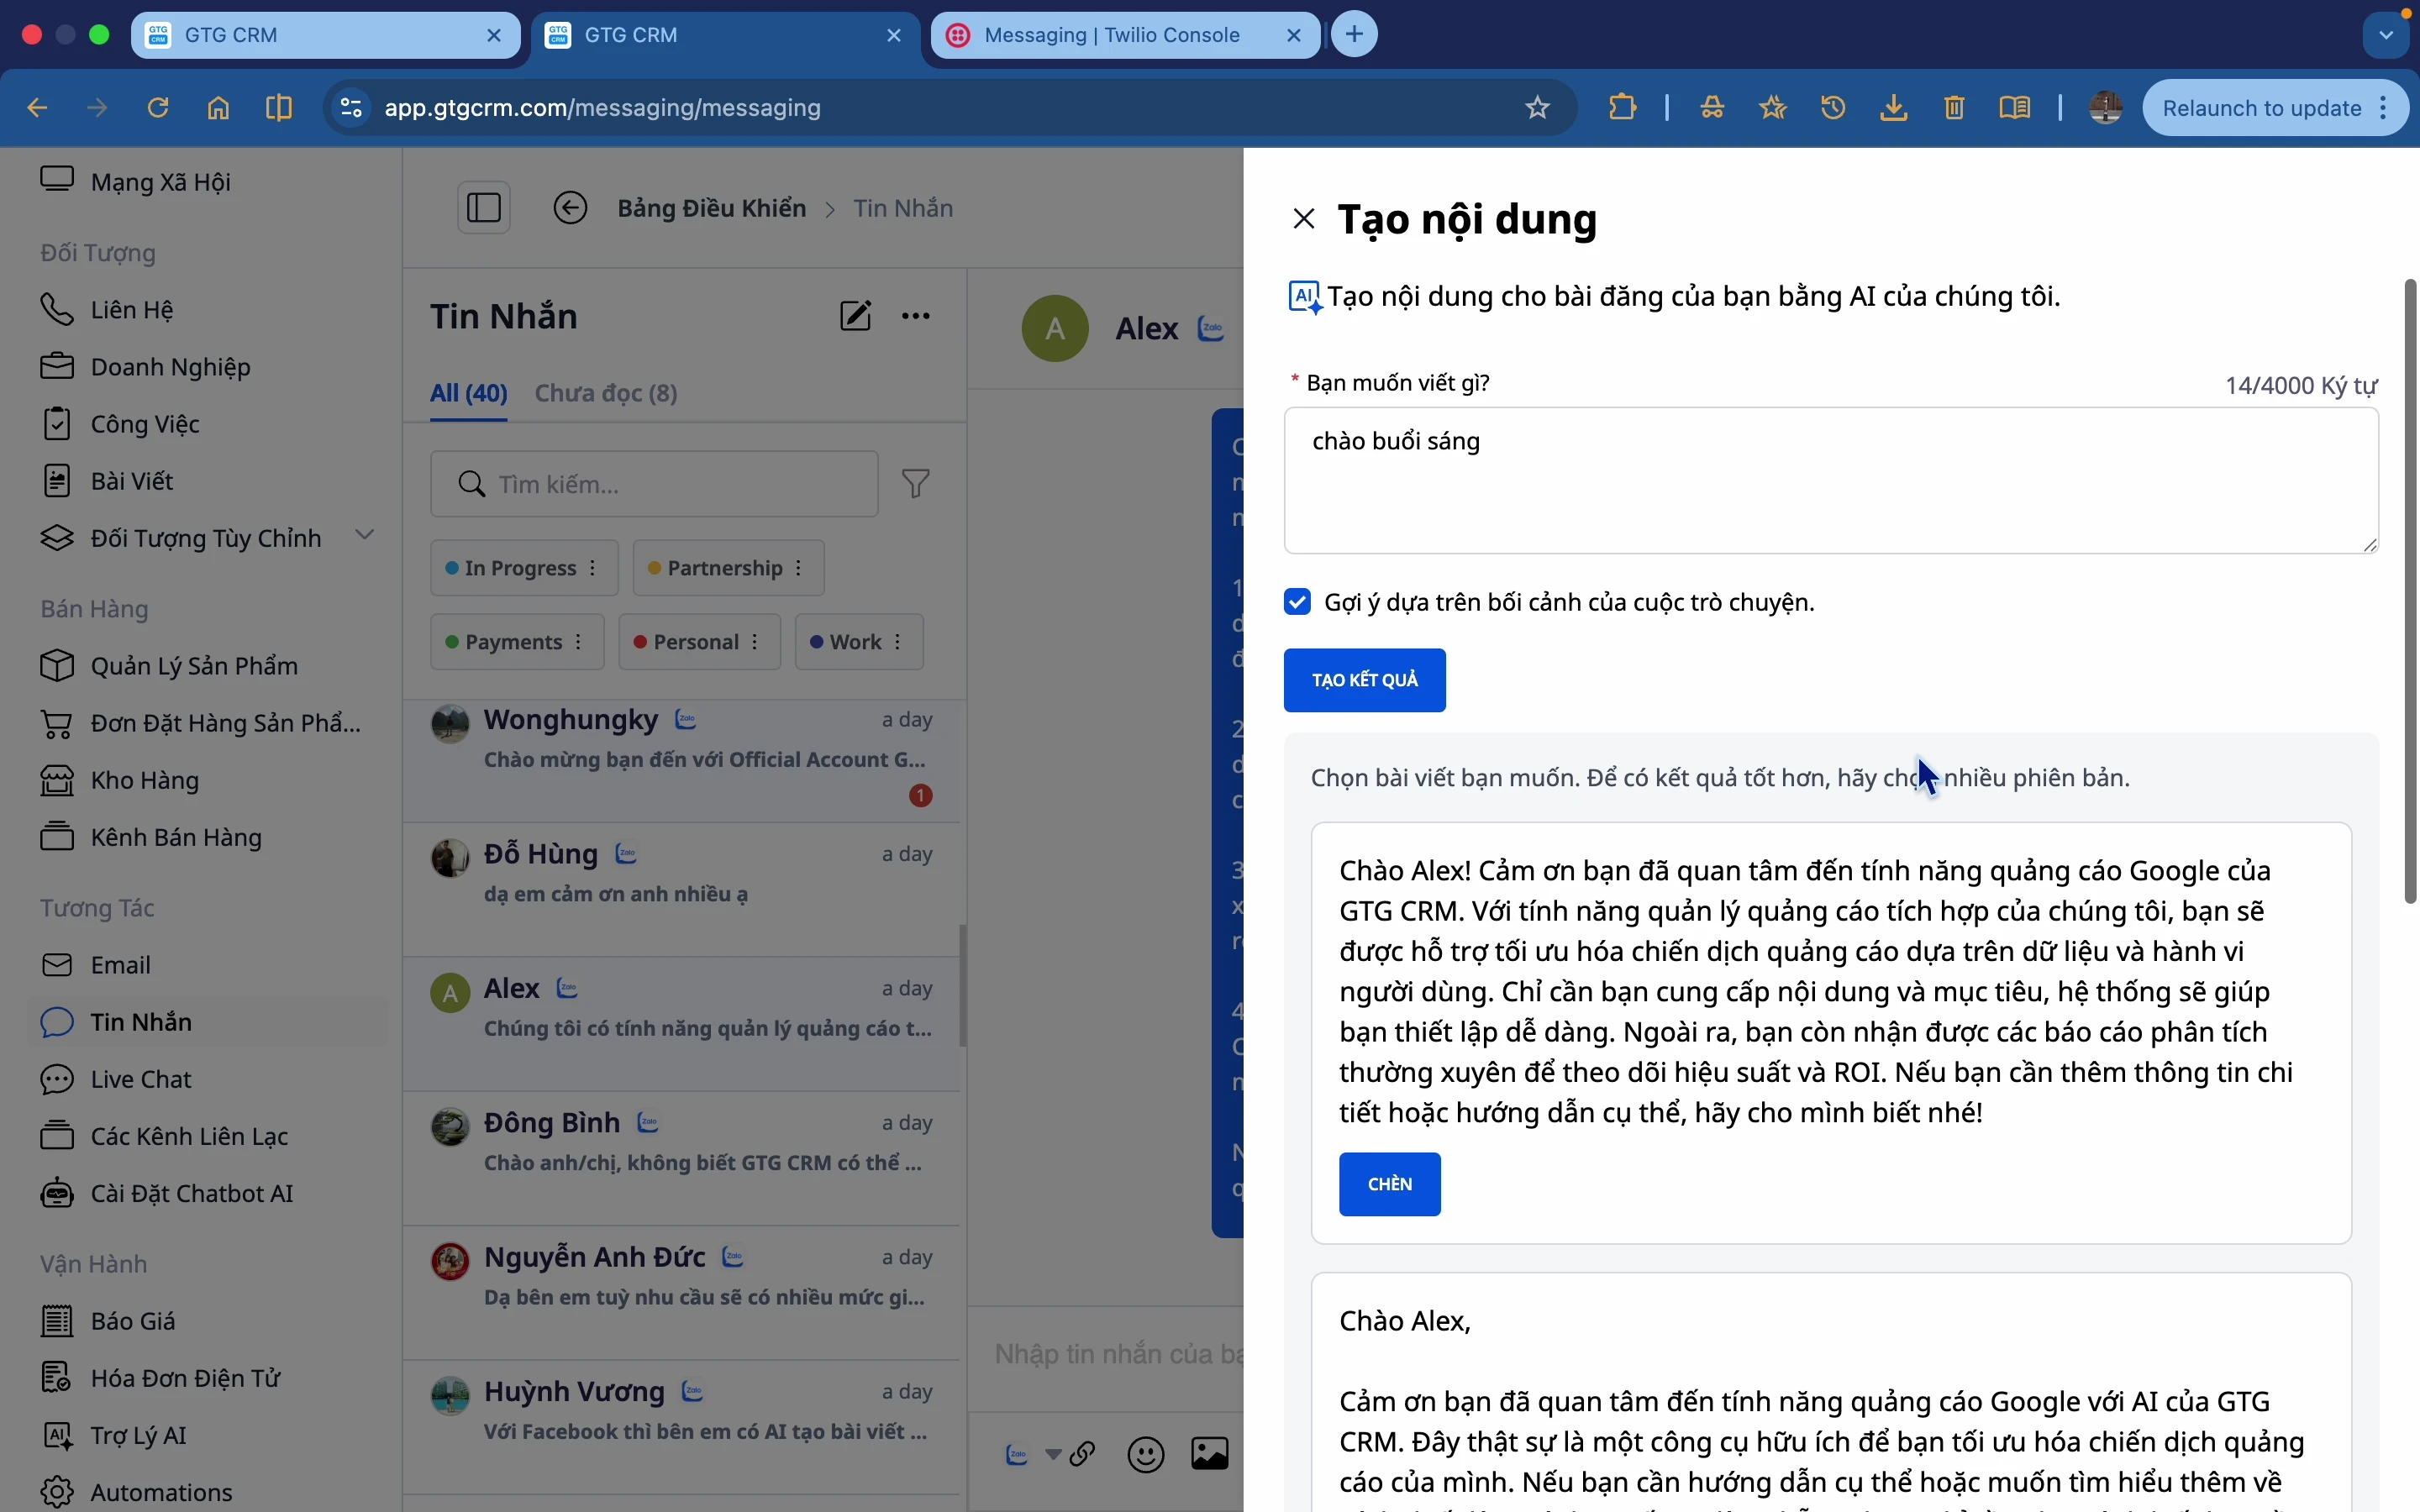
Step 4: Select and insert
Choose the most suitable option and click to insert it into the text editor.
Step 5: Edit and submit
Edit if necessary, then send the message.
6. Tag and filter your inbox.
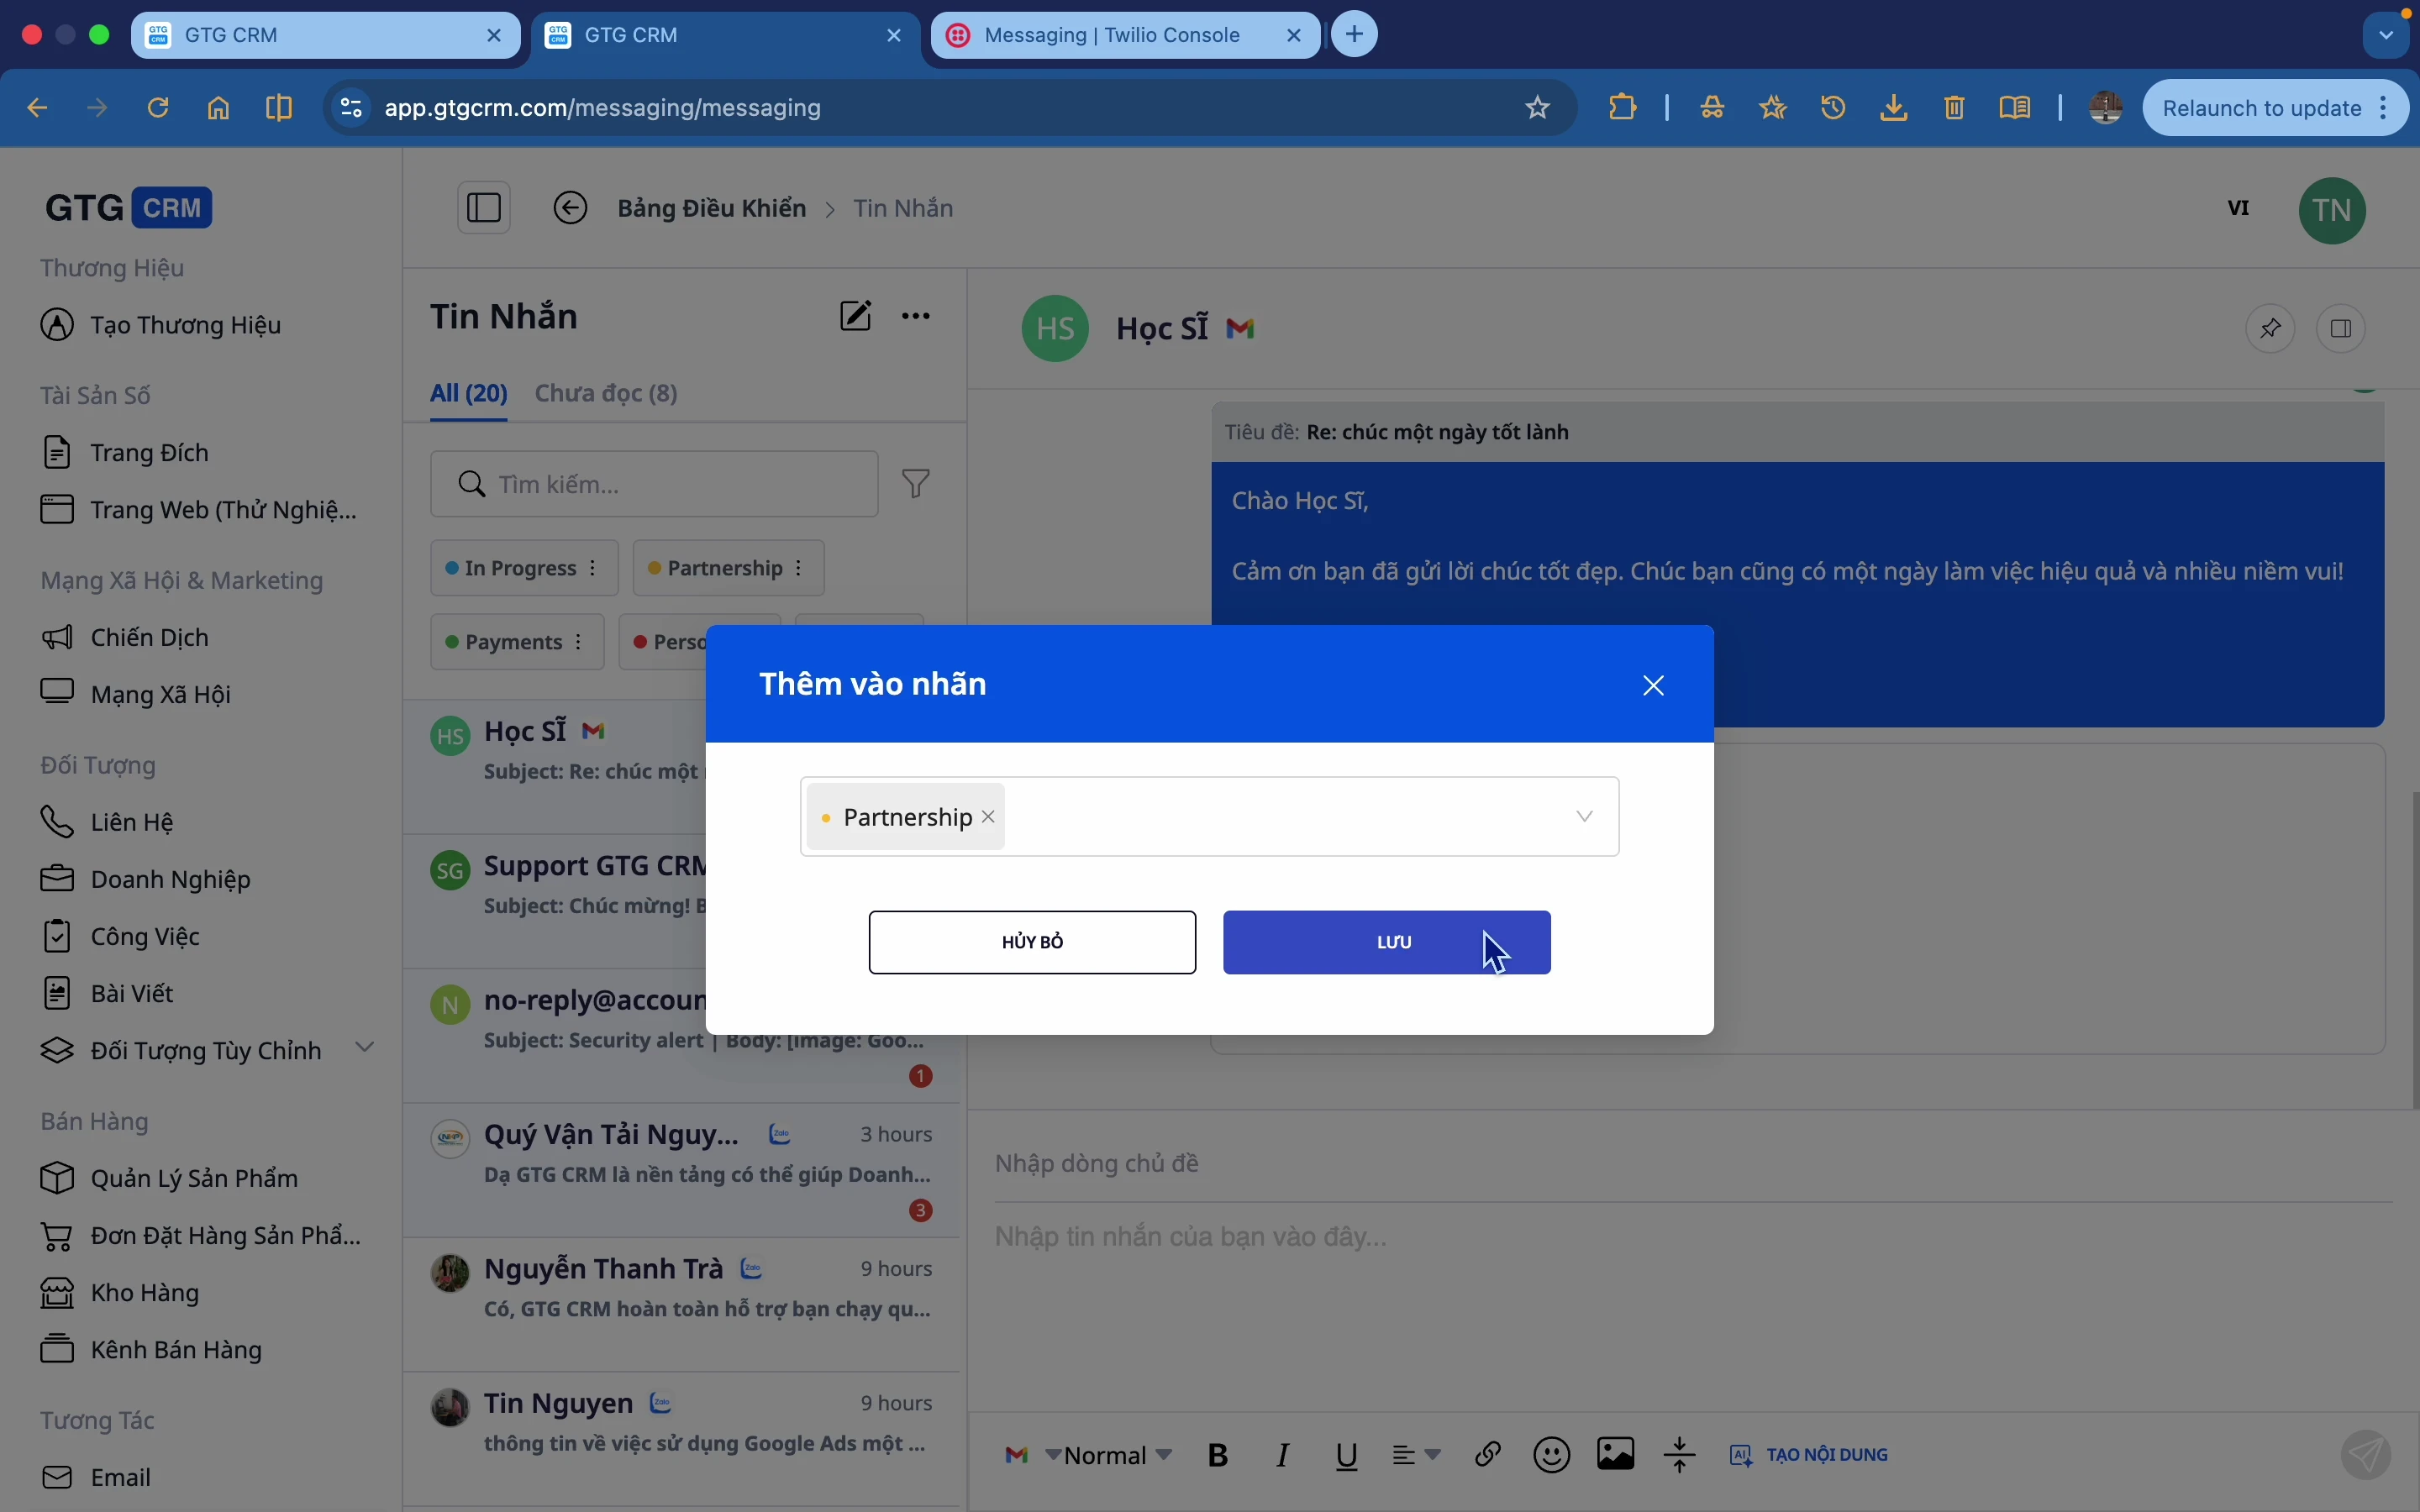
Tag your inbox
Step 1: Select the conversation.
Step 2: Click on the Tag section.
Step 3: Select a tab (e.g., "In Progress", "Partnership",...).
Step 4: Click Save .
Filter inbox by tags
Click on the tag to see all inboxes containing that tag.
Filter inbox by date
Step 1: Open the filter.
Step 2: Select the Start Date and End Date .
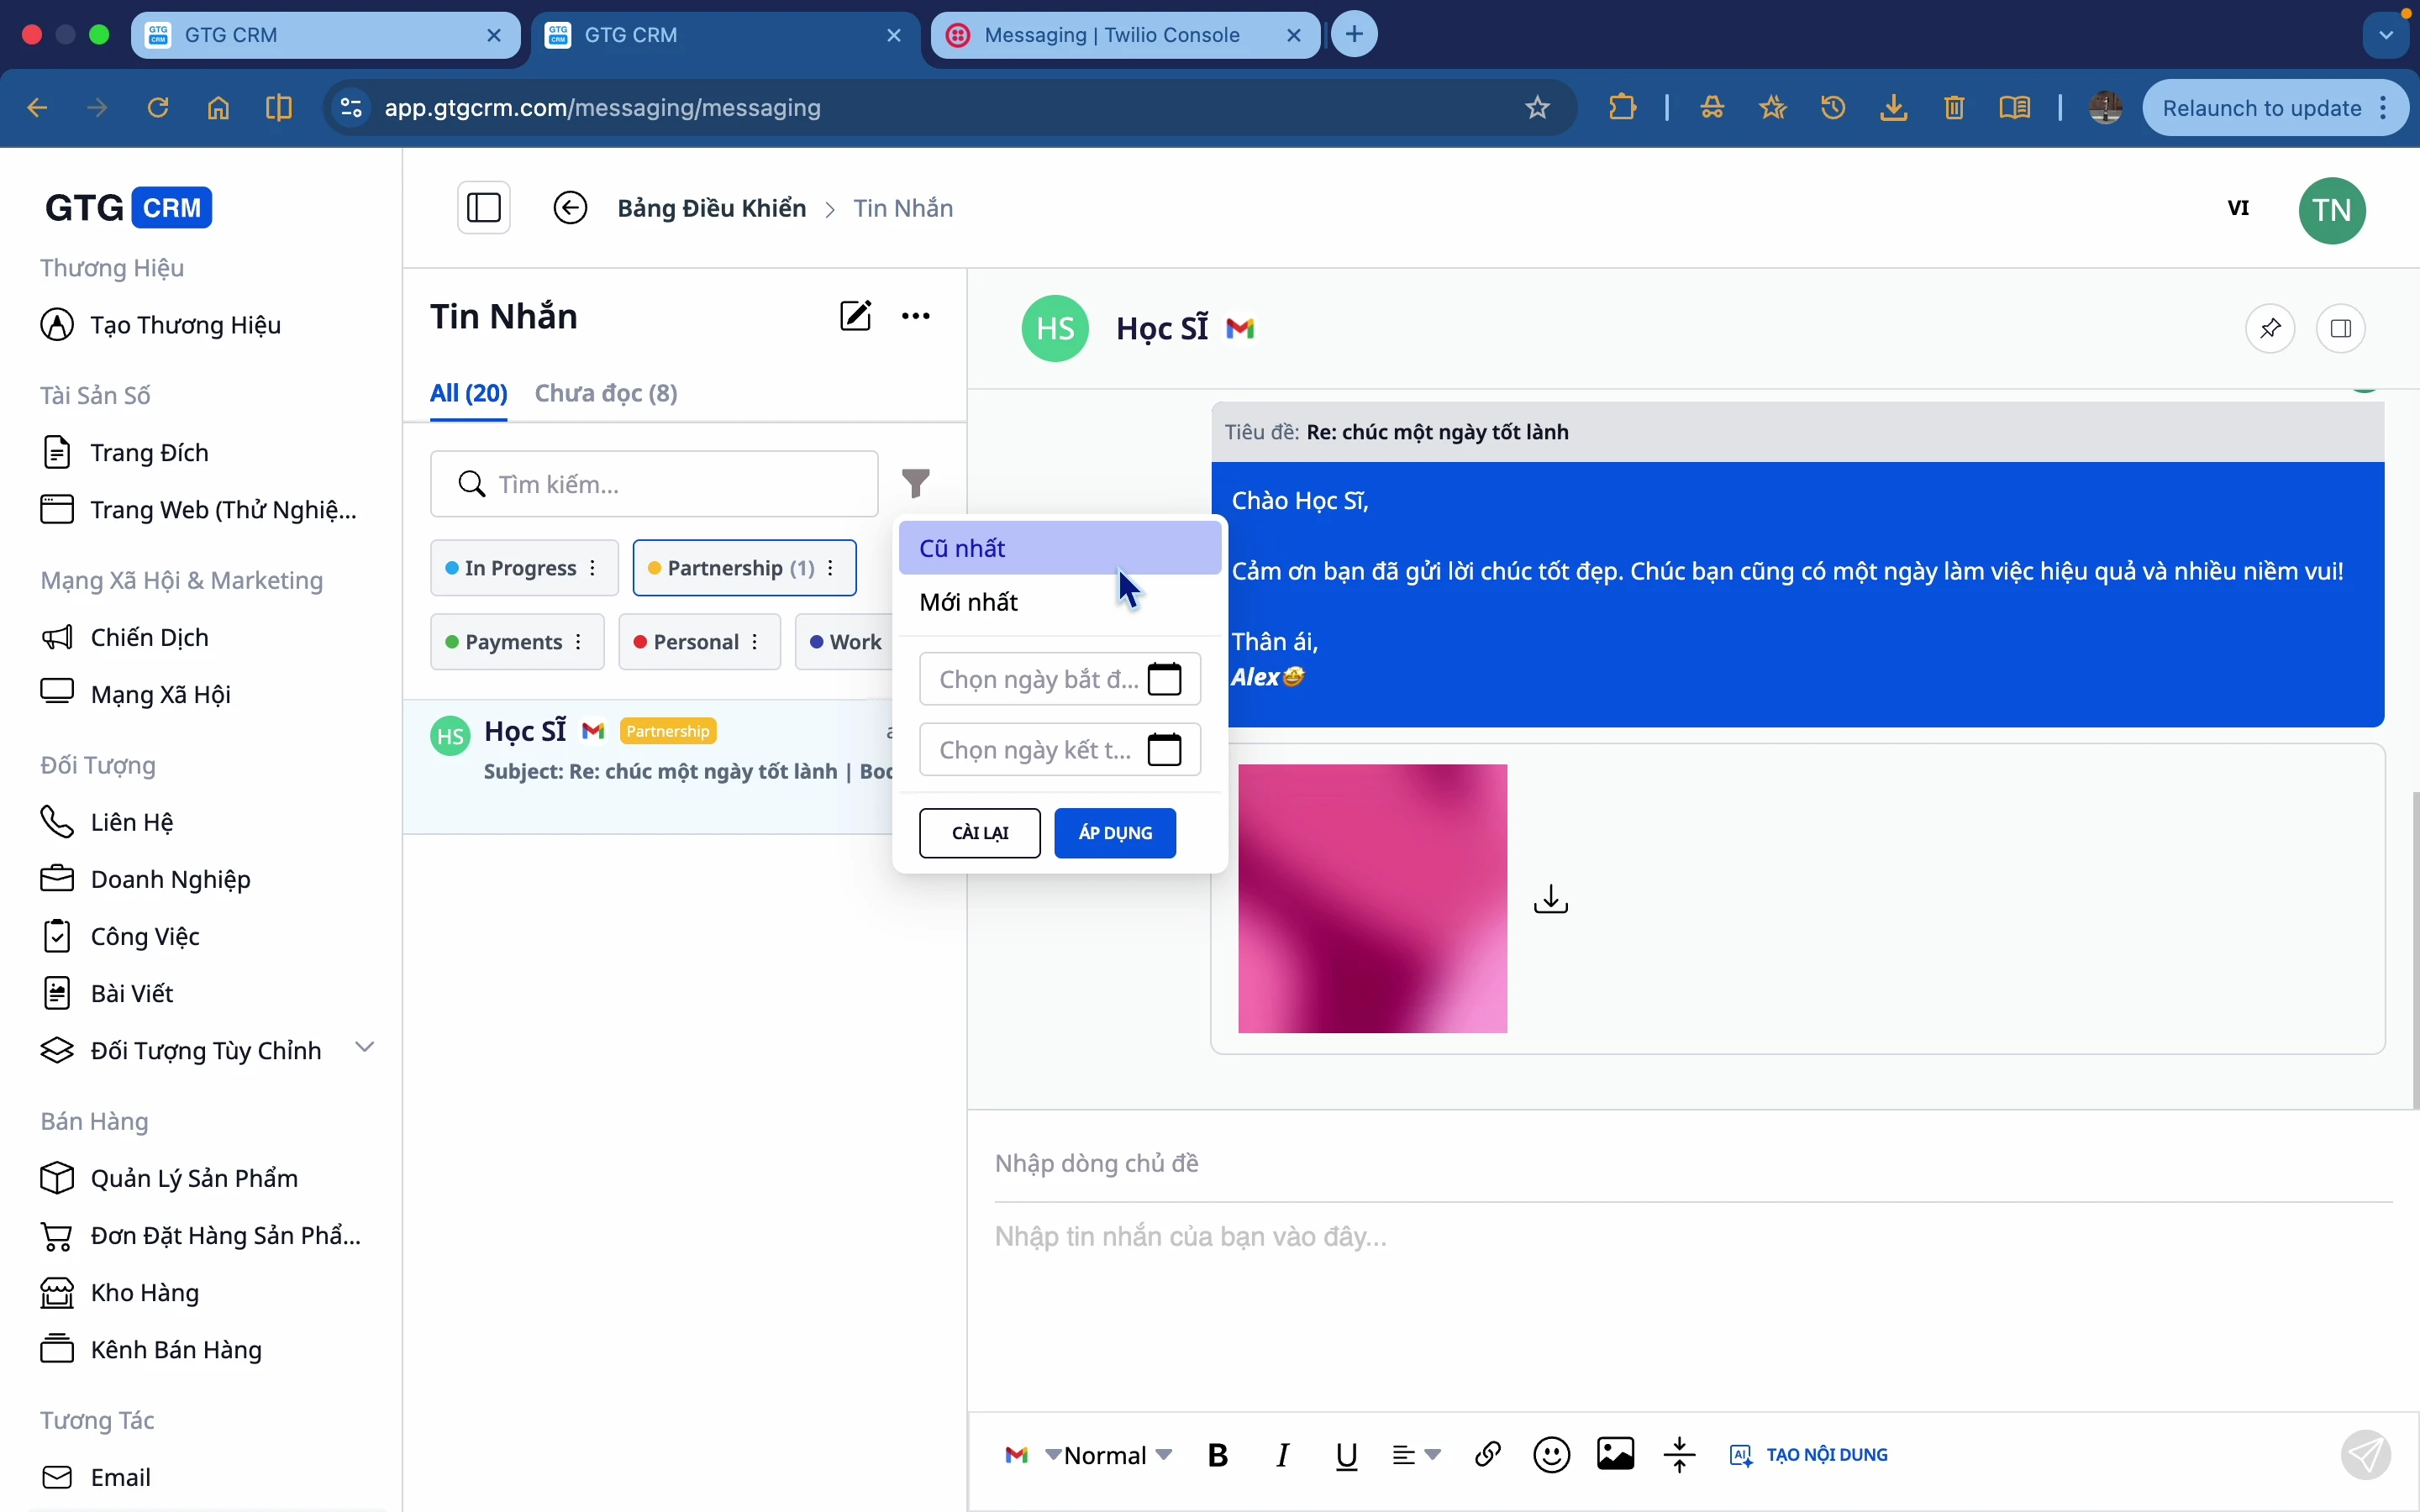
Step 3: The system will display the inboxes within that time period.
7. Add information to CRM
From the conversation, you can add customer information to your CRM.
Step 1: Open the information panel.
On the right side of the screen, find the Add to CRM section.
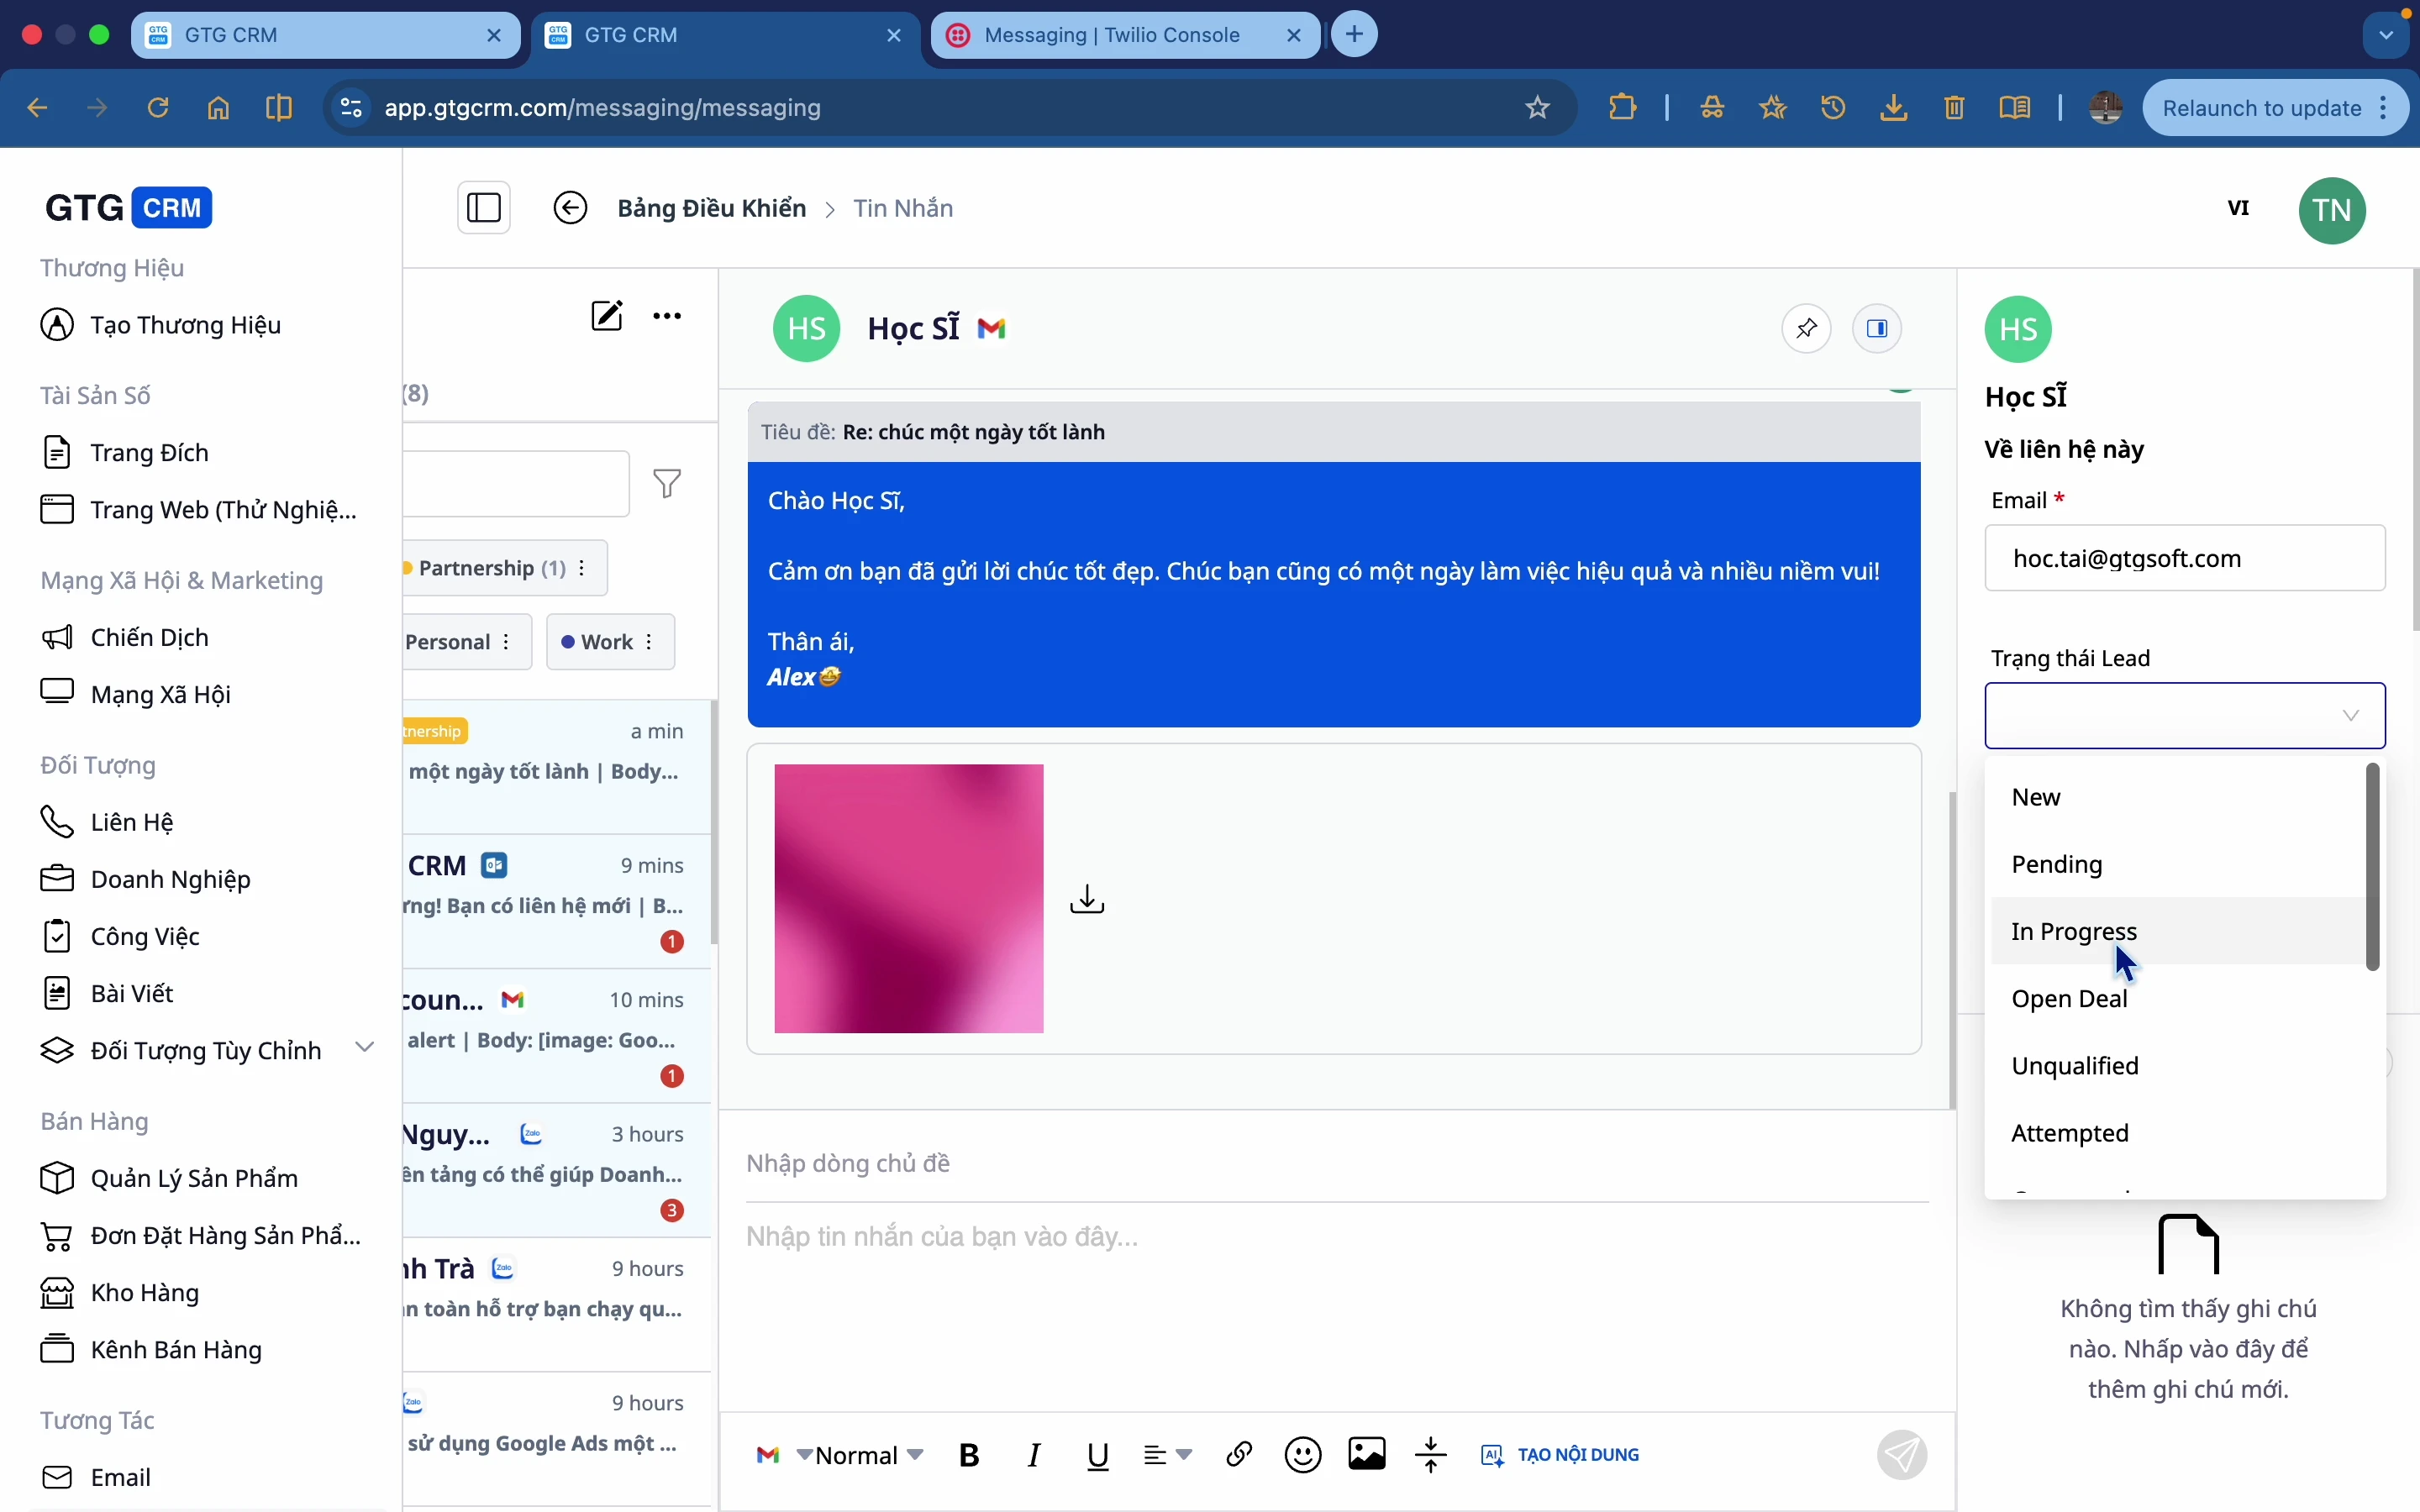
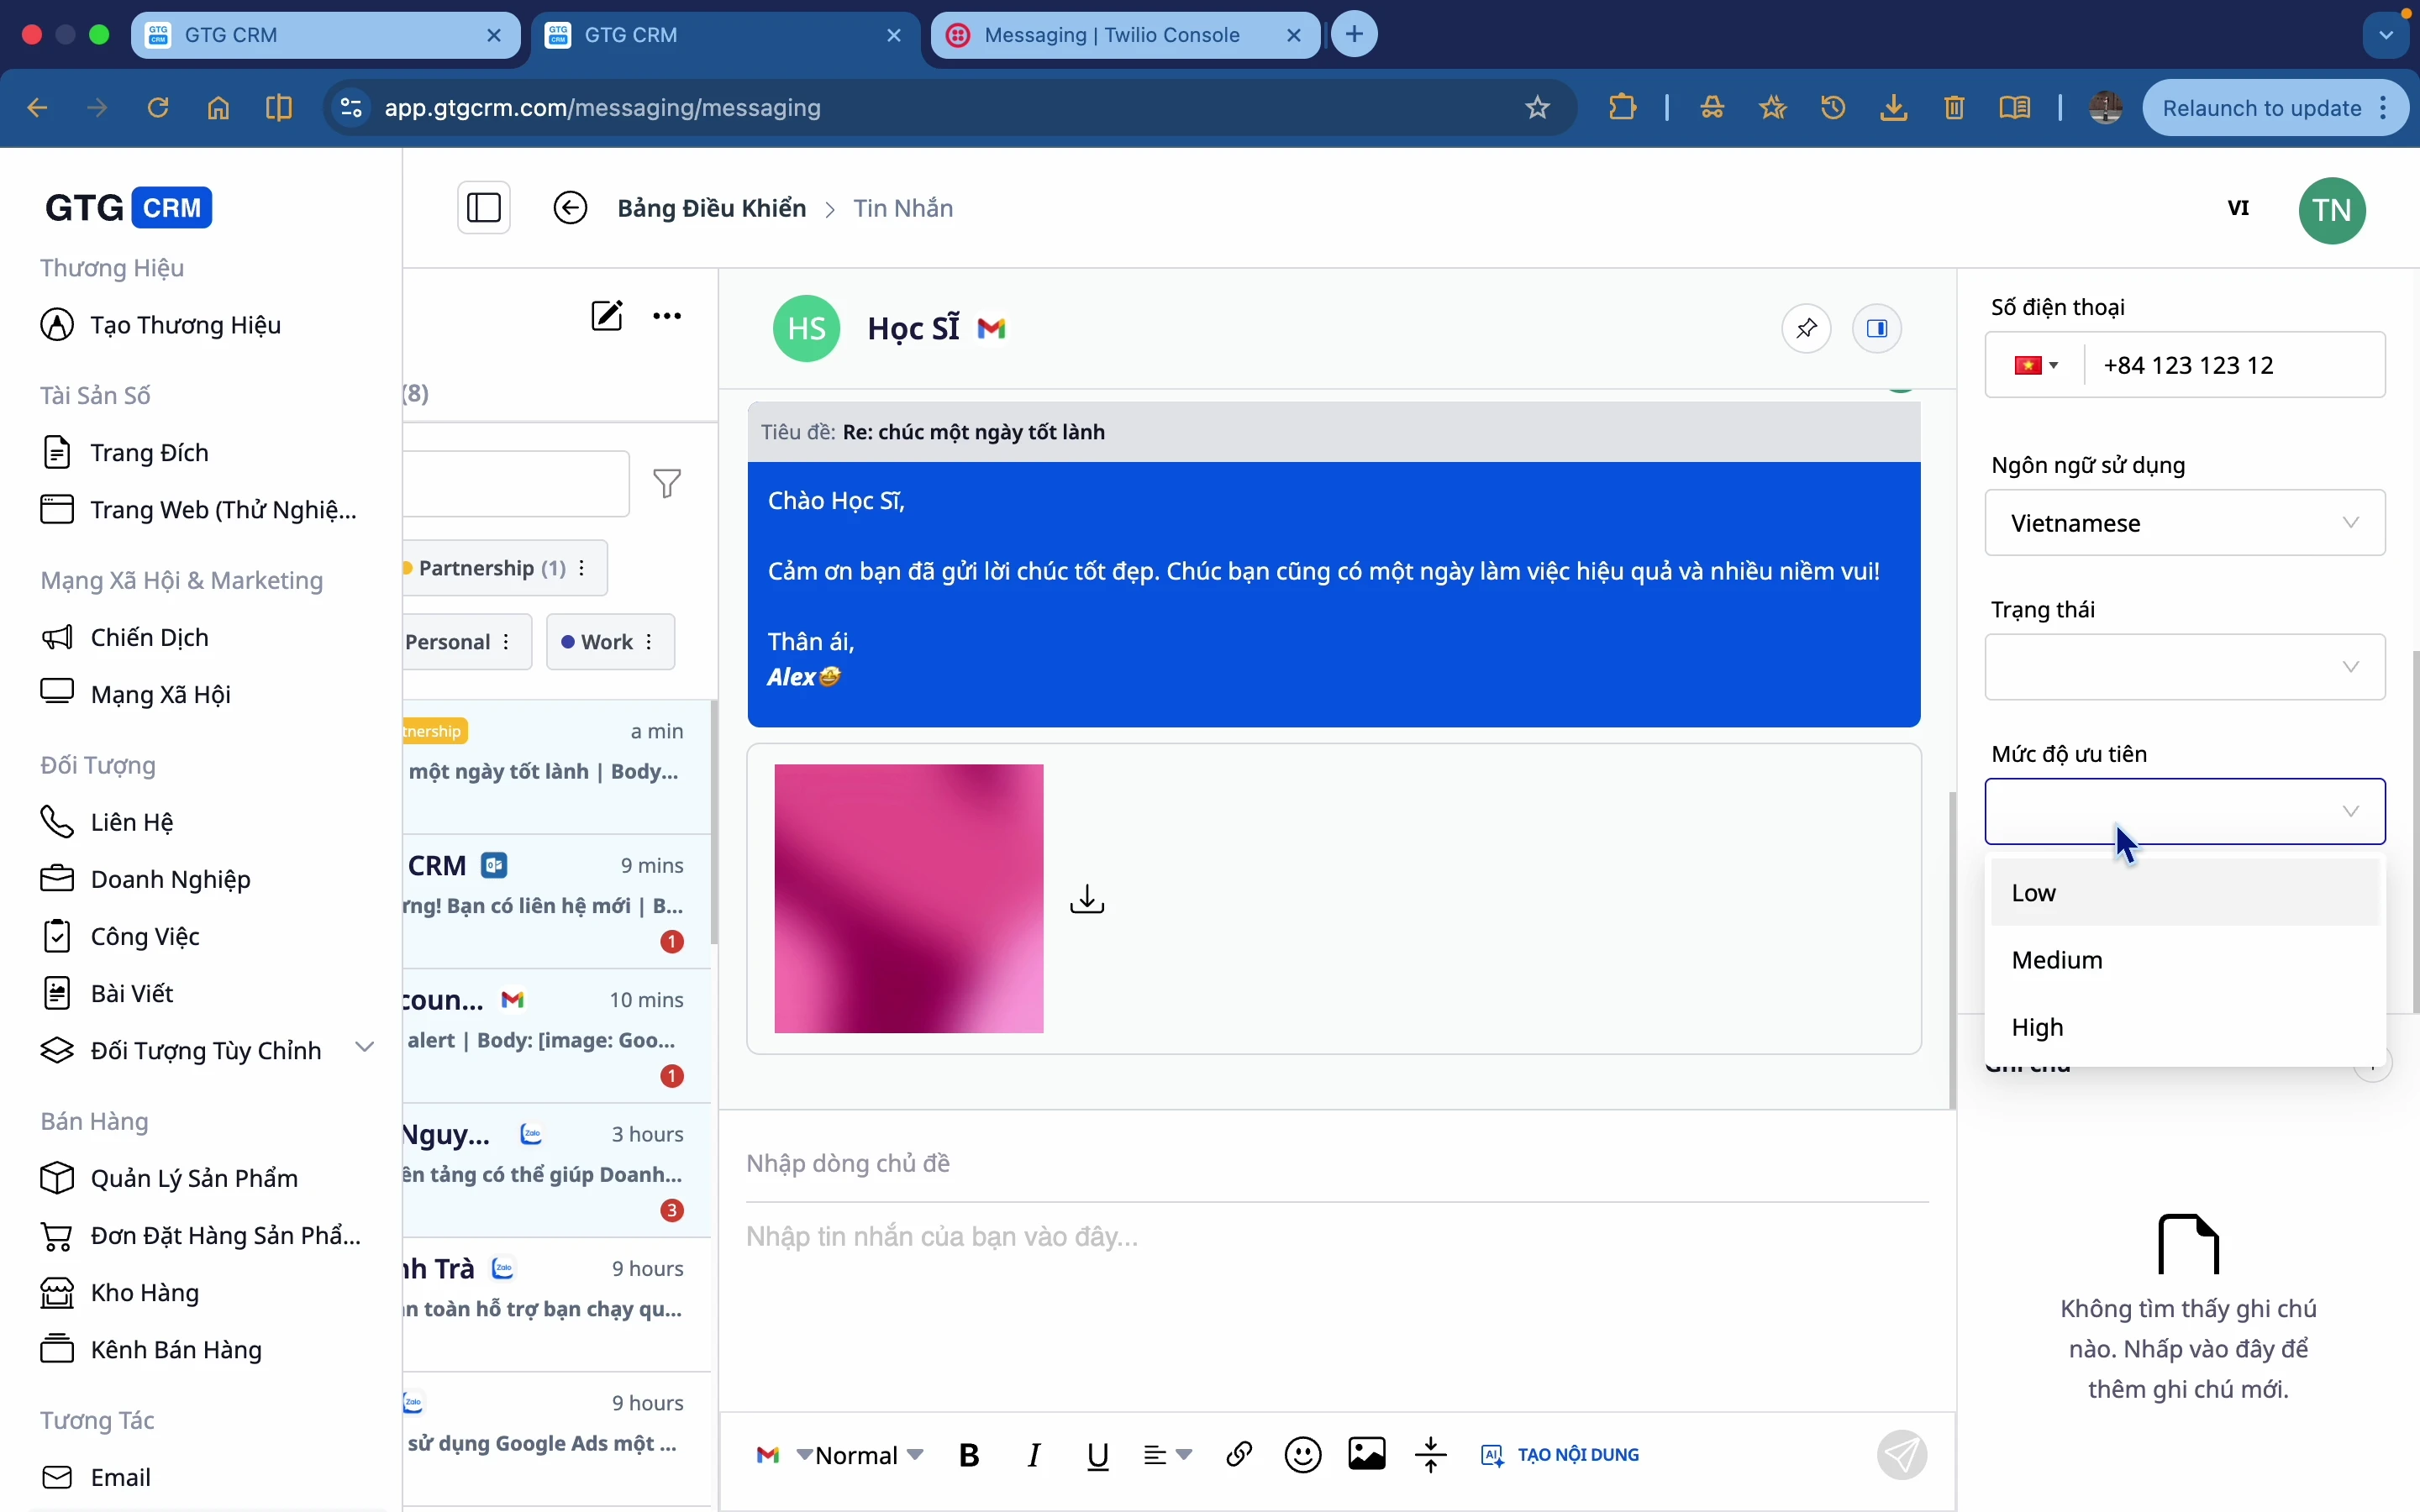
Step 2: Update information
- Lead Status : New, In Progress, Qualified, etc.
- Languages : Vietnamese, English, etc.
- Note : Additional information
Step 3: Save
Click Save to update the information in the CRM.
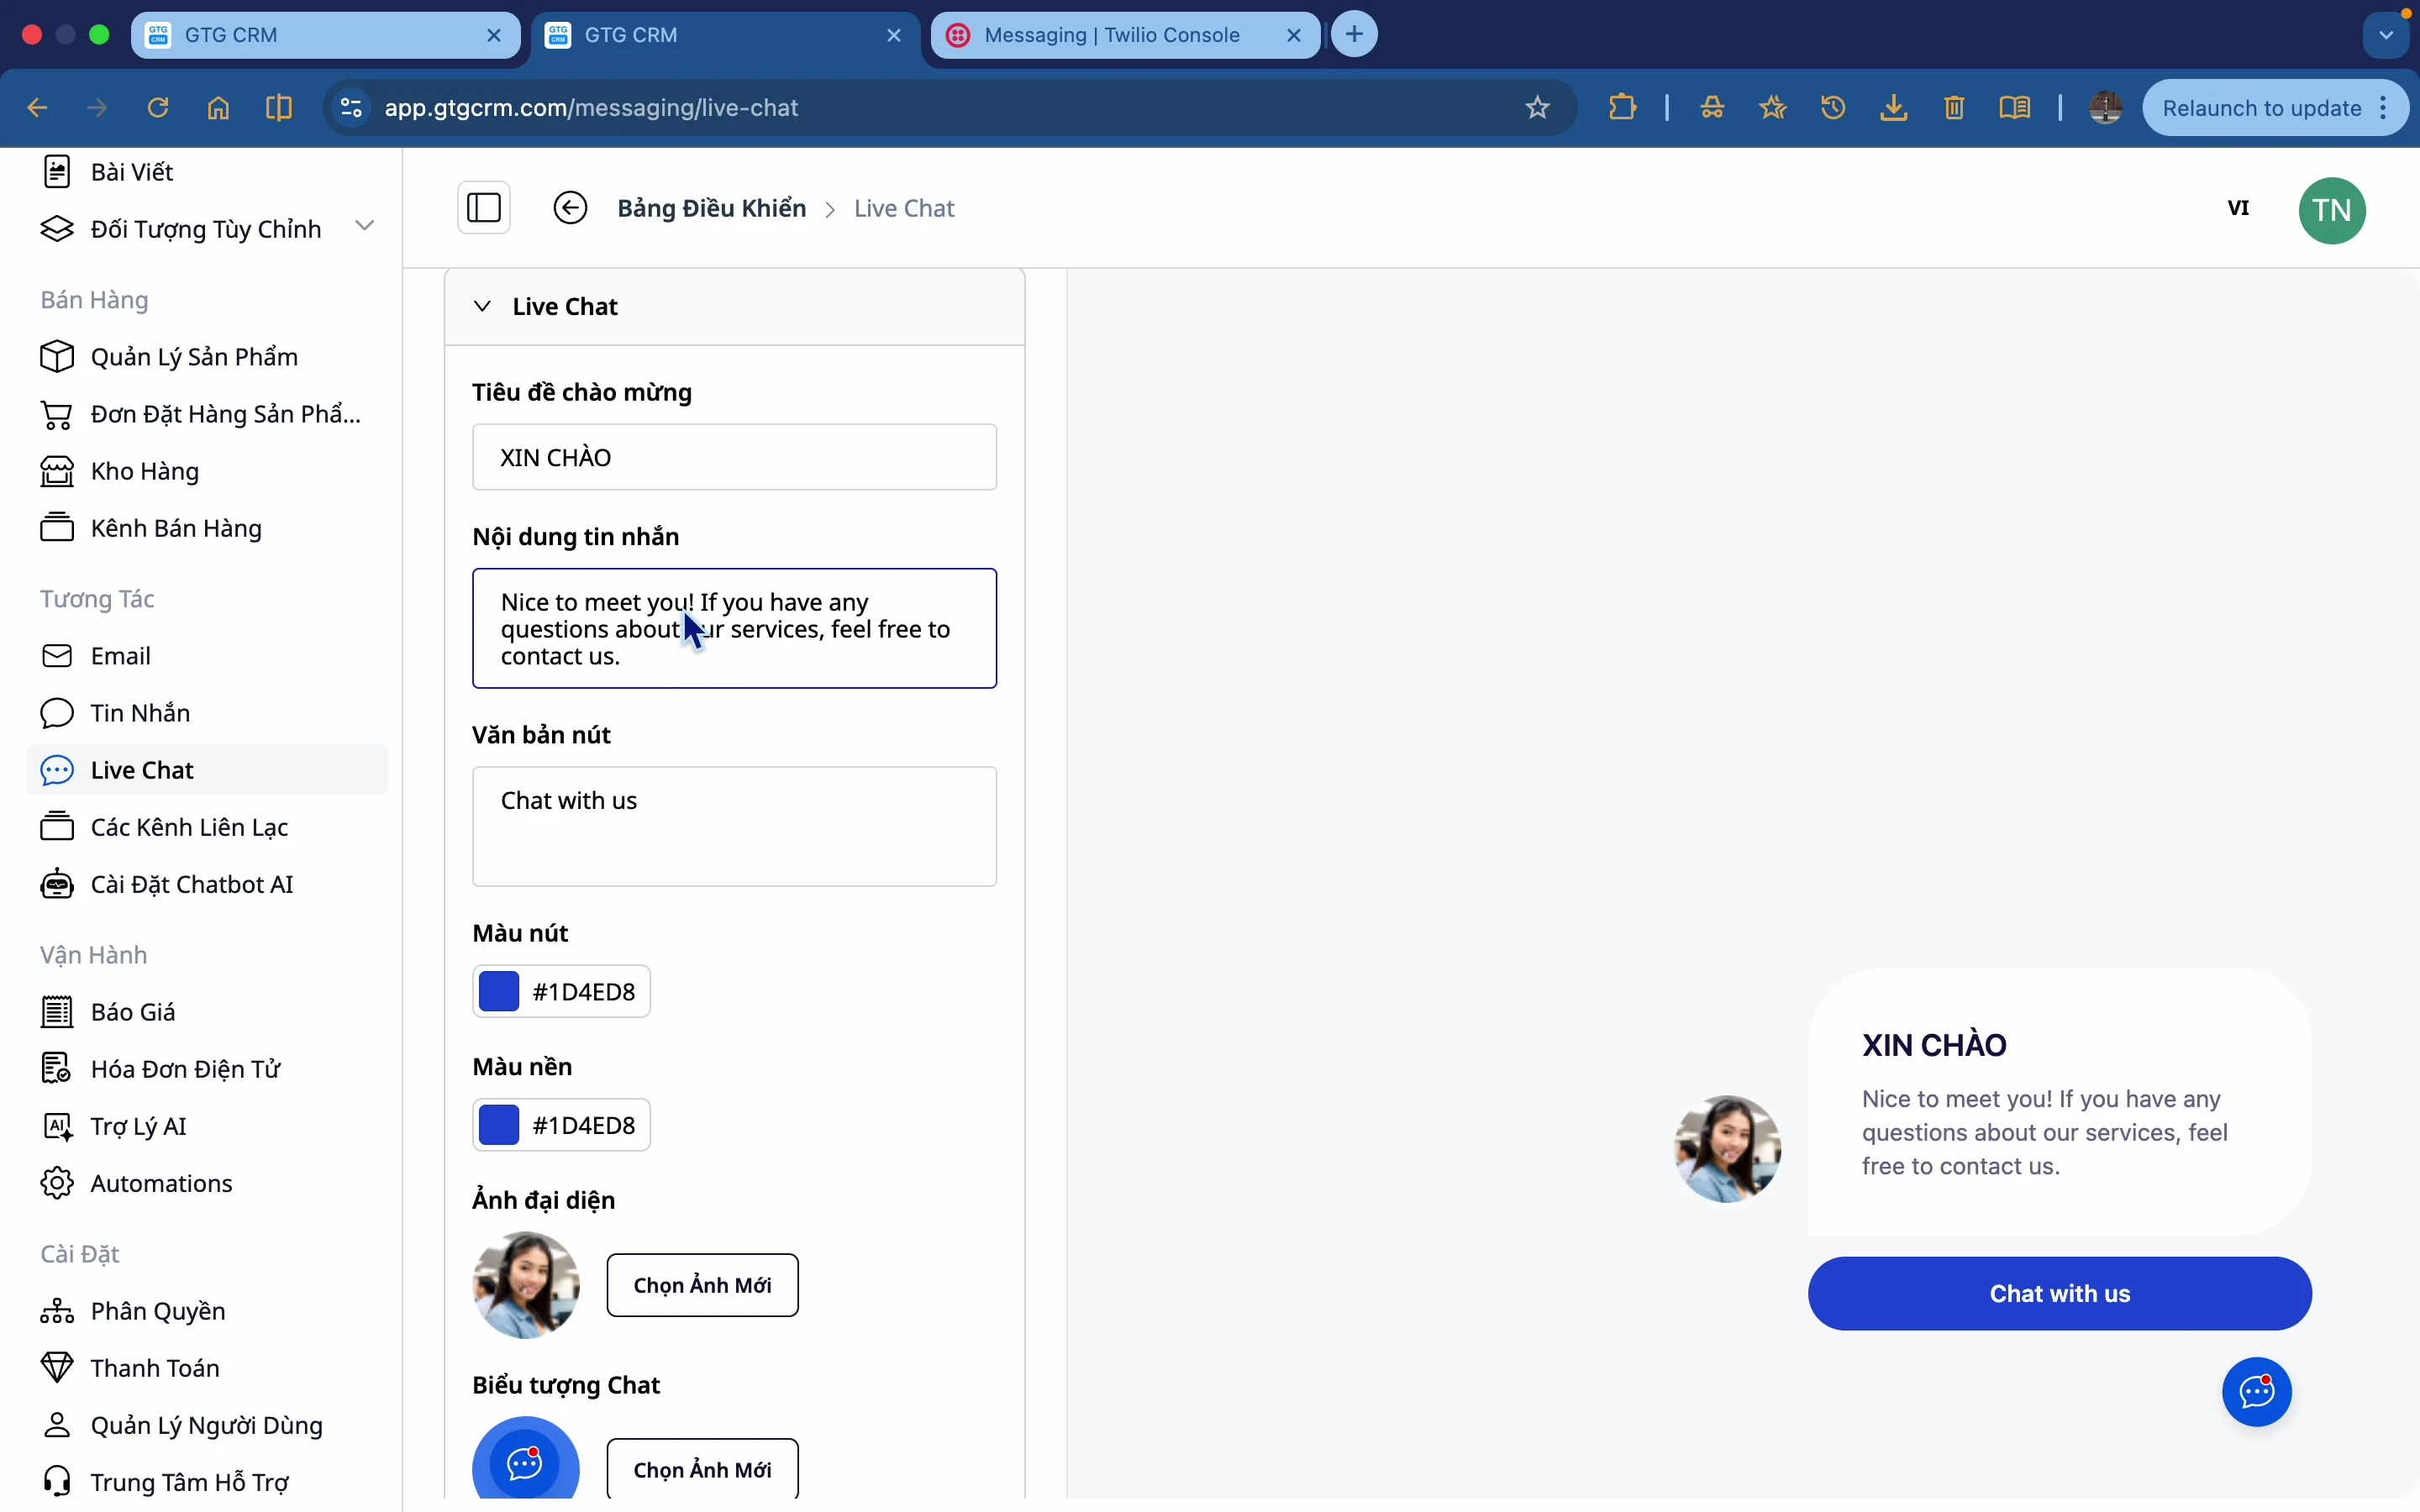
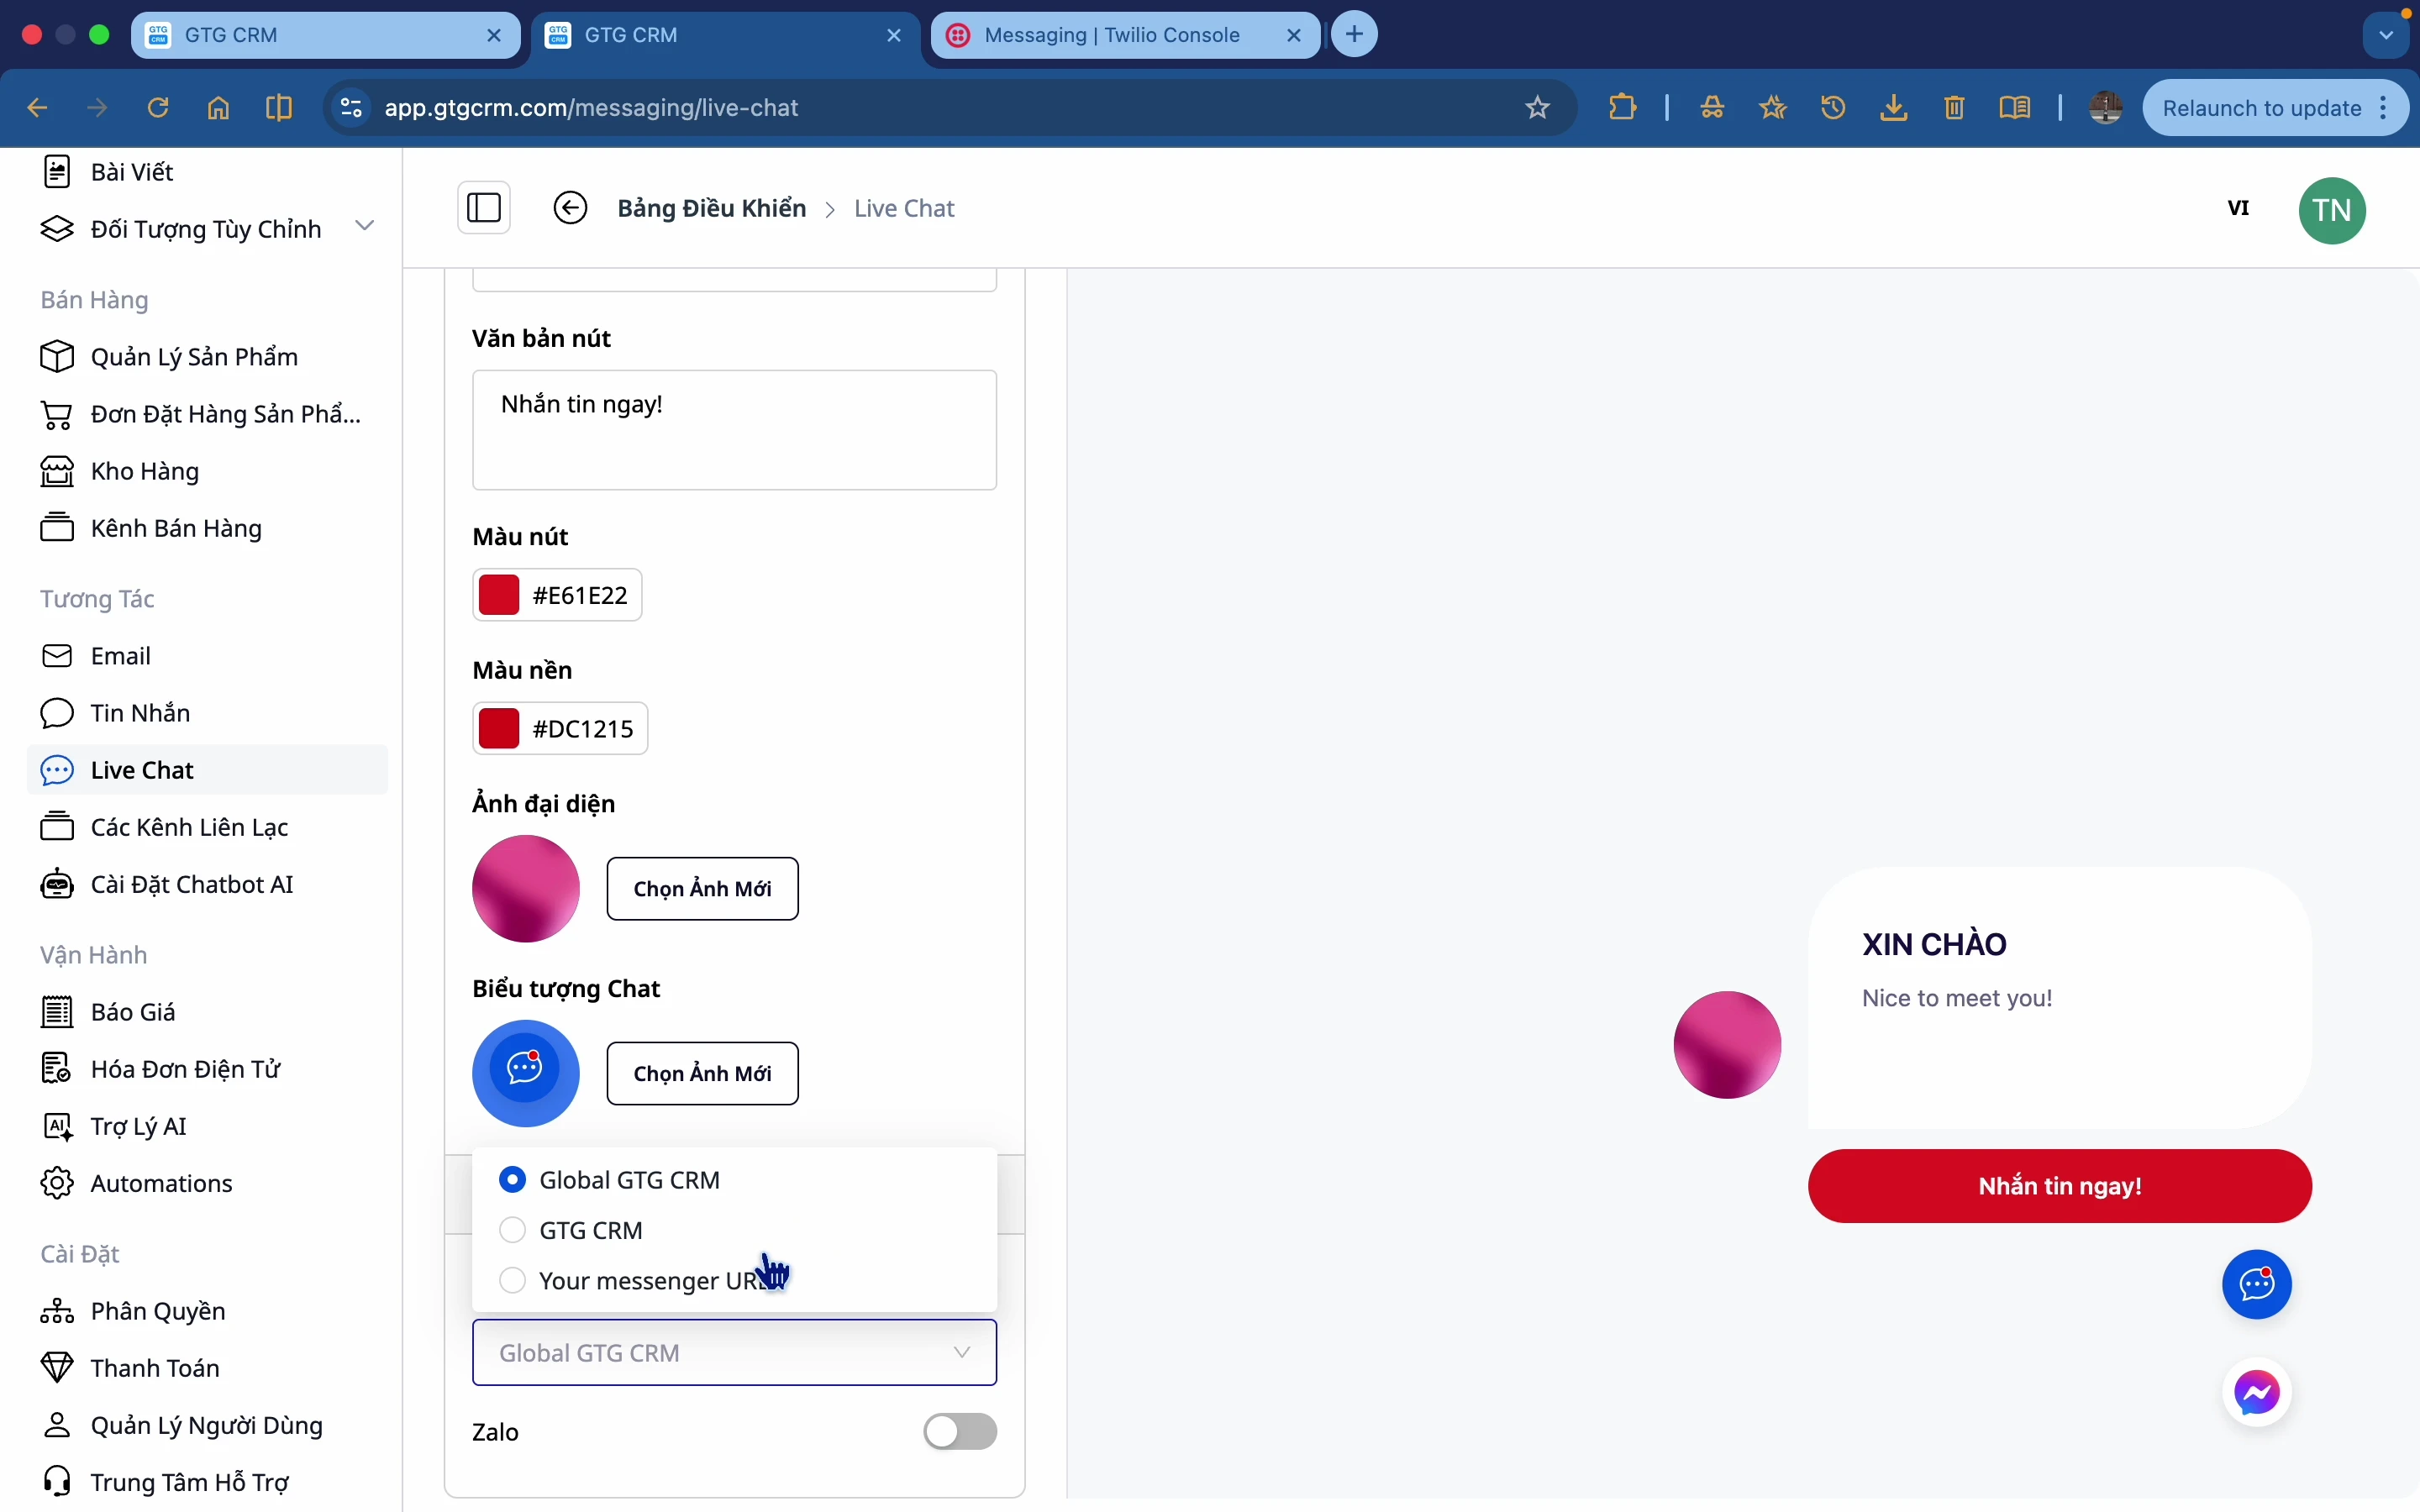
8. Setting up Live Chat
Live Chat allows customers to chat directly with you from your website.
Step 1: Access Live Chat settings
From the Messaging menu, select Live Chat .

Step 2: Customize the greeting
Change the greeting message displayed to customers.
Step 3: Customize button color
Choose colors that align with your brand.
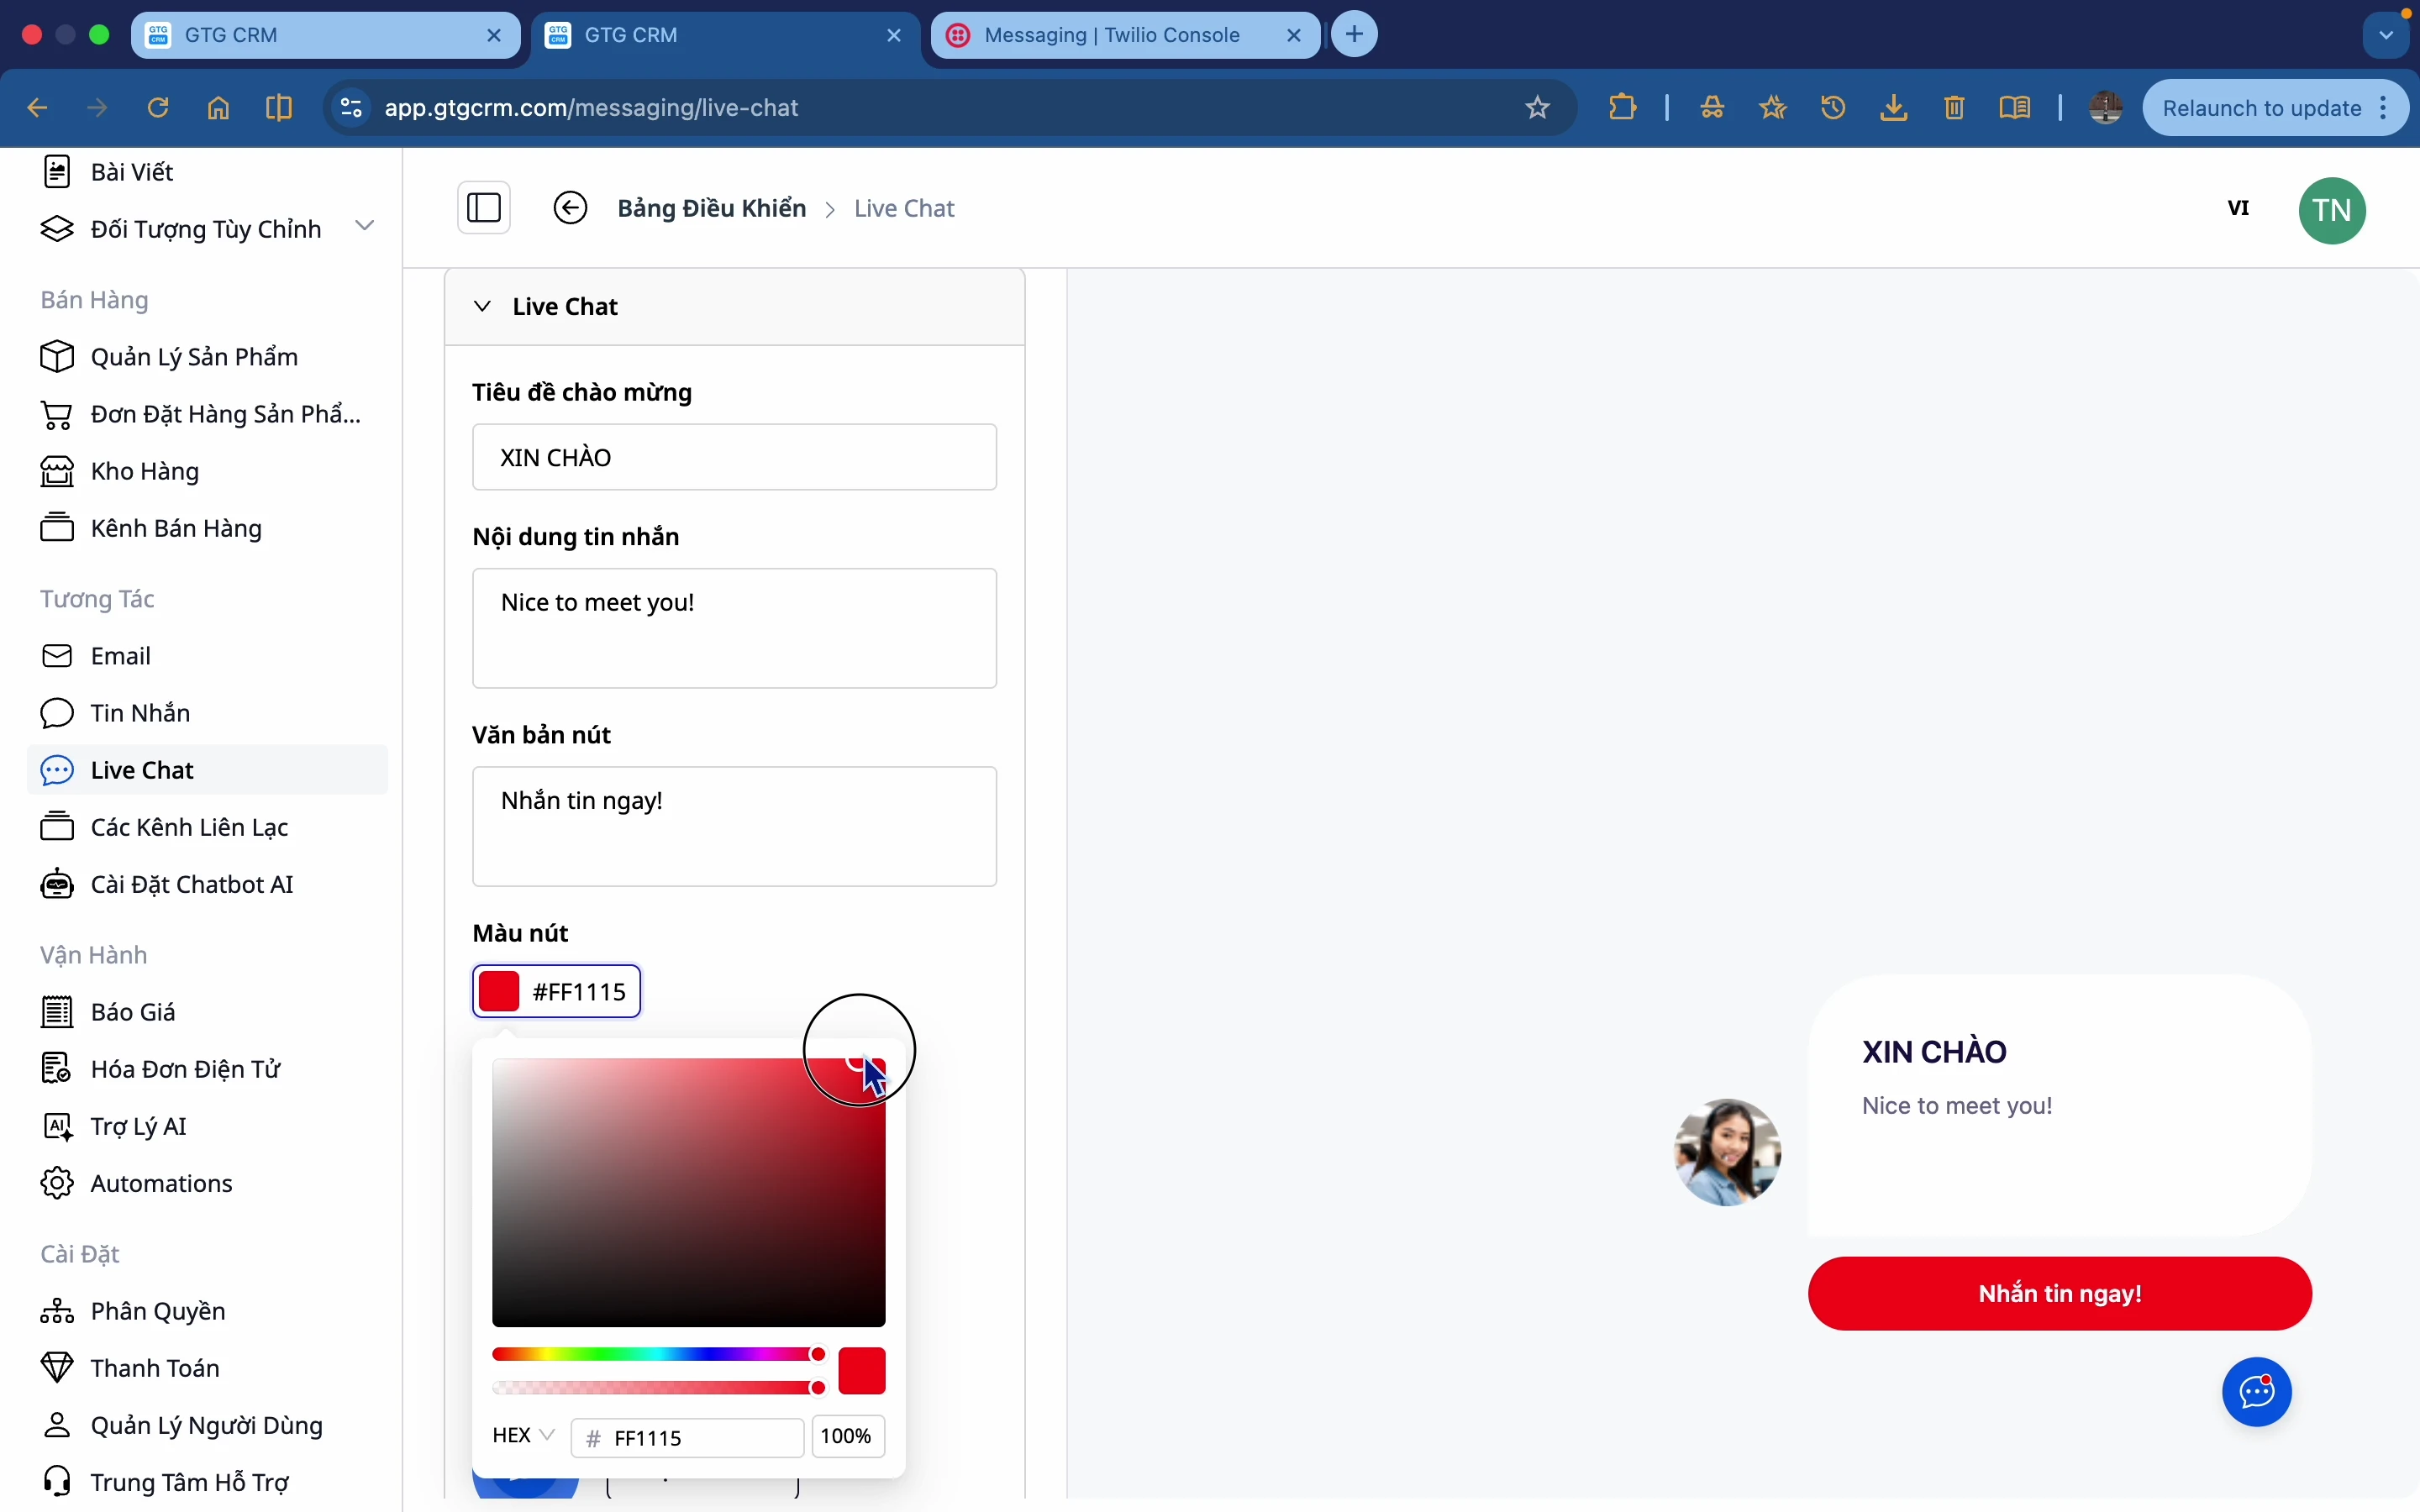
Step 4: Change Avatar
Upload a profile picture for Live Chat.
Options:
- Upload images from your computer.
- Using AI to create images
- Connect to Google Photos
Step 5: Connect to social media
Allow customers to switch to chatting via Facebook Messenger or Zalo.
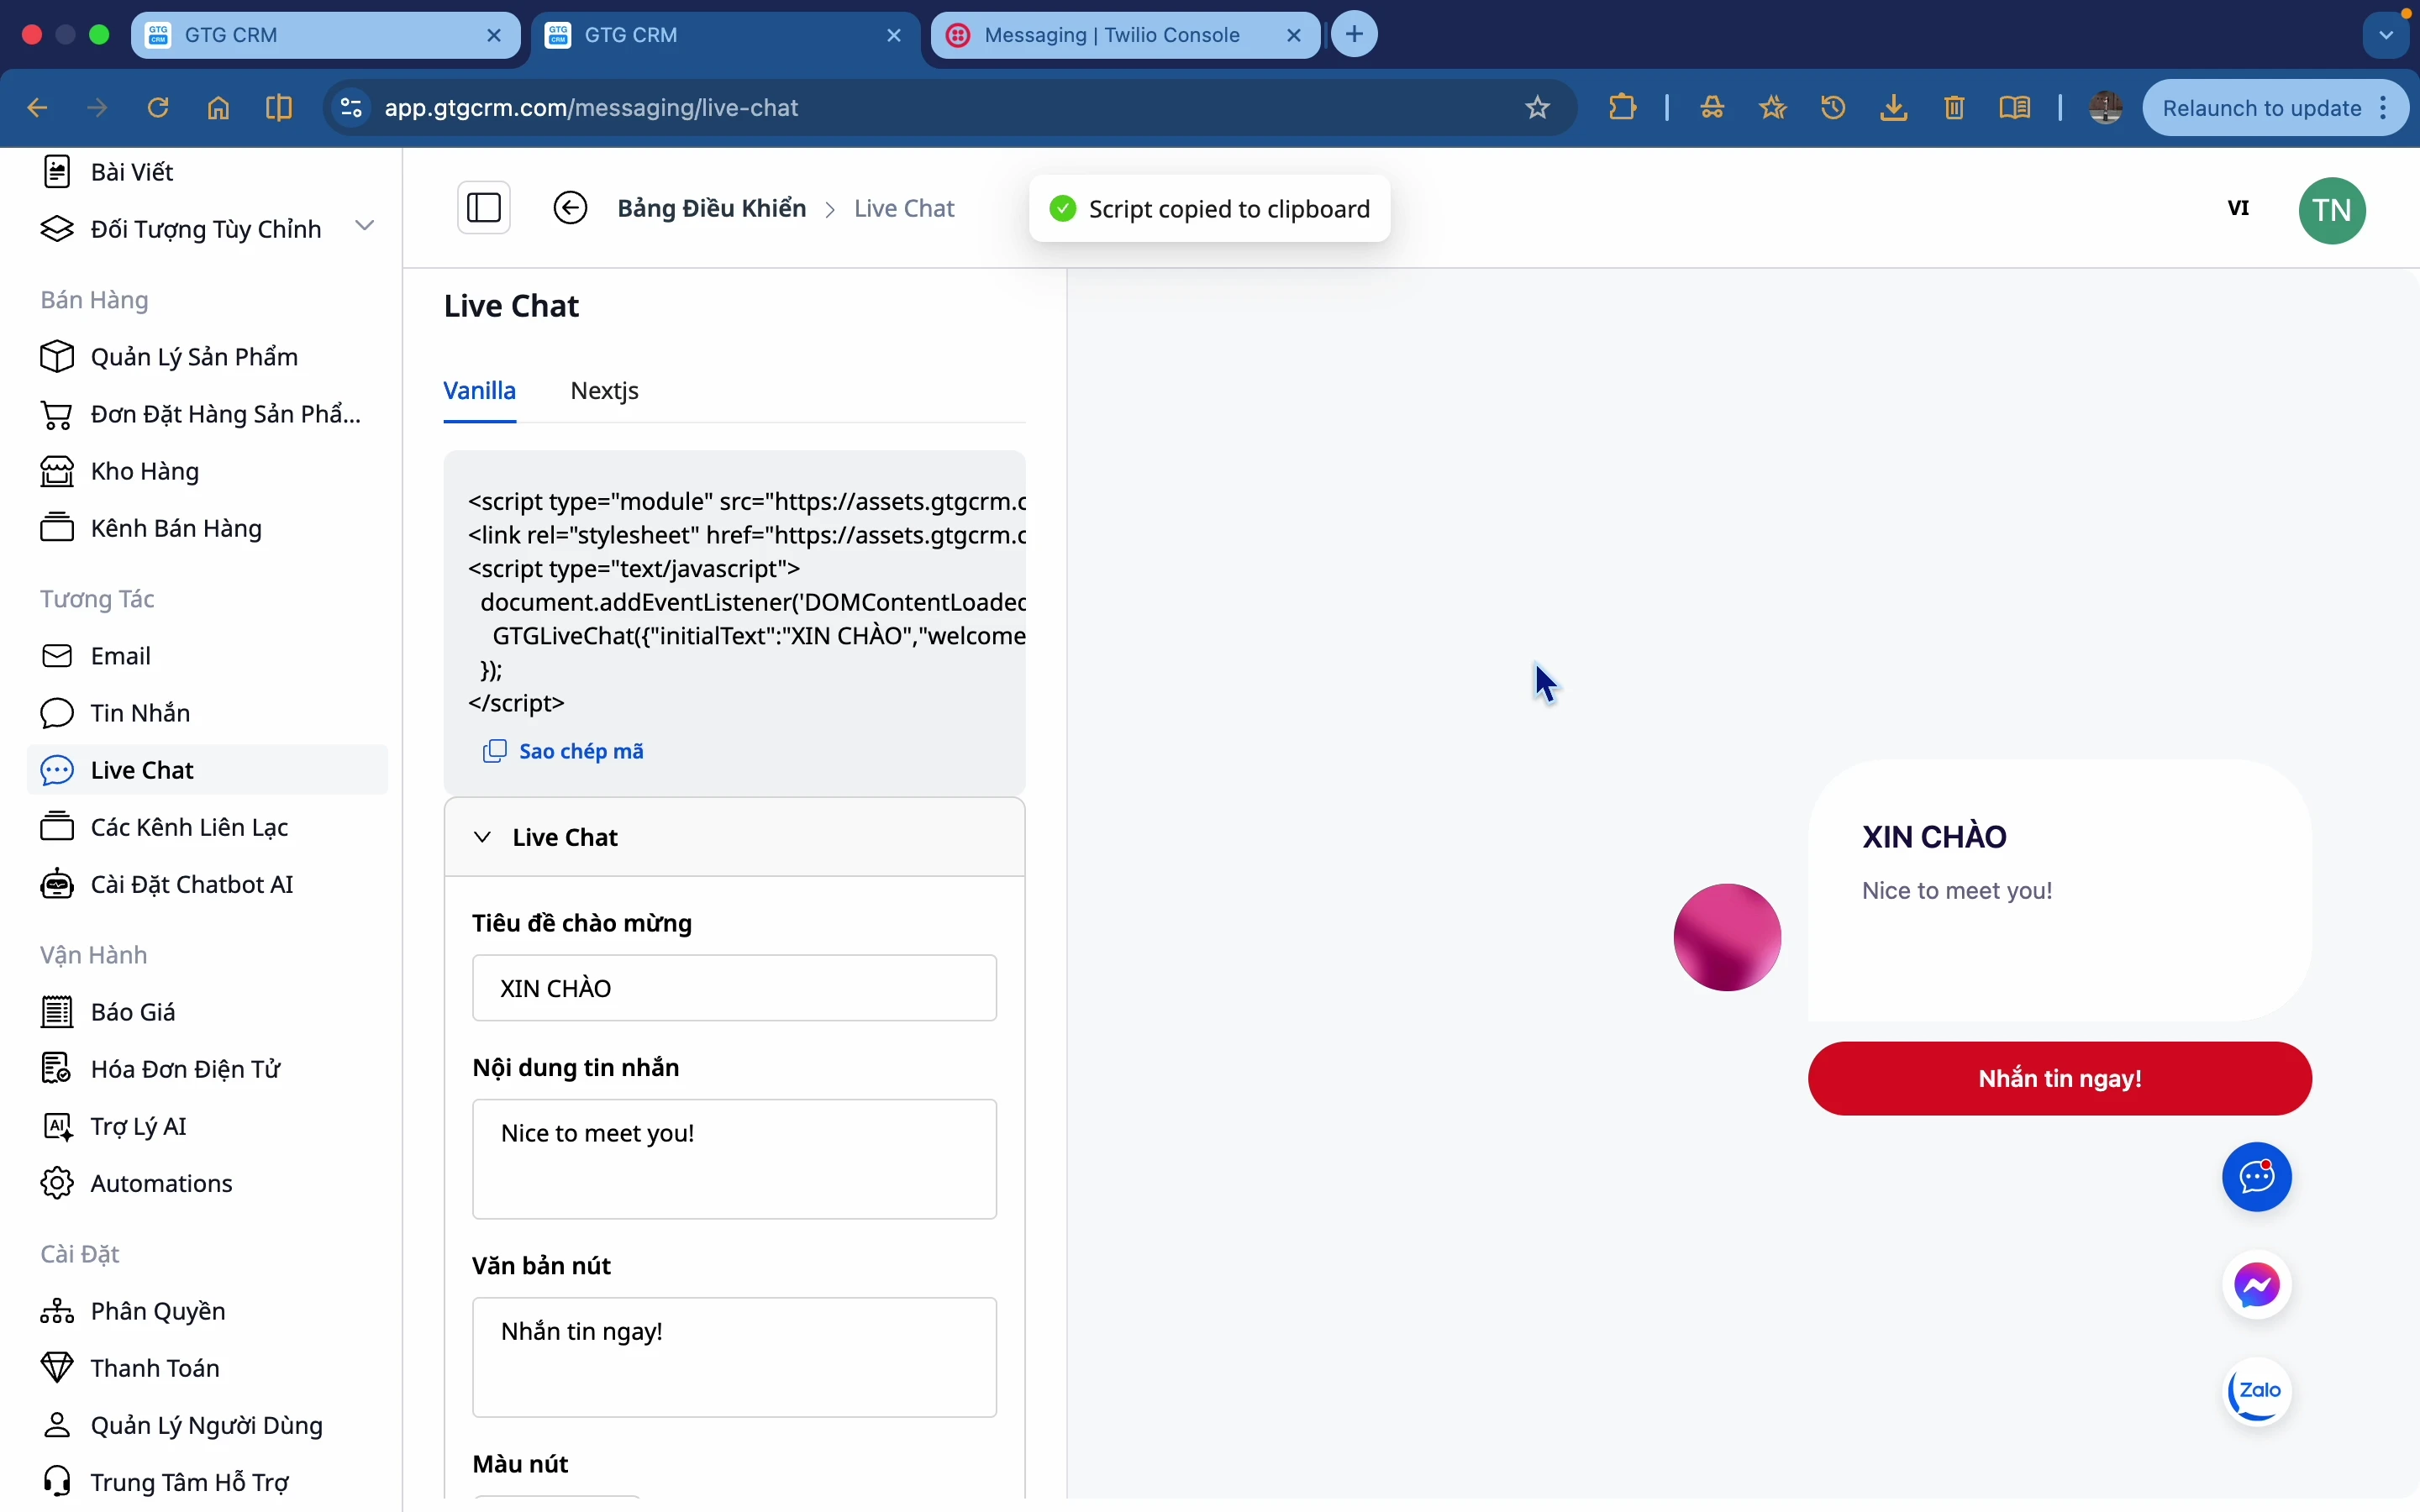
Step 6: Get the embed code
Copy this JavaScript code snippet and paste it into your website.
<!-- Dán đoạn mã này trước thẻ </body> --> <script src="https://gtgcrm.com/livechat/widget.js"></script>Step 7: Embed into the Website<!-- Dán đoạn mã này trước thẻ </body> --> <script src="https://gtgcrm.com/livechat/widget.js"></script>
Paste the code snippet into your website's source code, before the </body> tag.
Note: GTG CRM landing pages already have a Live Chat widget.
Usage tips
1. Tag people as soon as you receive a new inbox message.
It helps to make sorting and searching easier.
2. Use AI when you need ideas.
AI is especially useful when you need to write professional emails.
3. Update the information in the CRM.
Don't forget to add customer information to your CRM for tracking.
4. Customize Live Chat according to your brand.
The colors and avatar should be consistent with the brand identity.
Need support? Contact the GTG CRM team via email at support@gtgcrm.com
Maybe You Should Read These

Messaging & Live Chat

24/7 AI Chatbot
AI Chatbot

Customer Care Call Center Solution
AI Email Campaign

Social Hub
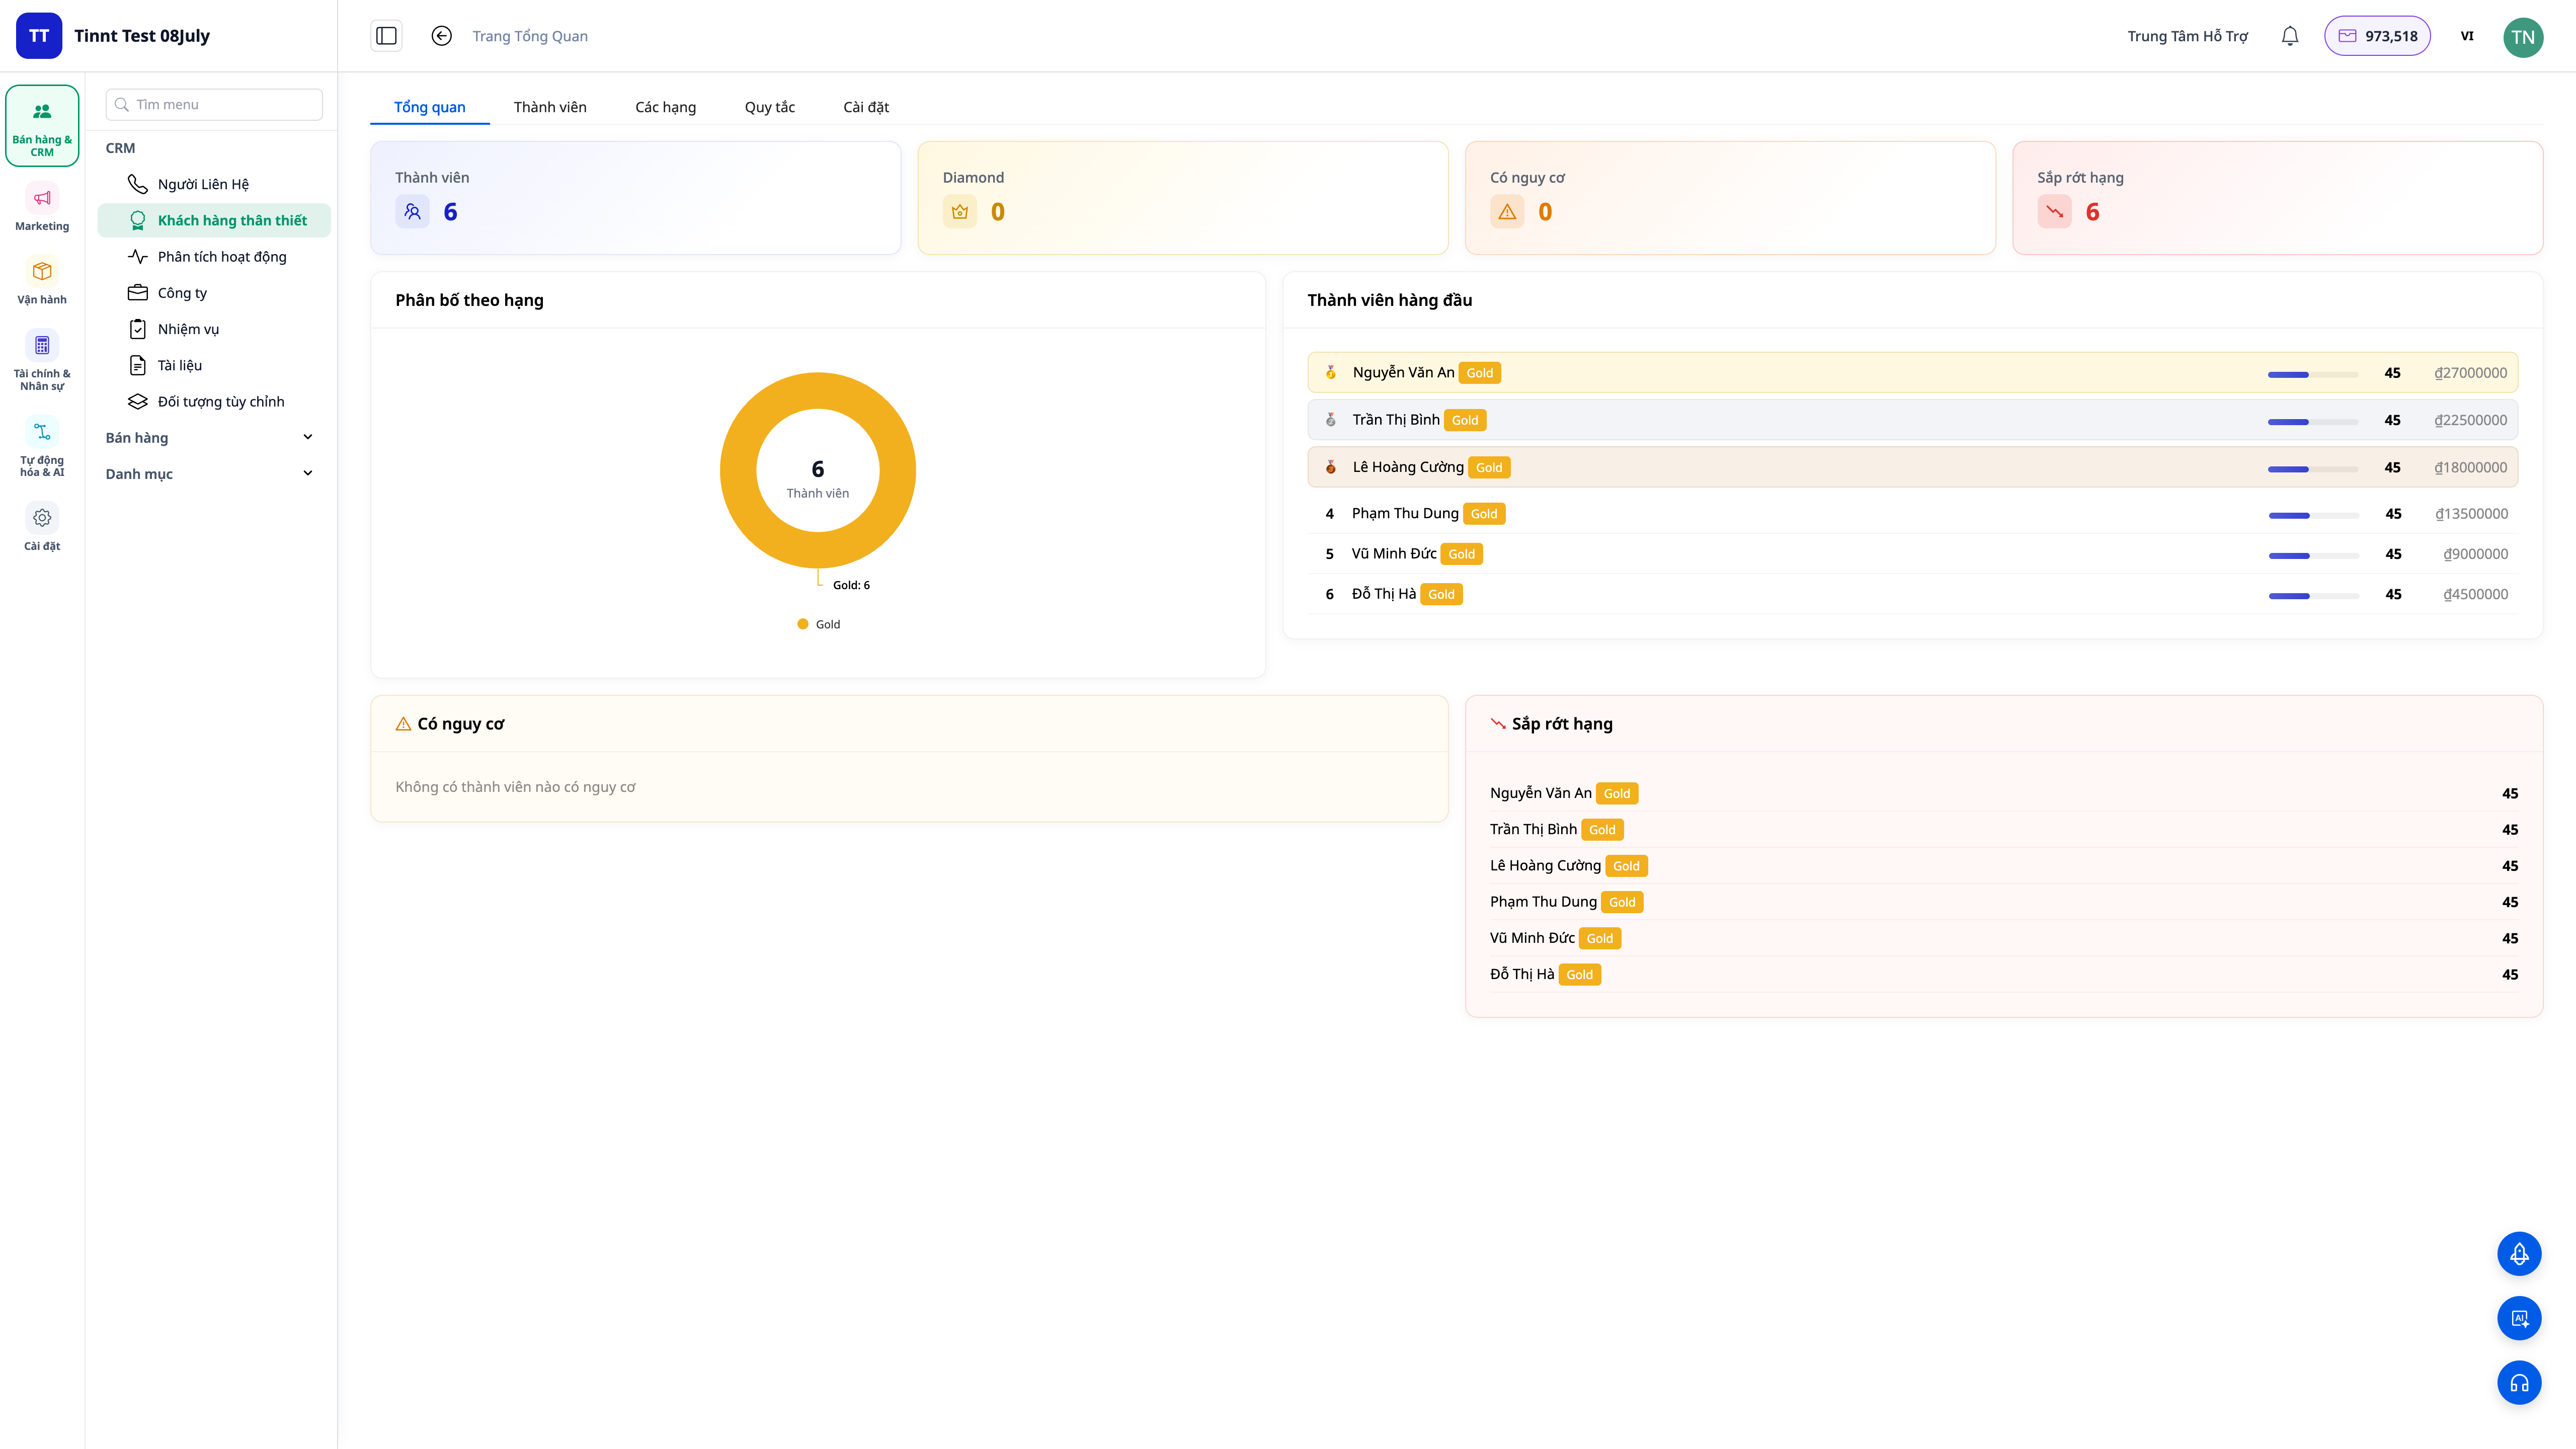
Loyalty Program — Automate Scoring, Tiering, and Right Person Engagement

CRM
Order Hub
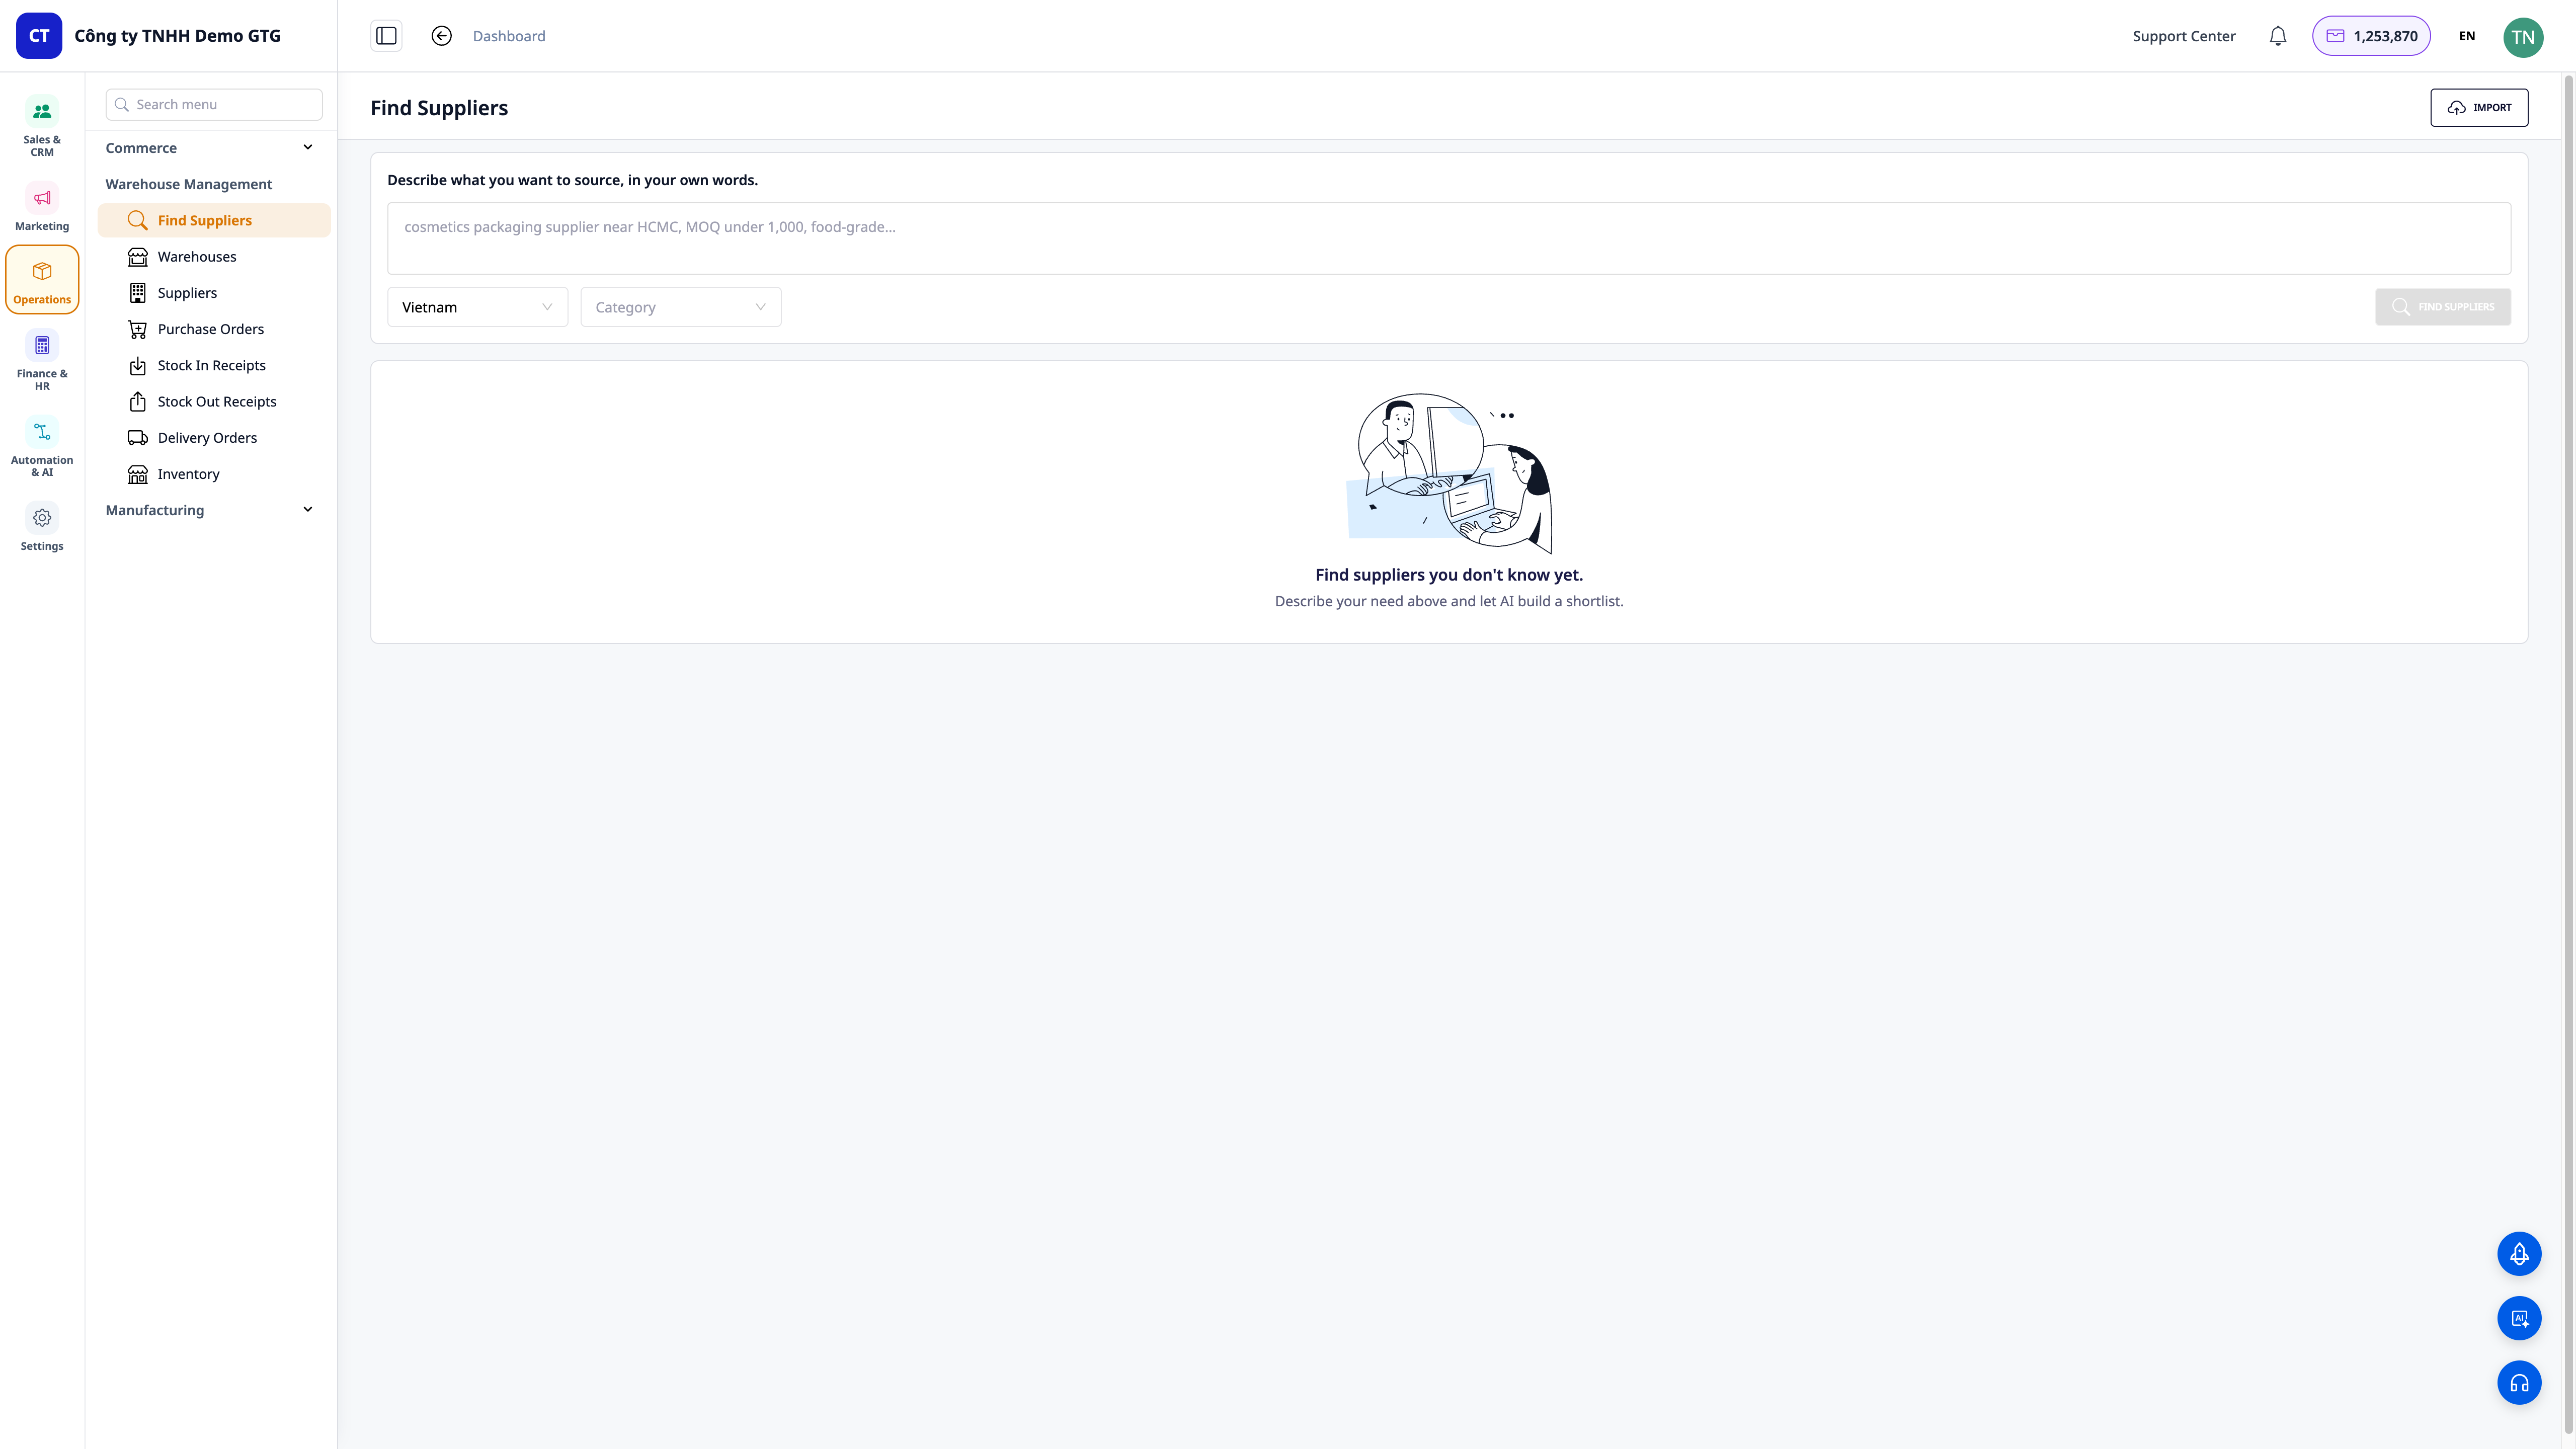
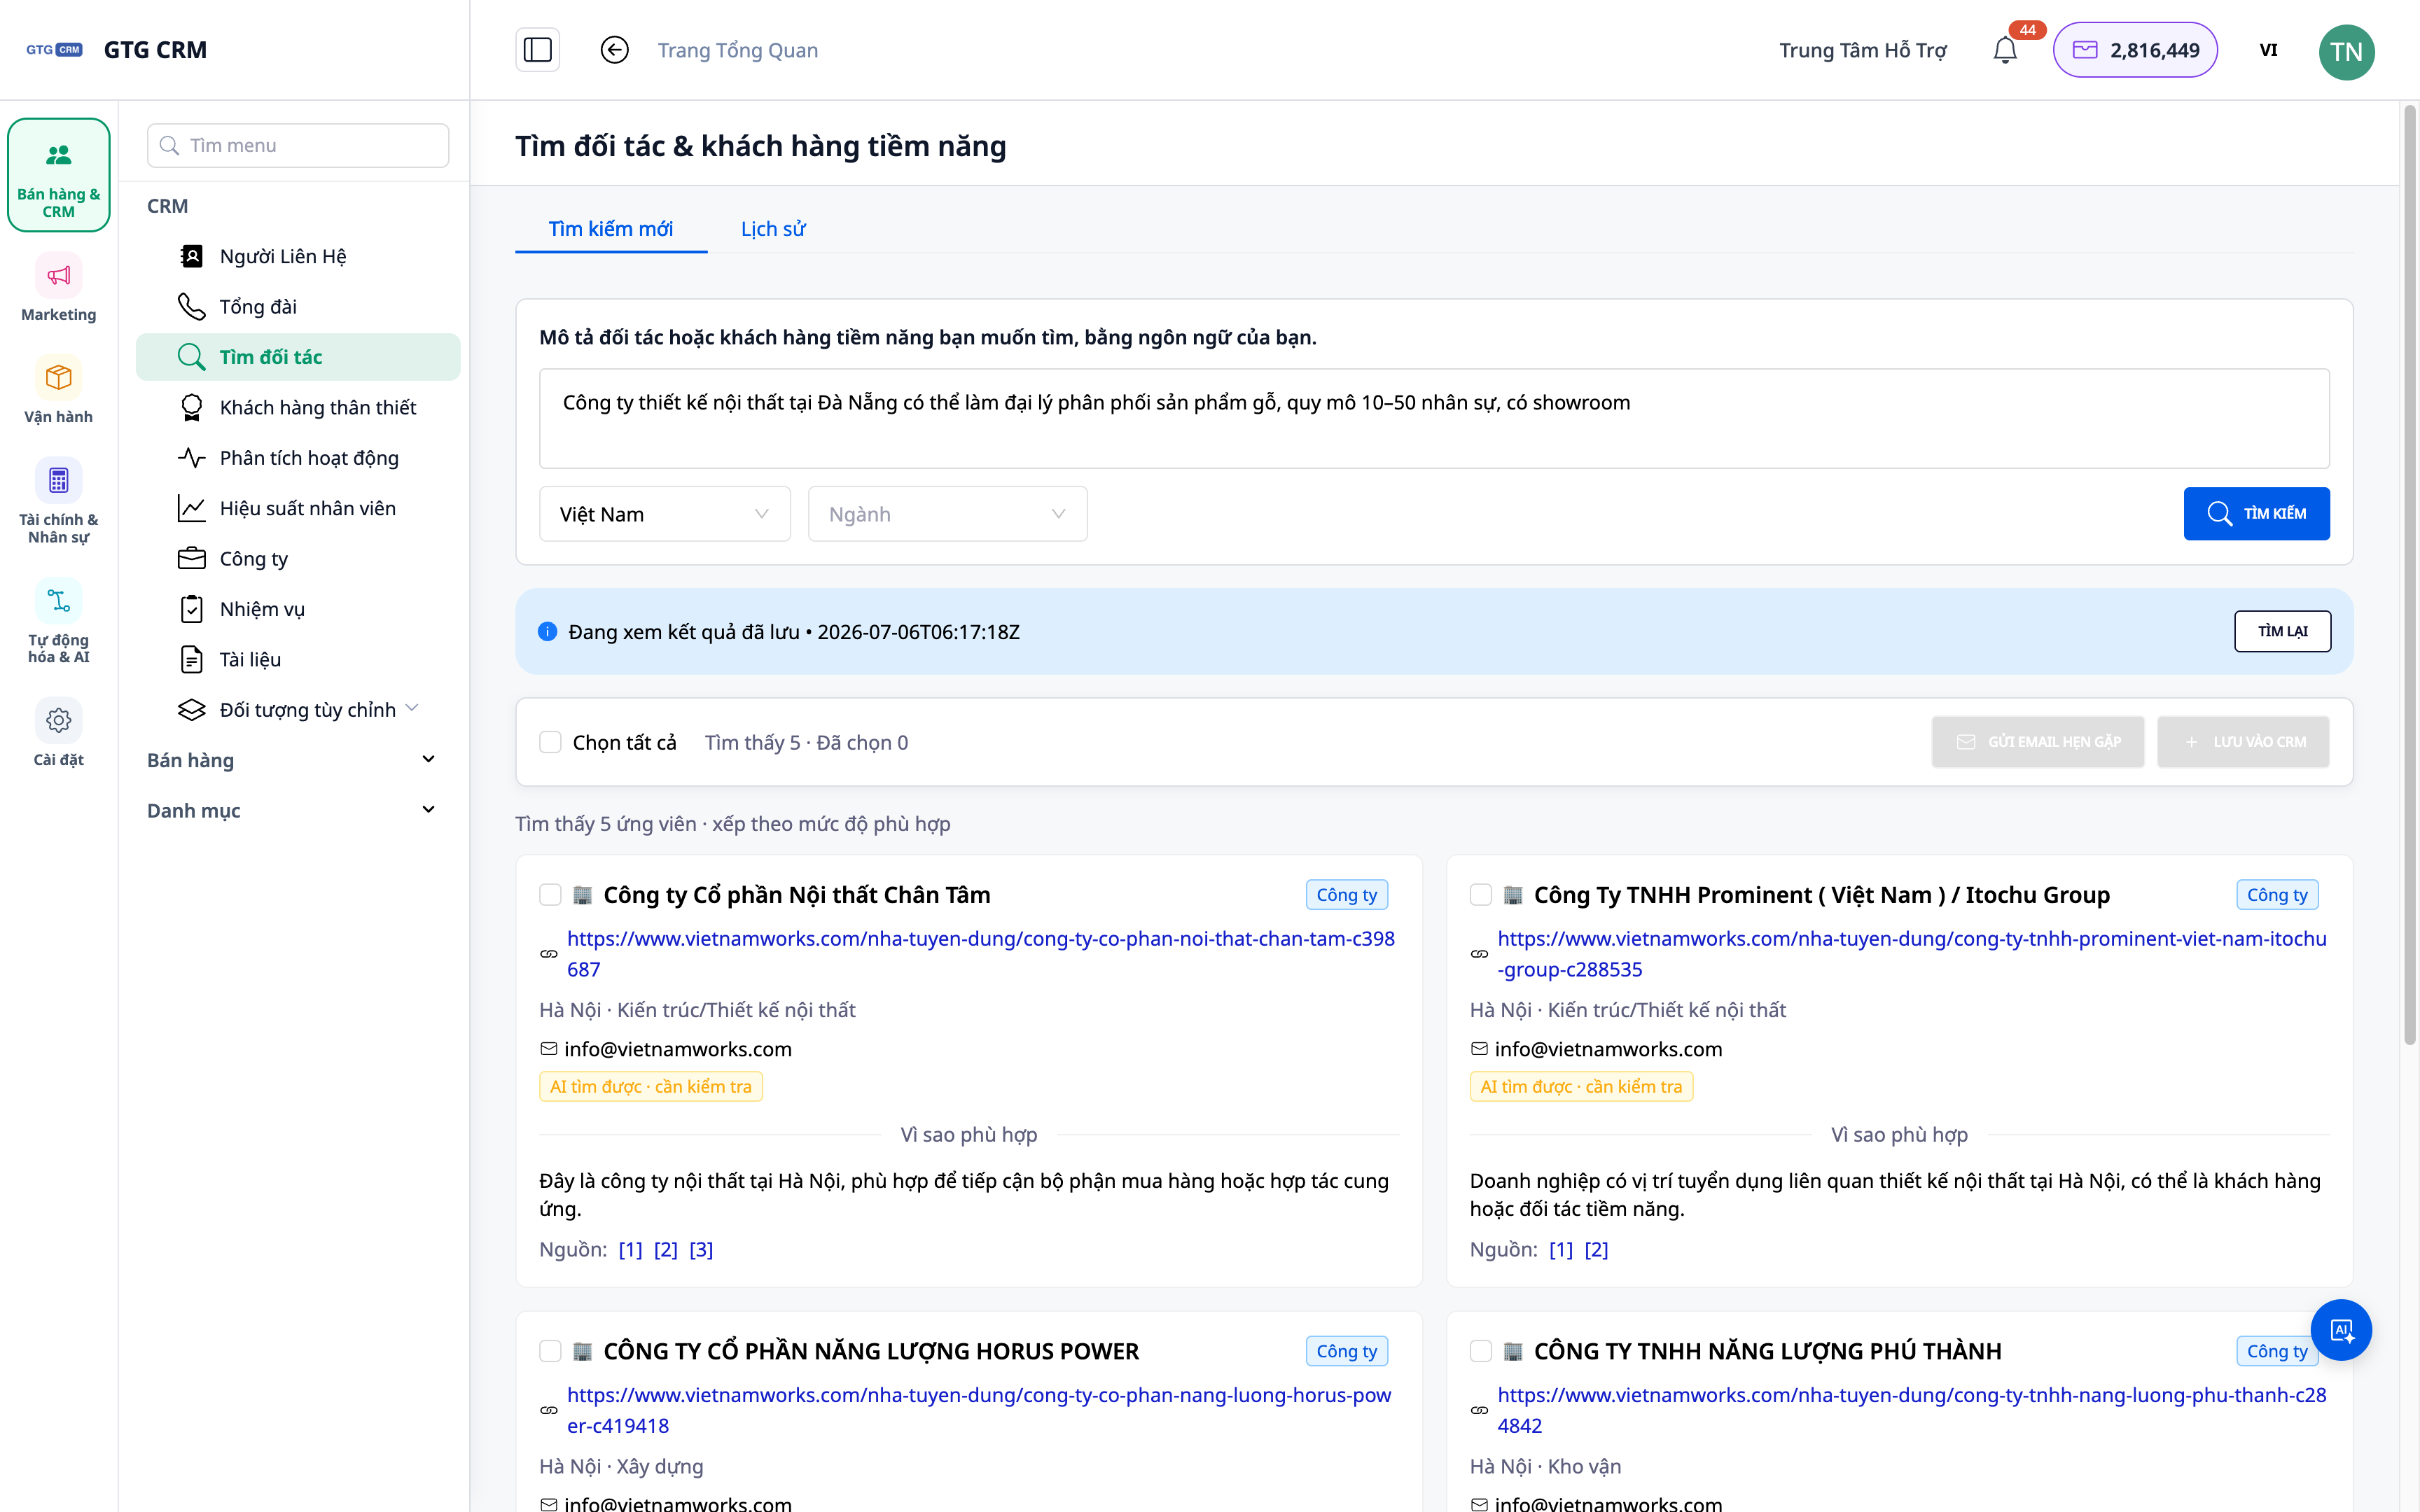
Find Suppliers with AI — Verbal Descriptions, Get Real Shortlists, Save to CRM & Send RFQs in Minutes

Comprehensive sales solution for retailers