Table of Contents
1. Access Permissions
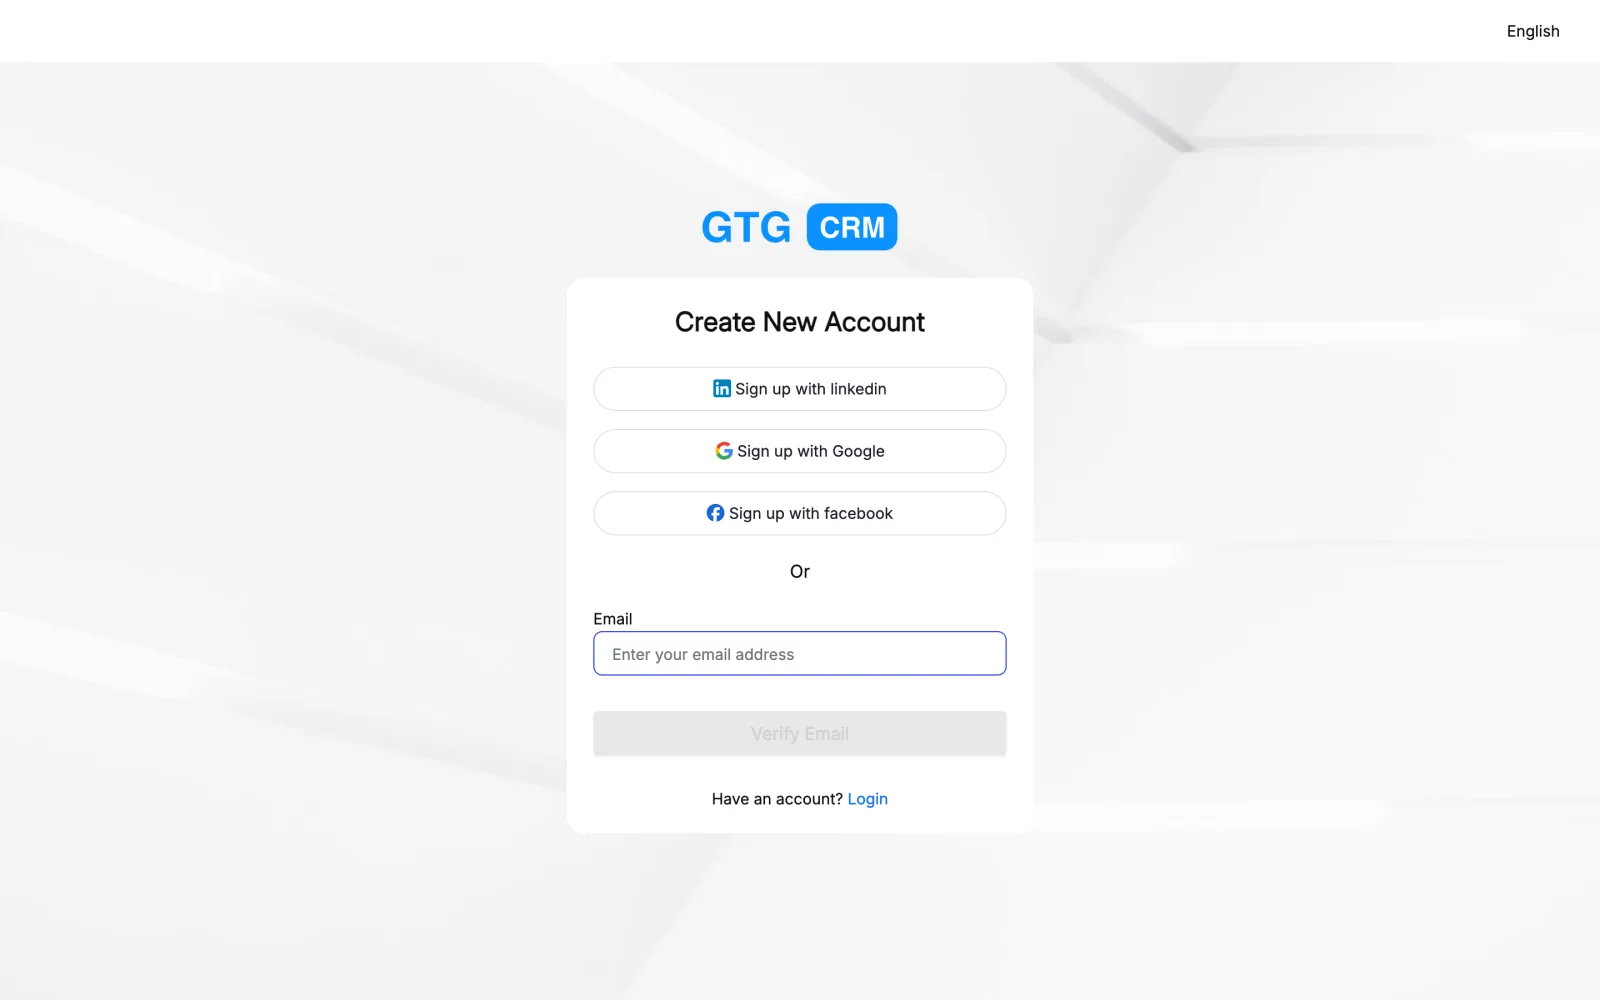
Step 1: Log in to GTG CRM
Log in to your GTG CRM account.
Step 2: Open the Settings Menu
Look at the menu on the left , scroll to the bottom and click on Settings .
Step 3: Select Permissions
In the Settings menu, click on Permissions . 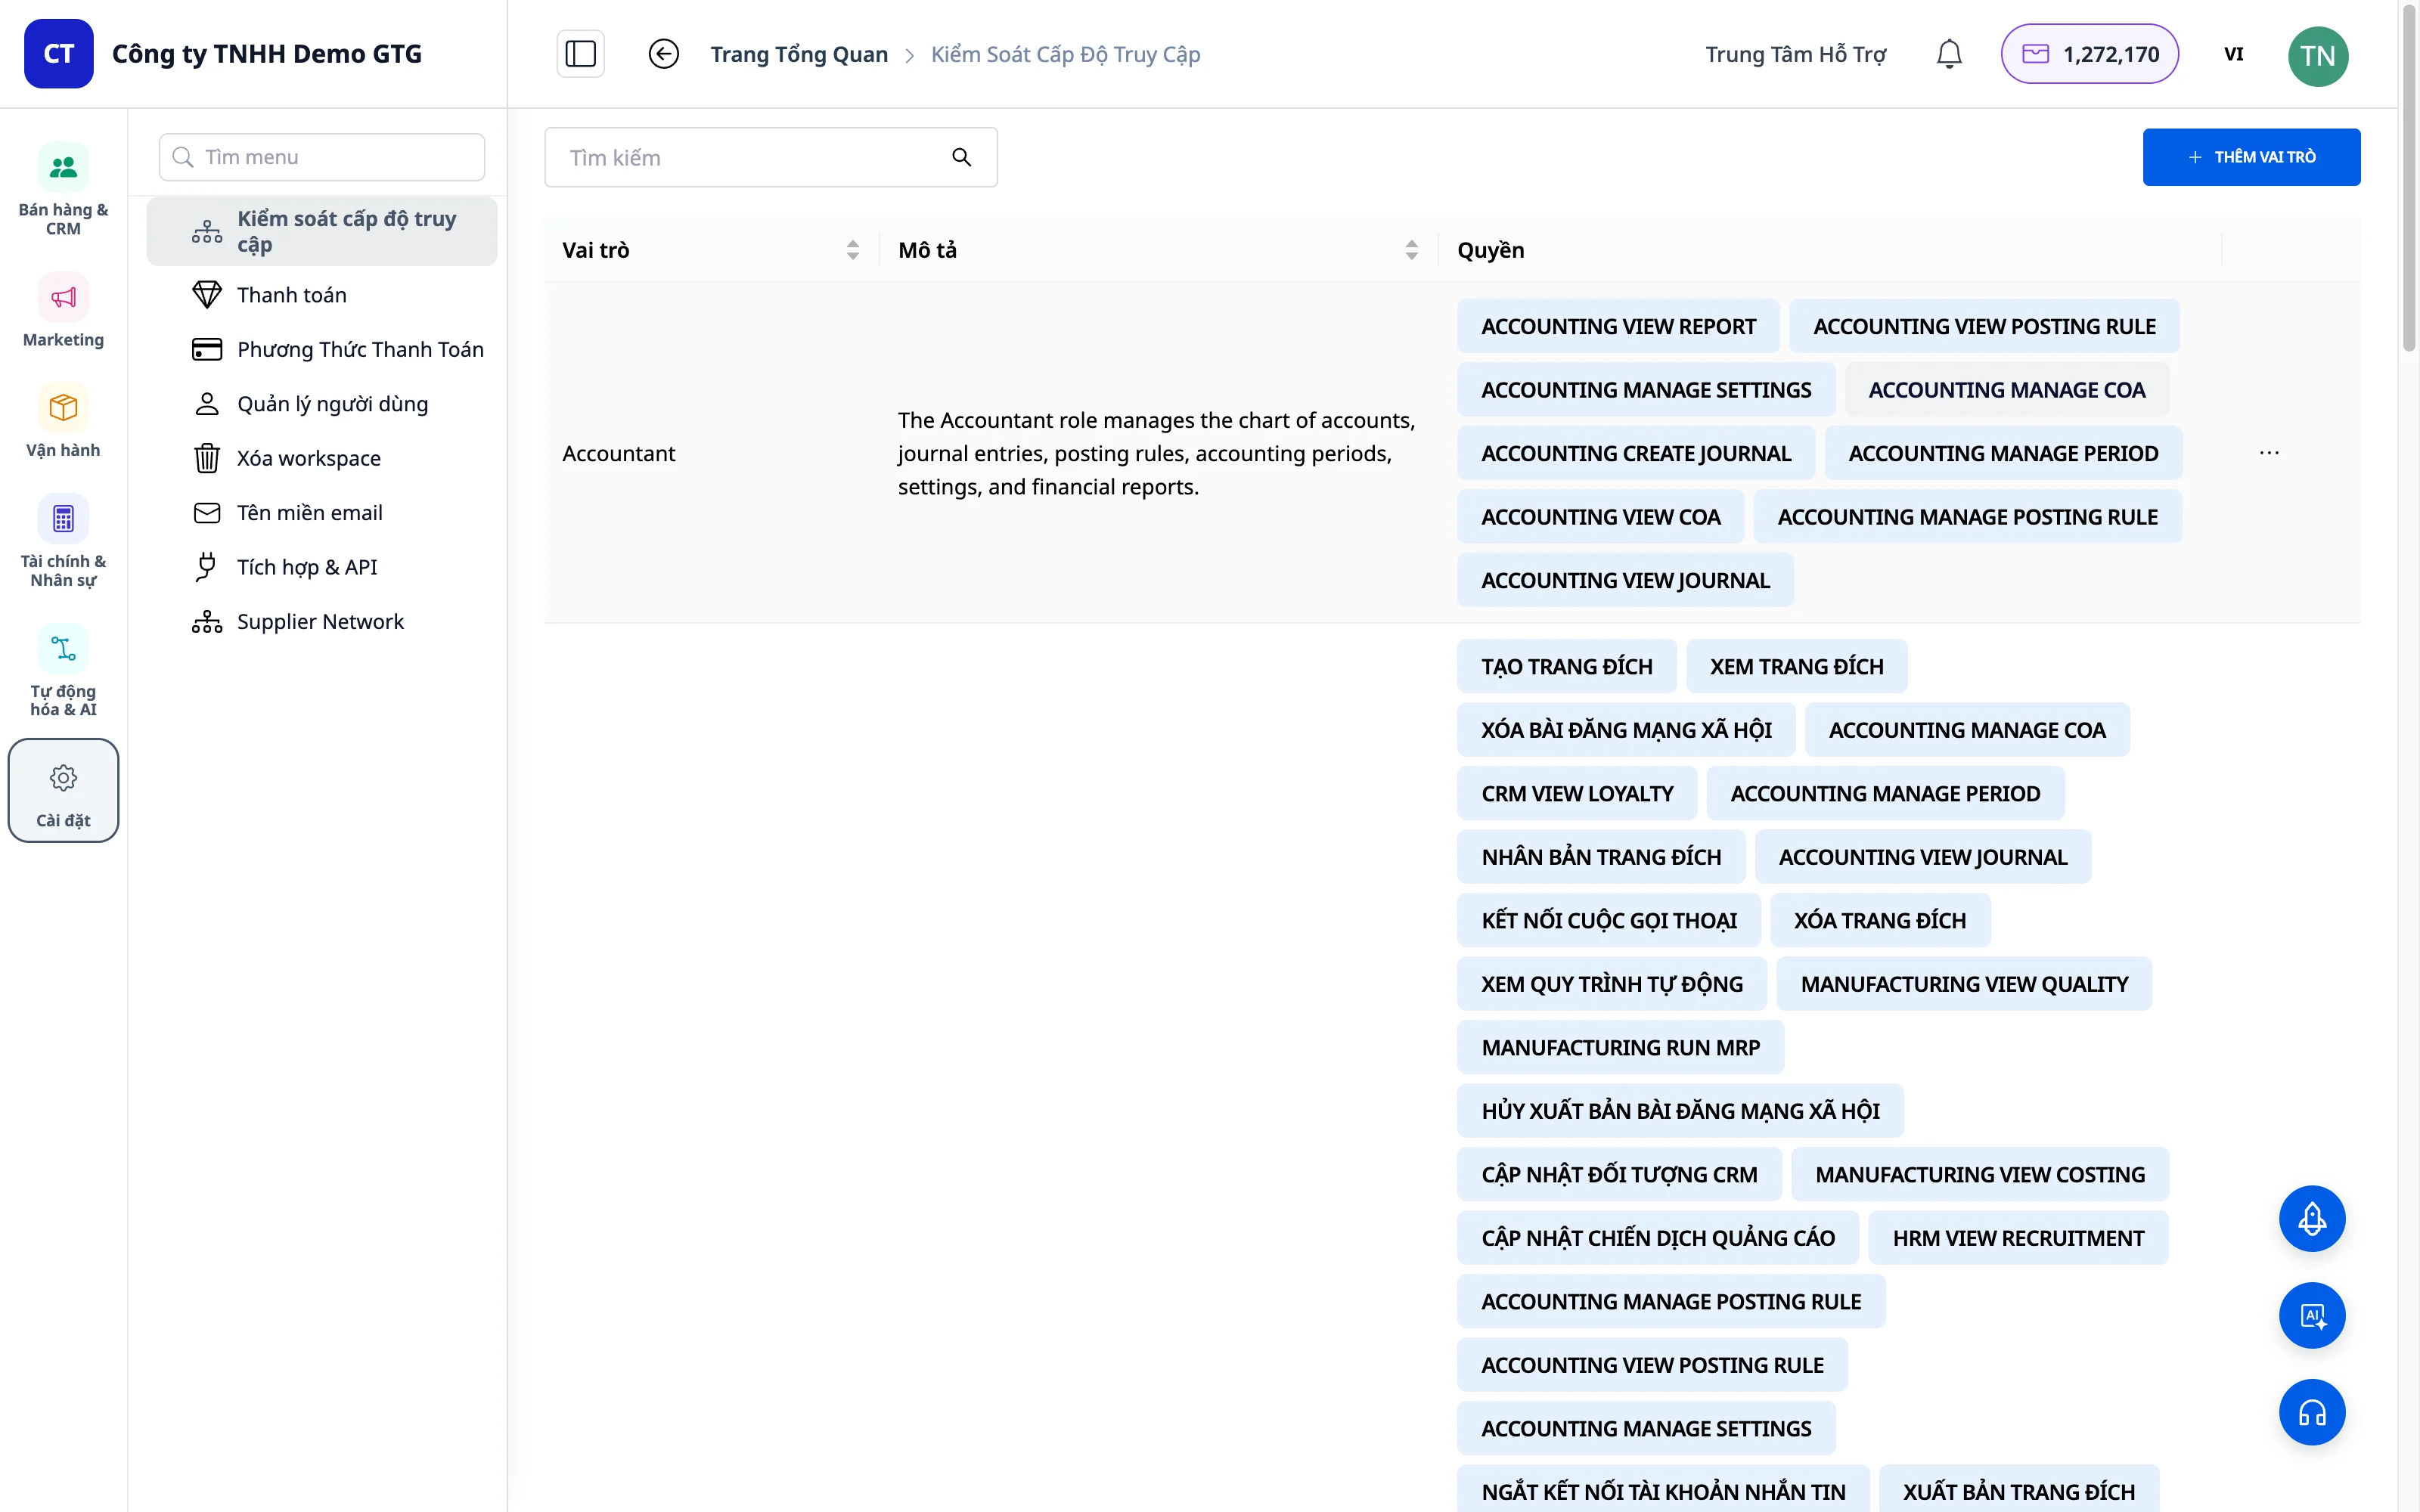
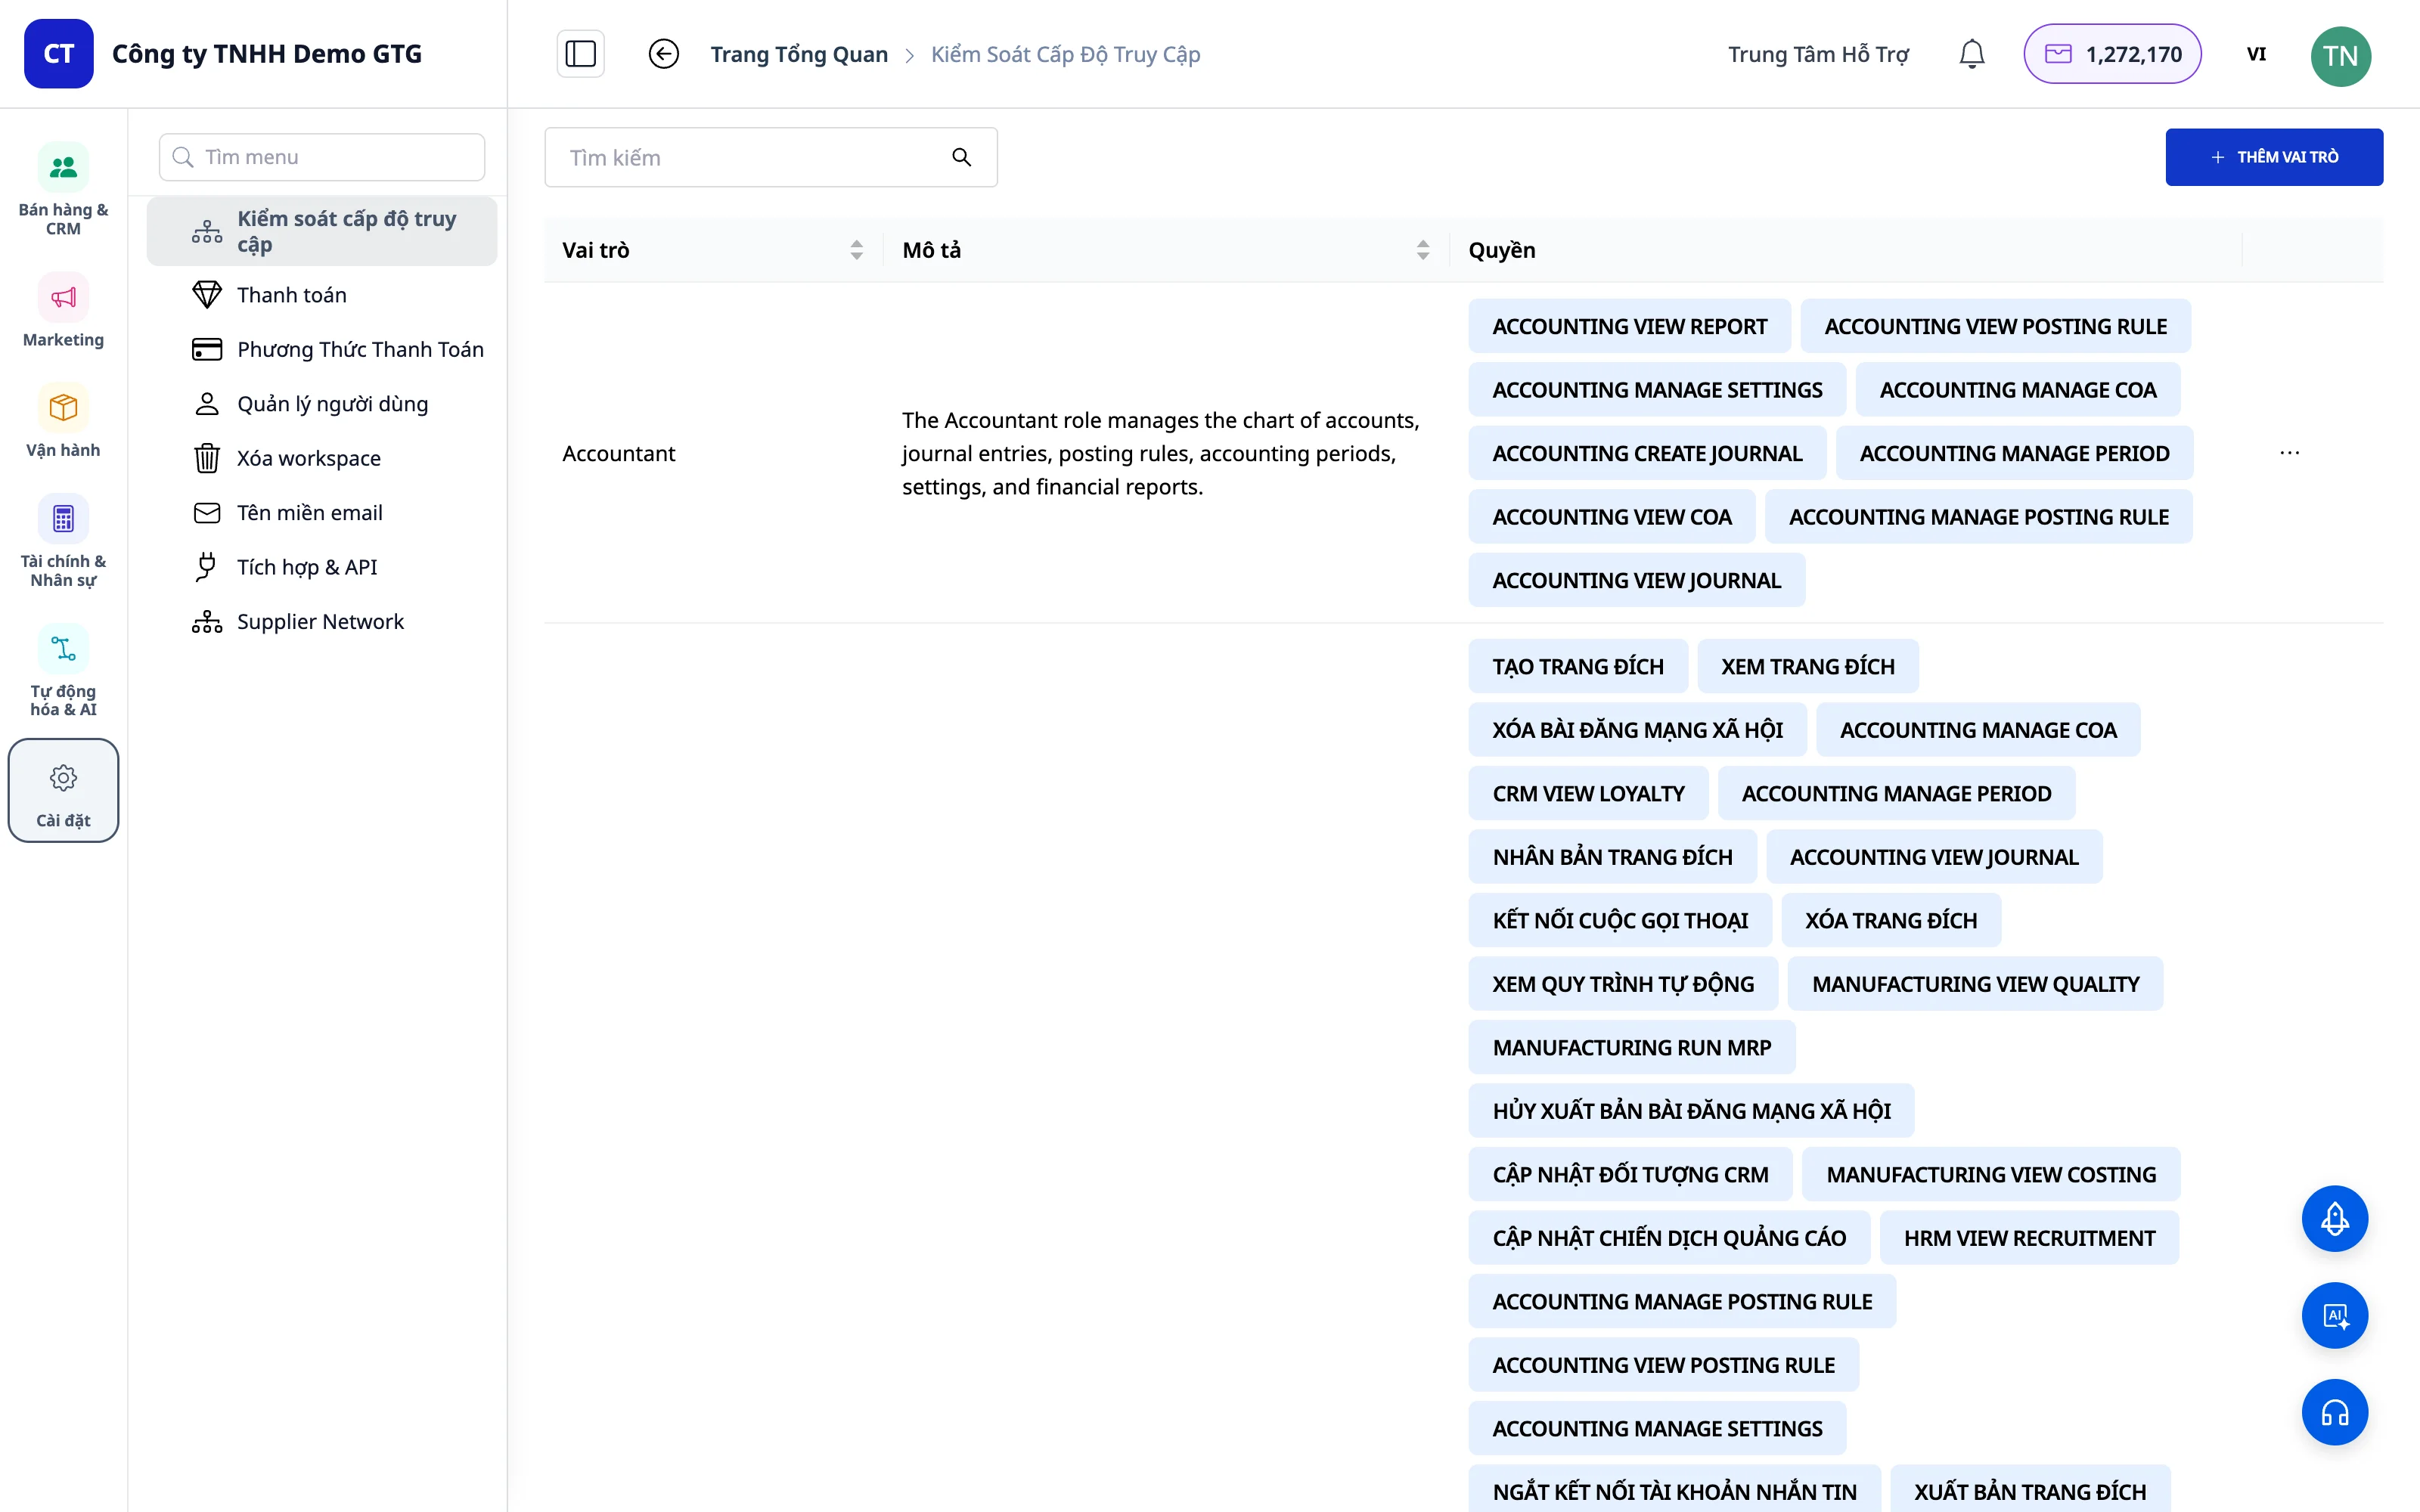
2. View Default Roles
GTG CRM provides 3 default roles :
Administrator
| Attributes | Value |
|---|---|
| Name | Administrator |
| Power | All rights on the platform |
| Describe | Highest authority, managing the entire system. |
| adjusting | Automatically gain full Settings permissions (from May 2026) |
Marketing Manager
| Attributes | Value |
|---|---|
| Name | Marketing Manager |
| Power | Marketing manager, view reports. |
| Describe | For marketing team managers |
Marketing Staff
| Attributes | Value |
|---|---|
| Name | Marketing Staff |
| Power | Perform marketing tasks. |
| Describe | For marketing staff |
3. Create a New Role
Step 1: Click "Add role"
In the upper right corner of the screen , click the "Add role" button.
Step 2: Name the Role
Enter a name for the new role (e.g., "Sales", "Support", "Warehouse").
Step 3: Add a Description (Optional)
Provide a brief description of this role for easier management later.
 Example: - Name: Sales - Description: Sales representative, manages customers and orders
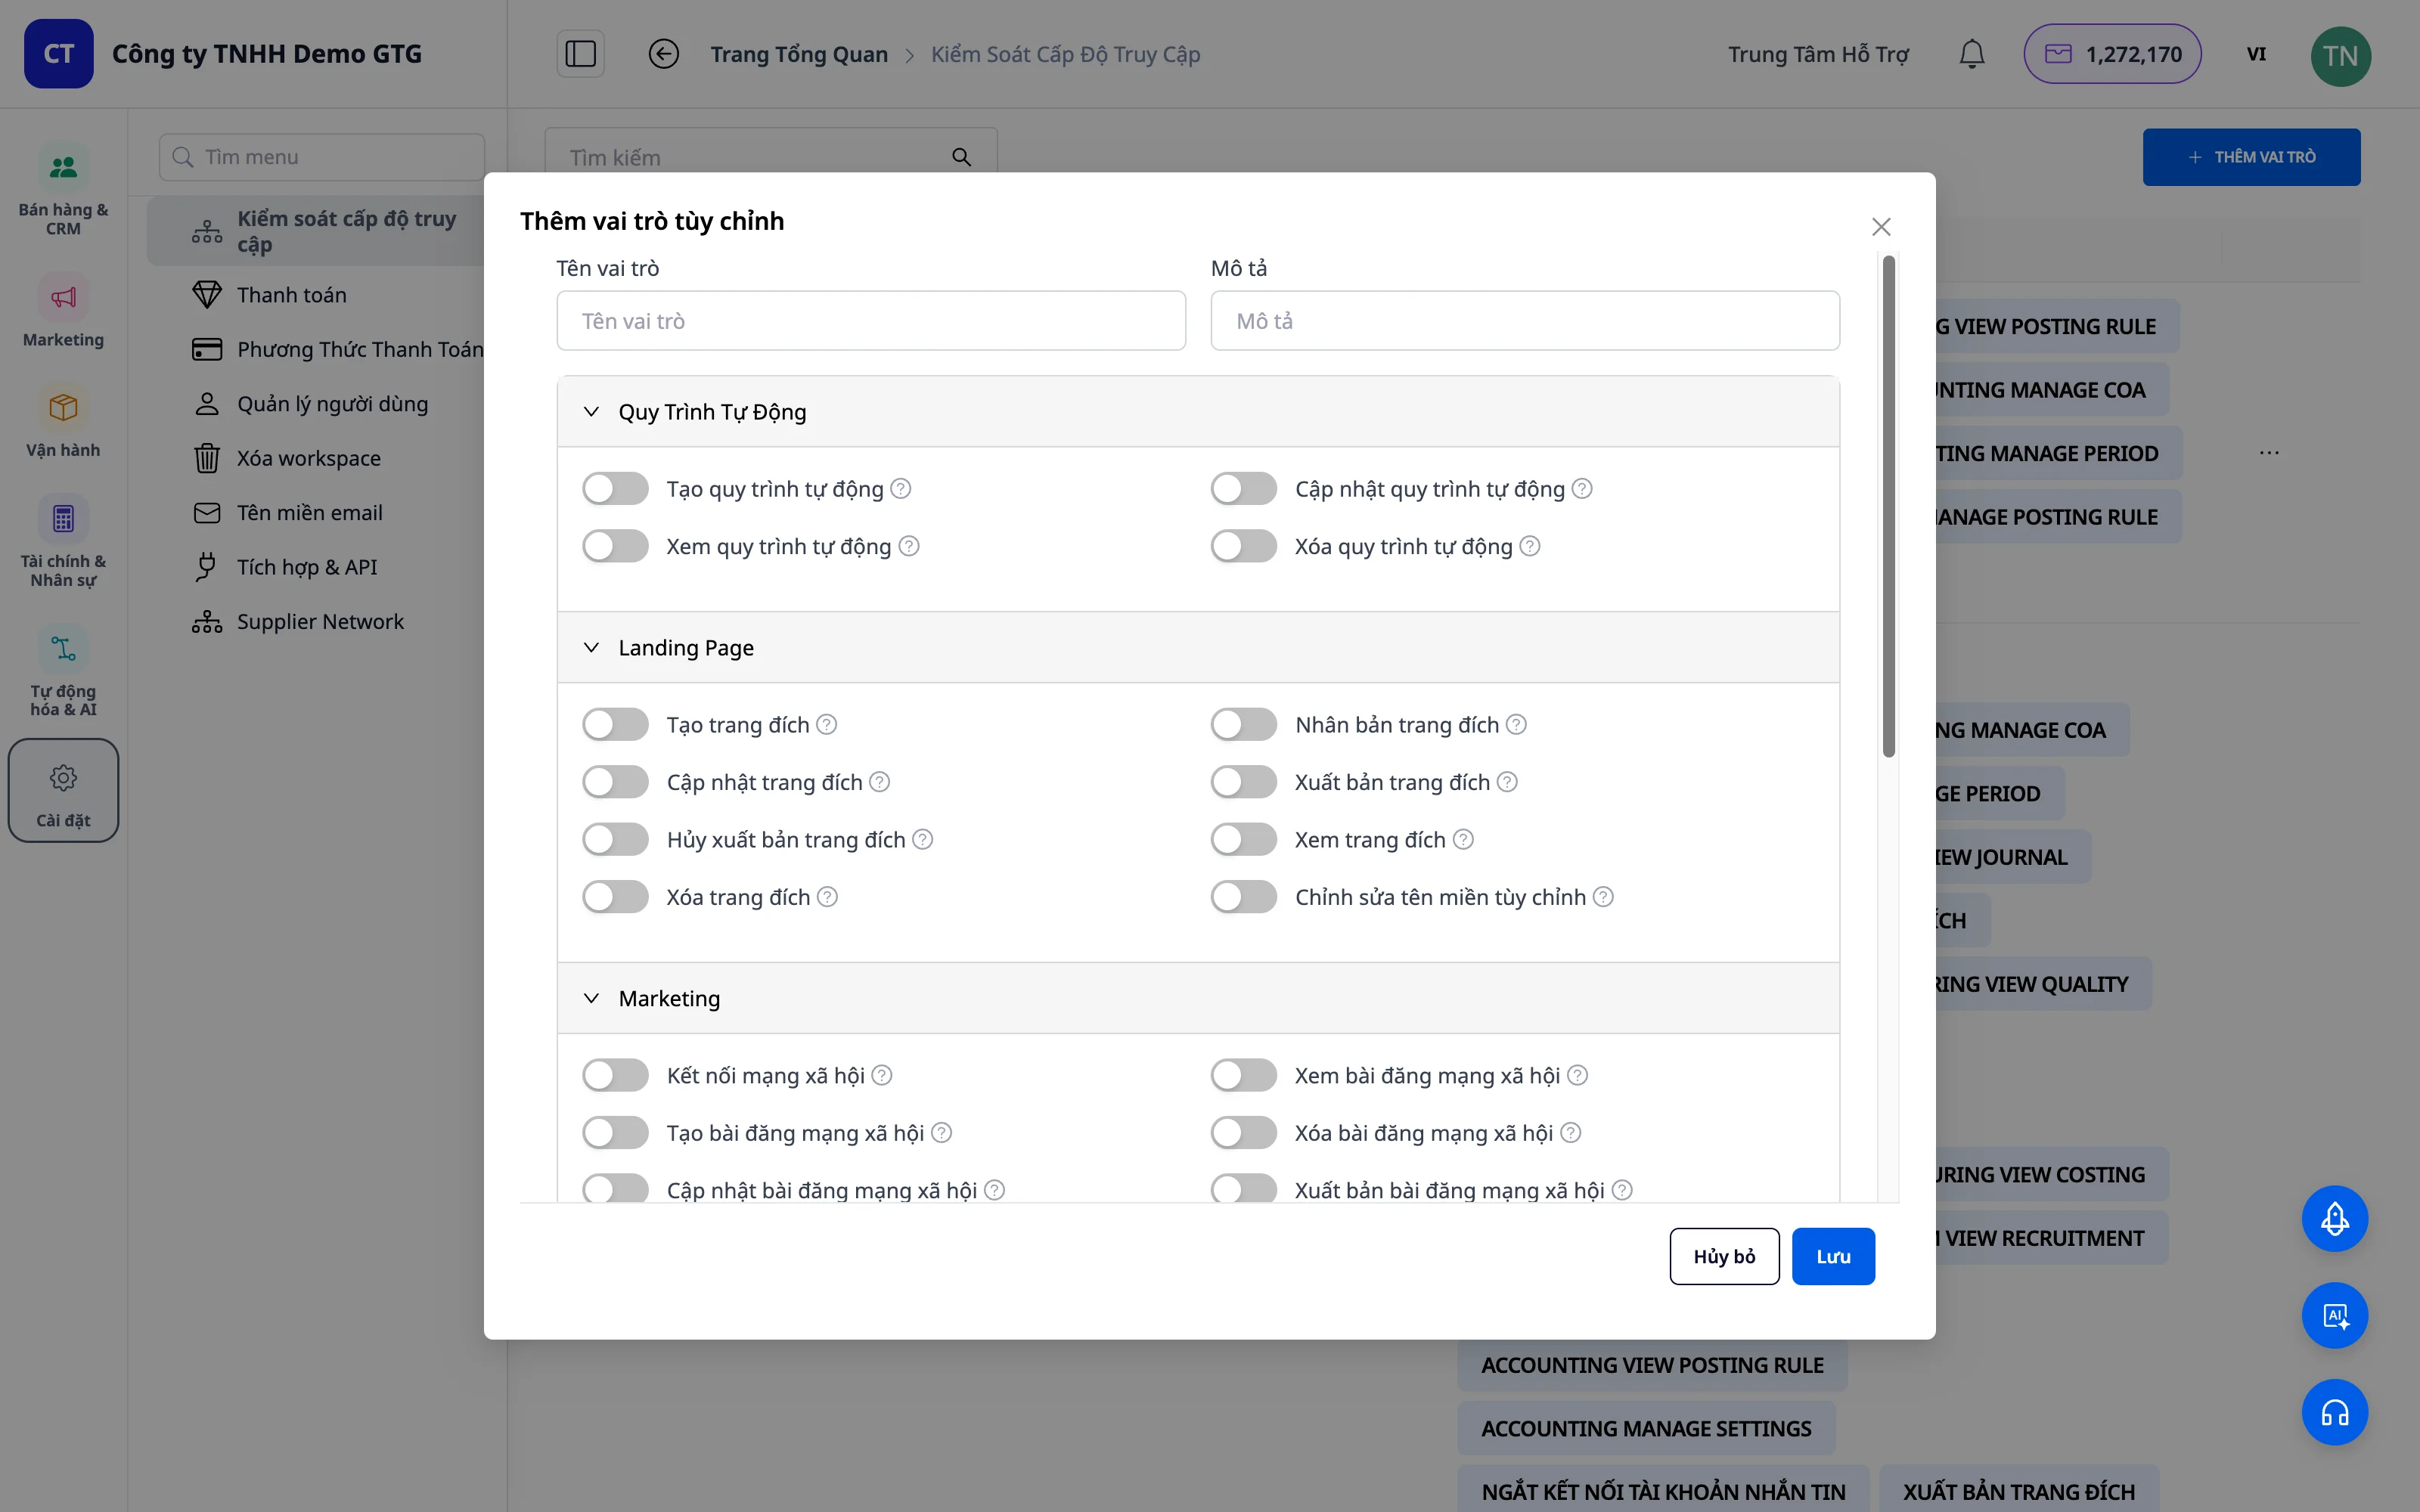
4. Customize Permissions
Rights Structure
Each module has its own set of permissions:
Module ├── Create (Tạo mới) ├── View (Xem) ├── Update (Cập nhật) ├── Delete (Xóa) └── Các quyền đặc biệt khácEnable/Disable PermissionsModule ├── Create (Tạo mới) ├── View (Xem) ├── Update (Cập nhật) ├── Delete (Xóa) └── Các quyền đặc biệt khác
Use the toggle switch to enable/disable each permission: - Toggle ON : Allow - Toggle OFF : Disallow
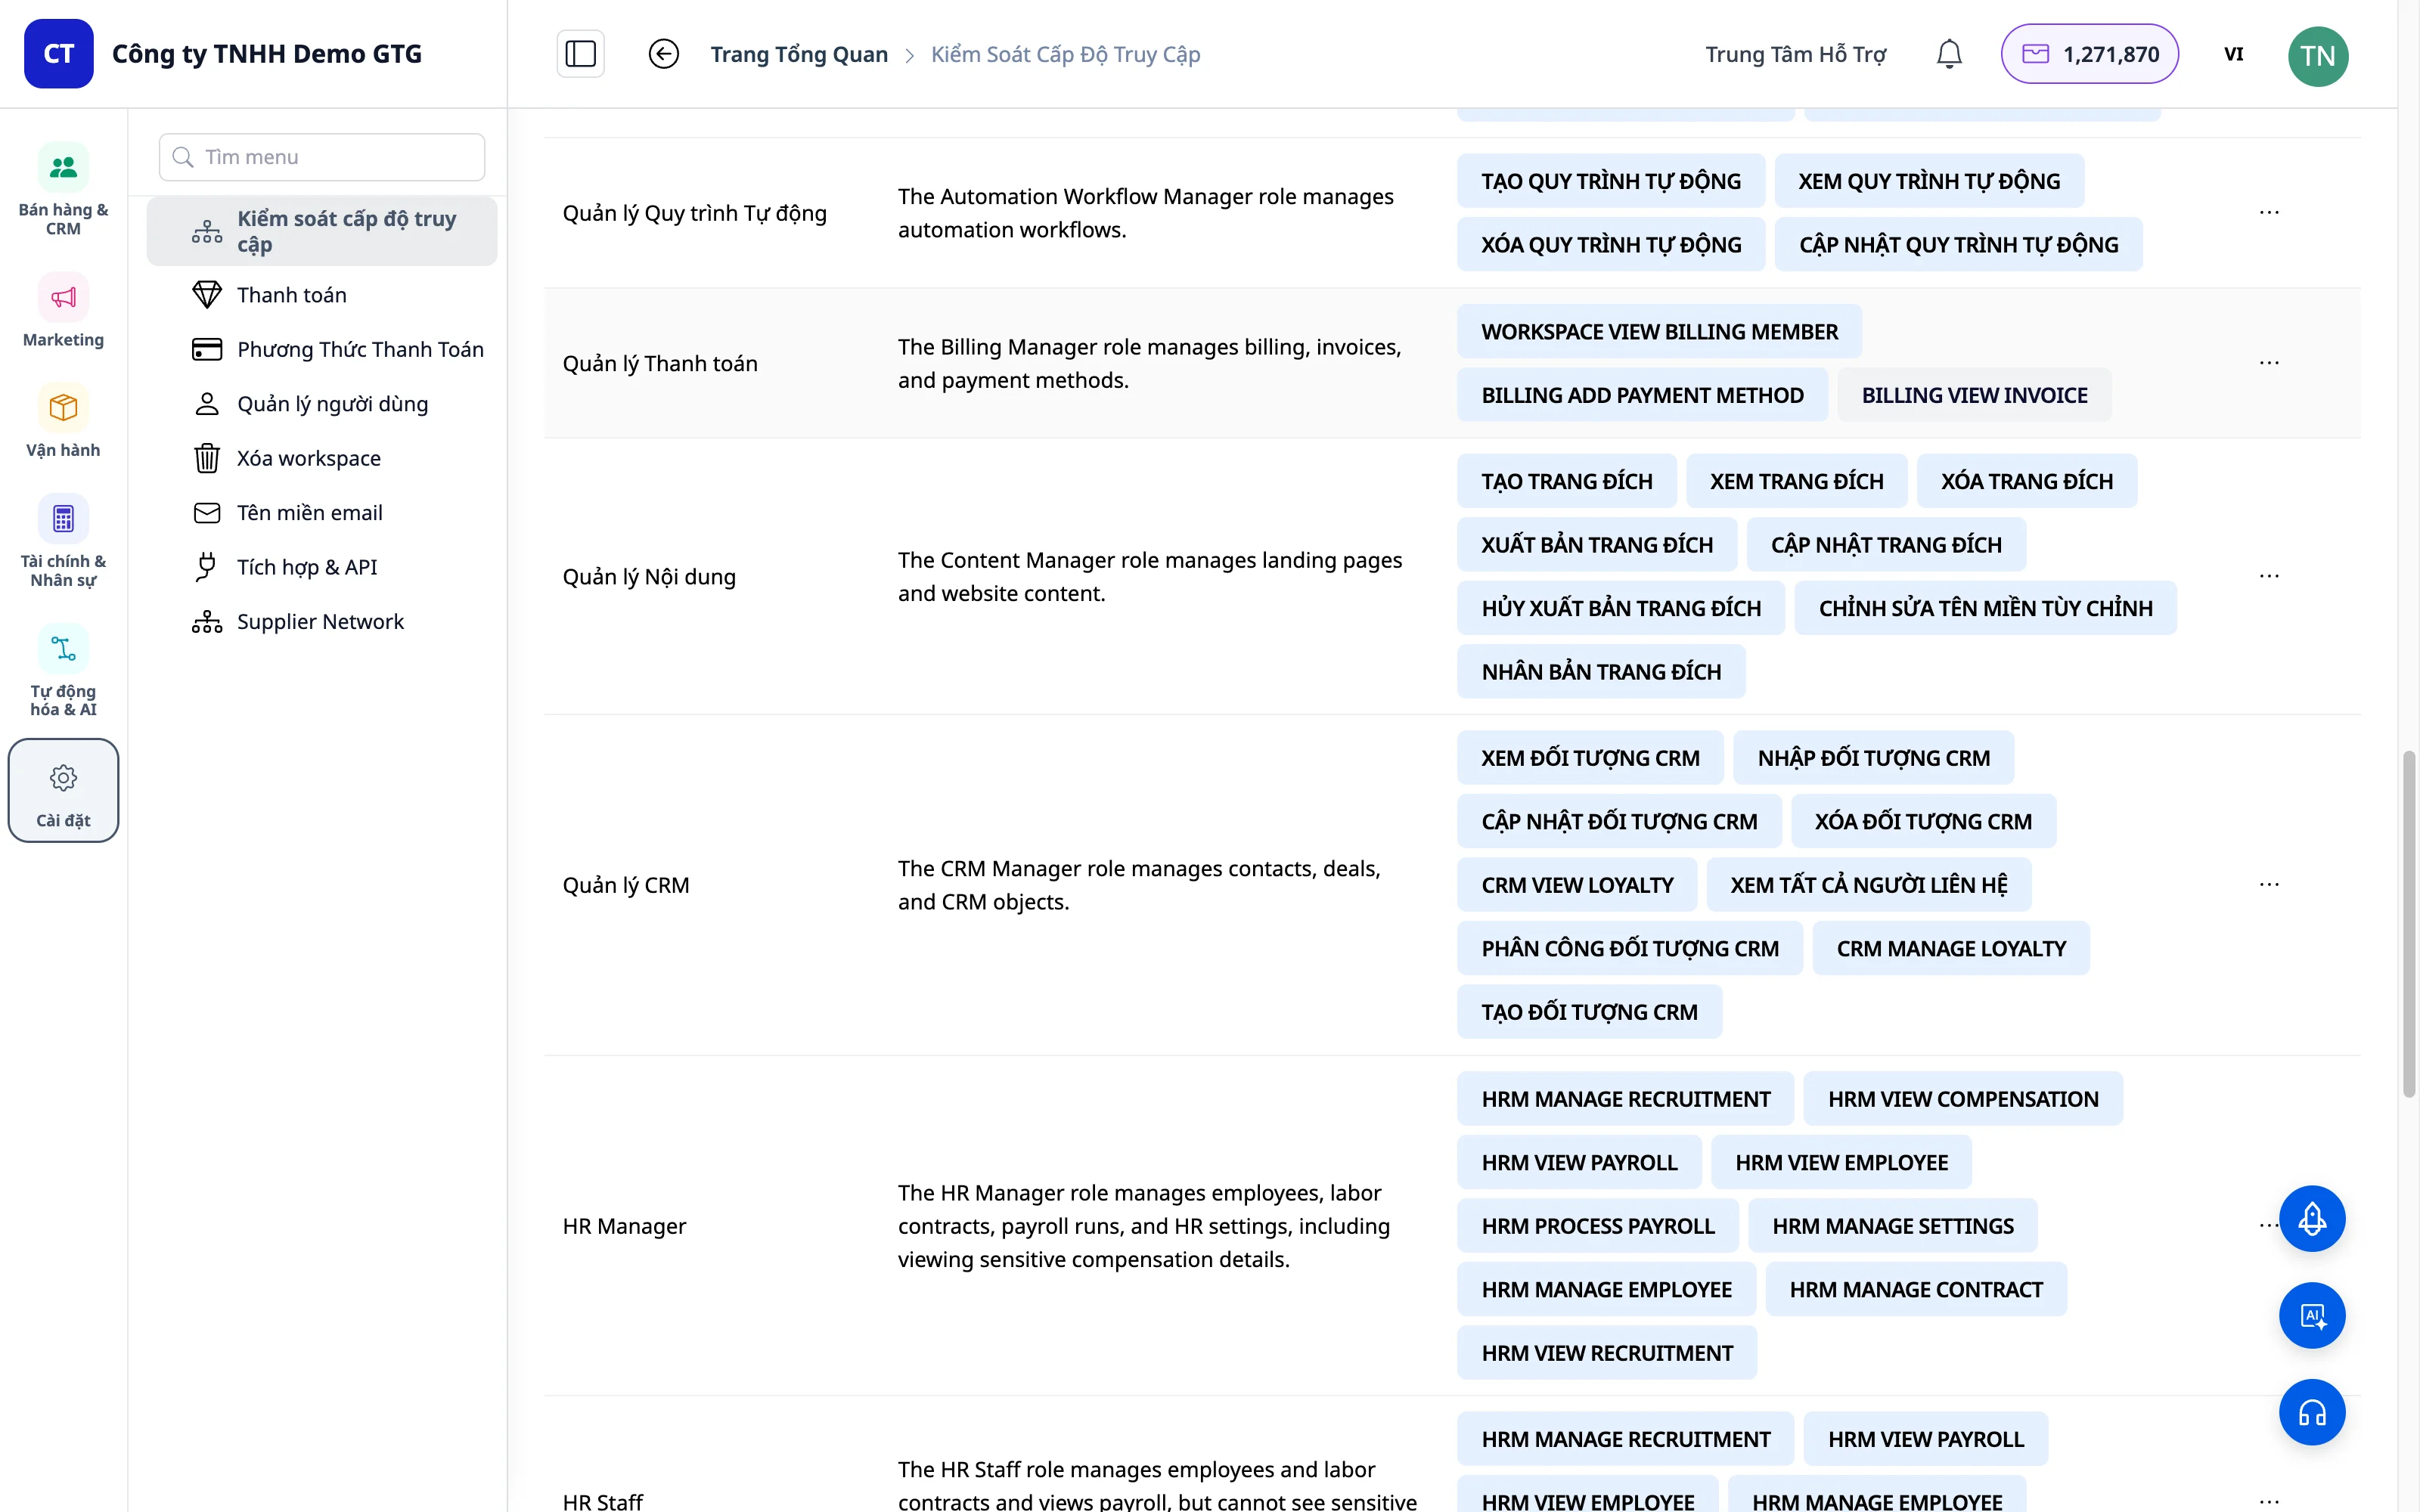
Module-based permissions
Automation Workdraw
| Rights | Convention A | Describe |
|---|---|---|
| Create | AUTOMATION_WORKFLOW_CREATE | Create a new workflow |
| View | AUTOMATION_WORKFLOW_VIEW | View the list and details of the workflow. |
| Update | AUTOMATION_WORKFLOW_UPDATE | Edit workflow |
| M | AUTOMATION_WORKFLOW_DELETE | Delete routine |
Landing Page
| Rights | Describe |
|---|---|
| Create | Create a new landing page |
| Update | Edit landing page |
| Publish | Publish a landing page |
| Unpublish | Unpublish |
| M | Delete landing page |
| Modify Custom Domain | Set up a custom domain. |
Marketing
| Rights | Describe |
|---|---|
| View Social Posts | View social media posts |
| Manage Campaigns | Campaign management |
printer
| Rights | Convention A | Describe |
|---|---|---|
| View All Contacts | CRM_VIEW_ALL_CONTACT | View all contacts |
| View Object | CRM_OBJECT_VIEW | See contact details |
Email & Messaging
| Module | Rights |
|---|---|
| Create, Send, View, Delete | |
| Messaging | View, Reply, Manage |
Billing
| Rights | Convention A | Describe |
|---|---|---|
| View Invoice | BILLING_VIEW_INVOICE | View the invoice |
| Add Payment Now | BILLING_ADD_PAYMENT_METHOD | Add payment methods |
Settings / Workspace
| Rights | Convention A | Describe |
|---|---|---|
| Manage Users | WORKSPACE_ACTION_USER | User management |
| View Billing | WORKSPACE_VIEW_BILLING_MEMBER | View billing information |
Save Role
After you've finished customizing, click "Save" to create the role.
5. Assign Roles to Users
Step 1: Open "User Management"
The "User List" here contains all users in the workspace.
Step 2: Find the User
Find the user you want to assign permissions to in the list.
Step 3: Choose a Role
In the "Roles" column, click the dropdown to open the list of roles.
Step 4: Assign Roles
Select the appropriate role from the dropdown. The role will be assigned immediately.
Step 5: Confirmation
Verify that the assigned roles are correct.
6. Role Management
Edit Roles
- Click on the role you want to edit.
- Change of authority
- Click Save
Delete Role
- Click on the role you want to delete.
- Click Delete role
- Confirm deletion
Note : Default roles (Administrator, Marketing Manager, Marketing Staff) cannot be deleted.
Practical Example
Example 1: Creating the "Sales" Role
Objective : Sales staff need to manage customers, send text messages, and send emails.
Permission granted : - CRM: CRM_VIEW_ALL_CONTACT , CRM_OBJECT_VIEW - Messaging: All - Email: All - Automation: AUTOMATION_WORKFLOW_CREATE , View, Update - Landing Page: Create, Update, Publish, View - Marketing: View only
Permissions NOT granted : - AUTOMATION_WORKFLOW_DELETE - Delete Landing Page - Manage Marketing Campaigns
Example 2: Creating the "Support" Role
Objective : Support staff only need to view messages and respond to customers.
Permission level : - Messaging: View, Reply - CRM: CRM_VIEW_ALL_CONTACT , CRM_OBJECT_VIEW - Email: View only
Rights NOT granted : - All other rights
Example 3: Creating the "Finance" Role
Objective : Accounting for invoices and payment methods.
Permissions granted : - BILLING_VIEW_INVOICE — View invoices - BILLING_ADD_PAYMENT_METHOD — Add a payment method - WORKSPACE_VIEW_BILLING_MEMBER — View billing information
7. Convention A - Domain Name DOMAIN_ACTION_OBJECT (New 5/2026)
All permission names in GTG CRM are standardized according to Convention A — DOMAIN_ACTION_OBJECT .
How to read the name of Convention A
BILLING_VIEW_INVOICE │ │ │ │ │ └── Object: INVOICE (đối tượng: hóa đơn) │ └── Action: VIEW (hành động: xem) └── Domain: BILLING (lĩnh vực: thanh toán)Domain Name TableBILLING_VIEW_INVOICE │ │ │ │ │ └── Object: INVOICE (đối tượng: hóa đơn) │ └── Action: VIEW (hành động: xem) └── Domain: BILLING (lĩnh vực: thanh toán)
| Domain | Name of Rights | Meaning |
|---|---|---|
BILLING_ | BILLING_VIEW_INVOICE | View the invoice |
BILLING_ | BILLING_ADD_PAYMENT_METHOD | Add payment methods |
WORKSPACE_ | WORKSPACE_ACTION_USER | Manage workspace users |
WORKSPACE_ | WORKSPACE_VIEW_BILLING_MEMBER | View your workspace's billing information. |
AUTOMATION_ | AUTOMATION_WORKFLOW_CREATE | Create an inventory workflow |
AUTOMATION_ | AUTOMATION_WORKFLOW_DELETE | Delete scheduling workflow |
CRM_ | CRM_OBJECT_VIEW | View CRM objects |
CRM_ | CRM_VIEW_ALL_CONTACT | View all contacts |
Why the name change?
Previously, permission names were inconsistent: SEND_EMAIL , CREATE_LANDING_PAGE , VIEW_BILLING — making them difficult to find and audit when workspaces had multiple permissions.
Convention A addresses this by: - Grouping by Domain → searching for BILLING_ immediately reveals all billing permissions - Consistent Actions → VIEW always means view, CREATE always means create - Easy Auditing → typing the domain name filters out all related permission groups
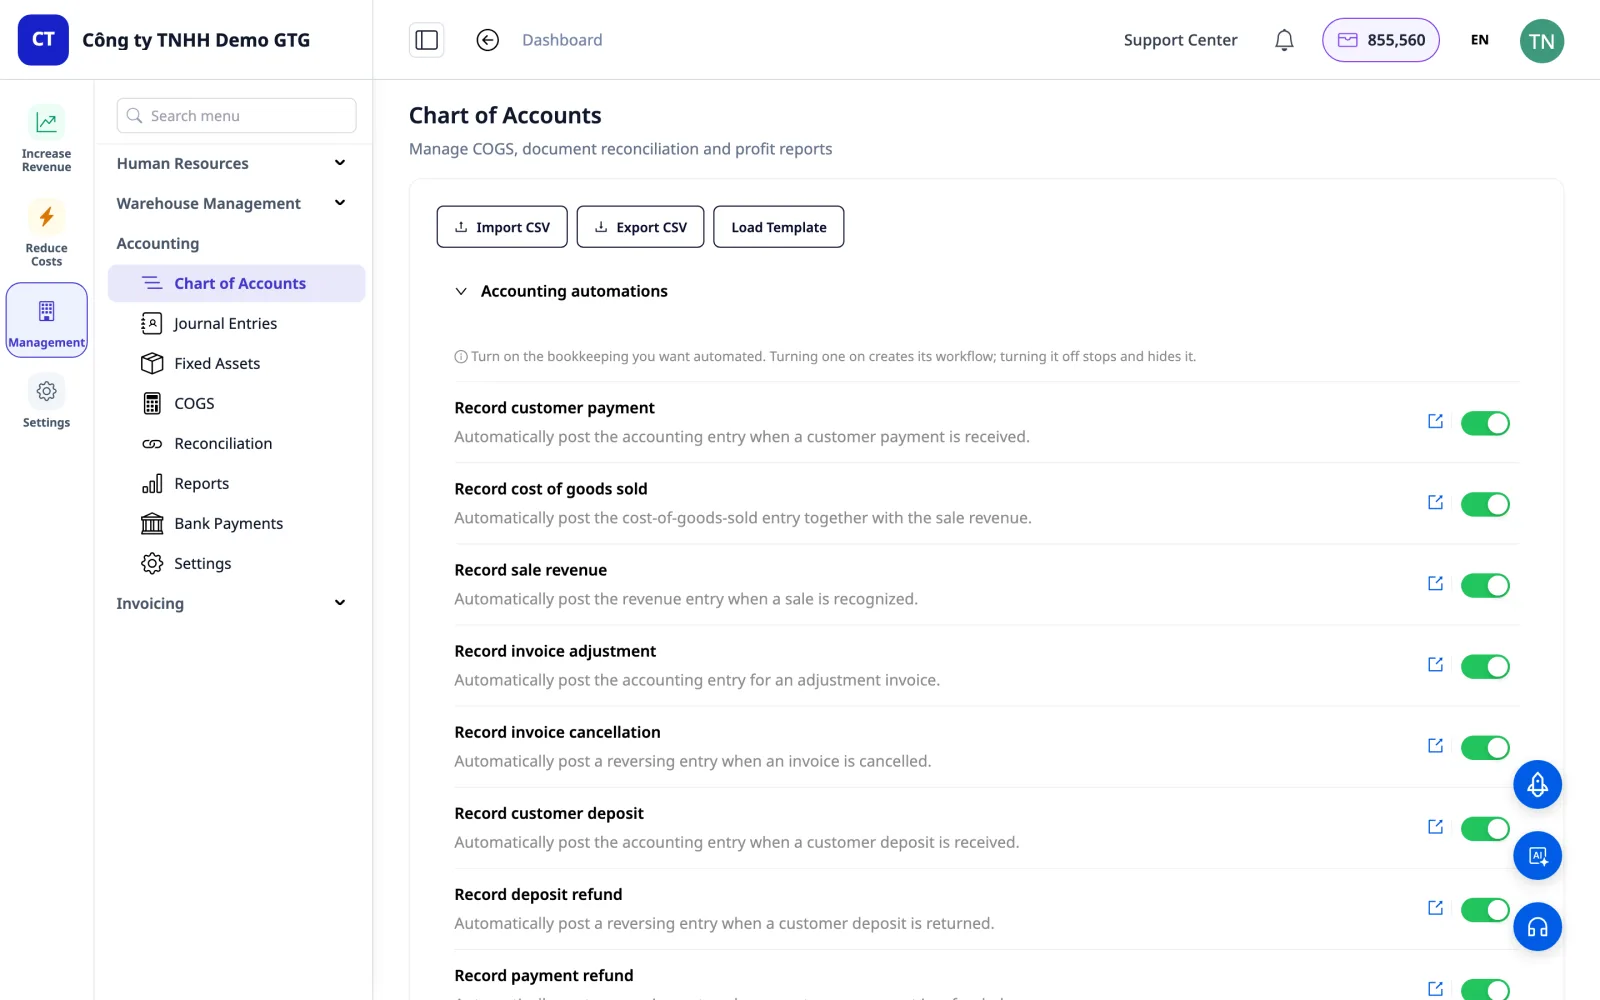
8. Administrator Automatically Accesses Settings
Administrators will be assigned new, individual WORKSPACE_* permissions that can be accessed through the Settings menu.
Administrators automatically have full Settings permissions — no further assignment is needed.
Important Note
Best Practices
- The principle of least authority : Grant only the authority necessary for that role.
- Periodic Review : Re-examine employee permissions when employees change positions.
- Backup before deletion : Record the role configuration before deleting.
- Permission test : Log in using the assigned account to verify the permissions.
Security
- Only administrators are authorized to manage permissions.
- Do not share the Administrator account.
- All permission changes are logged automatically.
FAQ
Q: Is it possible to assign multiple roles to one person?
A : Currently, each user can only be assigned one role.
Q: Will the new role have an immediate impact?
A : Yes, the role is applied immediately after assignment.
Q: Is it possible to roll back permissions?
A : The role can be reassigned at any time.
Q: Where is the rights name under Convention A displayed?
A : In the Settings → Permissions interface, each permission toggle displays a name according to Convention A for easy lookup.
Summary
With the Permission Management feature in GTG CRM:
- Expand the safety team - each person does only their assigned task.
- Control access to critical data.
- Convention A - a standardized rights name, easy to audit by domain.
- Administrator automatically has Settings - no more misconfiguration
- Operate professionally like a large enterprise.
Maybe You Should Read These

Authorization
CRM
Double-Entry Accounting Right in Your CRM — General Ledger, P&L, Balance Sheet & VAT Filing Without Separate Accounting Software

Automation
HR & Payroll Management Within CRM — Automated Labor Contracts, Payroll, Social Insurance, and Personal Income Tax Accounting
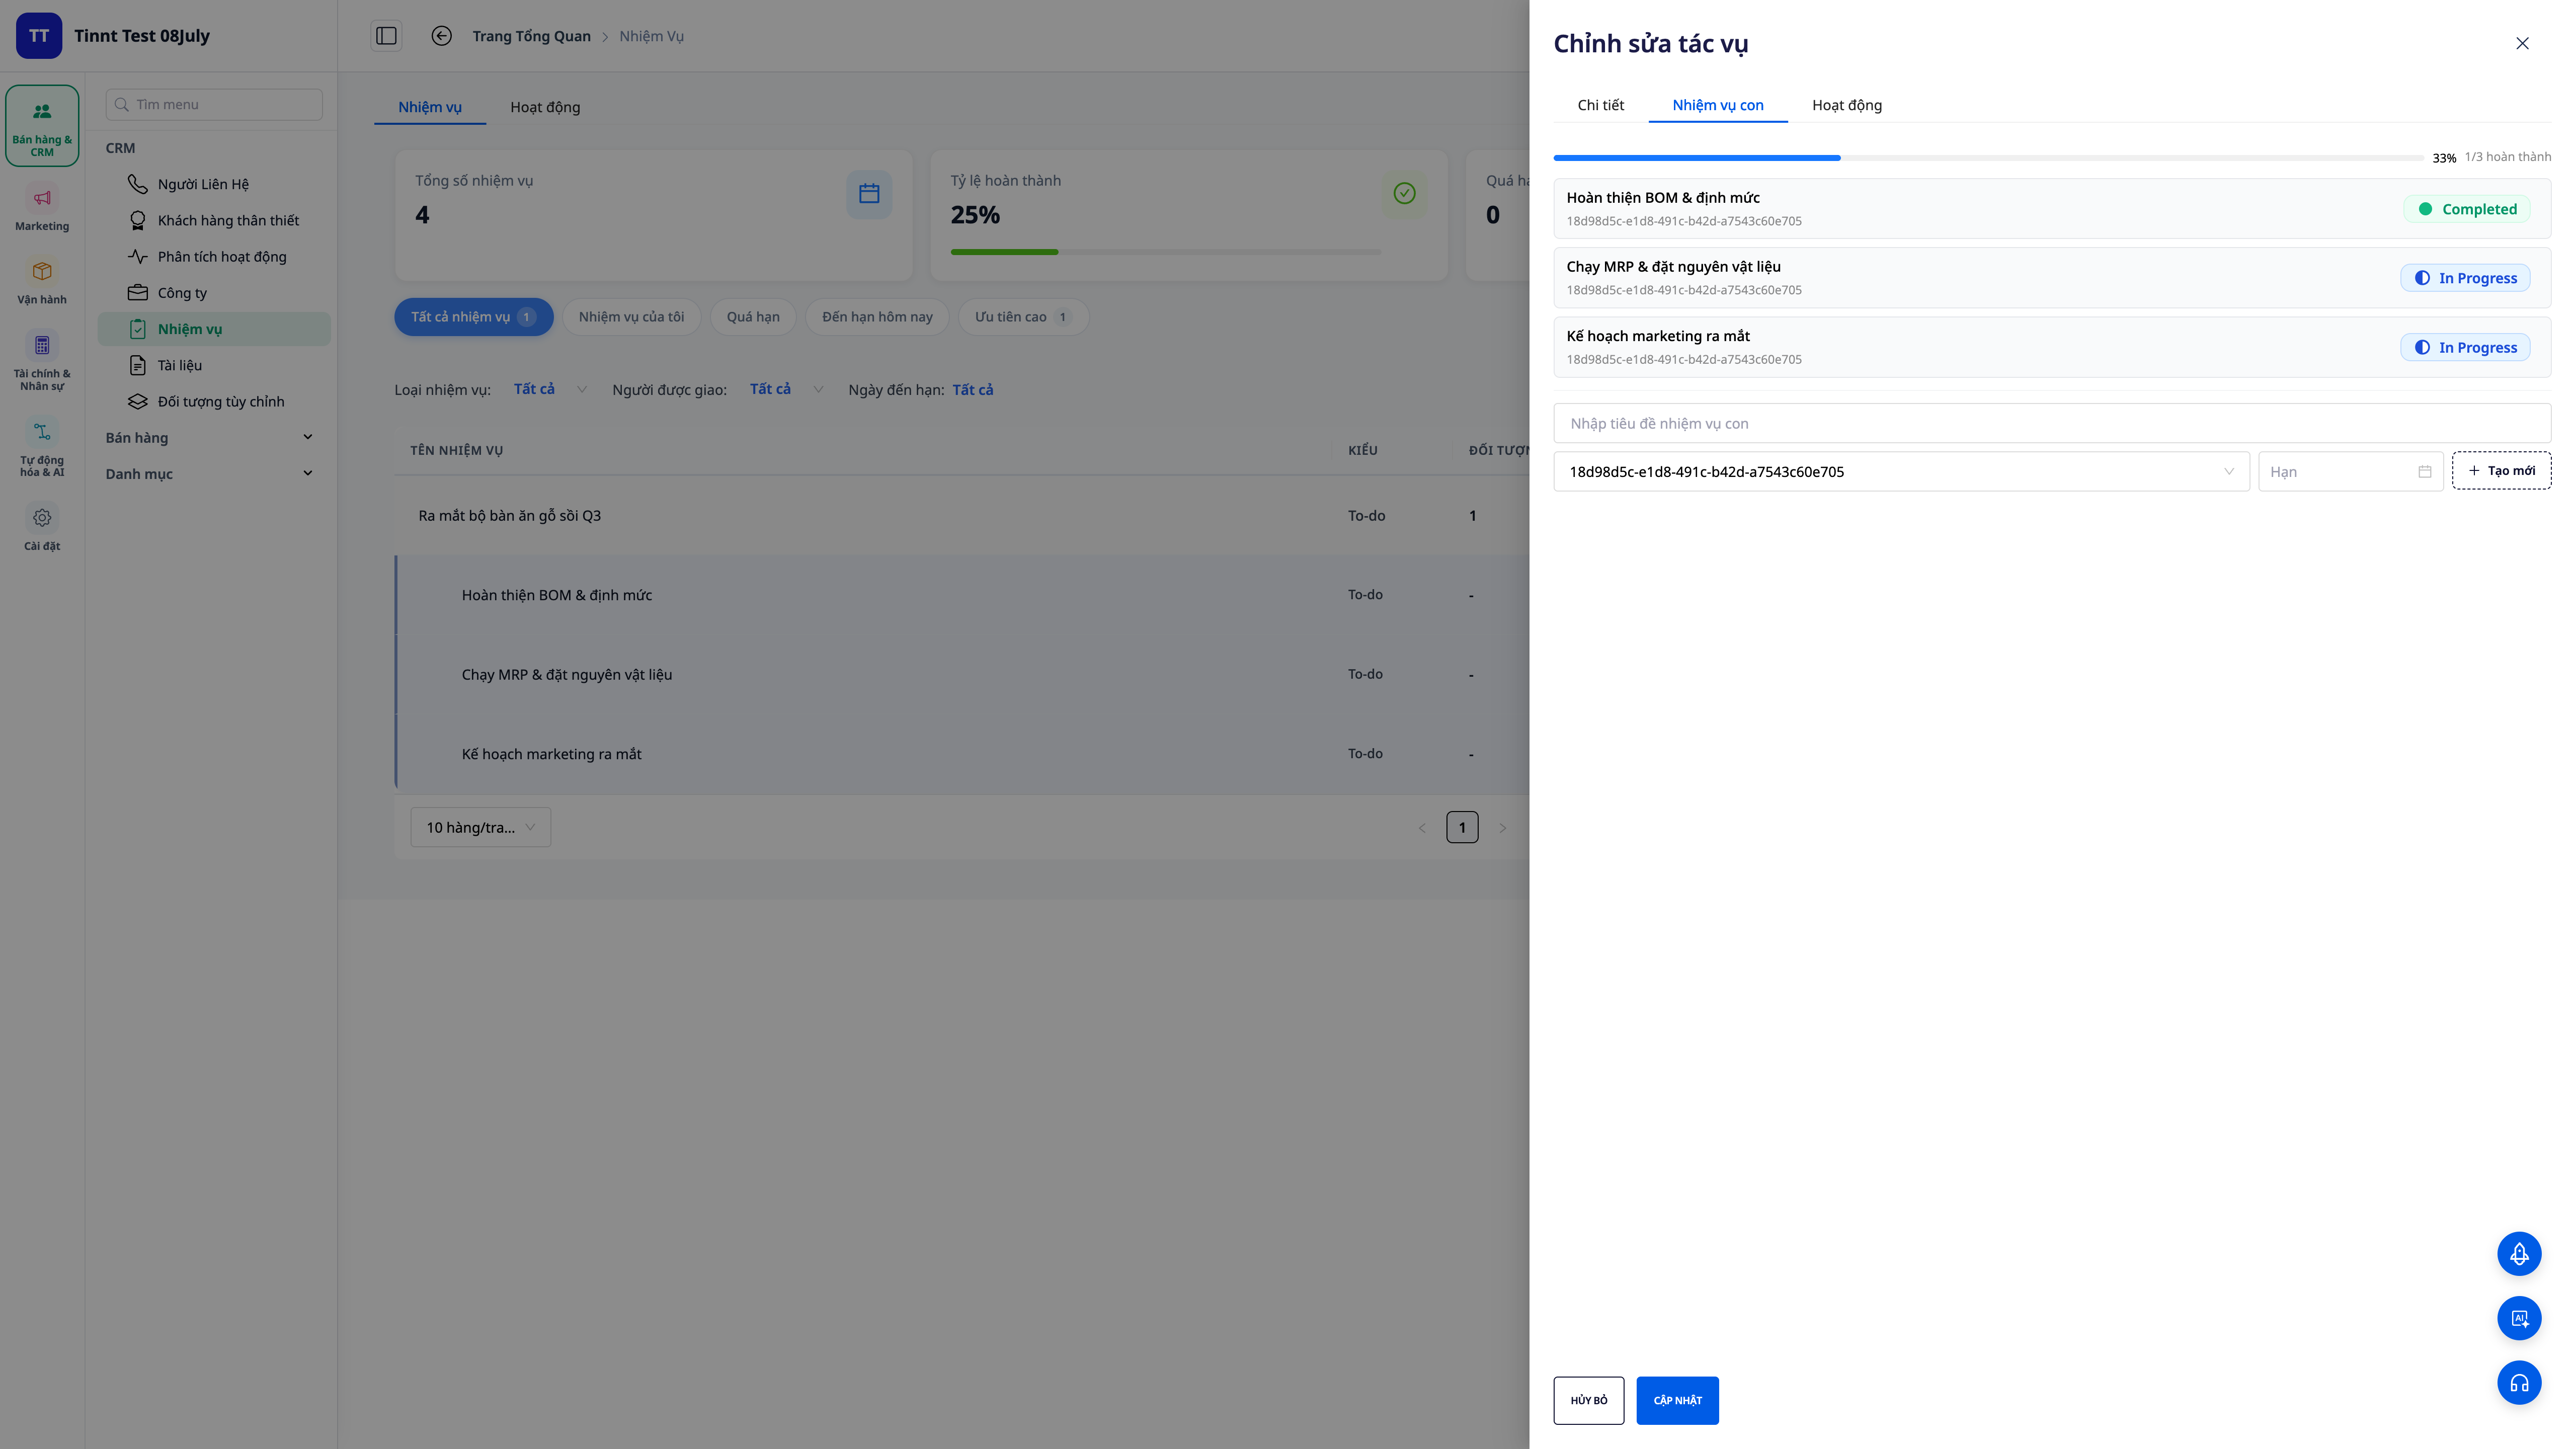
Task Management 2.0 — Break Down Tasks, Auto Update Progress, Link to Deals & Orders

30+ One-Tap Revenue Growth Playbooks — Cart Recovery, Failed Payment Rescue, Win-Back, Lead Nurturing, Post-Purchase Service
Multi-Platform Sales Management
Faster Registration, Immediate Start — Timely Trial Credits & DIY Brand Identity

E-Invoice
Integration Hub